I quite fancy Penguins! So today we decided to make our own Penguins.

{This post contains affiliate links for your convenience, read our Disclosure Policy for more information.}
Supplies needed:
(UPDATE: After having so many people request the Tacky Pattern, I made one that you can download HERE.)
- Tacky the Penguin Craft Template
- black cardstock paper
- white cardstock paper
- scrapbook paper
- small orange sheet of cardstock paper
- scissors
- googly eyes
- glue stick
- fine tip black marker
Tutorial:
(Some of these steps won’t be relevant if you choose to download and use the new pattern I created.)
1. Trace your pattern on cardstock
First print out and use the Tacky patterns to trace them onto your black, white and orange cardstock paper. My boys helped me cut out the black and white pieces, but I cut out the orange feet and beaks. This is what our Penguins looked like before we added the tacky shirt and bow tie.

2. Make your shirt
To make the shirt, the boys picked out a tacky piece of scrapbook paper. Then I put the penguin face down on the back side of the scrapbook paper and traced around the penguin.
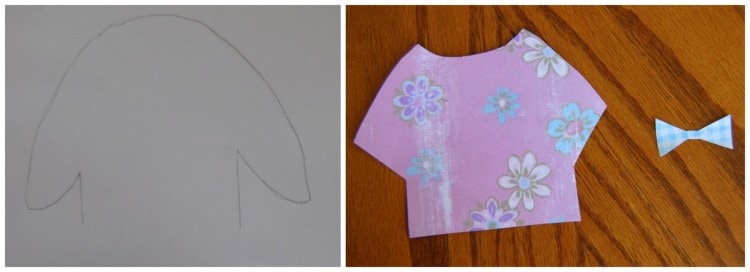
3. Cut the outline and glue to the penguin
Then I cut the outline out, placed it on the penguin and kind of eyeballed where I needed to cut it for the neckline and arms. Hope that makes sense. Here is what the shirt looked like before gluing it on. I simply free handed a bow tie using a different piece of scrapbook paper. The boys picked out what paper they wanted for the bow tie too.
4. Draw buttons and feet lines
After gluing on the shirt and tie, the boys added buttons up the whole shirt, and then added lines for his feet.