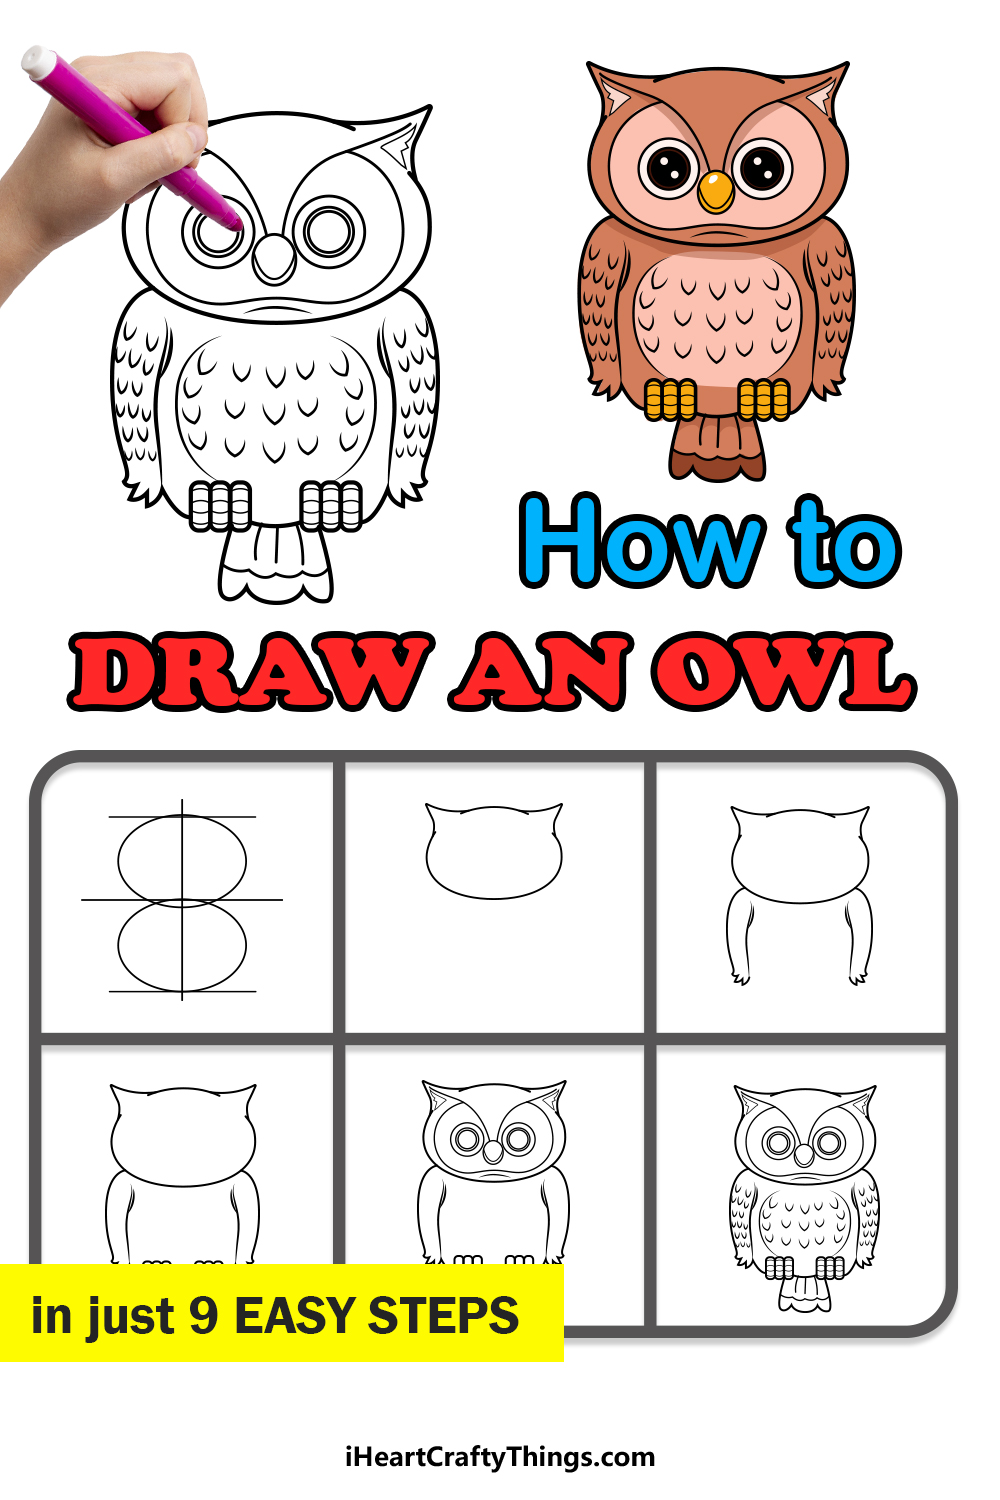
If you want to know how to draw an owl, this guide for kids was made for you! You’ll soon see just how easy it can be to create a cute owl just by following these steps.
Owls are beautiful and a bit mysterious, and it’s little wonder as to why they are so popular around the world. When someone wants to draw an owl, they may find that it’s not as easy as they thought, though.
That’s why I have created this guide to make it so much easier for you. This cute cartoon owl design is easy enough for kids and artists of all ages to take on.
Once you have finished your owl drawing, you could even draw a background to make a home for it! You could even draw a second owl for it to befriend once you have the hang of it.
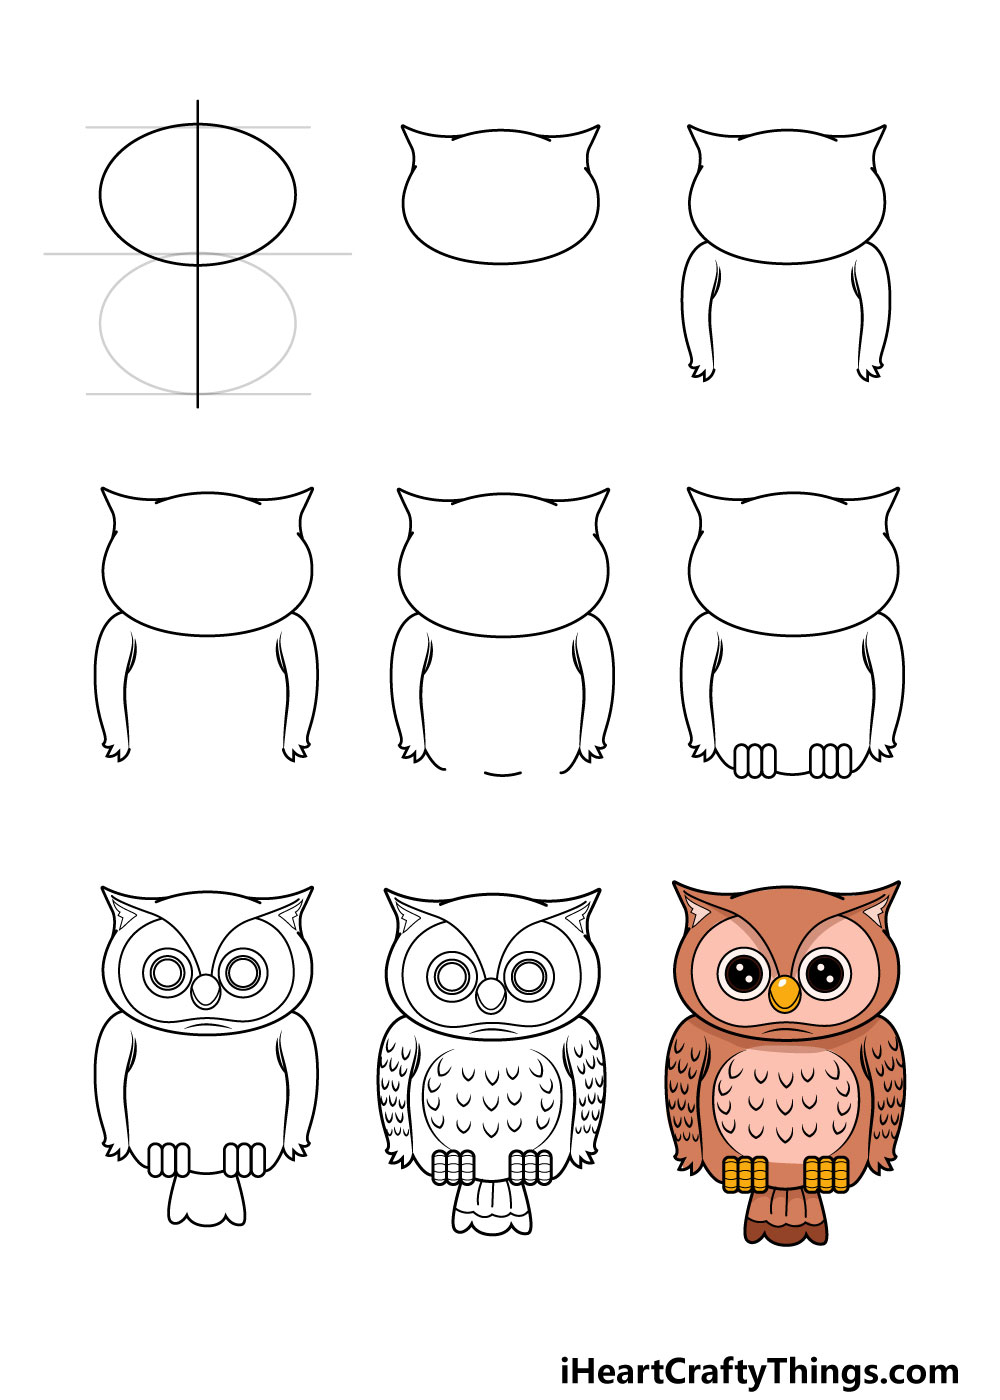
Watch These Steps To Create Your Owl Drawing
How to Draw An Owl – Let’s get Started!
Step 1
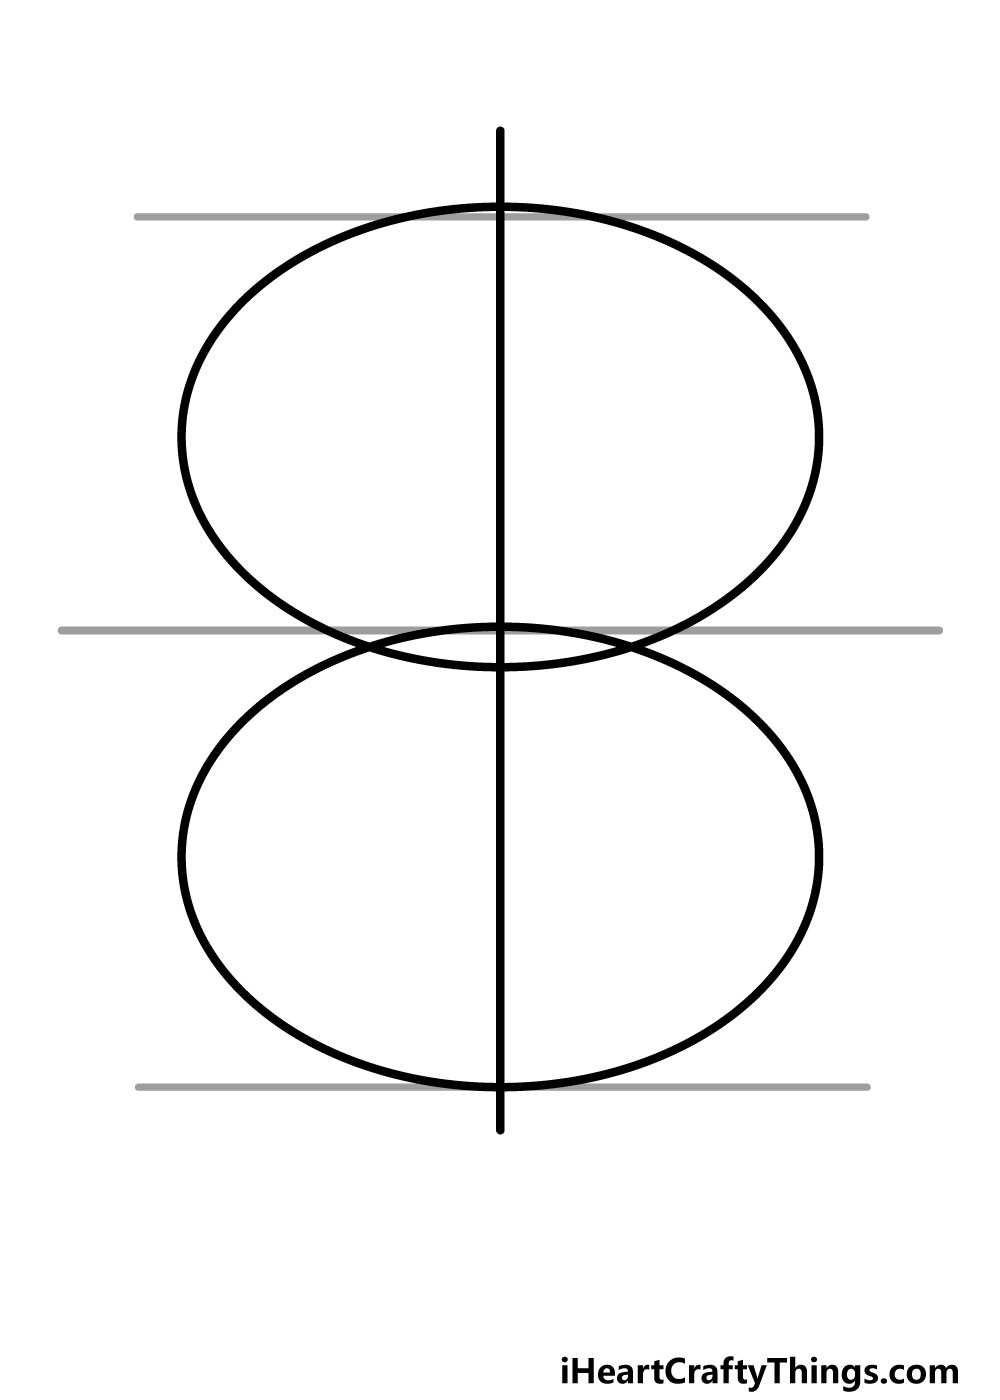
For the first step in our guide on how to draw an owl, we will be using a pencil to draw in some guide shapes for the rest of the drawing.
For this step, if you have a lighter pencil that would be best, as we will be erasing these lines later on.
In this first step, there are a few tools that will make it much easier. First of all, having a ruler will help a lot.
If you have a tool such as a drawing compass for drawing circles you will have a much easier time too! If you don’t have these tools, you could also go slowly and draw them freehand, and you will still have a similar effect.
First of all, draw a straight line down your page. Then, you can draw in two ovals that overlap with each other just a bit as you can see in the reference image.
Finally, simple draw three lines horizontally, using the picture as a guide on what the spacing should look like.
Step 2 – Next, start drawing the owl’s head
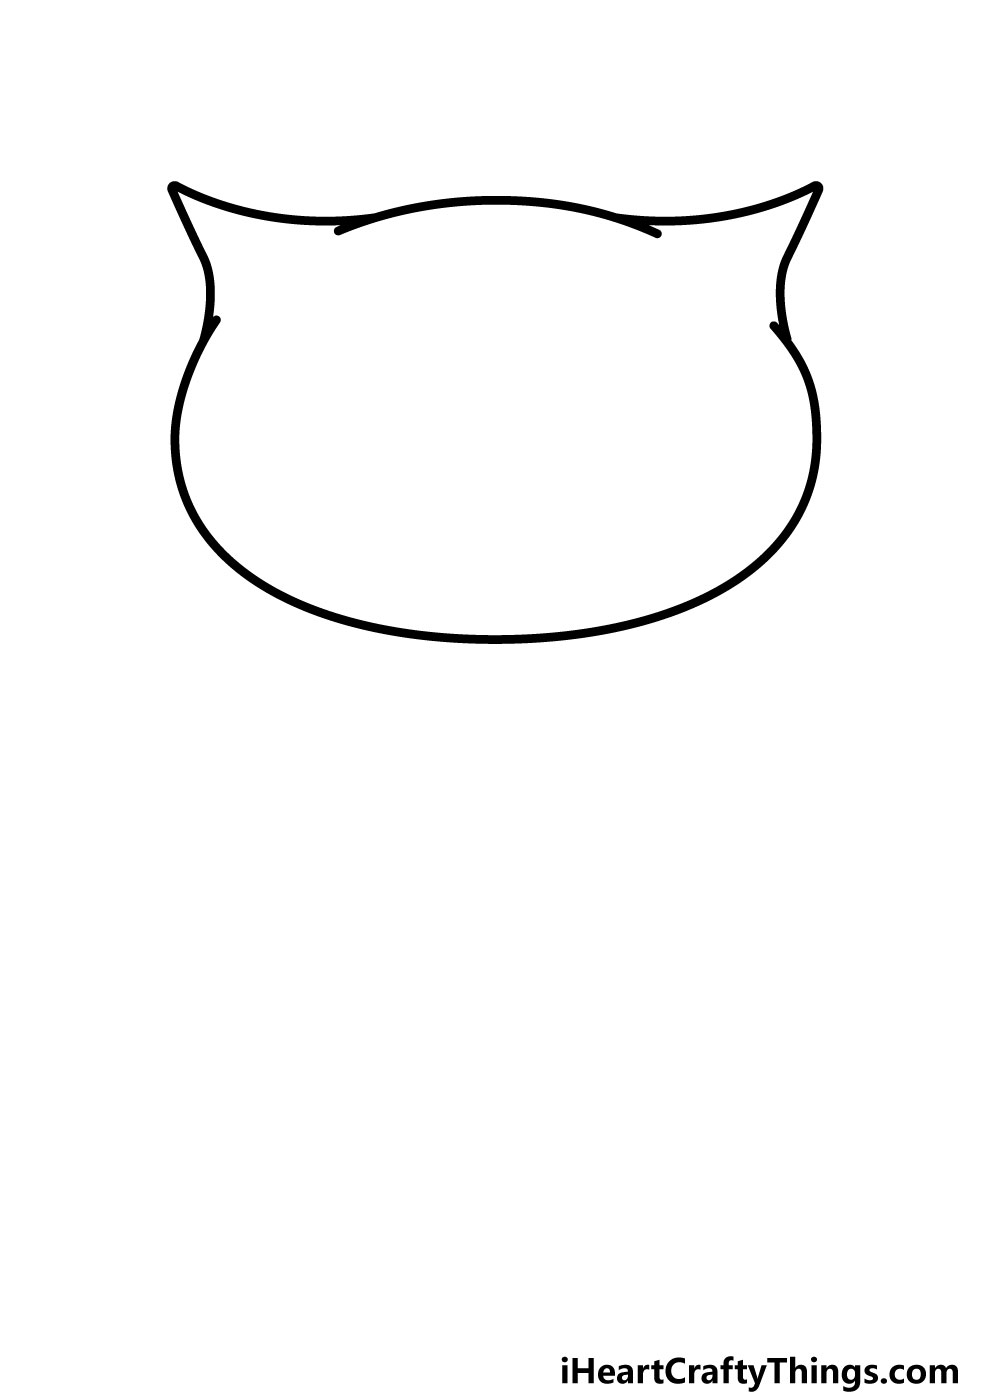
Now that you have your pencil guides drawn, you can start to draw the outline of your owl drawing’s head.
Using the top oval you drew previously, carefully draw in over the outline and make two triangular extensions for the feathers on your owl’s head as you can see in the picture.
I would recommend not erasing your pencil guides yet at this point, as you can still use them for the next few steps.
Step 3 -Now, draw in the first wing
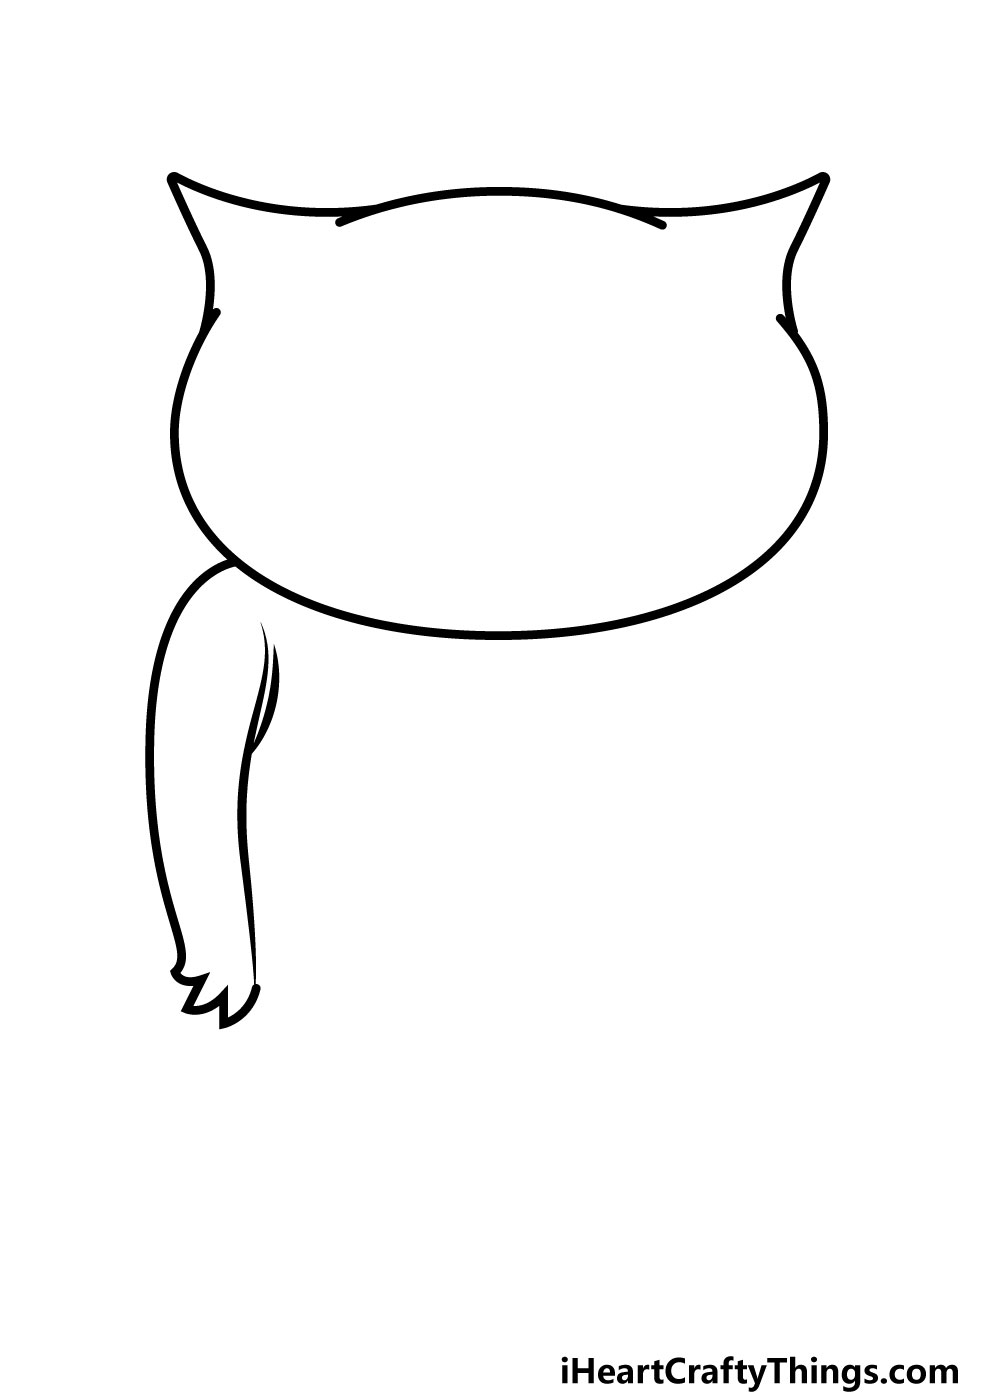
For the thirst step of this guide on how to draw an owl, you will be adding in the wing on the left. Using the bottom oval as a reference for the owl’s body.
Simply use some curved lines on the outer edge of the second oval to form the first wing as it appears in the picture.
Step 4 – Next, we will draw in the other wing
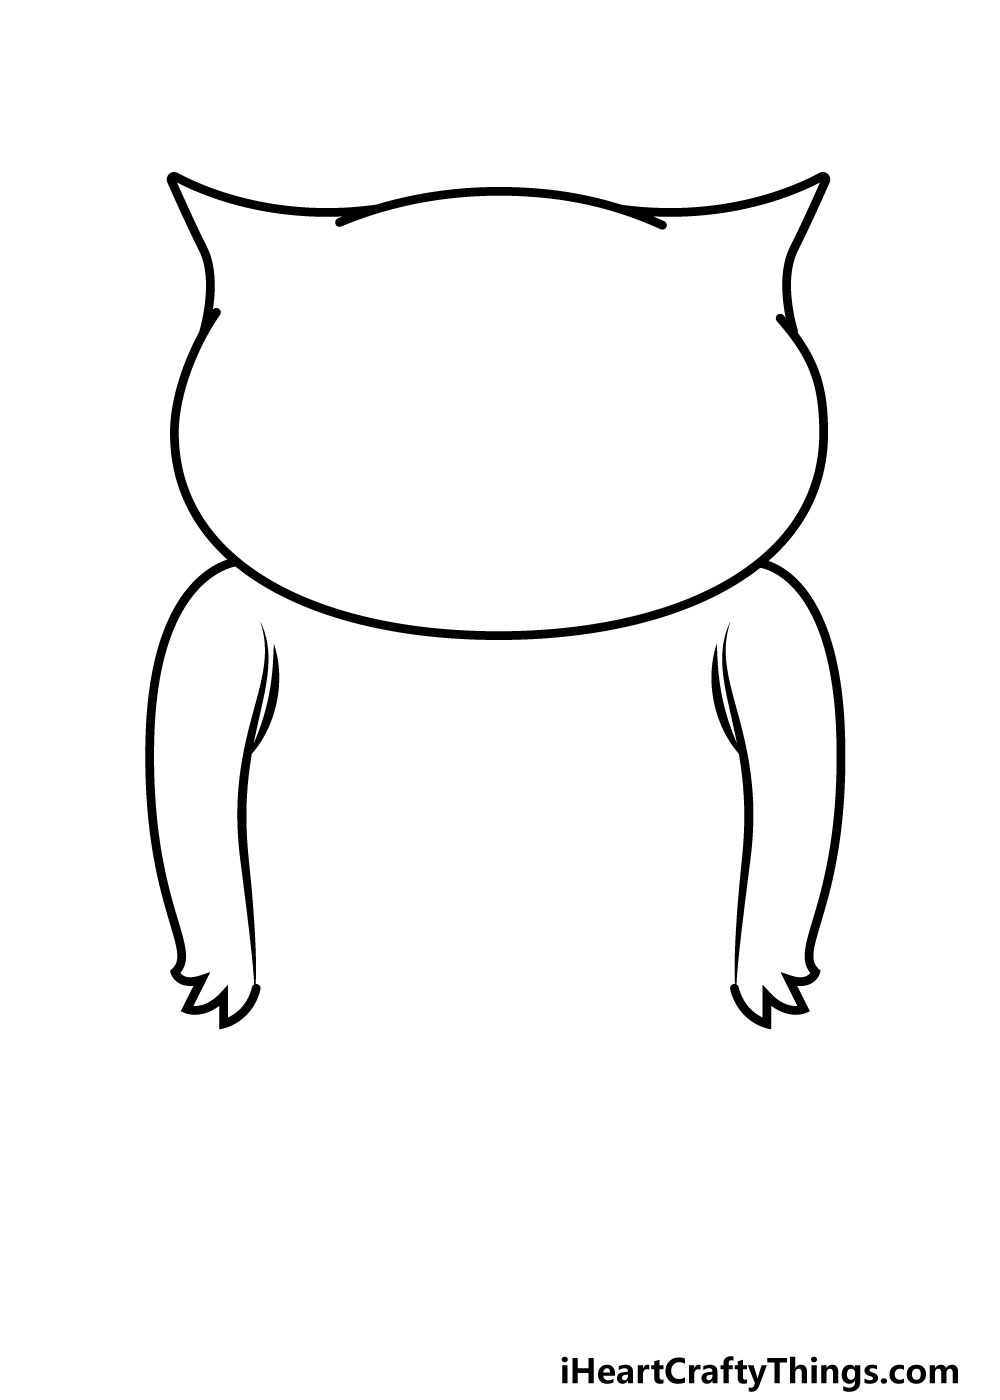
Your owl needs two wings, so for this step, you can simply repeat the process of step 3 only mirrored for the other side.
Step 5 – Now, we will draw in more of the body

With the wings added in, you can start to finish off the body of your owl drawing.
For this step, you can draw in three curved, short lines under the owl, with the other ones extending from the end of the wings. You’ll be filling in the spaces in between them in the next step!
Step 6 – Next, draw in the feet
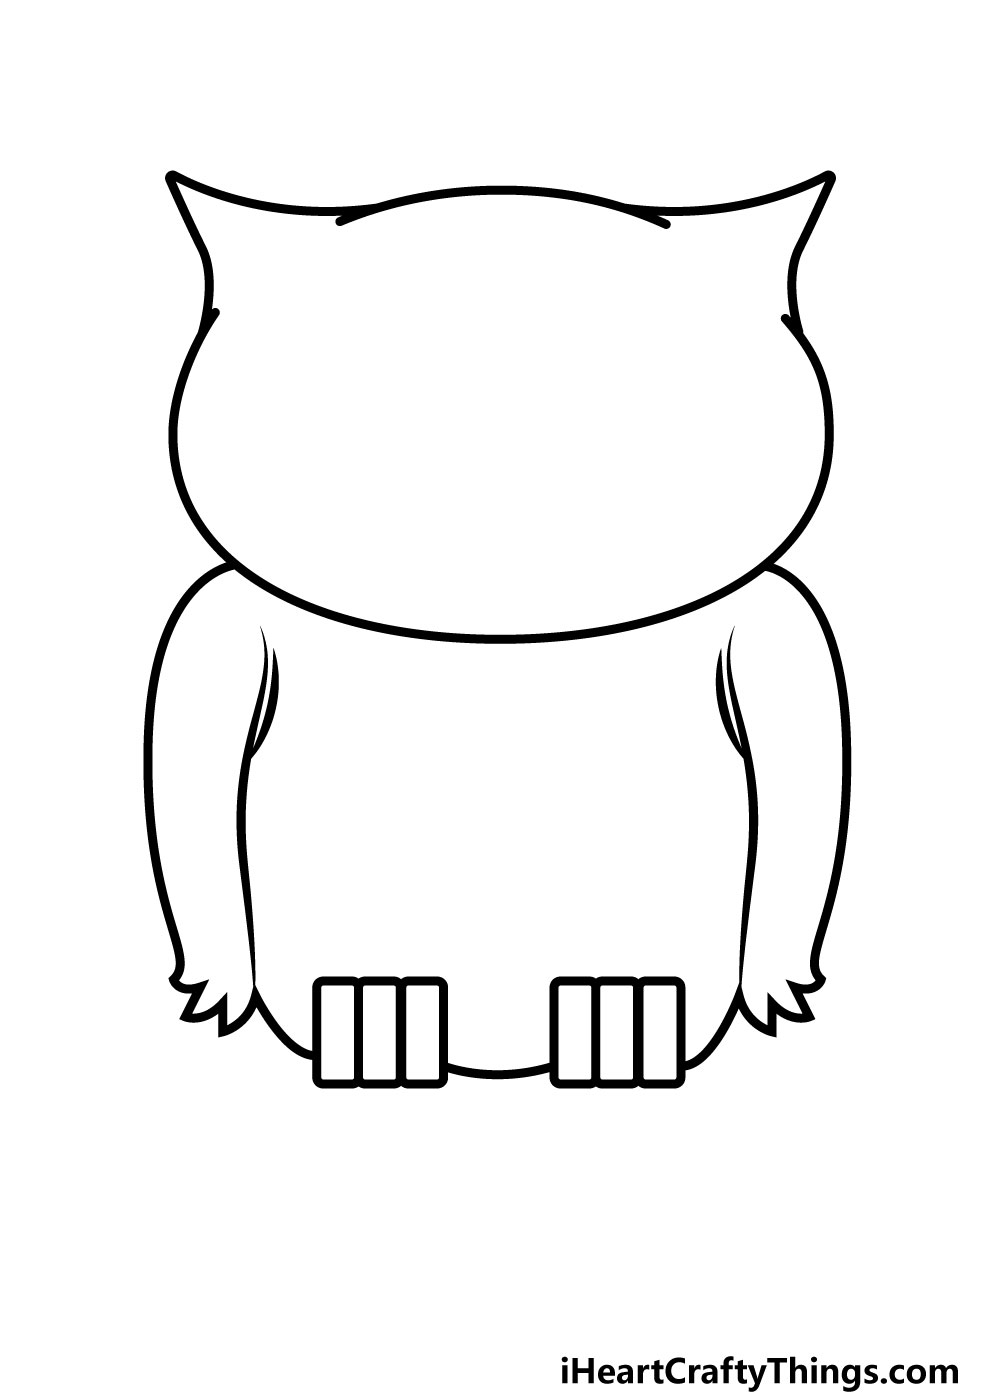
For the sixth step of this guide on how to draw an owl, you can add in some feet for your owl.
To do this, simply draw in two rectangles in the spaces you left earlier, and then divide each rectangle into 3.
This will show the divides in the owl’s feet, and make it look as though it is perched on a branch.
Step 7 – Now, draw in the face and tail
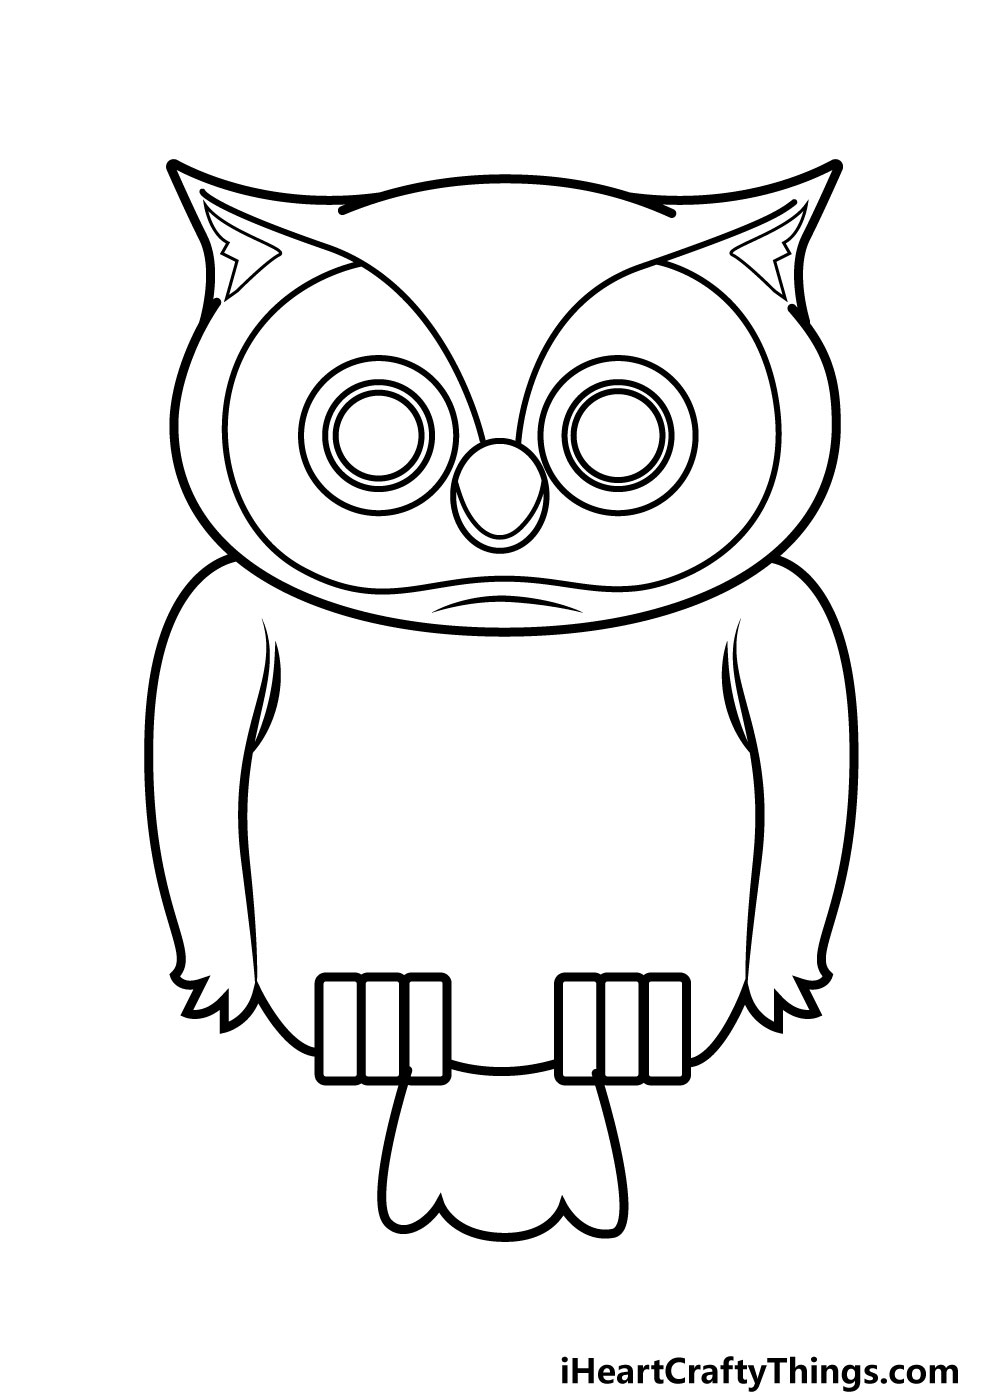
At this point, you can start to erase your pencil guides from the first step. Now, we will be adding in a face for your owl.
In the reference picture, we have shown one way you can draw a face for your owl, but you could also make your own variation by changing some of the details!
You could add more or less curved lines and change up the eyes and mouth for some fun facial expressions!
Once your face is drawn in, simply use some curved lines to add in a tail underneath the owl.
Step 8 – Next, draw in some final details
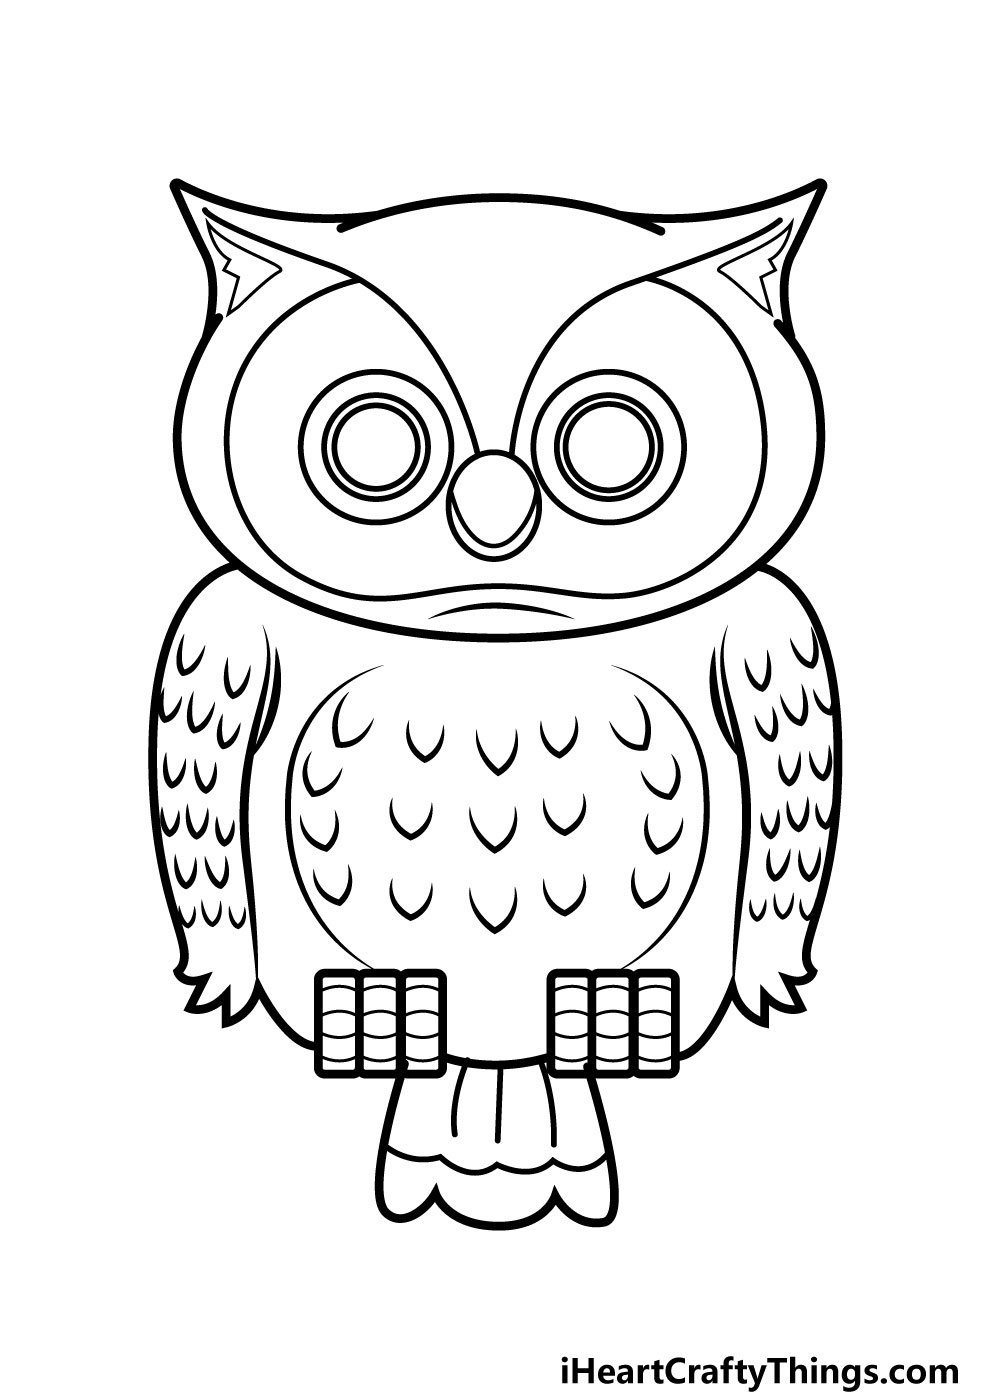
Your owl drawing is very nearly finished now! It just needs a few more little details to finish it off.
You can use some curved lines on the body to create the look of feathers on your owl, as well as using some lines on the tail.
Will you replicate the details we have in our picture or add some of your own?
Step 9 – Lastly, finish it off with some color
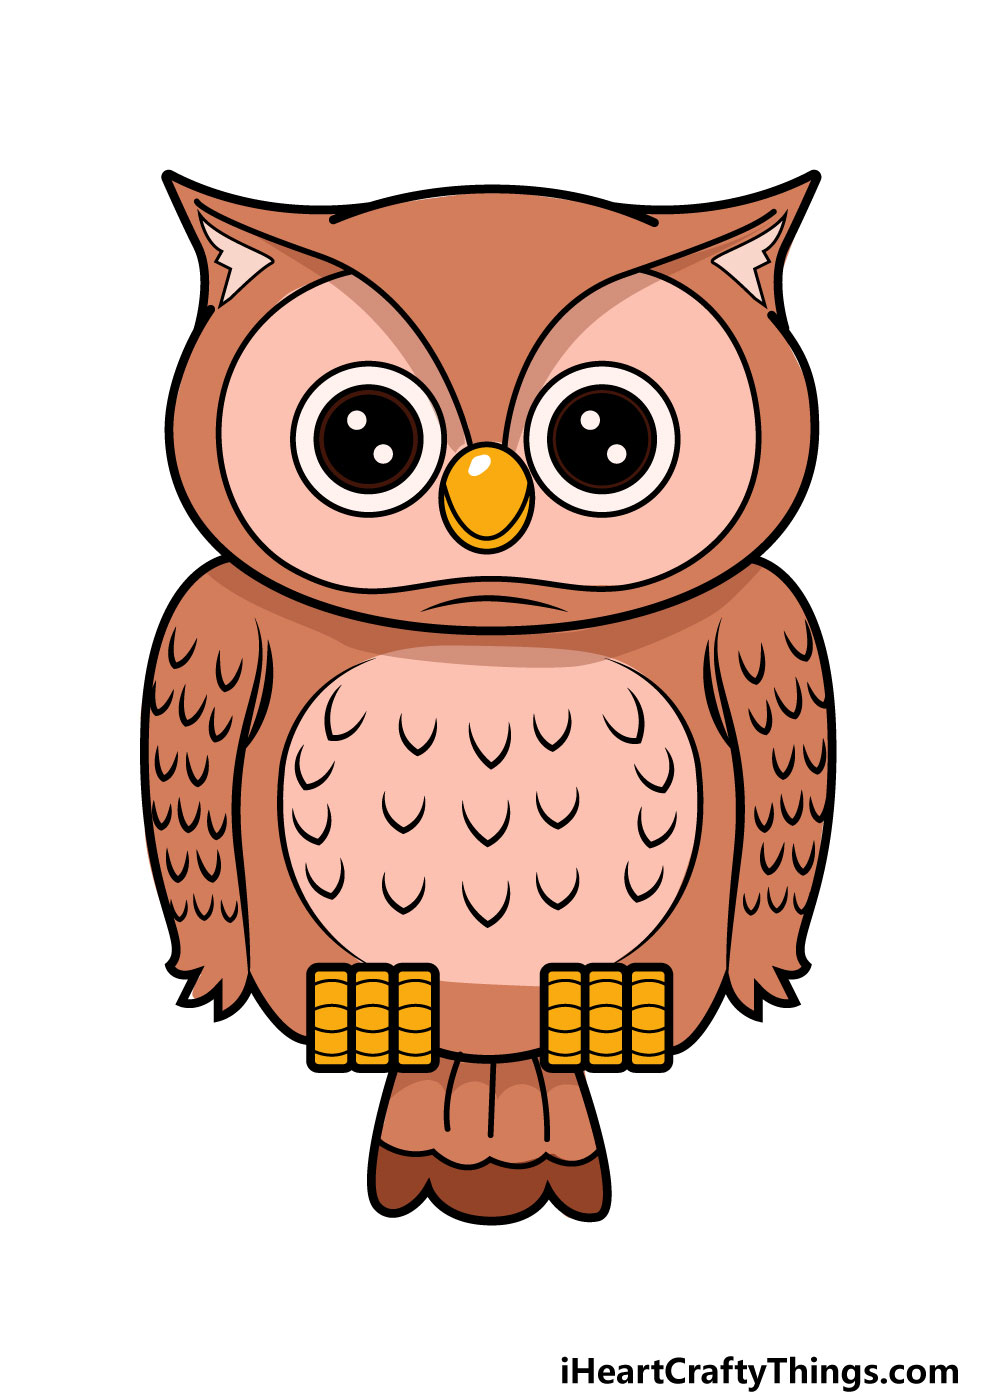
You have successfully completed your owl drawing now, but it needs one more thing! This step will be a lot of fun, as you get to express yourself with some beautiful colors.
We’ve shown one way you could color it in with our image, but for this step you should let your creativity run wild!
Choosing your own favorite colors is one way to personalize your drawing, but you can also have fun experimenting with different art mediums such as acrylics, watercolors, colored pens or pencils.
The possibilities are endless, and I’m sure it will look amazing when it’s done!
Bonus: Turn This Owl Drawing Into A Fun Gift
Now that you have completed this drawing of an owl, you can do all sorts of cool things with it. One of the best ways you can make your drawing even more special would be to give it as a present.
There are a few ways that you can turn this drawing into a lovely gift. One of the easiest ways would be to turn it into a card for someone.
This could be for a birthday, a special occasion or just for the fun of it! If you wanted to do this, you could draw the owl on a piece of cardboard which you then fold over.
This would allow you to add a nice message on the inside, allowing you to customize it to any occasion you want. If you would like to present this owl drawing in another fun way, you could turn it into a paper doll.
This could be done with different colors of craft paper which you could cut out in certain shapes and then stick over one another. Once it’s assembled, it could be fun to stick it to some string or ribbon so you can hang it.
For a simpler way of presenting it as a gift, it could be put in a frame that someone could proudly hang on their wall. When it comes to creating a gift out of your art, it can be as complex or simple as you like.
It would also be a hoot to make some different variations if you wanted to give different people some owl-themed gifts. We’ve given you some ideas to consider, but now it’s up to you!
How else could you present this owl drawing?
5 Tips To Make Your Owl Drawing Even Better!
These 5 tips we have for your owl sketch will make it look even more amazing!
This cute drawing of an owl we have created looks great, but at the moment it is just sitting in mid-air. You could make it look a bit more complete by adding a branch for it to sit on.
Owls will be perched on all kinds of branches and other surfaces, and this simple addition will do a lot to give this image more of a sense of place.
Once you have added something for the owl to sit on, you could also create an entire background setting to build on the idea.
This could be anything from a tree in a spooky forest to an enclosure at a zoo. These are just a few ideas, but you can probably think of some interesting alternative locations this owl could be in!
One owl is great, but two can be even better! For that reason, we think it would be fun to add a friend to this owl drawing. Now that you know how to draw an owl, it would be easy to add another one to this scene.
Would you have it in a similar pose or try something different?
There are other animals you could also add as some friends for the owl. These could include animals like squirrels, or you could add any number of other bird species.
You may want to keep it in the family and draw other breeds of owls beside this one. Can you think of some other animal pals that would go well with this owl?
This owl sketch looks so great, and we think that the way you present it could make it look even better! For example, you could draw it on a big piece of paper to turn it into a poster.
It could also be great to draw it on some cardboard to use it as a birthday card as a gift for a loved one. That would be a great way to finish off this awesome owl!
Your Owl Drawing is Complete
With some beautiful colors added in, you have learned how to draw an owl! This one had a few tricky elements to it, but it can be so much easier when you break it down into steps.
Our aim with this guide was to show you how you can plan out your drawing before taking it slowly and arriving at a beautiful drawing in the end!
Now you can create some unique owl drawings by changing up some details, drawing in a beautiful background and experimenting with different colors.
The sky is the limit, and we can’t wait to see what creative touches you add to your drawings!
We will be uploading many more great step-by-step drawing guides like this one, so please keep checking our site frequently to never miss out!
Once you’ve drawn and colored in your owl drawing, we would love it if you would share it to our Facebook and Pinterest pages for us to enjoy.
We can’t wait to see your incredible and colorful owl drawings!