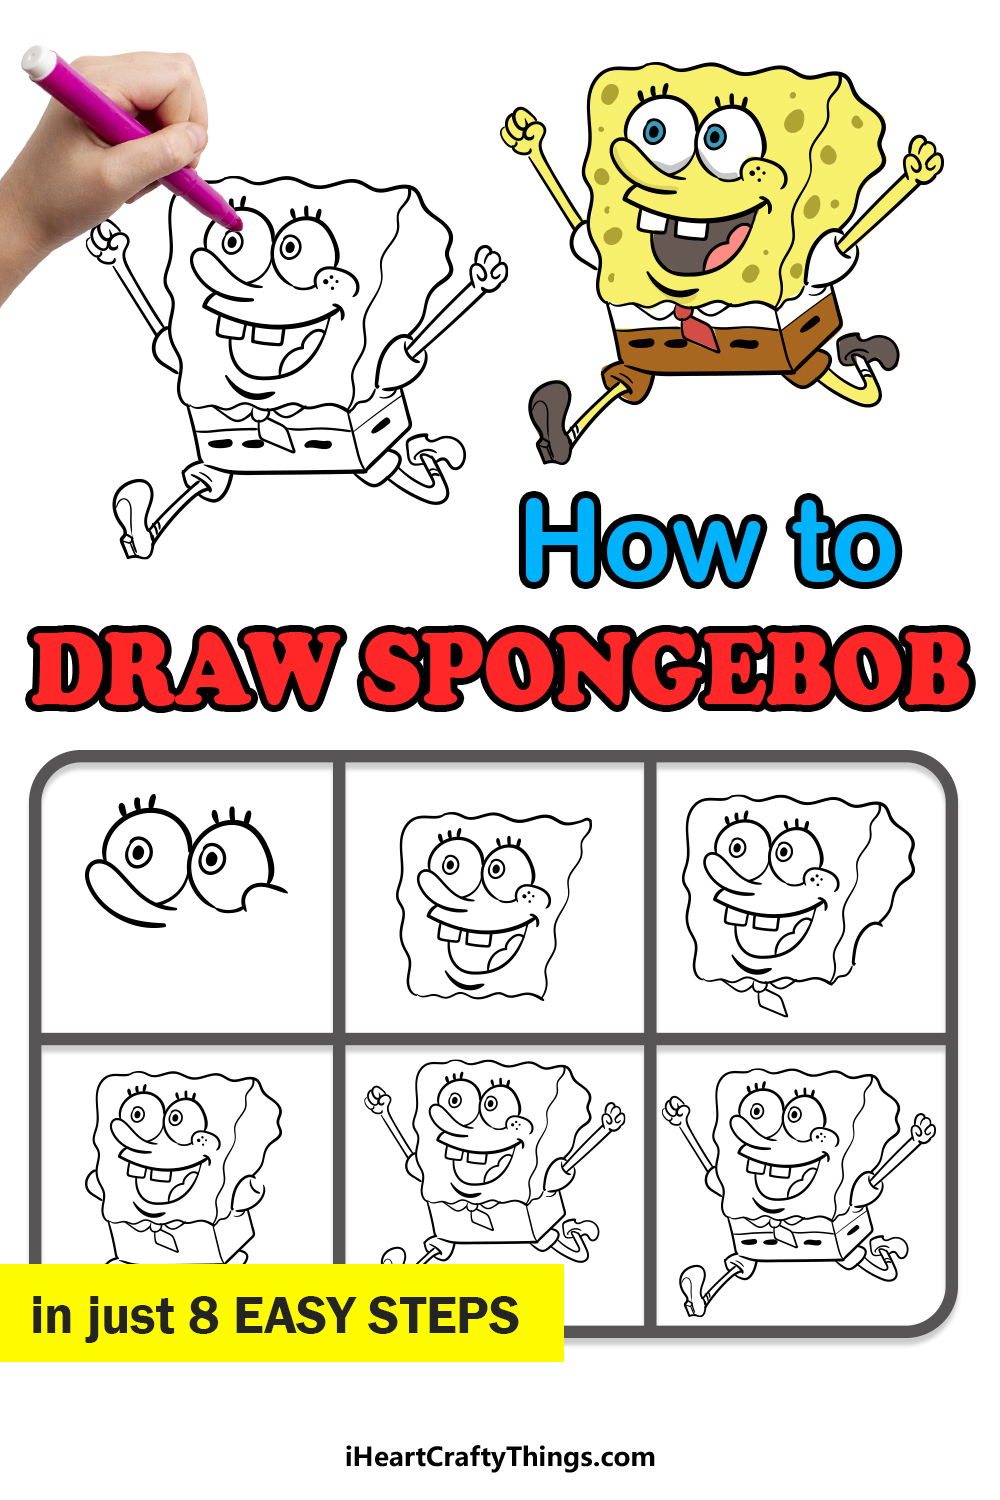
Are you ready to learn how to draw Spongebob? This simple, fun guide for kids will show anyone how to draw our favorite sea sponge.
Spongebob is one of the most iconic cartoon characters of all time, and his adventures are enjoyed by millions of people. Many of his fans may try to draw him, only to discover it’s not as easy as it seems.
He’s quite a detailed character with a very specific shape, so in order to make it easier I’ve broken down his design into intuitive steps you can follow.
Once you have finished it, you could even draw a background featuring his home of Bikini Bottom and add some of his friends like Patrick, Squidward, or Mr Krabs.
It all starts with learning to draw the man himself, and you’re about to see just how easy it us when you know the right tricks!
Watch These Steps To See How To Make A SpongeBob Drawing
How to Draw Spongebob – Let’s get Started!
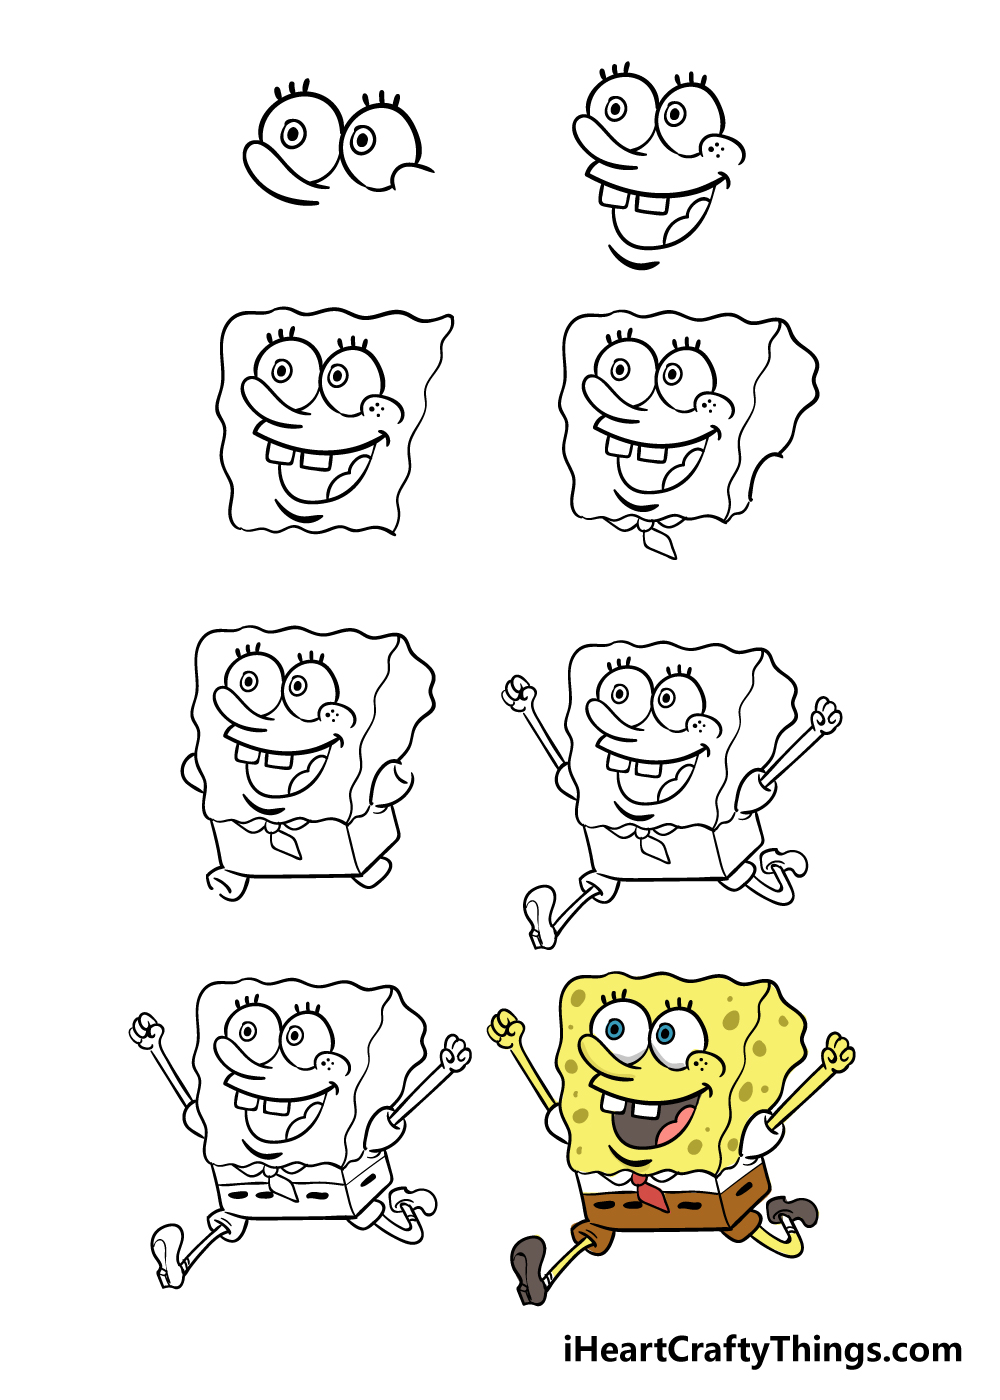
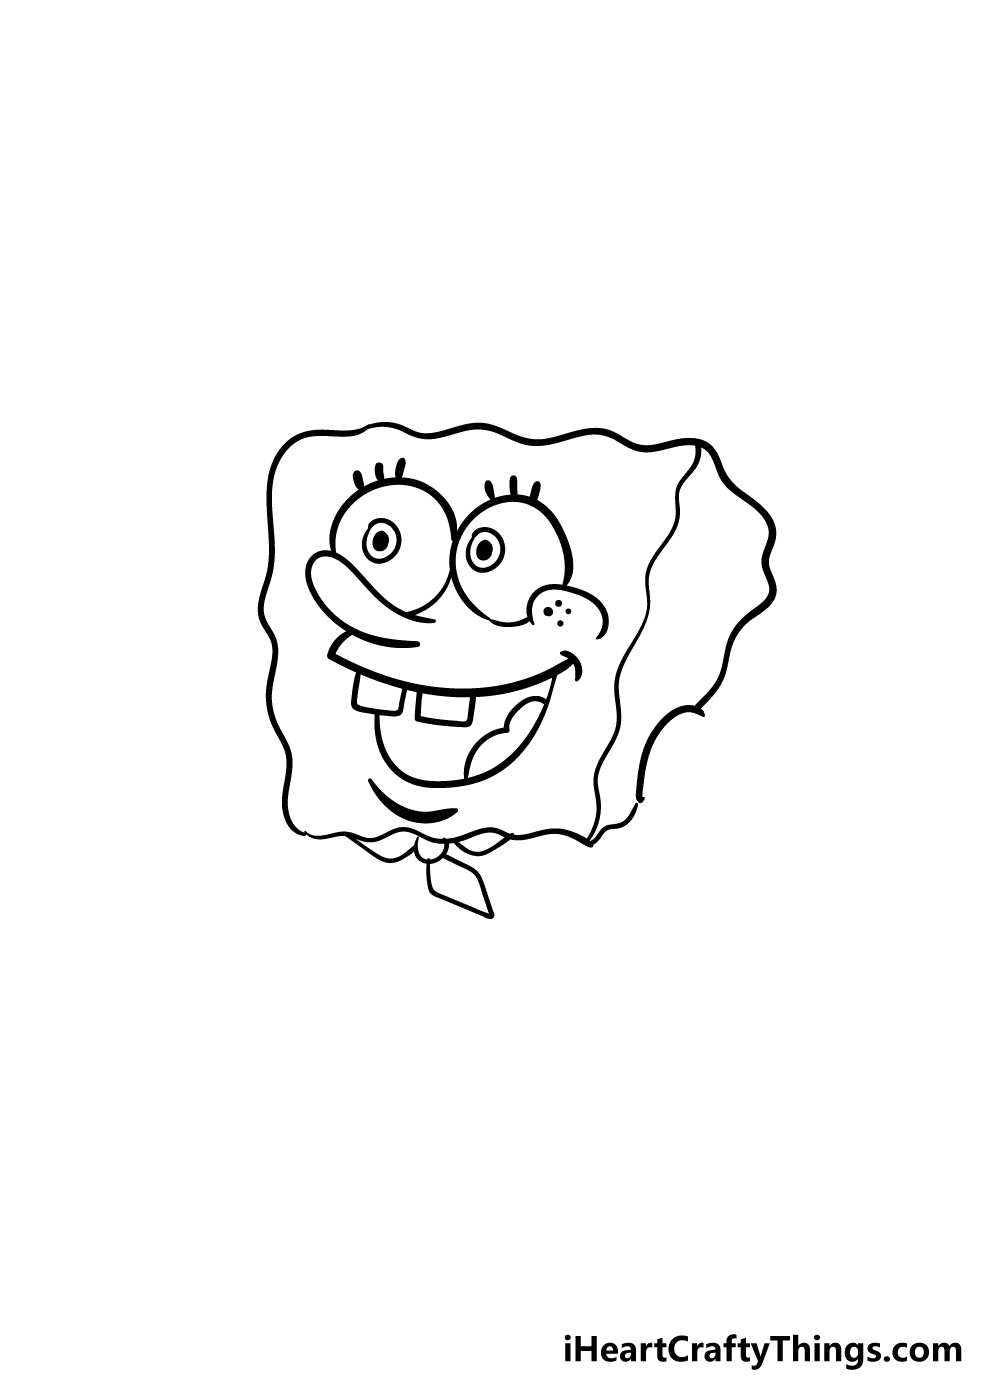
Step 1
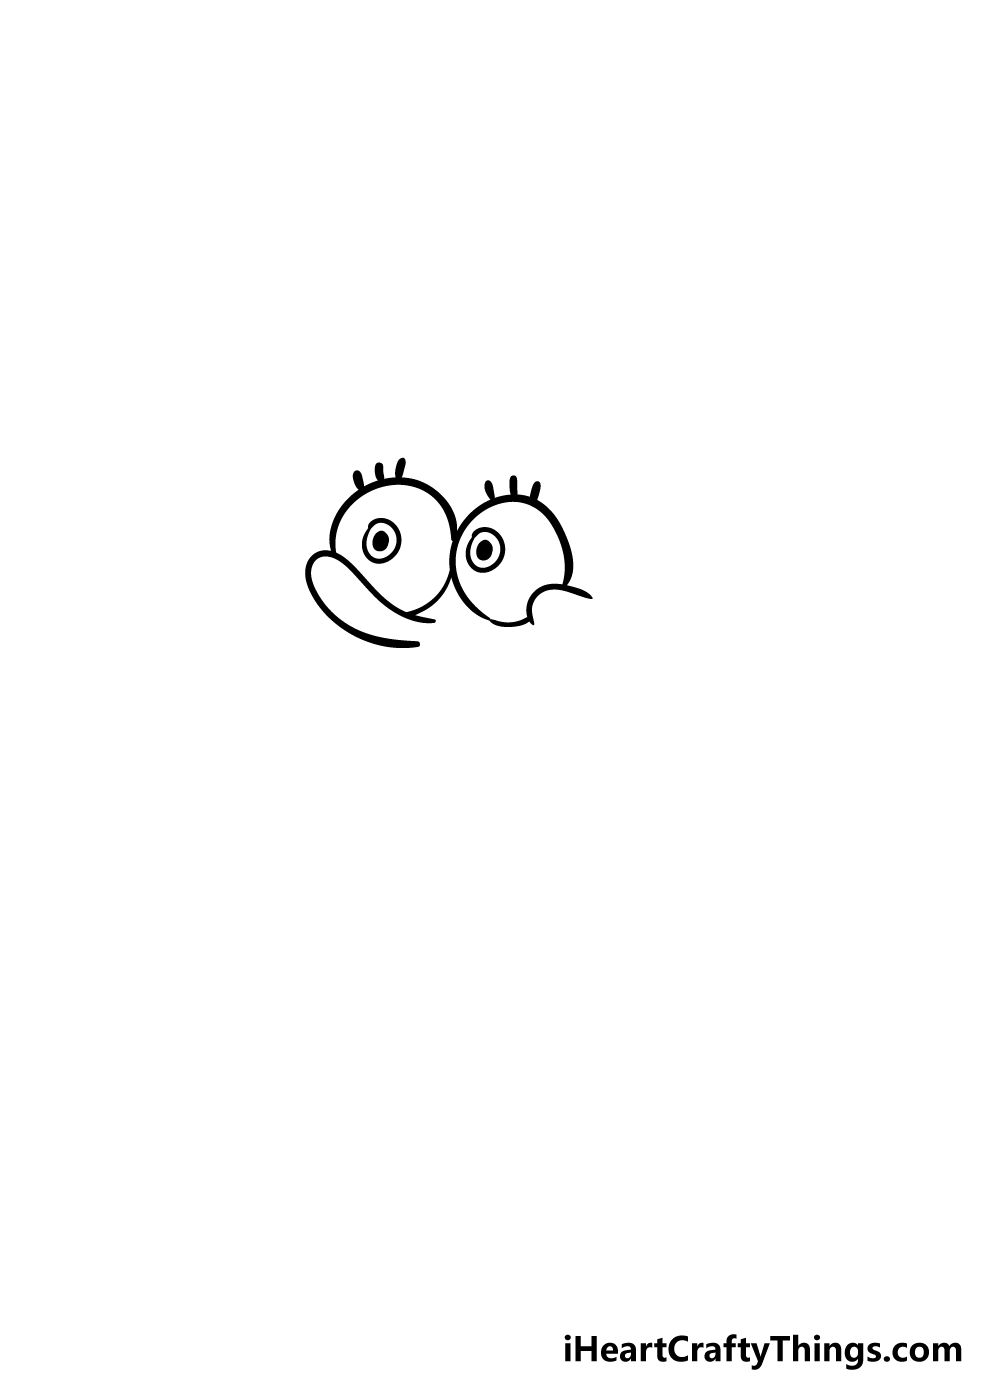
To begin this guide on how to draw Spongebob, we shall start with his eyes and his nose. Let’s begin with his nose. His nose is quite long and curves up as it goes along.
Once you’ve drawn it in to look like the picture, you can add in the eye on the left. Drawing from the nose, try your best to draw as perfect a circle as you can.
Be sure to leave a small space on the right-hand side of the eye, as that is where the other eye will intersect.
Then carefully draw in the eye on the right, but leave another space on the lower right of the eye, then draw in a curved line for his cheek.
You can finish off this step with three lines atop each eye for his eyelashes.
Step 2 – Next, draw in his mouth and cheek
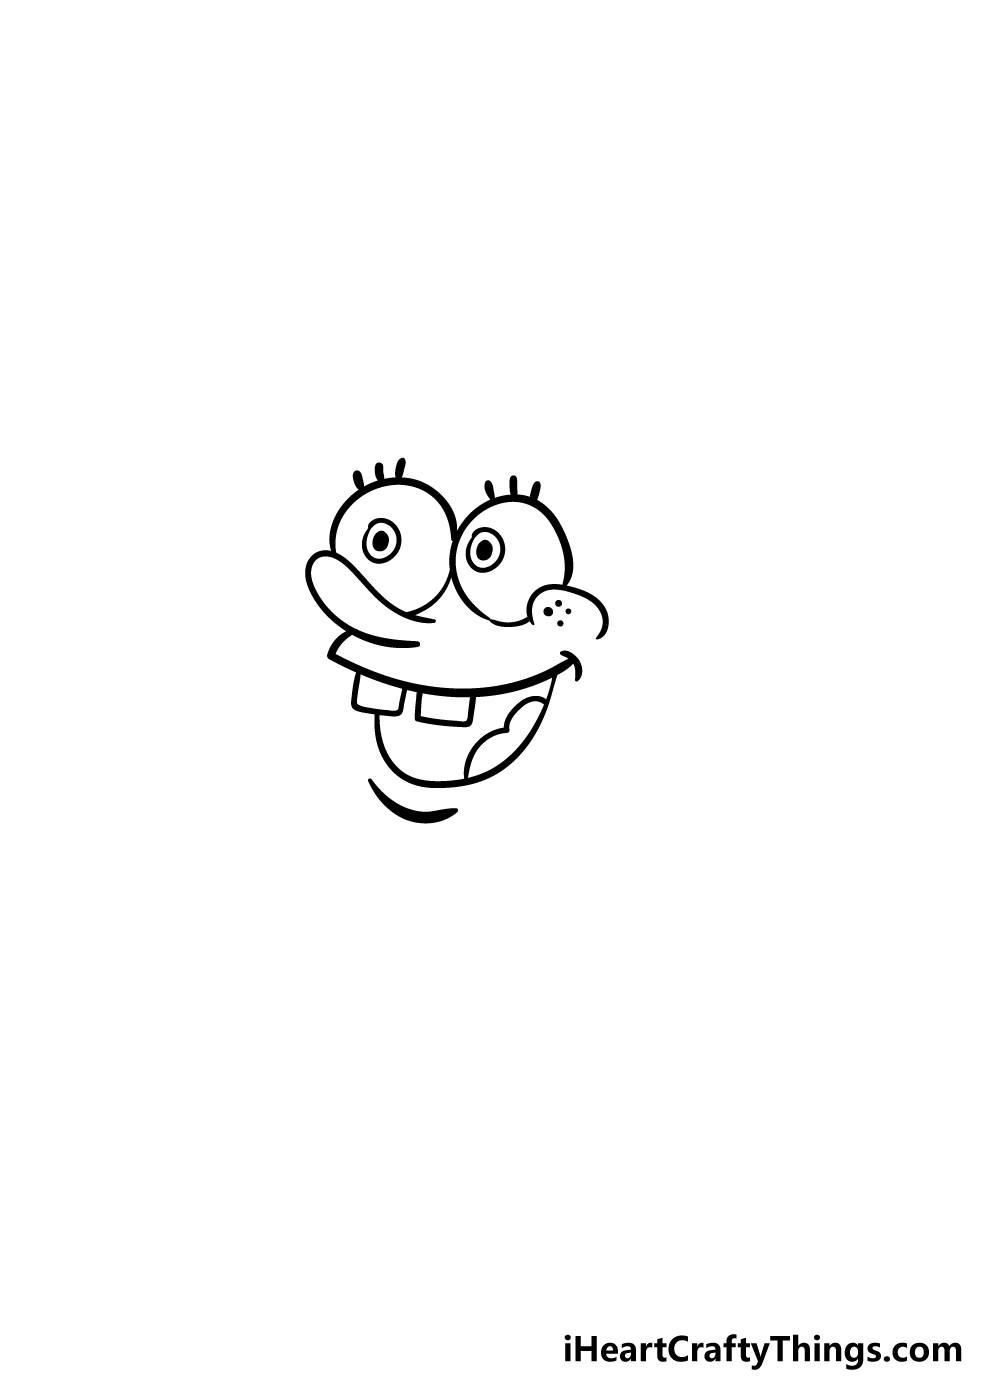
It’s rare to find Spongebob without a big smile on his face, so we shall add one in for this step of your Spongebob drawing.
First, draw a small, curved line down from his nose. It should be very short and then turn sharply right into another curved line that extends until it’s under the cheek.
Once you have that line drawn, draw in two square shapes to form his distinctive teeth. Then, you can finish it off with a curved line underneath it from the teeth to the corner of his mouth. Don’t forget to give him a tongue!
Lastly for this step, draw in the rest of his cheek and add three dots to give some freckles. A curved line under his mouth will give him a chin.
Step 3 – Now you can start to draw in his body

The face is complete, so for this part of our guide on how to draw Spongebob, we will begin with his body.
While he has square in his name, Spongebob is more of a 3D rectangle shape. For now, draw in a rectangle shape around his face as you see it in the reference picture.
As you can also see, you should use a wavy line, as the lines that make up Spongebob aren’t completely straight.
Step 4 – Add in more of his body and his tie
For this step of your Spongebob drawing, start off by giving him his shirt and tie. This will be made up of triangular and circular shapes with the tie extending down from the bottom line of his body.
Once you have that, you can draw in the side portion of his body as it appears in the image. Be sure to leave a smooth, curved space at the side, as his arm will go in there later.
Step 5 – Now, give Spongebob his shirt and pants

It’s time to dress up Spongebob! Let’s begin with the arms of his shirt. These will be made with a few curved lines.
The arm on the right will slot into the space you left earlier, and the one on the left will come straight from his body.
Then, you can use some straight lines to form a rectangular shape to make his pants. These lines will be straight, unlike the lines of his body.
Add in more curved lines for the legs of his pants and you’re ready to proceed!
Step 6 – Draw in the limbs for Spongebob
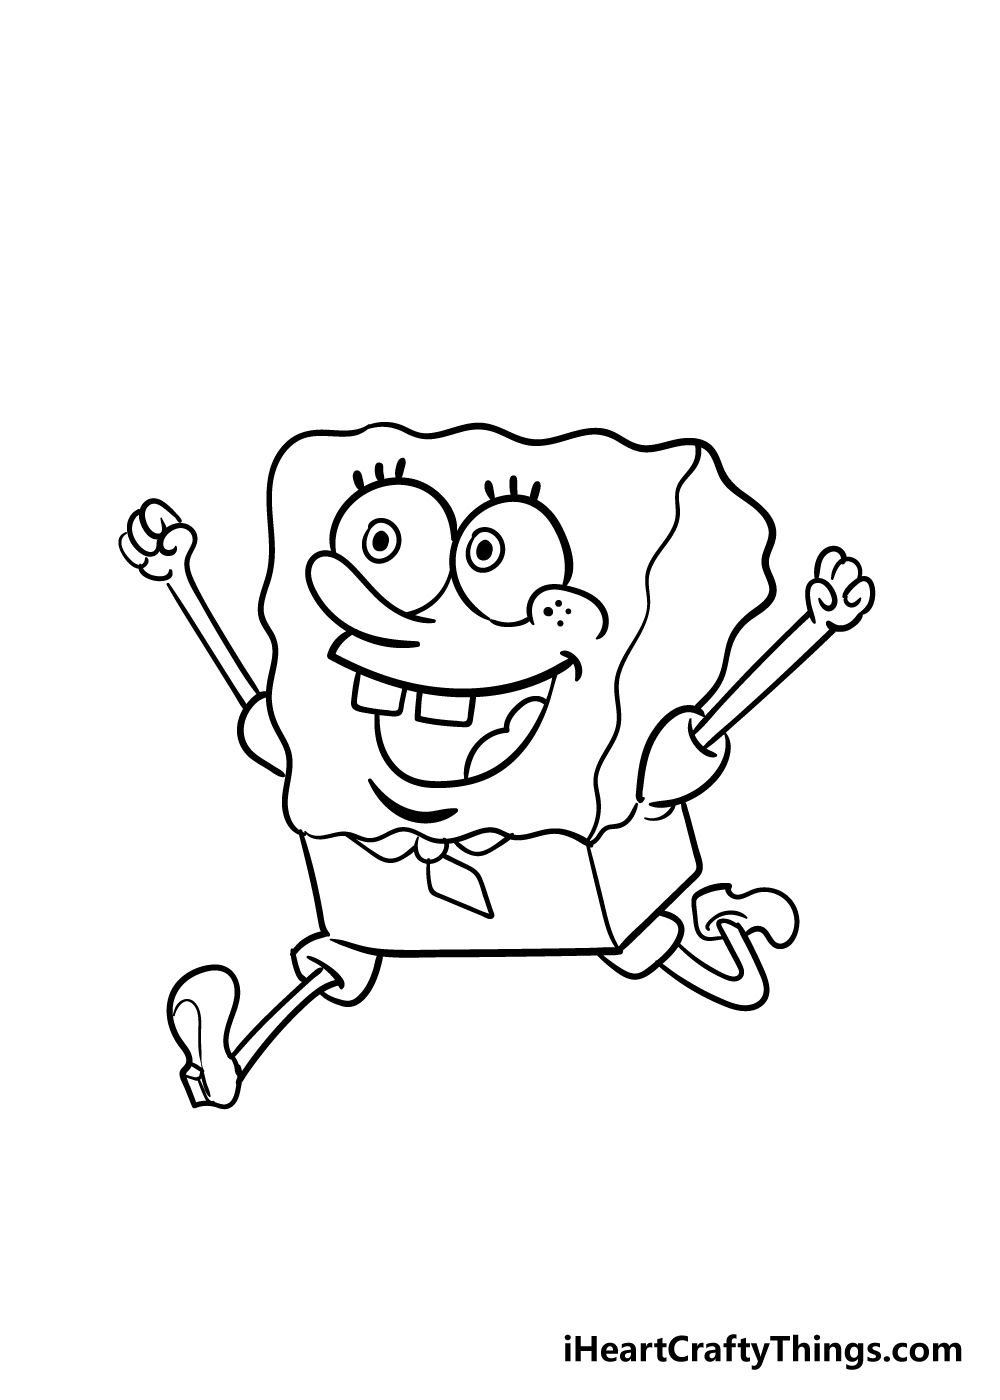
Your Spongebob drawing is looking really good! Let’s give him some limbs in this step of our guide on how to draw Spongebob.
His arms are very straight in the air, so they can be made ith two straight lines with curved lines for fists at the end.
The leg on the left with be straight out, and the one on the right will be curved to show him running. The reference picture will show you how to use some curved and straight lines to form his shoes.
Step 7 – Next, draw in some final details
It’s almost time for the final step of your Spongebob drawing! Before you can move on to the coloring stage, let’s add in some final details.
Use some straight lines to divide his shirt from his pants as you see in the picture. Then, you can use some thick but small black rectangles making a pattern to show his belt.
Lastly, add in some lines above his shoes to show his socks.
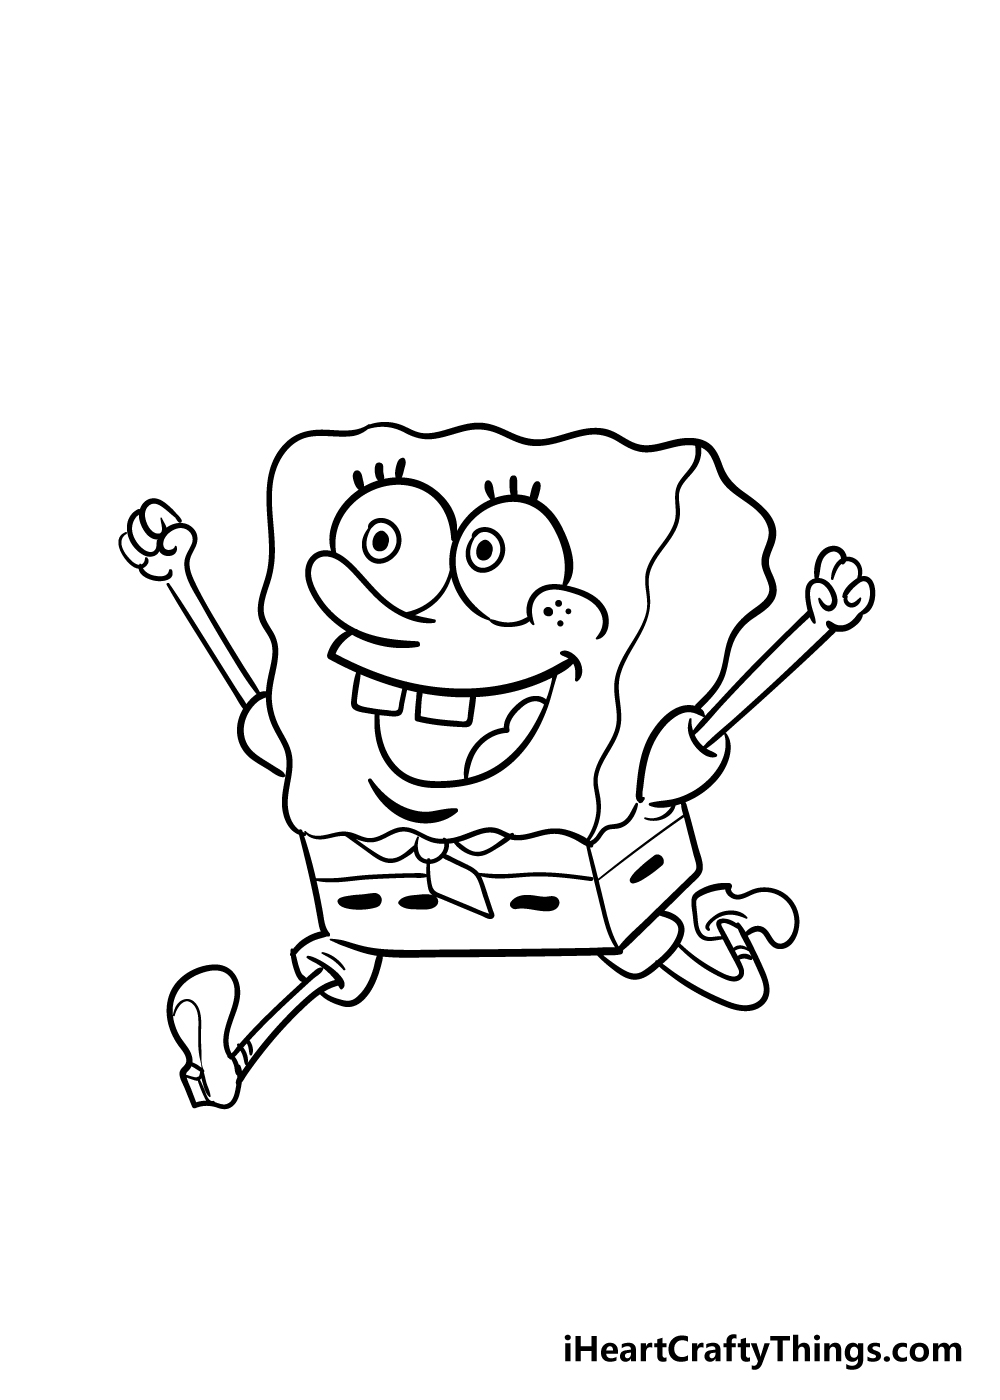
Bonus: Have Fun With Some Facial Expressions
You’re just about to take on step 8 to finish off this Spongebob drawing with some color. Before we move to that final step, we thought that you may want to personalize your drawing a bit.
One of the best ways to do that would be by changing his facial expression. There are a few reasons for this, one would be that it’s an easy element to change without altering the whole design.
The second reason would be that the Spongebob series is famous for its over the top facial expressions. There are so many emotions that are portrayed on the various characters, and it’s always to an extreme.
Now that we have the reasons out of the way, we can cover how you can change the face. Of course, you would want to start with removing the facial expression in our design.
That will leave a blank canvas for you to change the face. If you have a favorite Spongebob facial expression from the series, then you could pause the scene and use it as a reference as you add the face.
You could also come up with your very own facial expressions for Spongebob. If you need some help with this, one good way to do it would be to get out a mirror.
You can then make the craziest faces you can and maybe even take a picture of your favorites. Then it would just be a matter of converting your favorites to the Spongebob style.
This way you can make some brand new faces that no fan of the series has ever seen! The only question now is what kinds of faces would you like to portray on Spongebob in this image?
We would love to see what kinds of faces you can come up with!
Step 8 – Now finish off your Spongebob drawing with some color
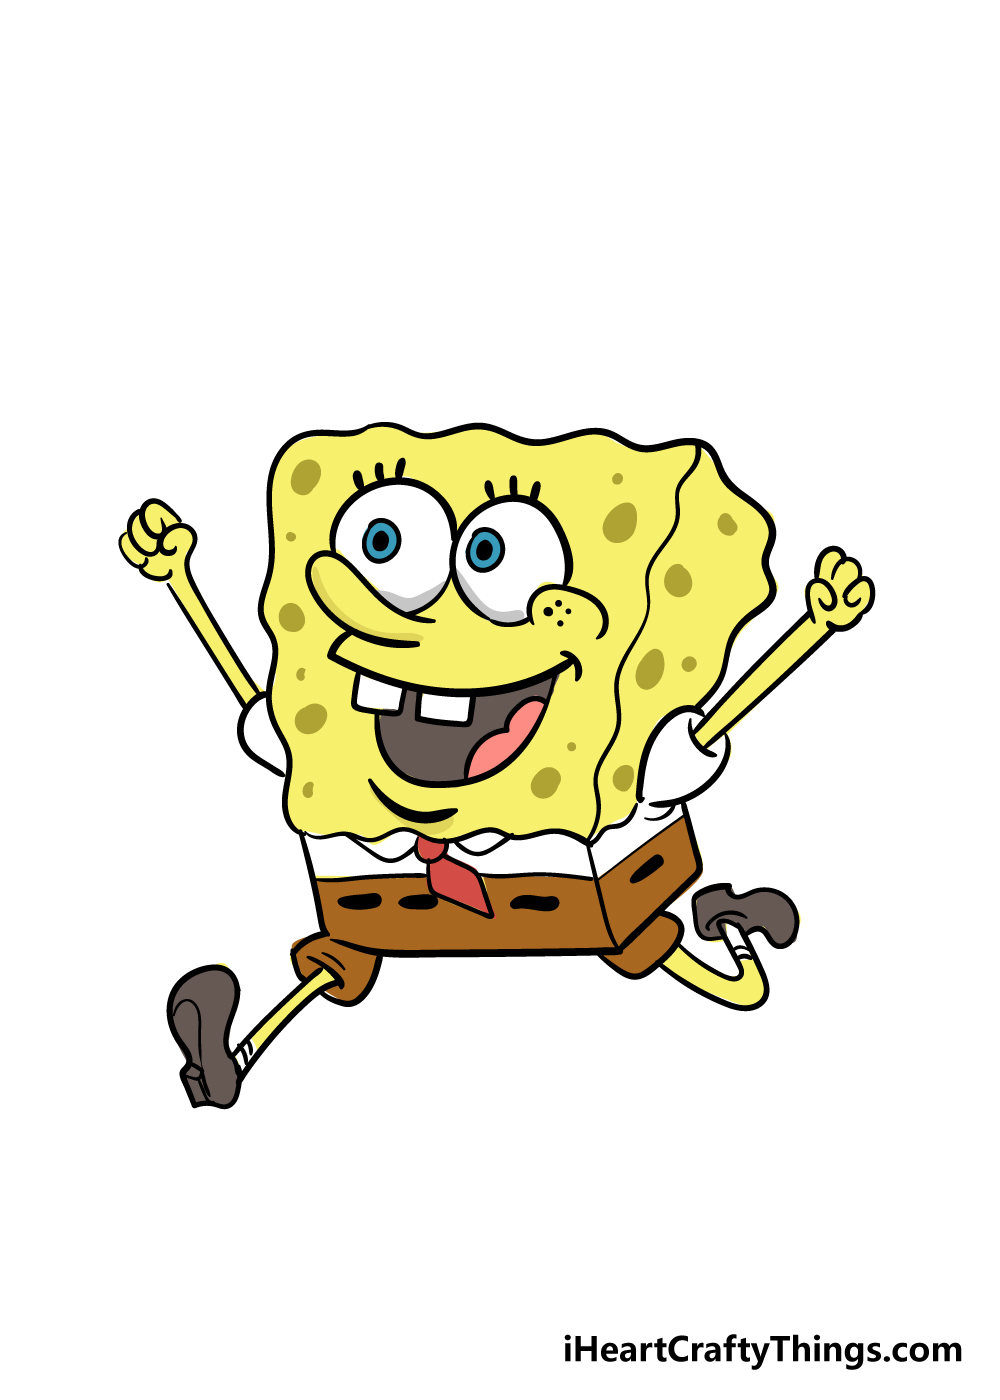
You’ve successfully drawn an awesome Spongebob, so now you can have some fun coloring him in!
Spongebob has a distinctive yellow coloring, and the image shows how different shades of yellow for different parts of his body will help give him depth.
What fun art mediums will you use for your Spongebob drawing? I would personally use some acrylic paints, as they give a nice vibrant look to colors that would suit Spongebob perfectly.
That’s just one way to do it though, and we can’t wait to see what colors and art tools you use to finish this off!
Do this to take your Spongebob drawing to the next level
Take a trip under the sea as we show you how to make your Spongebob drawing even better!
Spongebob is one of many iconic characters from the TV series. You could make your Spongebob sketch even better by adding some of these characters around him!
Maybe you’d want to add his best friend Patrick, his long-suffering neighbor Squidward or his excitable friend Sandy.
These are just a few of the colorful characters you could add to the picture, and you can use the show to get the look of the characters.
What are some famous Spongebob characters you would like to add to the image?
There may be many iconic characters in the show, but there are also many famous locations. These locations would be perfect to add to this Spongebob drawing!
You could draw the pineapple home of Spongebob, the stone head home of Squidward or Patrick’s simple rock home. Or, maybe you could add the Krusty Krab or the home of the villainous Plankton.
These are just a few of the locations you could use for this image, but we’re sure you can think of more!
We have this character in his usual outfit for this drawing of Spongebob. He has also worn many other outfits throughout the years, however, and you could depict these.
Some examples would be showing him in his Krusty Krab uniform or maybe dressed as a pirate. Or, you could go with something completely brand new and design a wholy unique outfit for him to wear.
What kind of changes would you make to his outfit?
If you’re feeling confident about this Spongebob drawing, you could then put him in different positions. For example, he could simply be standing or maybe frying some Krabby patties.
There are so many different activities that he performs, and you could depict them with just a few changes. Just by moving his limbs or changing his facial expression, you can make a big difference!
What kinds of activities would you like to have him performing?
Your Spongebob Drawing is Complete
Now that you have the final details and colors, you have reached the end of our guide on how to draw Spongebob!
We hope that this guide was not only super helpful but lots of fun for you to use!
We created it to make drawing Spongebob a fun and easy process, and we know that if you follow the guide you’ll be drawing him with ease soon!
Now you can add your own touches to this drawing as well. You could change his body position a bit or even draw in a fun background inspired by the show!
The possibilities are endless, and we hope to see what you decide to draw in to make this image unique.
We have so many more fun step-by-step drawing guides in the pipeline, so we hope you will check in to our site frequently to join in the fun.
We would also love to see your finished Spongebob drawing, so please do share it on our Facebook and Pinterest pages so we can see how creatively talented you are!
Here Is A Spongebob Sketch To Inspire You!
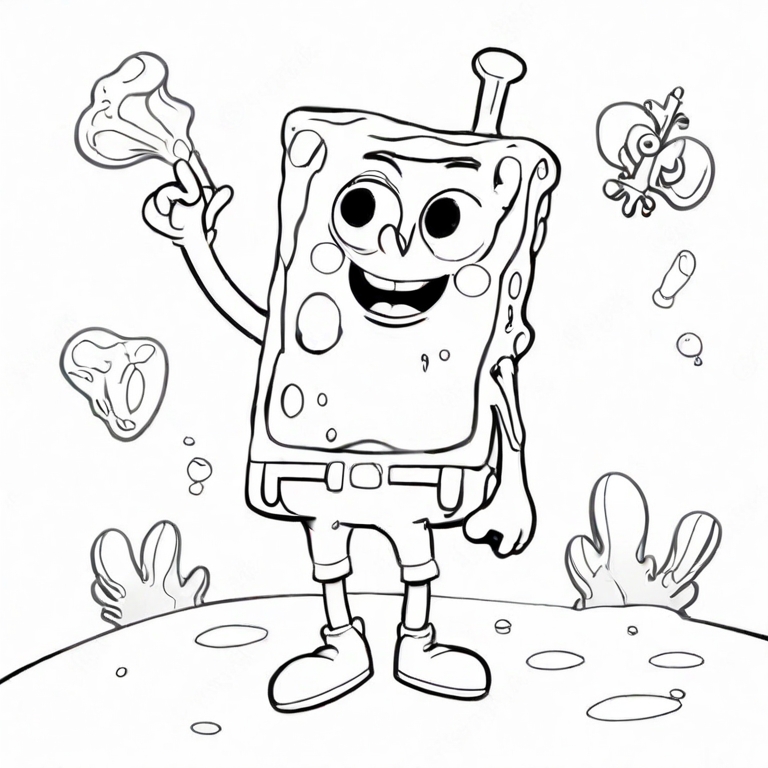
How can you not love the character of Spongebob Squarepants? He is such a bright and happy character that brings a lot of smiles and laughs to all who watch him.
This Spongebob sketch for kids by our artist Freddy is an interesting take on this iconic character. He is drawn in a stylized way that is different to the show but captures Spongebob’s essence.
The details in the background of the image also help to capture the look of the show. The backgrounds in the show will often be filled with similar patterns.
Now, you can make this drawing even more distinct with your own details and additions. This would be an excellent opportunity for you to replicate your favorite moments and settings from the show!
What classic Spongebob moments would you choose to show off here?