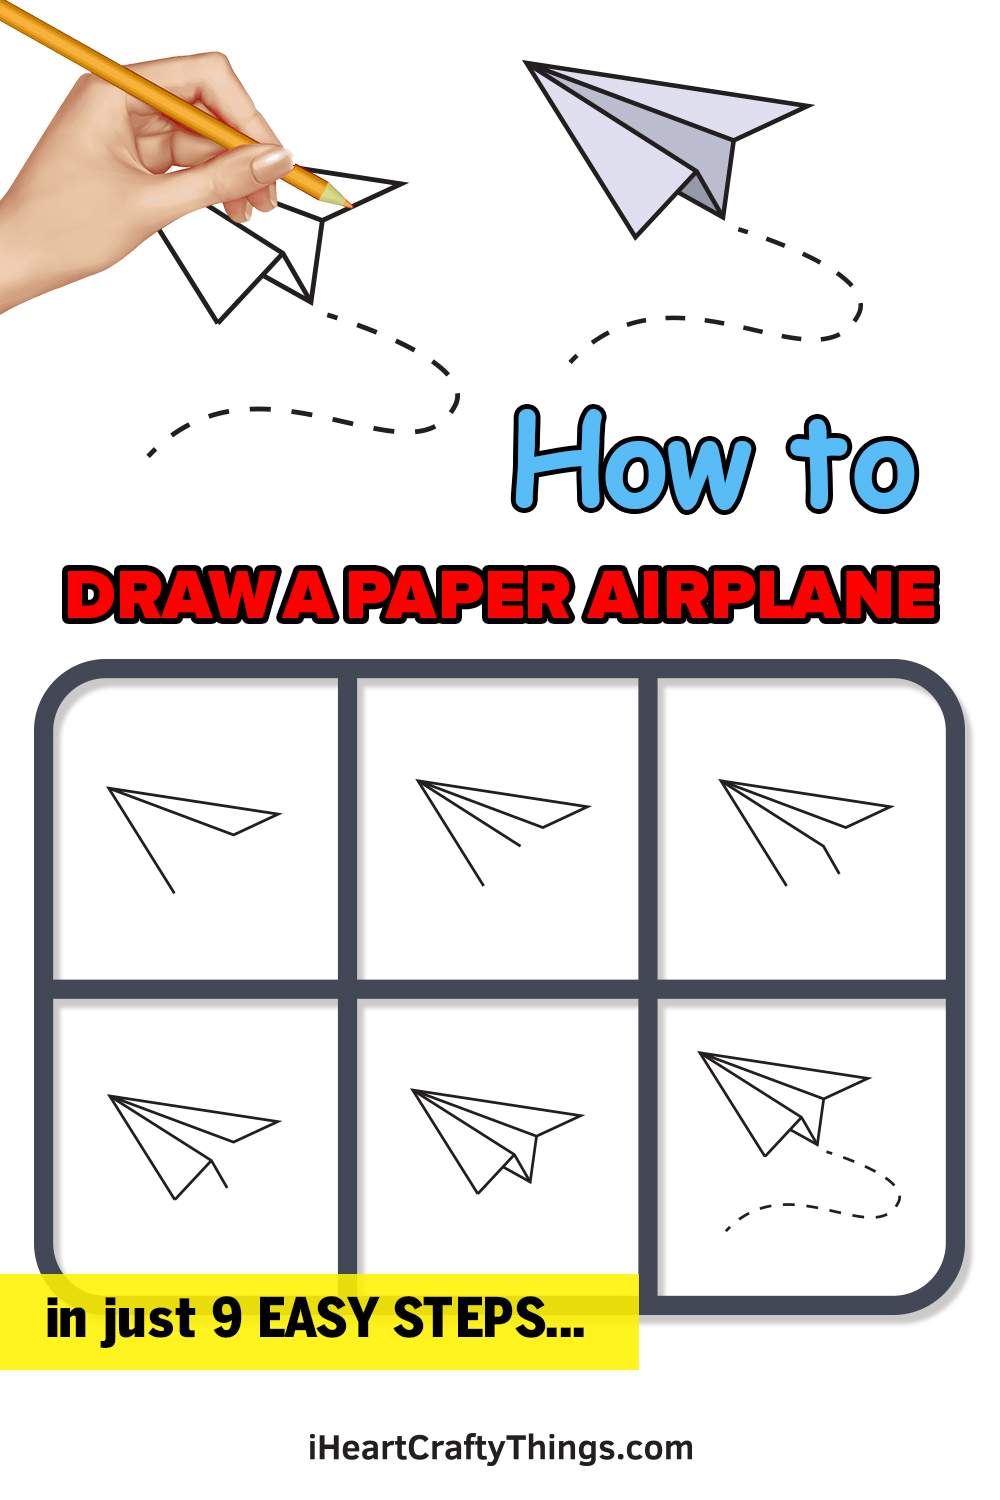
As kids, we’ve always enjoyed creating paper airplanes, throwing them into the air, and watching in amazement as they fly mid-air.
Despite today’s digital world where kids spend most of their time on screen, paper airplanes remain the easiest and most enjoyable toy aircraft to build and fly.
If you’re one of the many people who enjoy paper airplanes, why not try something new like drawing a paper airplane instead of creating one?
We have created a step-by-step tutorial on how to draw a paper airplane, summed up in 9 quick and easy steps.
Each instruction comes with an illustration that serves as your visual guide as you follow the steps one by one.
Have fun and use your creativity to draw a paper airplane!
How to Draw a Paper Airplane – Let’s get started!
Step 1
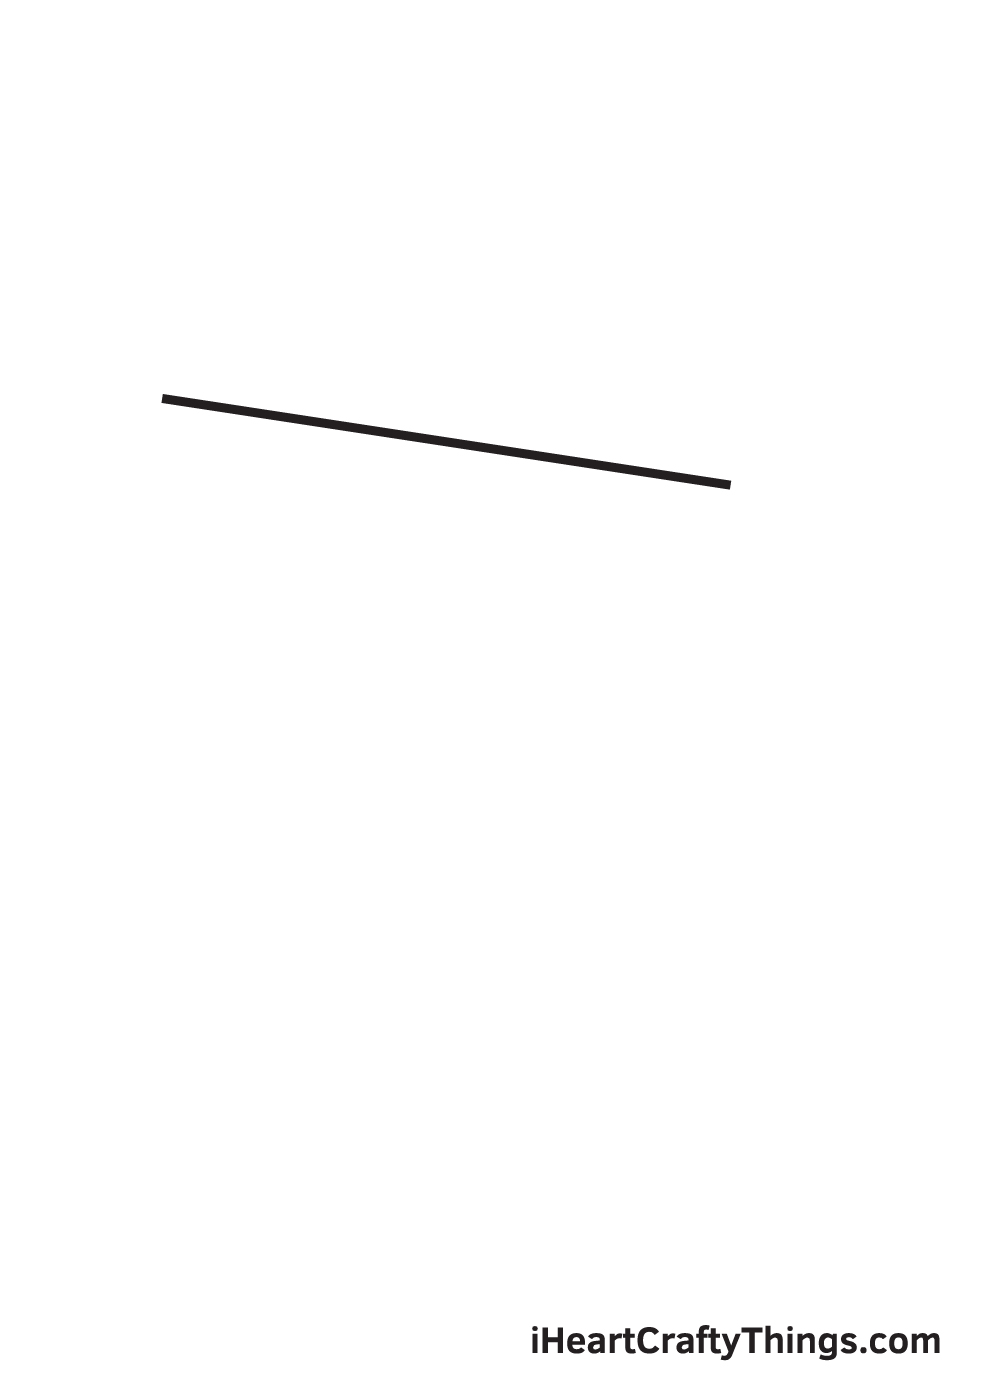
To make the paper airplane easy to imagine, you can think of drawing a horizontal or upside-down letter “V”.
Start by drawing the upper part of the airplane. Draw a descending diagonal line on the upper portion of your paper.
Drawing a paper airplane, or a real airplane for that matter, is heavily dependent on straight lines. So, feel free to use a ruler to help you draw straight lines quickly and easily!
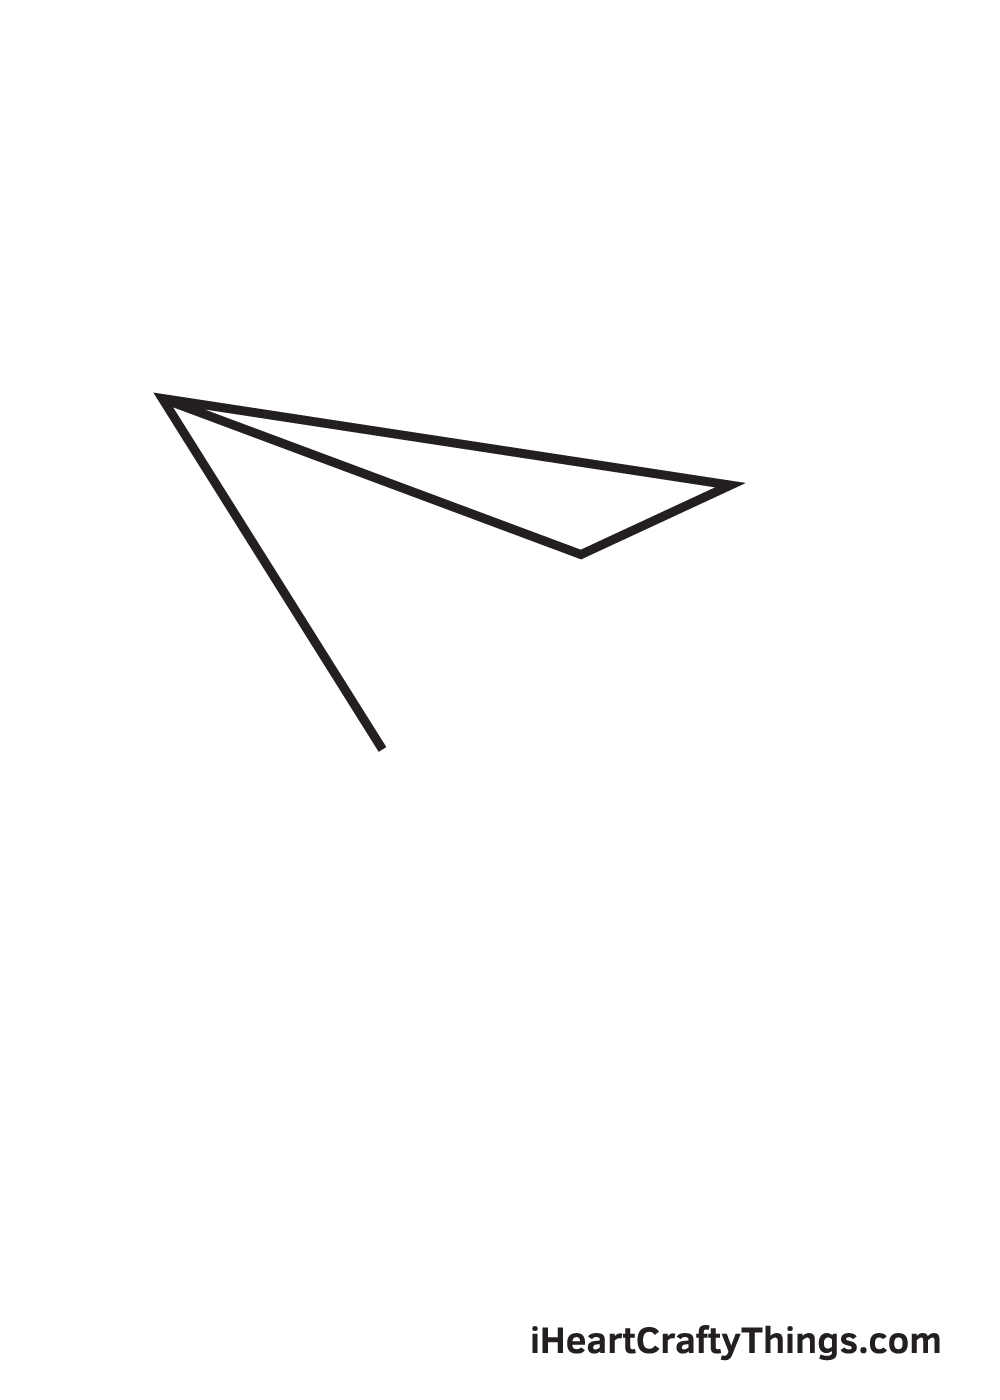
Step 2 – Create an Outline of the Paper Airplane
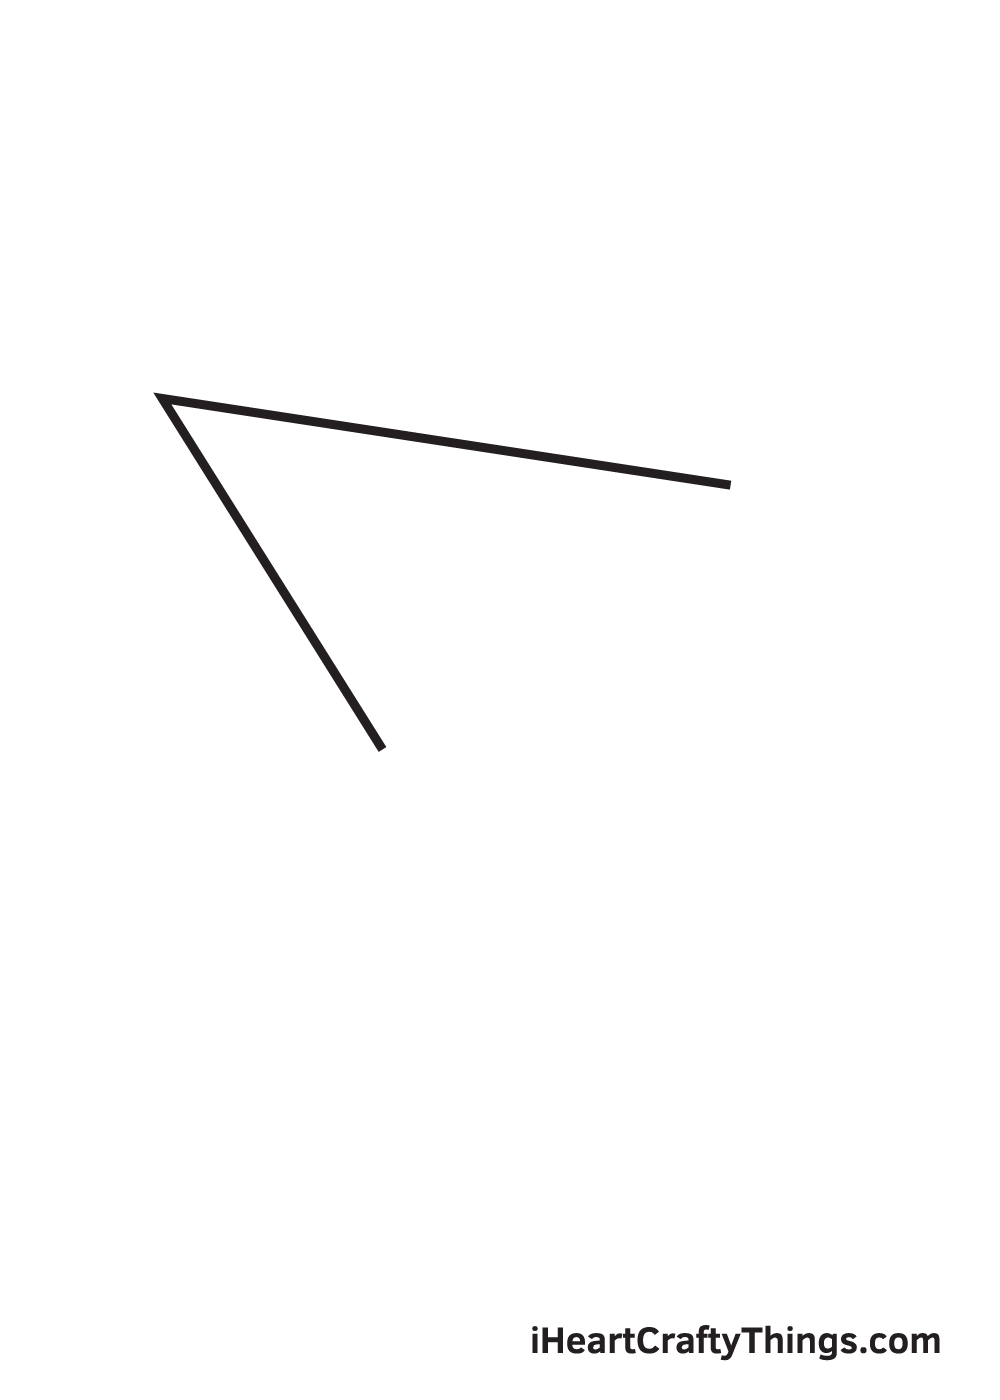
Next, draw another diagonal line to complete the “V” shape as shown in the illustration.
Make sure that it is connected with the upper tip of the first diagonal line that we drew in the previous step.
Step 3 – Draw the Right Wing of the Paper Airplane
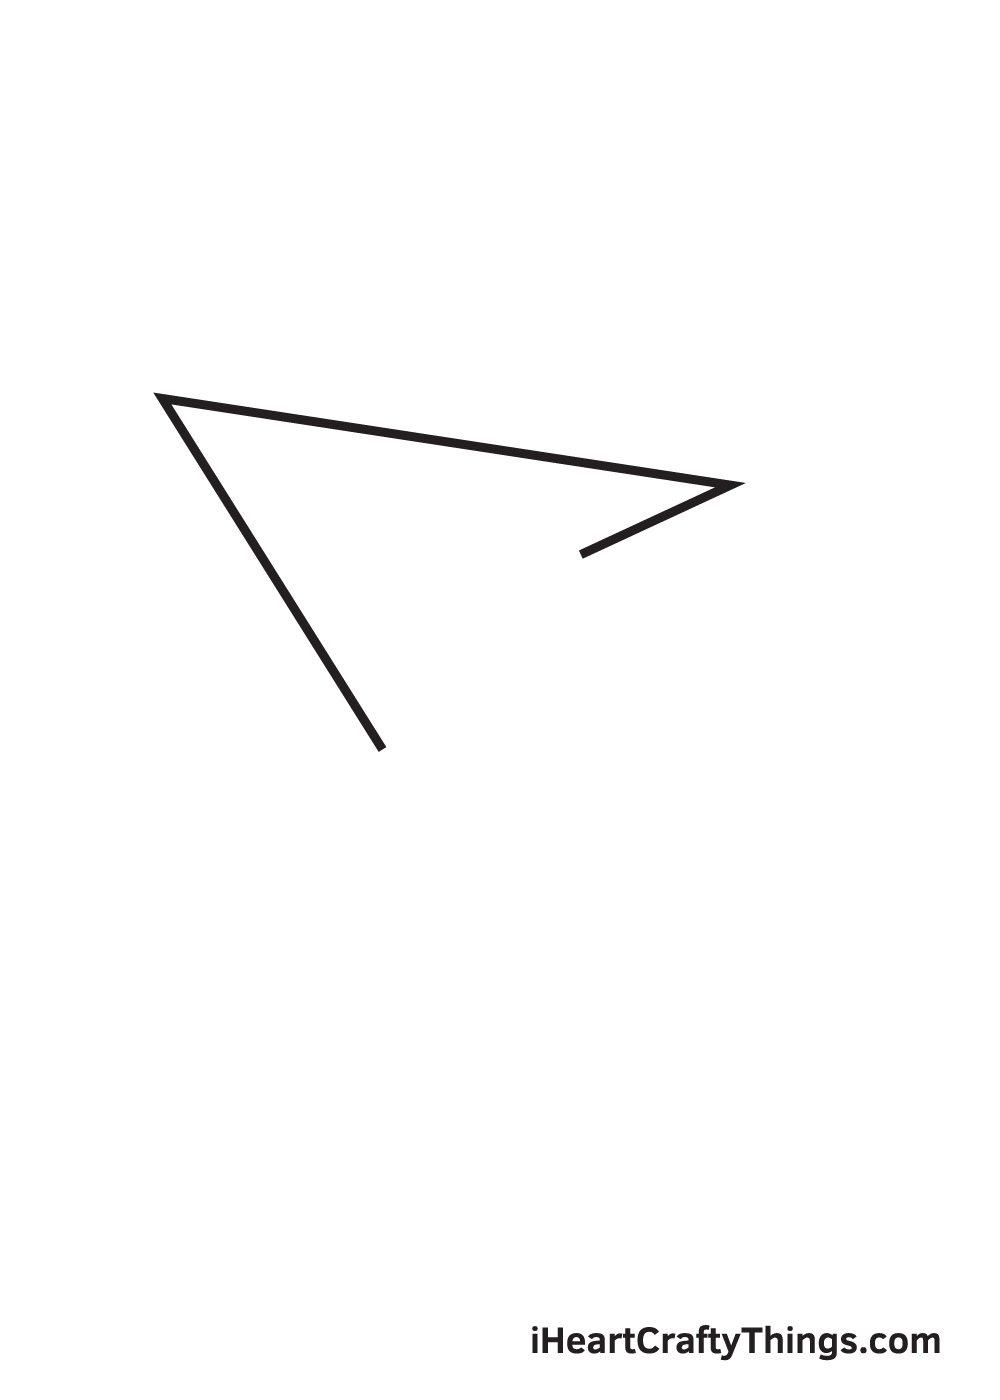
In this step, we will be drawing the right wing of the paper airplane.
Proceed by drawing a short downward diagonal line connected to the endpoint of the upper diagonal line as seen in the illustration above.
At this point, the pointed end of the right wing of the paper airplane should now be complete.
Step 4 – Finalize the Right Wing of the Paper Airplane
Draw a straight line beginning from the bottom endpoint of the diagonal line we drew in the previous step all the way to the pointed edge of the V-shaped outline.
This completes the structure of the paper airplane’s right wing.
Step 5 – Next, Draw the Left Wing of the Paper Airplane

Repeat the previous step on the opposite side to create the left wing of the paper airplane. This forms the side by side structure of the left wing.
Similar to the previous step, this line should be connected to the pointed edge of the V-shaped outline and should be aligned with the bottom endpoint of the left diagonal line forming the left wing.
Step 6 – Afterwards, Draw the Folds of the Left Wing
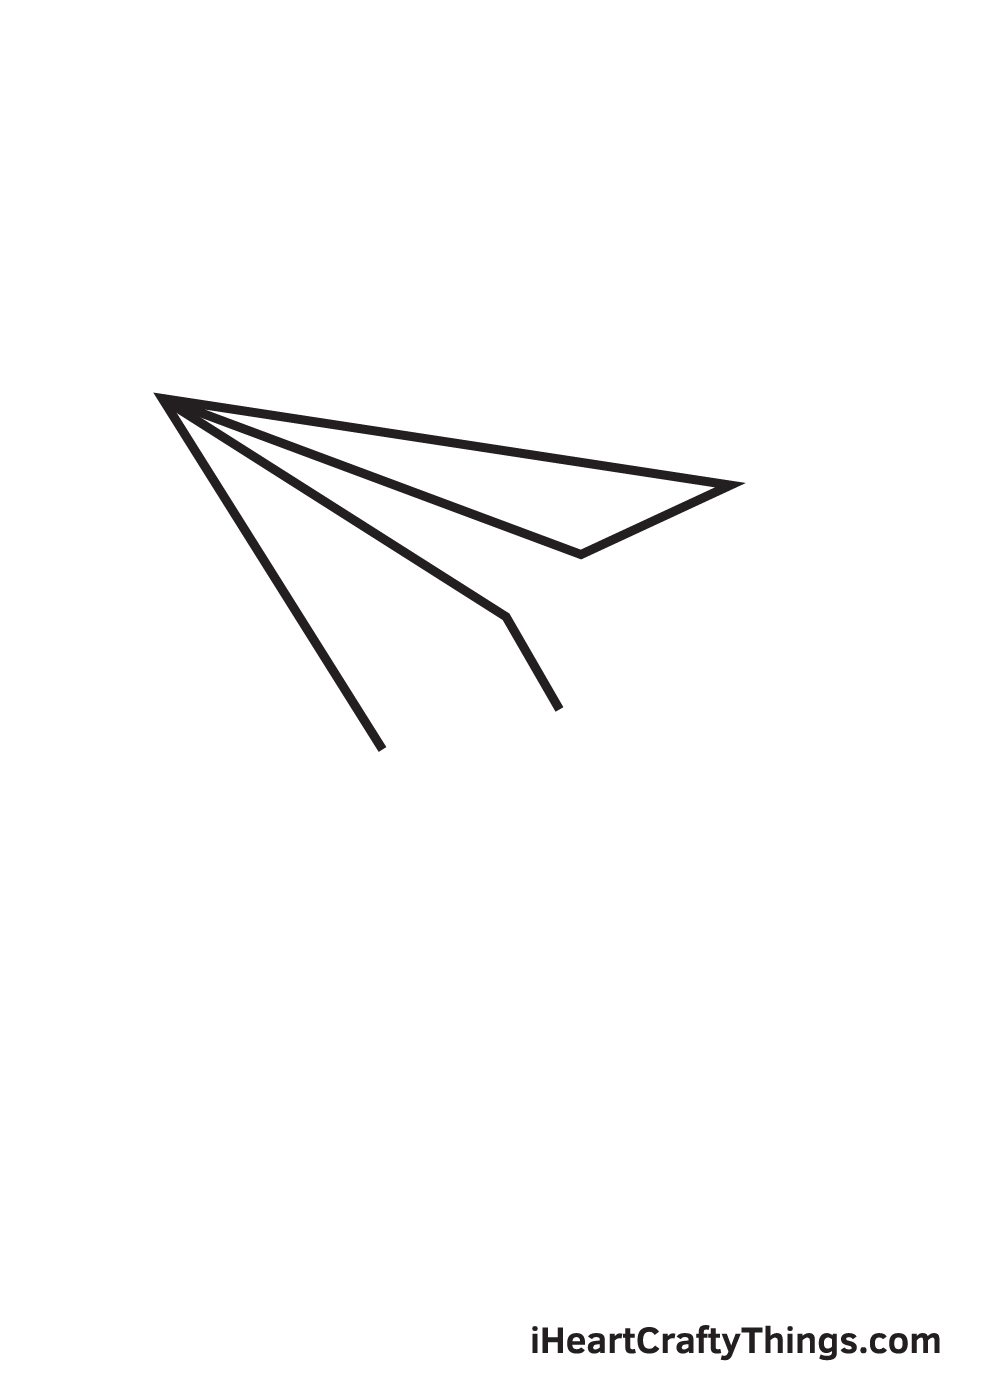
Draw a short diagonal line beginning from the endpoint of the diagonal line that we drew in the previous step.
This forms the folds of the left wing. This is also the part that we hold when throwing the paper airplane into the air.
Step 7 – Complete the Left Wing of the Paper Airplane
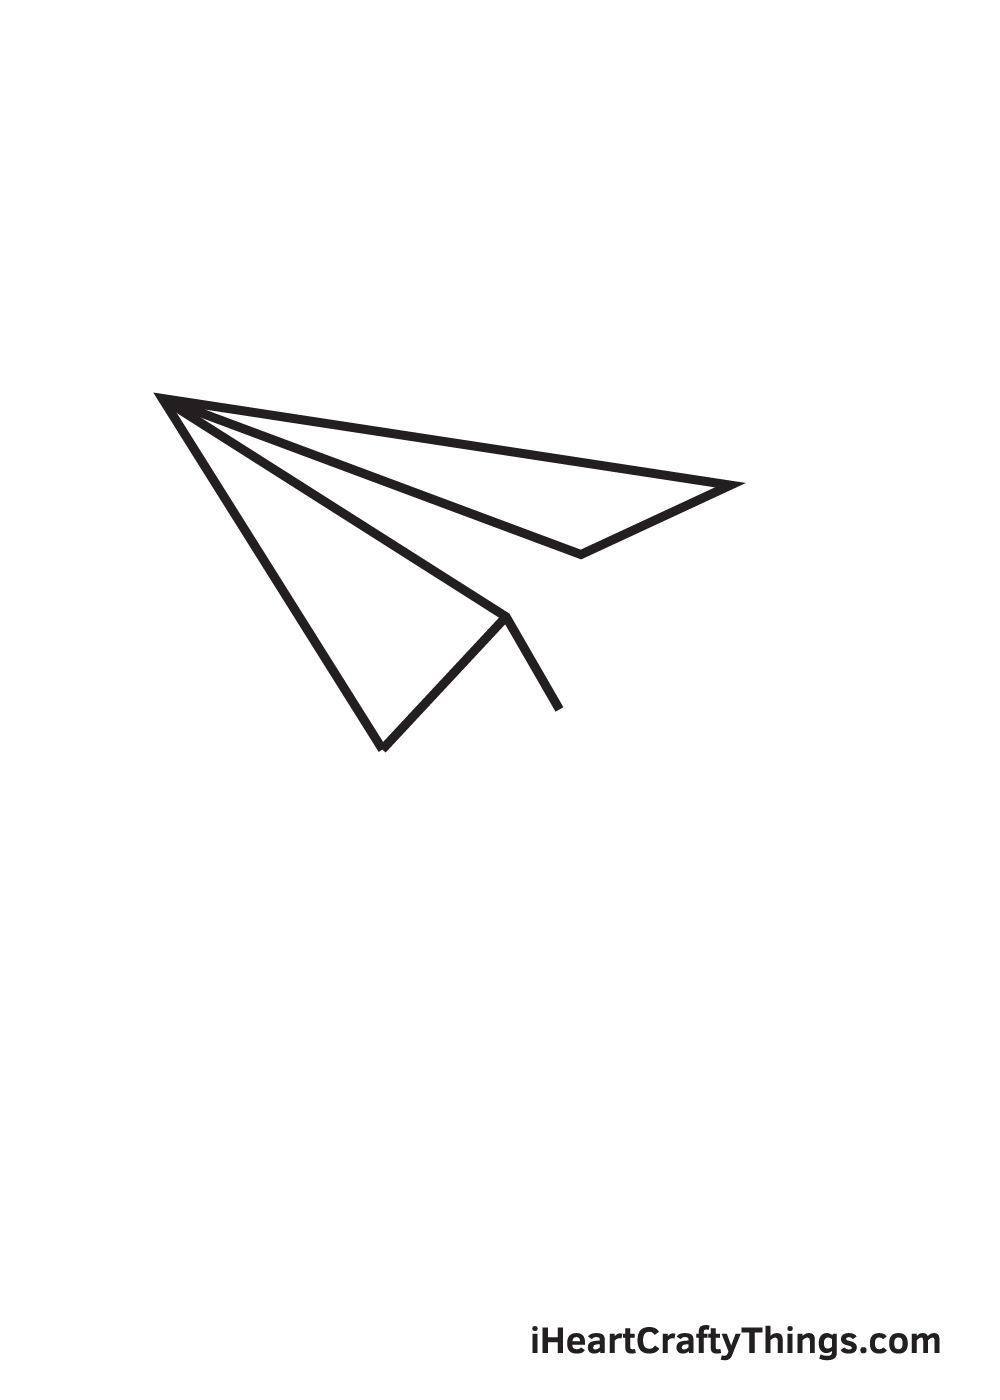
Draw a straight line connecting both sides of the paper airplane’s left wing. This finalizes the structure of the left wing.
At this point, both wings of the paper airplane should be complete.
Step 8 – Draw the Handle Part of the Paper Airplane
Draw an irregular V-shaped line right underneath both wings of the paper airplane. This forms the handle, an essential part of the paper airplane to make it fly into the air.
When drawn correctly, this line should connect all endpoints of the paper airplane, thus completing the structure of the entire paper airplane.
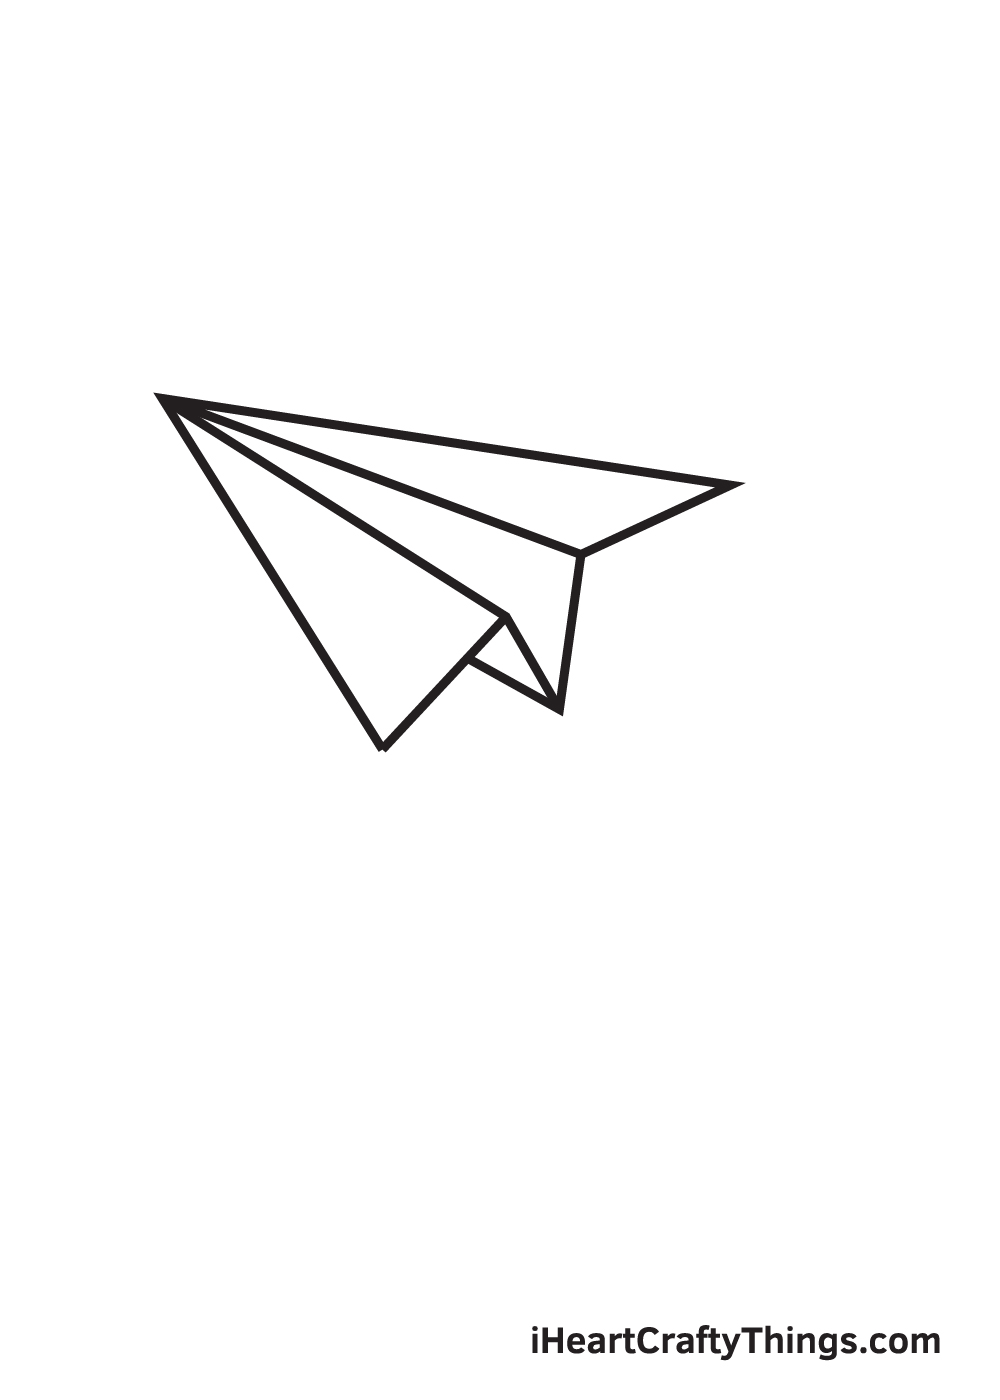
Step 9 – Draw the Flight Trail of the Paper Airplane
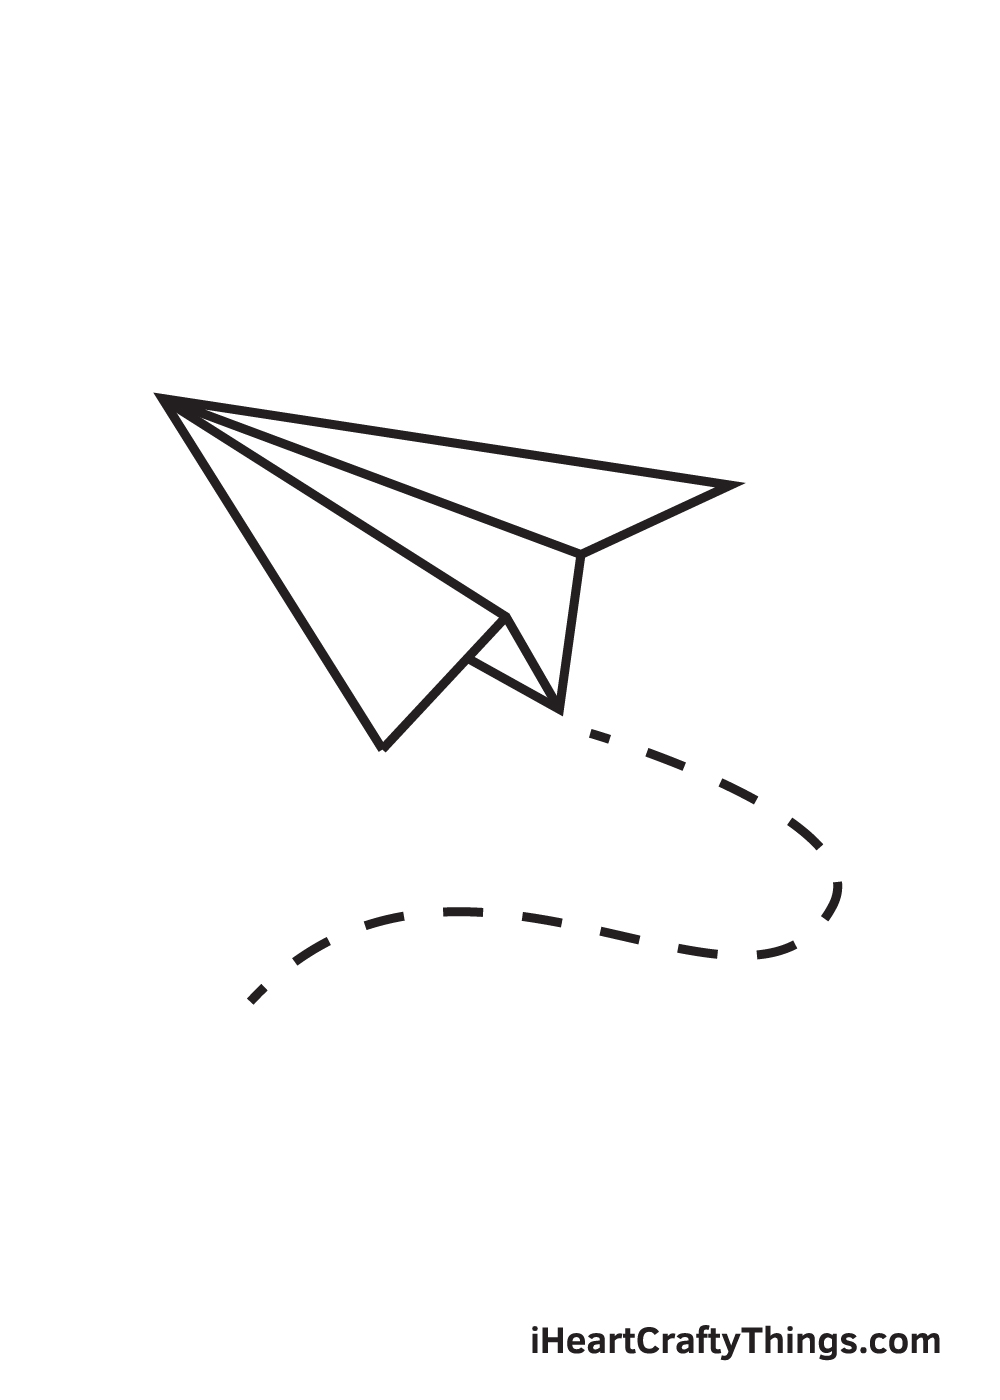
Draw a dashed line that consists of multiple lines forming a curve beginning from the tail of the paper airplane.
This creates the illusion that the paper airplane is on a flight, making it appear like it is flying mid-air.
There you have it—we have successfully drawn a paper airplane! Now, we’re finally on the most exciting part, which is coloring the paper airplane!
Since the paper airplane is made of paper, it can be any color you want it to be! The colors you will be using for the paper airplane is entirely up to you!
Feel free to use any color you prefer. You can even use more than one color to create a multi-colored paper airplane!
Have fun playing with colors and watch as the paper airplane ultimately comes to life!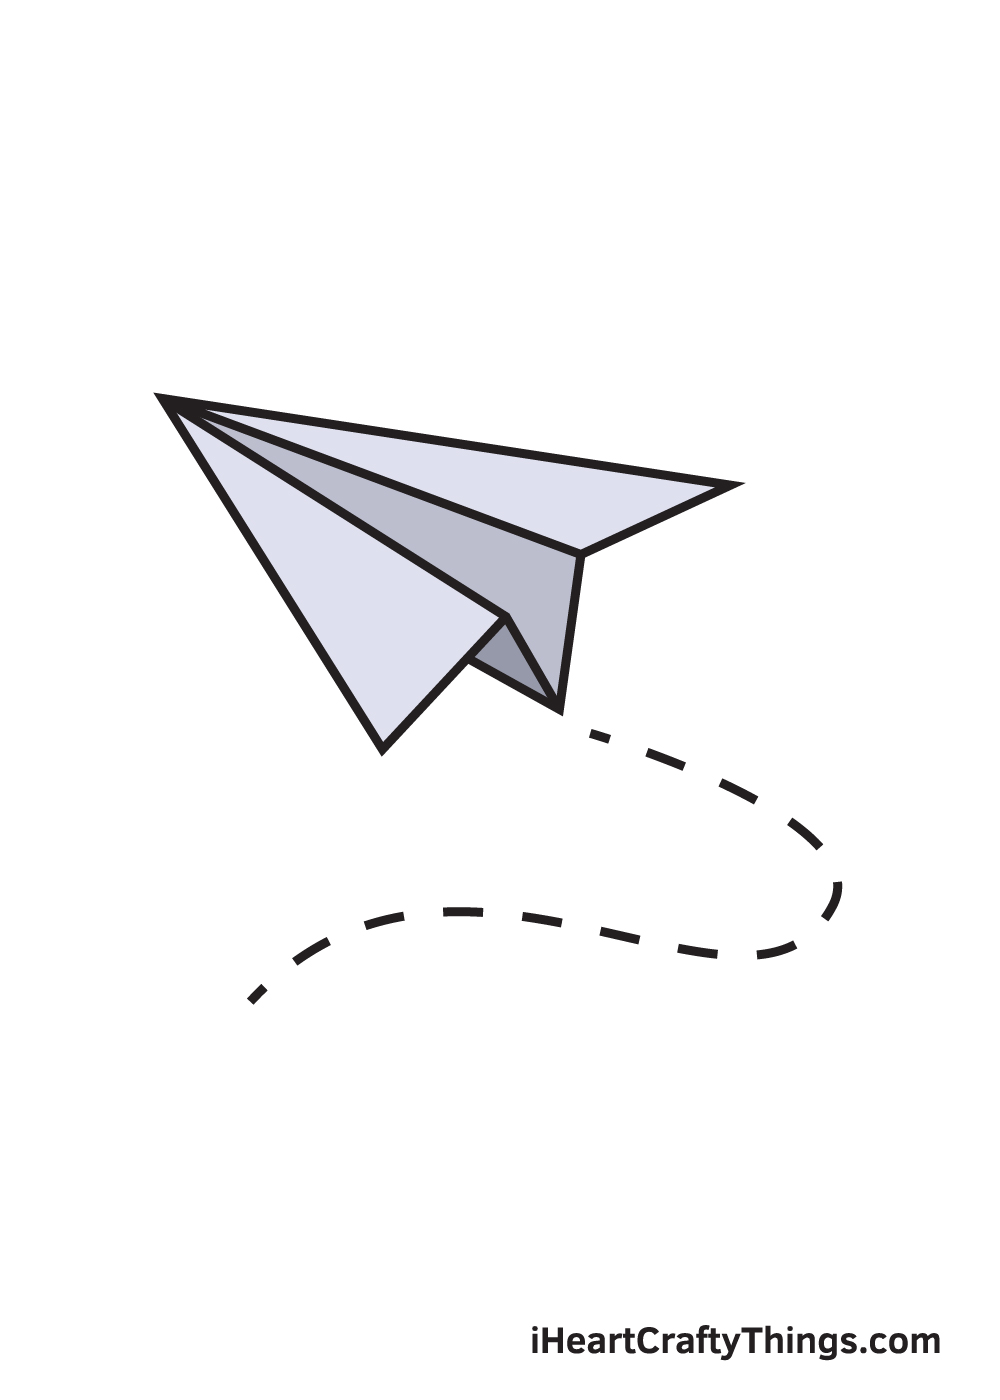
3 More tips to make your paper airplane drawing easy!
Get ready to fly through these 3 helpful tips for making this paper airplane drawing easier!
Learning how to make a paper airplane drawing is tougher than it looks, so one way to make it easier is by using a model.
If you know how to make a paper airplane already, then this suggestion will be easy for you! If you’ve never made one before, then you get to have extra fun as you learn how to do it.
There are tons of helpful guides online that you can use to learn how to make a wide variety of paper airplanes.
Once you have one in hand, you can use it to help make drawing all of the various details and angles much easier.
If you’re struggling to make this paper airplane drawing easy, then you may want to look at things from a different perspective, literally!
The paper airplane in this design is at an angle, and this can make it a lot trickier. If you’re struggling, maybe you could draw it from a top view angle instead.
This would make it much easier to draw, but you would still have the effect of a paper airplane design that is easy to recognize. If you want to try this, then this tip would go well with the previous one!
Finally, we simply recommend perseverance as you work on this drawing of a paper airplane. Even if it takes you 50 attempts to get it right, you have still achieved something great!
No one ever has to see all of the failed attempts, and it’s all part of learning. The important part is that you don’t give up if it gets tricky.
You may also just want to take a short break and do something else for a bit if you start getting frustrated.
Also, don’t be shy to use any tools that will make it easier. Using pencils, rulers and set squares will help you to draw this awesome paper airplane in no time!
Your Paper Airplane Drawing is Complete!
Hopefully, you had an enjoyable drawing activity with this step-by-step paper airplane drawing tutorial.
Remember, all of our drawing tutorials are completely free for you to use as learning materials or references for your drawing activities.
We are regularly updating our catalog so make sure you keep re-visiting our website to continuously enjoy brand-new drawing tutorials!
Successfully completing a paper airplane drawing is a great achievement, so you should feel proud of yourself for completing a masterpiece!
Don’t forget to take a photo of your artwork and share it on our Facebook page and on Pinterest. Don’t be embarrassed! You’ve worked hard for it, so we’re sure it looks impressive!
We can’t wait to see your colorful paper airplane drawing!