Seeing a city skyline is often an awe-inspiring sight to behold.
There are many incredible cities to see in the world, but it would be hard to find one as iconic and recognizable as the New York skyline.
This is a view that has been used in countless forms of media from films to video games, and this city has captured millions of imaginations worldwide. Learning how to draw the New York skyline is the perfect way to capture some of the magic of the city that never sleeps.
If you find yourself captivated by the lights of the big city, then this will be the tutorial for you!
Our step-by-step guide on how to draw the New York skyline will help you to recreate this famous city.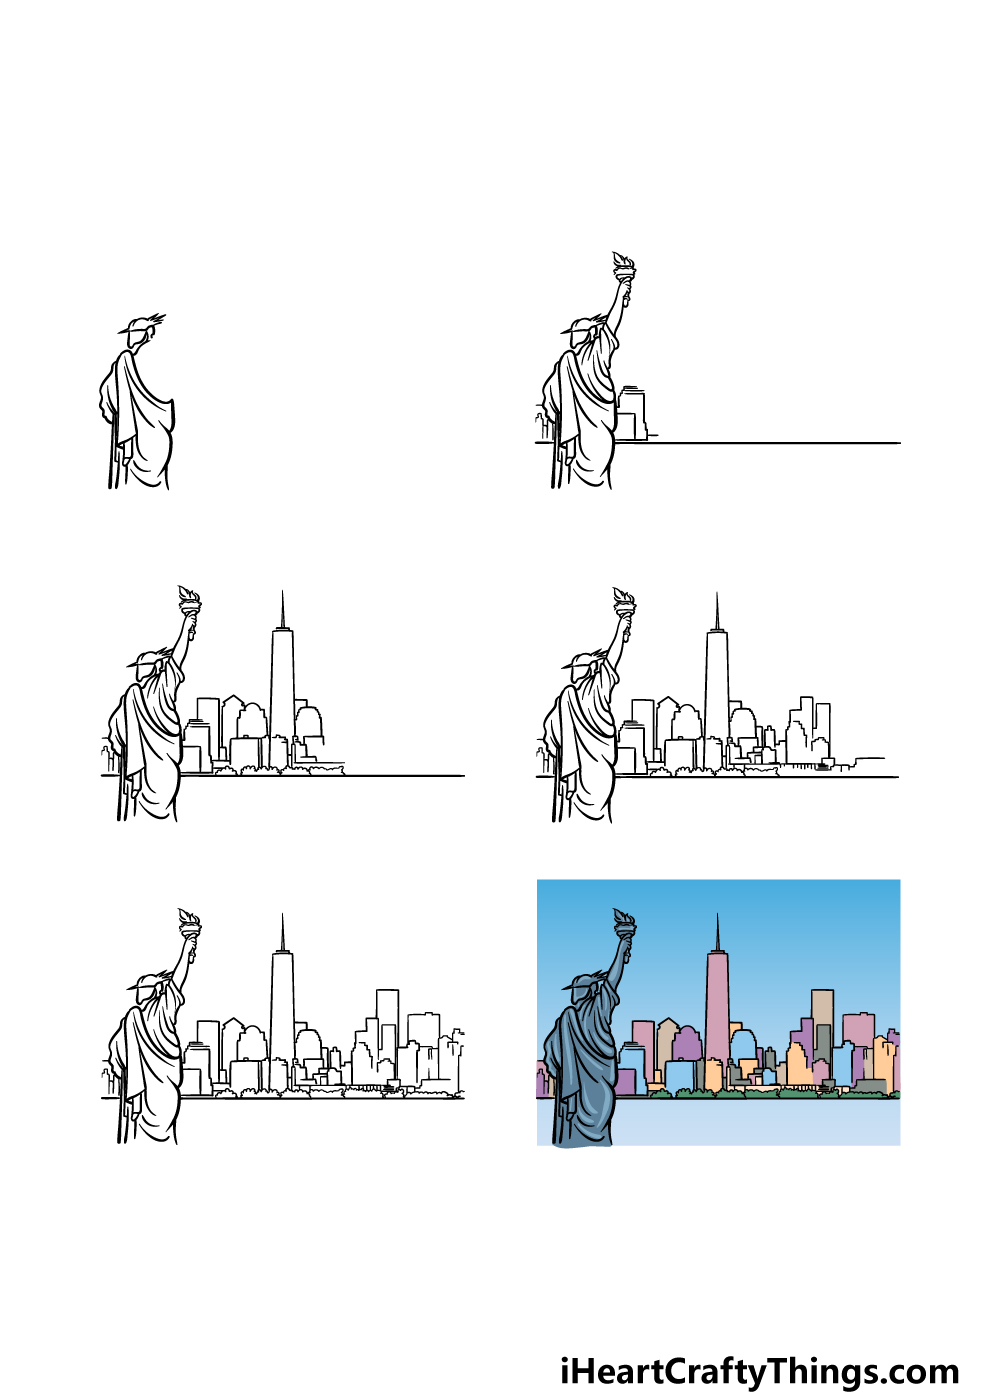
How to Draw The New York Skyline – Let’s Get Started!
Step 1
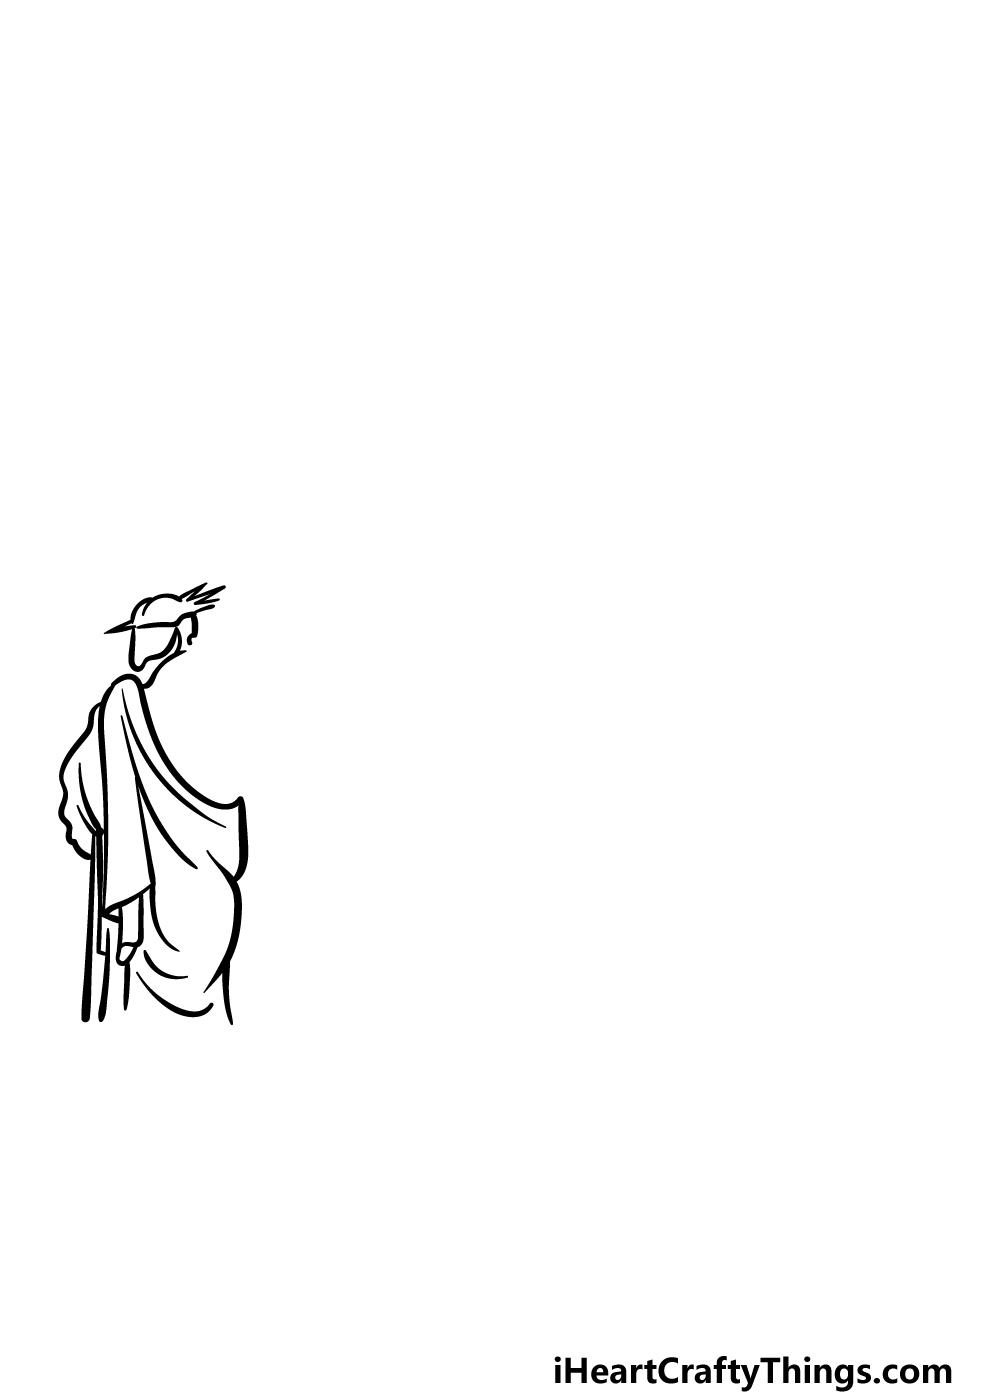
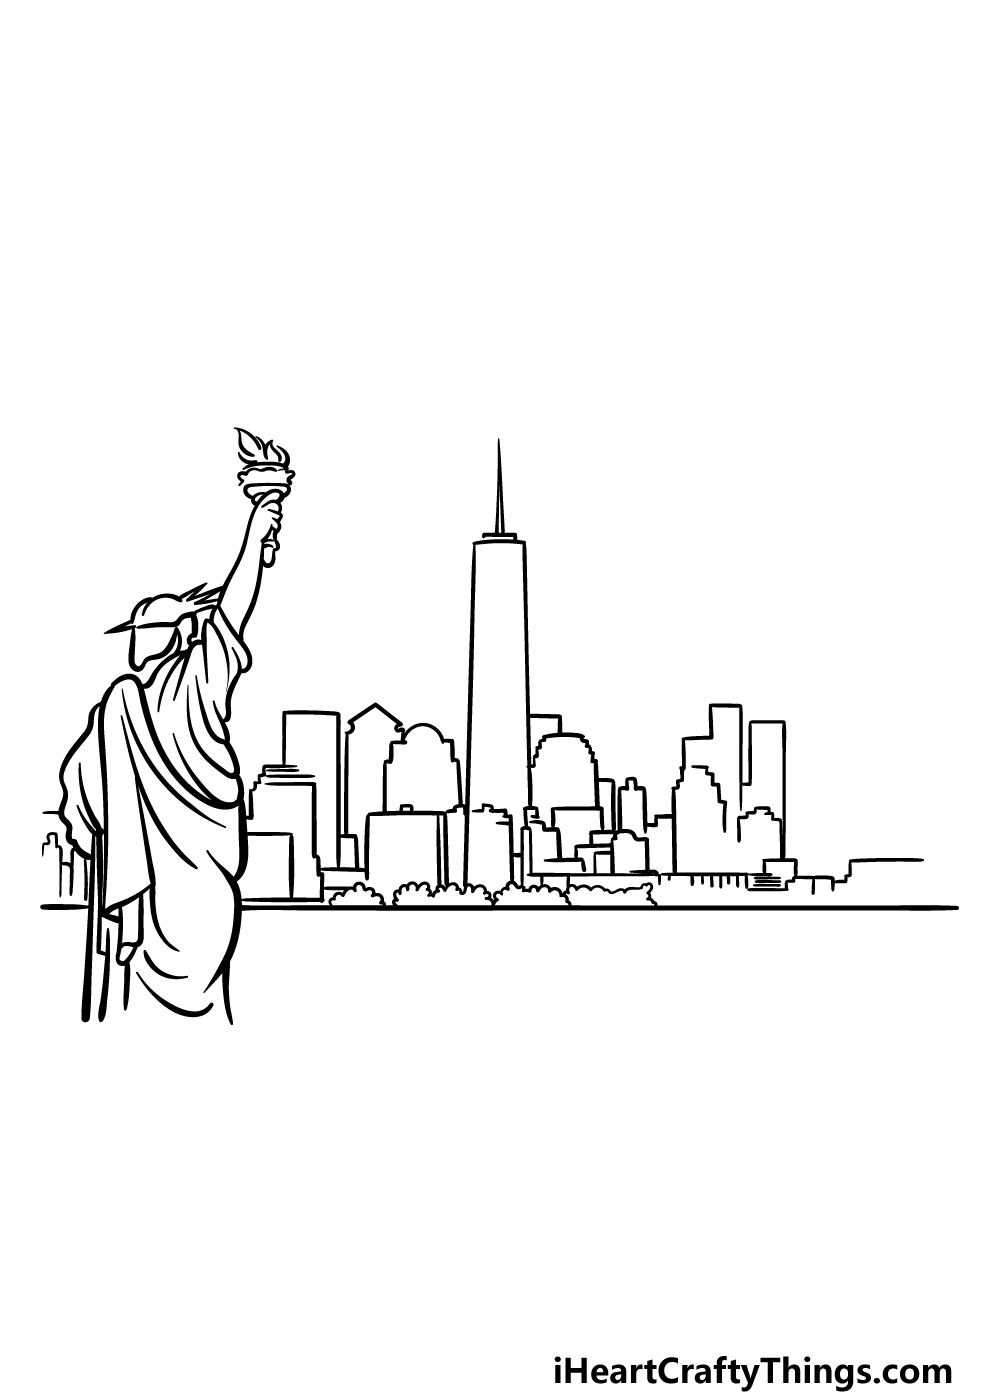
For this first step of our guide on how to draw the New York skyline, we will be drawing the guardian of the city herself: Lady Liberty.
We will be viewing her from the back, which presents an interesting and unusual view of this famous statue.
When drawing her at this angle, you may want to try and copy the lines exactly as they appear in our reference image.
We will mainly be using some curvy lines for her, as we will be focused mainly on the fabric of her gown.
There will be an empty space where her right arm will be, but we will fill that in when we get to the next step.
Step 2 – Now, draw her arm and the start of the city

One of the most recognizable elements of the Statue of Liberty is the torch that she is raising high into the air.
Use some more wavy lines for the fabric of her sleeve, and then we can draw her long, thin arm with some smoother lines.
Then, draw her signature torch being clutched in her hand. Once this is complete, we will draw the first lines for the city itself.
To start this, draw a straight line using a ruler across the image. Then, start drawing the outlines for some shorter skyscrapers on the left-hand side of the image as they appear in the picture.
Step 3 – Draw the next section of the city
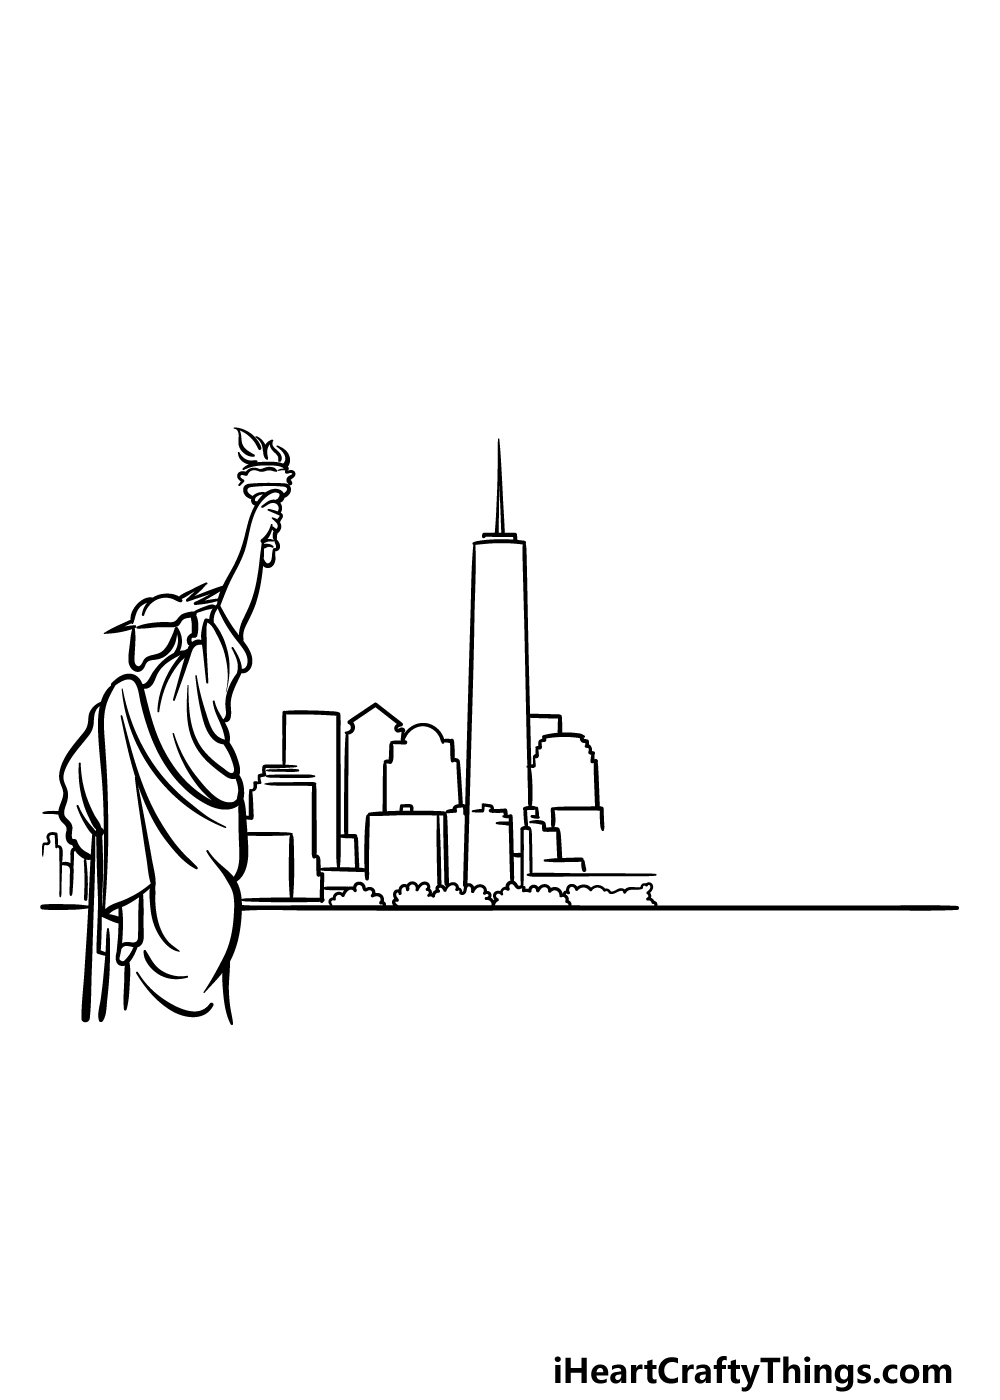
For this third step of our guide on how to draw the New York skyline, we will be focusing on the central portion of the skyline.
For this step, you will make it much easier on yourself if you have a ruler on hand, as we will be drawing lots of straight lines for these buildings.
This is a step where you should also try to take it slowly and carefully follow the reference image, as there is a lot of variation to the various buildings.
Near the center of this section, we will be drawing a really tall, thin building that is none other than the famous Empire State Building.
Once you have drawn this and the other buildings, you will be ready to proceed to the next section of the city in the next step.
Step 4 – Next, draw another section of the city
You’re doing a great job on this New York skyline drawing so far! In this fourth step, we will be adding another portion of the city.
To do this, you will be following a similar process to the one you have been using for the other sections.
This means you will want your ruler handy again, as there will be lots of straight lines to draw.
When you have completed this next section to look as it does in our reference image, you will be ready for the final details in the next step.
Step 5 – Add the final details to your New York skyline drawing
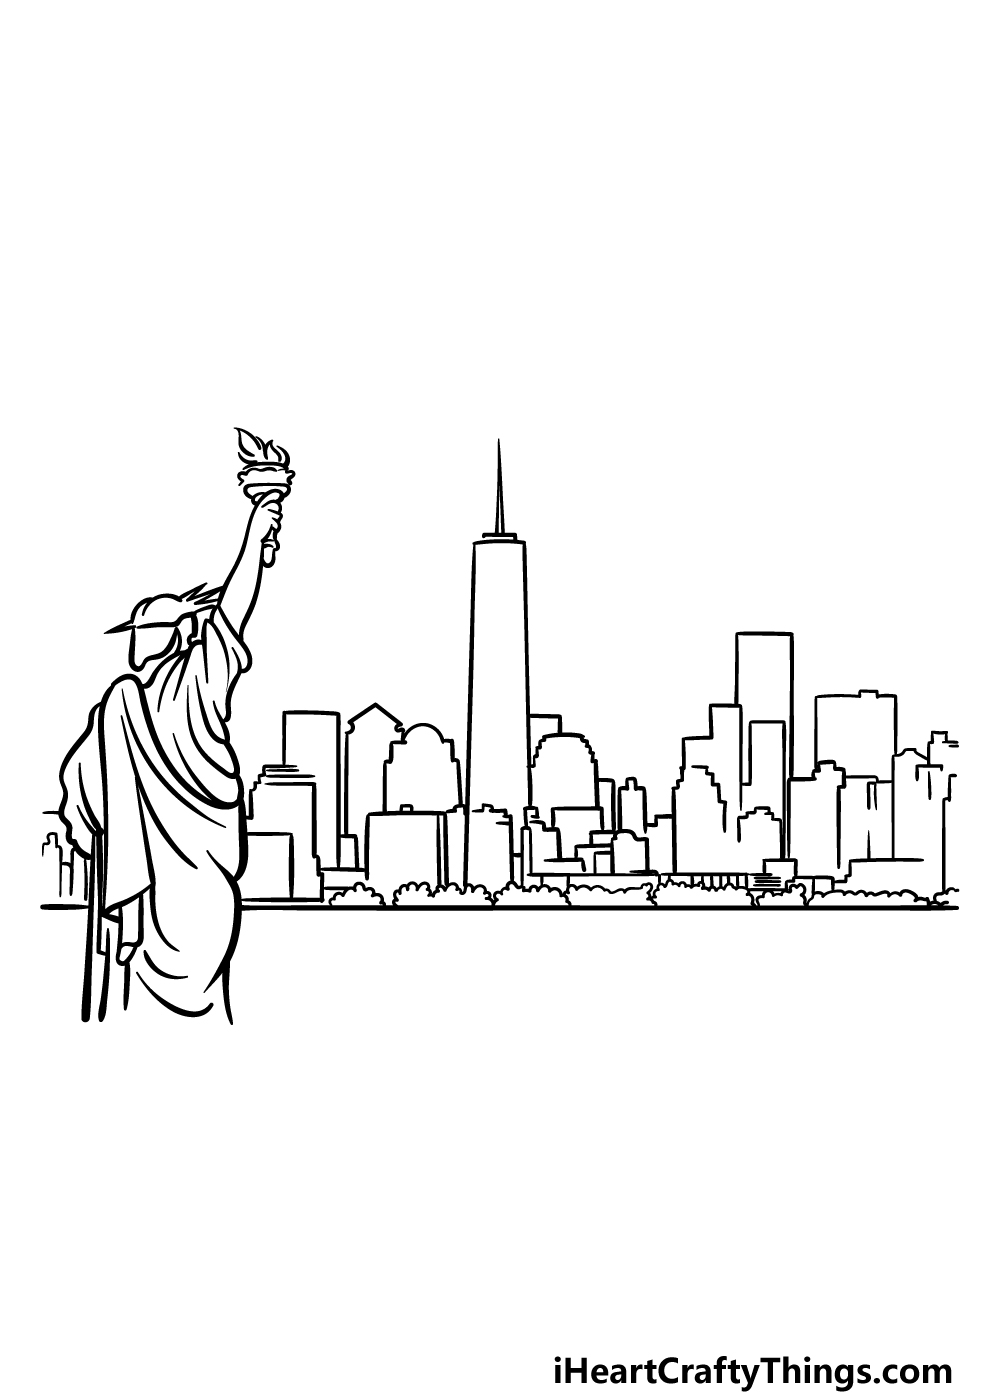
We will be finishing off the final section of the city in this step of our guide on how to draw the New York skyline.
With this final section, we will be adding some buildings that are taller than some of the other sections, but none of the buildings will be nearly as tall as the Empire State Building.
Once you have finished this final section, you can take it even further by adding some details of your own!
You could add some weather details such as clouds and rain for one idea, but what other cool background details can you think of that would bring this to life?
Step 6 – Finish off your New York skyline drawing with color
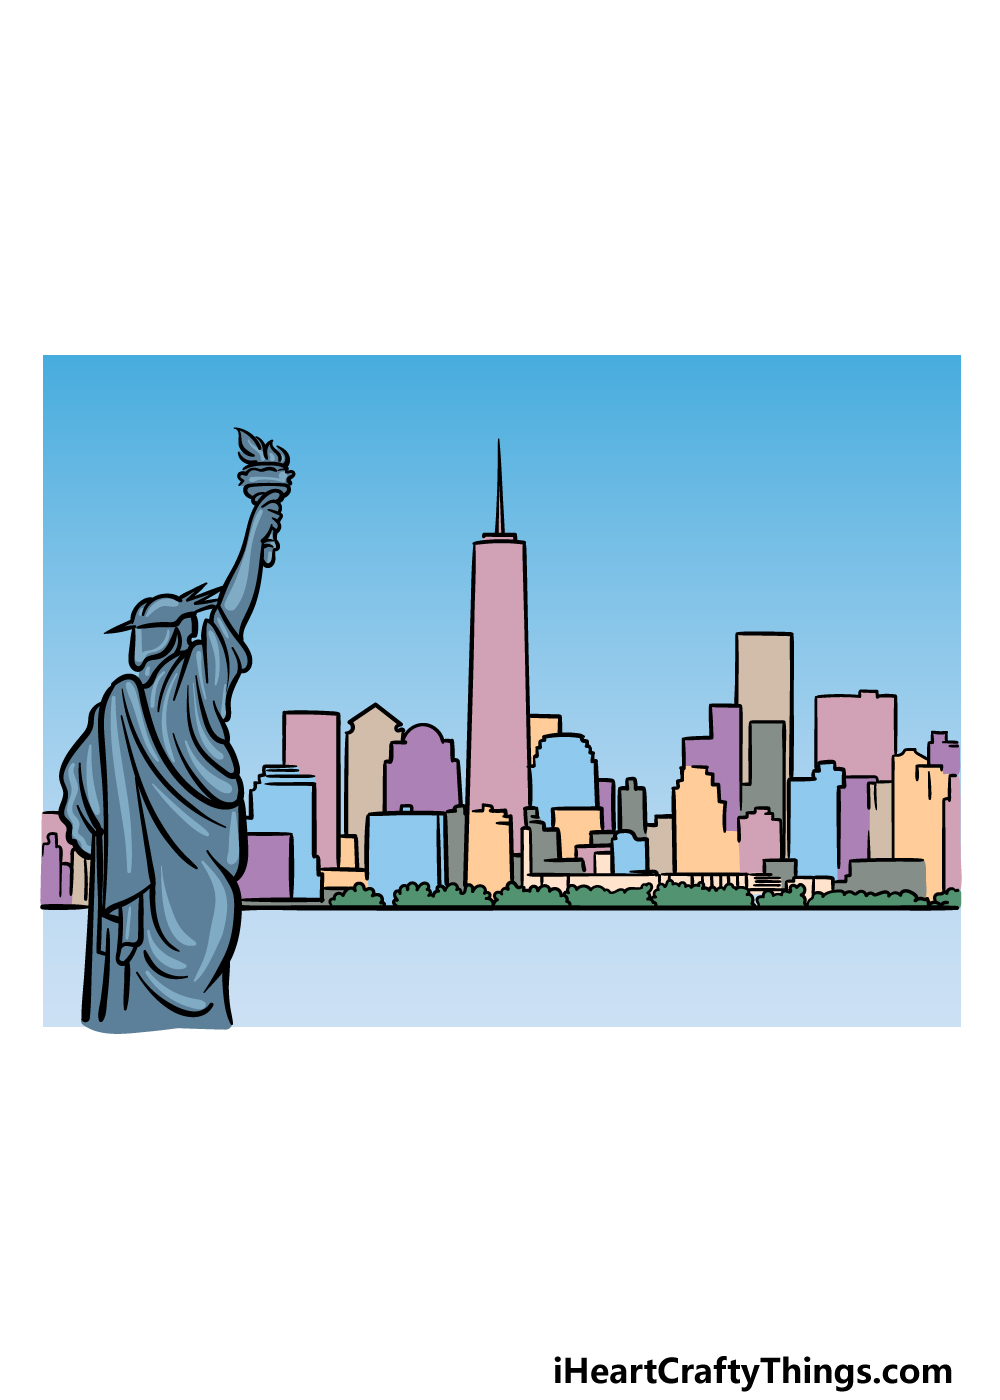
This final part of your New York skyline drawing will see you finishing up by adding some amazing colors to the image.
In our reference picture, we showed you just one way that you could go about coloring it in.
We chose some lighter tones for a softer image, but this is definitely not the only way that you could go about coloring the image!
You could use darker colors, lighter shades or even a mix of both. Another idea would be to use some small yellow dots on the buildings to make it look like a nighttime scene for the city.
How will you choose to finish off this image?
Here’s how you can make your New York skyline drawing even better…
Make your New York skyline sketch look even better with the help of these tips!
For this drawing of the New York skyline, we left the details on the buildings and skyscrapers a bit blank so that you could focus on the structure of the drawing.
Now, you could add in some of those missing details to make it even better.
One way of doing this would be to use a thin-tipped pen or sharp pencil to draw windows and other small details on the buildings.
What other details could you add?
We also kept the sky above the New York skyline blank, but you could create some more specific weather effects quite easily. It could be as simple as adding the shining sun and some clouds.
Or, you could make it a cloudy, rainy day and have some lightning effects as well. These are a few ideas, but there are so many different forms of weather you could create!
The look of New York City can be quite different depending on the season. You could show off the different seasons to make your New York skyline drawing look even more unique.
To show off a Winter scene, you could add some snow on some of the buildings while making the sky grey and foreboding.
Adding some orange trees would be a good way to create a Fall setting, too.
Maybe you could make four versions of the same drawing but show a different season in each one!
This New York skyline sketch that we created would make for a great postcard! You could turn it into one in a few ways.
One way would be to draw a rectangle around the image and add some text, maybe something like “Welcome to NYC!”
Or, you could draw the image on a piece of cardboard roughly the size of a real postcard and add text as well. That way, this drawing could be a great gift to give to someone you know!
Your New York skyline Drawing is Complete!
As we mentioned at the beginning of this guide on how to draw the New York skyline, this is certainly one of the most famous cities in the world.
We hope that the process of representing this famous metropolis was made not only much easier but also more enjoyable with the help of this guide!
Now that you have completed this design, remember that you can keep experimenting and adding some details of your own to finish it off.
We mentioned changing the weather details or adding lights to the buildings as a few ideas, but this is a chance to let your creativity flow! How will you complete this picture with your own touches?
You can then visit our website, as we have some awesome guides waiting to be discovered there. We have a huge selection with more on the way all the time, so keep checking in for more fun!
We would love to enjoy some big city fun by admiring your New York skyline drawing, so please share your creation on our Facebook and Pinterest pages.