In our lifetimes, we will see thousands upon thousands of human faces.
Whether this is just from passing a stranger on the street or getting to know the face of a loved one, you will be taking in facial details whether you realize it or not!
You may think that would make it easy to learn how to draw a face shape, but you may be in for a surprise.
Even though we see so many faces in our lives, it can be surprisingly hard to draw one accurately.
The good news is that when you break it down and know what to do, it can be made much easier.
This step-by-step guide on how to draw a face shape will show you how easy it can be!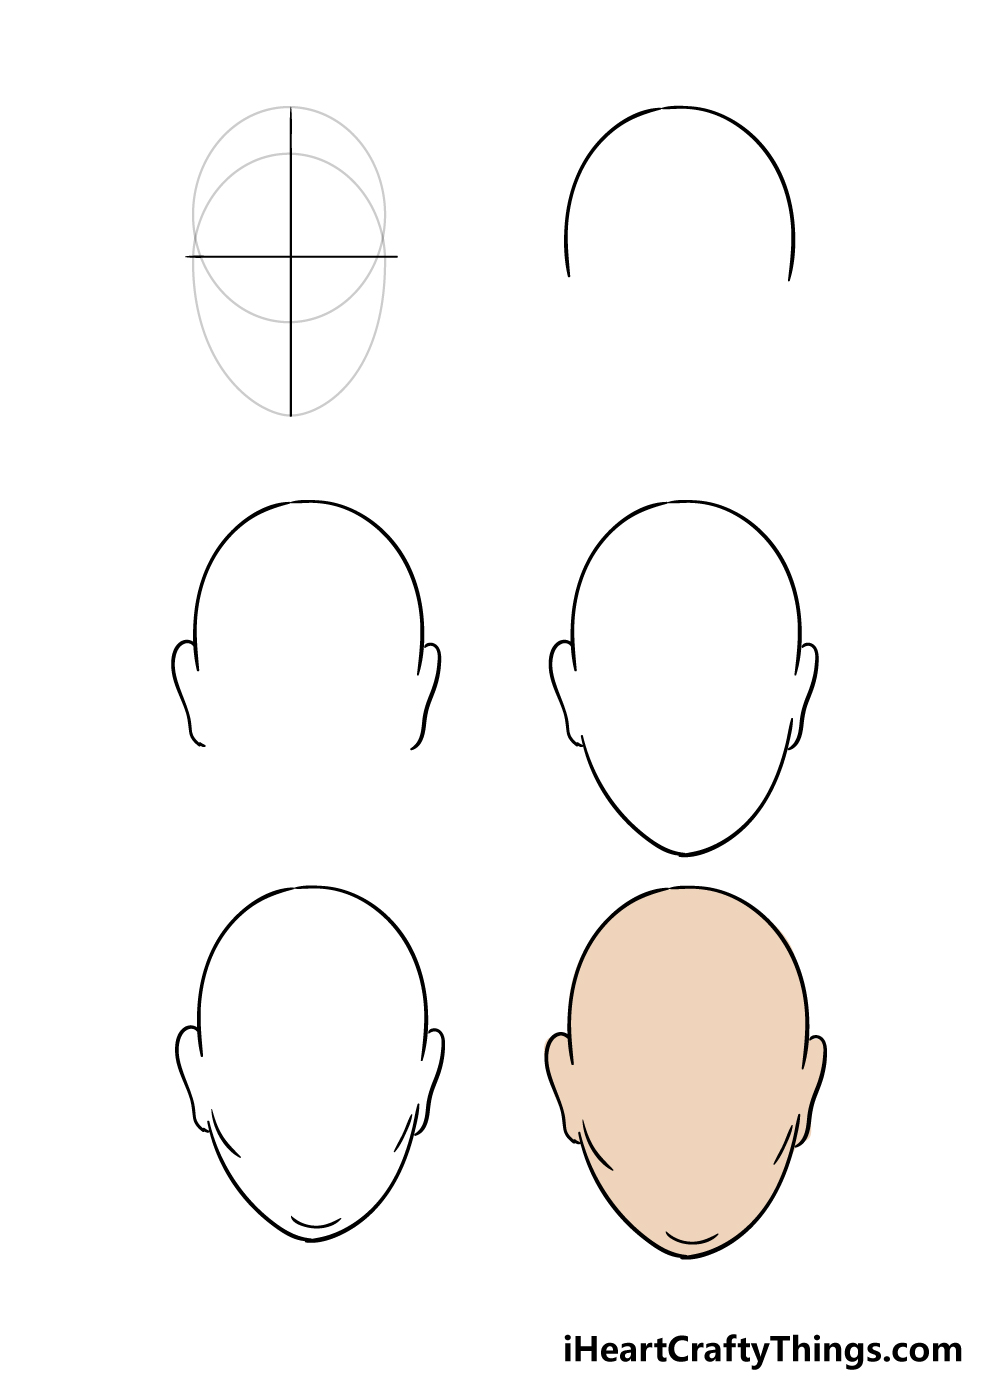
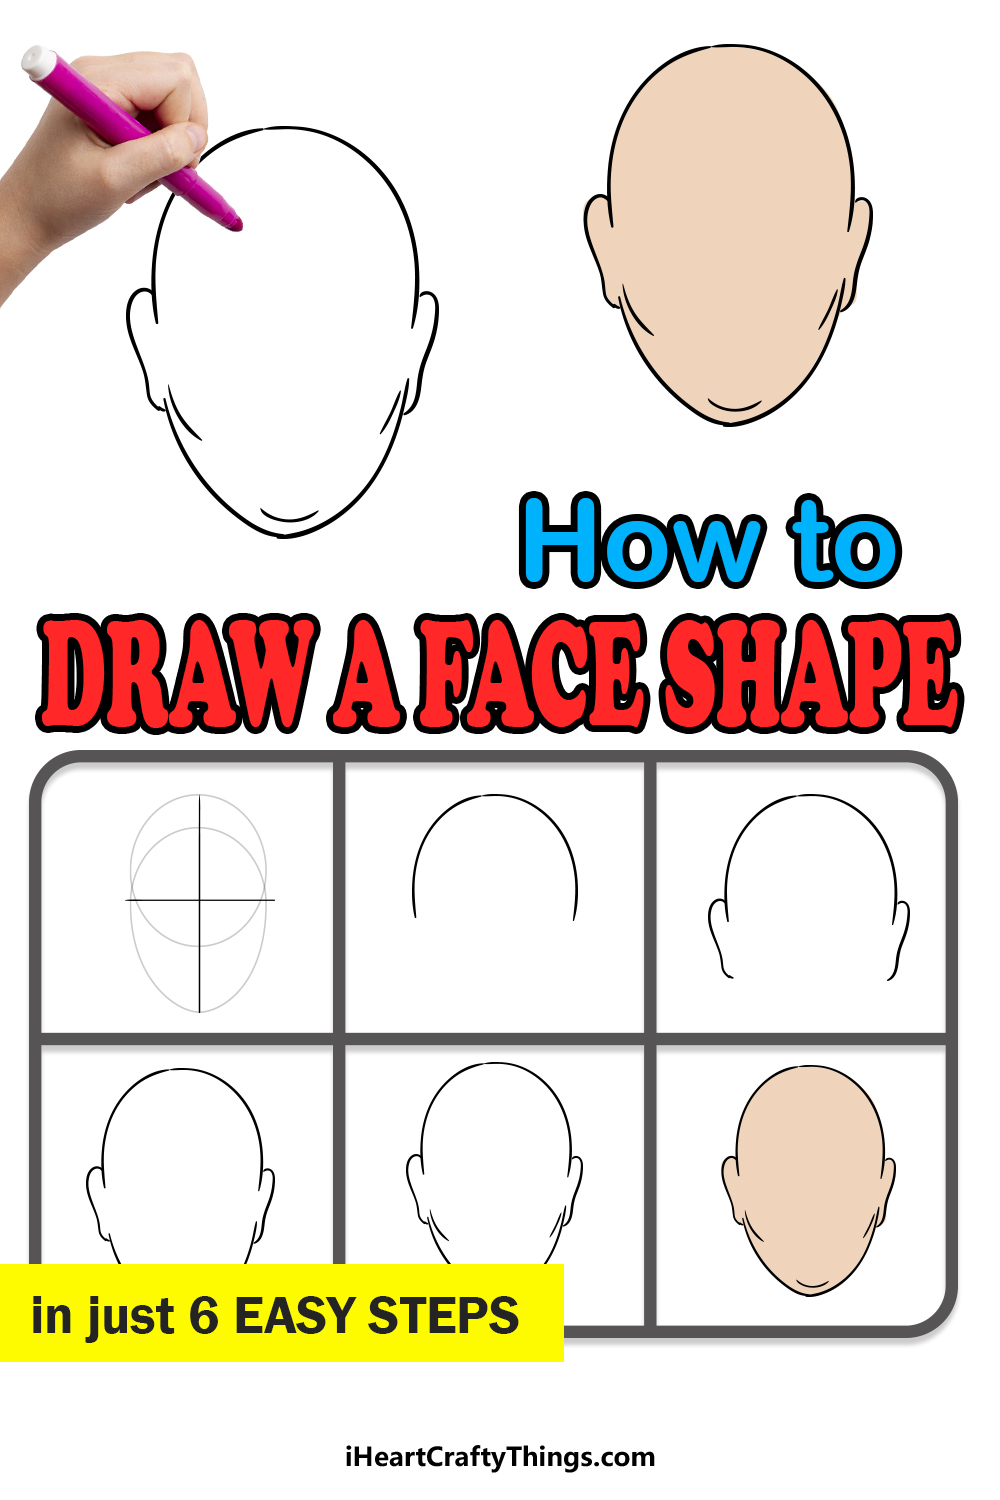
How to Draw A Face Shape – Let’s Get Started!
Step 1
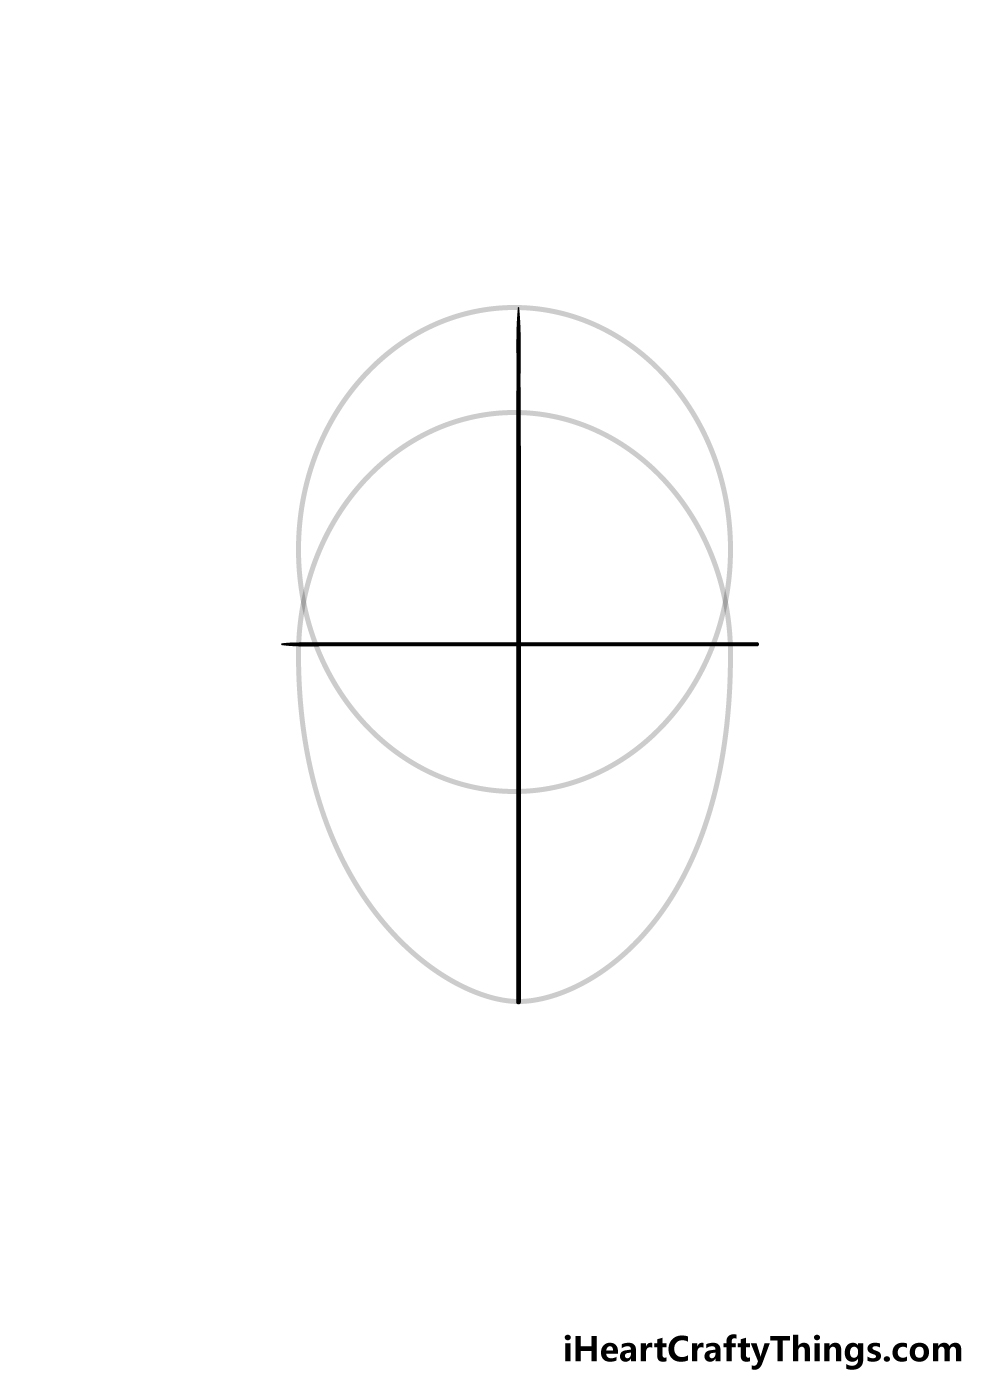
To begin this guide on how to draw a face shape, you will need a light pencil, a ruler and a drawing compass if you have one.
We shall be using a pencil for this part, as these shapes will be there to guide you rather than showing up in the final picture.
Using the reference picture as a guide, carefully draw two ovals intersecting with each other. The one on the bottom will form the jaw portion of the face shape, and will be a bit longer and thinner.
The top oval will form the top of the head and will be shorter and a bit rounder.
Then, using your ruler, simply draw a line down the vertical center of the two ovals. Then, draw another one on the horizontal center as well.
Once you have it looking like the reference picture, you’re ready to move on!
Step 2 – Draw the top line of the head
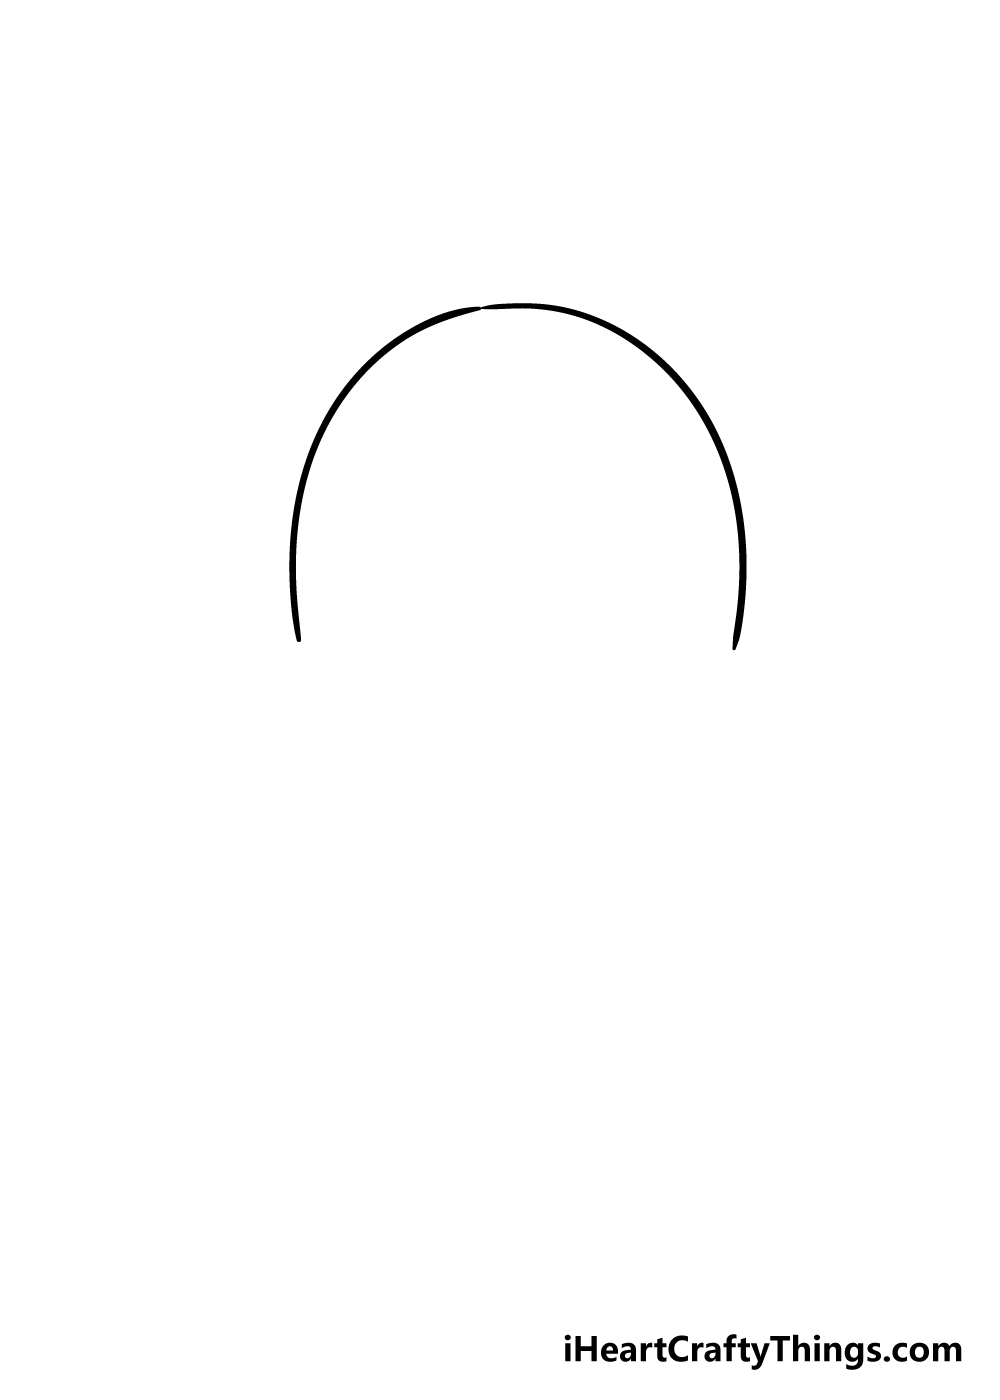
You can start to use your drawing pen for this part of your face shape drawing. It would still be recommended to keep your pencil guiding shapes for now, however!
Using those guide shapes, carefully draw a curved line over the top of the upper oval. This line should extend until it hits the horizontal line.
Step 3 – Now, add some ears to your face shape drawing
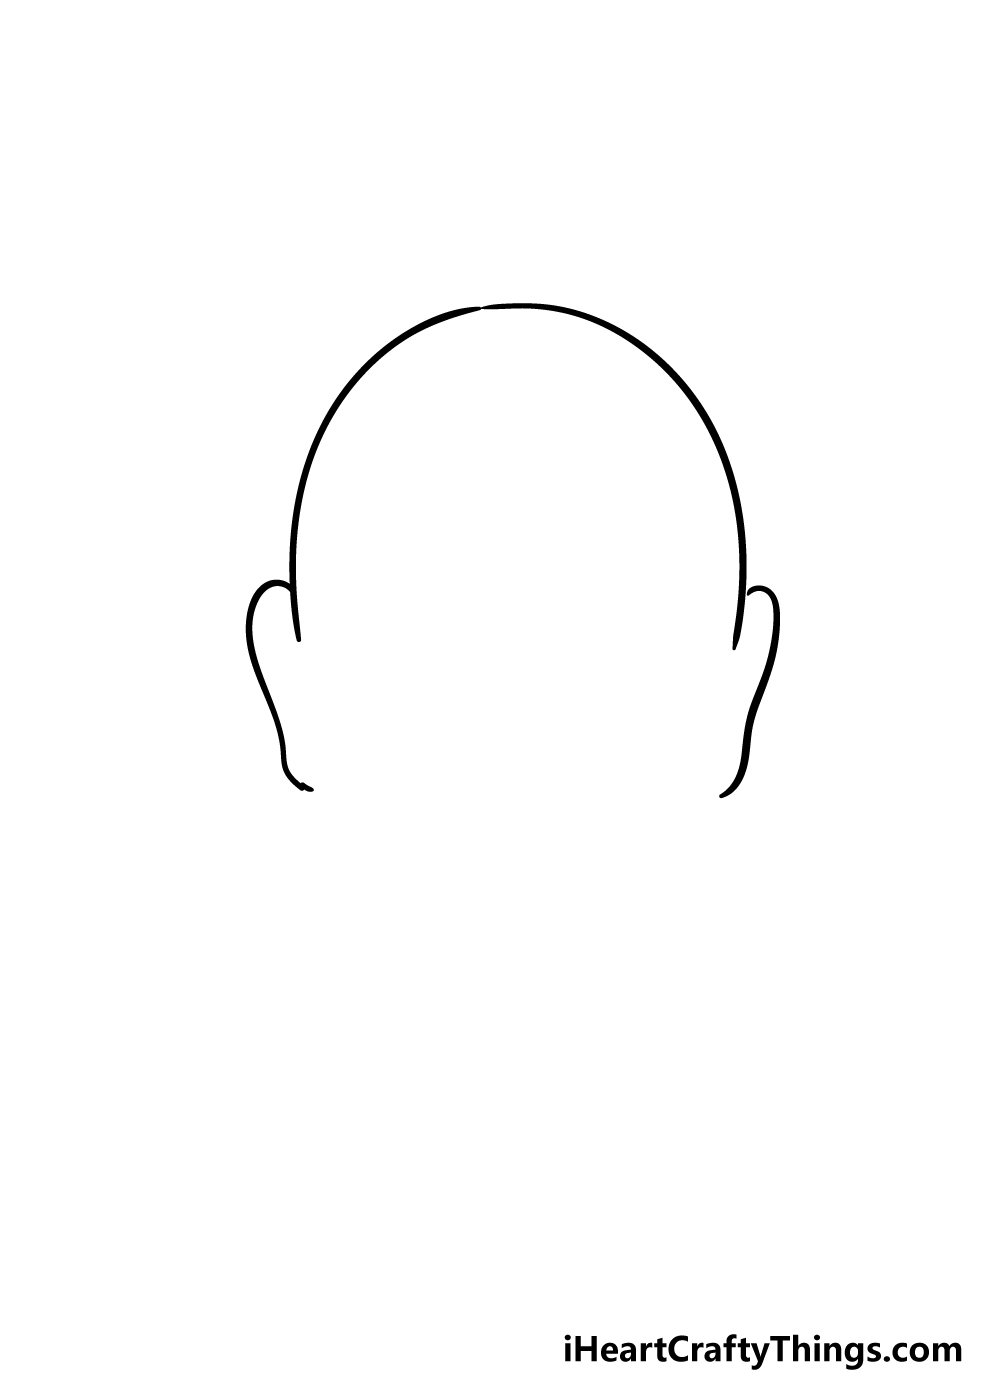
We will be drawing some ears in this step of our guide on how to draw a face shape. The ears will begin from the curved line that you drew for the top of the head.
It will also start a little bit above the horizontal guiding line. These ears will be drawn with a curved line that has two bumps to it, and they will connect with the bottom oval of the face.
Step 4 – Next, draw the jawline
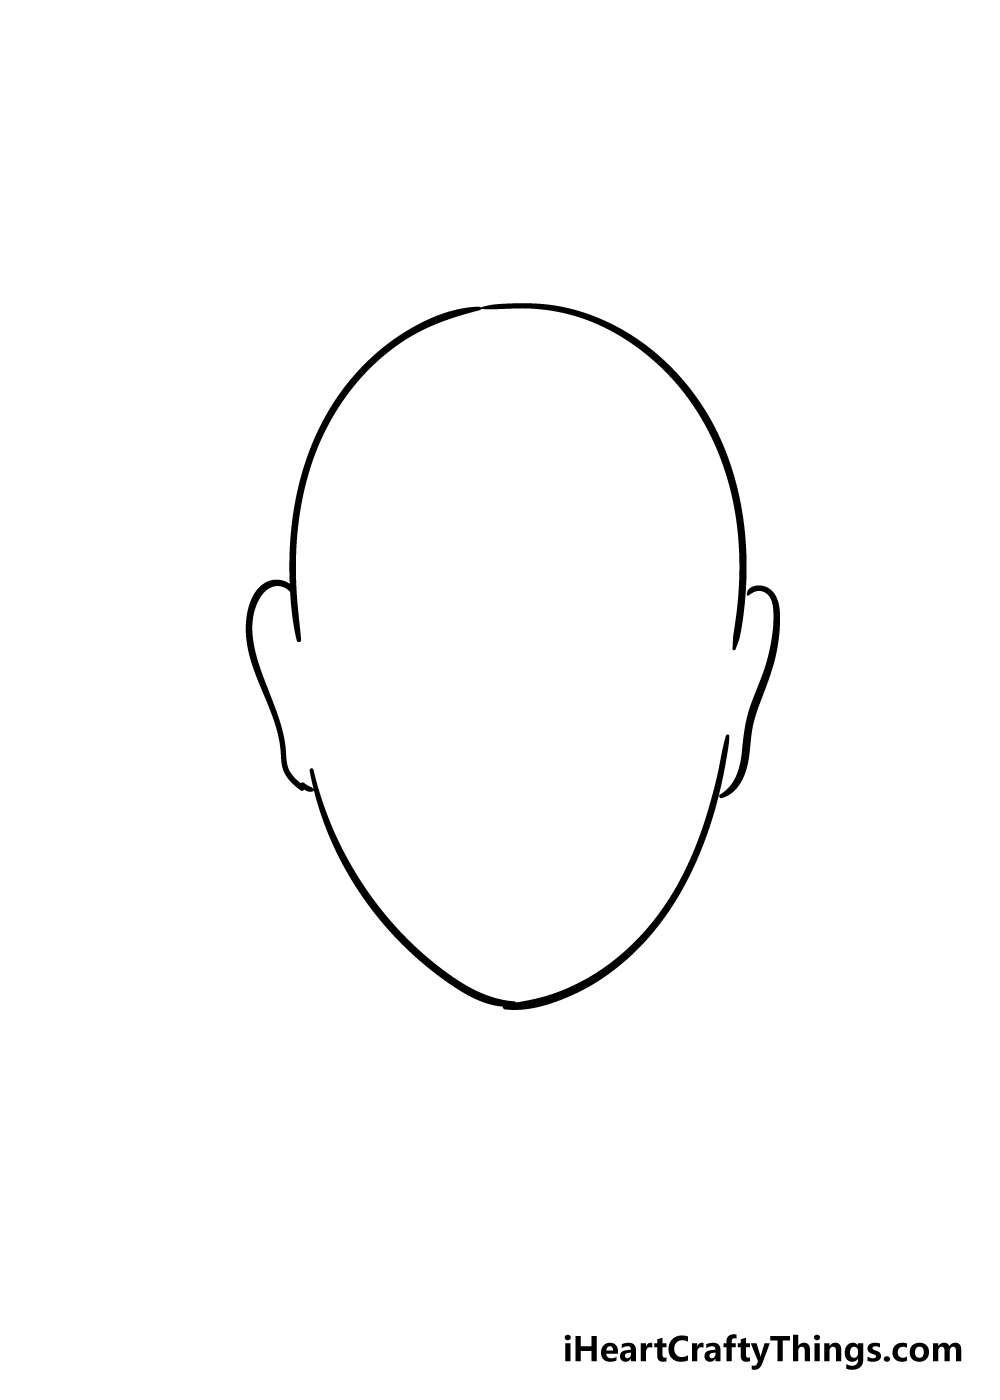
Your face shape drawing is really beginning to come together! For this step, we shall be drawing the jaw of the face.
The jaw will begin from slightly above the bottom of the ear and extend down along the bottom oval of the face. By following that oval, the jaw should have a rounded tip at the bottom.
At this point, you won’t be needing the pencil guiding lines anymore, so you can go ahead and erase them. Be sure to let the pen ink dry completely before you start erasing, however!
Step 5 – Now, you can finish off with some final details
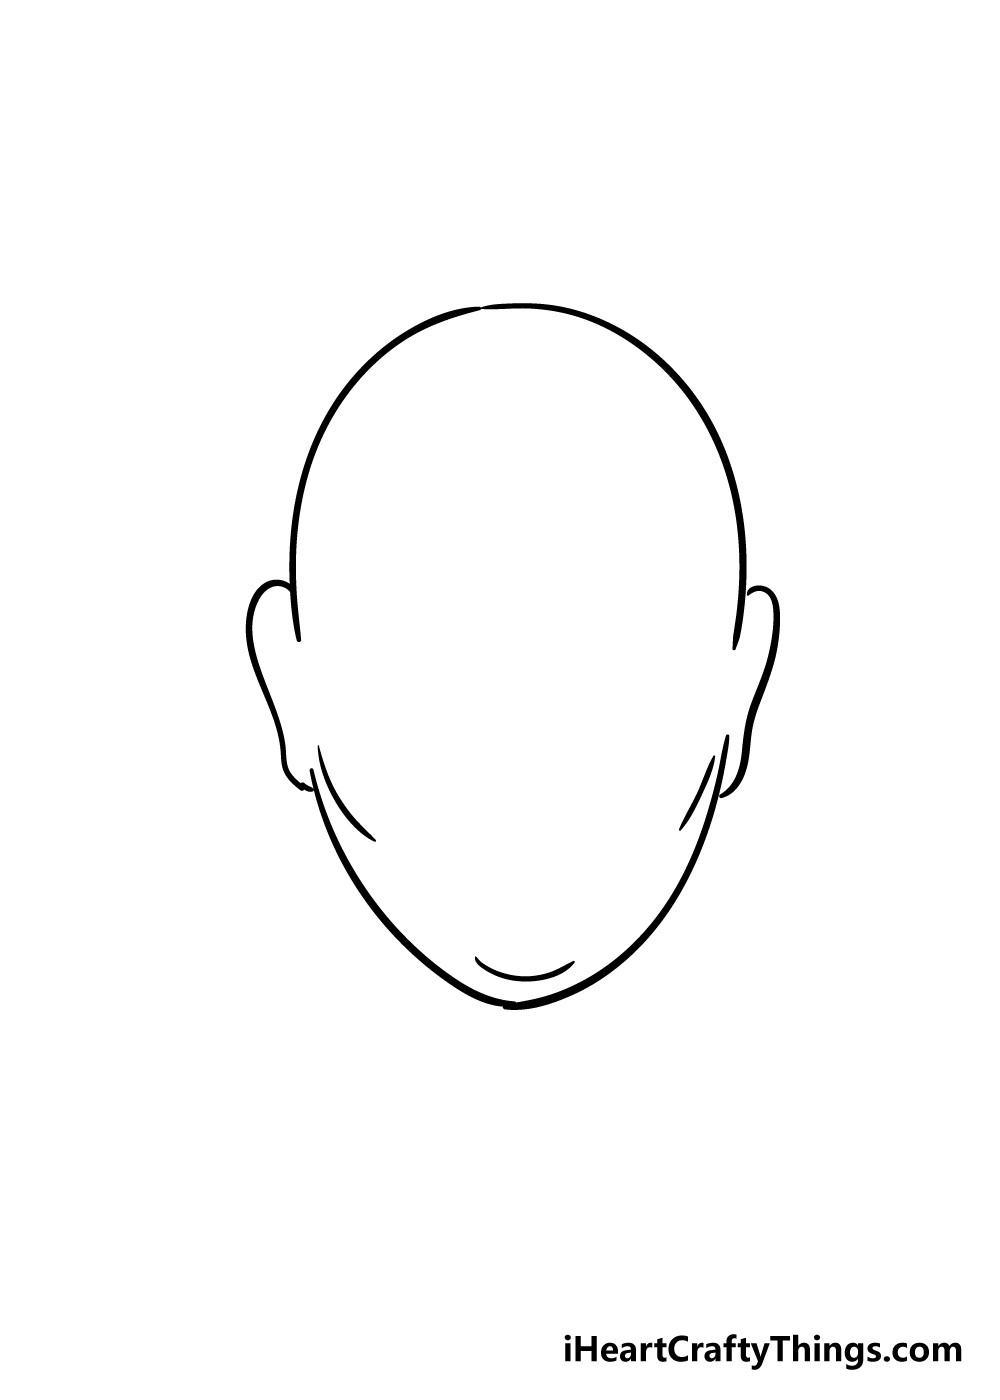
You have the outline of the face done, so now we shall add some final details in this step of our guide on how to draw a face shape.
Using some curved lines, you can draw the cheekbones of the face, and then create some chin details at the bottom as well. With that, you have finished the drawing part of this guide!
Before you move on to the final step, you should feel free to add any extra details you would like. If you’re feeling creative, you could take it a step further and draw some facial details.
If you’re not sure how to do that, then remember that you have the perfect model: your own face! You could use a mirror or a photo of your own face to draw in some details for this picture.
Or, you could use a picture of a favorite celebrity or family member to help you out. Who will you draw for this picture?
Step 6 – Finish off your face shape drawing with some color
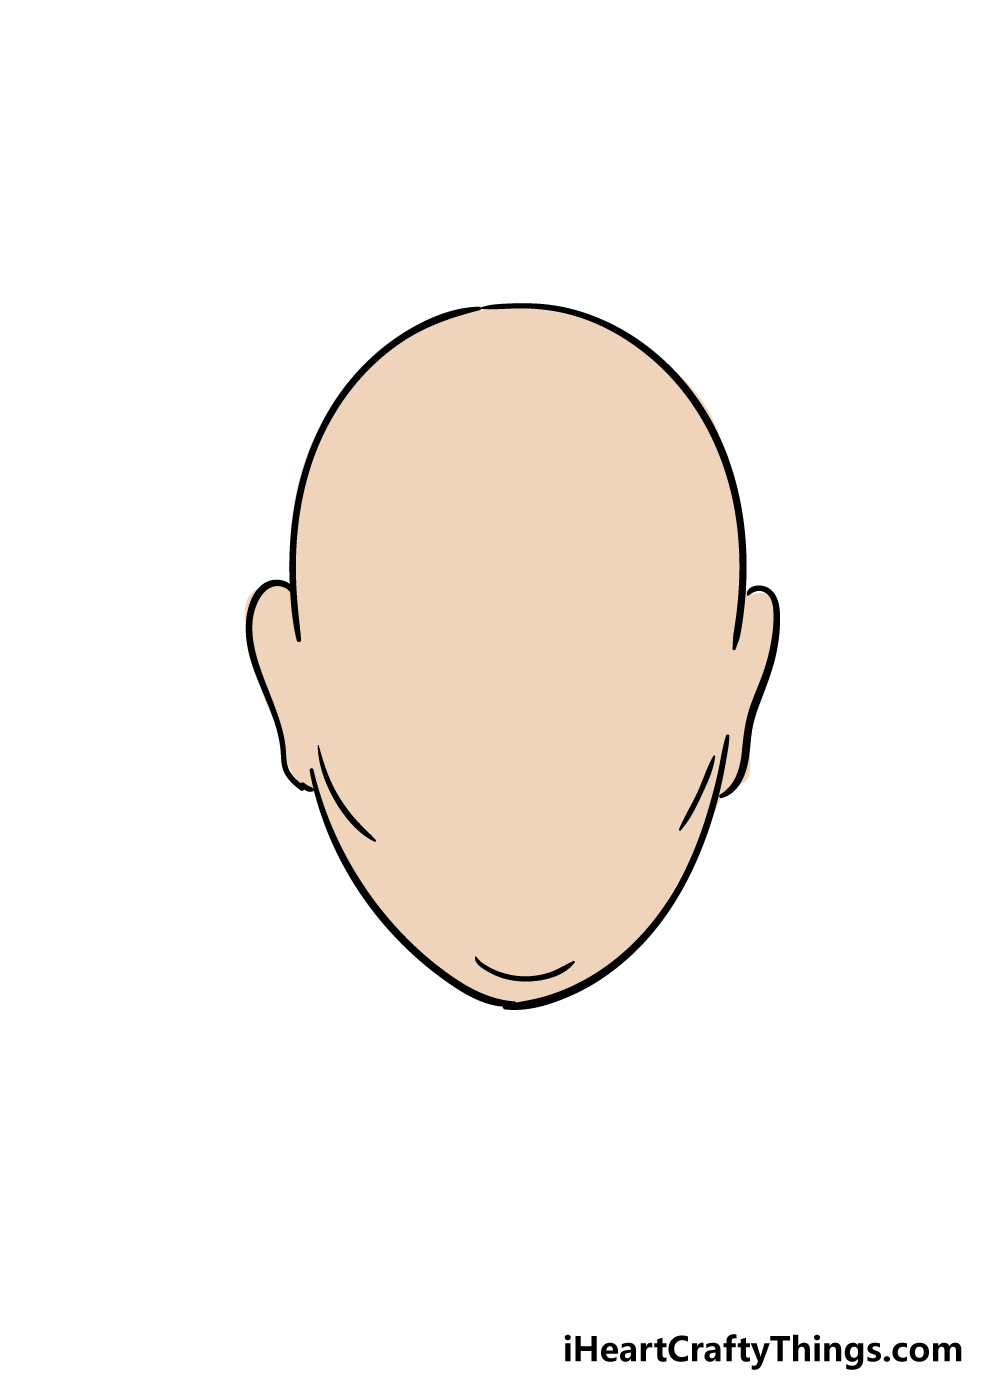
That brings us to the final step of your face shape drawing, and it’s the one where you get to have some coloring fun!
If you modeled this face after a real person, then you can use your various coloring tools and mediums to replicate their skin tone for your drawing.
If you don’t want a more realistic image, you could always make it more stylistic with some bright and vibrant colors! You should really just let your creativity flow as you color this in.
Once you have chosen the color tones you want, you can have some fun picking art mediums.
Watercolor paints may be a good option as they are good for creating skin tones, but which other art tools are you thinking of using for this picture?
Do this to take your face shape drawing to the next level
Find out how to make your face shape sketch take shape with these fun and easy tips!
You have finished this face shape drawing now, and it’s a blank canvas for you to work on! The most obvious way to make it even more unique would be by drawing some facial features.
By adding eyes, a nose and a mouth, you will already be well on the way to creating a great facial expression.
If you need some help, you could use your own face or the face of someone you know to help you with these details.
What sort of expressions would you create?
Of course, the facial features are just one part of having a complete face. You could also add a hairstyle to your drawing of a face shape to personalize it.
This is another one where you could use your own hairstyle or that of someone you know to help you as you style this one. You could also look at the hairstyles of your favorite celebrities as inspiration!
Once you have finished up the face and hair of this face shape sketch, you could then add some of the body. This would also allow you to continue styling your creation as you design some clothing!
There are so many different items of clothing you could draw to finish off the style of this drawing. Depending on how much space you have on the page, you could draw a lot of this person too!
What kinds of poses might you depict?
Lastly, you could have some fun designing a background to finish off this face shape drawing. If you depicted someone specific, then you could use the background to match that.
The background doesn’t have to be based on a specific location, however. You could also use patterns, shapes and colors to fill the background instead.
Using all sorts of details and colors can make the background so vibrant and can really bring it all together! Do you have some background ideas?
Your Face Shape Drawing is Complete!
You have successfully reached the end of this step-by-step guide on how to draw a face shape!
As we mentioned earlier, a face is something that is harder to draw than one might think, and has caught many artists by surprise.
For that reason, you should be very proud of completing this drawing! Our goal was to create a guide that made learning how to draw this subject not only easy but also lots of fun.
Now that you can draw a face shape so well, it’s up to you to put your own spin on it.
A great way to do this would be to draw the rest of the facial details in. As we suggested earlier, you could use some real-world faces to help you, even your own!
We have a lot more fun in store for you on our website, as we have plenty of awesome drawing guides waiting for you there. Be sure to visit us often, as we upload new ones all the time!
We would also love to see your amazing face shape drawing when it’s complete, so please let us see by sharing it on our Facebook and Pinterest pages!