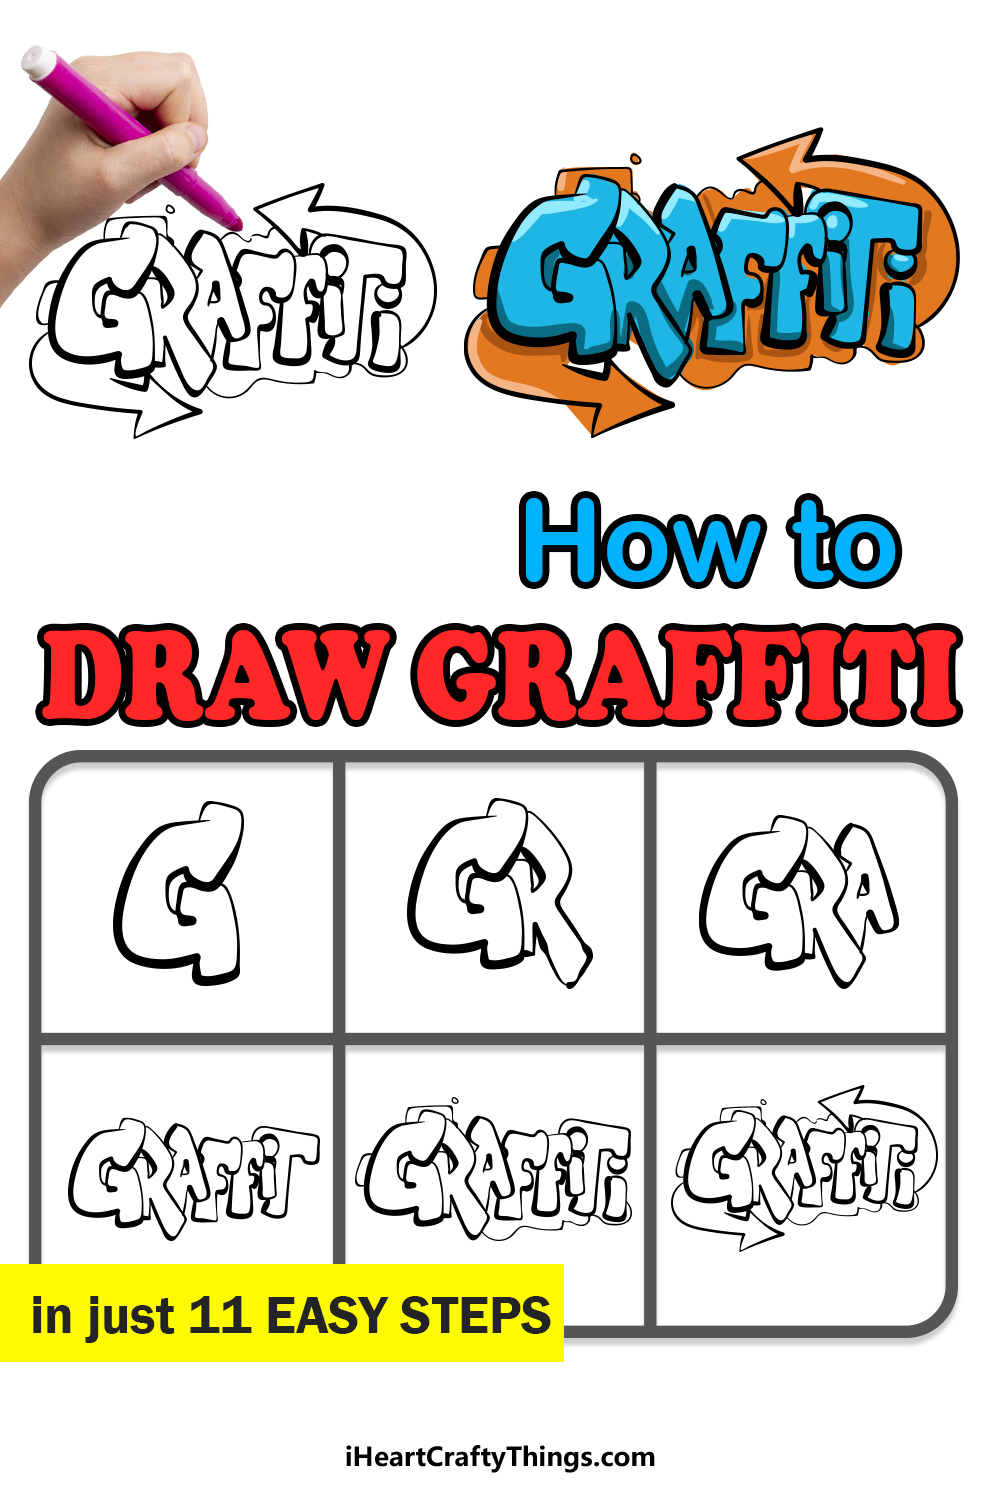
Unleash your inner street artist with this guide on how to draw graffiti! Once you have mastered this guide, you can make all kinds of cool and funky designs.
Graffiti may be seen as a nuisance by some, but when true artists attempt it they can create true beauty. There are famous street artists such as Banksy, but most cities have at least a few talented artists who leave their mark on the streets.
Many people wonder what it would be like to make graffiti art, but they may not want to go out and risk getting in trouble. This guide will allow you to make some graffiti art from the comfort of your own home!
I will show you how to write the word graffiti in a cool font, but once you have the hang of it you could make your own words and phrases in a similar style.
Discover The Easiest Way To Make Your Graffiti Drawing
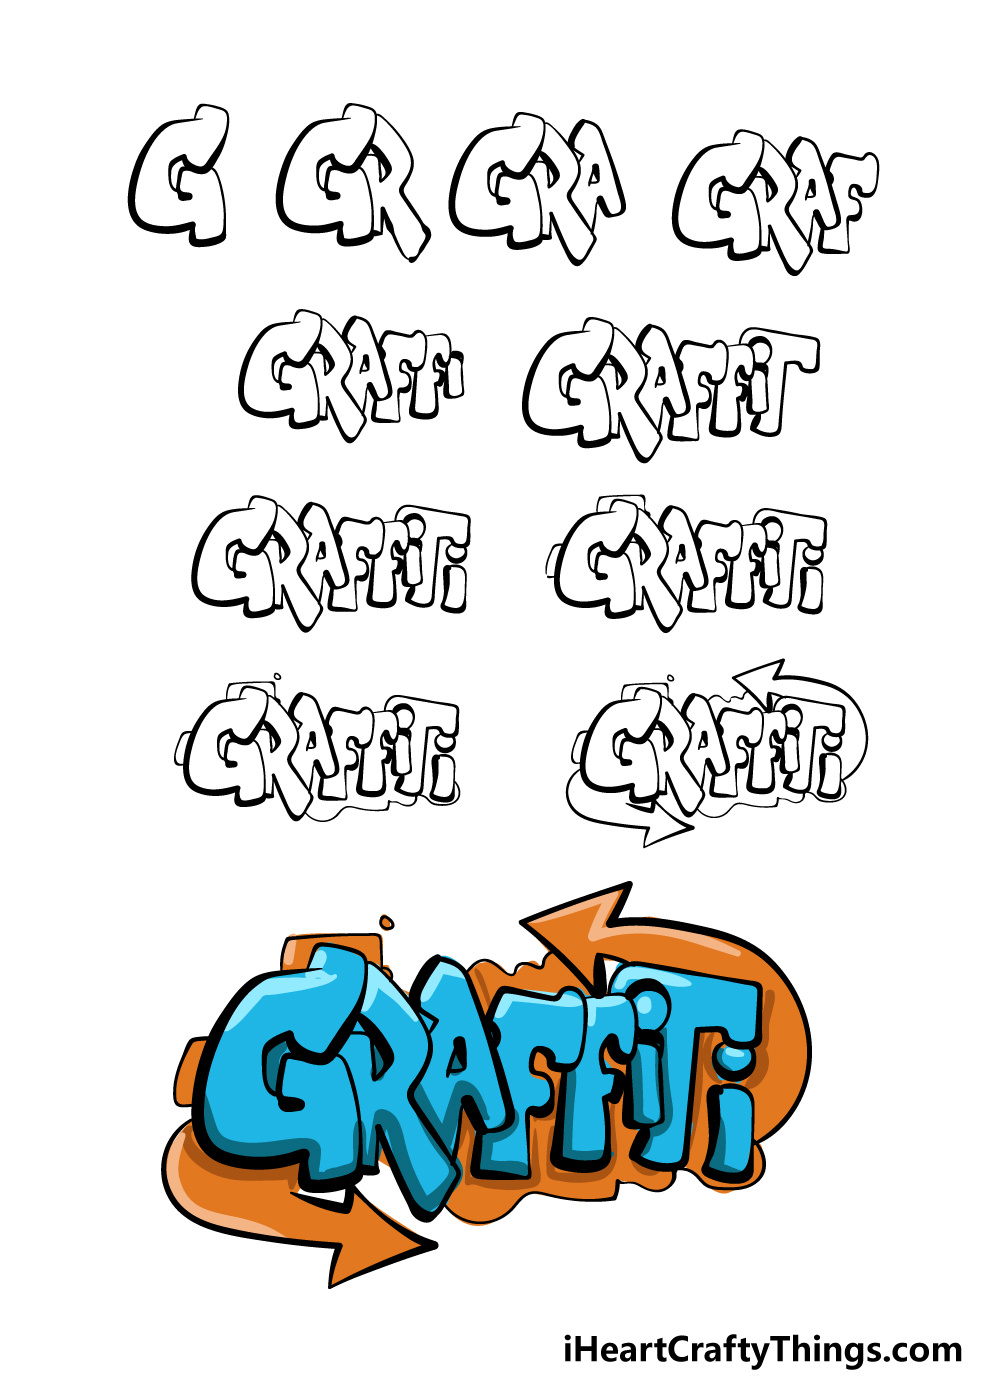
How to Draw Graffiti – Let’s get Started!
Step 1
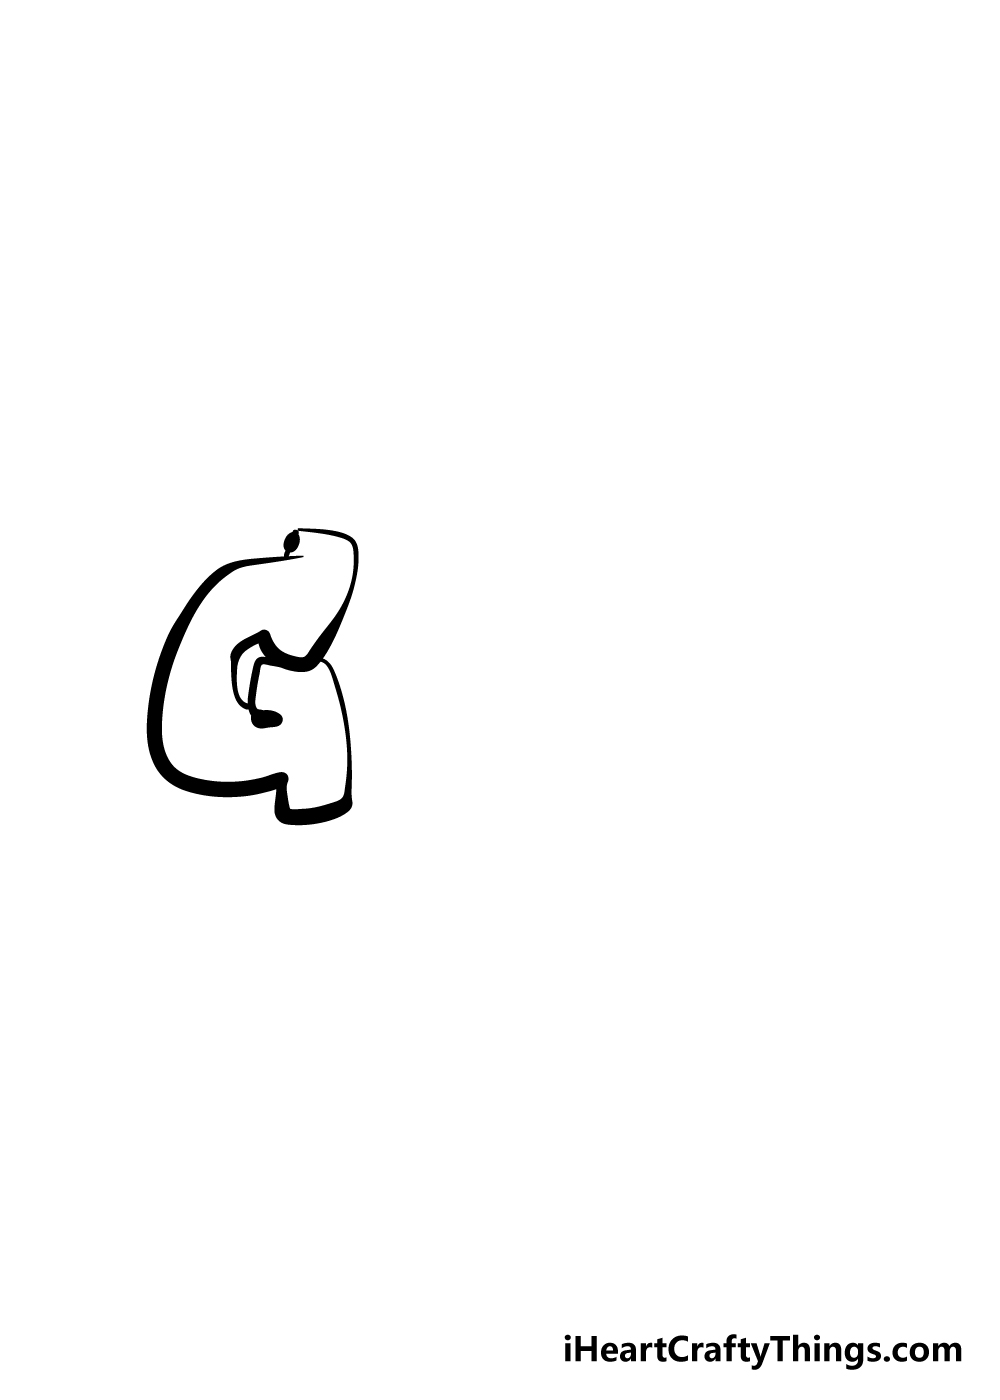
We will be writing out the word ‘graffiti’ in this step-by-step guide on how to draw graffiti. You would be able to apply what you learn to other letters and words as well!
To start with, you can draw the letter G. As you can see in our reference image, some edges of the letter will be thicker than others.
This will help to give the letters a more stylistic appearance
Step 2 – Draw the next letter
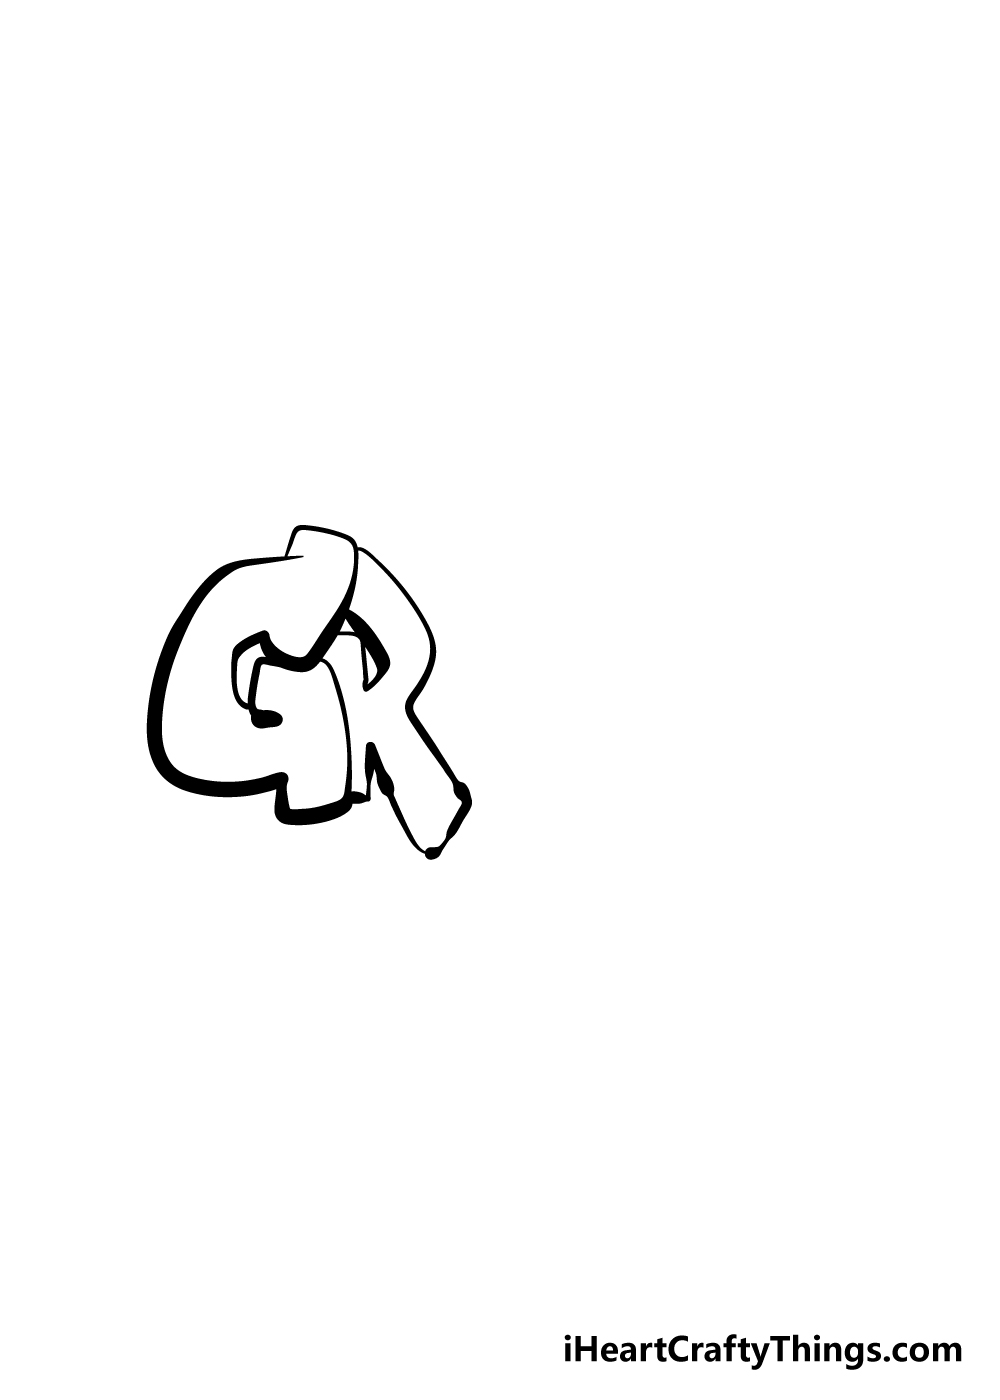
We shall continue your graffiti drawing by adding the next letter. You can draw the R coming directly off from the G.
It should look like the R is behind the G, and it will have the same style as the G in the previous step.
Step 3 – Keep adding letters to your picture
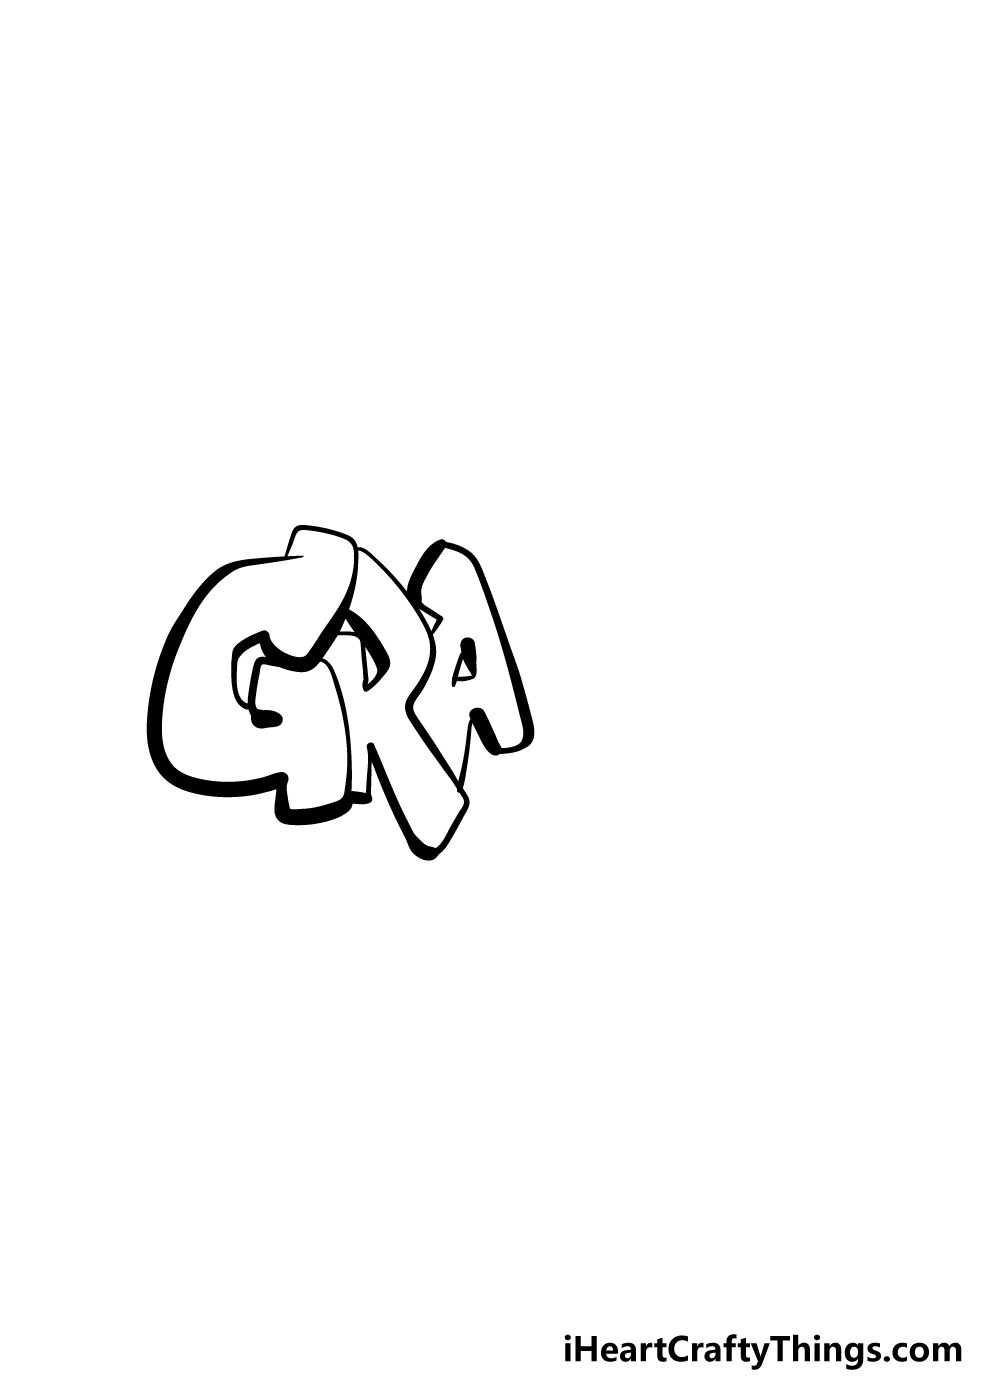
You’re starting to get the hang of it now! We shall continue adding more letters for the next few steps of our guide on how to draw graffiti.
You can add the A in this step, and it will also look like it’s behind the previous letter.
Step 4 – Draw the F of the word graffiti for this step
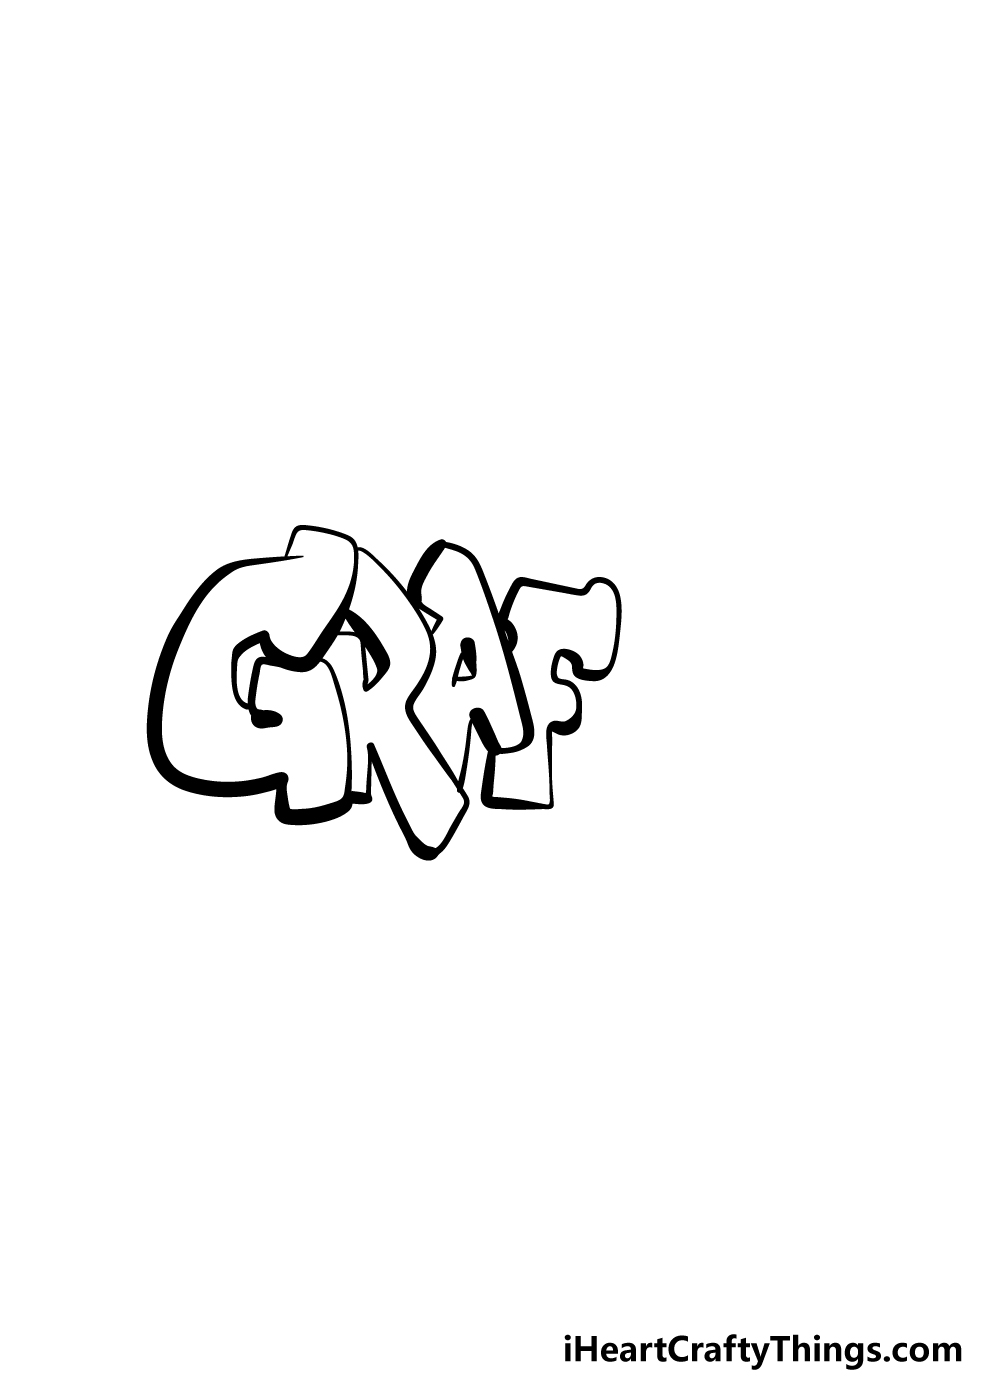
Your graffiti drawing is really starting to take shape!
For this part, we will be adding the first F of the word. This will bring you past the halfway point of the word already!
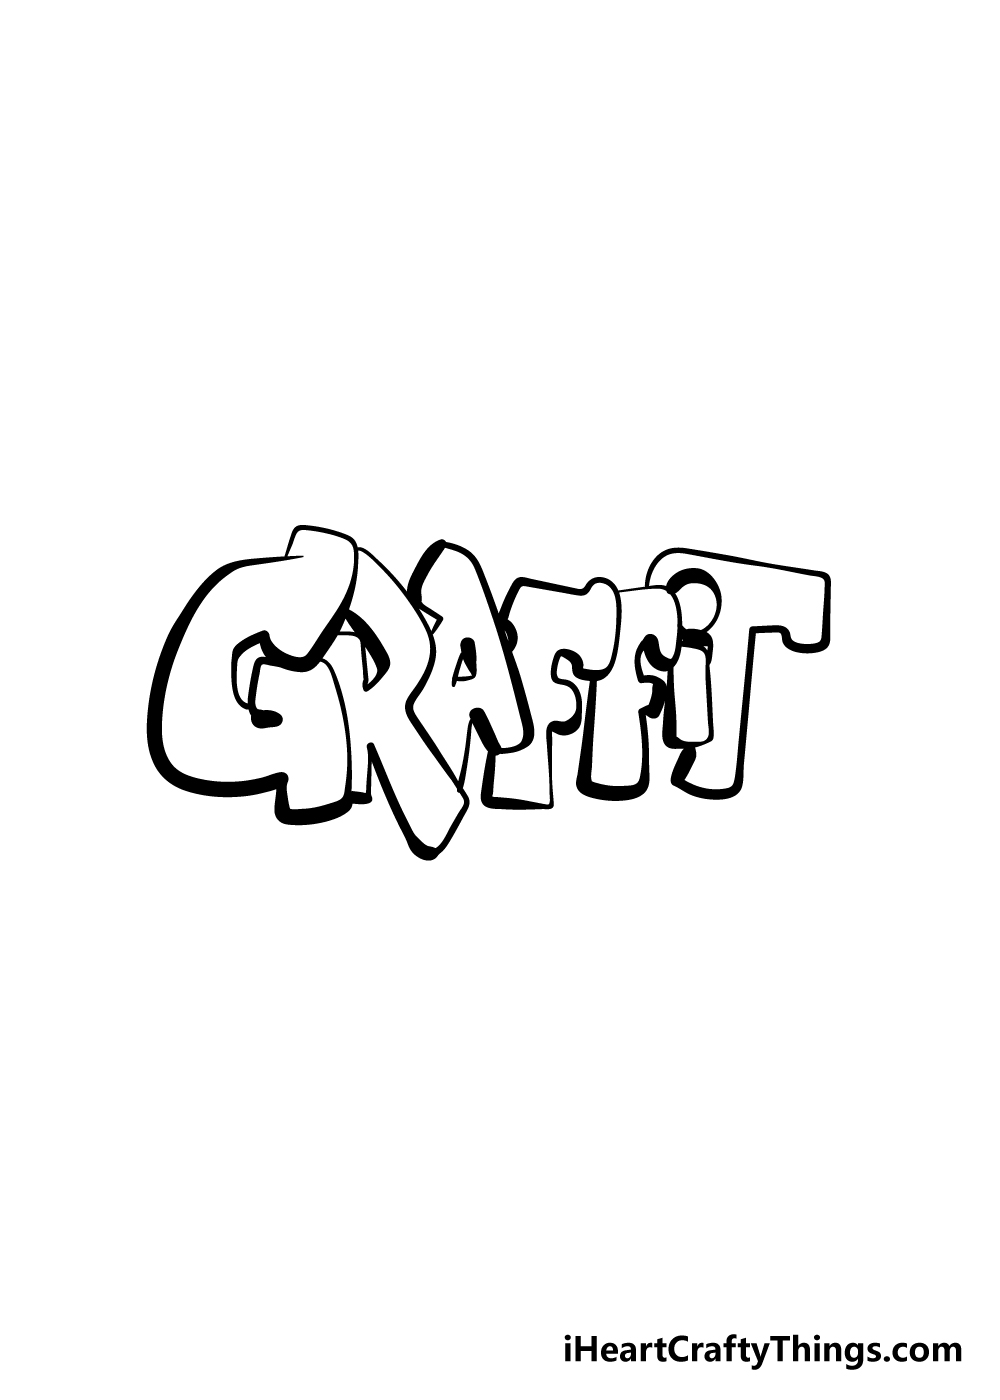
Step 5 – Next you will add the next two letters

We shall add two more letters in this step of our guide on how to draw graffiti. In this part, we will be adding two letters, the F and the I.
These letters will follow the trend of the precious few by getting smaller and appearing to be behind the previous letters.
Once you have these letters, we shall keep adding more in the next few steps.
Step 6 – You can add the T in this step
The next letter of your graffiti drawing will be slightly different from the previous letters.
The T that you will be drawing will still be drawn as if it’s behind the previous letter, except this time you can make the letter bigger than the previous one. This will help to add to the graffiti style of the font.
Step 7 – Now, draw the final letter of the word
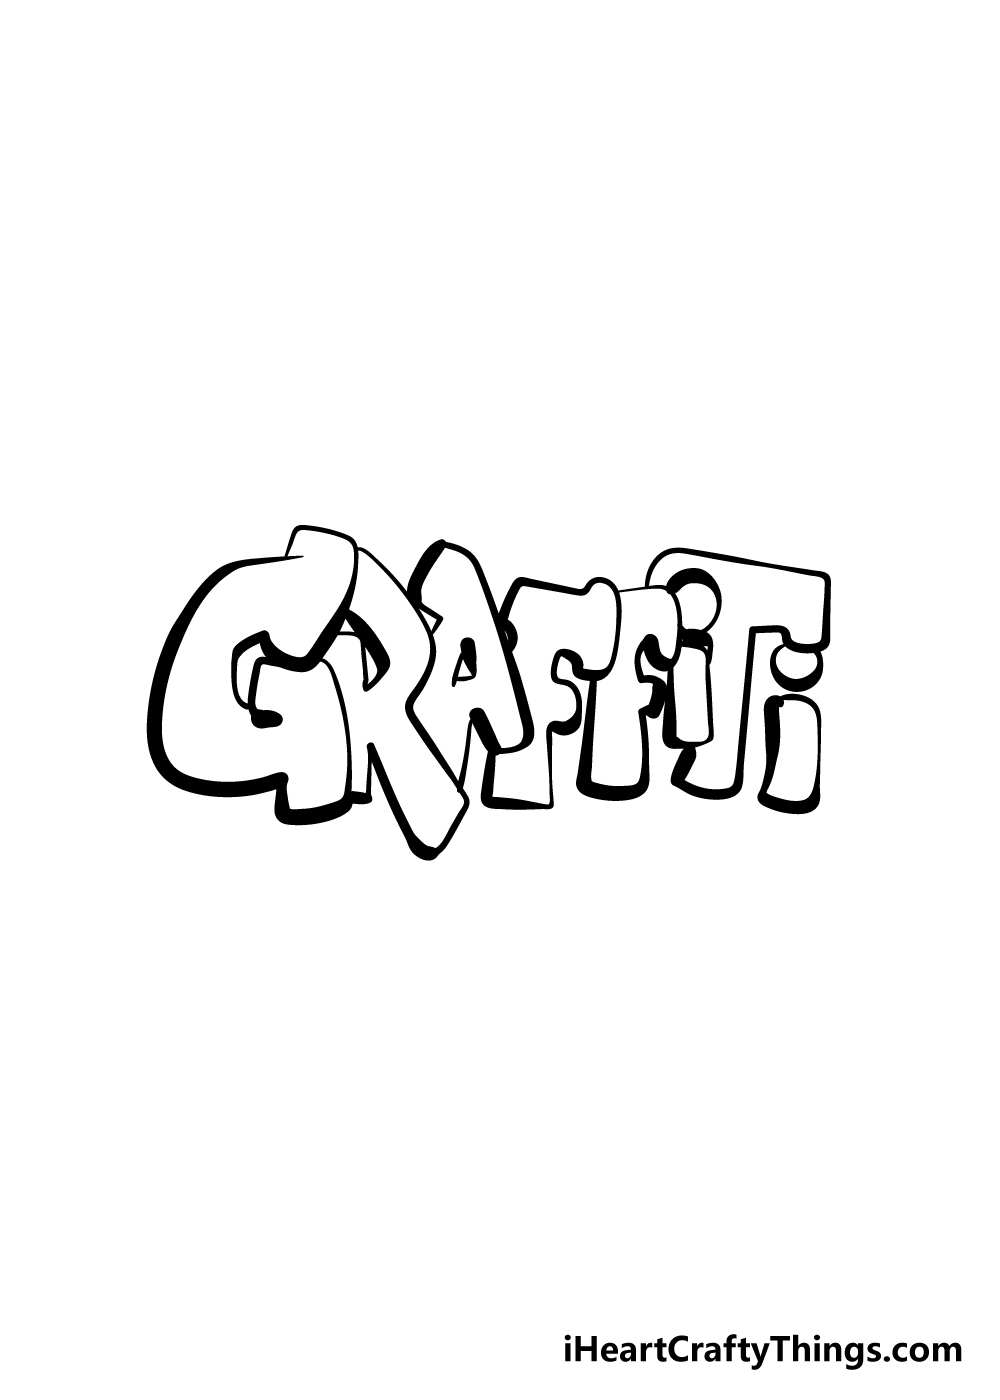
We shall add the final letter of the word in this step of our guide on how to draw graffiti. Much like the previous one, this letter will deviate from the trend of the other letters.
You will be drawing an I for this step, but it won’t be up against the previous letter like you’ve usually been doing. The I will also not be capitalized this time.
Step 8 – Add some stylish details

You’ve finished writing the letters of the word now, and from this point onwards we shall be adding some extra details to your graffiti drawing.
We shall be keeping it simple for now, and all you have to do is draw a square shape over the G and the R.
Finally, you can draw one to the left-hand side of the G. You could also add more of these details elsewhere if you choose!
Step 9 – Continue adding details to your graffiti drawing

For this next step of our guide on how to draw graffiti, we shall keep adding some cool details!
For this part, you can draw a curvy line underneath the letters, specifically from the bottom of the R to the I.
Step 10 – Add the final details to your graffiti drawing
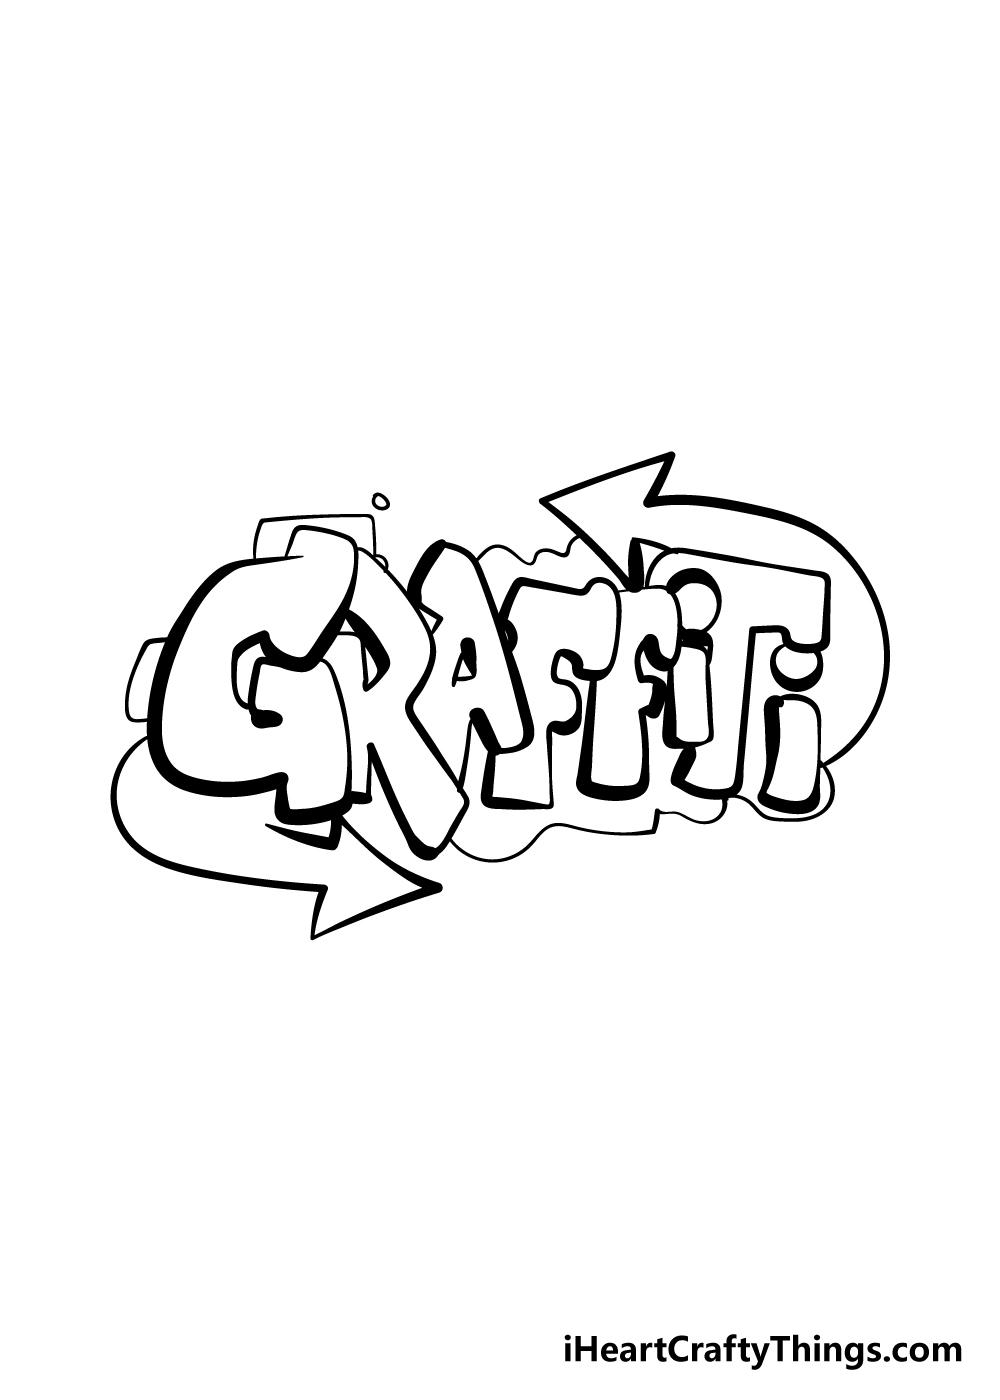
Before we move on to the final stage of your graffiti drawing, we shall add a few more details! You can draw a curved arrow coming out from under the G and to the right.
Finally, you can draw one coming out from the I and up to finish off the pattern. Be sure to add any extra touches that you would like before moving on!
Step 11 – Now finish it off with some color
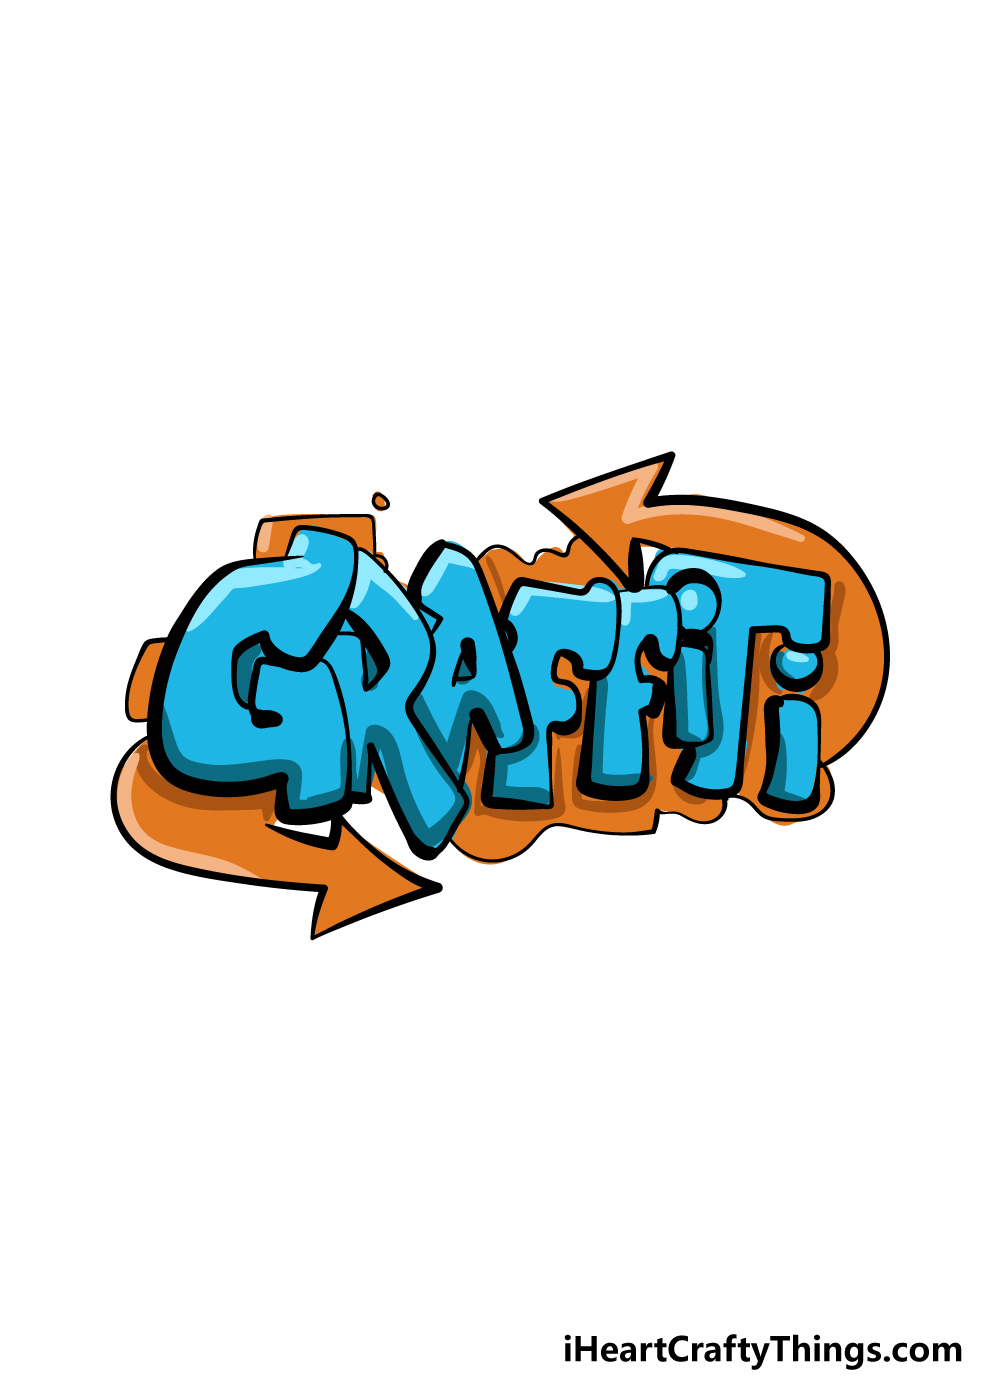
Graffiti is often bright and colorful, so it would really bring your image together if you used your favorite bold and beautiful colors to finish off your graffiti drawing.
This is a step where you will want to be creative as you can and really express yourself with your colors!
If I were coloring in this picture, I would use some bright colored markers to finish it off, or perhaps some acrylic paints.
These mediums would really help to make the colors pop off the page, but any art mediums that you use will look amazing! How will you finish off this drawing of yours?
5 Tips To Make Your Graffiti Drawing Even Better!
Create street art from your own home as we make your graffiti sketch even better!
When it comes to graffiti in real life, there are many different styles. You could experiment with some of these for your graffiti drawing!
The styles could have to do with the font of the letters or the shapes surrounding them. Looking up various examples of graffiti could provide you with some inspiration.
Do you have some favorite examples of graffiti that you could use in order to help your design?
Once you have chosen the design of your drawing of graffiti, you could also think about drawing a different word. We used the word graffiti to make an example, but it’s not all you can do with it.
For a simple example, why not try drawing your own name in a graffiti style. Once you have the hang of it you could make any word you like!
Graffiti words will also often be surrounded by various pictures and designs. These can make it even easier to add some personalization to a design, and you could do it as well!
For example, you could design a cool cartoon character and draw it next to the word. What are some other examples of things you could add to this graffiti?
While making the graffiti design is the point of this graffiti sketch, you could take it even further by drawing a background setting. You could do this by showing the brick wall the graffiti is on and some of the surrounding environment.
What kind of place do you think this graffiti could be in?
Finally, one of the greatest ways to really make this graffiti drawing pop would be by using colors and art tools. We showed you one set of colors you could use, but you should really let your inspiration take over.
You could also use various mediums like markers, pens and paints to recreate the colors and lines that real graffiti may have. What are some colors and mediums you could use?
Your Graffiti Drawing is Complete!
We hope that you had an amazing time working through this step-by-step guide on how to draw graffiti alongside us!
We created this guide to show you that creating an awesome design can be much easier than you would expect. We also tried to make sure that it would be not only helpful but lots of fun!
Now that you have finished our design, you can keep going by using this guide to create your own graffiti designs. What do you think you would like to write in this style?
We have lots of amazing drawing guides for you to enjoy on our website! We hope that you will visit us there, we upload new guides frequently so check in often to make sure you never miss out!
Once you have finished your graffiti drawing we hope that you will share it on our Facebook and Pinterest pages for us to enjoy!