I was up for most of the night last night tossing and turning all because I had this fun idea for a witch craft in my head and I was so excited and worried all at the same time that I would forget about it by morning that I hardly slept.
At about 6 a.m. I finally gave up on trying to get some sleep, brewed myself a big mug of coffee and found myself making this adorable stuffed paper bag witch craft that I’m sharing today.
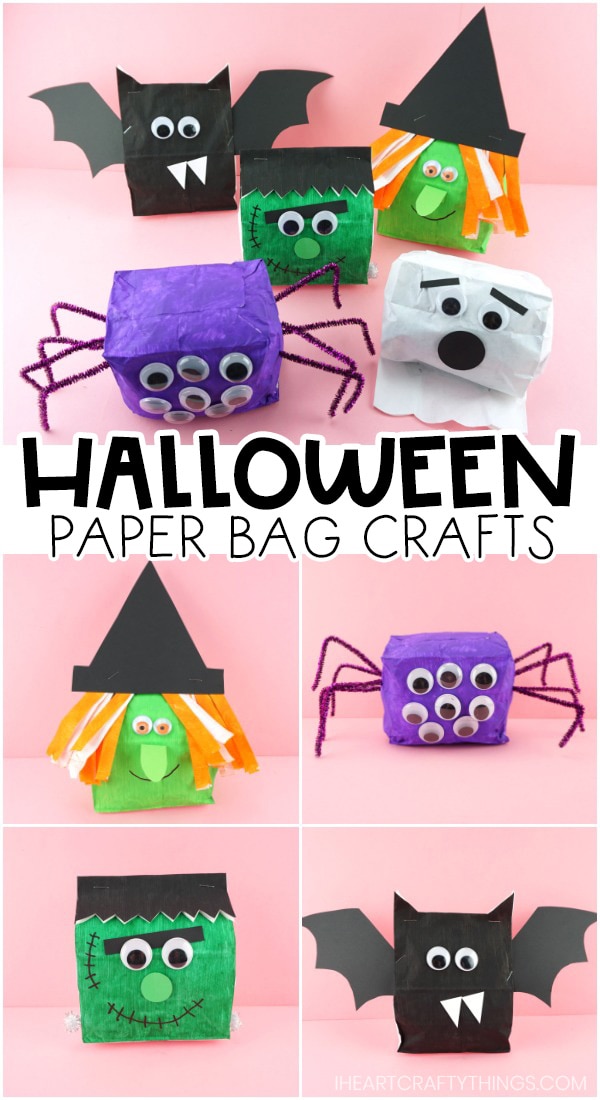
It reminds me of some of my most favorite Halloween books so you are going to love combining them with this fun Halloween craft this year. Find our book recommendations near the bottom of this post.
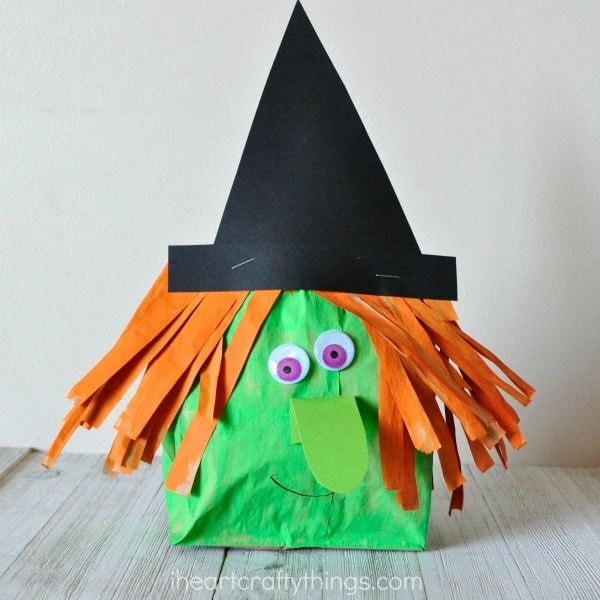
How to Make a Stuffed Paper Bag Witch Craft
This post contains affiliate links to the products mentioned. Read our disclosure policy for more information.
Supplies needed for making paper bag witch
- witch hat template <—- Get the TEMPLATE HERE
- brown paper lunch bag
- green and orange paint
- paintbrush
- newspaper
- green and black cardstock or construction paper
- googly eyes (The purple ones we used are from Michael’s.)
- red or black marker
- googly eyes
- scissors
- stapler
- glue
Instructions for making Halloween Witch Craft
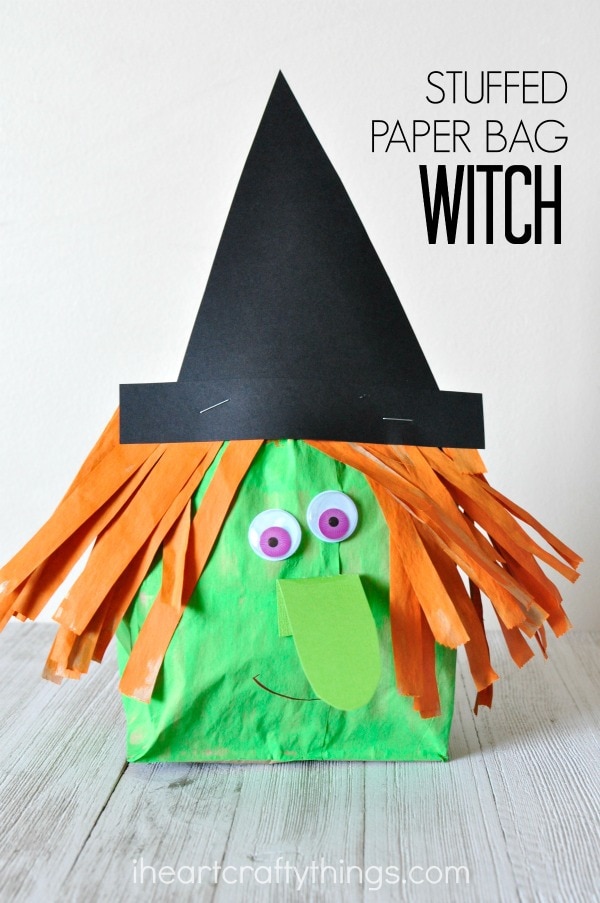
Step 1: Start by painting the bottom half of your paper bag with your green paint. Then paint the top half of your paper bag with your orange paint.
You will also need to paint the back top half of the paper bag with your orange paint because you are going to fold it over in a later step for the witch hair. Set your paper bag aside to dry completely.
Step 2: Once your paper bag is dry, crumple up strips of newspaper and stuff your bag with it until it is half way full. Close the bag and place a staple on each side in the middle (where the green and orange meet).
Related: Paper Bag Monster Puppets
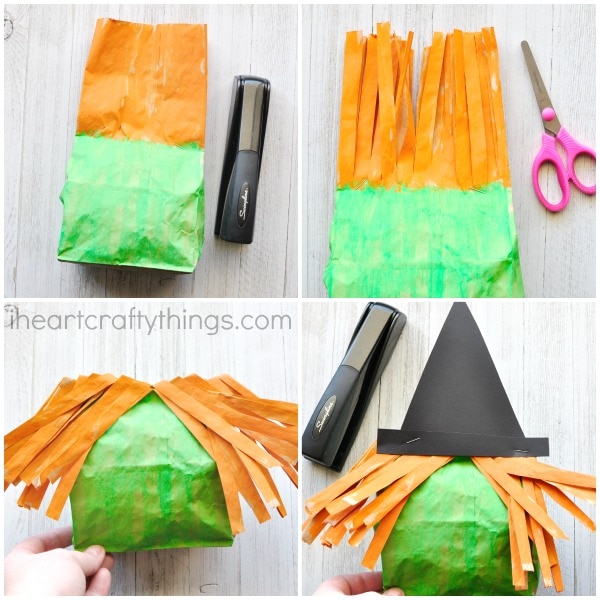
Step 3: Use your scissors and cut small strips all the way down the orange section of the bag. This is your witch hair. When you are finished, fold all of the strips down towards the front of the paper bag, parting them in the middle to form your witch hair.
Step 4: Download and print out the witch hat template on black construction or cardstock paper. Cut out the template and staple it onto the top of the bag over the hair.
Related: Yarn Wrapped Mummy Craft
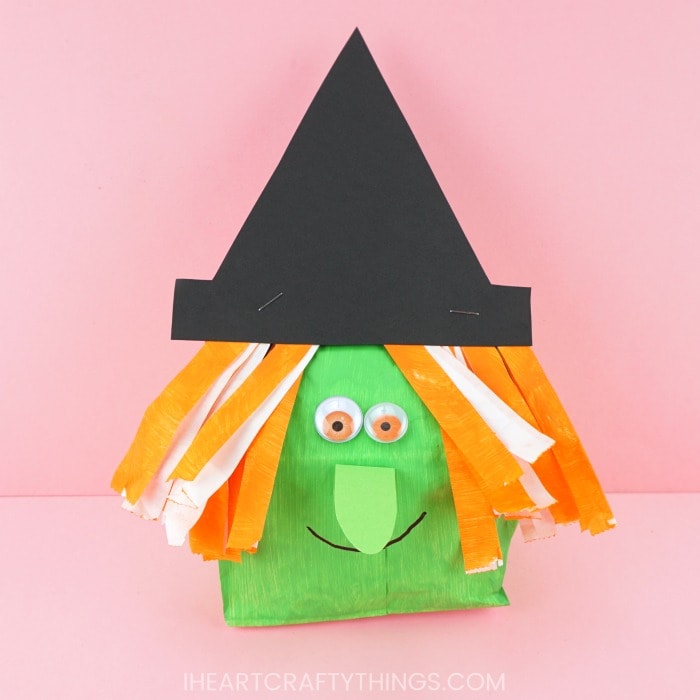
Step 5: Cut out a long witch nose from your green cardstock or construction paper. Make a small bend on the end, add some glue to it and attach it to the middle of your witch face.
Step 6: Finish your stuffed paper bag witch craft by gluing on googly eyes and drawing on a mouth with your red or black marker.
Combine this craft with a fun Halloween Children’s book:
Room on the Broom by Julia Donaldson
Big Pumpkin by Erica Silverman
VIDEO TUTORIAL: HOW TO MAKE HALLOWEEN CHARACTER PAPER BAG CRAFTS
Watch the video below for a step by step guide on how to make each of these Halloween paper bag crafts.
Find more fun and easy fall arts and crafts ideas by browsing the categories at the top menu bar of our website.
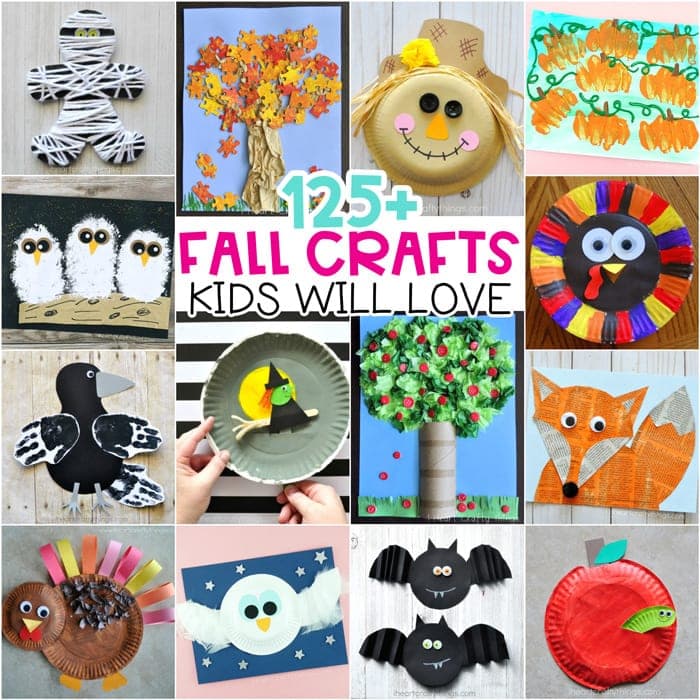
Looking for more amazing fall arts and crafts ideas? You’ll love our resource of over 125 amazing fall crafts for kids. Find pumpkins, fall trees, paper crafts, woodland animals, Halloween and Thanksgiving crafts and more.