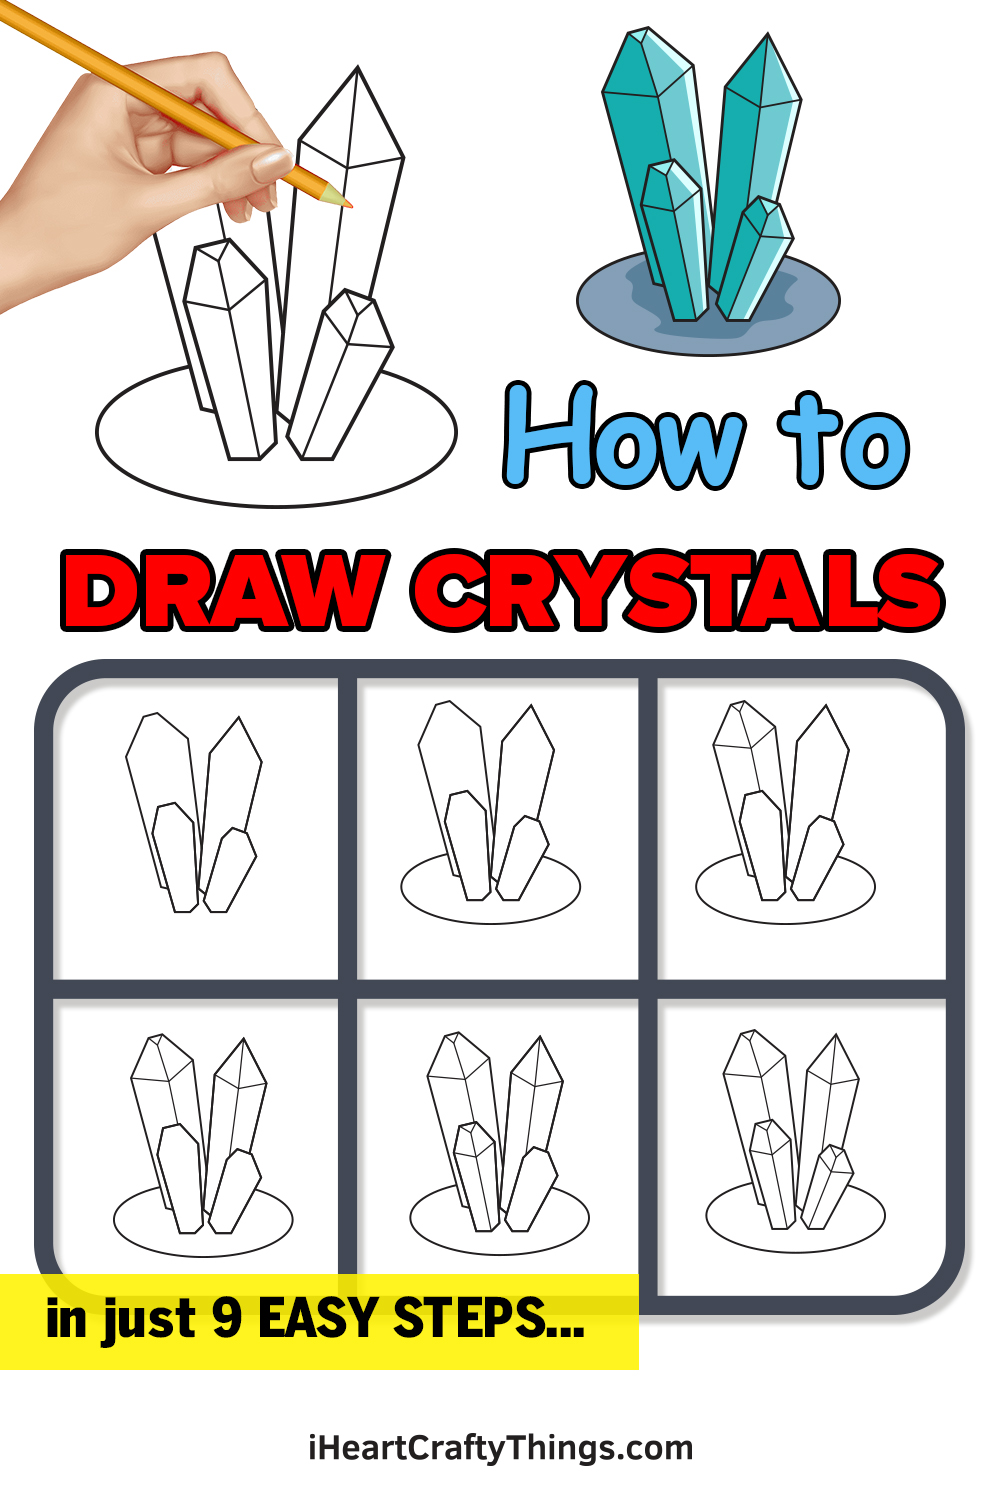
Let’s learn how to draw crystals together by following this guide for kids! I will make it much easier for kids of all ages to draw these beautiful natural artifacts.
Crystals have always fascinated humans, and we have attributed great value to them. Their beauty and perfection have made them highly sought after in all of their different forms.
Not everyone has the means to cultivate a massive crystal collection, but the next best thing is to create your own in your art! This guide will give you everything you need to do just that.
I will show you how to draw these gorgeous crystals, and then there is a world of possibilities open to you after that. You could add your own background details and ideas to really bring these crystals to life.
Watch And Learn How To Make Your Crystals Drawing
How to Draw Crystals – Let’s get started!
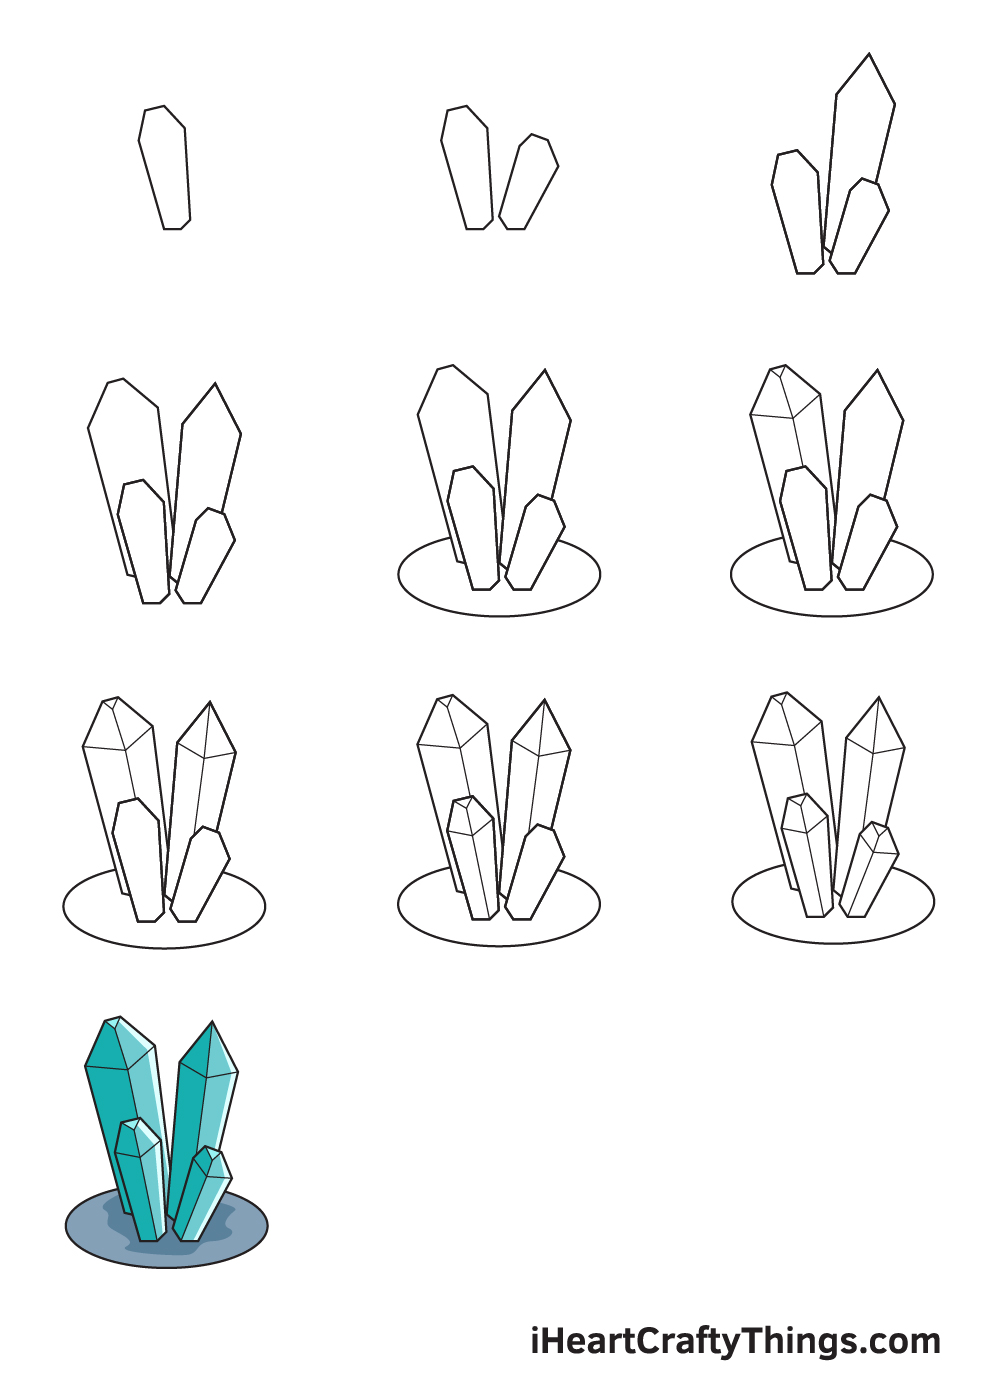
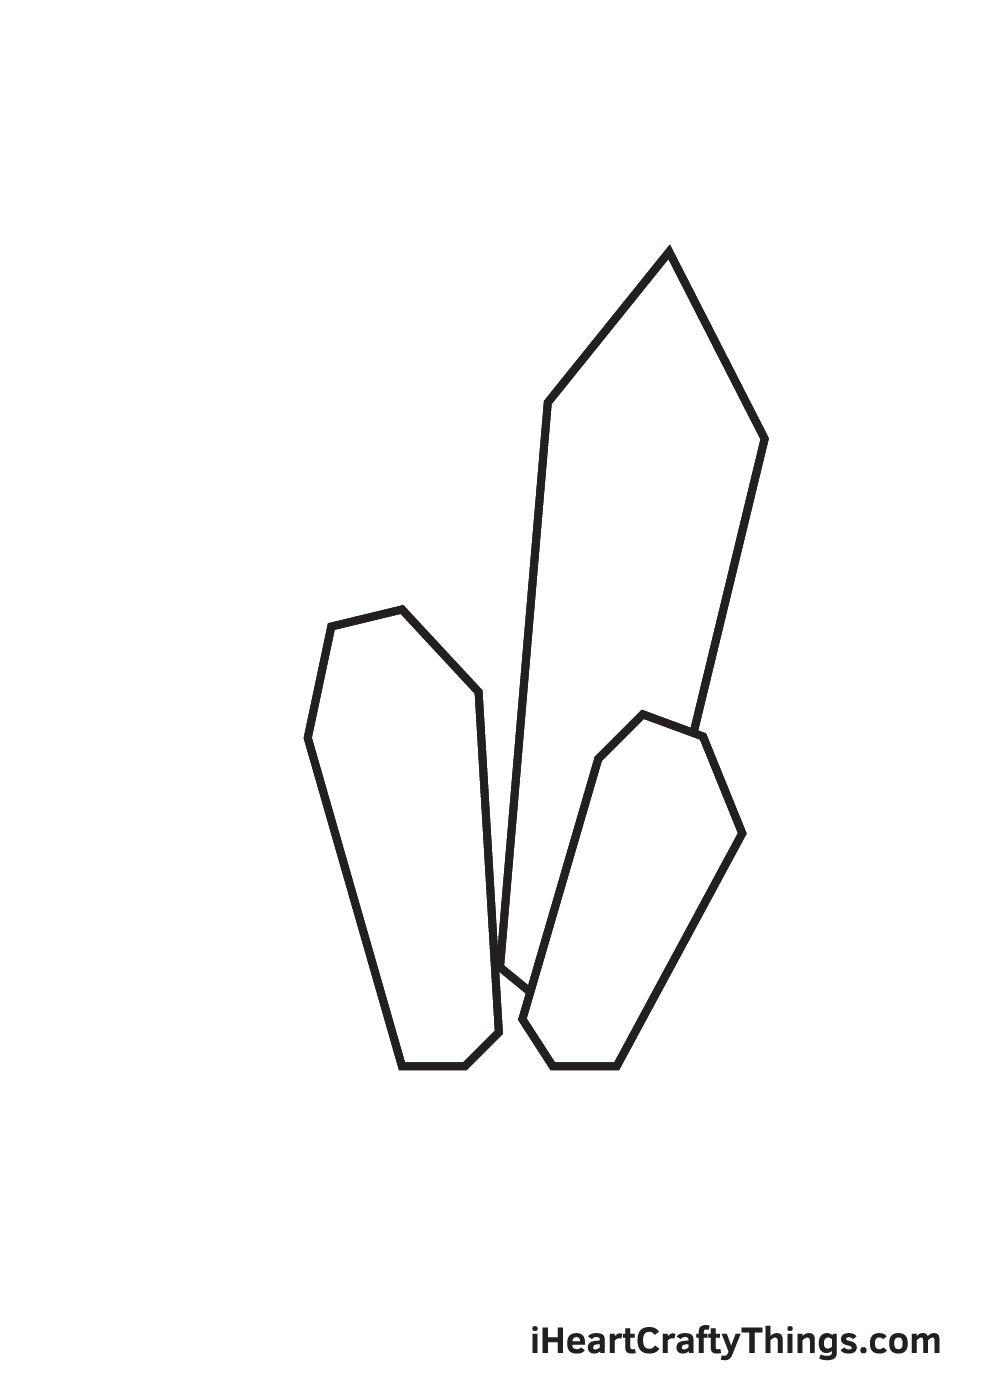
Step 1
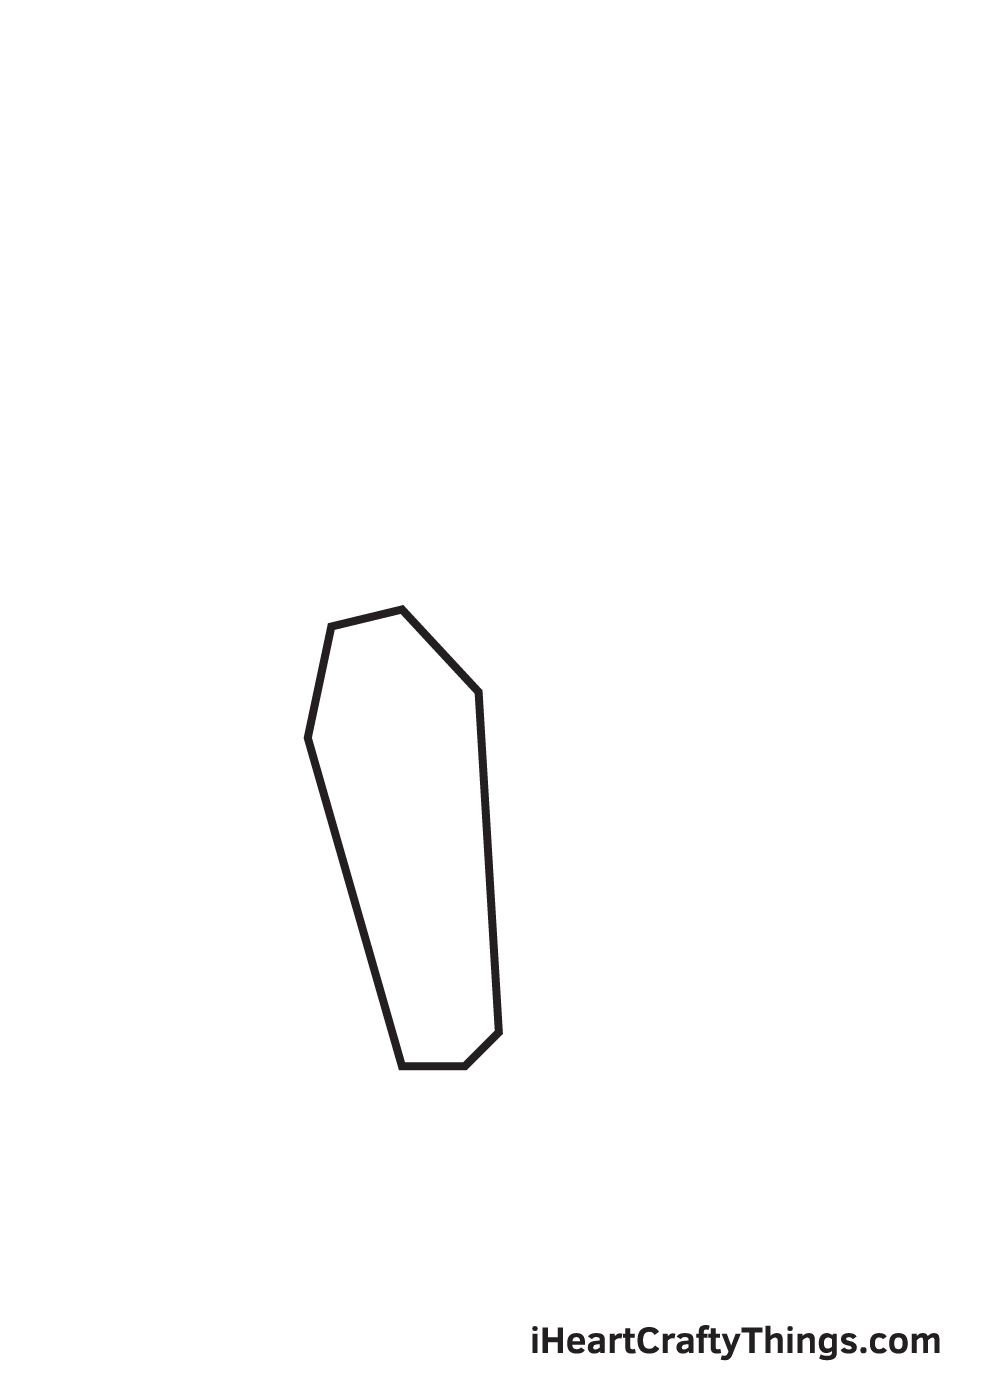
Start by drawing the first crystal on the bottom portion of your paper.
Draw a horizontal line to form the topmost part of the crystal. Then, draw two diagonal lines heading outwards beginning from each endpoint of the horizontal line.
Afterwards, extend the lines by drawing two longer diagonal lines leaning towards each other. Now, draw a wide V-shaped line at the bottom to enclose the figure. At this point, the shape of the first crystal is finalized.
Step 2 – Create an Outline of the First Two Crystals
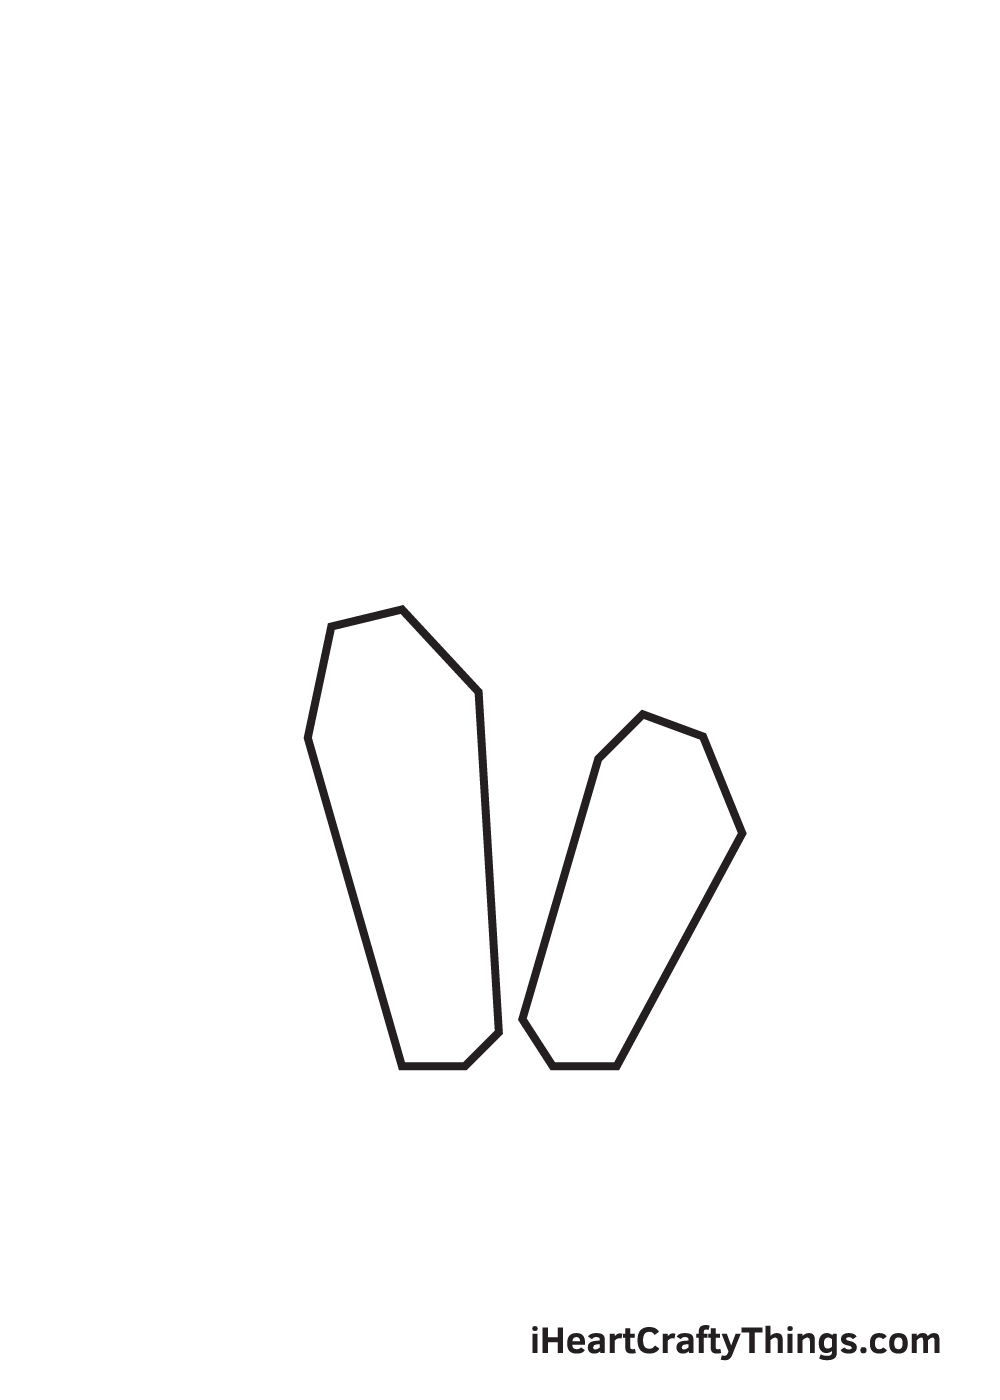
Draw another crystal with a similar form to the previous one. This time, however, this crystal should be a bit smaller than the first.
Keep in mind that the two crystals should be drawn side by side.
Step 3 – Afterwards, Draw the Third Crystal’s Outline
After drawing the small crystals, we will now be drawing the bigger ones.
Continue by drawing an upside down V-shaped line to form the topmost part of the third crystal. Then, on each endpoint of the V-shaped line, draw a downward diagonal line leaning towards each other.
This creates the entire body of the crystal. Afterwards, finalize the outline of the crystal by drawing a line at the bottom, closing off the figure.
When drawn correctly, the figure of this crystal should look like an elongated pentagon shape.
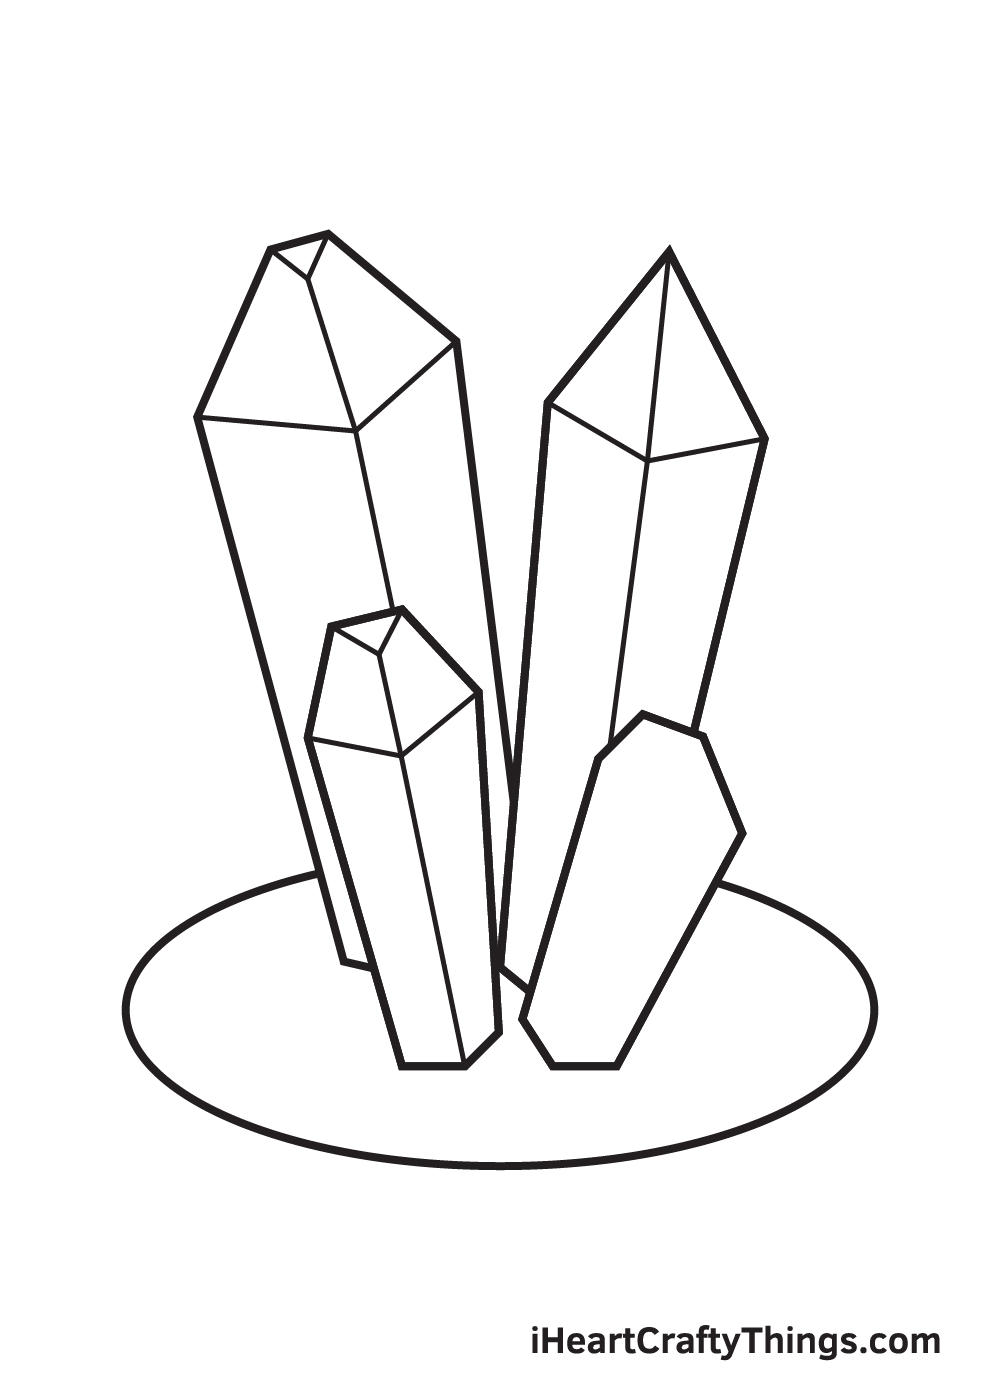
Step 4 – Now, Draw the Outline of the Last Crystal

Draw a significantly bigger version of the first crystal we drew in the very first step. This forms the fourth—and the last—crystal in our drawing.
This crystal should be situated beside the one we drew in the previous step. Remember, this should be the biggest and tallest crystal among all four crystals.
Step 5 – Draw the Plate Where the Crystals are Placed On
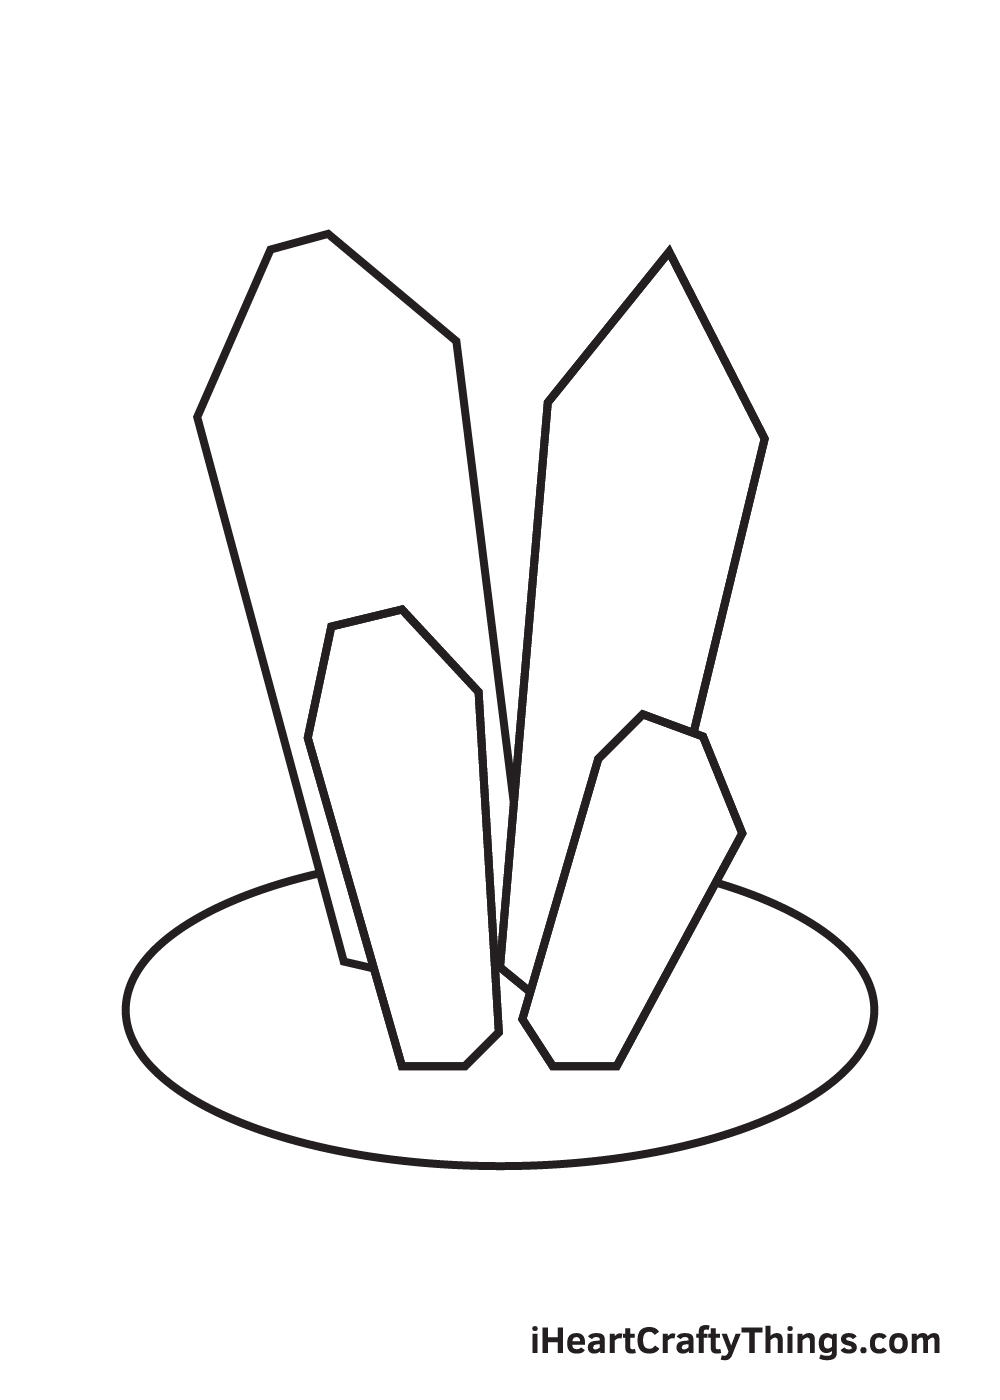
Draw a sideways oval shape at the bottom surrounding all four crystals. The rear part of the oval shouldn’t be visible as the crystals are covering it, as shown in the illustration.
Keep in mind that it should look like the crystals were standing on a circular platform.
Step 6 – Then, Add Details on the Tallest Crystal
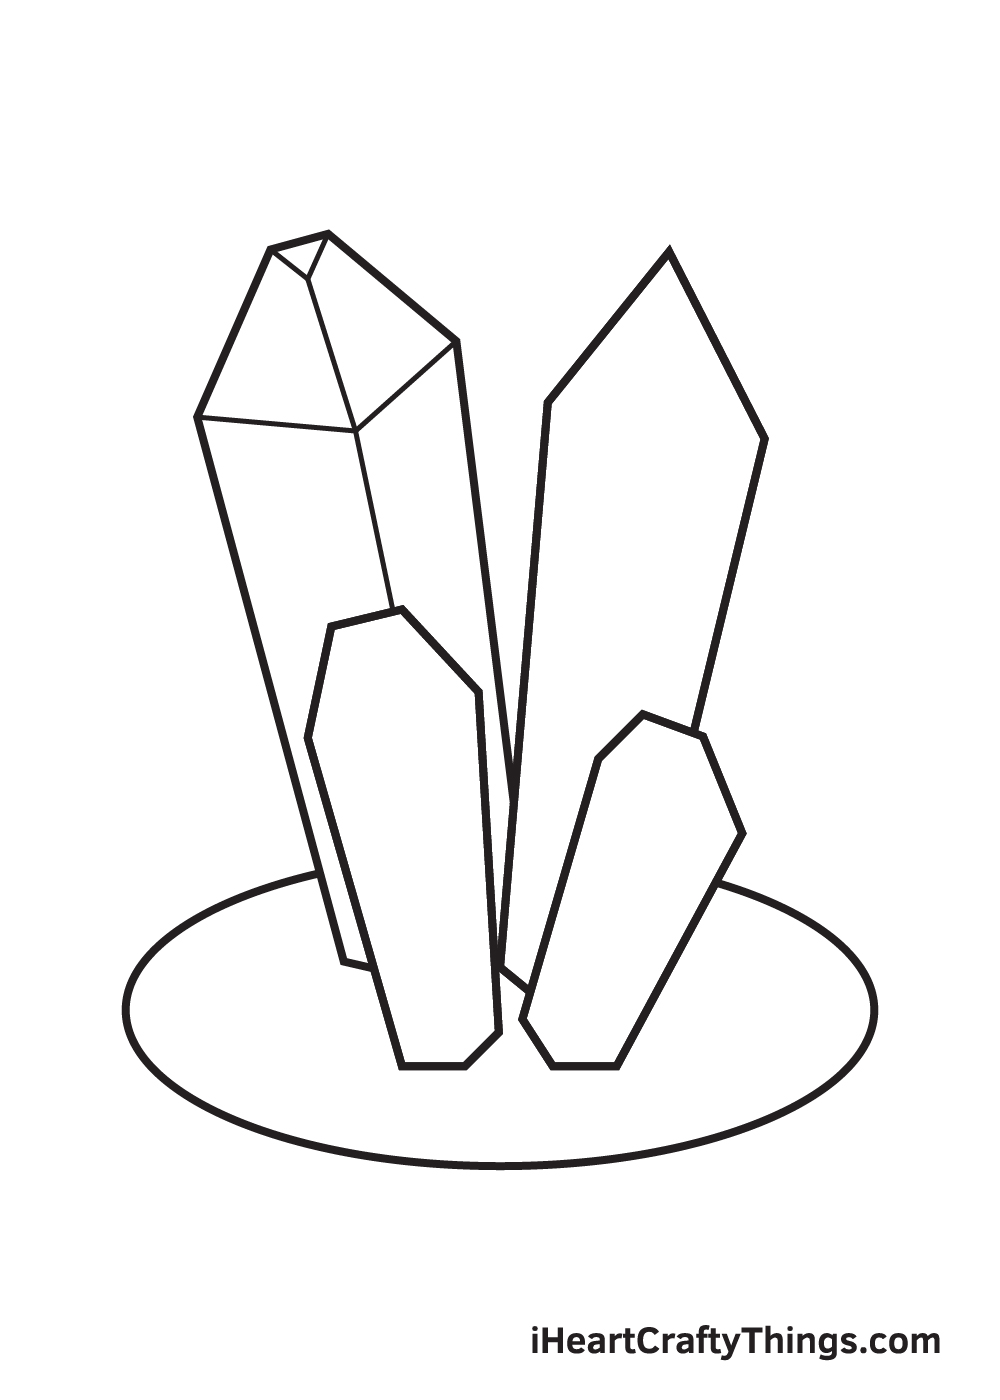
Details and patterns are the distinctive features of any crystal, so that’s exactly what we’ll be drawing in this step.
Let’s start filling in the patterns of the biggest crystal. Simply draw a small V-shaped line on the upper edge of the crystal.
Then, draw an intersecting horizontal and vertical line across the crystal. Make sure to draw the lines in an angle to make them aligned with the form of the crystal.
These lines make the crystal look three-dimensional, thus making it appear more realistic!
Step 7 – Add Details and Patterns on the Next Crystal
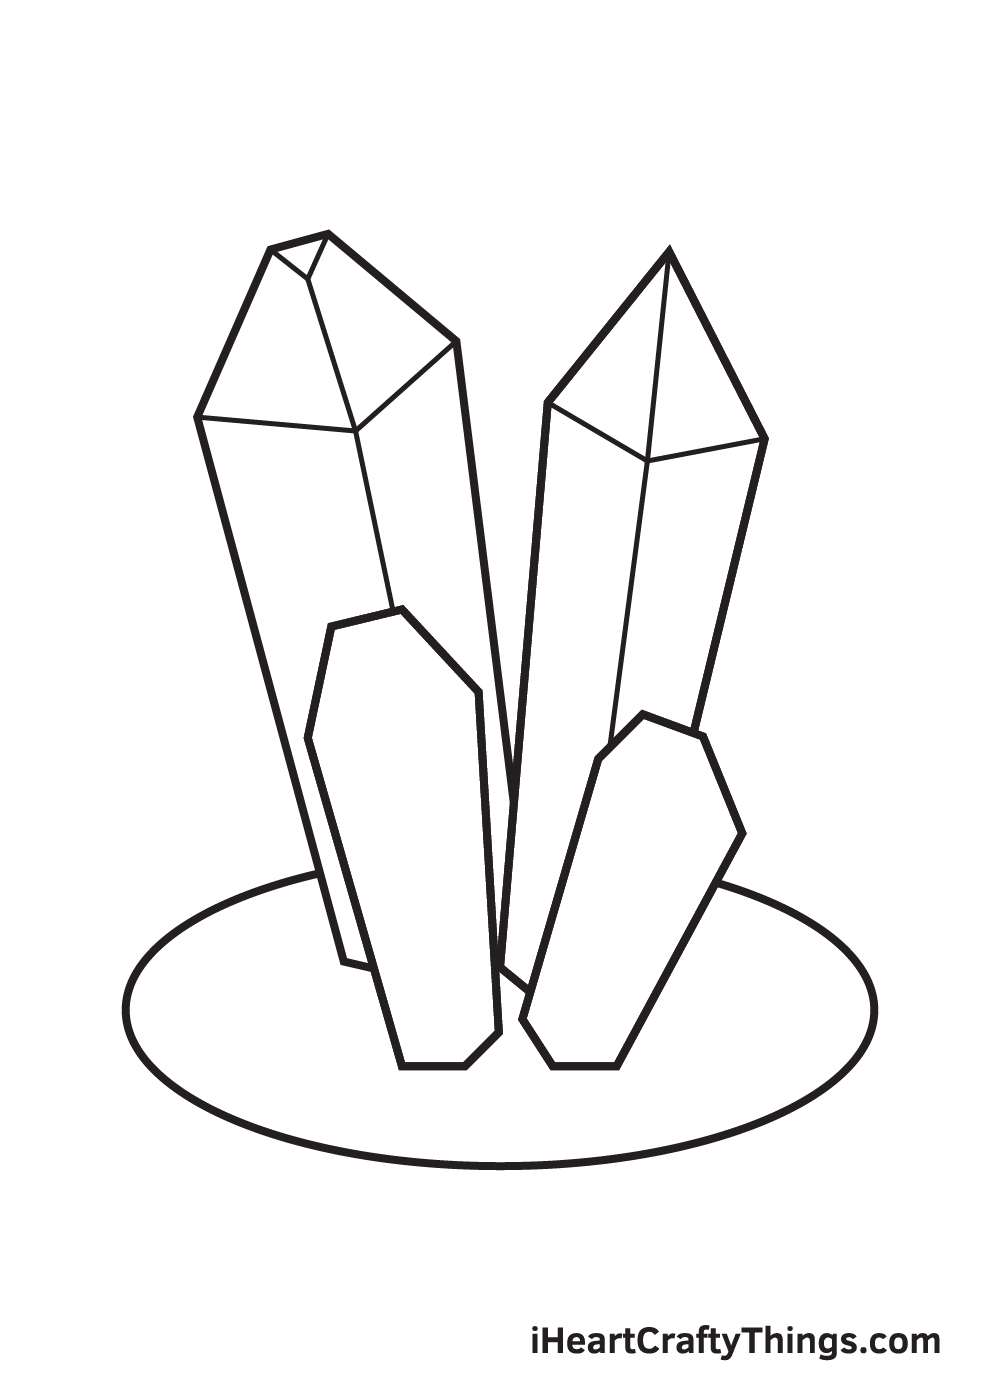
In this step, we’ll be drawing the patterns of the other big crystal. The details in this crystal varies from the first one mainly because its form is different.
Draw a vertical line beginning from the crystal’s pointed edge at the top. Then, draw an angled horizontal line from the upper corner edges of the crystal intersecting with the vertical line
Step 8 – Afterwards, Add Patterns on the Small Crystal
Now, we’ll be adding the details of the small crystal on the left side. Proceed by drawing a V-shaped line on the top edge of the crystal. Then, draw an intersecting angled horizontal and vertical line across the body of the crystal.
The details on this crystal should be similar to the patterns on the bigger crystal adjacent to it. This is because these two crystals have identical shape and form, and only the size differs.
Step 9 – Now, Finalize the Details on All Crystals
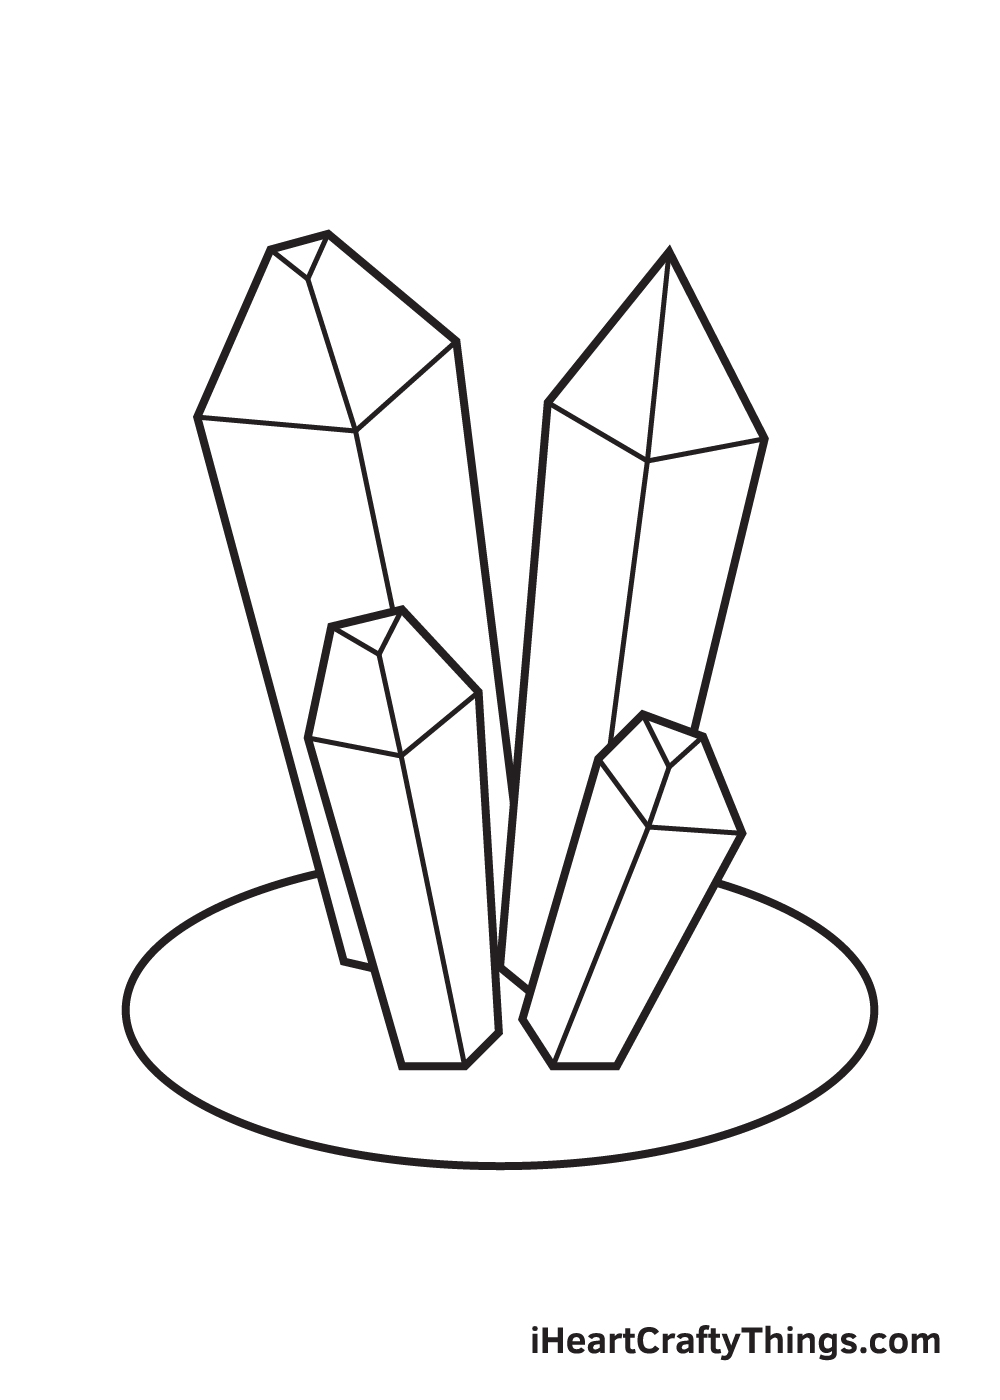
Since the remaining crystal has a similar form to the other small crystal, you can simply repeat the previous step. This completes the details and patterns on all four crystals.
When adding the details and patterns of any crystal, keep in mind that you’re simply outlining its form to magnify its dimensions.
Now that we’ve successfully drawn crystals, it’s finally time for the most exciting part. In this final step, we’ll be choosing the colors and coloring the crystals!
Crystals exist in every color there is. Some of them are even multi-colored! This gives you a lot of color options to choose from depending on which kind of crystal you’re drawing. For example, a malachite is green while a rose quartz is pink.
The colors you will be choosing for the crystals on your drawing is completely up to you! After all, it’s your work of art!
Have fun playing with colors and watch as the crystals ultimately come to life!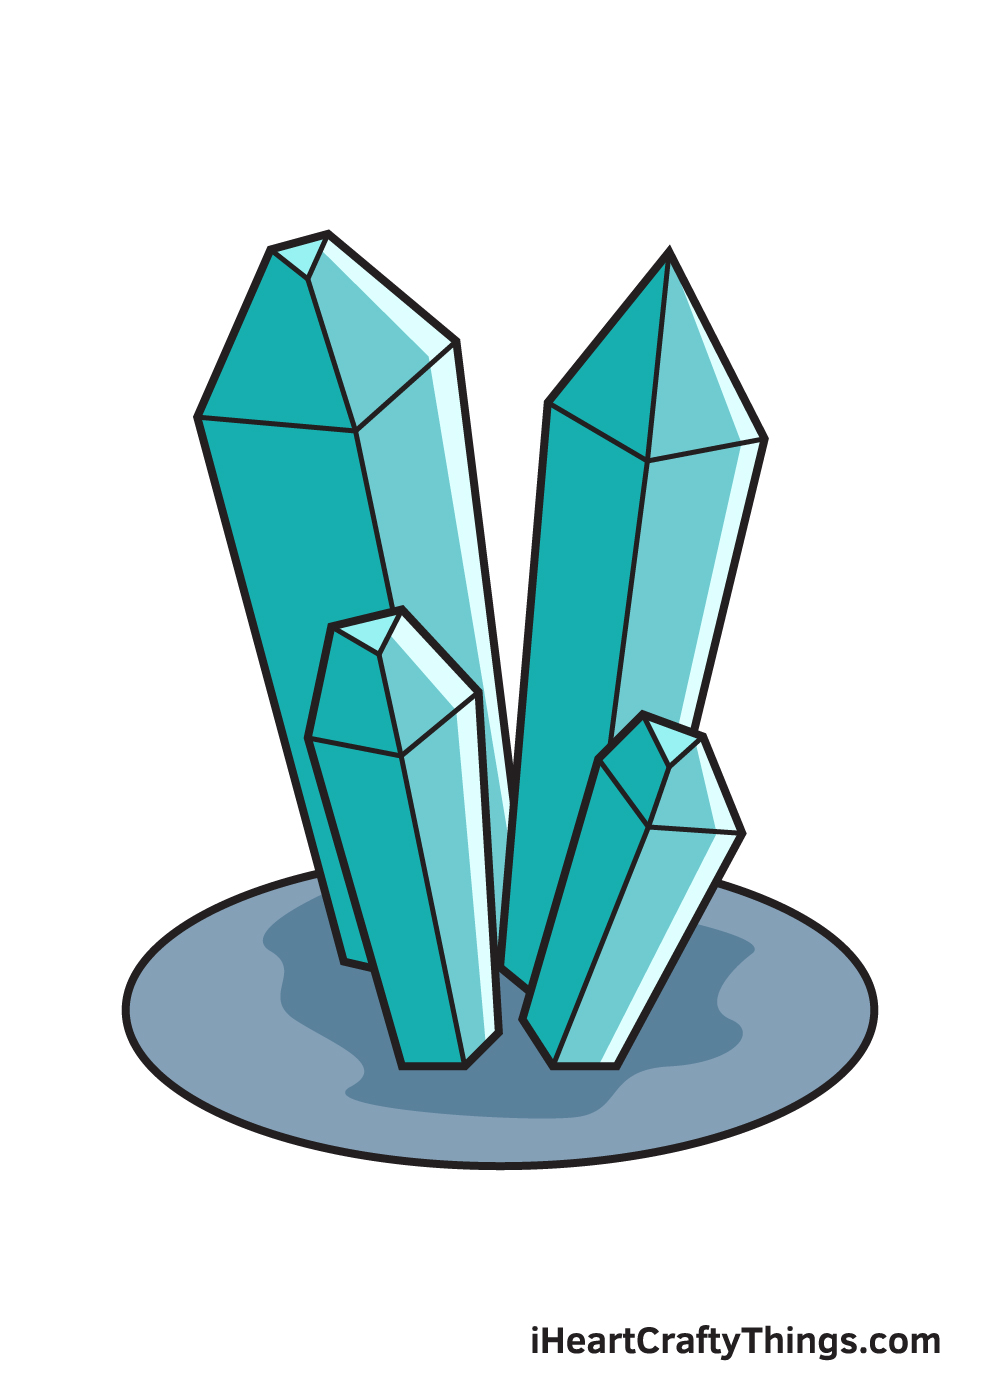
Bonus: Create A Story Around This Crystals Drawing
When you look at this crystals drawing we created in this guide, it may look simple, which is not necessarily a bad thing. Simplicity can be a great thing in art!
However, while that is true, it can also be great to have some complexity in your art. We think it would be a fun challenge to create a story around this drawing.
Crystals are such a precious resource and this means that they are featured in many stories. So, maybe the crystals could be in a vault surrounded by lasers with a thief descending to nab it.
Crystals are also often featured in fantasy stories as sources of power. Therefore, you could incorporate this drawing into some kind of fantasy setting.
Perhaps these crystals could be at the end of a wizard’s staff to represent the magical source of his powers. That would be a challenge, but you could use some simple cartoon styles to represent your vision.
Maybe it could be in a deep, dark cave that is being mined by goblins with pickaxes, for another idea. If you don’t fancy such a high concept setting, there are some simpler stories you could create.
Maybe it could be in a museum in a glass case with families walking by and admiring it. Once again, you could use some simple styles for these characters.
The style of these crystals is simple enough that you would be able to incorporate it into many different styles and formats. The colors you use will also contribute to the types of pictures you want to create.
We have given you a few ideas to work with, but now you can show us what stories you can think of for this image!
Do this to take your crystals drawing to the next level
Create a sparkly artwork with these tips we have on making your crystals drawing amazing!
Crystals come naturally in all different shapes and variations, so you could change the design of the ones in this crystals sketch.
If you were to do this, you could look at pictures of rough crystals, or you may know someone who owns one.
This would be a great way to do it, but you could also create your very own crystal shape! What kinds of shapes and variations would you go for?
Creating some rough crystals is one idea, but you could also make them look more refined and change the design. For this, you would again benefit from looking at refined crystals to help you out.
If you can somehow get a real one to use as a model, then that would be even better! You could even incorporate the crystals into rings and other jewelry.
Again, don’t be shy about creating your own unique variations! What kinds of jewelry would you use these pretty crystals for?
When you have settled on the design of your crystals, you could also create a cool background. Adding a background would be a great way to make this drawing of crystals even more interesting!
For example, you could have the crystals sitting on a fancy felt pillow in a museum. We mentioned adding the crystals to jewelry, and if you do that then you could draw a character wearing them.
What other settings can you think of that you could use for these crystals?
Lastly, you can use some interesting art tools and mediums to make this crystals drawing really shine! Some of these could be more conventional such as colored pens and markers for bright colors.
But what if we told you that you can make these crystals literally sparkle? You could do this by spreading a thin layer of glue over the crystals.
Then, carefully drop some glitter onto the glue to make it sparkle. Blow away the excess and you have a sparkly gem to admire!
Your Crystals Drawing is Complete!
We hope you enjoy this step-by-step crystals drawing tutorial.
We are regularly adding new content on our “How to Draw” catalog, so don’t forget to keep checking back to continuously enjoy brand-new drawing tutorials. What would you like to draw next?
As soon as you finish drawing and coloring the crystals, make sure to show off your masterpiece! Take a picture of your artwork and post it on our Facebook page and Pinterest.
Don’t be embarrassed, we’re sure it looks impressive because you’ve worked hard for it!
We would love to see your stunning crystals drawing!
Here Is A Fun Crystals Drawing To Inspire You!
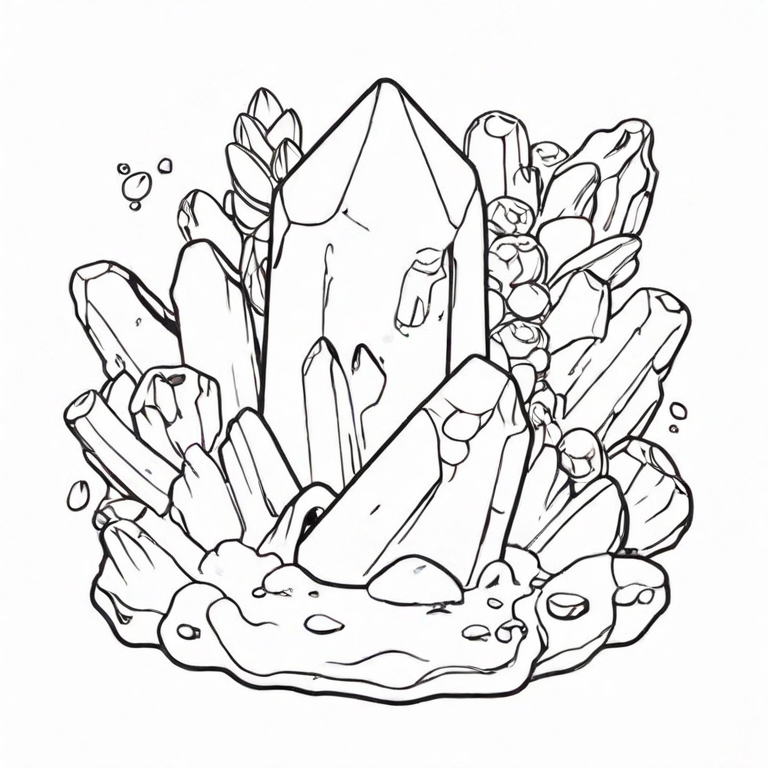
Our artist Amanda has created this fun crystals drawing for kids to help you with this challenging design. This drawing is rather complex, but it’s not as hard as you may think.
It’s important to keep a positive mindset when you work on a drawing such as this, and you should also take your time with it. Amanda added so many surfaces and details on these crystals, and they look amazing.
It can make it complicated, but try to separate it into smaller sections and take them one at a time. Then, you can put the larger image together, almost like a puzzle.
When you do it that way and refer to the reference image, you may find it to be easier than you could have expected. You will have a drawing to be proud of by the time it’s done!