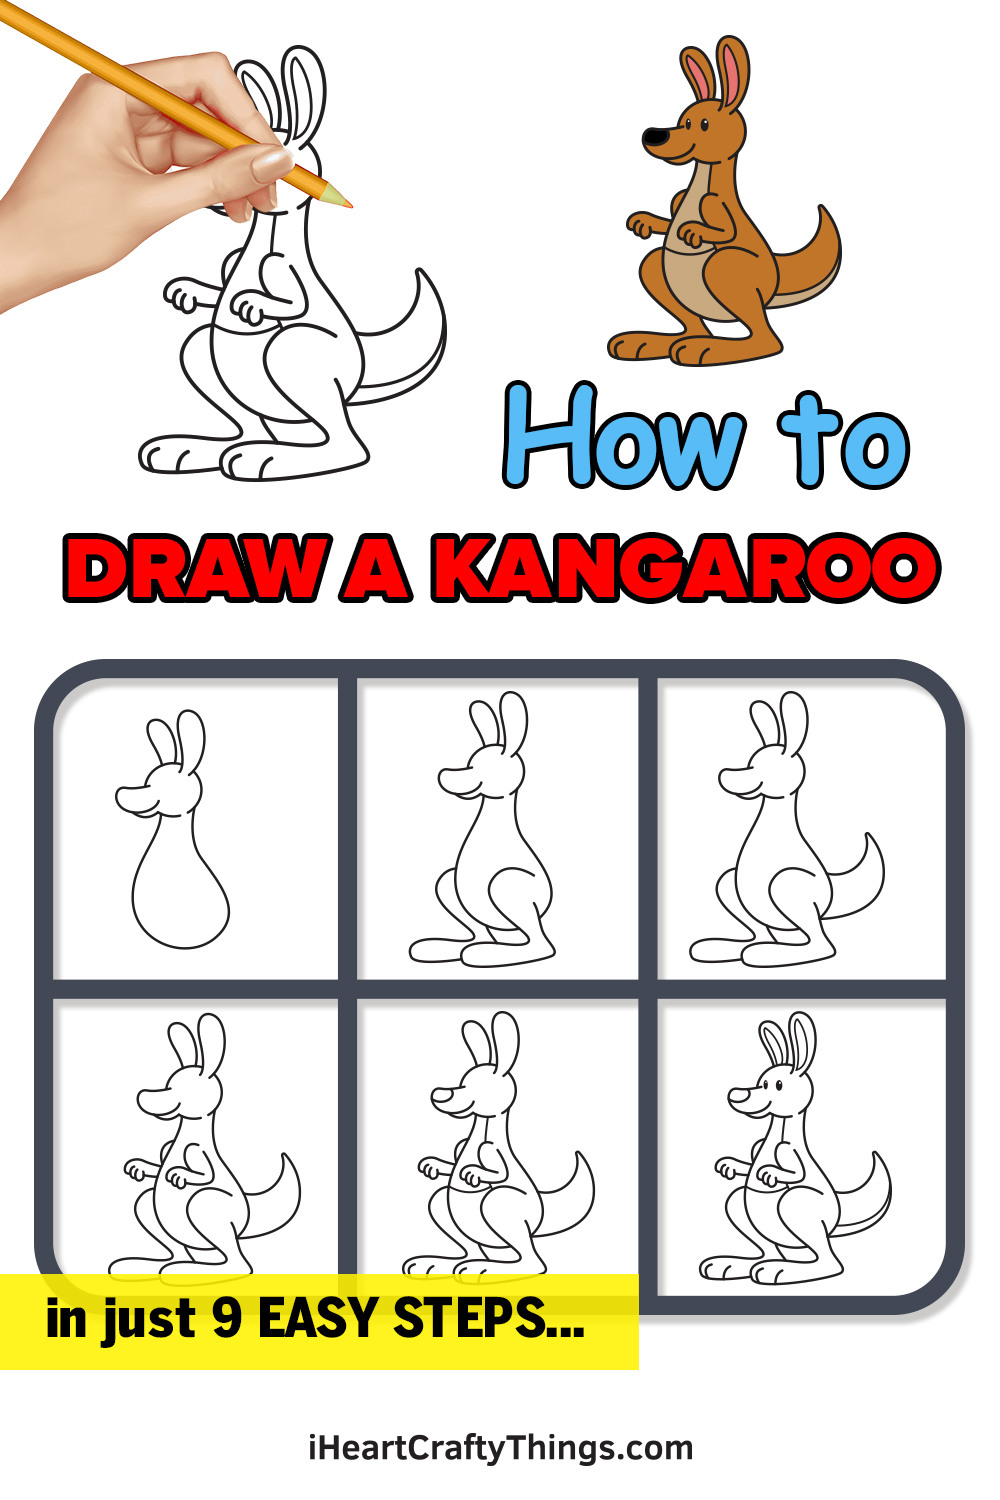
You couldn’t ‘hop’ for a better guide on how to draw a kangaroo! This tutorial for kids will make it so much easier to depict this cute cartoon ‘roo.
Kangaroos are native to Australia and are one of their most iconic animals. They have a really unique appearance, and as marsupials, they carry their young in little pouches on their bellies.
Because they are so famous around the world, many people like to try and depict them in their artwork. It isn’t always easy as all that though, and that’s partly because of just how unique they are.
This guide will show you how to build up simple shapes and use them to construct the cute cartoon fella you see below. At the end, you will be able to make your own additions and background settings as well!
Discover How To Make Your Kangaroo Drawing
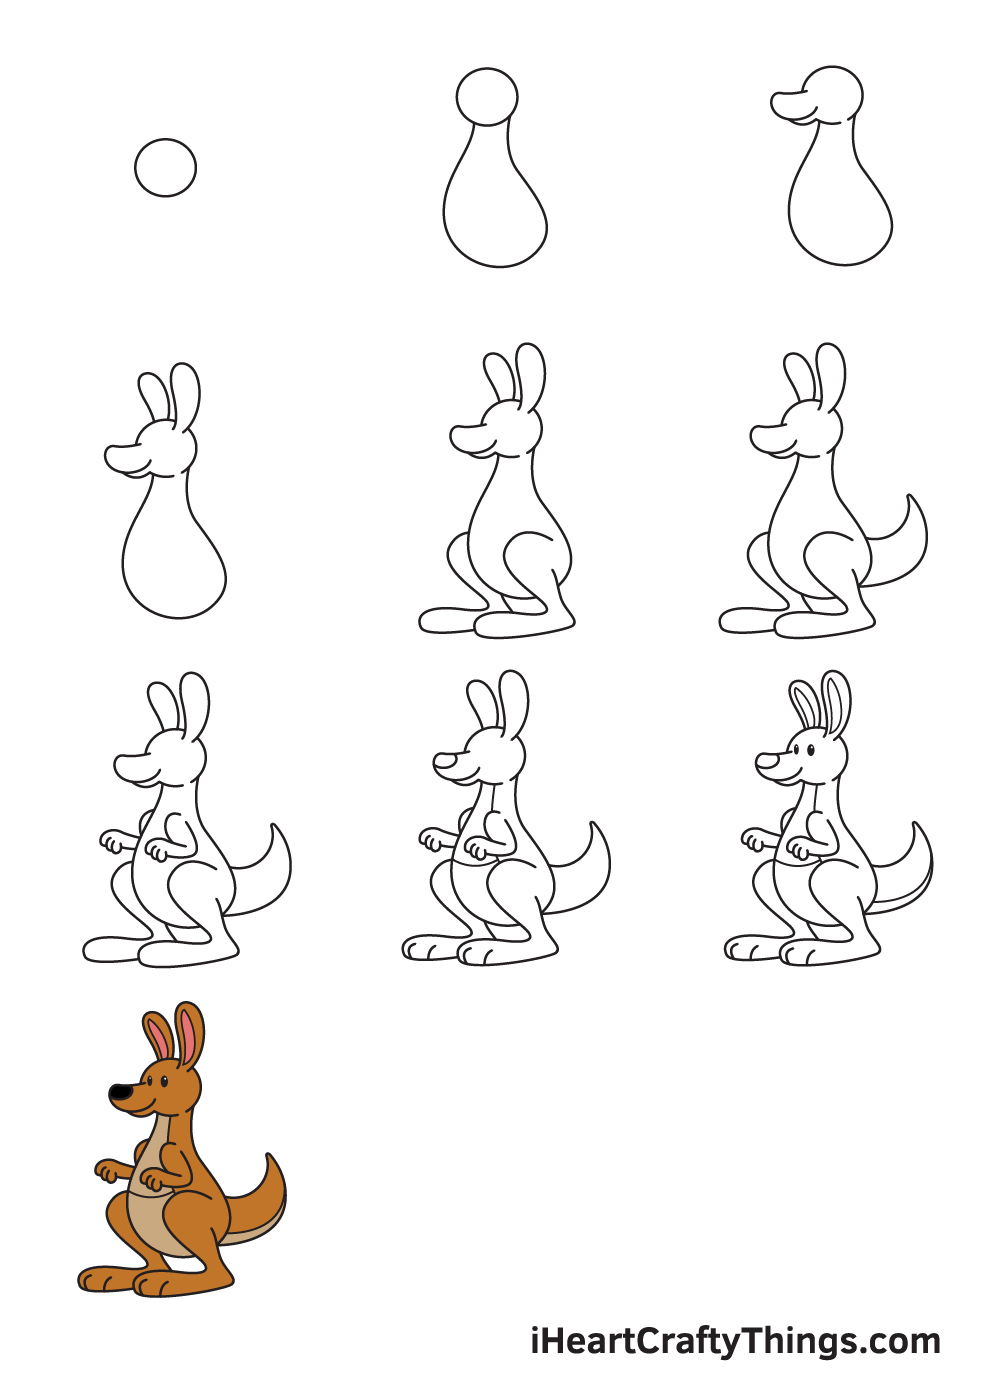
How to Draw a Kangaroo – Let’s get started!
Step 1

Start by drawing a small perfect circle shape in the upper middle of your paper. This outlines the head of the kangaroo.
Remember, use light strokes when drawing the outline. Avoid pressing down too hard with your pencil so you can easily remove any part of the outline you may no longer need later on.
To ensure that the outline will be drawn in the correct spot, you can create reference lines by drawing an intersecting horizontal and vertical line across the paper.
The outline of the kangaroo’s head should be aligned with the vertical line above the horizontal line.
Step 2 – Outline the Kangaroo’s Head and Body
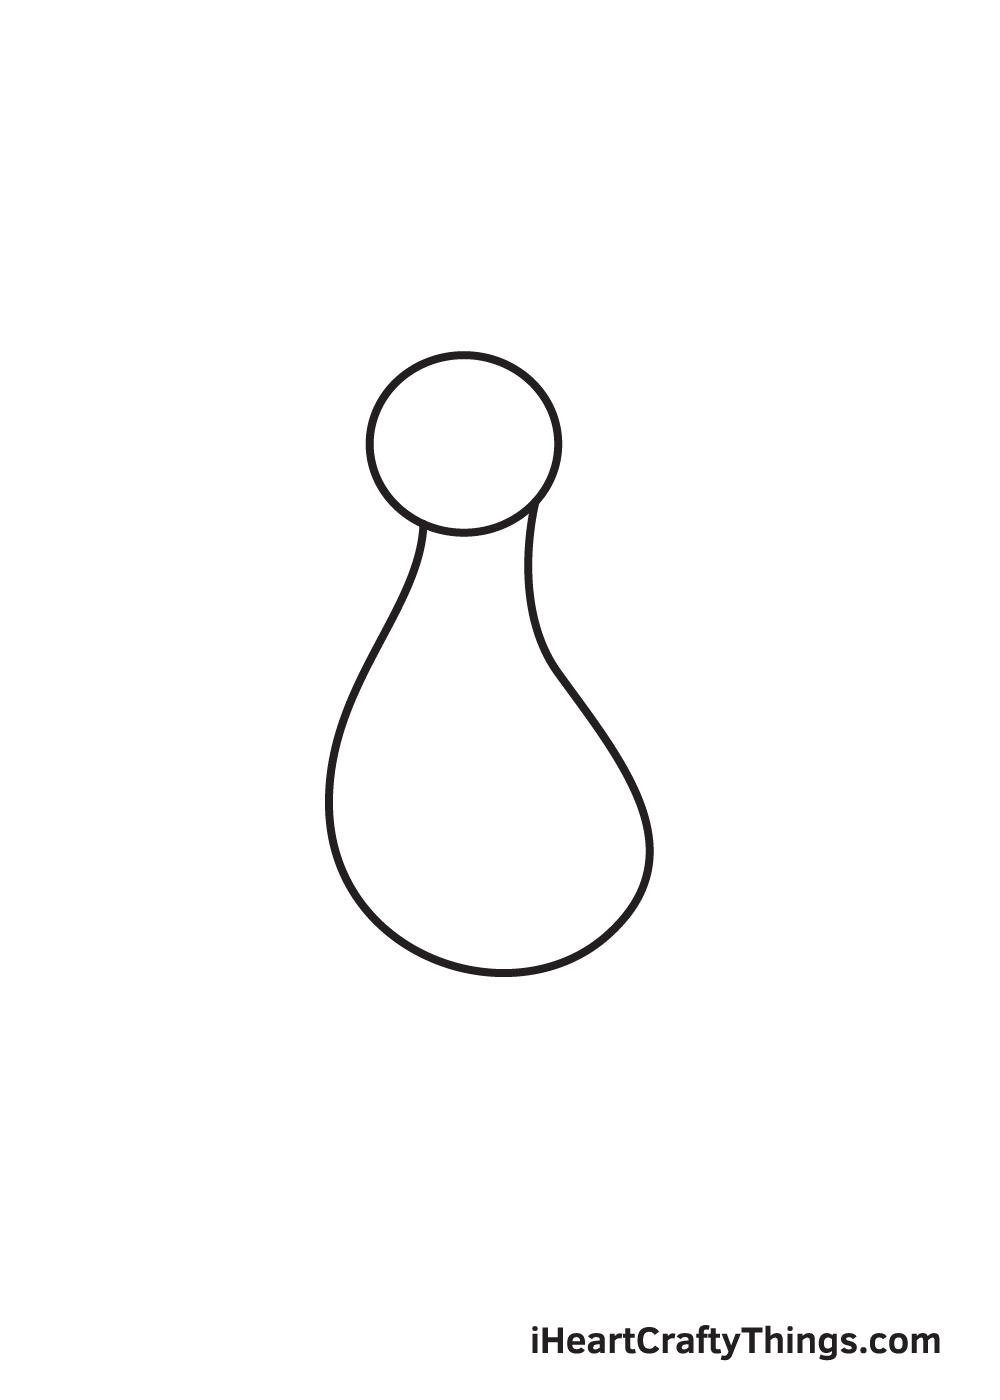
Draw an uneven oval shape right underneath the head. The figure should be narrow at the top and wider and curved at the bottom.
Similar to the head’s outline, make sure that the outline of the body can be easily erased whenever necessary.
Step 3 – Next, Draw the Snout of the Kangaroo
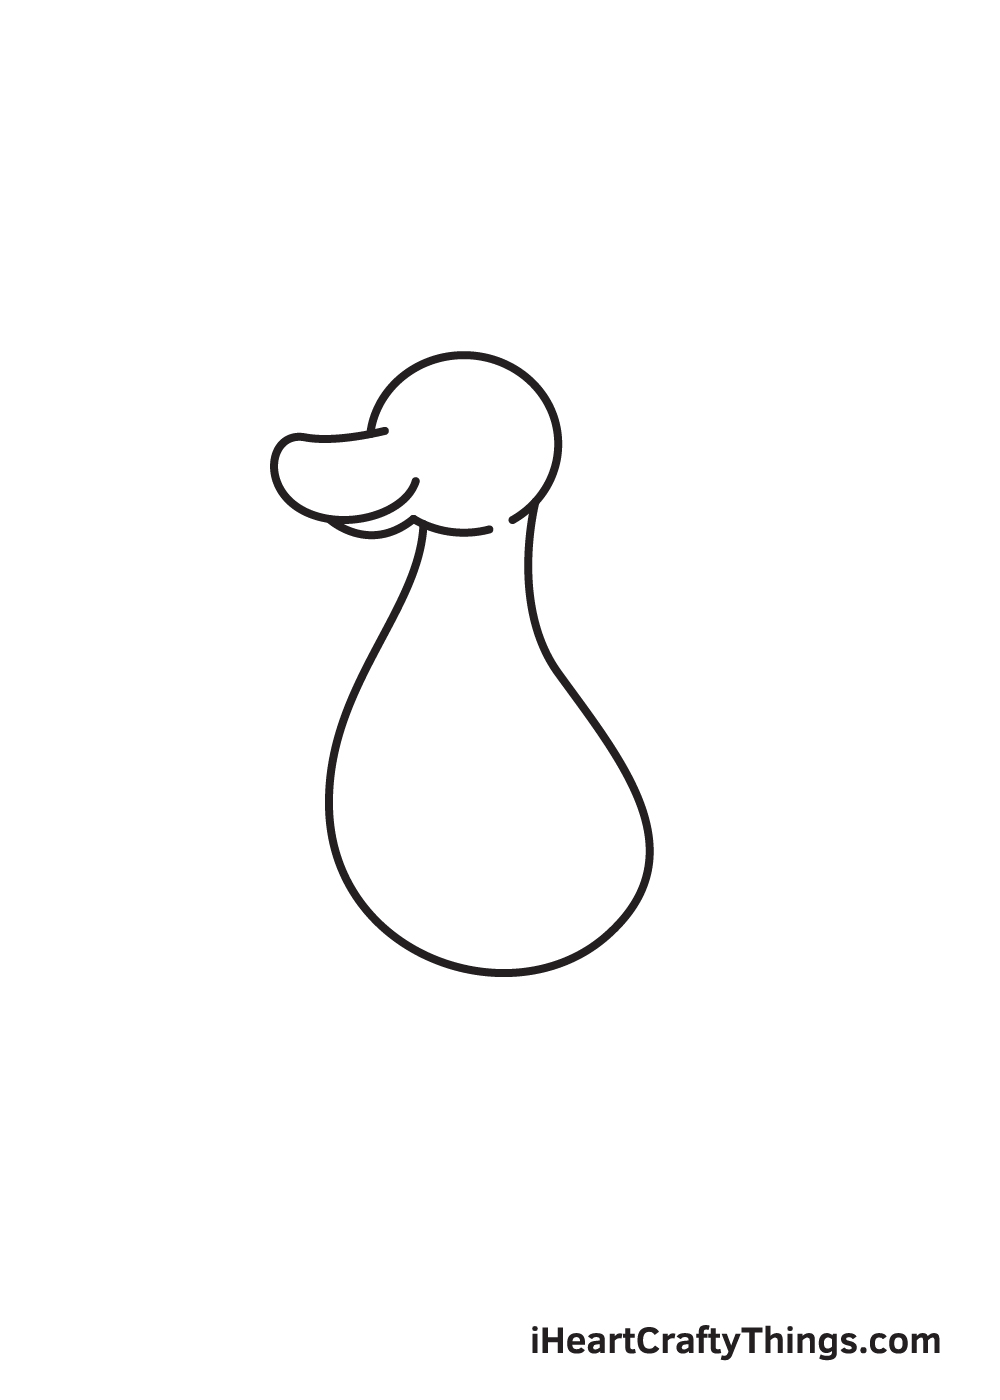
Draw a sideways U-shaped curve on the left side of the kangaroo’s head. Then, draw a curve at the bottom. This forms the snout of the kangaroo.
Don’t forget to erase any parts of the outline that overlaps within the snout. This helps keep your drawing more refined and most importantly, neat and tidy.
Step 4 – Afterwards, Draw the Kangaroo’s Ears
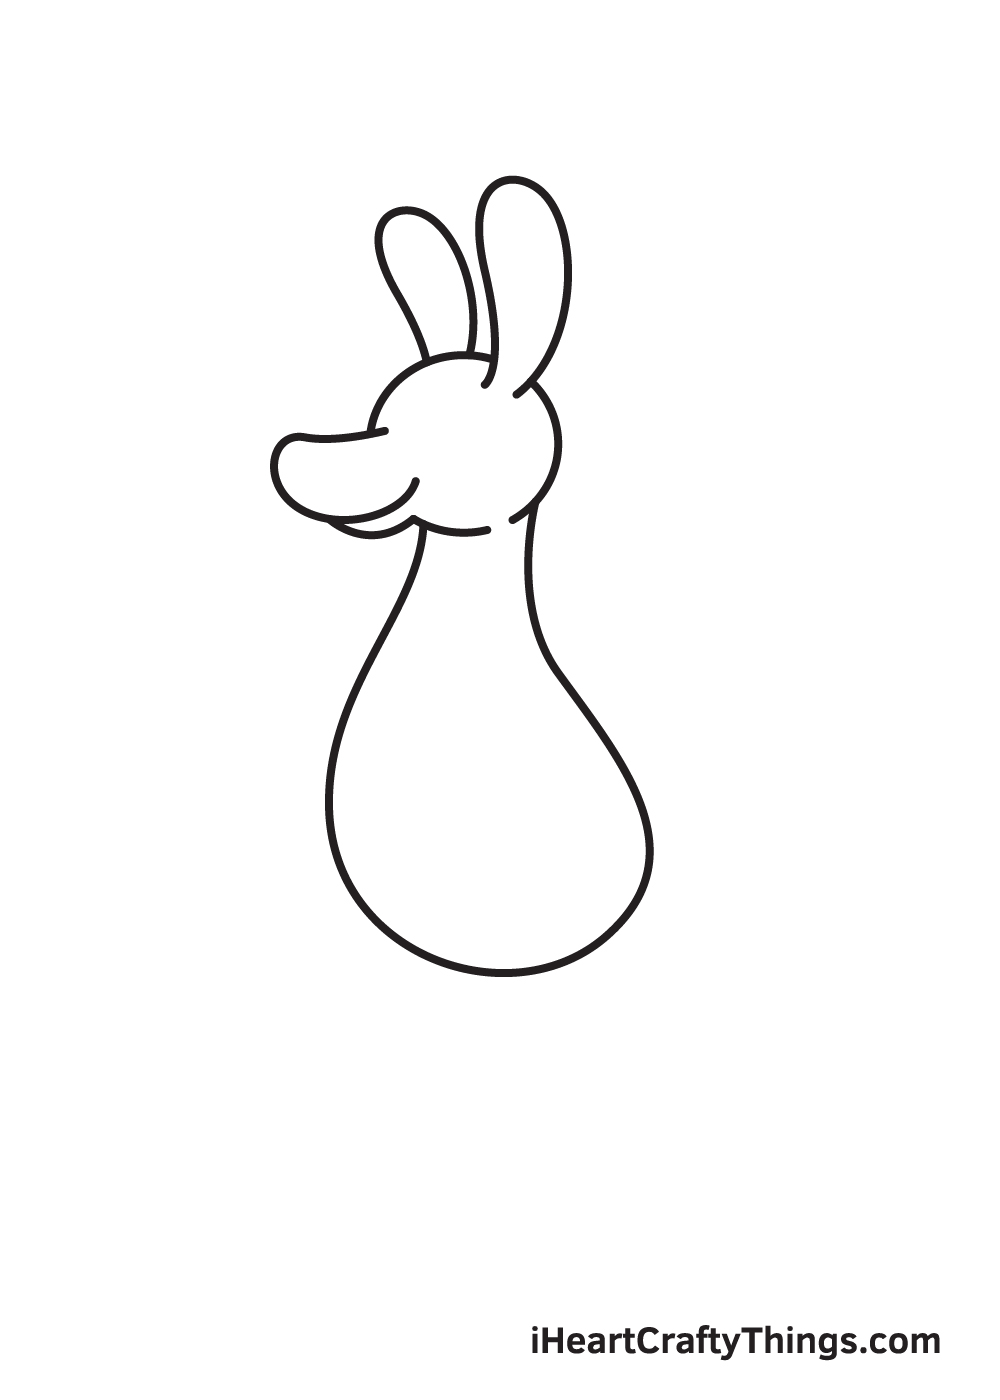
Draw two upside down U-shaped curves on each side at the top of the kangaroo’s head. Try to make the ears uniform in shape and size.
Afterwards, erase the line from the outline that overlaps inside the right ear.
Make sure that the ears are tall and standing upright—it’s one of the distinct features of a kangaroo!
Step 5 – Then, Draw Both Legs of the Kangaroo
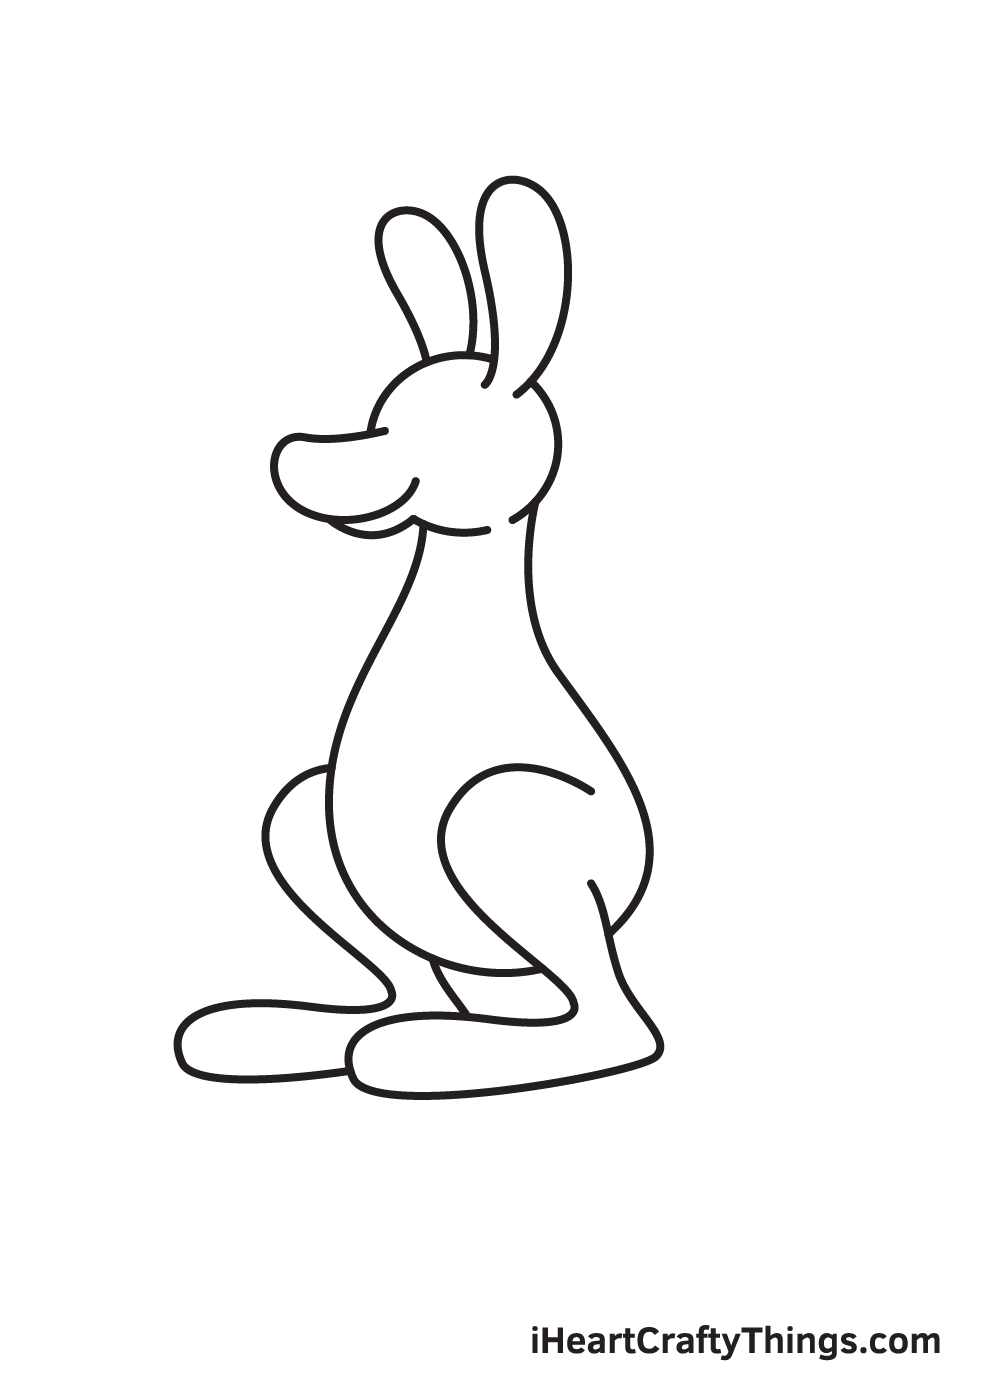
Did you know that kangaroos can jump up to 10 feet? It’s all thanks to their muscular legs and wide feet, which are also among the unique features of the kangaroo. In this step, that’s exactly what we’ll be drawing.
Continue by drawing a curved line on the right side of the kangaroo’s lower body to form the legs.
Then, extend the line to the left until you form a sideways U-shaped curve to form the foot. Afterwards, bring the line upwards, finalizing the form of the right leg and the foot.
Repeat the same steps on the opposite side of the kangaroo’s lower body. This forms the left leg, thus completing both legs of the kangaroo.
Step 6 – Now, Add the Kangaroo’s Pointed Tail
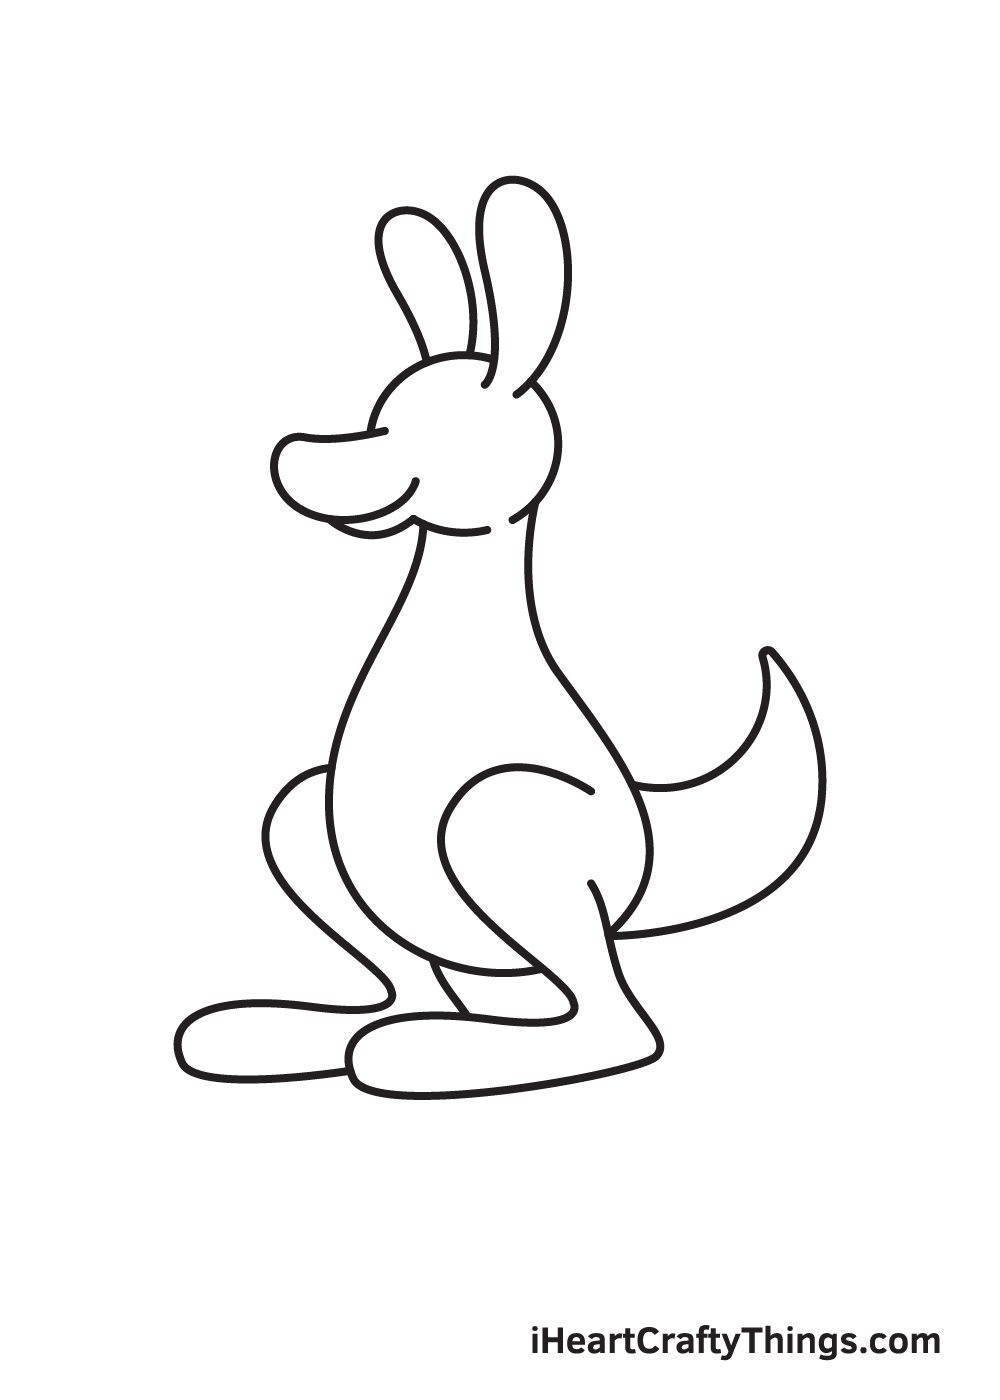
Draw a curved narrow shape with a pointed end on the bottom back of the kangaroo. This creates the kangaroo’s distinct pointed tail.
Make sure to draw the tail in an angle to make it appear like it is slightly raised upwards, as shown in the illustration.
Step 7 – Draw the Kangaroo’s Left and Right Arm
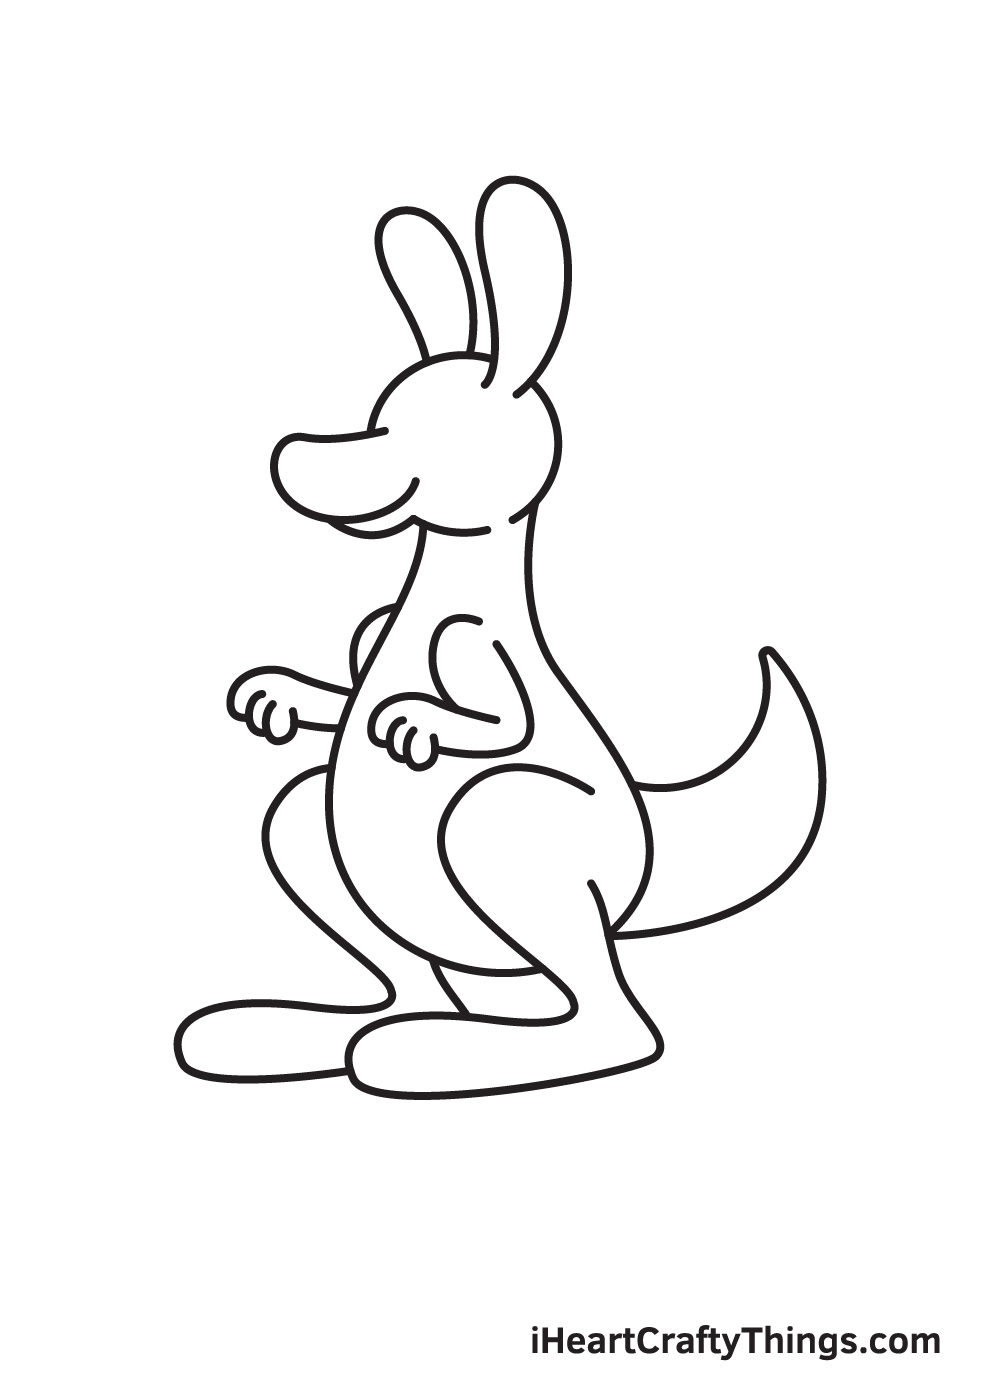
Draw a folded arm with three paws on each side of the kangaroo’s chest. The arm can be created by drawing two parallel angled lines while the paws are simply three connected U-shaped curves.
Because of the kangaroo’s tilted position, its left arm isn’t fully visible, unlike its right arm.
Step 8 – Add Details and Patterns on the Kangaroo

In this step, we’ll be adding details and patterns all over the body of the kangaroo. This helps make your drawing look more elaborate.
Starting from the top to the bottom, draw a curved line enclosing the edge of the kangaroo’s snout.
Then, draw a vertical line down the length of its body and a horizontal line to outline its pouch. Don’t forget to add multiple lines on each foot to create a division between each paw!
Step 9 – Draw the Features on the Kangaroo’s Face
Draw two standing oval shapes on the face of the kangaroo. This outlines the kangaroo’s pair of eyes.
Since the kangaroo is facing sideways, the left eye should be relatively smaller than the right eye. Then, add a tiny circle on each eye. Afterwards, shade the entire eyes while leaving out the small circle within unshaded.
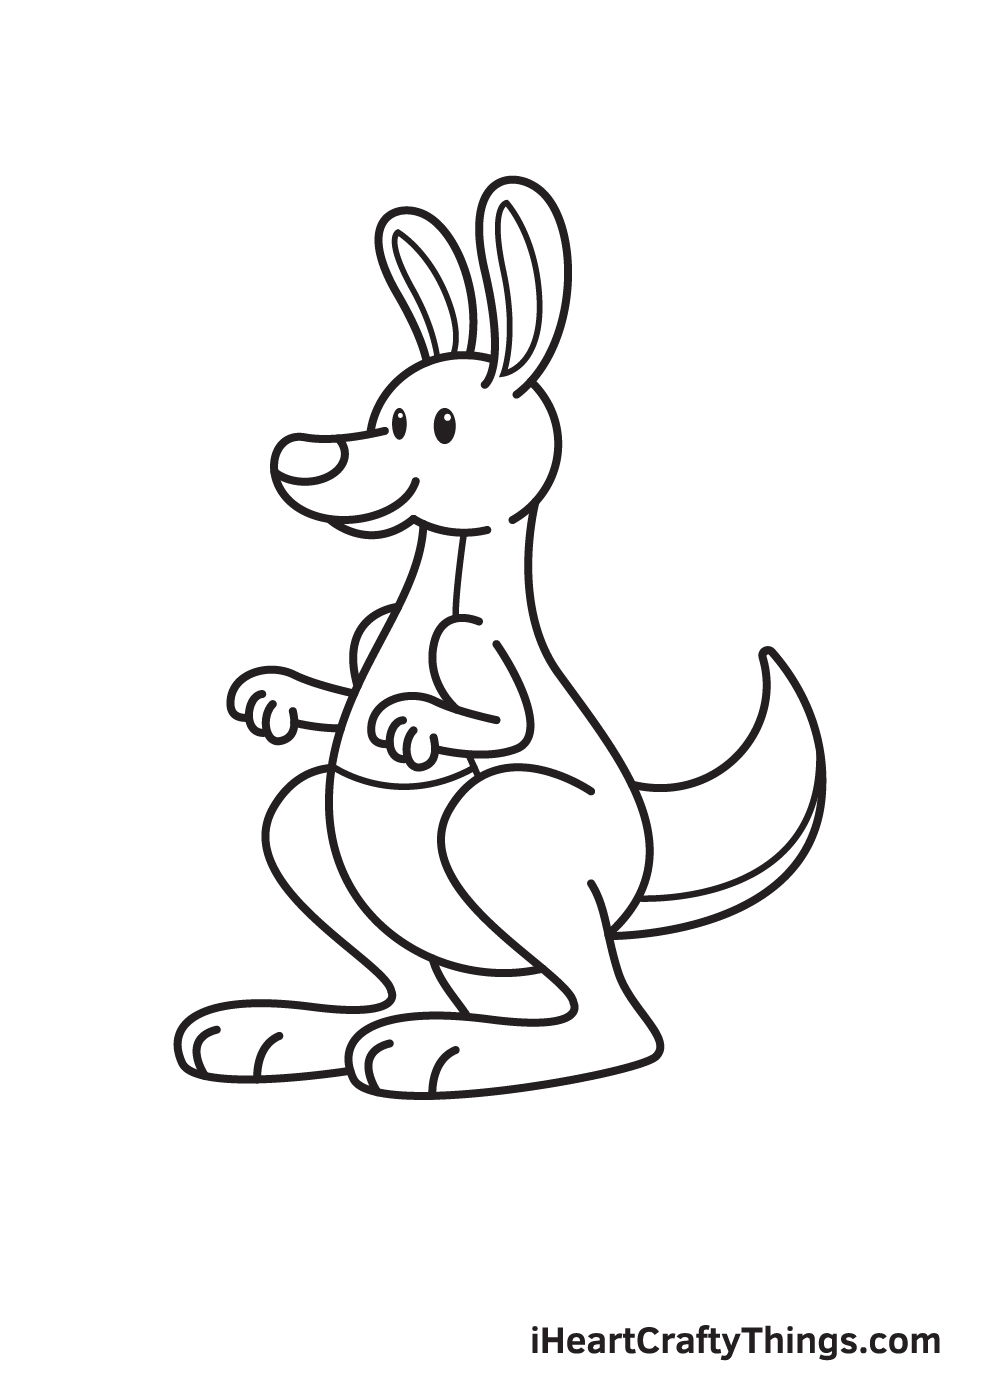
Don’t forget to add an outline within the ears of the kangaroo as well as a line at the bottom of the tail to outline the underside. This adds an extra detail on the kangaroo, making it look more realistic.
Now that we’ve successfully drawn a kangaroo, it’s time for the most exciting part. In this step, we’ll be choosing the colors and coloring the kangaroo.
The color of a kangaroo’s fur ranges from red to brown and it typically fades to a more subtle hue on their underside and on the legs.
You can opt to color the kangaroo using its original colors or use a unique set of colors. Either way, we’re sure the colors will turn out beautifully!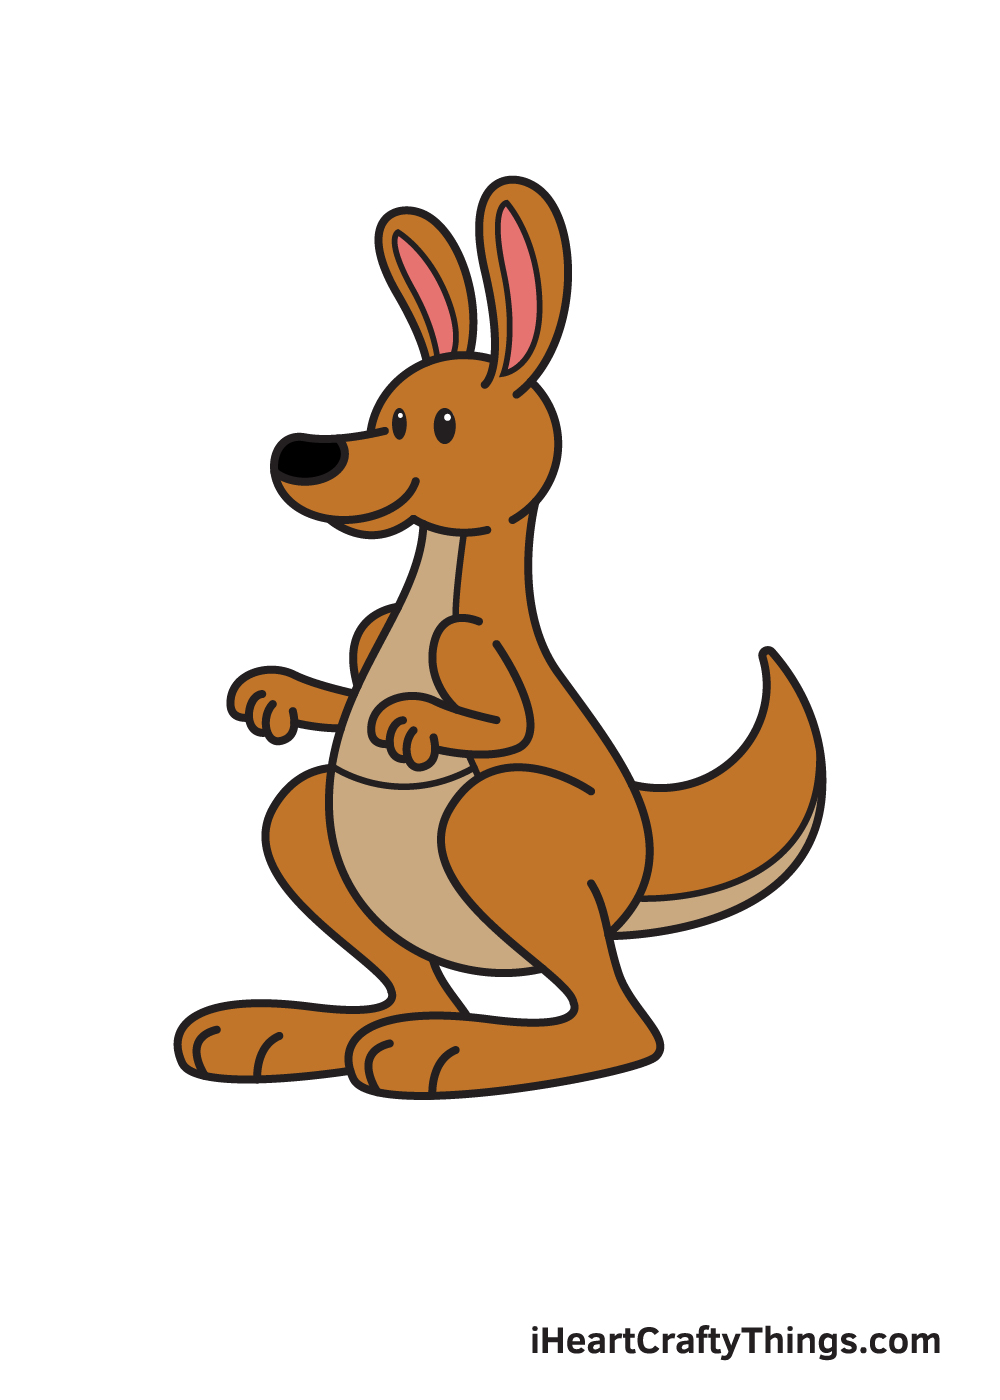
Here’s how you can make your kangaroo drawing even better…
Hop on over for some amazing tips for your kangaroo sketch!
One of the most recognizable features of a kangaroo is how they will carry their babies in their pouches. That would be an adorable detail to add to your kangaroo drawing!
The best part about adding a baby to this image is that you would easily be able to do it after finishing this guide. Simply follow the steps to draw a kangaroo head in the pouch and shrink it down a bit.
You could also draw the baby kangaroo next to its mom for another idea!
For another fun suggestion, you could also add some more animals to your drawing of a kangaroo. Even if you just stick to Australian animals you would have so many to choose from!
For some cute options, there are animals such as a koala or a wombat that you could add. Of course, you would be able to add any animals you like!
If you need some help or inspiration, then you can look up pictures online to help you. What are some cute animals you could add to this image?
Next, you may want to add a background to your kangaroo sketch. If you were to do this, one of the more obvious settings would be the arid Australian outback.
That’s one option, but certainly not the only one! You might want to create a zoo setting, for instance. There are so many options to choose from, so what else could you create for a background?
Finally, you should get ready to have some fun with colors and art mediums to really finish off this kangaroo drawing in style. In our guide, we used flatter colors to give the image a cartoony look.
That is an approach that suits the style of the picture, but you may want something more muted and realistic. In that case, maybe watercolor paint or colored pencils would be more suitable.
It’s all up to you, so what will you choose for your picture?
Your Kangaroo Drawing is Complete!
Hopefully, you enjoy this step-by-step kangaroo drawing tutorial. What’s fun about this guide is that it allows you to add customizations as much as you like, further improving your artistic skills.
You can personalize the colors you will be using too!
Once you’ve finished drawing and coloring a kangaroo, don’t forget to show off your masterpiece!
Take a photo of your colored drawing and post it on our Facebook page and Pinterest. You’ve worked hard for your artwork, so it’s definitely worth sharing.
We can’t wait to see your impressive kangaroo drawing!