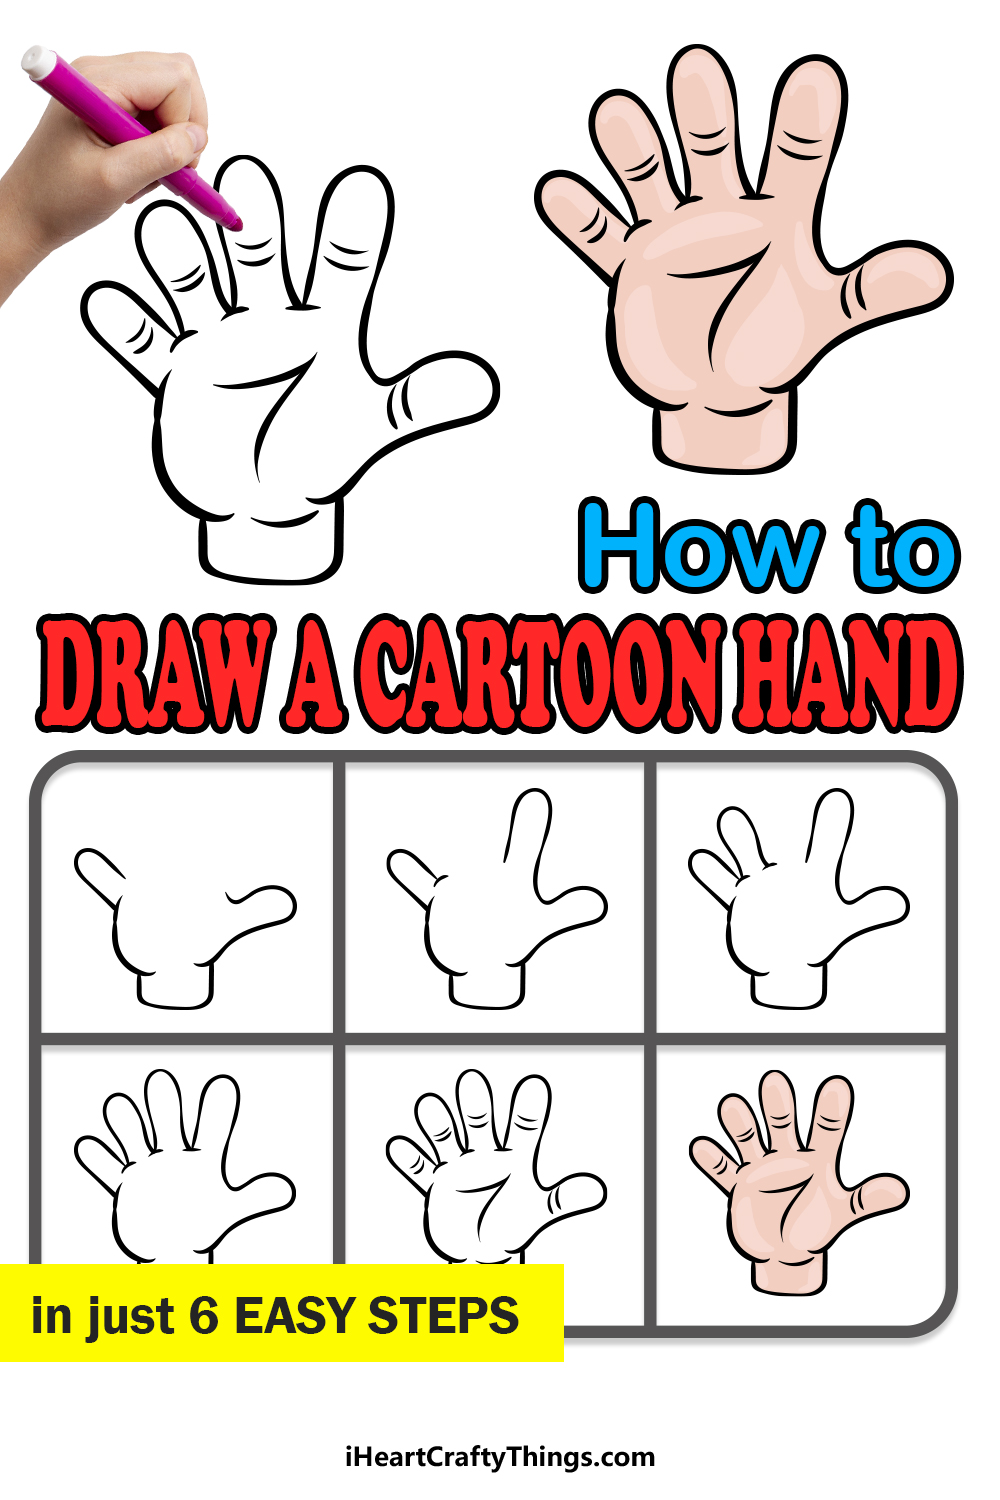
If you ask anyone who draws a lot what their most dreaded thing to draw is, you will find that a few things come up a lot.
Human hands are something that will be mentioned a lot when this question is asked, and even seasoned artists will fear having to draw them!
This is a drawing challenge we will be simplifying in this guide on how to draw a cartoon hand, though.
With the help of the steps we have for you here, you will soon find that it can be easier than you may have ever thought! You will also see just how fun it can be when you know what to do.
So get ready to conquer this drawing challenge as we start this step-by-step guide on how to draw a cartoon hand!
How to Draw A Cartoon Hand – Let’s Get Started!
Step 1

The secret to making a tough drawing like this easier is by breaking it down into smaller sections, and that is what we will do now.
We will actually be starting with quite a lot of this cartoon hand drawing as we begin, but we will break it down.
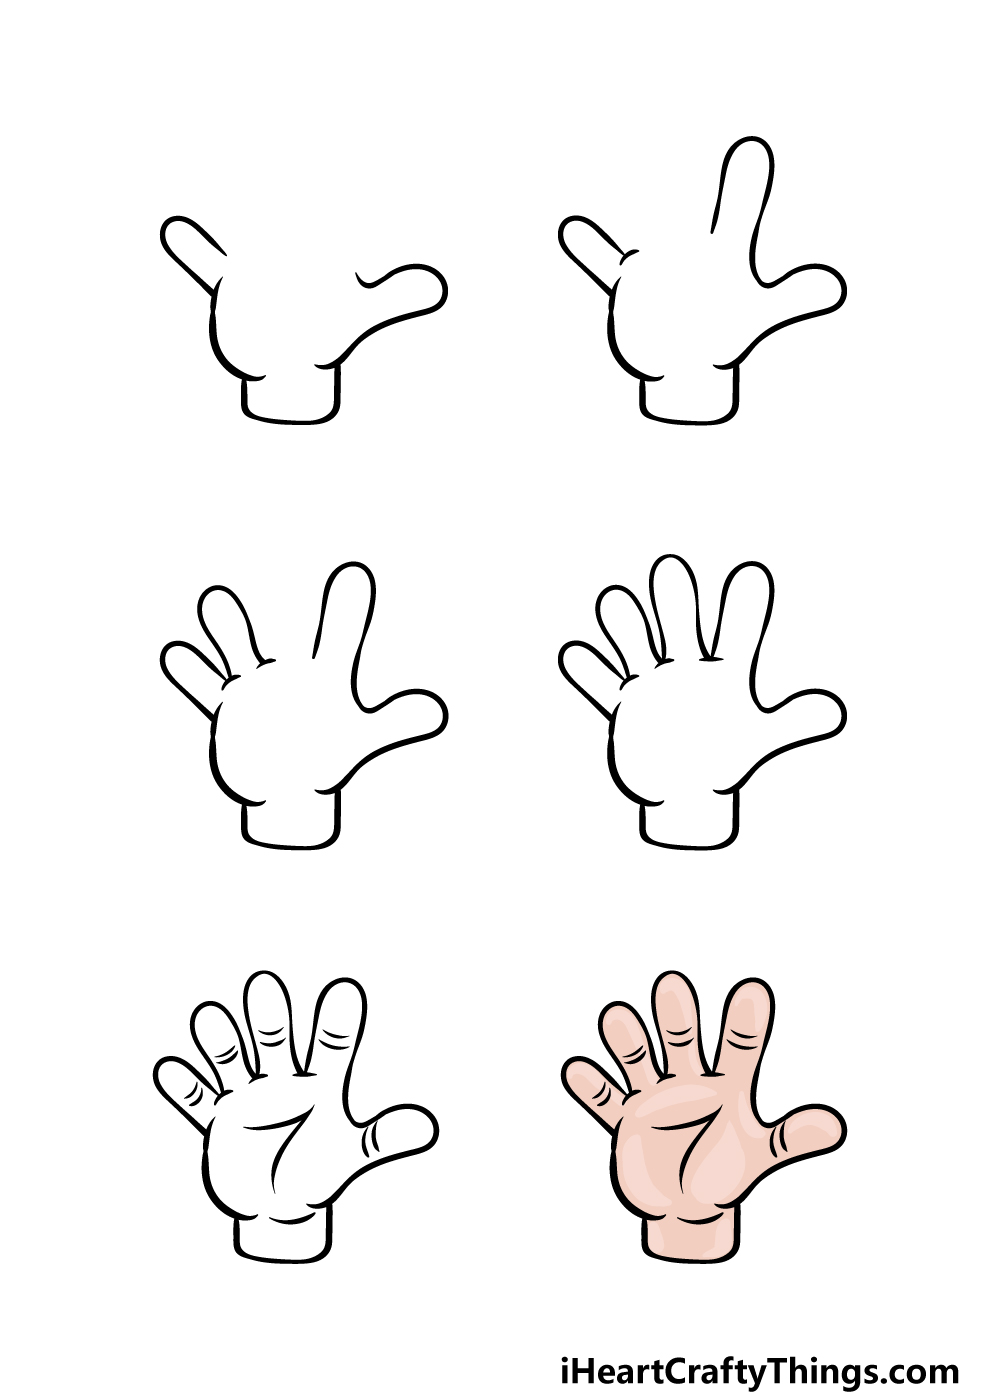
First, use a curved line that forms a roughly squared shape for the wrist. Instead of closing it off as we did in our reference, you could also extend it to the rest of the arm or even draw a shirt sleeve.
Once it’s drawn, use a large, rounded line on the left for the palm. We will then add a finger, and this will be formed using a nicely rounded shape.
Finally, you can add the thumb. This will extend from a curving line that forms the right side of the palm.
This can be tricky, so take your time with this step and you can continue when it looks like our reference image.
Step 2 – Now, draw the index finger

You have a good basis to work from with everything we drew in the previous step of our guide on how to draw a cartoon hand, and now we will keep adding fingers and other details as we proceed.
For now, we will simply be adding the index finger.
This will have a gap between it and the thumb, and it will be much longer than the thumb and the pinky.
Speaking of the pinky, we will also add a small horizontal curved line ar the right-hand base of that finger. That’s all for now, and then we can proceed!
Step 3 – Next, draw the ring finger

You’re doing a great job on this drawing so far! We will keep things simple for now as we add one more finger to the hand.
This time, it will be the ring finger, and this one goes to the right of the pinky. It will take on a very similar shape to the other fingers, but it will be slightly longer than the pinky.
It should be roughly the same length as the index finger, too.
To finish off this step, draw another of those small curved lines at the right-hand base of the ring finger. There will just be one more finger to add before we add some finer details!
Step 4 – Now, draw the final finger

Now you’re ready to add the final finger to your cartoon hand drawing! This time, it will be the middle finger that we’re adding.
This finger, much like on your own hand, will be the longest one of all. It won’t be that much longer, but it should still be noticeable.
As with all the other fingers, we will also add another of those small curved lines at the right-hand side of this finger’s base. Then, we will be ready for some final details in the next step of the guide!
Step 5 – Add the final details to your drawing

You’ve overcome the hardest parts of this guide on how to draw a cartoon hand, and now we can add some details to finish it off for the final step!
These details are quite simple, but they are important for making the hand look more realistic. First, we will add two small curved lines onto the center point of each finger to show where the joints are.
Also, you can add a curved horizontal line above the wrist. We will then finish off this step by adding two larger wavy lines connecting to one another on the wrist of the hand.
Once these have been added, you could also add some extra details of your own!
Some ideas would be to draw a background, add a clothing sleeve or even draw some rings onto the fingers. How will you finish it off?
Step 6 – Finish off your drawing with color

It’s time to close off this guide with some color! In this step, you will bring this drawing to life with color, and there are loads of options to go for here.
There are lots of different color schemes and skin tones you could go for when coloring this hand.
As you can see in our reference image, we used different tones and color variations on different areas of the hand to make it look more textured and realistic, and you could do the same no matter which colors you go for.
So which colors and art tools do you think you will use for this incredible cartoon hand drawing?
5 Tips To Make Your Cartoon Hand Drawing Even Better!
Explore some handy tips for making your cartoon hand sketch look even better!
This drawing of a cartoon hand is done in a very simple, standard pose. If you wanted to make it look different, you could start by drawing it in different poses.
To start this, try to make gestures with your hand such as a thumbs up. Then, use that reference along with the steps of this guide to draw this new pose.
Another way to customize this drawing would be to add clothing or pieces of jewelry. These could include rings or sweater sleeves that will give the arm a bit more personality.
It’s another case where you could use your own arm or those of people around you to help as you draw. What are some clothing items you can think of to add to this image?
We love the cartoon style of this cartoon hand drawing, but if you feel like experimenting then you could also try out various different styles.
For instance, you could make the hand look more realistic. Or, you may want to try a different style such as comic book characters.
There are many different approaches you could take, so what favorite styles could you use?
To really complete this drawing, you could go the extra mile and add the rest of the body it is attached to. This would be a great way to have some fun designing a cool cartoon character!
The only question is who you would use as inspiration for your character. For a fun touch, why not use yourself as a model and turn yourself into a cartoon?
Then, you can bring it all together by adding a background for your cartoon hand sketch. This would be especially recommended if you added more to the character, but it would work regardless.
The background you choose would depend on the character design you ended up going with, and there are so many possibilities to choose from!
What are some ideas for backgrounds you have to finish off your artwork?
Your Cartoon Hand Drawing is Complete!
Now that you’re at the end of this guide on how to draw a cartoon hand, you can hold your head up high as you have conquered a notorious drawing challenge!
Even though this hand was done in a simpler cartoon style, it can still be hard to draw, so we hope that these steps helped to make it easy and fun for you.
Now it’s up to you to decide how you will finish off this drawing as you add your own color choices and extra details!
Then, you’ll want to head on over to our website for more awesome drawing guides to enjoy. We have more coming soon, so keep checking in to never miss out!
We would absolutely love to see your finished cartoon hand drawing, so please share it on our Facebook and Pinterest pages for us to see.


