All around the world, microphones are used in a variety of different situations and scenarios, from singing contests to important speeches by world leaders.
Whatever the purpose may be, it’s definitely true to say that microphones are important tools to help amplify voices!
They are an often under-appreciated tool despite how useful they can be, so this guide on how to draw a cartoon microphone is here to put them in the spotlight.
We have a really fun and creative interpretation of this valuable tool for you to work on in this guide, so you’ll definitely want to see it all the way through to the end!
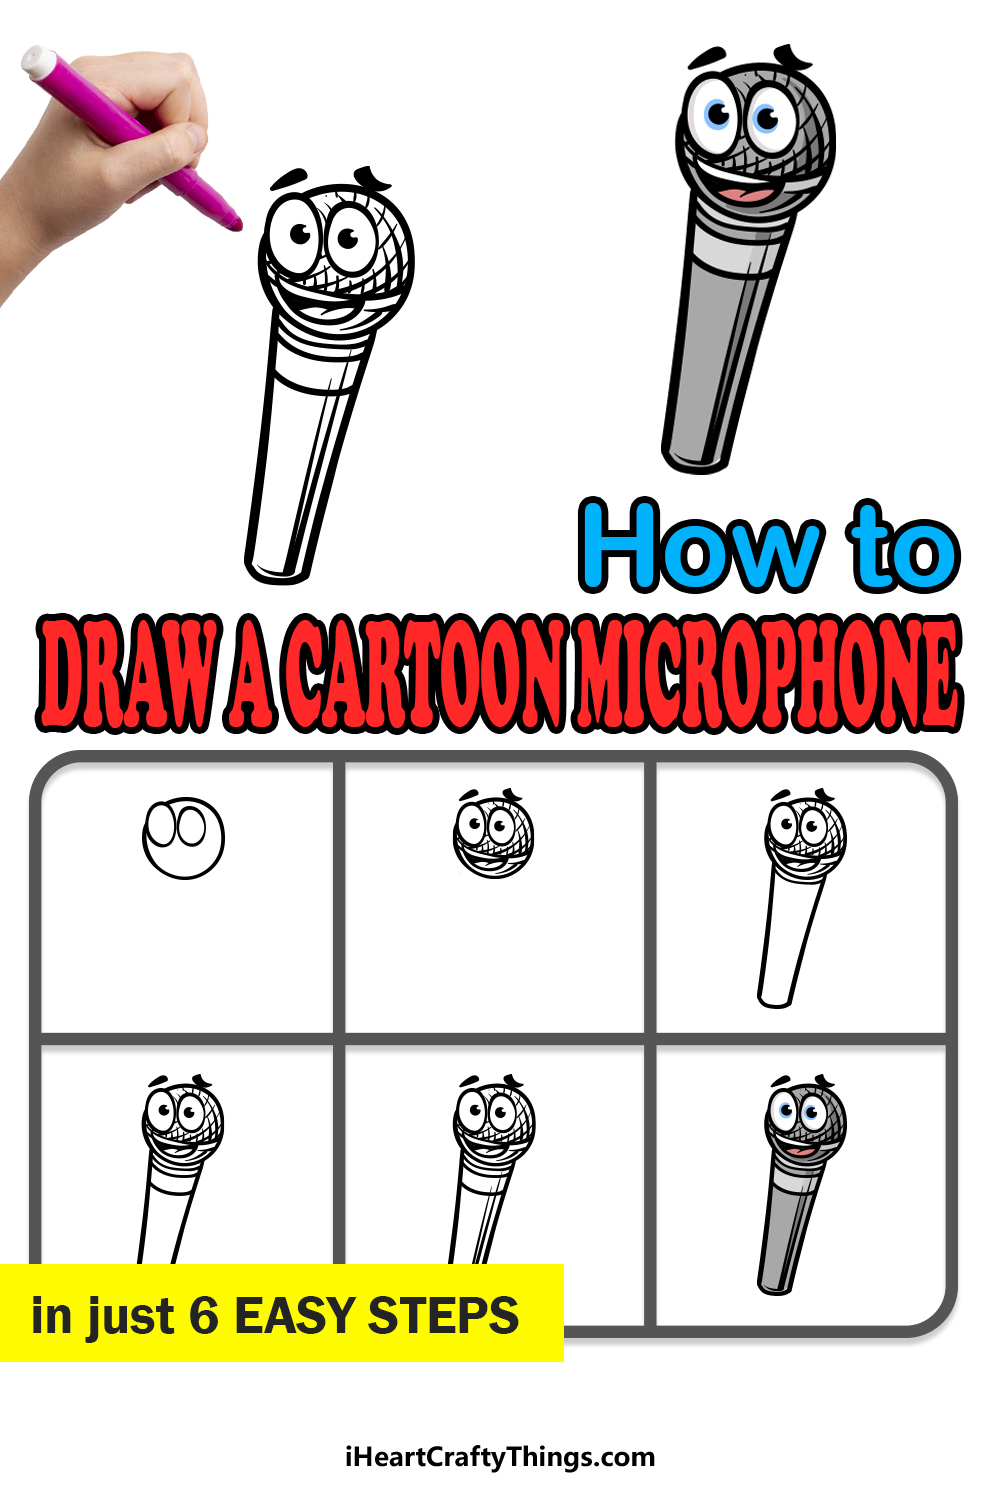
So get ready to begin this step-by-step guide on how to draw a cartoon microphone in just 6 fun and easy steps!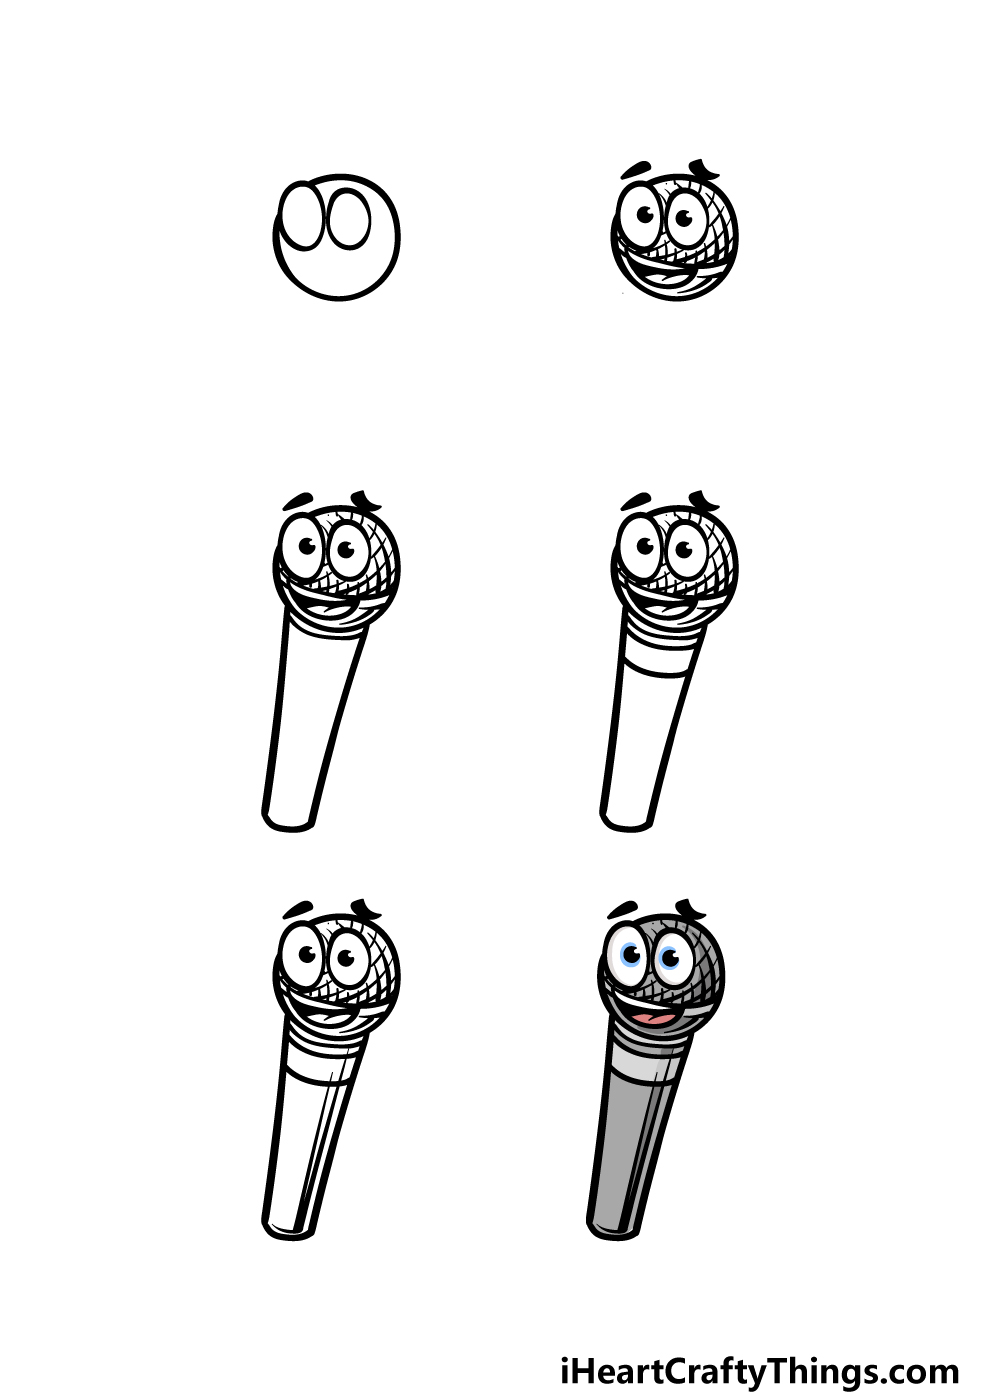
How to Draw A Cartoon Microphone – Let’s get Started!
Step 1
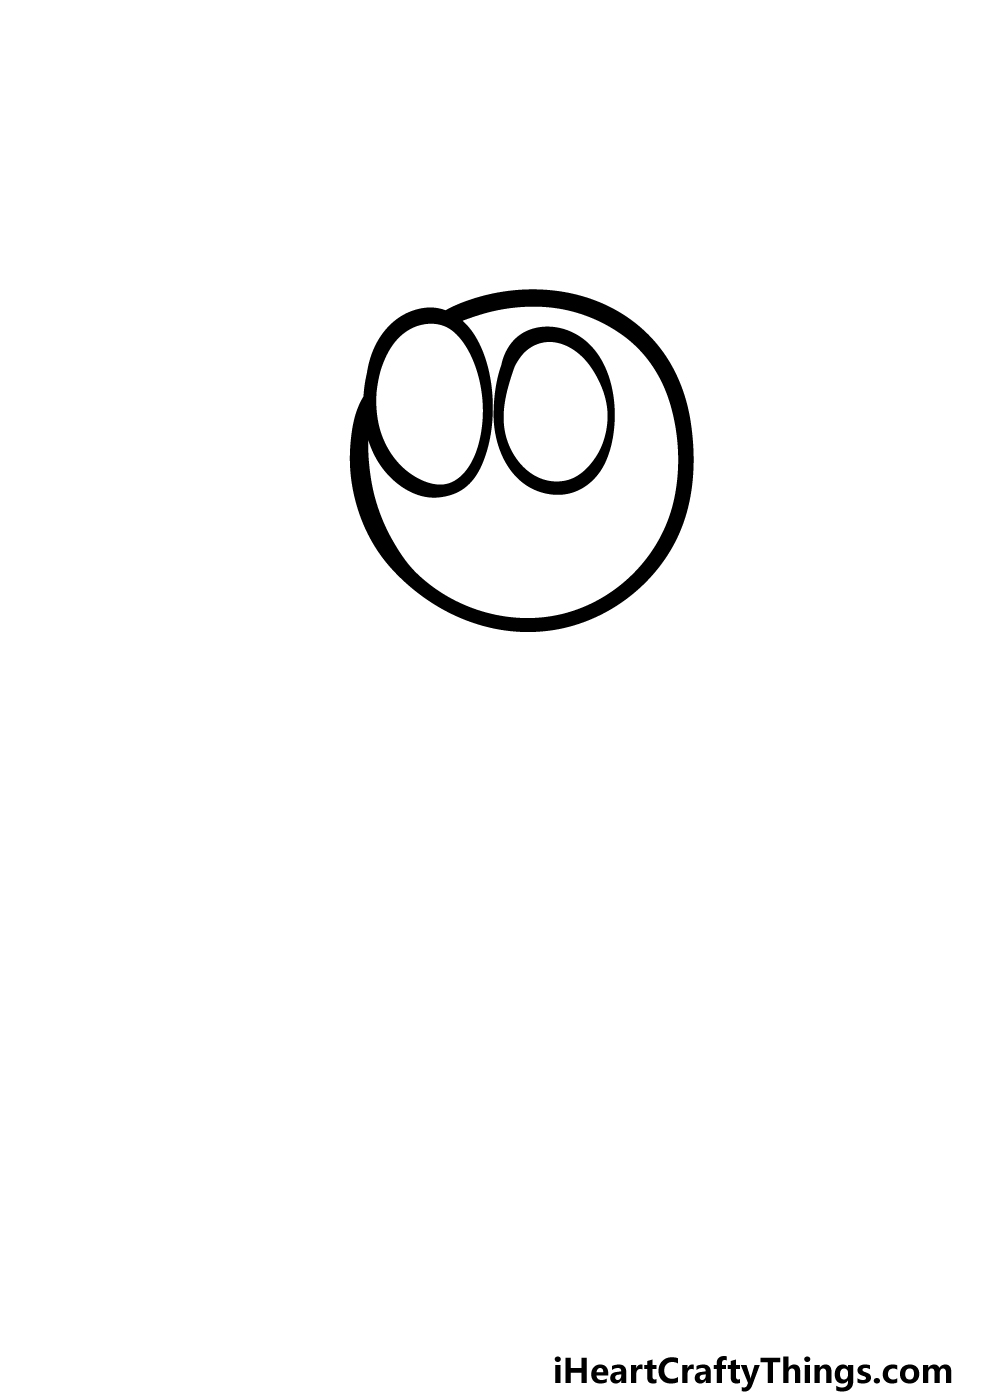
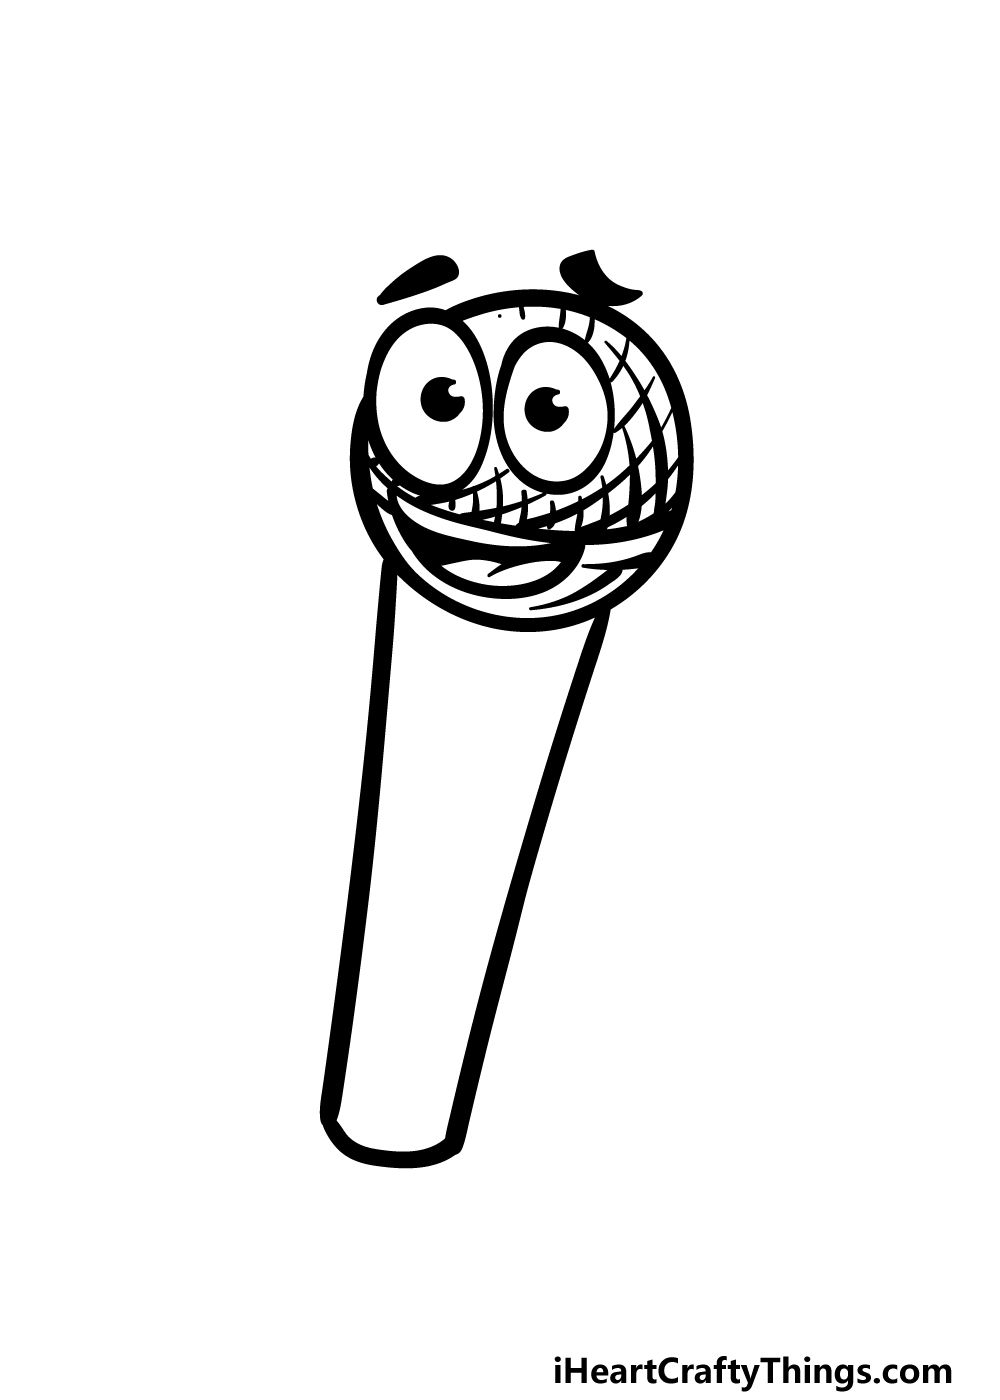
We will begin this guide on how to draw a cartoon microphone with the head of the microphone.
This will include the start of the cartoony face design we will incorporate into this drawing. To begin this, we will draw the large eyes for this cartoon face!
You can do this by drawing two oval shapes, and one will be larger than the other to give this face a quirky look.
Then, simply draw a circular shape around the eyes for the head of the cartoon microphone.
This circle doesn’t have to be perfect, so you can slowly draw it free-hand without fretting too much about creating a perfect circle. Then, it’s on to step 2!
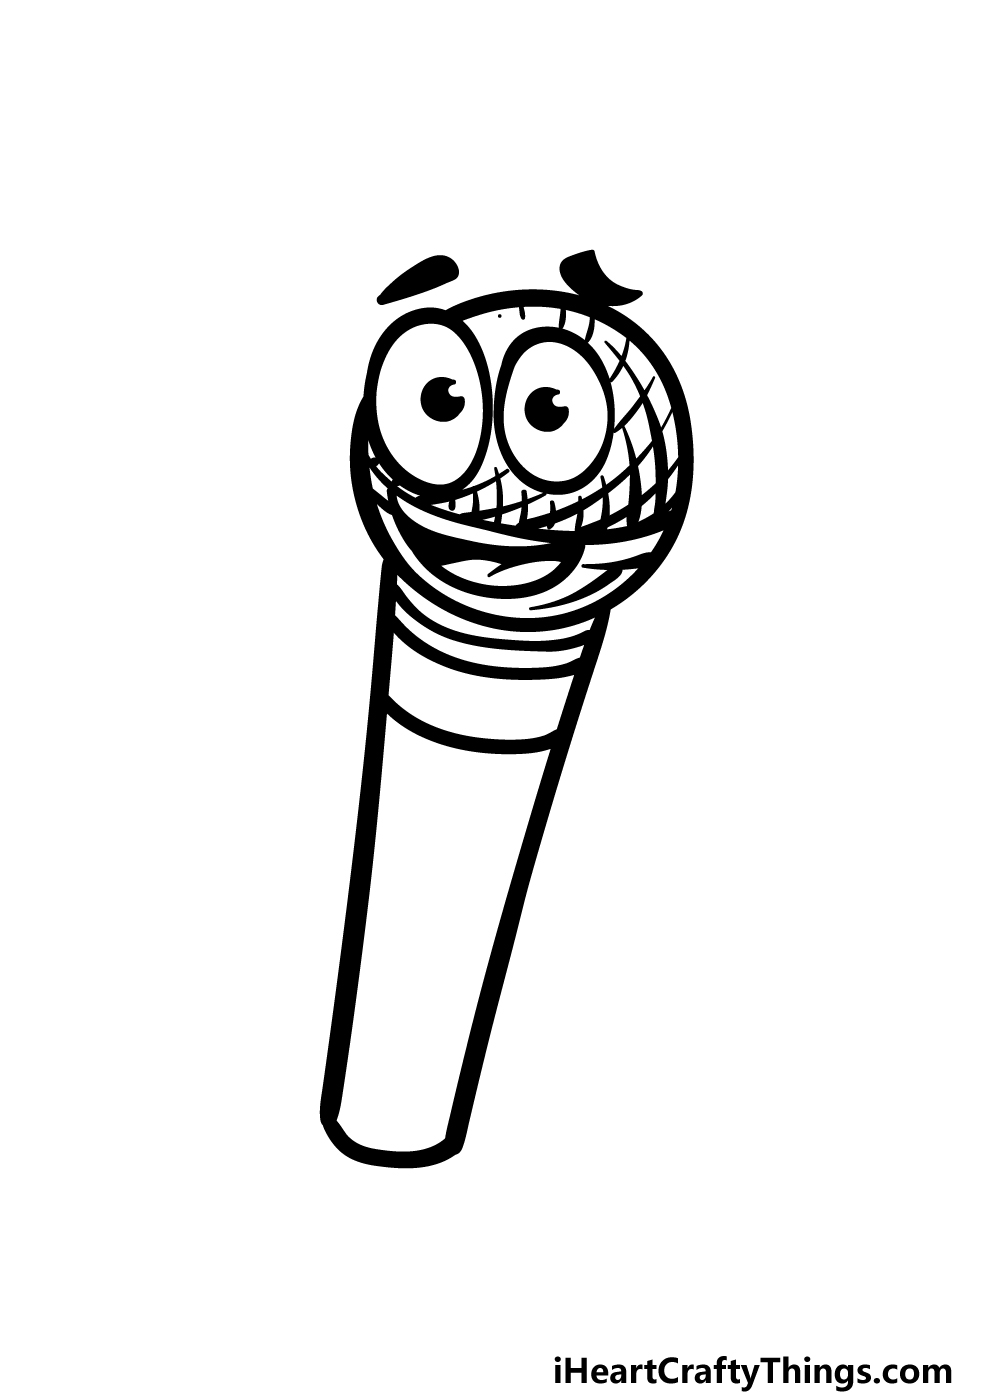
Step 2 – Draw some facial details for this cartoon microphone
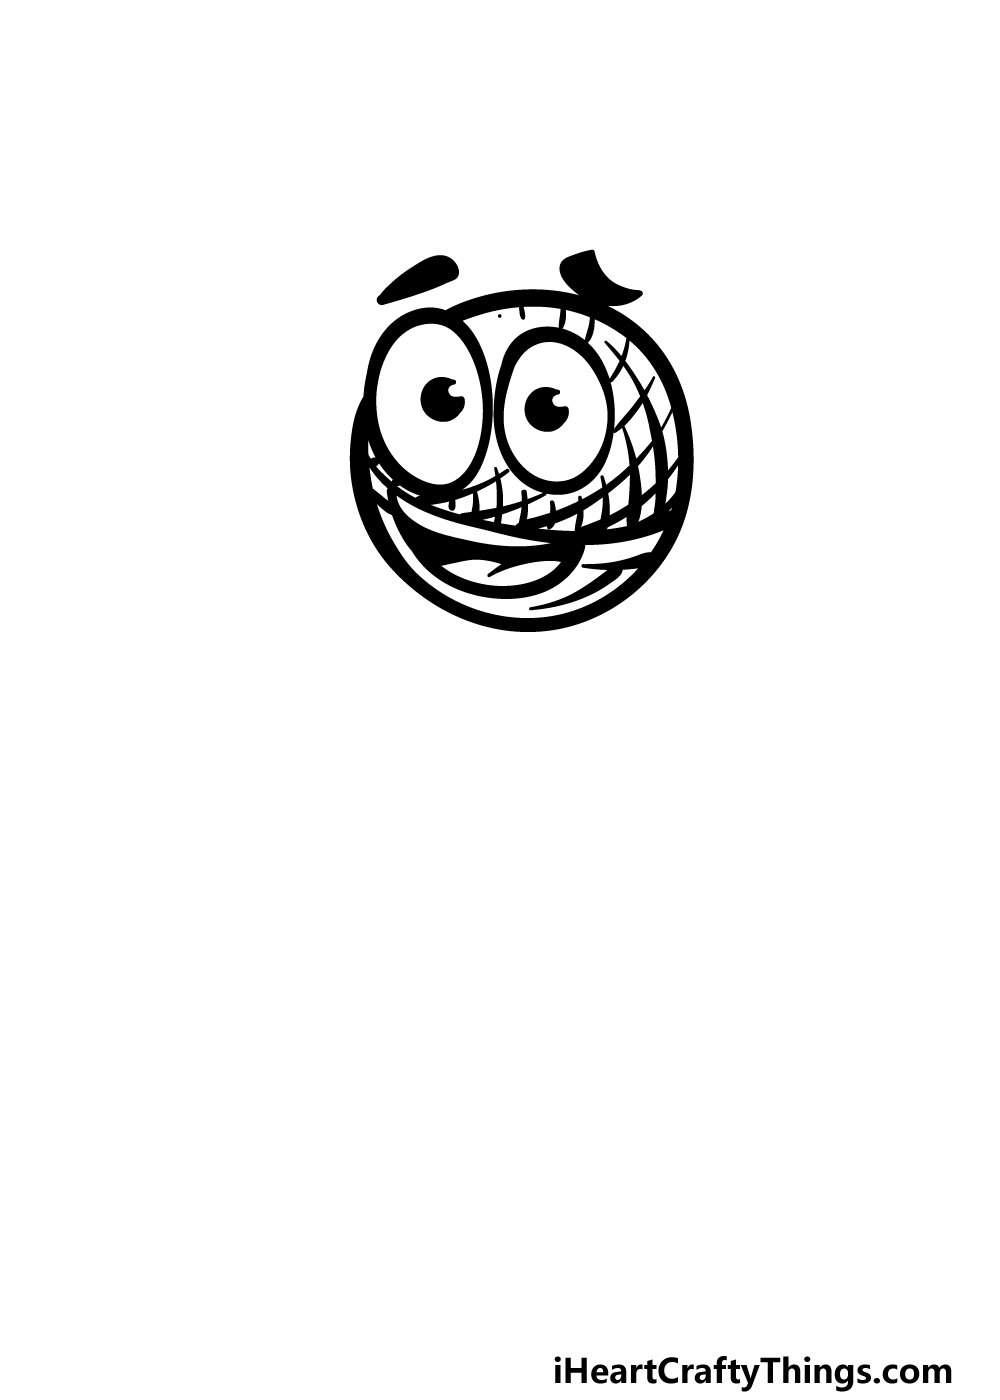
Now that you have the outline of this cartoon microphone drawing done, we can now start adding some facial details onto it.
First, add two black circles, one inside each eye, for the pupils. Next, we will add a large, smiling mouth with teeth and tongue details within it.
The head of a microphone is often mate of a metallic, mesh material, and we will create that look now as well.
You can do this by creating a sort of cross-hatch pattern using curved lines intersecting with one another.
Once you have drawn these lines as they appear in our reference image, we can proceed to step 3!
Step 3 – Now, draw the handle of the microphone
Moving lower down, we will draw the handle of this microphone in this third step. This will also function as the body of the cartoon microphone!
To draw this handle, we will be using two thick, straight lines coming down from the base of the head.
These will angle inwards slightly, and then they will be joined at the bottom with a slightly curved line.
It’s as simple as that, and then we can add some more details in the next step.
Step 4 – Add in some details for the handle
We will now be adding some simple details to the upper portion of the handle for your cartoon microphone drawing in this step.
In order to do this, we will be adding three curved lines onto the handle. The first two will be rather close together, and the third will be further down.
The slight curve in the lines is to show that the handle itself is smooth and cylindrical in shape.
Once you have added these lines, we will be ready to add some final details and touches in the next step of the guide!
Step 5 – Now, you can add in the final details
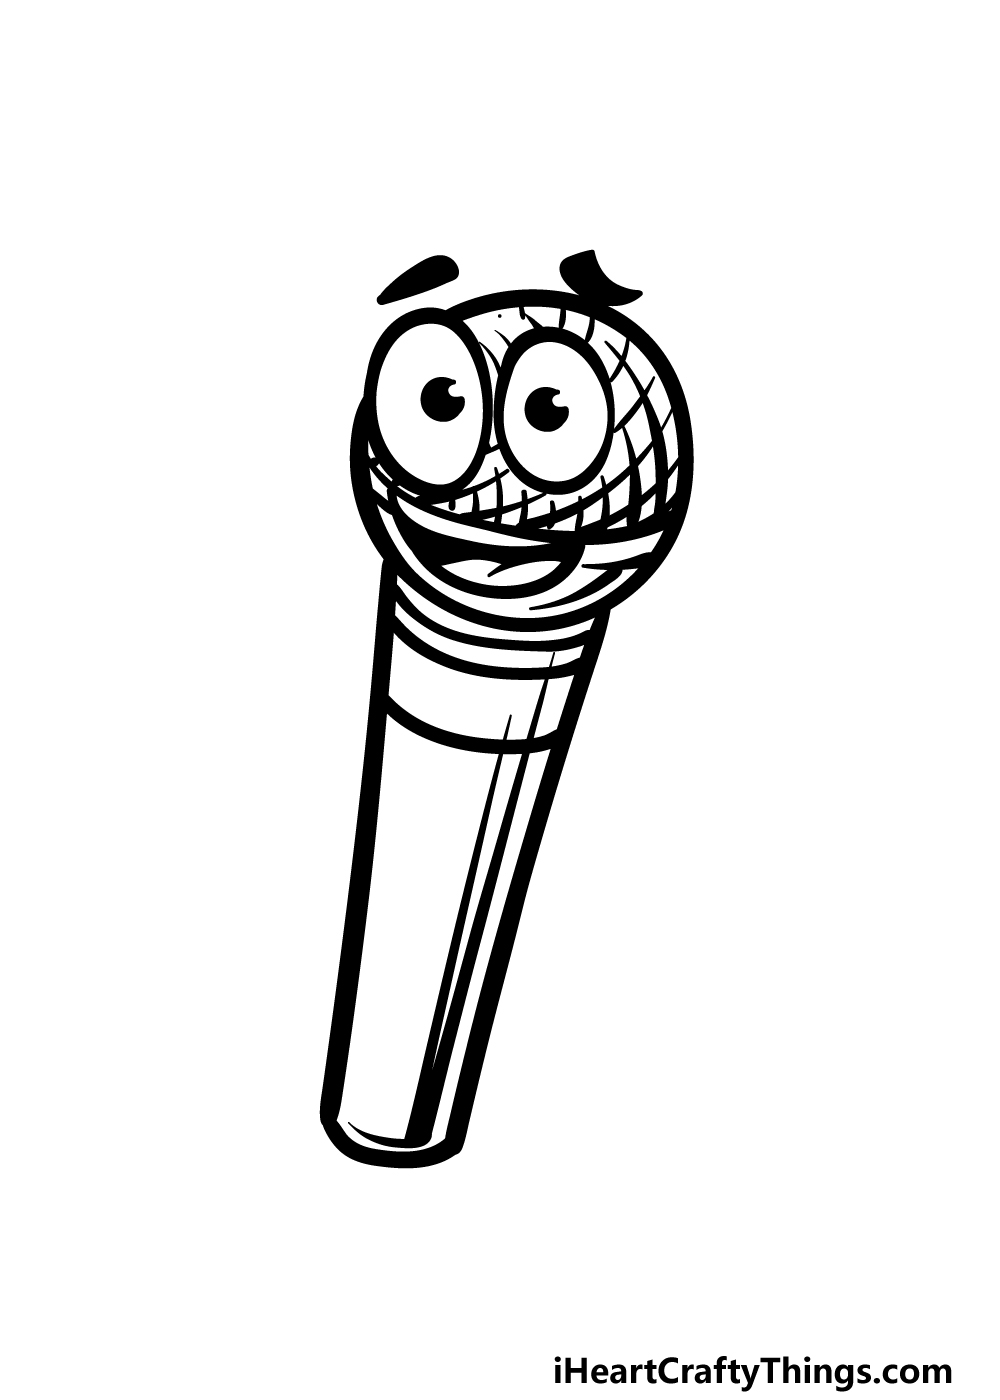
In this fifth step of our guide on how to draw a cartoon microphone, we will finish off with some finer details!
We will be adding some minor details in this step, but they will be very effective in finishing off the design despite how small they are!
We added some small curved details onto the round portion of the microphone, and these help to further create the textured look of the mesh.
Then, we added some thick, straight line details with points at the upper ends to finish off this step.
Now, you can take over and add some of your very own additional details.
You could add a fun music based background or maybe design some more cartoon equipment that could go with this microphone for a few ideas.
What other ideas do you have?
Step 6 – Finish off your drawing with some color
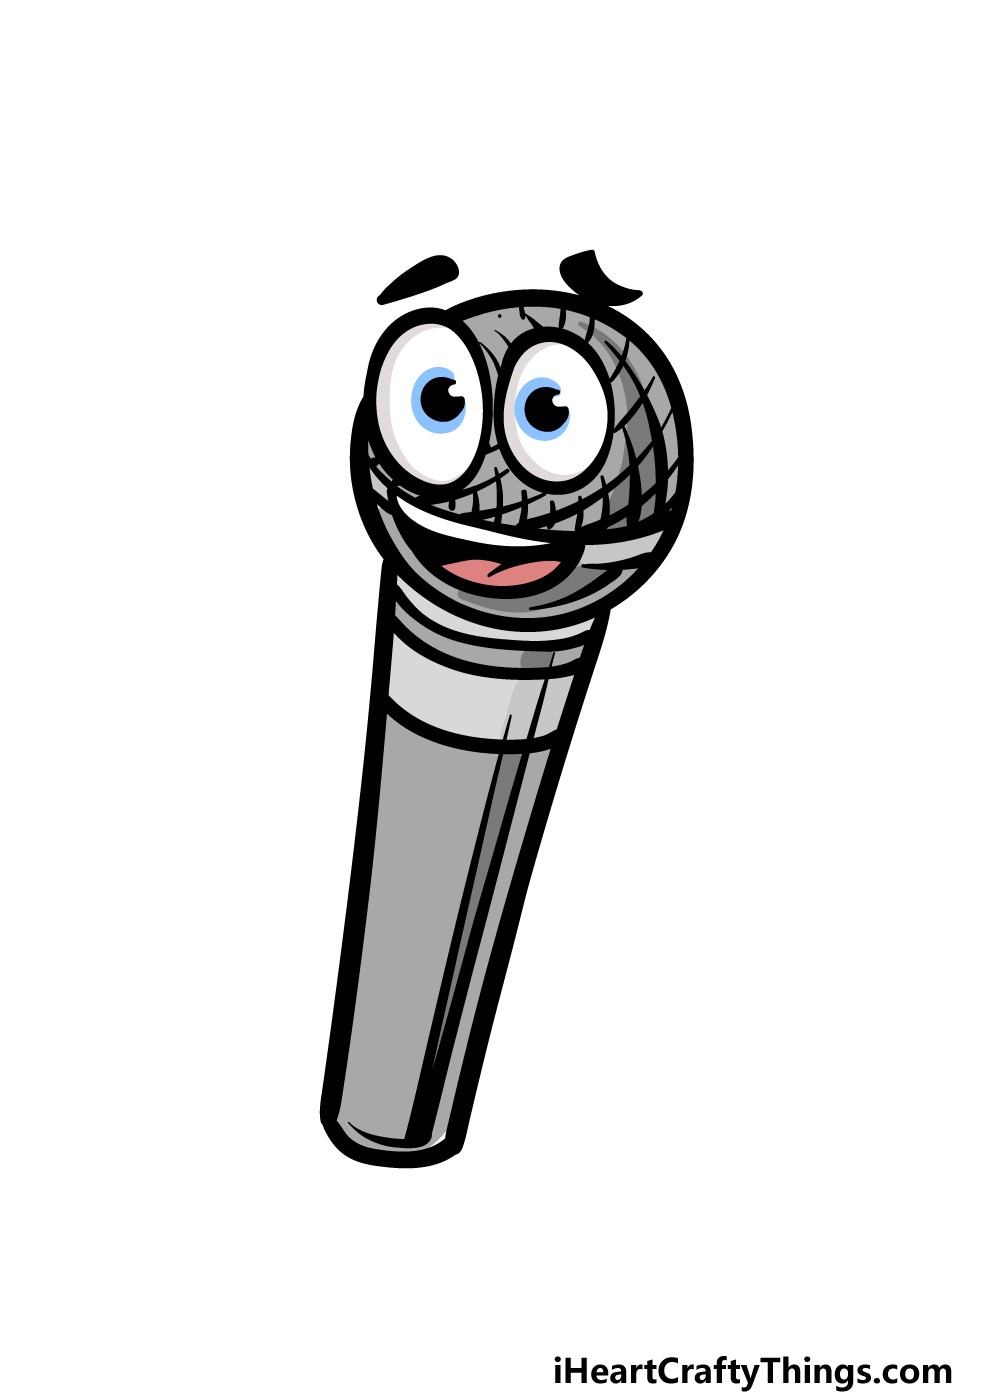
Microphones can come in pretty much any color you can think of, and that gives you lots of freedom in this final step of the guide!
In our reference image, we showed you what we would choose to finish off this image.
You’ll see that we used various shades of grey for the microphone. We varied the shades in order to provide some shading detail and to give the microphone a metallic look.
You could absolutely go for similar colors in your own depiction, but you should also feel free to go for any other colors you would like for the picture!
As we mentioned, microphones can come in many different colors, so you could go for any colors and combinations you like. What colors and mediums will you choose?
Do this to take your cartoon microphone drawing to the next level
These tips for your cartoon microphone sketch will make you want to sing!
For this drawing of a cartoon microphone, we kept the focus on the microphone itself. That being said, there are loads of extra objects and other elements that you could add.
One simple yet effective addition would be a cord coming from the base of the cartoon microphone.
Drawing this twisty cord would help to make it look even more complete!
Then, you could add other equipment such as amps or maybe a stand to make the ensemble more complete. What other equipment could you possibly add?
Continuing on from our previous suggestion, you could also build a background setting for this drawing. Adding things like amps and cords would be great, but you could add a lot more.
Maybe this cartoon microphone is being used on a big stage for a concert, or it could be in a recording studio.
These are just two of the many settings you could expect to use a microphone in, but you can probably think of many more!
Another way of making this cartoon microphone drawing more complete would be adding a human character to the image. This person could be based on anyone you like!
You could also portray them in any kind of style that you like. They could be based on someone you know, or maybe you could use your favorite singer as a model.
That would be a great way to bring this image to life!
Microphones can be used for many different purposes, but they are most commonly associated with music and singing. That would be another great element for this cartoon microphone sketch!
For example, you could show what kind of song you would choose to sing with this cartoon microphone. This could be done by writing the lyrics or music notes of one of your favorite songs.
It would be a great addition to combine with the previous suggestion of adding a human character to the scene!
Your Cartoon Microphone Drawing is Complete!
These 6 steps pf our guide on how to draw a cartoon microphone have all been completed, so that means you have overcome this drawing challenge!
These steps were designed to not only make things easier for you but also a lot more fun, so we hope both of these goals were reached for you.
This guide was all about creating this fun image, but now that you have finished drawing it you can take it even further with your own ideas and details.
You could design a cool background or add some other objects you would associate with a microphone for a few ideas we discussed in the guide! What else can you think of for this guide?
When you would like to try your hand at a new drawing challenge, you can find it on our website! We have tons of awesome guides to enjoy there with more on the way all the time.’
It would be great to see how your cartoon microphone drawing turned out, so please show off your artwork by sharing it on our Facebook and Pinterest pages.