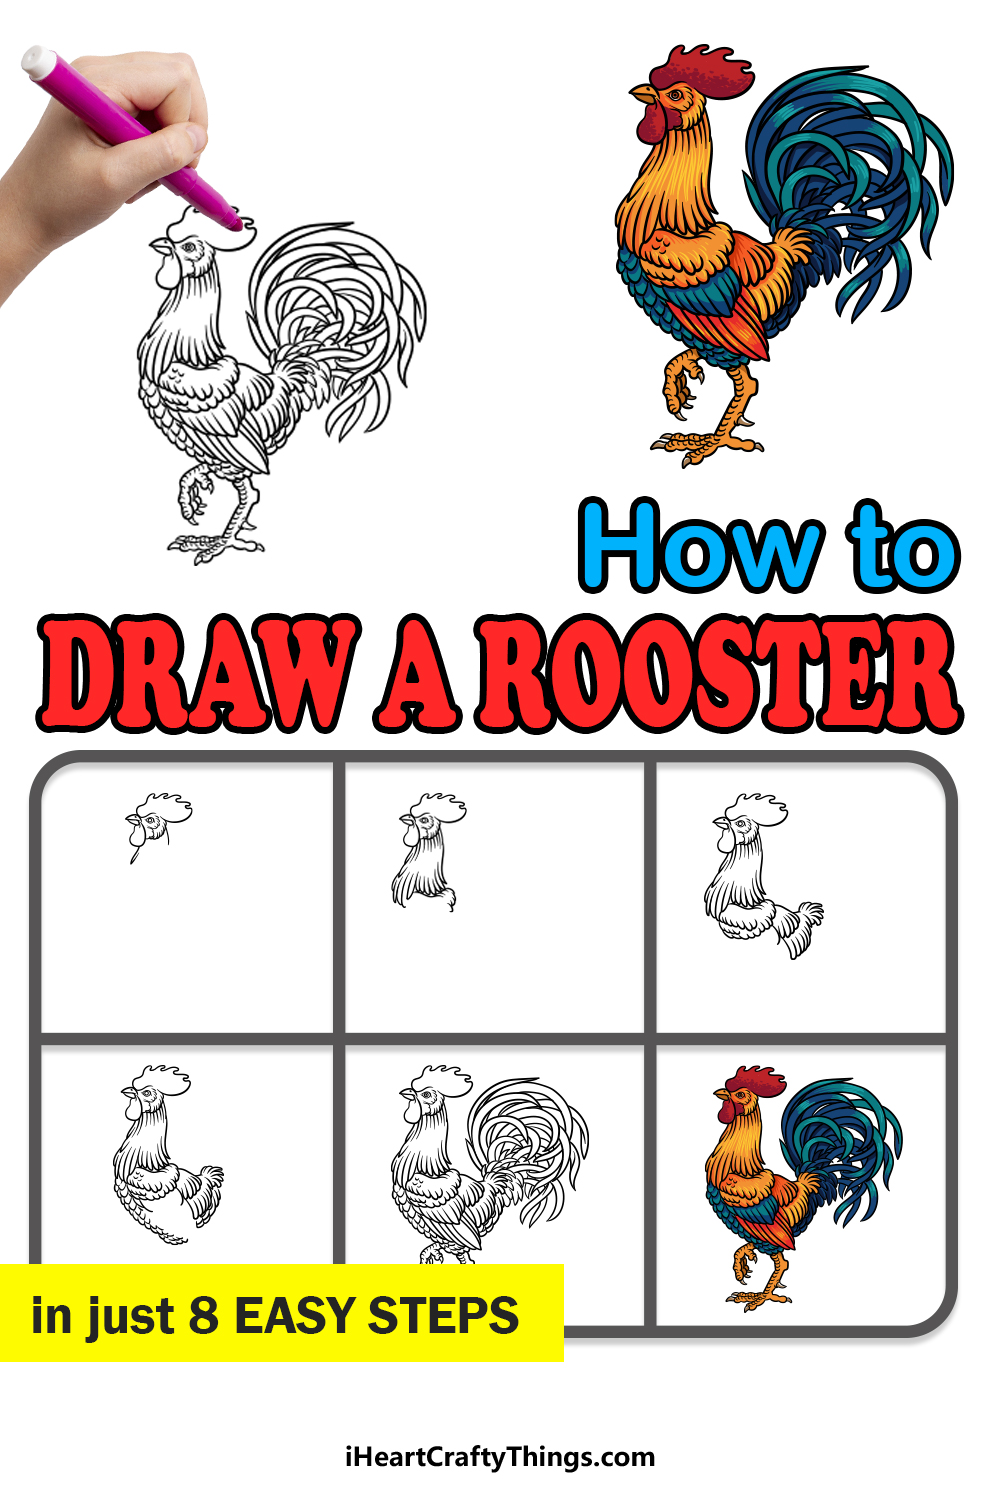
Get ready to discover the simplest way to learn how to draw a rooster with this guide for kids! This detailed, fun design will be easier than ever with the steps I have for you.
Roosters are an integral part of farm life. In fact, the crowing of a rooster may be the first thing that many farm people will hear first thing in the morning.
They are not only a great natural alarm clock but they also have a beautiful appearance. Because they are so integral to farm life, many people like to represent them in artworks.
However, their appearance, lovely as it is, also makes them harder to draw. This guide will fix that challenge for you and show you how you can depict a detailed rooster.
Once you have mastered the drawing, you could then add your own details and elements to finish it off nicely.
Discover How To Make Your Rooster Drawing
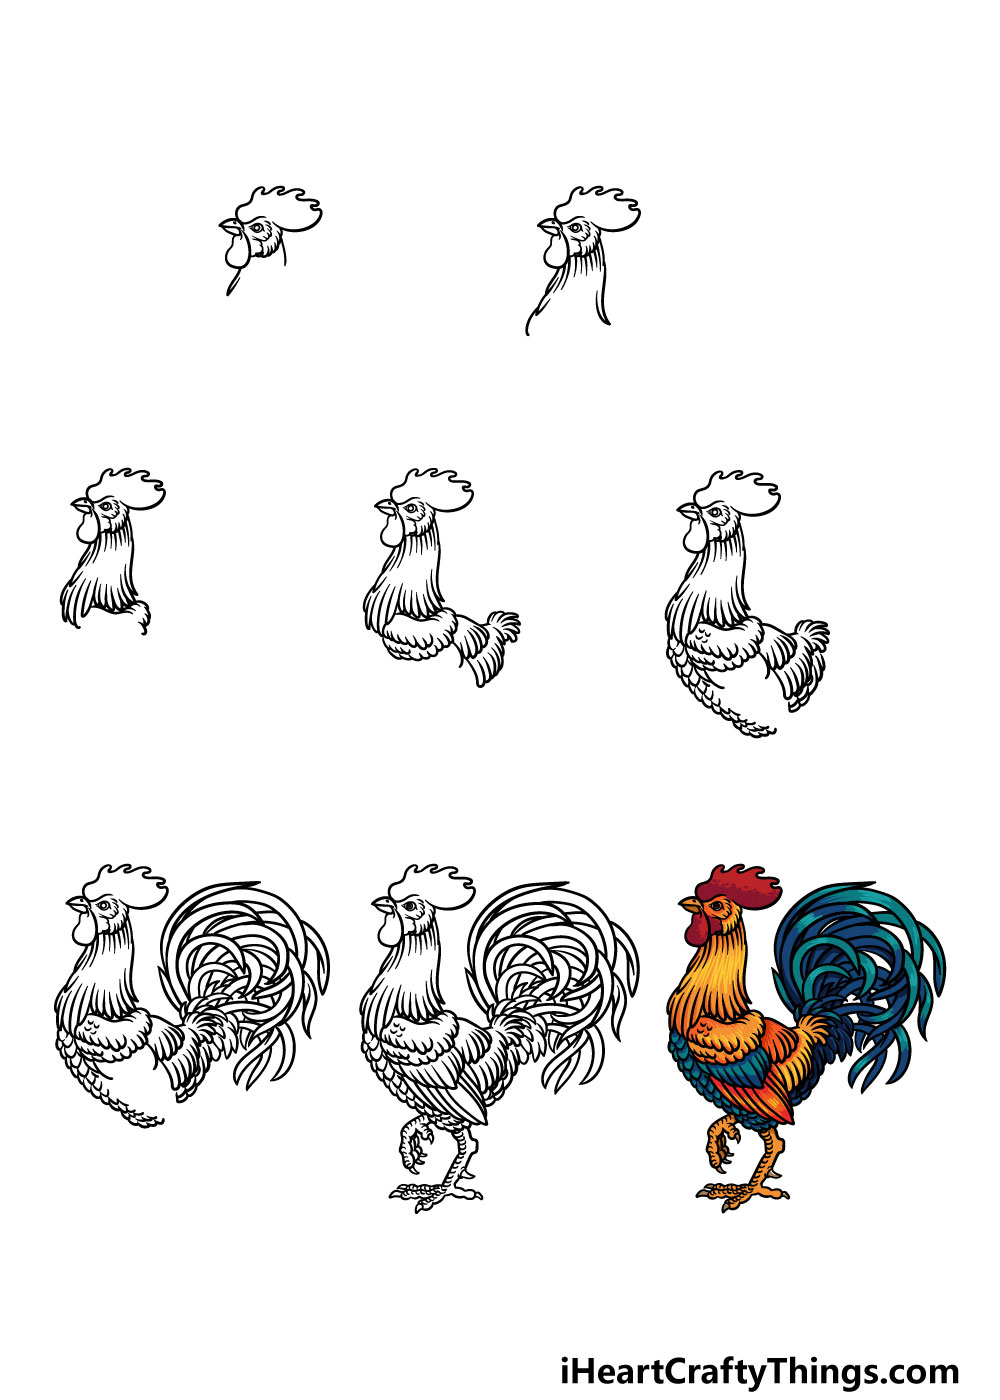
How to Draw A Rooster – Let’s get Started!
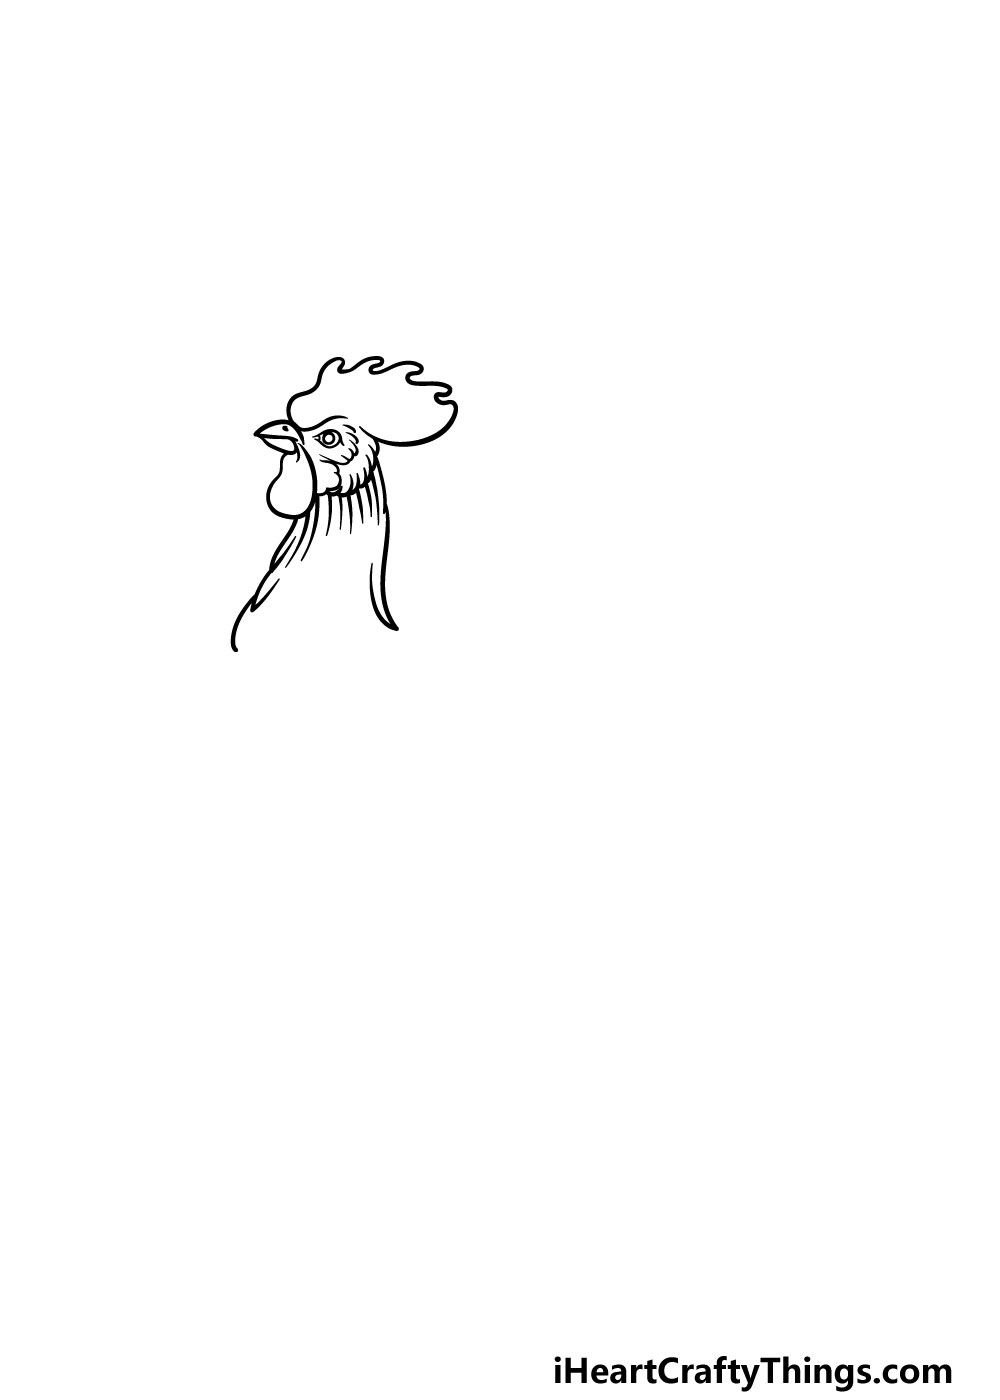
Step 1

We will be drawing the head of the rooster in this first step of our guide on how to draw a rooster. You can start by drawing the small, sharp beak of the rooster.
Then, the beak will extend into the large and impressive crest on top of the head. Then, you can use a rounded line underneath the beak for the wattle hanging below the face.
Finally, you can use a small circle for the eye and then add some feather details around that area of the face. Then you can finish off this step by drawing the neck down from the head.
Step 2 – Next, draw some more of the neck
This step of your rooster drawing will be quite simple. All you will be doing in this step is extend the neck further down using some more curved lines.
You can use a few smaller lines instead of one solid one to give the neck the appearance of being feathery.
Then, once you have it looking as it does in the reference image you’re ready to proceed!
Step 3 – Now, finish off the neck
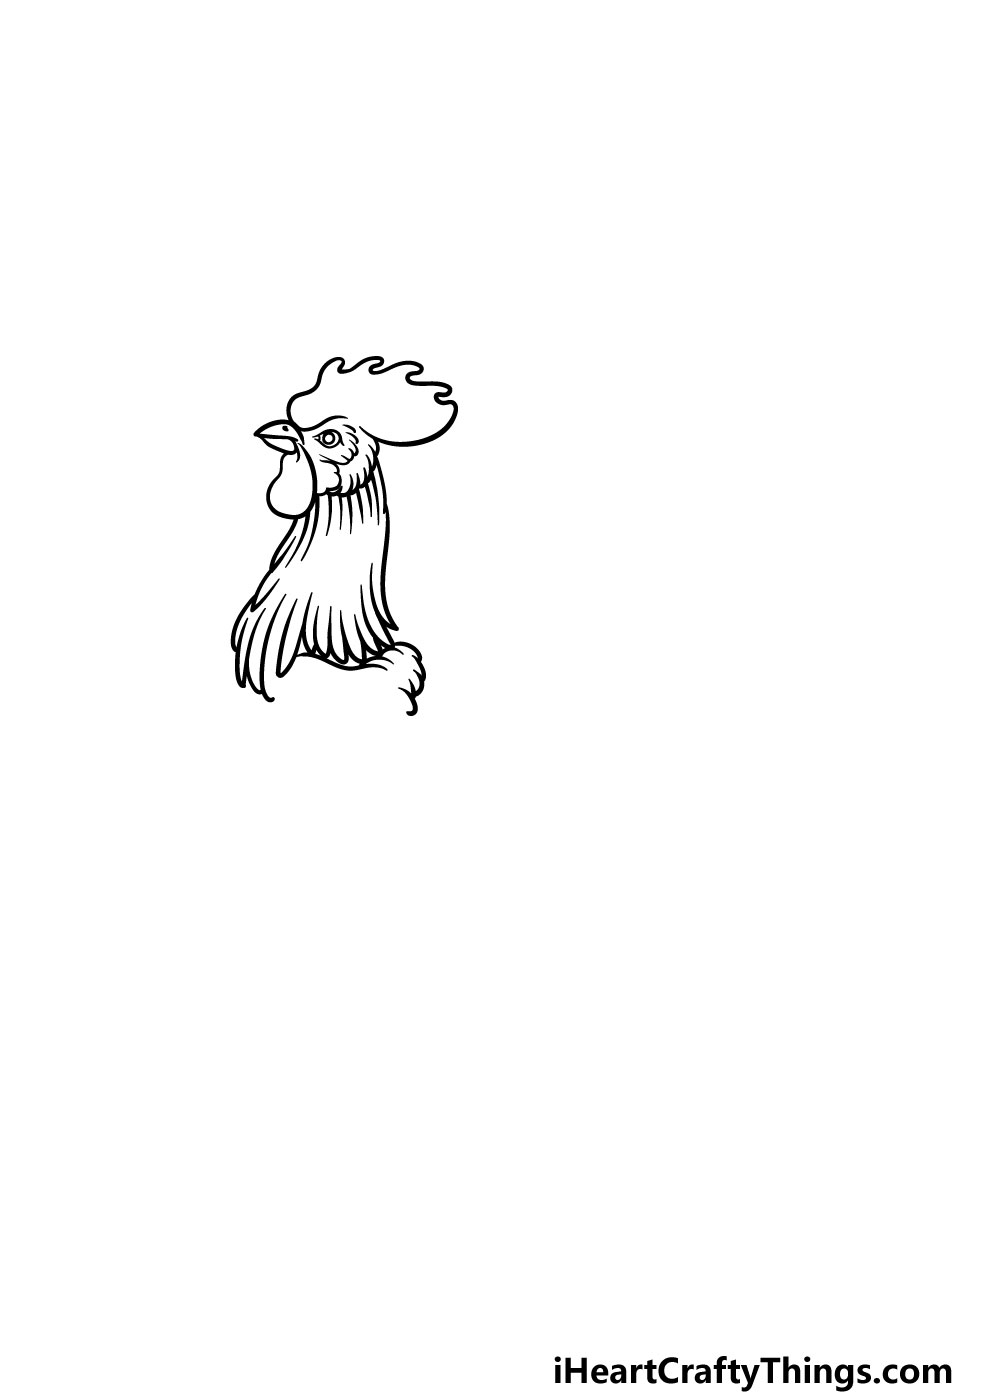
You will be finishing off the neck of the bird in this step of our guide on how to draw a rooster.
In this step, we will again be using lots of individual lines curving down, and they will have sharp edges at the end to make them look like layered feathers.
You can also draw the first feathers of the rooster’s back in this step.
Step 4 – Next, start the rooster’s body
The head and neck are done now, so for this step we can start to draw the body of your rooster drawing.
The back will be separated into several smaller sections connecting to one another. As you did in the previous steps, we will be using lots of sharper, more jagged lines to make the rooster look nice and feathery.
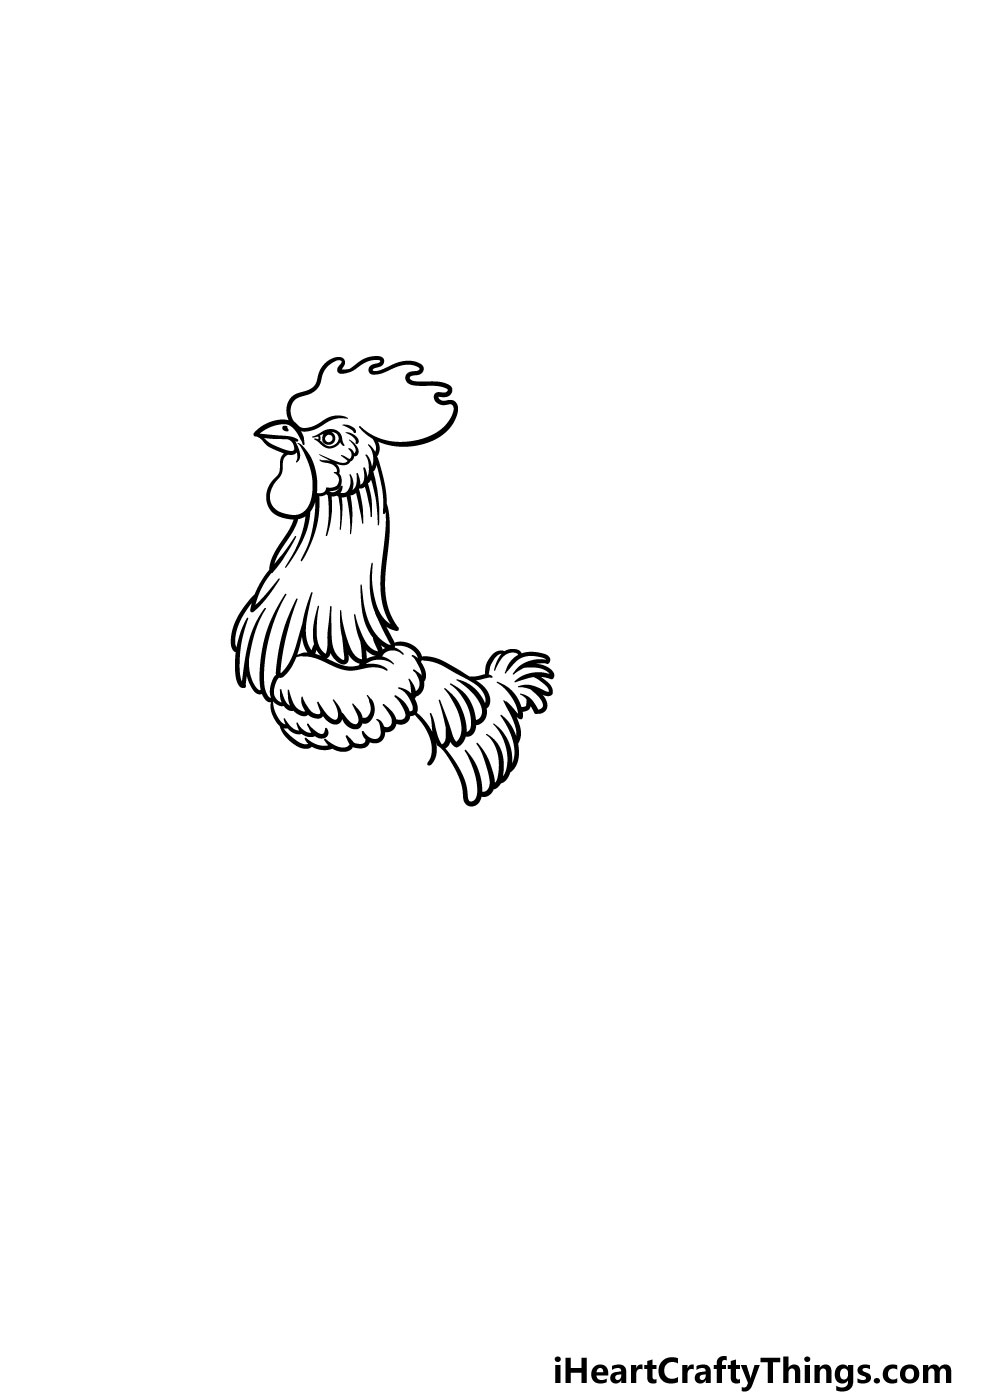
Step 5 – Now, draw the belly of the rooster
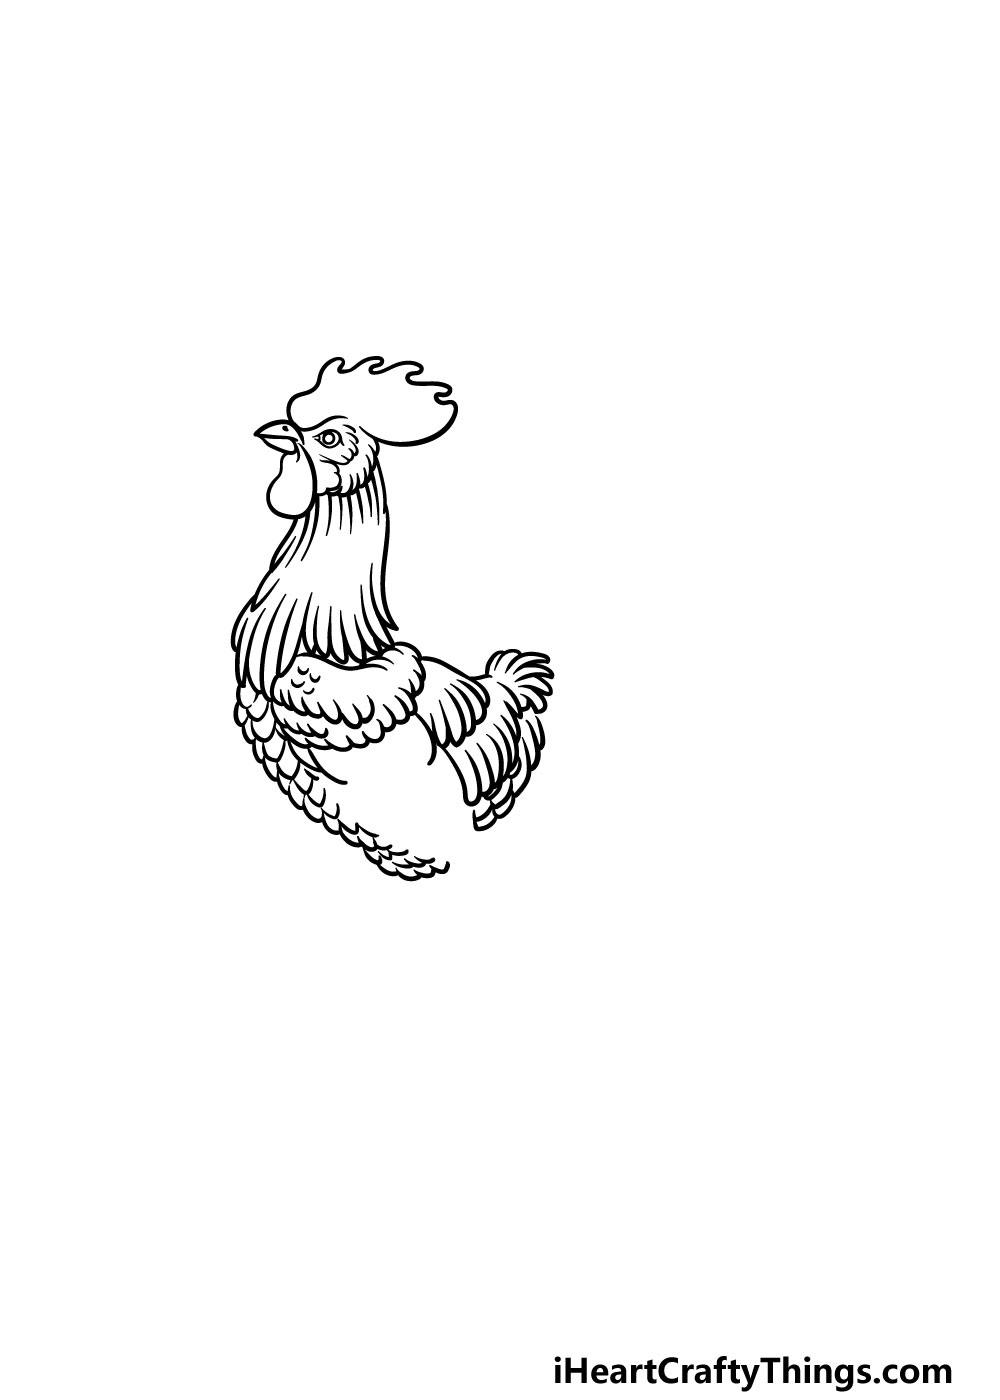
For this part of our guide on how to draw a rooster, we will be focusing on the belly of the rooster.
The feathers on this portion of the rooster will be much smaller and more coarse, as shown in our reference image. Once you have drawn these feathers with lots of small, sharp lines then you’re ready to move on.
Step 6 – Next, draw the tail of the rooster
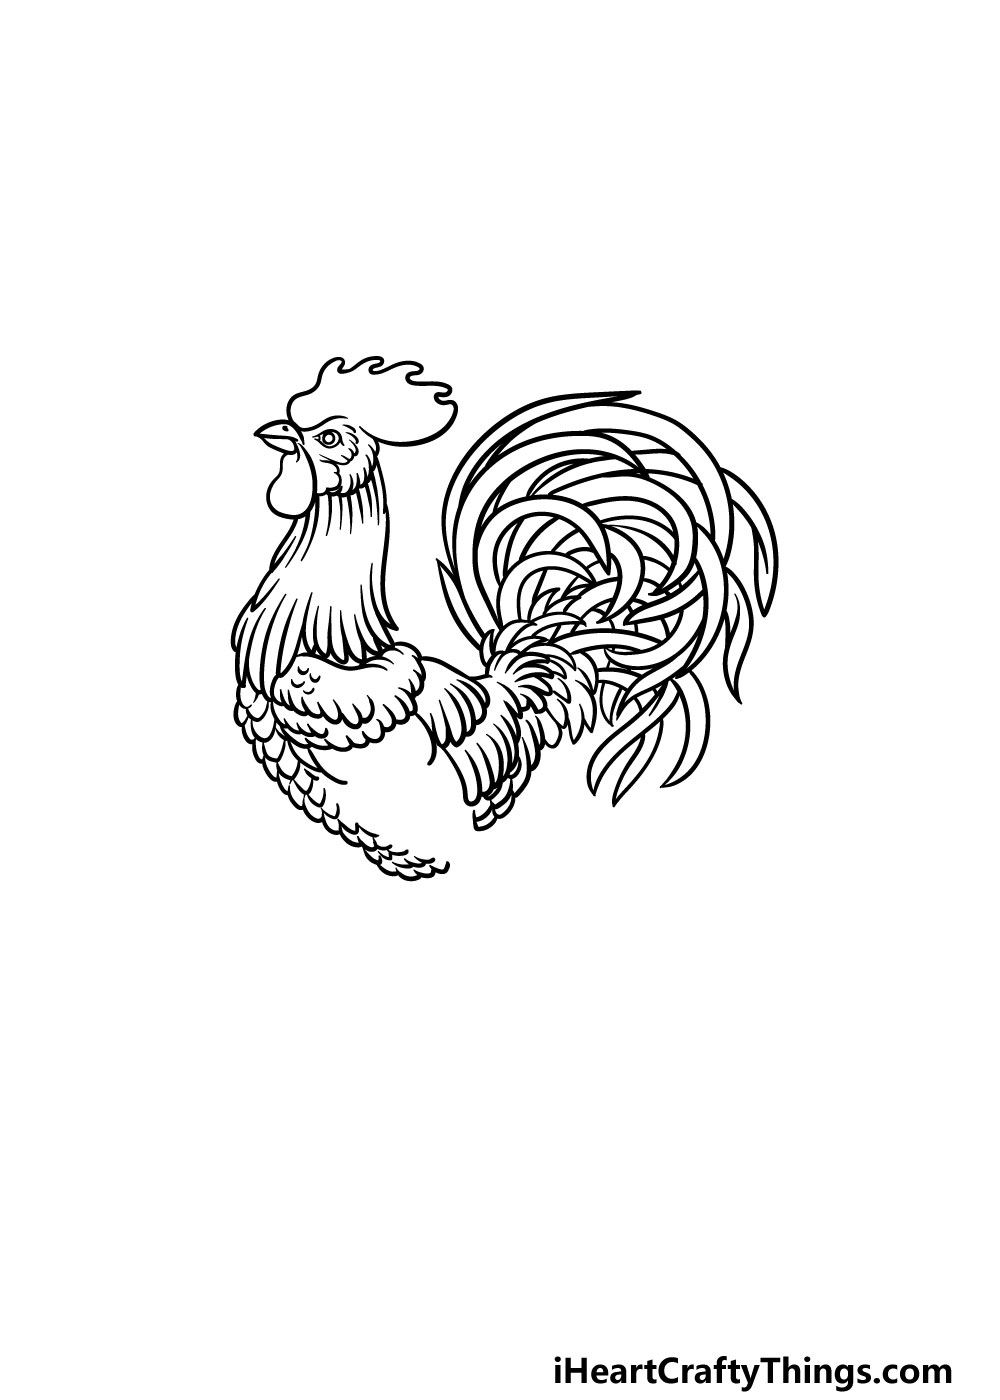
This next step of your rooster drawing may look complicated, but it’s not as bad as it looks! Still, you may want to take this step slowly and follow the reference image closely as you draw this part.
We will be drawing the tail of the rooster, and this tail will be made up of a lot of thin, curved feathers.
There are lots of feathers, but as long as you follow the picture closely and take it one feather at a time you should have no problem with it!
Then, we have just a few final details to add in the next step.
Step 7 – Now, draw the legs of your rooster
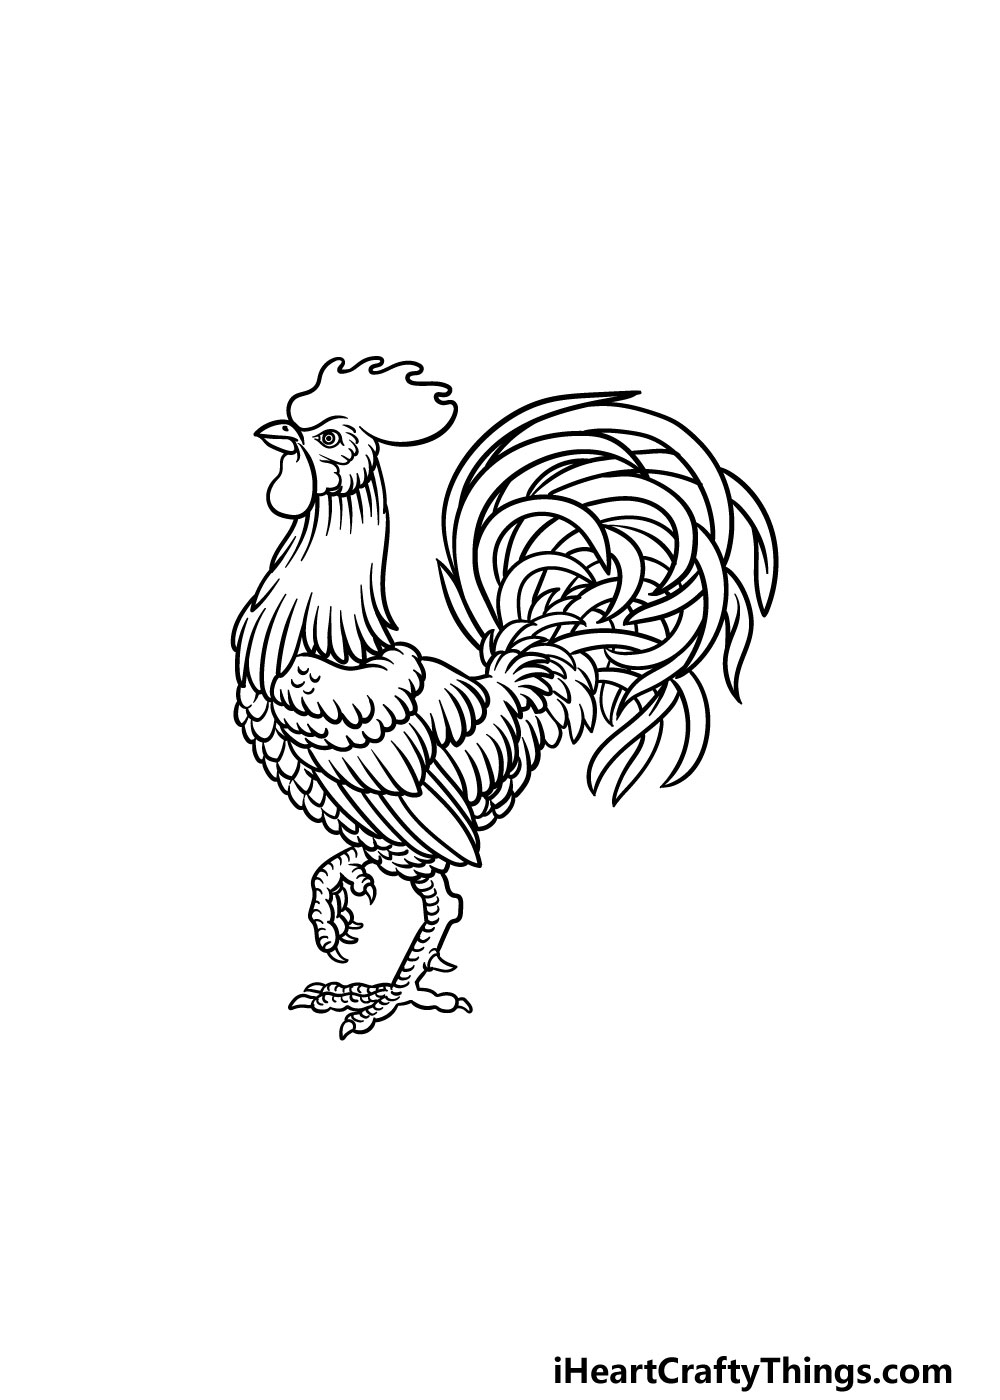
We will be finishing off the bird in this step of our guide on how to draw a rooster. First, you can finish off the wing of the rooster using some more sharp and jagged lines. Then, we will be drawing the legs of the rooster.
The outlines of the legs will be quite irregular and jagged, and the reference image will show you how to position them.
Finally, you can add lots of small lines to them to make them more scaly looking. That will finish off the details in this guide, but you could also add a background or any additional details you may want for your picture as well!
Step 8 – Finish off your rooster drawing with some color
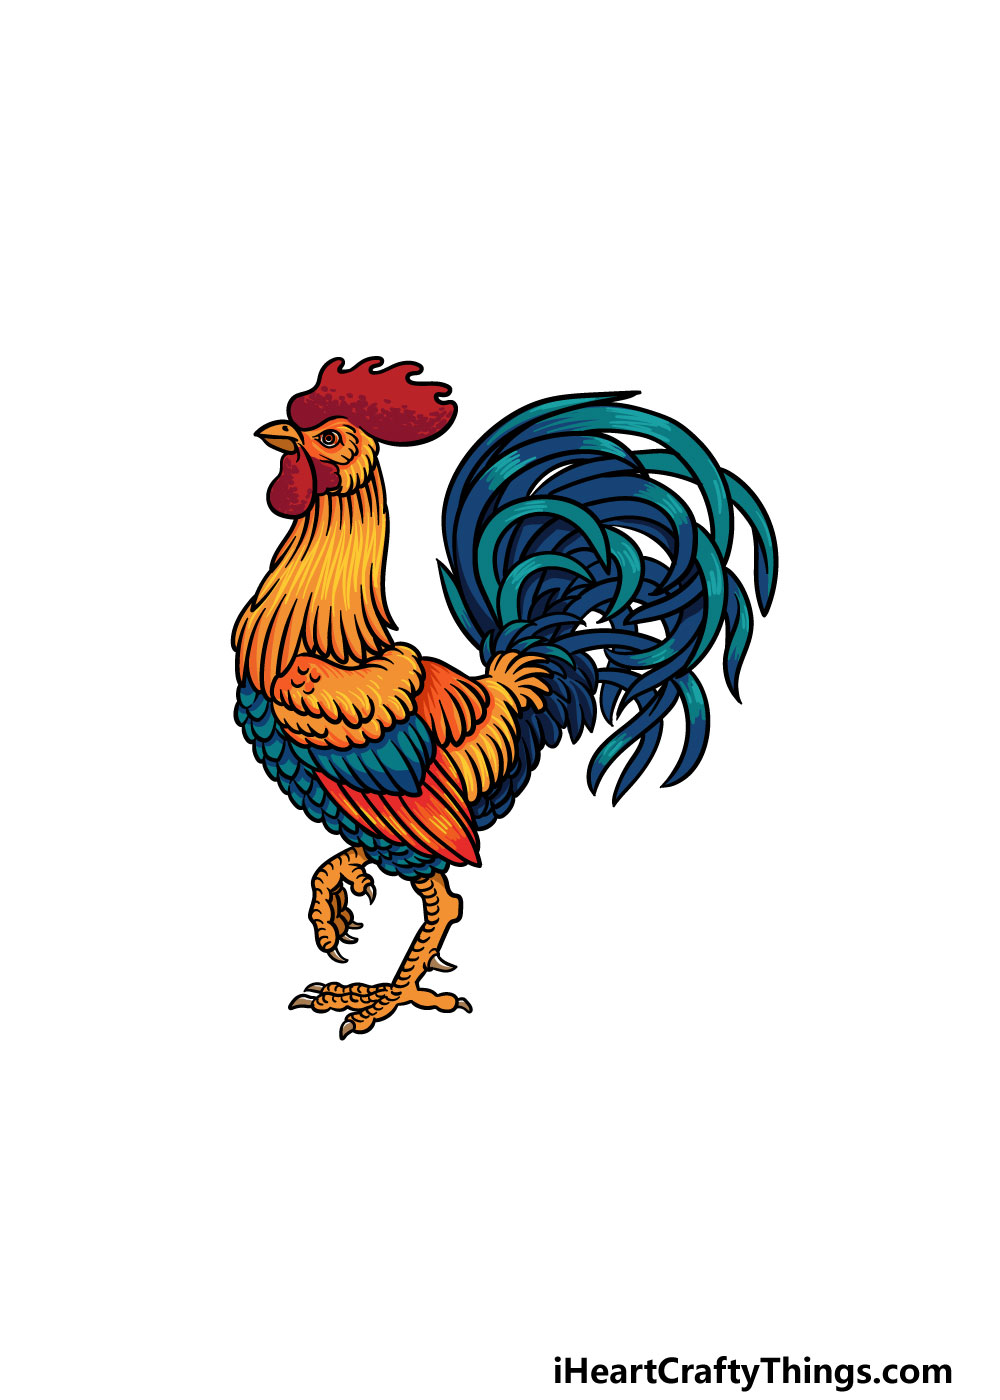
This final part of your rooster drawing will see you adding some amazing colors to your artwork. We used some lovely bright colors for our example, and this can serve as a reference if you would like a similar look for your rooster.
This is a step where you can really show off your creativity as well! Roosters can come in all manner of different colors, so you have lots of options with how you can color him in.
Once you know what colors you would like to use, you can then enjoy experimenting with your favorite art mediums to bring the colors to life! We can’t wait to see how you finish off your artwork.
Do this to take your rooster drawing to the next level
You’ll definitely want to check out these 4 tips we have for your rooster sketch!
This drawing of a rooster looks great just on its own, but it could look even better with some more animals! The obvious choice would be to add some chickens or even another rooster.
Now that you have mastered drawing this rooster, this should be an easy thing to do.
You could do this by using the guide again, but you may also want to look up some photos of roosters and chickens to help you as you draw these new ones.
How many chickens and roosters would you potentially like to add?
Adding chickens and roosters is one way of adding to this scene. There are many other animals that you could add to the image as well.
Keeping it to a farmyard theme would still give you many options for animals that you could add. For instance, you could add animals like pigs, horses and goats.
You could also add other animals you wouldn’t typically see on a farm, though!
You would normally expect to see a rooster on a farm, so adding a farmer character could also be a fun addition to this rooster drawing. The farmer wouldn’t have to be drawn realistically, and could be a cartoon character.
You could even merely draw his legs and shoes instead of adding a whole character. Will you add a farmer or another human character to finish off this artwork?
Finally, a background could really finish off this rooster sketch nicely. As we have mentioned a few times in this guide, a farm theme would be perfect for the subject.
For that reason, drawing a farm background would be a great fit to finish off this image. If you haven’t been to a farm in a while, then you could look up some photos of real farms to help as you draw.
There are other background settings you could use as well, so you can really get creative with it!
Your Rooster Drawing is Complete!
We hope that you had a great time working alongside us on this guide on how to draw a rooster!
This drawing had a lot of small and intricate details and required some patience, so you should be extra proud that you finished it.
Whenever taking on a new drawing, it’s always made much easier when you break it down into smaller steps, and that’s what we aimed to do for you in this guide.
Now you can take over and show us what you will choose to finish off this image. Whether you draw a background, add some more animals or experiment with our colors and mediums we know it will look amazing!
We hope to see you on our website soon, as we have so many more drawing guides waiting for you there. We add new ones often as well, so be sure to visit often!
Once your amazing rooster drawing is ready, you can let us take a look at it by sharing it on our Facebook and Pinterest pages. We can’t wait to see it!