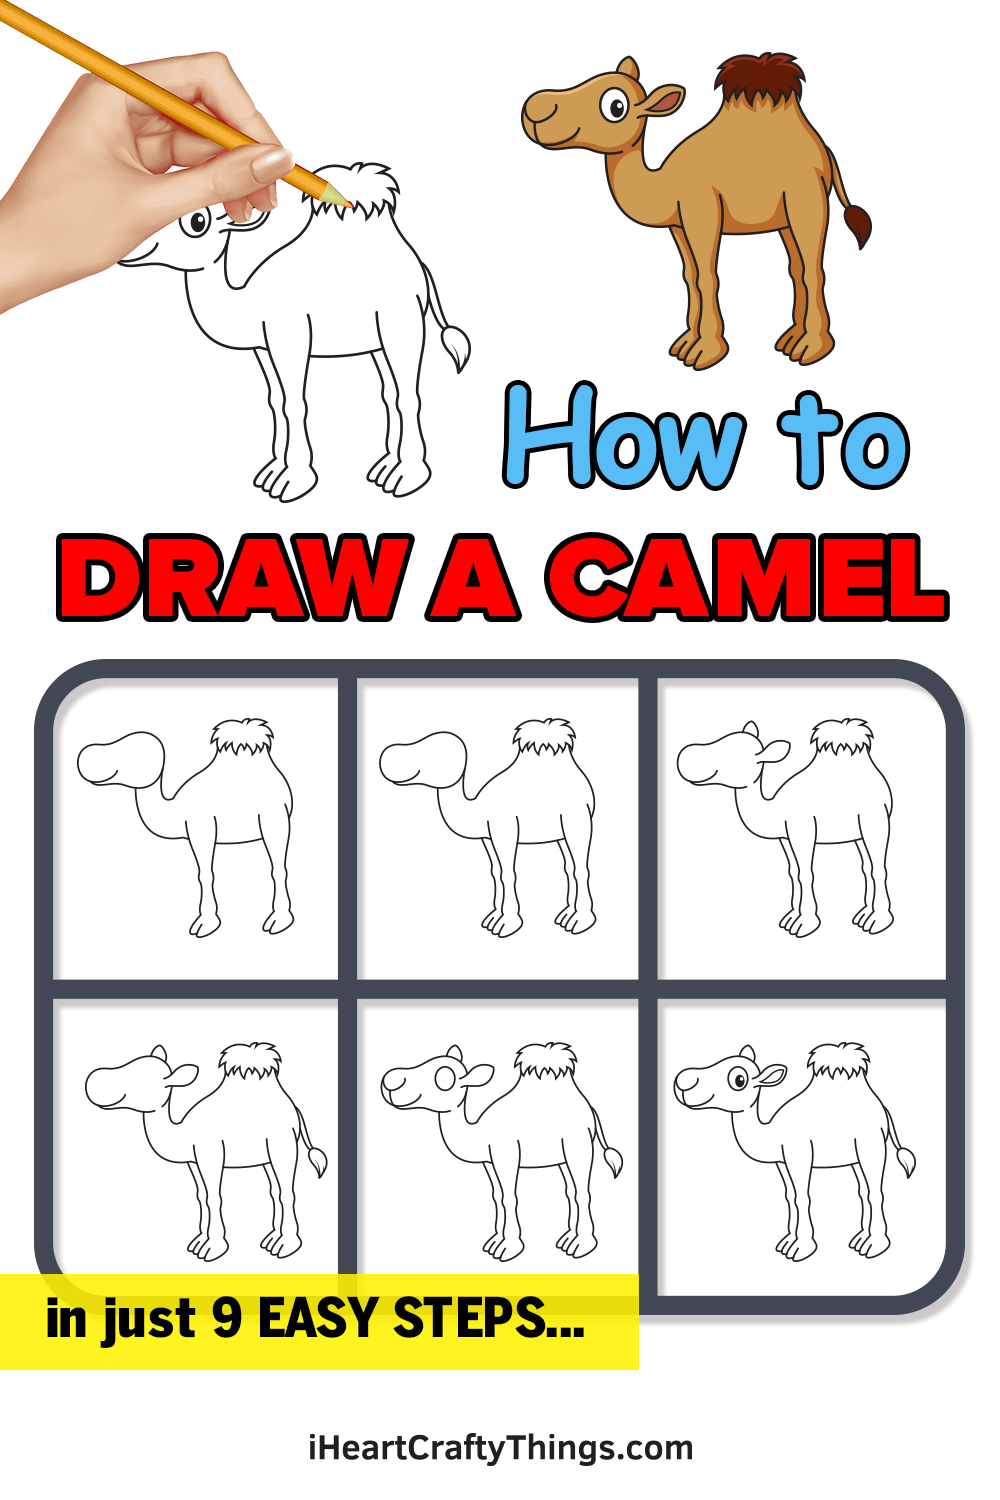
Kids of all ages can follow this guide on how to draw a camel! You are about to see the easiest way to draw a cartoon version of this unique creature.
Camels have a really unique look to them, and their most distinctive feature has to be the large humps they have on their backs. They’re commonly seen in arid desert regions and are even used as transport sometimes.
If you visit a place such as Egypt, you’re sure to see plenty of camels and may even be able to ride one. Not everyone can take a trip to a desert though, so this guide is the next best thing.
You will see everything you need to know about making this cartoony camel, and I’ll walk you through every single step. So let’s begin and see how you can make this drawing.
See How To Make Your Camel Drawing By Watching This!
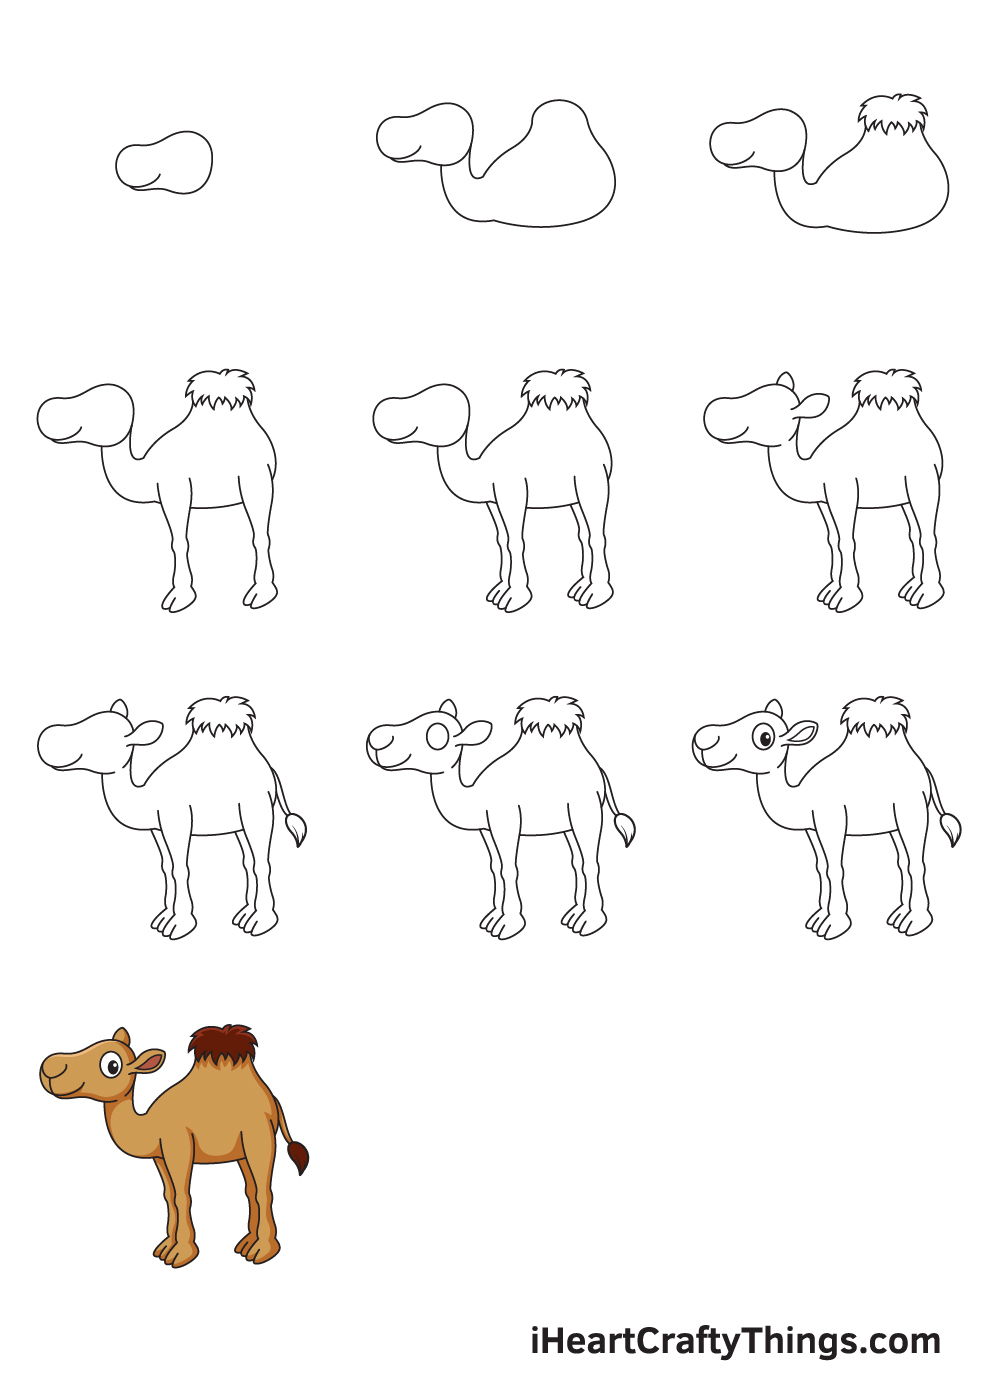
How to Draw a Camel – Let’s get started!
Step 1
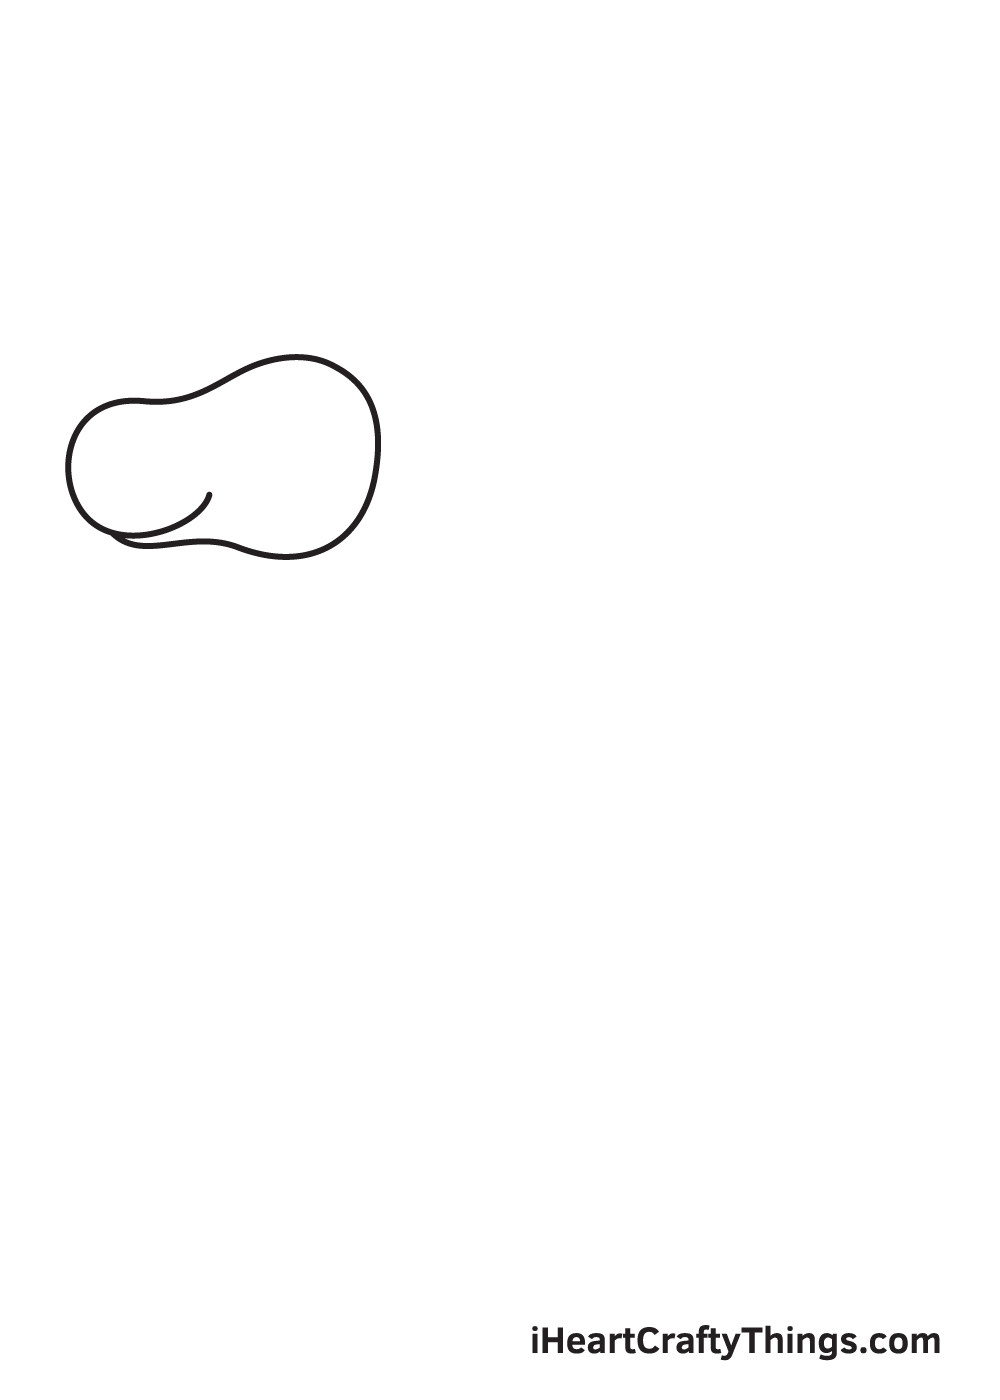
Start by drawing an irregular sideways oval shape on the upper left side of the paper. The oval should have a bigger right side compared to its left side.
This forms the outline of the camel’s head. Don’t forget to draw a curved line overlapping on the left bottom part of the outline to form the mouth of the camel.
To ensure that the camel will be drawn in the center, you can create reference lines by drawing an intersecting horizontal and vertical line across your paper.
These guidelines should divide your paper into four rectangular spaces. The space on the upper left corner of the paper marks the spot where you should draw the outline of the camel’s head.
Step 2 – Outline the Camel’s Head and Torso
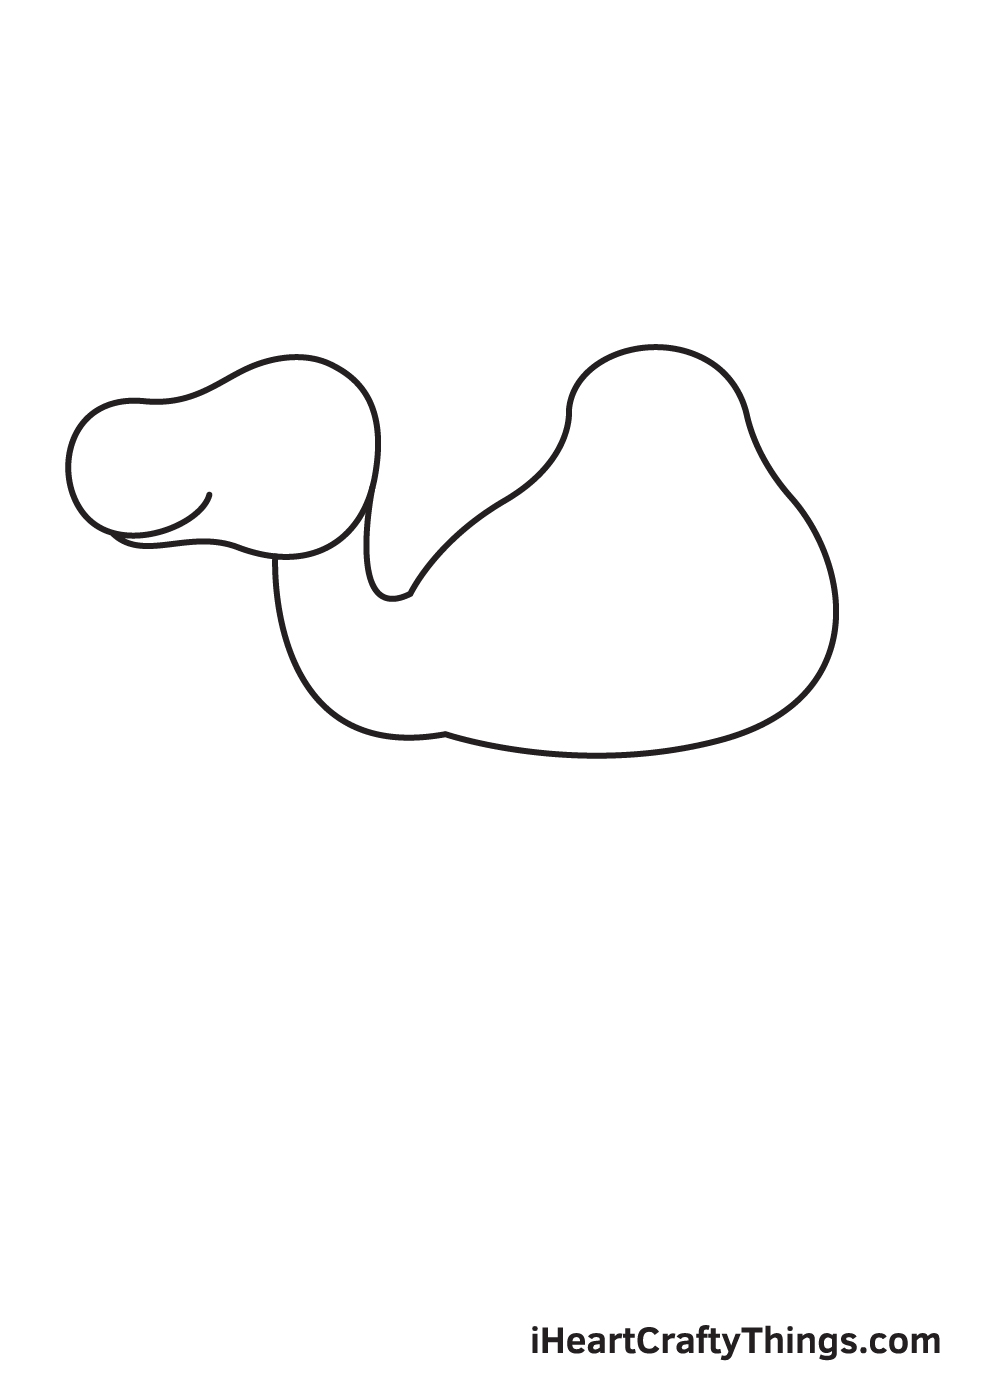
Draw an elongated, narrow curved shape underneath the head to form the long neck of the camel.
Then, draw the shape of the body with an enormous bump at the top—one of the camel’s most distinct physical features!
Remember, use light strokes when drawing the outline of the camel’s head and torso. Avoid pressing down too hard with your pencil so you can easily remove some parts of the outline you may no longer need later on.
Step 3 – Add the Hump on the Body of the Camel
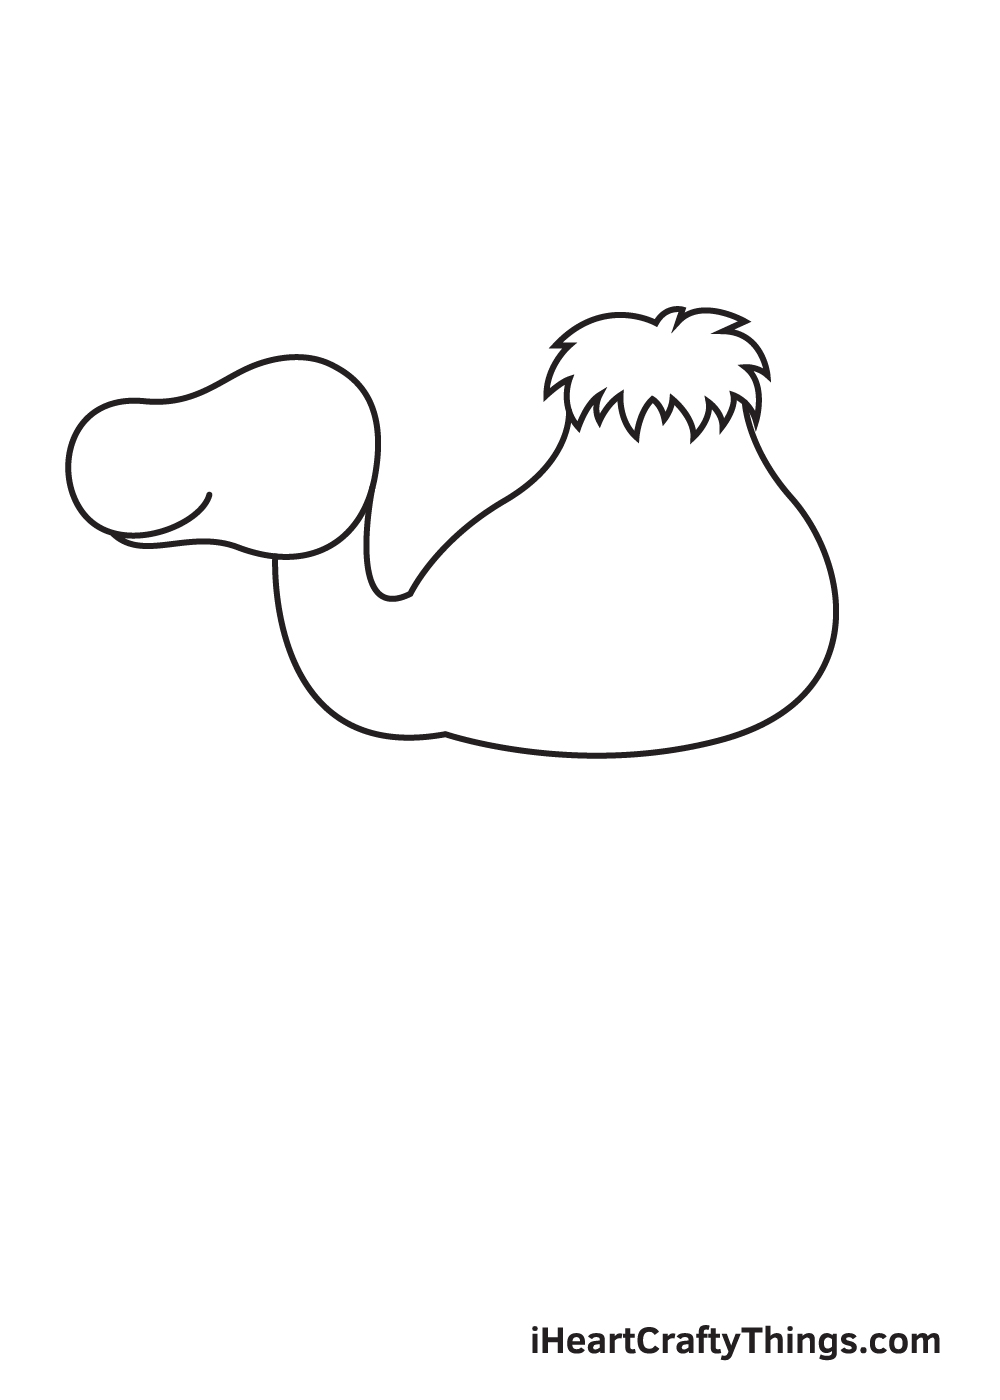
Add a bunch of hay or grass on the bump on the camel’s body. This makes it easier for people to ride on the back of a camel without hurting themselves.
The hay laying atop of the camel’s hump can be formed by simply drawing multiple pointed shapes. The pointed shapes should be clumped together side by side forming a sideways oval shape.
Step 4 – Next, Draw the Right Legs of the Camel
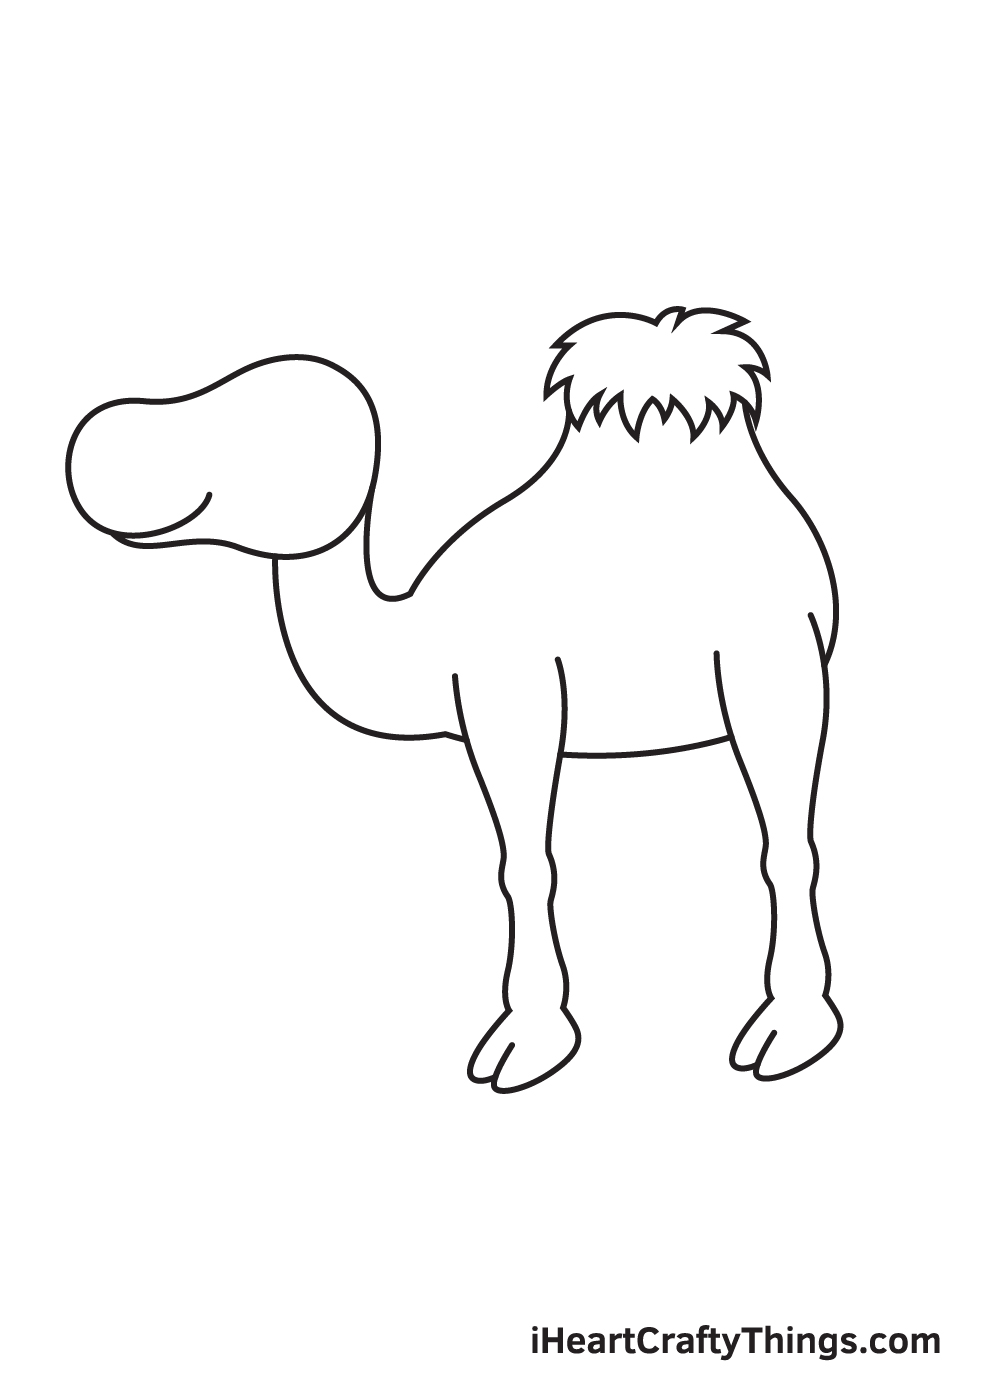
Draw two legs with hooves on the right side of the camel’s body. This forms both the right front leg and the right hind leg of the camel.
Make sure to add a bump in the middle of each leg. This imitates the camel’s bony leg structure, thus making your drawing look realistic!
After drawing the camel’s right legs, don’t forget to erase any lines from the outline overlapping within the legs. This helps keep your drawing more refined, and most importantly, neat and tidy!
Step 5 – Complete the Camel’s All Four Legs
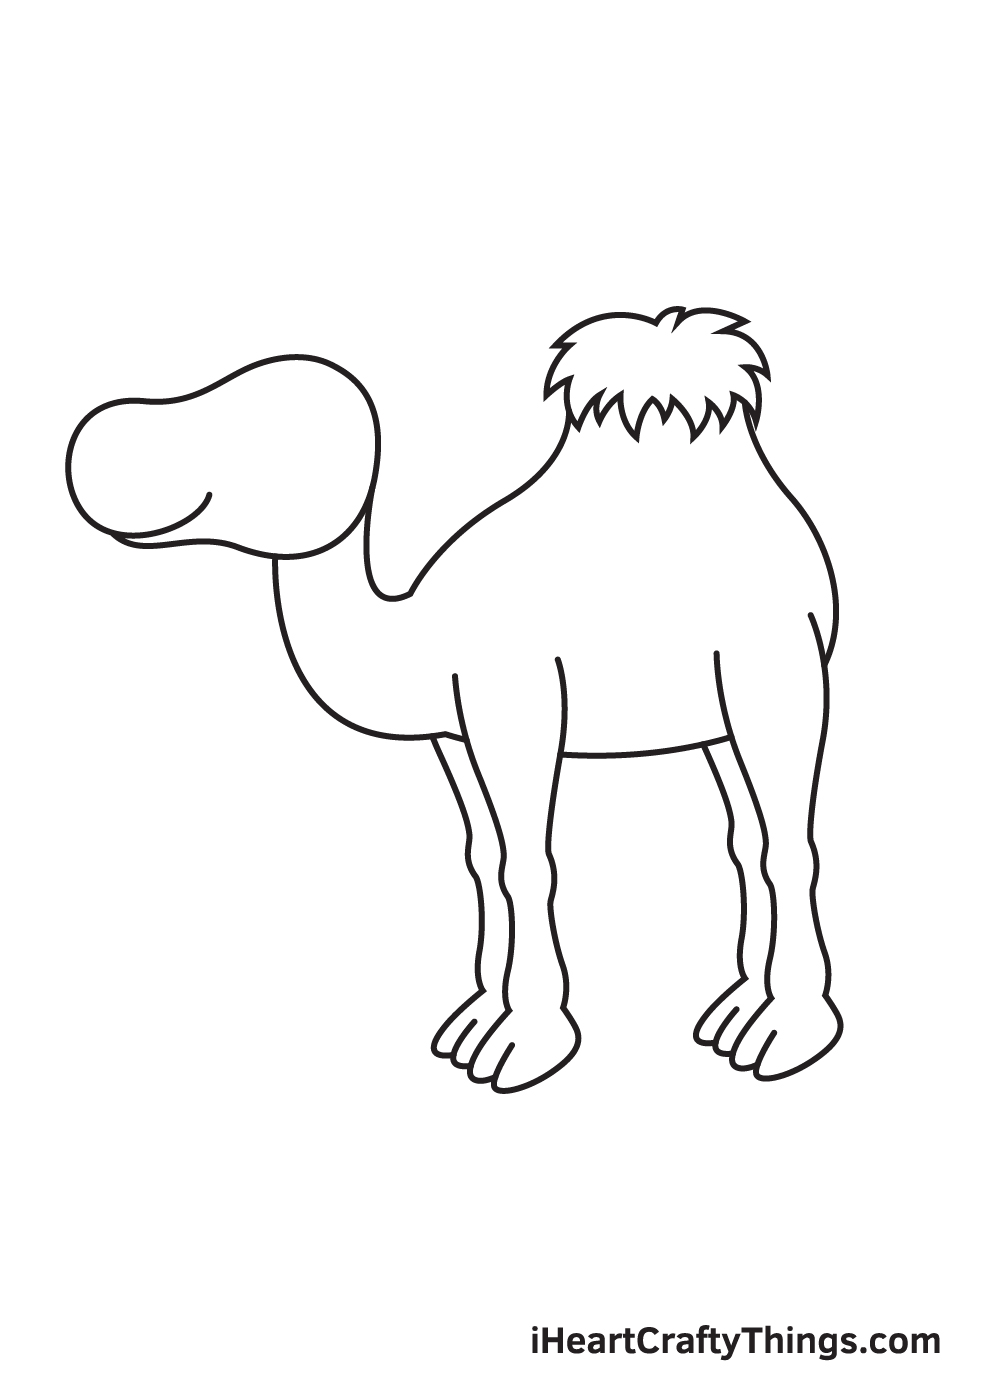
Repeat the previous step on the opposite side of the camel’s body. This creates the left front and hind legs of the camel, thus completing its four legs!
Since the camel is facing towards the left side, its left legs are only partly visible, as shown in the illustration above.
Step 6 – Then, Draw the Pair of Ears of the Camel
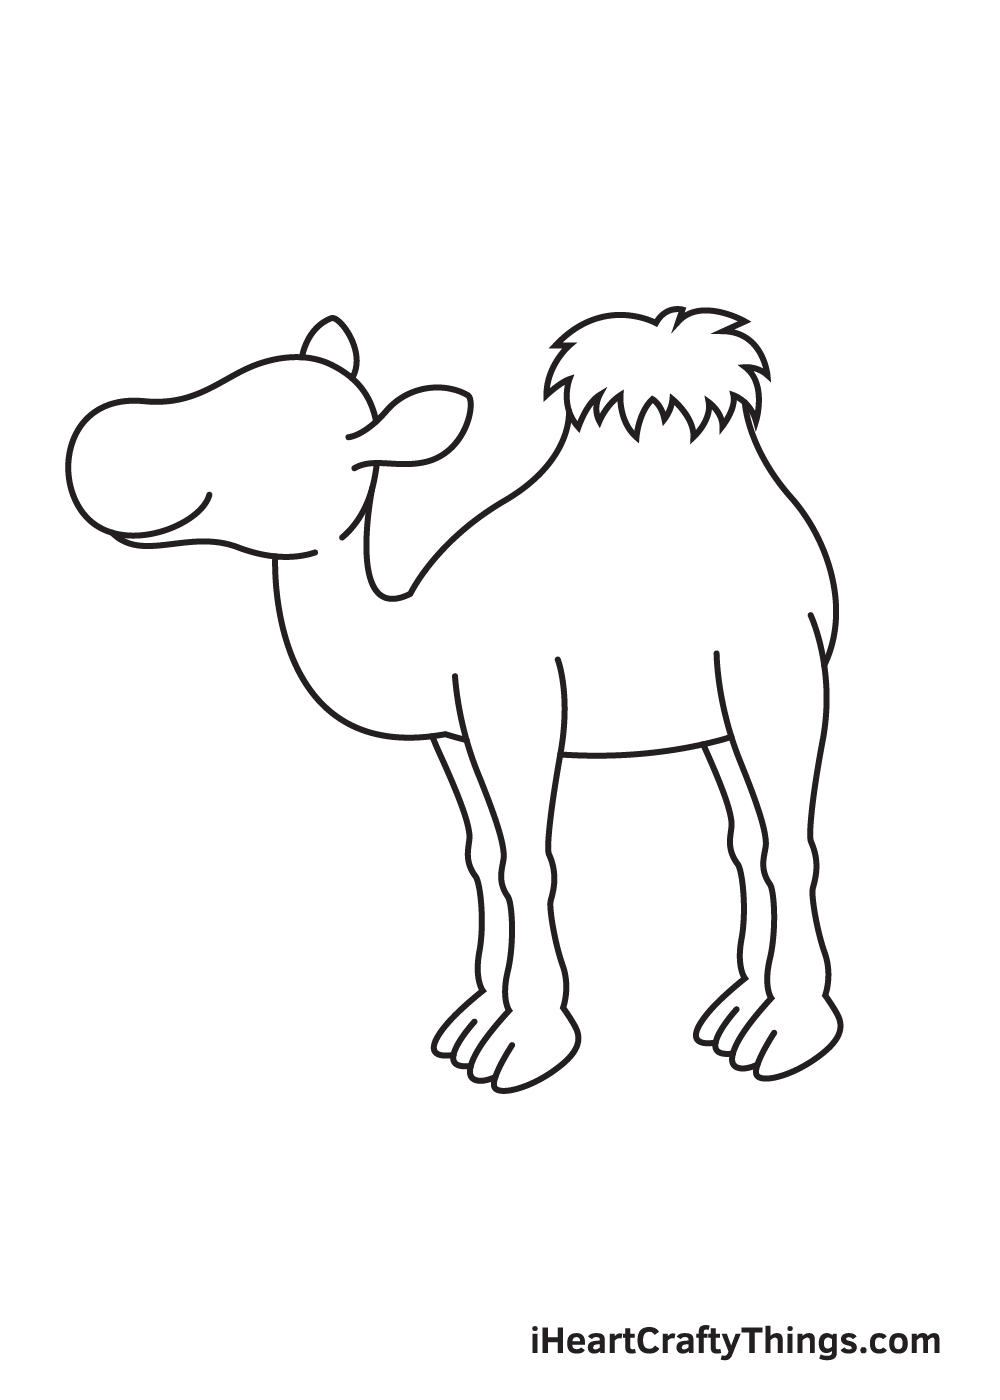
Draw an oval figure with slightly pointed ends on each side of the camel’s head. This creates the camel’s pair of ears.
Camels typically have short, upright ears, so keep that in mind when drawing the ears. Make sure you erase some parts of the head’s outline overlapping within the ears too!
Step 7 – Afterwards, Add the Tail of the Camel
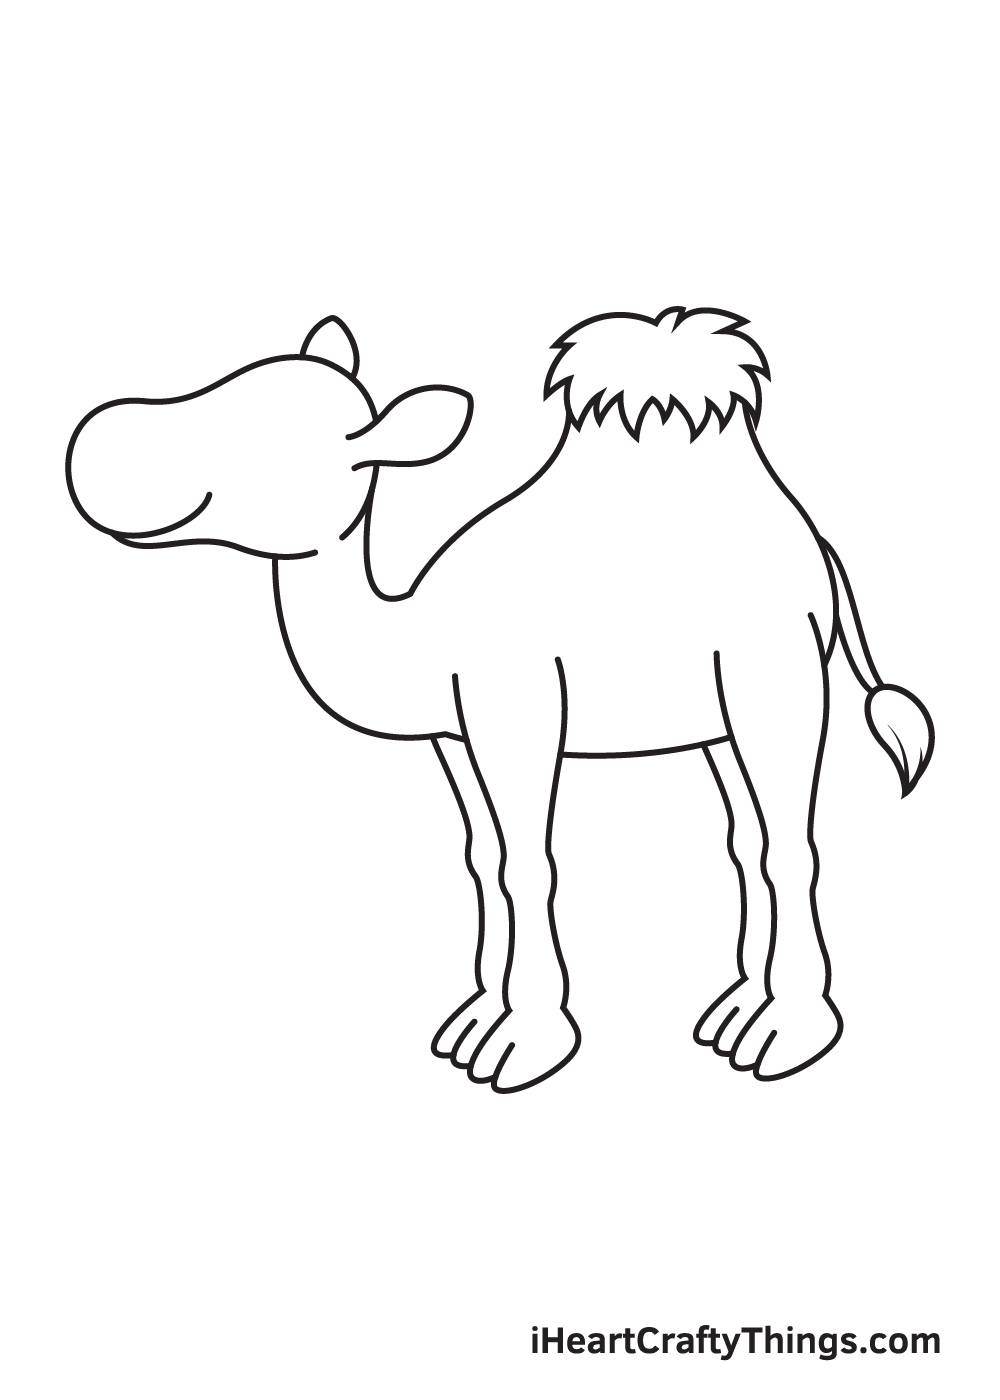
Draw an elongated, narrow line figure with a hairy tuft at the end directly connected to the bottom back of the camel. This forms the camel’s tail.
The tail can be formed by simply drawing two parallel lines while the hairy tuft is as easy as drawing an upside down droplet figure. Don’t forget to add thin line strokes on the pointed end of the hairy tuft to add texture!
Step 8 – Add Details on the Face of the Camel

Draw a large standing oval shape on the camel’s face near its ear. This forms the outline of the camel’s eye.
Afterwards, draw an upward curve shape with a short slightly curved vertical line at the bottom. This creates the nose of the camel right above its mouth.
Step 9 – Now, Draw the Camel’s Facial Features
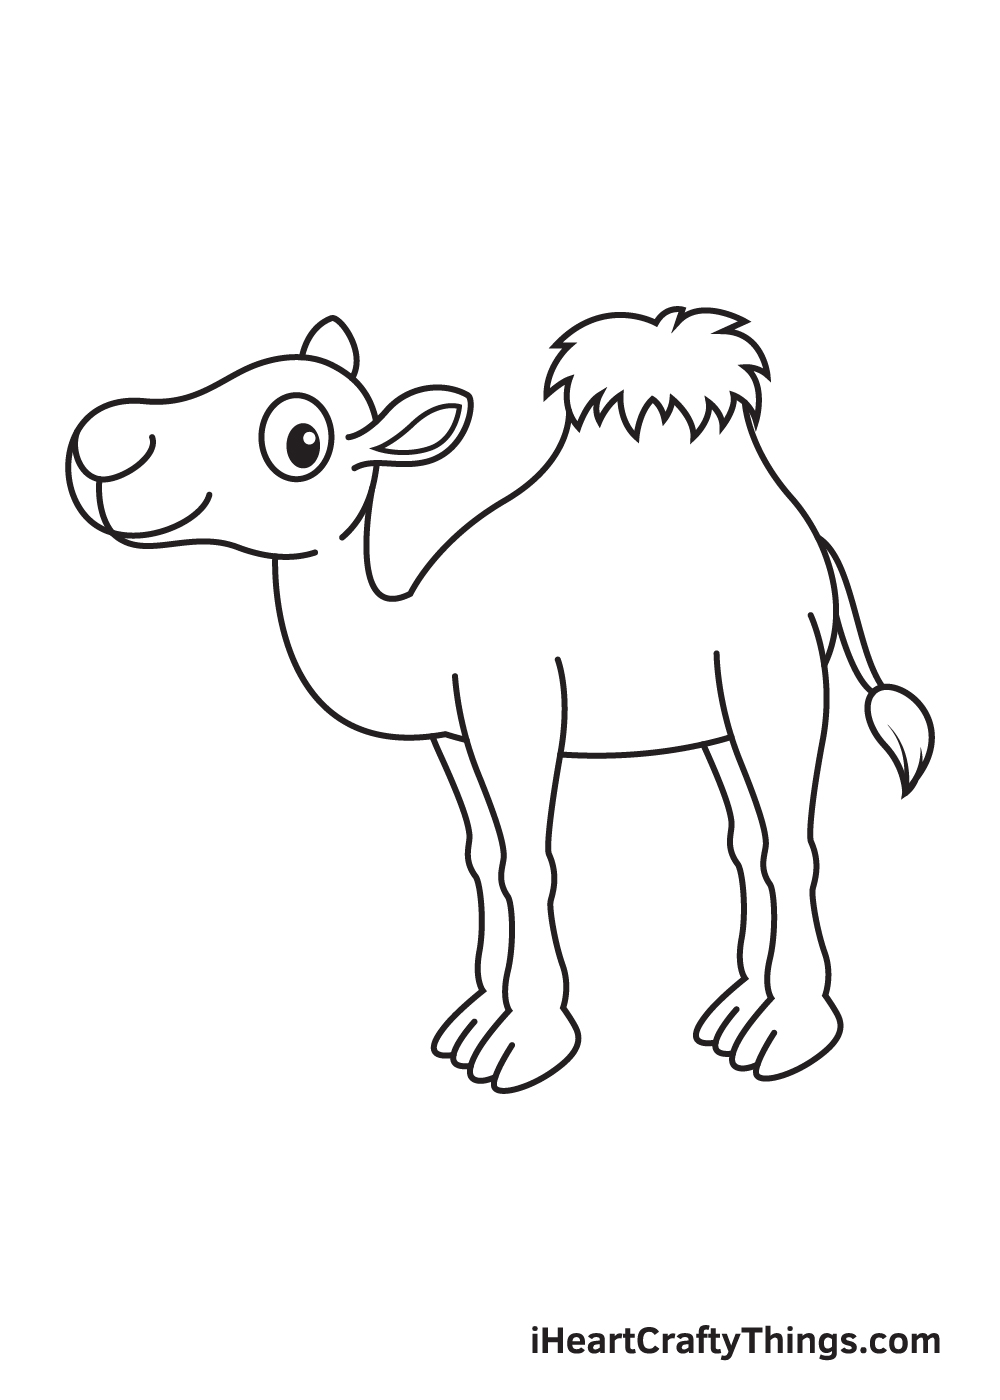
Complete the look by drawing the camel’s eye and inside ear!
Proceed by drawing a small oval shape within the outline of the eyes that we drew in the previous step. Then, draw a smaller circle inside the oval shape.
Shade the entire oval while leaving out the tiny circle unshaded. This creates a dramatic “sparkling eyes” effect.
For the inside ear, simply draw a figure inside the ear following its outline. And, there you have it!
Now that we’ve successfully drawn a camel, it’s time for the most exciting part. Finally, we’ll be coloring the camel!
Camels primarily have light brown coats with a hint of greyish hue. You can opt to color the camel using its original color or use a different color! We recommend doing the latter so you can customize your artwork.
You can also use more than one-colored to create a multi-colored camel. The colors you will be using is entirely up to you! Have fun playing with colors!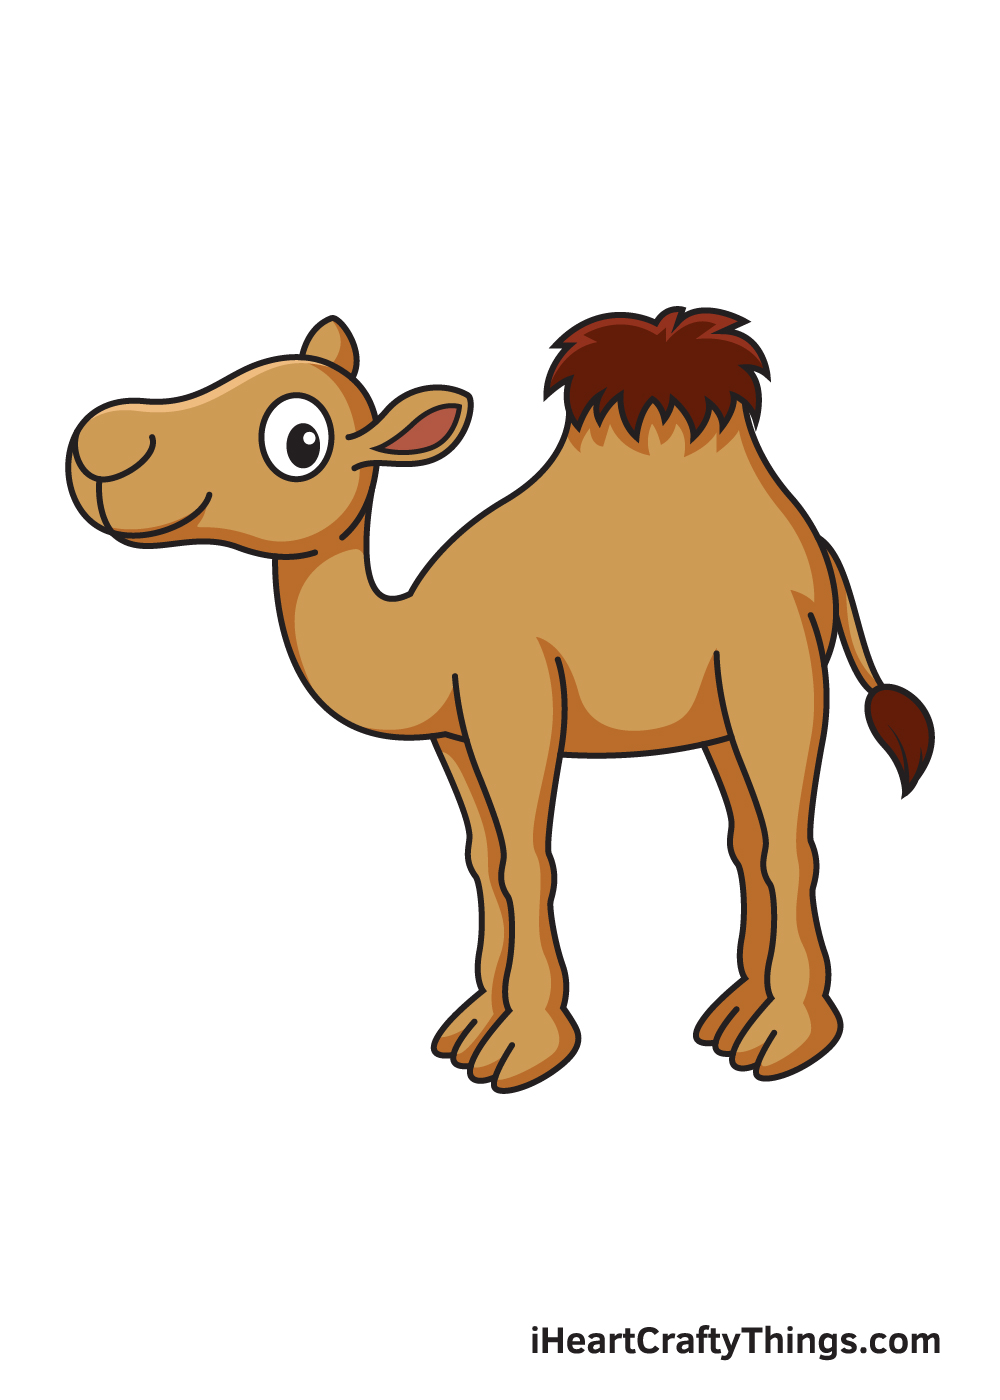
Do this to take your camel drawing to the next level
Get ready to see how you can make your camel drawing even better with these fun tips!
When people ride camels in real life, they will often have packs and saddles on them to help transport things. These would be a great addition to this camel sketch!
Adding a saddle or some packs on the camel’s back would allow you to add all sorts of extra details as well. You could also create a sense of what this camel would be used to transport.
What kinds of details would you like to add to this camel?
Once you have added these details, you could also show someone riding this camel!
If you were to add a human character to this drawing of a camel, they could be in the same cartoon style or maybe something more realistic.
If you need some inspiration, maybe you could even draw yourself and your friends or family riding the camel! Who do you think you would like to add to this image to interact with this camel?
Often when camels are used as transportation, there will be a convoy formed from many camels in a row. That could be a cool arrangement for this camel sketch!
You have everything you need if you want to add some more camels to the image. You can simply follow the steps again to add as many camels as you like.
Then, you could even go with our other suggestions and personalize them with extra details and maybe people riding them.
Finally, the best way to finish off this camel drawing would be with a background setting. This is a step where you can really get creative with it!
There are a few settings that would seem like obvious choices. For example, you could have a heated desert setting.
Another option would be to put this camel in a circus or zoo setting. These are some of the settings that come to mind first, but they are far from the only ones!
What other settings could you use?
Your Camel Drawing is Complete!
Hopefully, you enjoy this step-by-step camel drawing tutorial. What kind of animal would you like to draw next?
Let us know and we’ll do our best to create a drawing tutorial for it. Check out our “How to Draw” catalog to explore many more fun drawing tutorials like this!
As soon as you’re finished drawing and coloring a camel, don’t forget to show off your masterpiece!
Take a photo of your artwork and share it on our Facebook page and on Pinterest. While you’re at it, we hope you take the time to like our Facebook page too!
We can’t wait to see your incredible camel drawing!