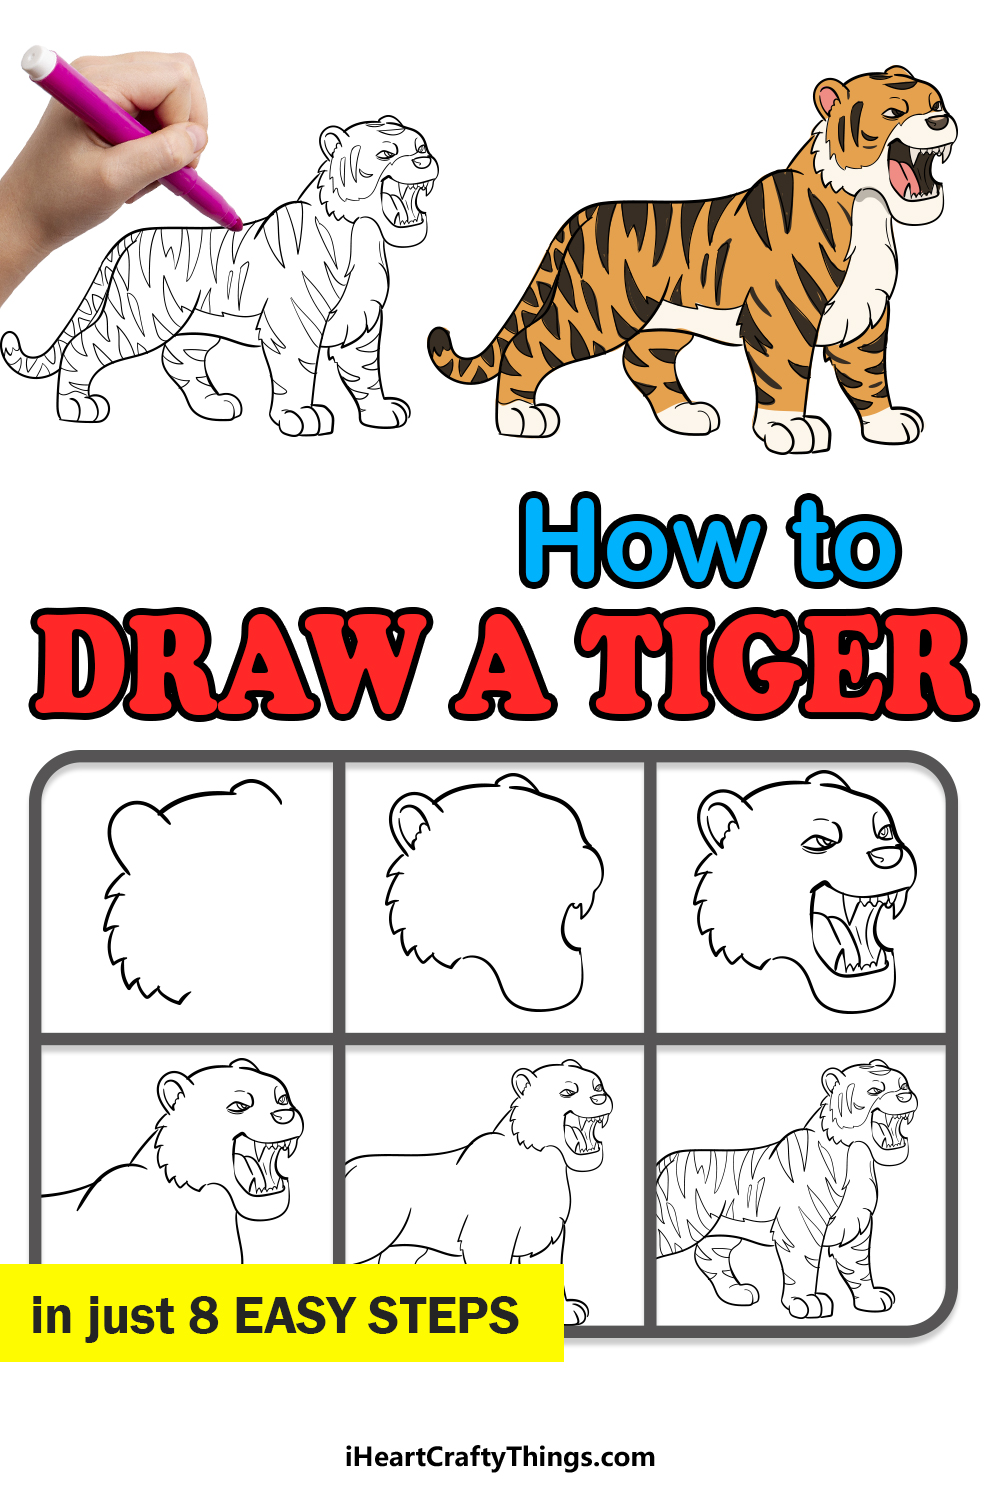
Tigers are some of the most fearsome and dangerous predators on the planet.
They may be known for being apex predators, but despite their dangerous side they are also known for their beautiful and distinctive coloring.
This reputation for danger along with their beautiful appearance has made them a favorite animal among many people.
Because of this, they appear in many art forms, from paintings to movies, animation and more.
If you would like to learn how to draw one yourself, then this step-by-step guide on how to draw a tiger in 8 easy steps is for you!
Make This Tiger Drawing Easier By Preparing For It
As you can see in the later images in this guide, this tiger drawing is somewhere between being realistic and cartoony. This style is awesome, but it can make it a bit tricky to draw.
The reason is that if you get some of the details or proportions wrong then it could throw off the whole drawing. That’s nothing to be intimidated by, however!
Not only will we be outlining how you can draw this design step by step, but there are some other ways that you can make it easier as well.
One of the best ways you can prepare for this drawing is by looking at some real tigers. Because these pictures will be completely realistic, they won’t match the design we’re drawing exactly.
However, it can still help you as you draw the details and the proportions, and you can use it along with the images we prepared in this guide.
If that doesn’t help completely, you can use a pencil lightly on the page to draw each step before you use your pen. Breaking down the design into simple shapes can also help you to get to grips with the proportions.
Creating these rough sketches and shapes can then prepare you for the final lines you will add later. If you really find that you can’t get the drawing right, you could also change the design a bit.
If you prefer a simpler cartoon style, then you could use that for this design by removing some of the details and simplifying the shapes.
If you keep these tips in mind, follow the steps and take it slowly then you will definitely be able to create an awesome tiger drawing one way or another!
How to Draw A Tiger – Let’s get Started!
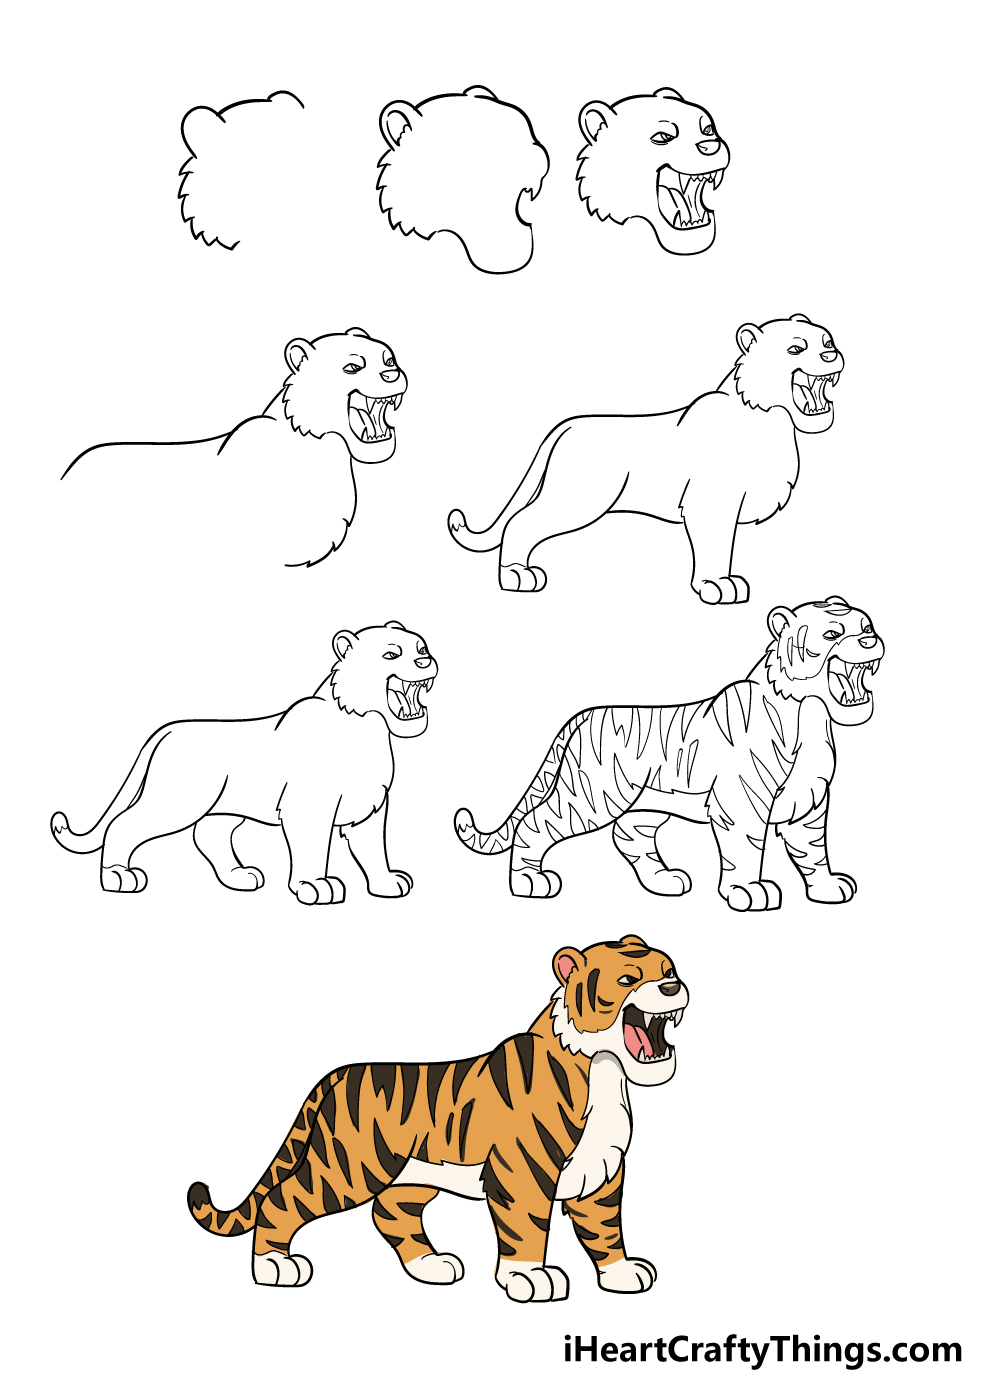
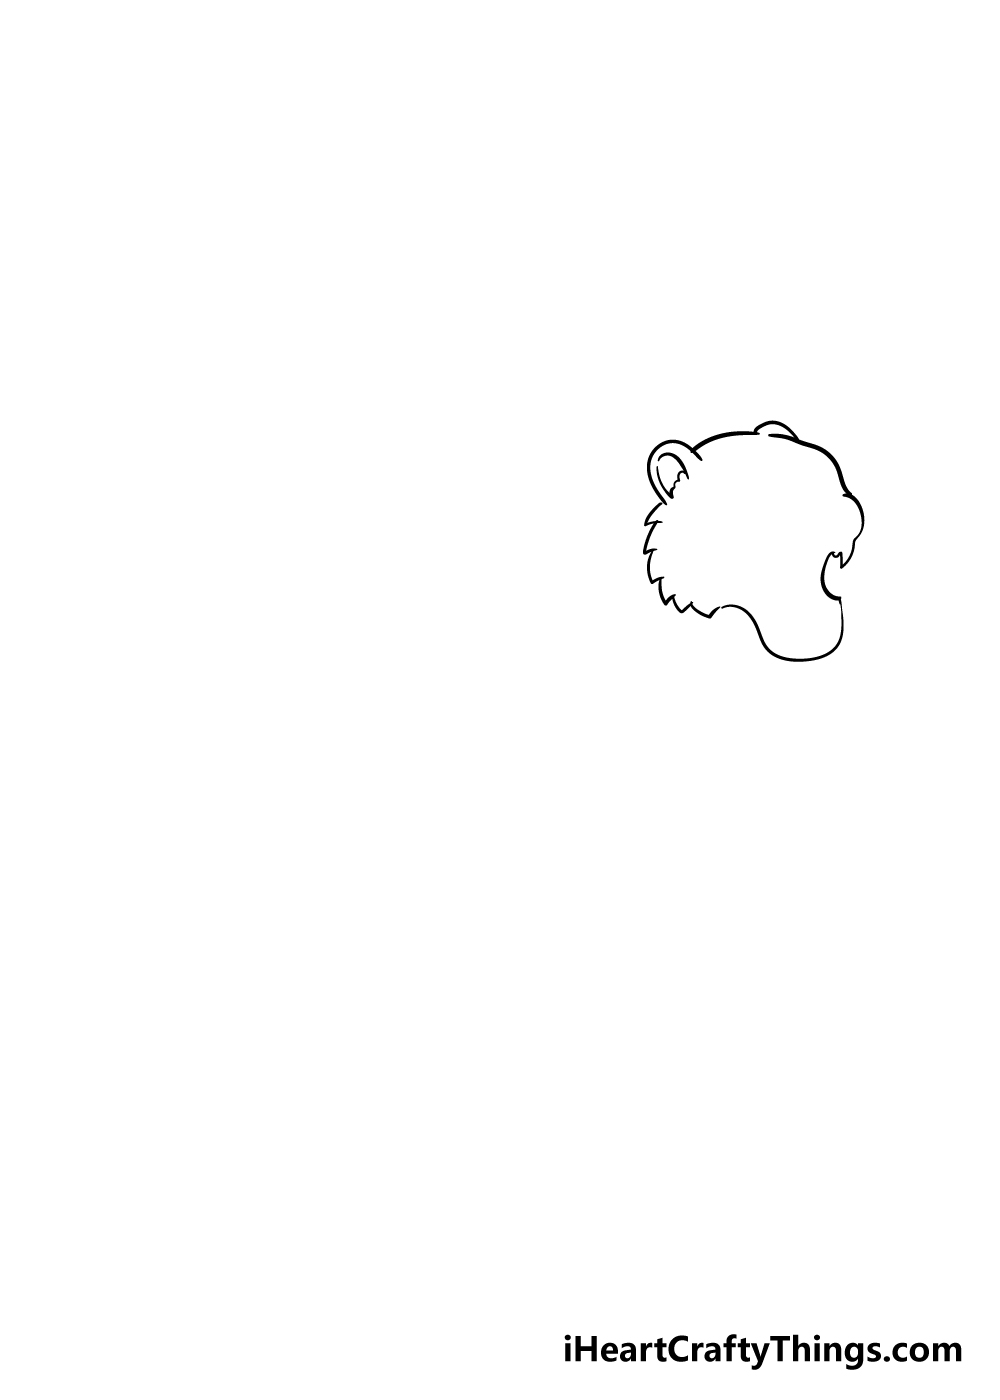
Step 1

We shall start with the head of this guide on how to draw a tiger. Tigers have some small, rounded ears, so you can start with that by drawing in some curved lines.
Once you have the ears in, you can use some sharp, jagged lines to make the hair at the back of the head.
Step 2 – Draw in the outline of the head
These next few steps could get a bit tricky, so you should refer closely to the reference image for help as you do these next few ones.
For these next steps, I would recommend using a light pencil to draw first and then go over it in pen once you’re happy with how it looks.
We shall be drawing in the forehead, open mouth and chin of the tiger with a line for the inner ear to finish off this step.
Step 3 – Add in a face for your tiger

Now that you have the head outline of your tiger drawing, you can start to draw in the face of the tiger. This is another tricky step, so it will help to draw in each element of the face one at a time.
You can use some curved lines with circles inside them to make some thin, fierce-looking eyes for the tiger.
Then you can use a rounded shape for the nose, and then give it a wide-open mouth. Once the mouth is drawn, your tiger definitely needs some sharp teeth inside of it.
I would again suggest using some pencil for this step before you go over it with a pen to finish it off.
If you follow the picture closely and take your time with it, I know you’ll do a great job of it!
Step 4 – Start to draw in the body
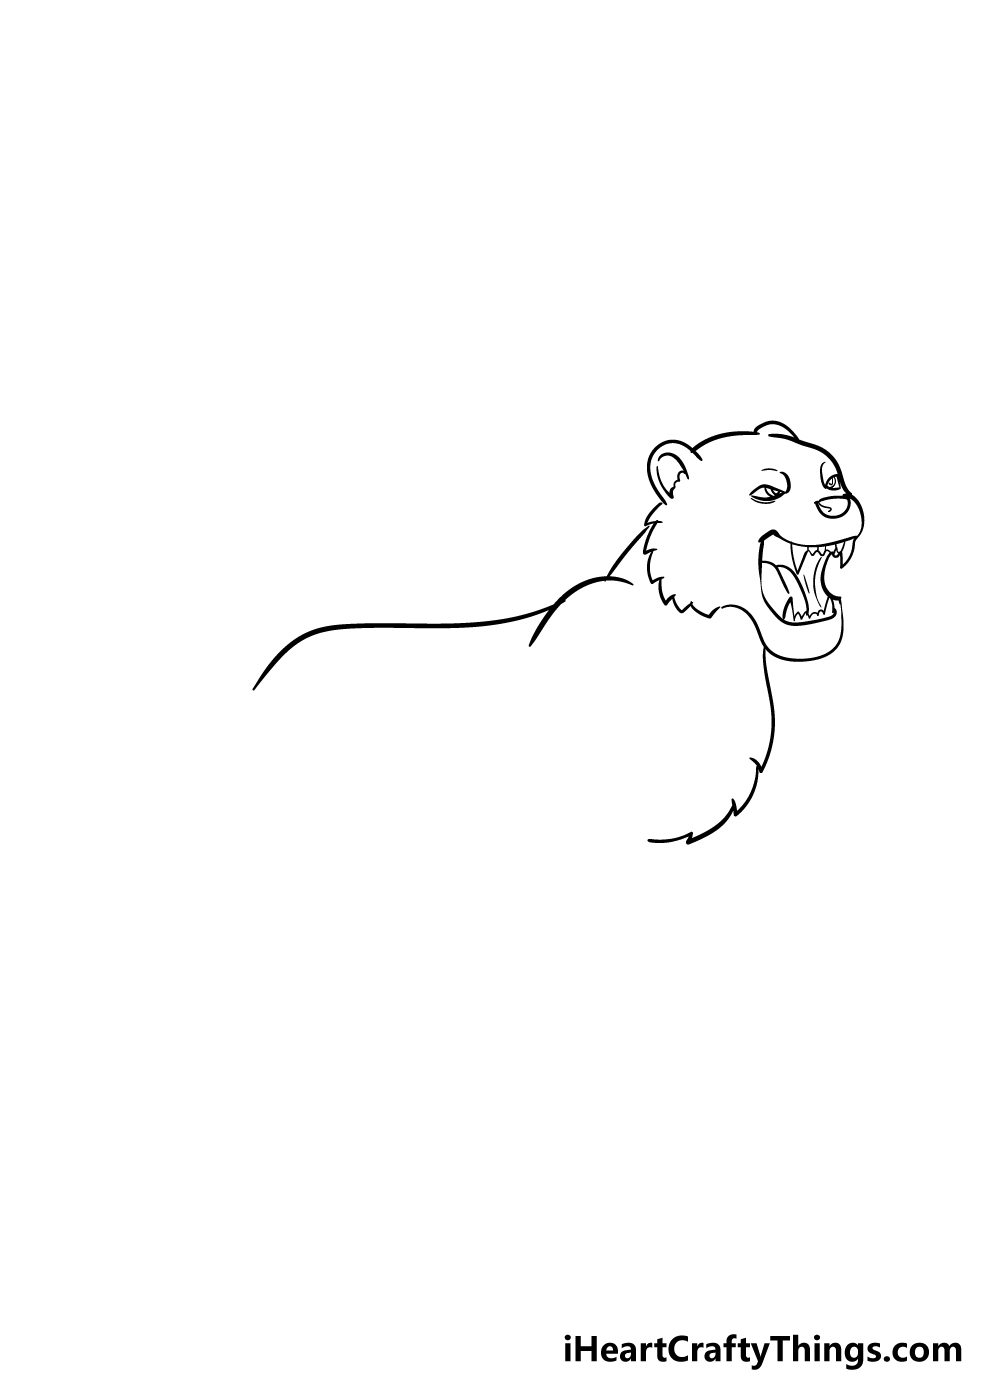
Now that you have the head and face of your tiger drawing done, you can start on the body. Your tiger should have a fairly straight back with a round shoulder as you can see it in the picture.
Then, you can draw in a nice rounded chest with some jagged edges to make it look furry.
Step 5 – Next, let’s draw in some legs and a tail
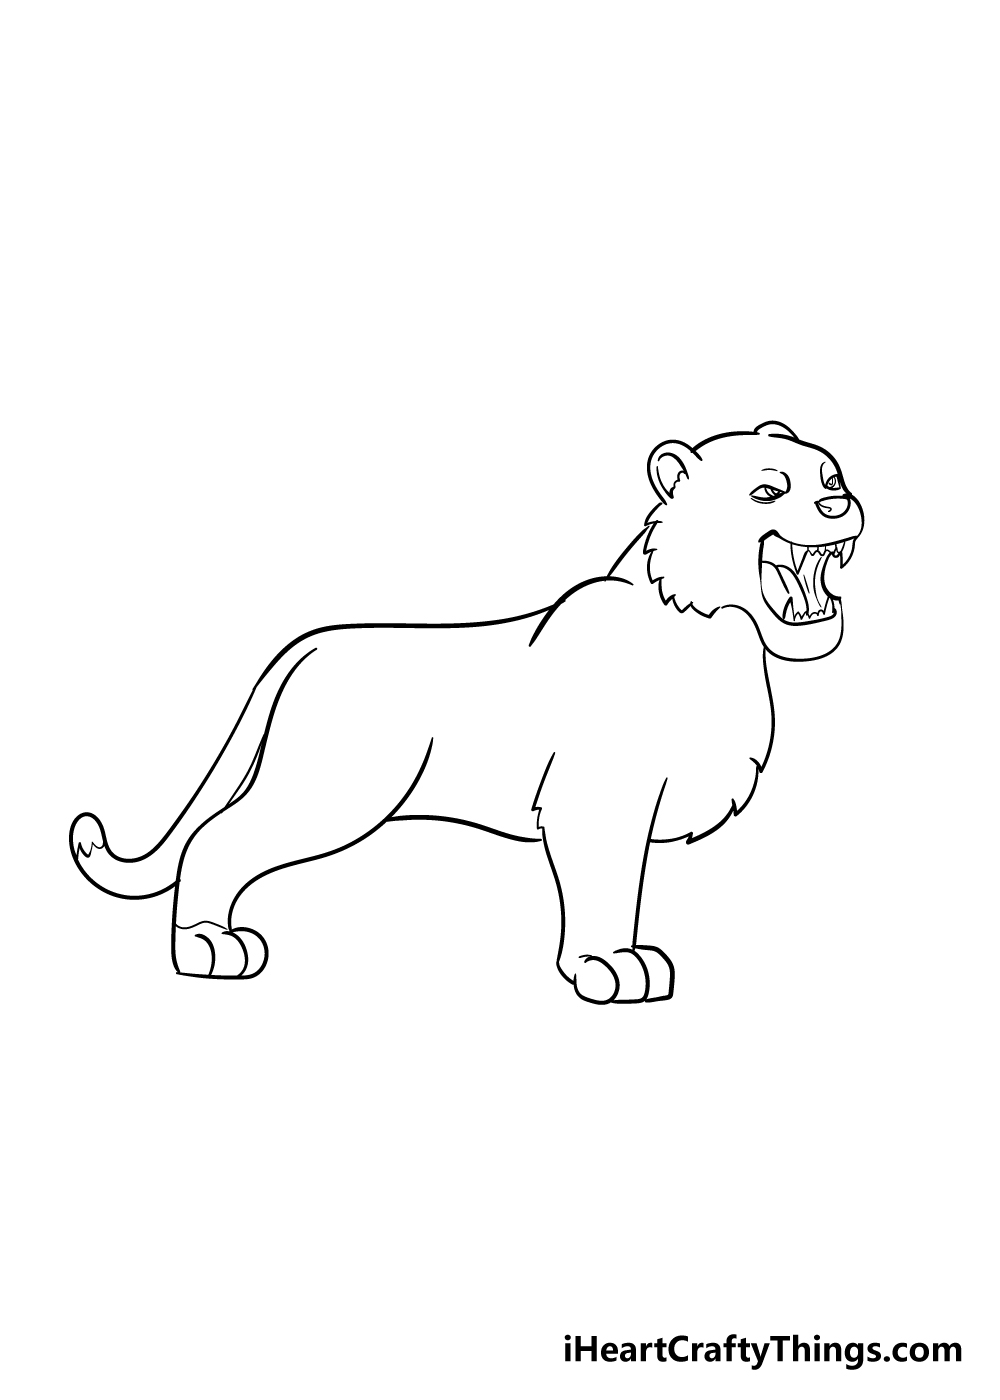
Your tiger drawing is starting to take shape, and now it needs some legs added to it. The front leg that’s closest to us will be quite straight, ending in some curved paws.
You can then draw in a slightly curved line for the stomach and then draw in a more rounded back leg. Lastly, you can draw in a straight tail with a curve at the end.
Step 6 – Now, we will draw in the back legs of the tiger
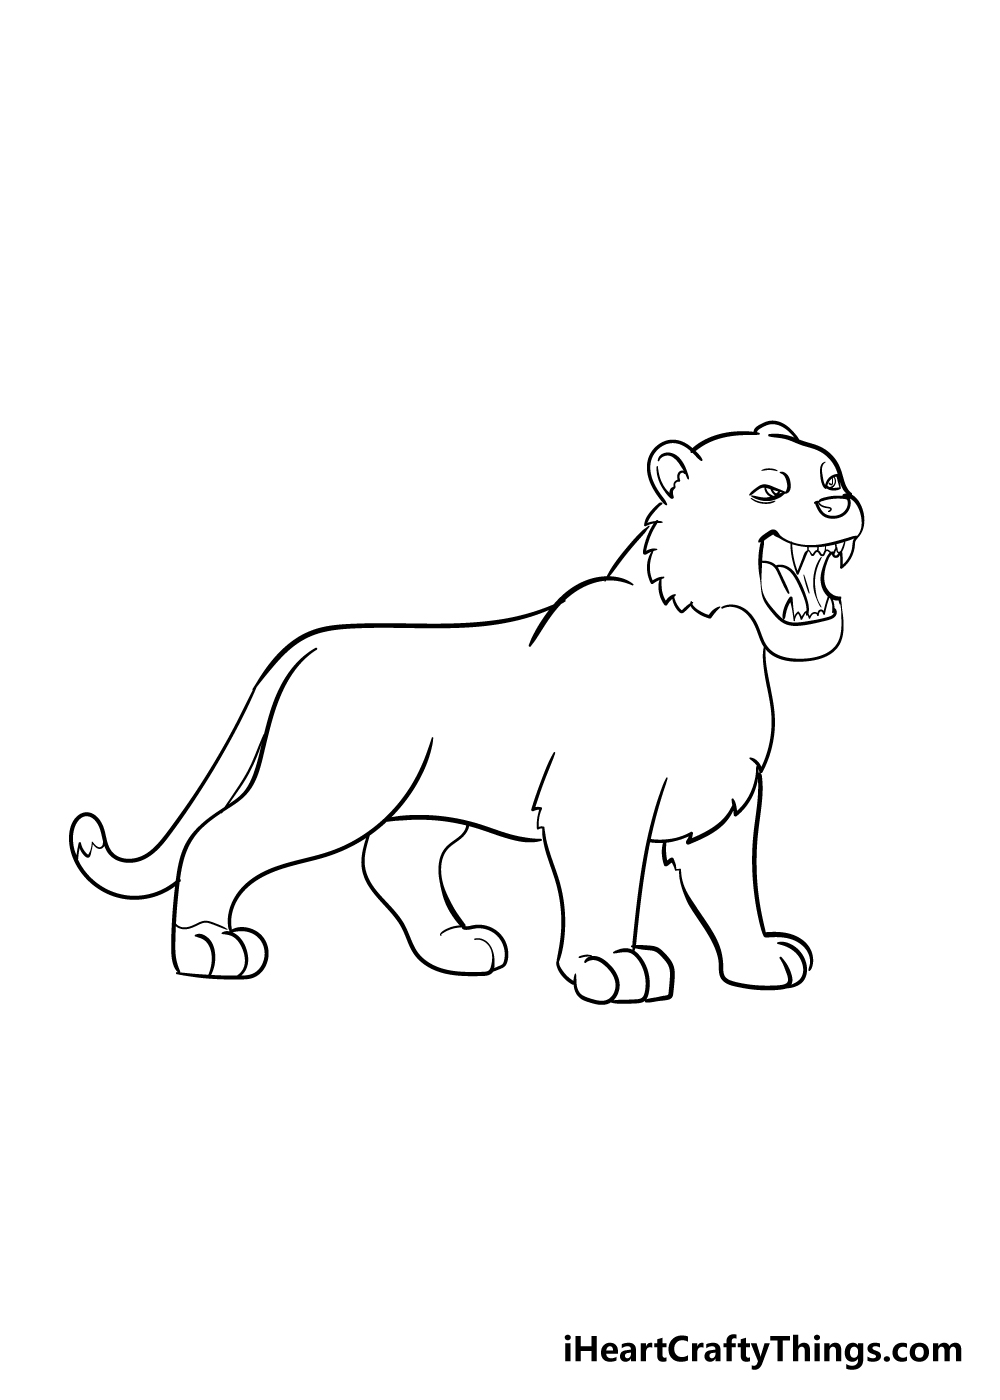
With the legs you drew in the previous step, these next ones should be much easier.
To draw in the other legs, simply draw in two that look similar to the other you drew, only on the other side of the tiger.
The reference picture will show you how it should look, and once you’re happy with how it looks, you can move on to the final steps.
Step 7 – Give your tiger some stripes
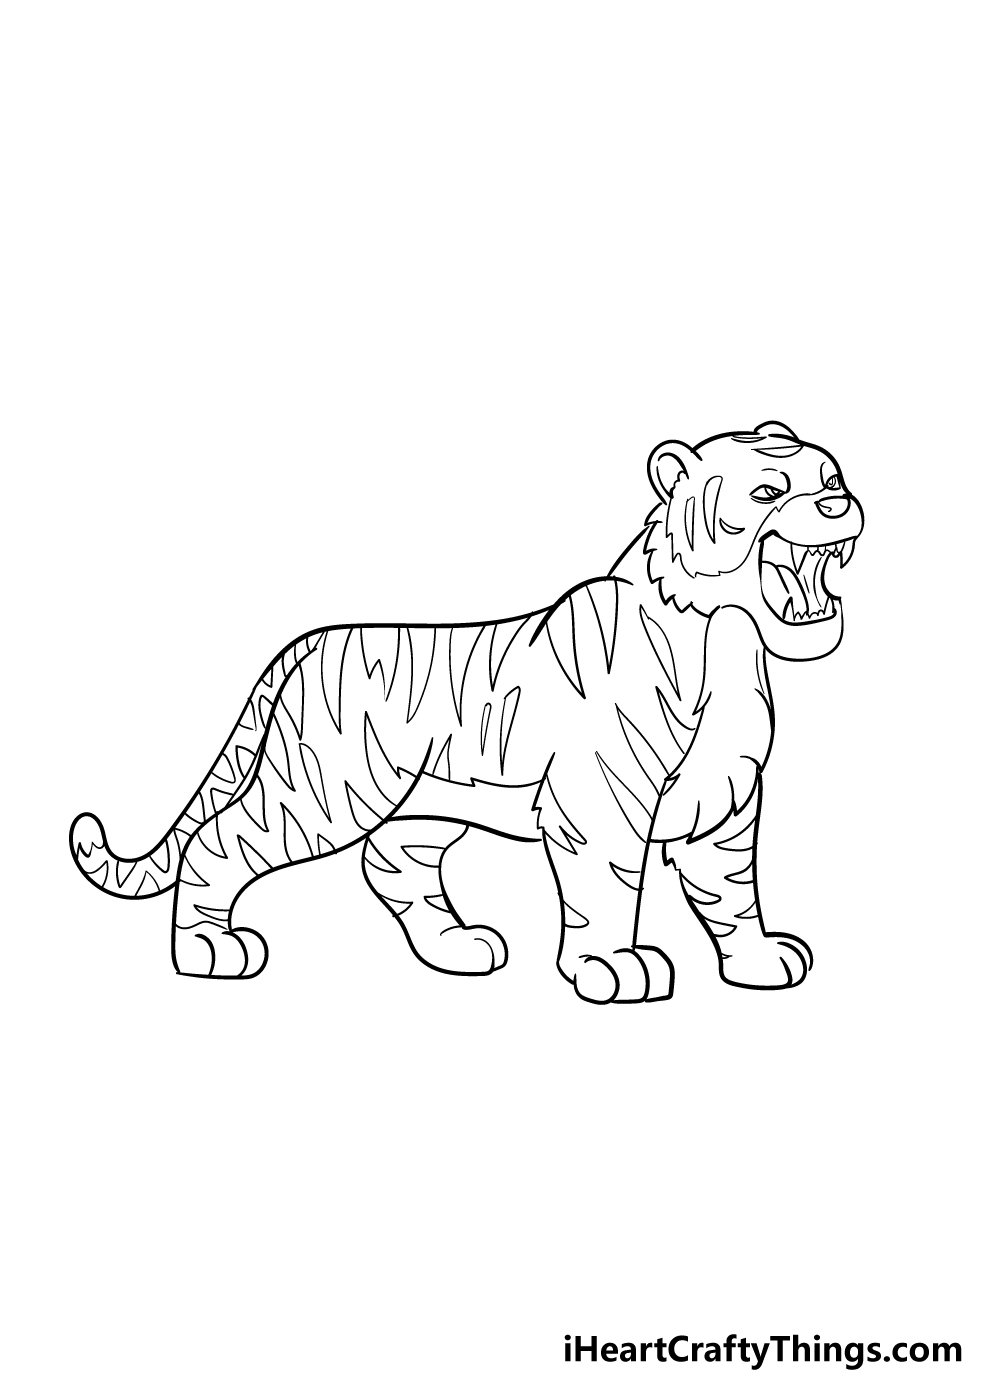
You’ve almost reached the end of this guide on how to draw a tiger! A tiger wouldn’t be a tiger without stripes, however, so we shall draw some in for this step.
It may look complicated when you look at the reference image, but it isn’t as hard as it may look. You can draw in some stripes using some curved line shapes throughout the tiger.
You can add in stripes as you wish, however, and you shouldn’t be too concerned with replicating the image exactly. You can get creative with this step and draw in the stripes in a way that looks good to you!
Step 8 – Now finish it off with some color
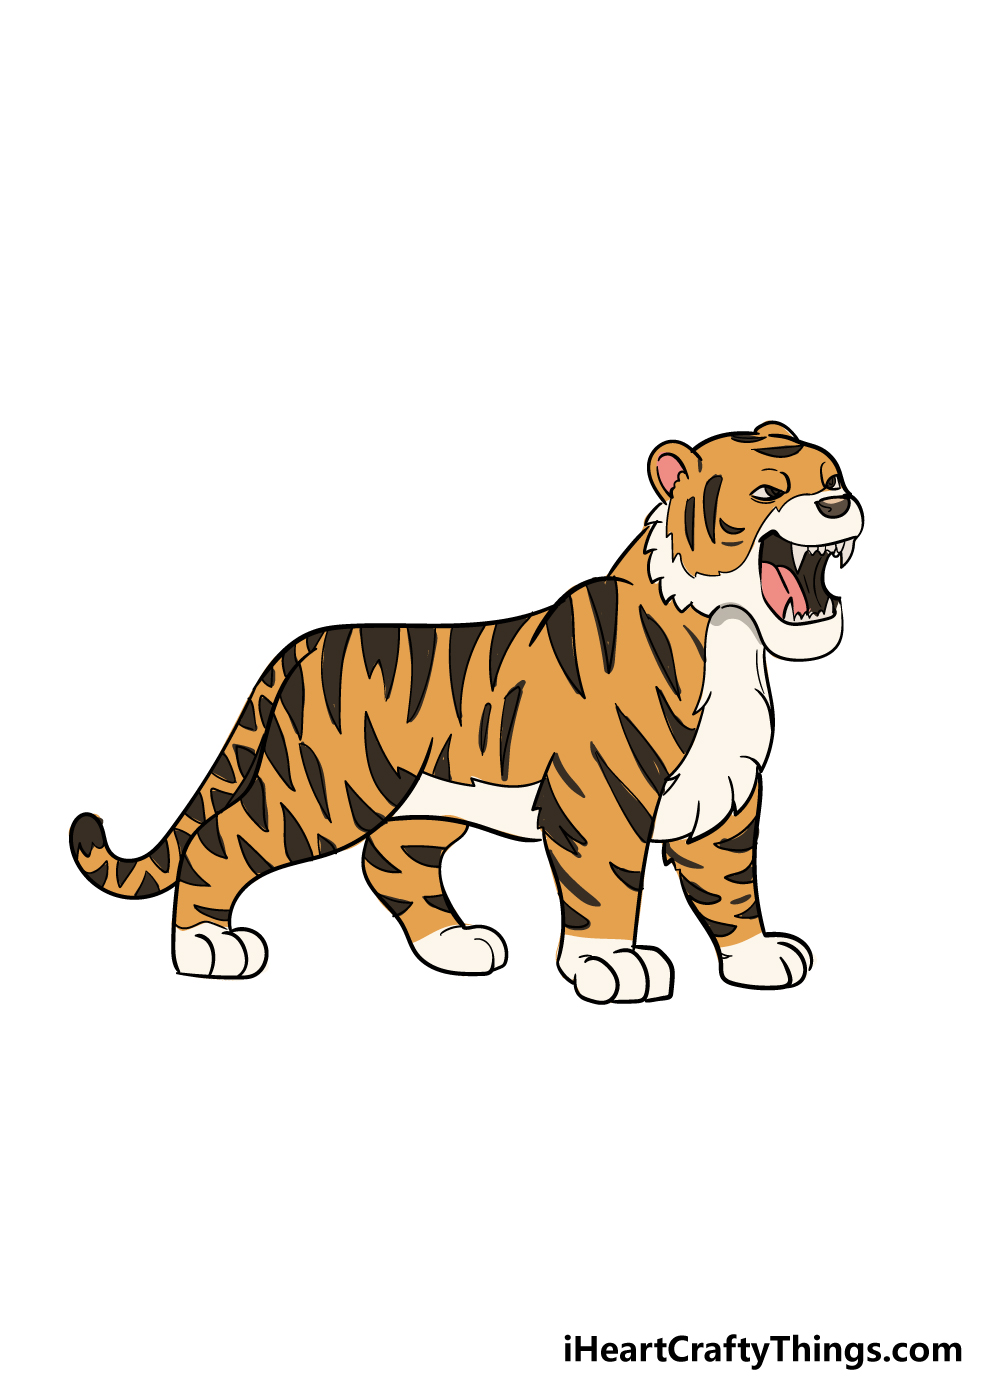
Now that you have drawn the entirety of your tiger, you should be very proud of yourself as there were a lot of details to get right on this one. Hile the drawing is finished, you still have one step left to go and that is to color in your amazing tiger drawing!
For this step, you should really let your creativity flow and express yourself with some brilliant colors.
Tigers are mainly colored with bright orange, black and white, so you can stick to these for a wonderful finish to your drawing.
That’s one way to go about it, but you could also get creative and use your own favorite colors for a more stylized, colorful tiger!
If I were coloring in this tiger, I would use some acrylic paints for a bright, vibrant look to the colors. That’s what I would do, but what colors and art tools are you thinking of for your tiger drawing?
5 Tips To Make Your Tiger Drawing Even Better!
Make your tiger drawing shine bright with these fun tips we have for you!
The animal we depicted in this tiger drawing looks like it is giving a mighty roar. You could show this by adding a few details to the drawing.
These could be as simple as drawing some wavy lines coming from the mouth of the tiger. Or, you could maybe add a speech bubble by its mouth and write a big ROAR in big letters.
How do you think you could depict a mighty roar?
Another way of making this drawing of a tiger even better would be to add some animals around it. You could use animals that would be found where tigers are naturally, but you could also add any you like!
Some colorful parrots or maybe some cute monkeys would be examples of animals you could add to the scene.
Speaking of making a scene, you may want to add a background to this tiger drawing. There are many different backgrounds you could go for if you wanted to do this.
One idea would be to draw the tiger in its natural habitat by drawing a jungle setting. Or, you could make it look like the tiger is at a zoo.
These are just a few ideas, but you can really use your imagination for this!
Once you have the hang of this design, you could also change it up a bit. For example, you may want to make it even more cartoony and expressive.
Or, maybe you want to make it look even more realistic! If you can’t decide, then you can also try out several different versions to have even more art to show off.
Tigers have a famously beautiful orange and black color scheme, and that would look amazing for this tiger sketch. You could stick to these colors, but it could also be fun to use some bright and unique colors for the tiger.
It may be less realistic, but sometimes a stylistic approach can be even better!
Your Tiger Drawing is Complete!
You’ve finished this guide on how to draw a tiger, and you should be incredibly proud of your drawing!
This guide may have seemed like it would be difficult when you first saw it, but if you follow the guide, take your time with it and plan it out nicely then we know you will have a beautiful tiger drawing in no time!
Once you can draw it, you can then further personalize your tiger with your own details, colors, art mediums and even backgrounds that you can draw in!
There’s no end to the creativity you can show off, and we can’t wait to see what you do!
We have so many more great step-by-step guides coming out soon, so be sure to check our site out every day to never miss out on our awesome guides!
Also, we would love to see your incredible tiger drawings, so we really hope you will share your drawing on our Facebook and Pinterest pages so we can admire your creativity!