Going to school is arguably one of the most enjoyable parts of our lives.
Though answering quizzes and doing homework can be stressful, nothing beats the fun of eating lunch with your friends and playing games with your classmates.
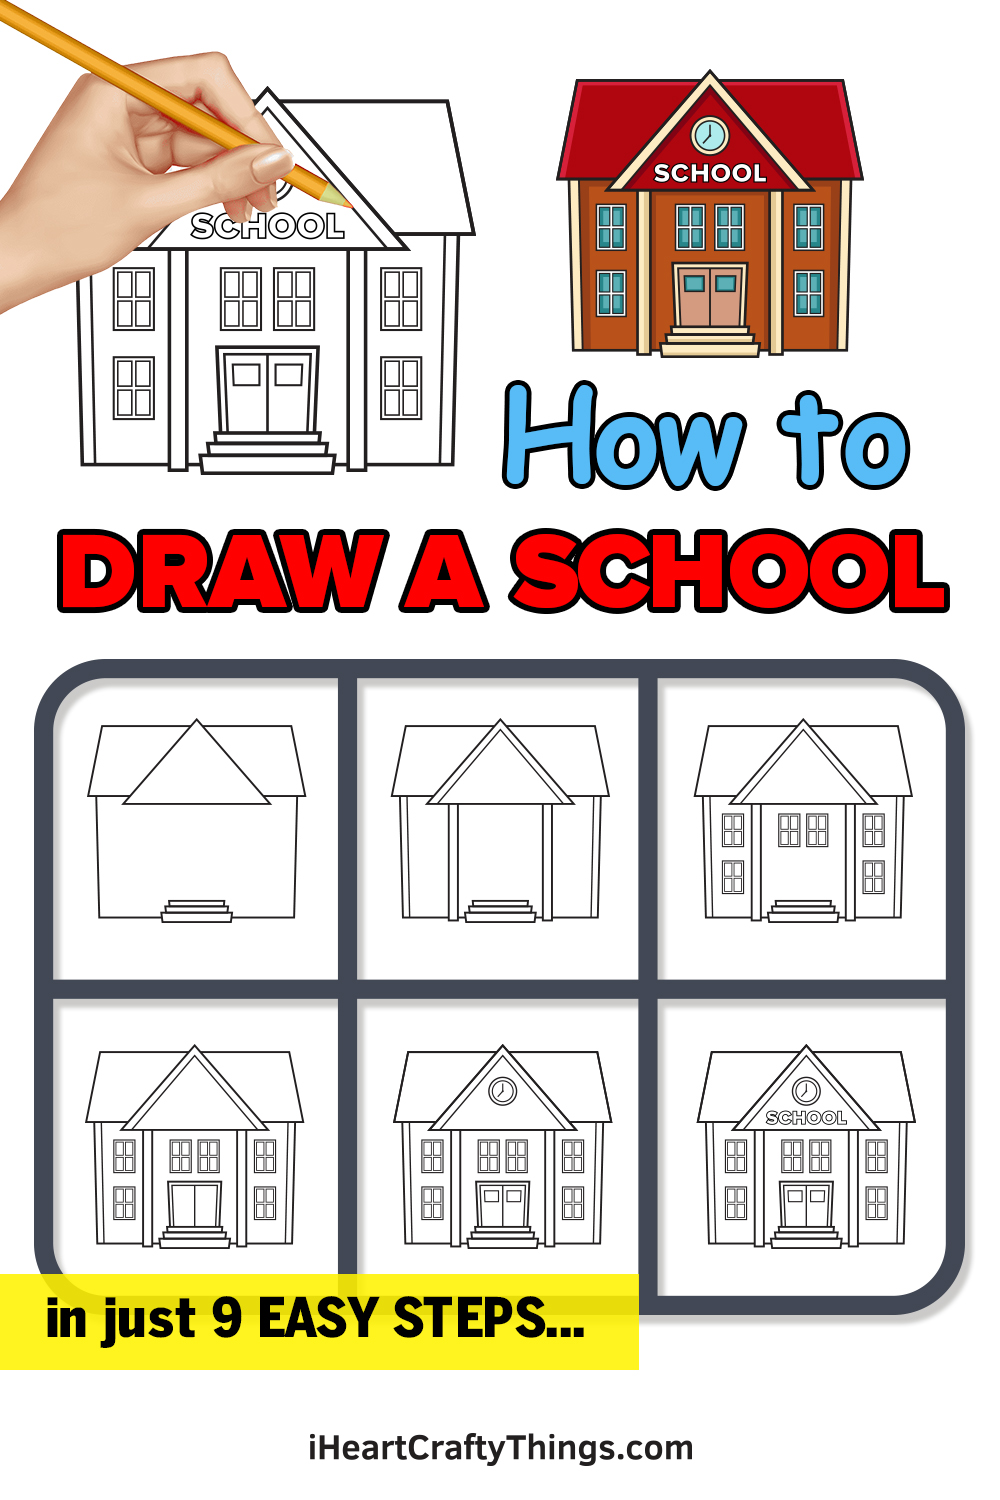
Today, we’ll reminisce about the good times of going to school. We have created a step-by-step tutorial on how to draw a school, summed up in 9 easy instructions and simple illustrations.
What’s fun about this tutorial is that you can customize your drawing to create your very own dream school!
Have fun and unleash your creative potential!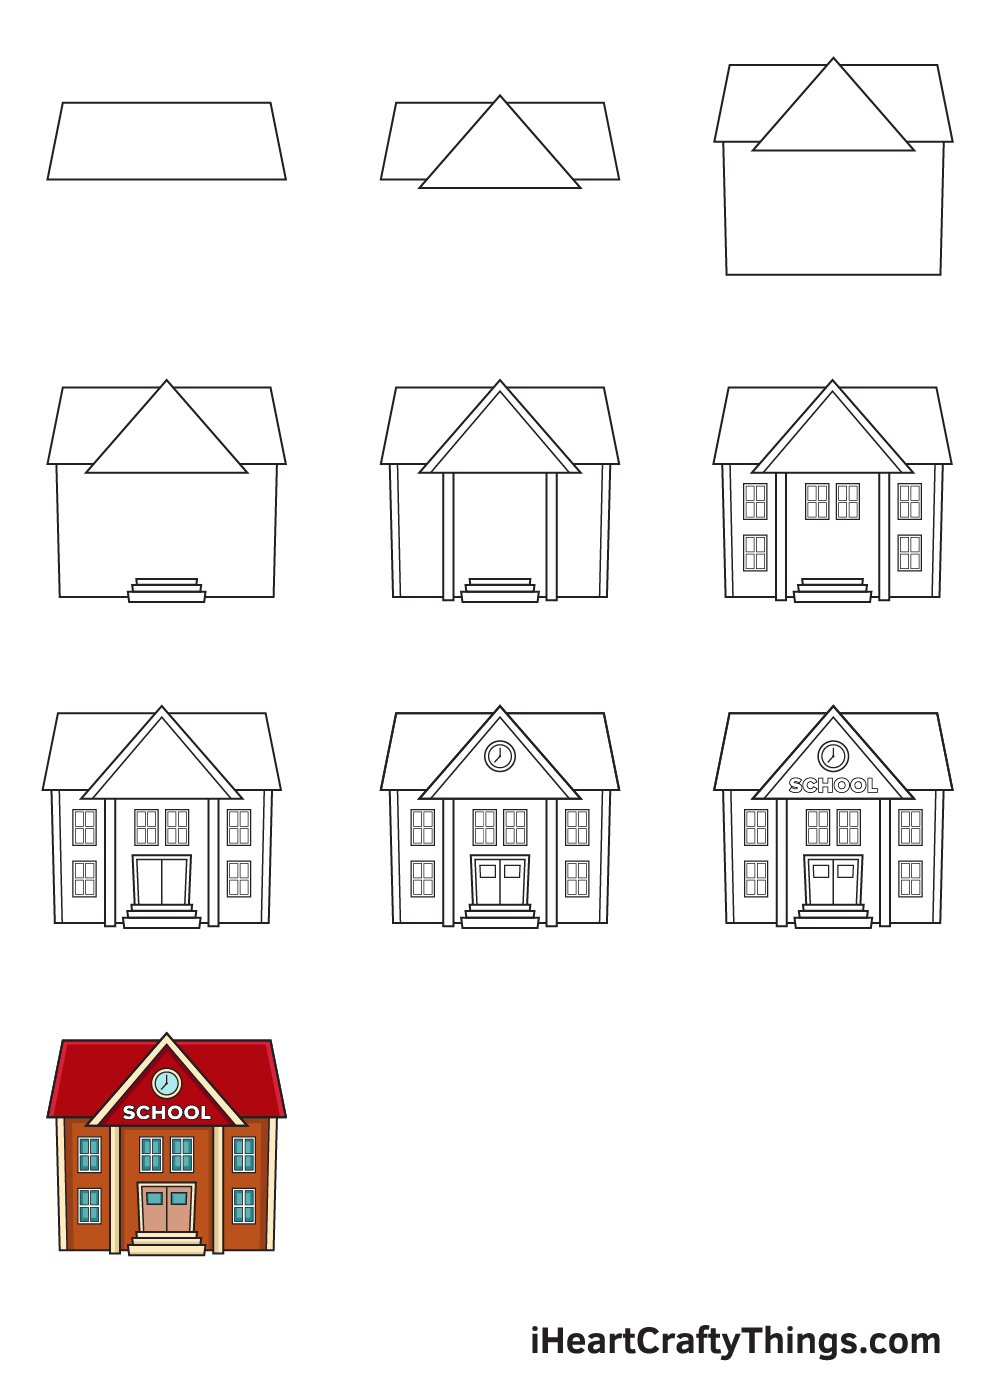
How to Draw a School – Let’s get started!
Step 1
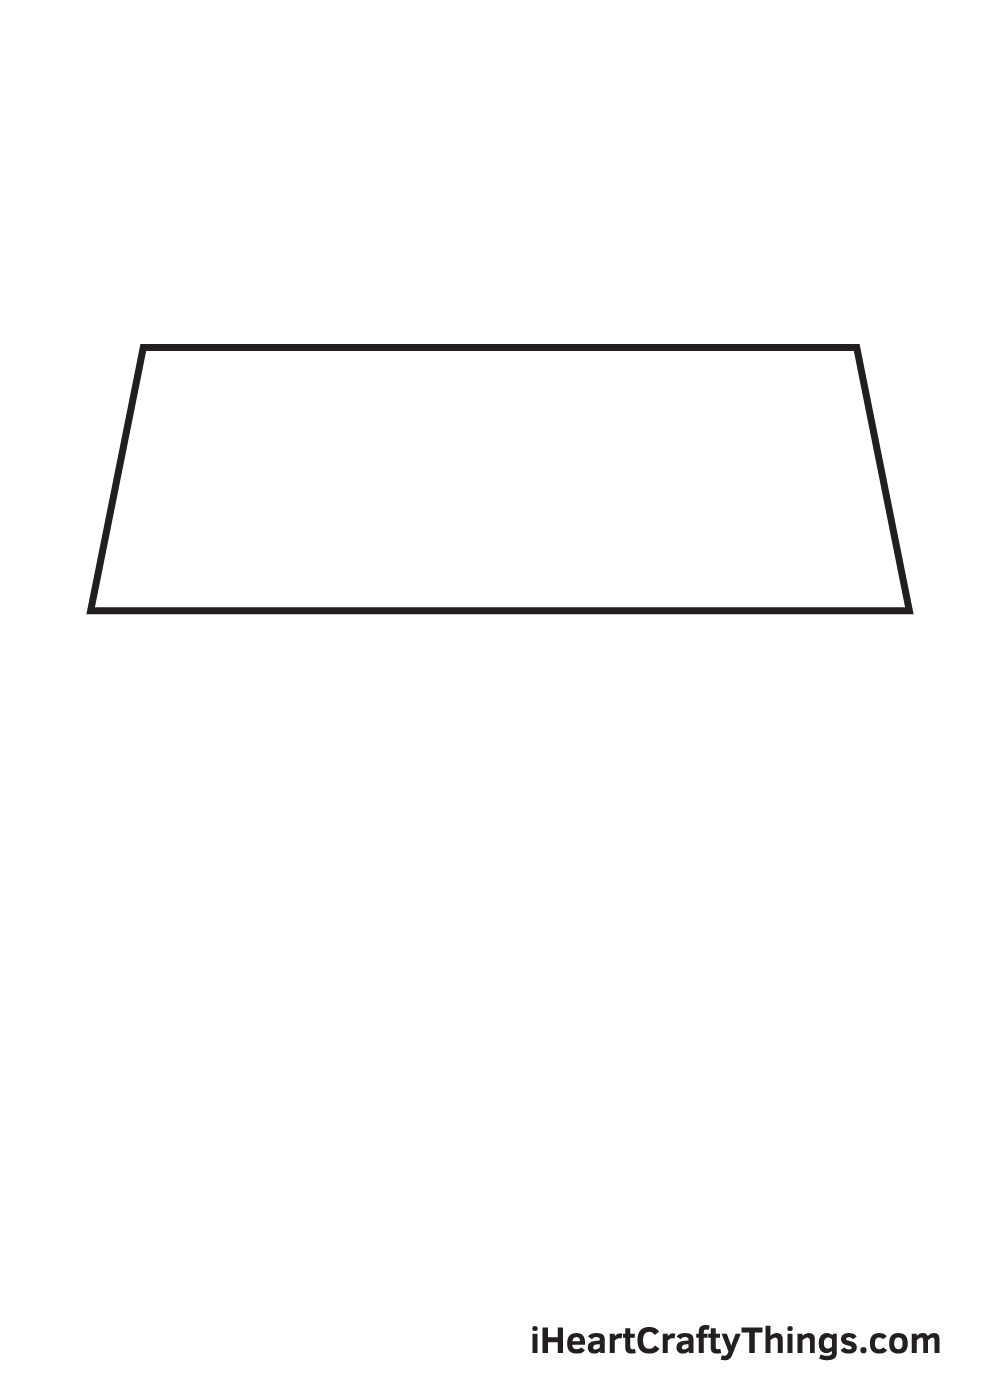
Start by drawing a wide trapezoid shape on the upper portion of your paper.
This forms the roof of the school. Beginning on the top part of your paper ensures that there’s sufficient space for the wall and other parts of the structure.
Remember, maintain a gentle grip and light strokes when drawing an outline or rough sketches. Avoid pressing down too hard with your pencil so you can easily get rid of any lines you may no longer need later on.
Drawing a school is heavily dependent on straight lines. So, feel free to use a ruler every step of the way to help you draw straight lines quickly and easily.
Step 2 – Structure the Roof of the School
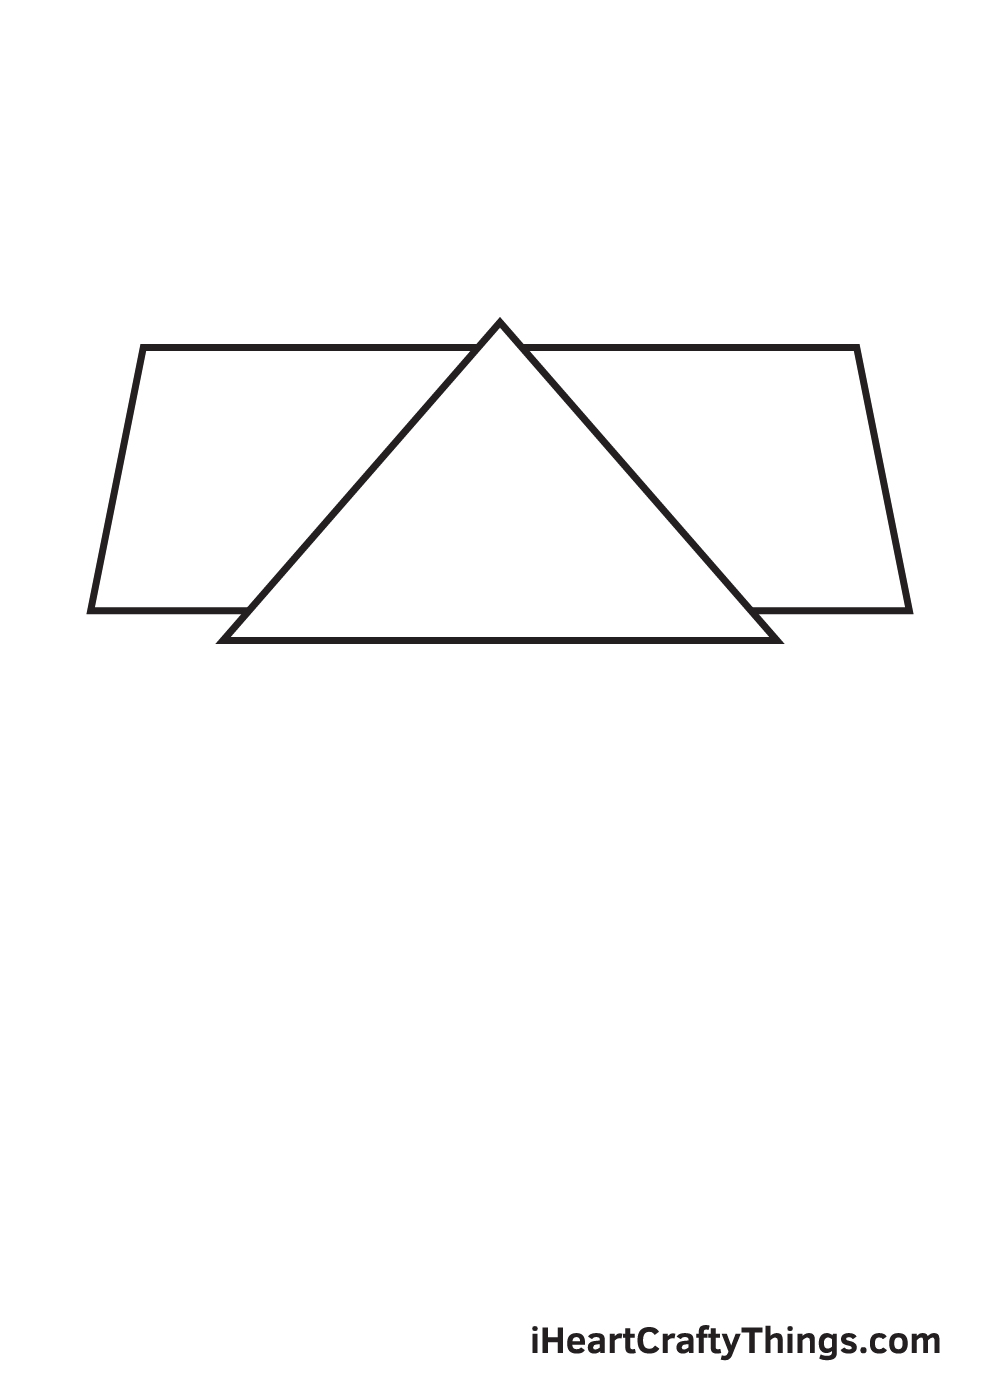
Draw a wide triangle shape overlaid in the middle of the trapezoid shape that we drew in the previous step.
Then, erase the parts of the trapezoid that overlaps within the triangle shape. This helps keep your drawing neat and tidy, and most importantly, refined.
Keep in mind that the triangle shape should be a bit taller than the trapezoid shape, as shown in the illustration above.
Step 3 – Afterwards, Draw the School’s Wall
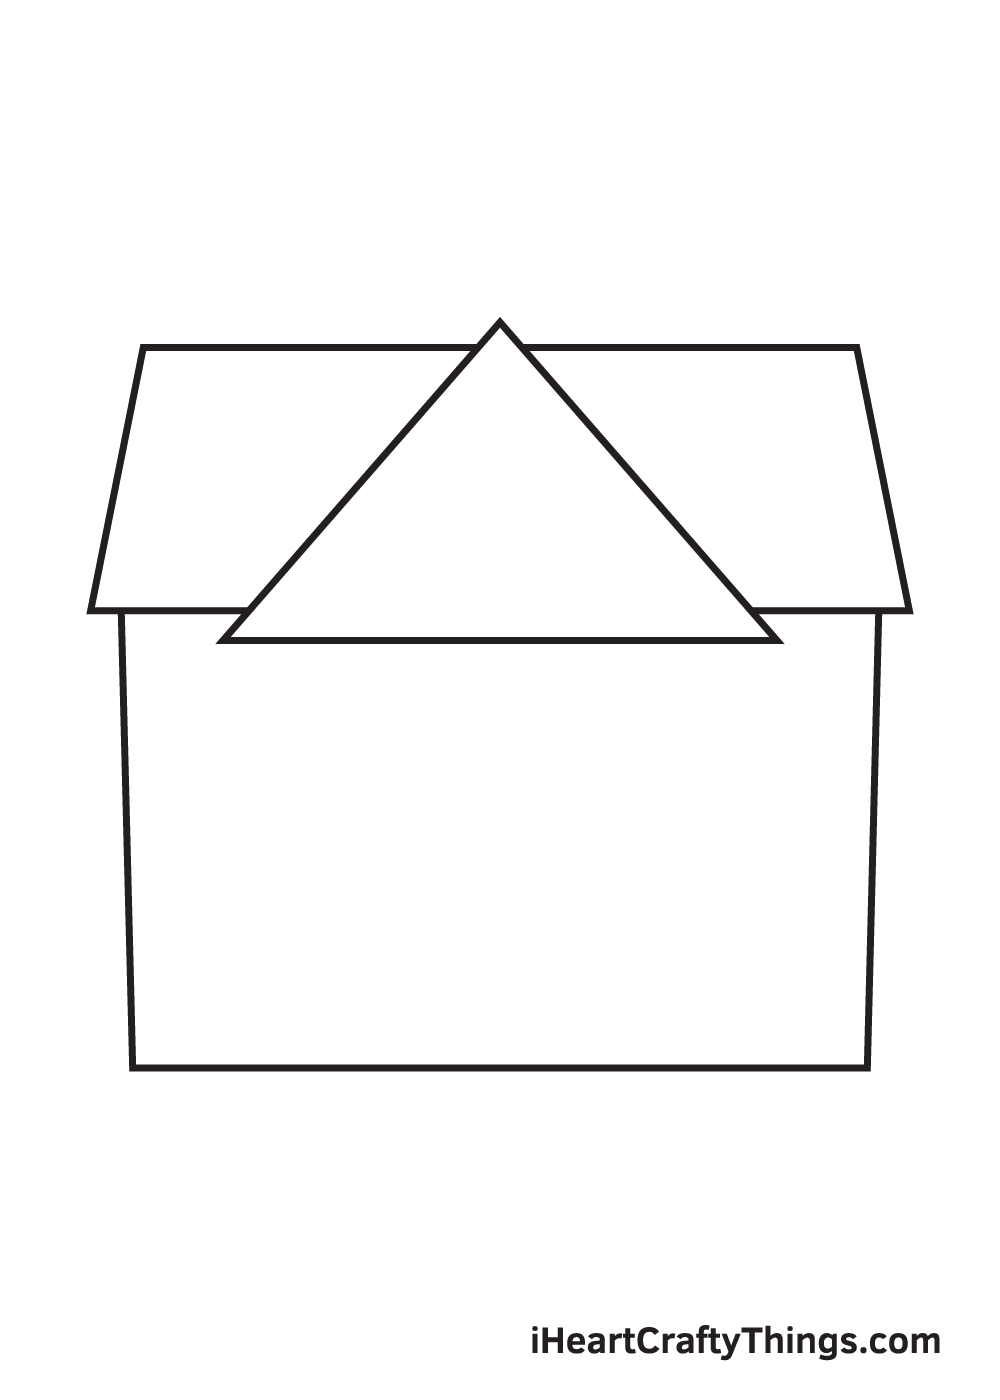
Draw a vertical line on each side right underneath the roof of the school. Then, connect both endpoints of the vertical lines by drawing a horizontal line at the bottom.
This forms the structure of the walls or foundations of the school.
At this point, the structure of the entire school is now complete. Now, all it’s missing are some features and details, which is what we’ll be working on next.
Step 4 – Then, Draw the Stairs of the School
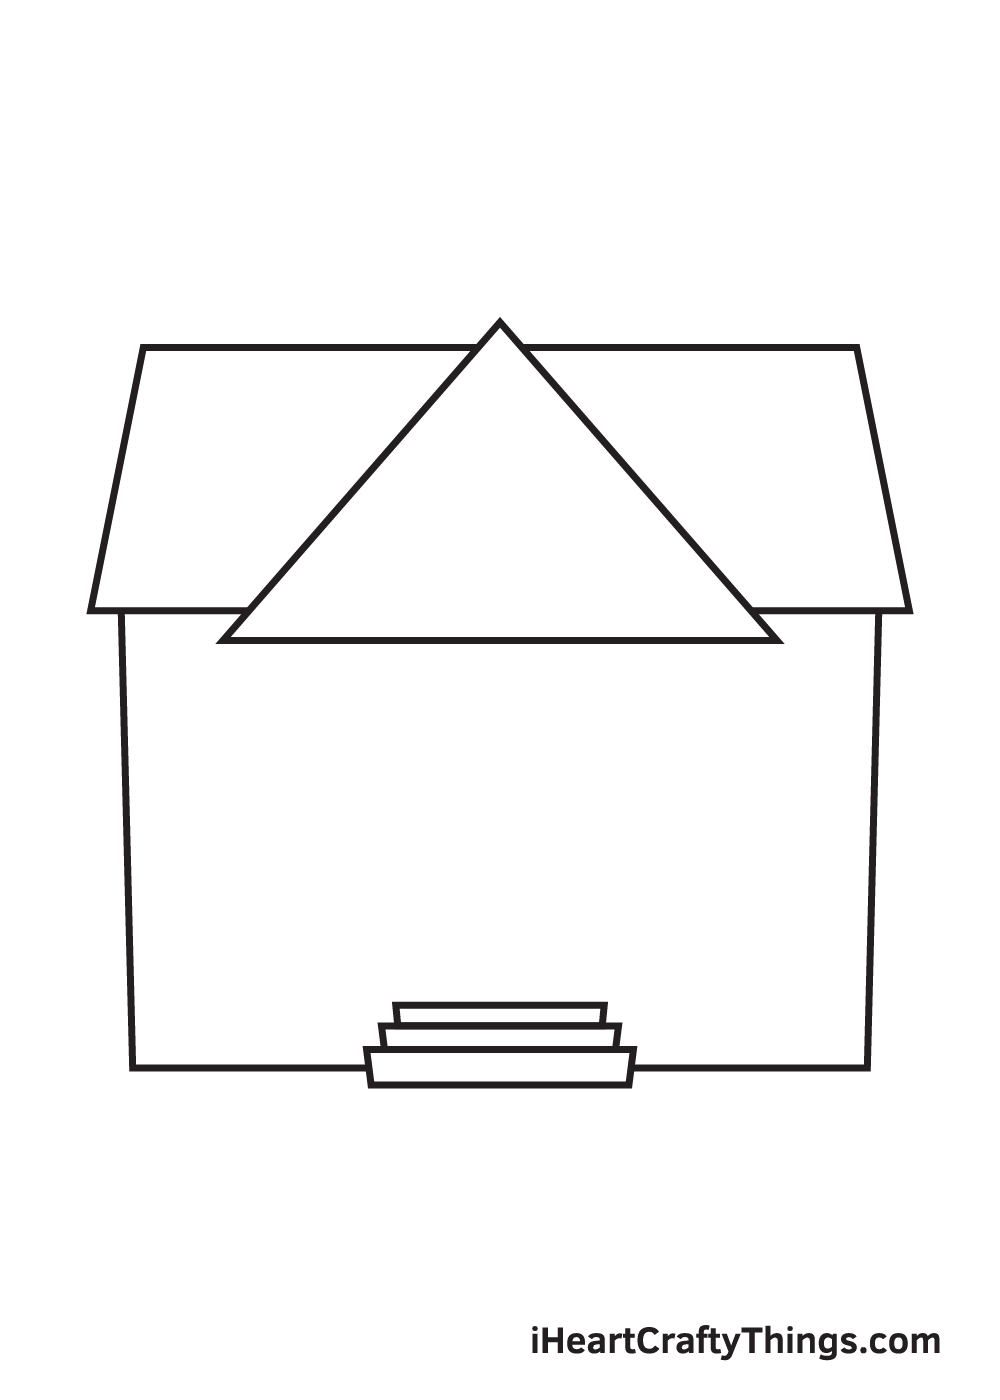
Draw three rectangular shapes on top of each other on the lower middle part of the establishment.
Keep in mind that the rectangle at the top of the stairs should be the smallest while the one at the bottom should be the biggest. This creates the illusion of stairs going upwards.
Step 5 – Add Patterns on the Wall and the Roof
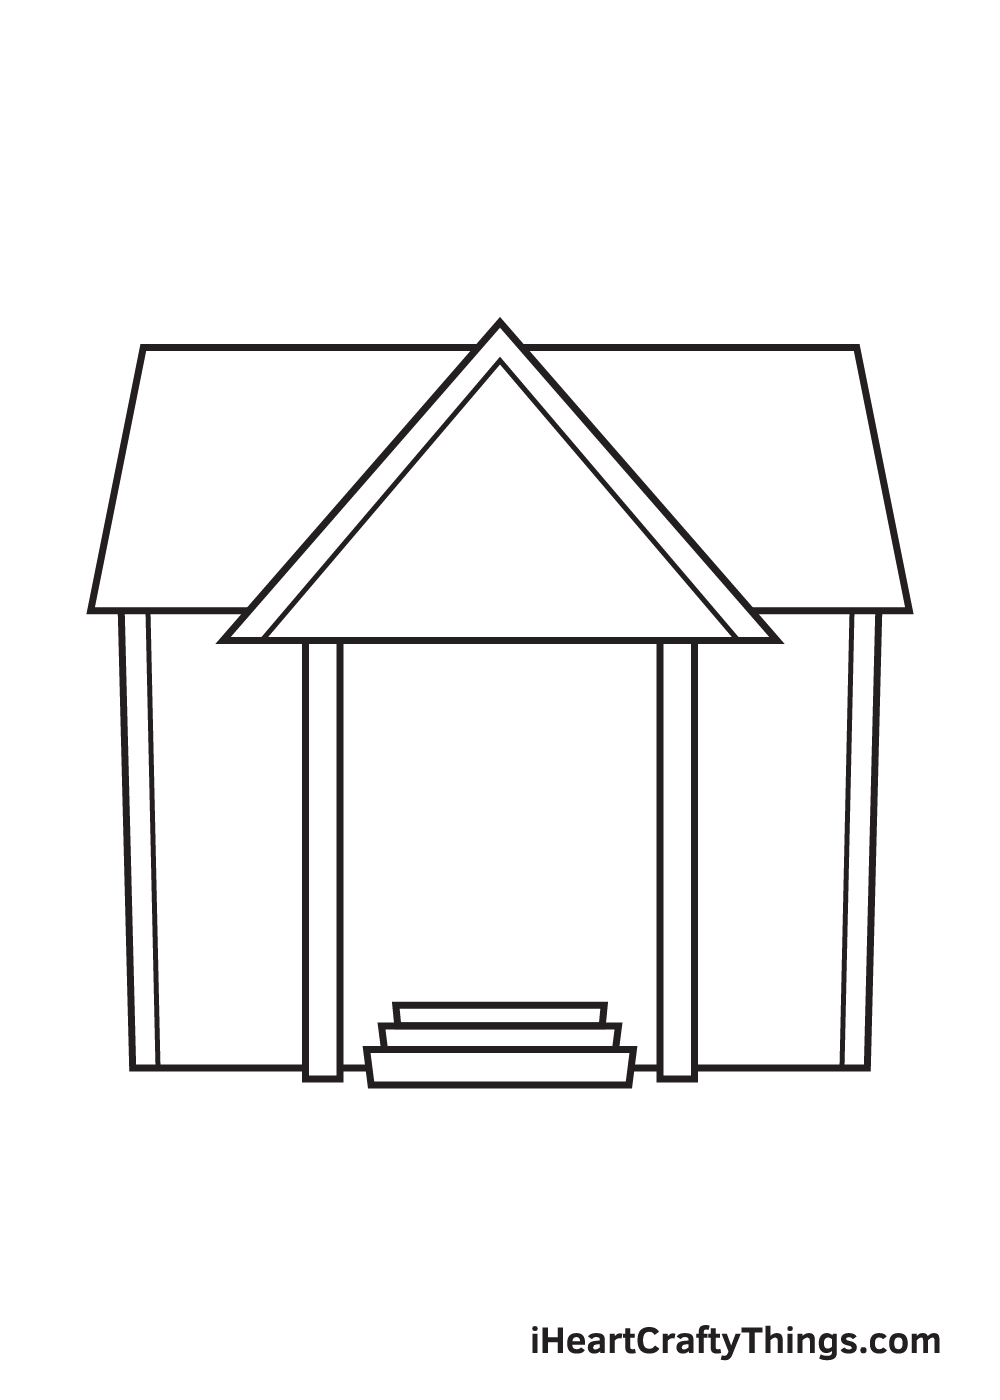
In this step, we’ll be drawing some lines on the roof and the wall of the school to enhance its appearance.
Continue by drawing a wide inverted V-shaped line within the triangle-shaped roof. The line should be parallel to the outline of the roof.
Then, draw two parallel vertical lines underneath the roof to create a space where the door will be drawn later on.
Afterwards, draw a vertical line parallel to each side of the school’s wall.
Step 6 – Next, Draw the Windows on the Wall
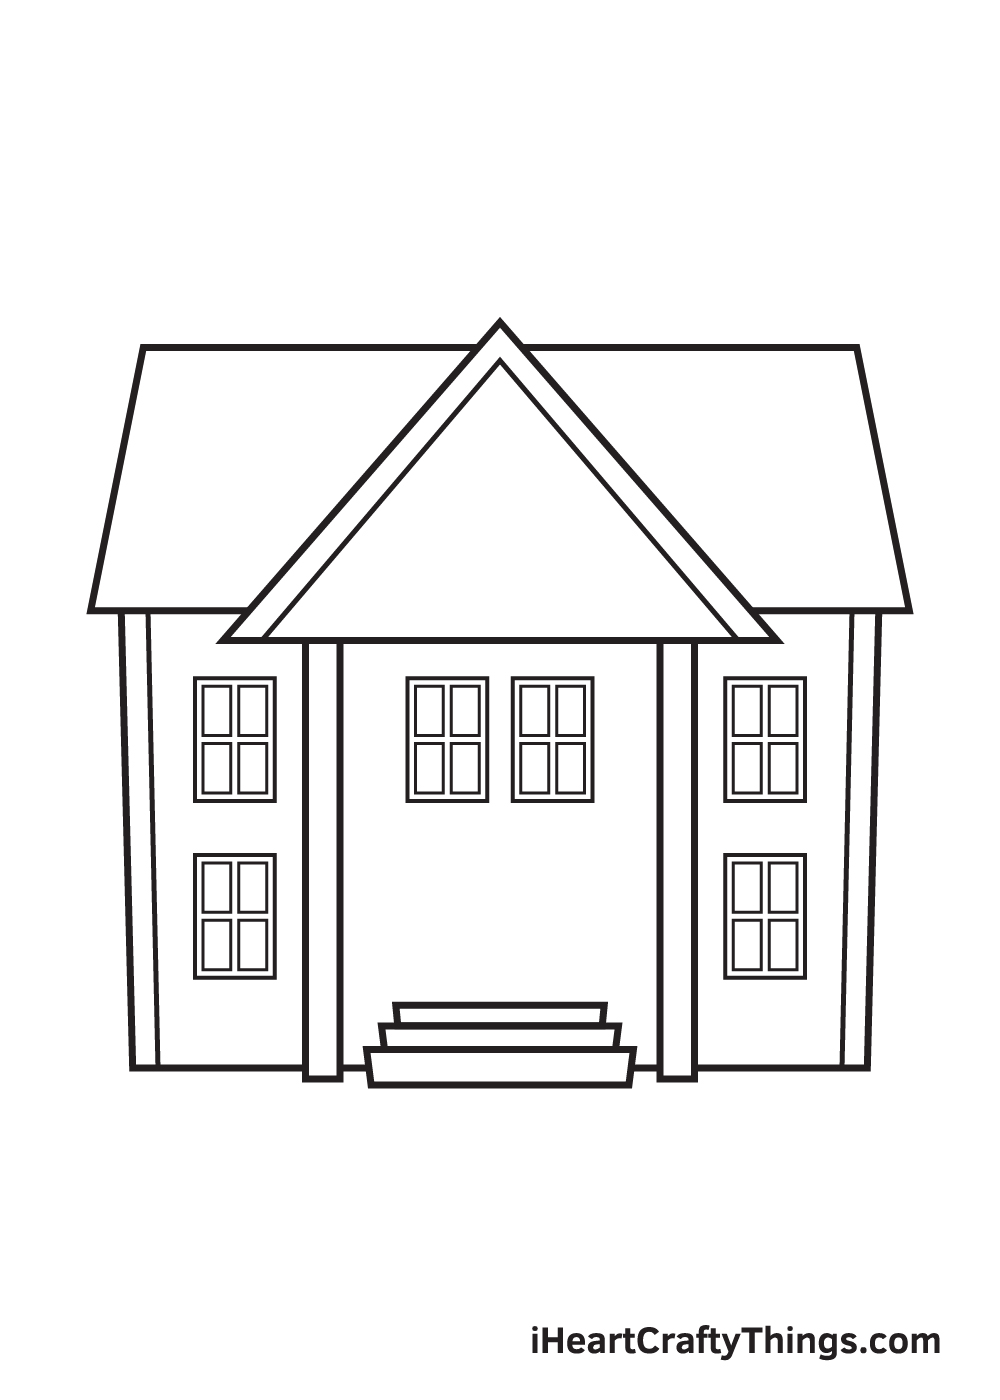
Draw a standing rectangle shape with a border on all four sides. Then, draw an intersecting parallel horizontal and vertical line within the rectangle shape. This creates a single window on the wall of the school.
After finishing this step, you should have a total of six windows on the wall of the school: two on both sides and another two in the middle.
Step 7 – Draw the Door Entrance of the School
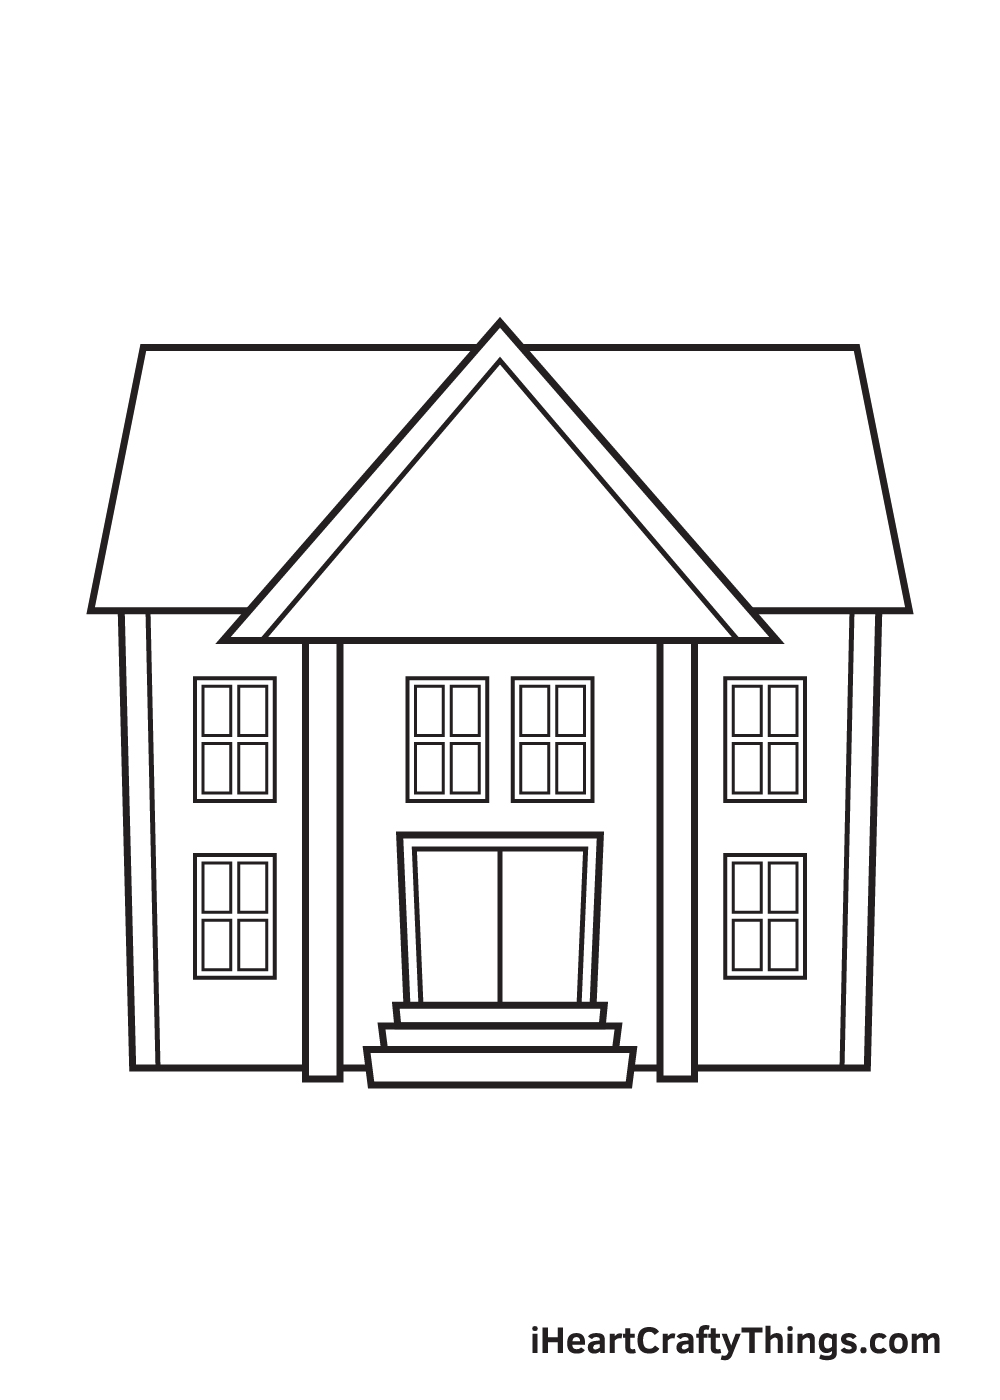
Right above the stairs that we drew previously on the fourth step, draw an open-bottom square shape with a border line parallel to it.
This creates the door, which is the entrance going inside the establishment.
Next, draw a vertical line in the middle of the door. This creates a division between the left and the right door.
Step 8 – Add a Clock on the Roof of the School
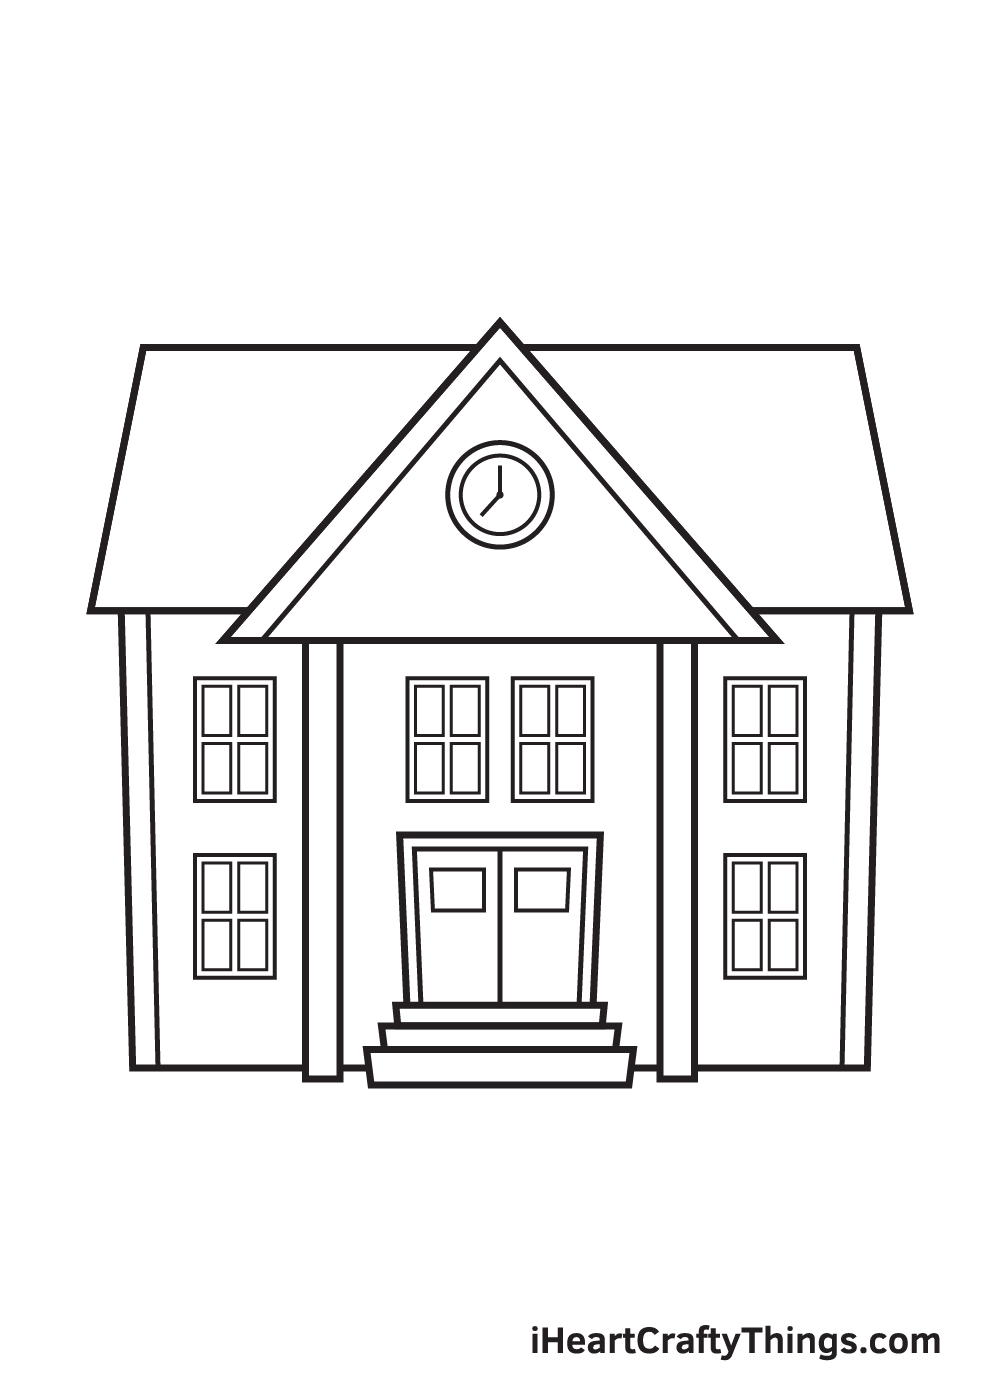
Draw a perfect circle shape with a smaller circle inside on the top part of the triangle-shaped roof. This forms the outline of the clock. Then, draw an angled line to create the hands of the clock depending on what time you want it to display.
Don’t forget to add a small rectangular shape on the upper portion of each door. This forms the ventilation that doors typically have.
Step 9 – Now, Add the Name of the School
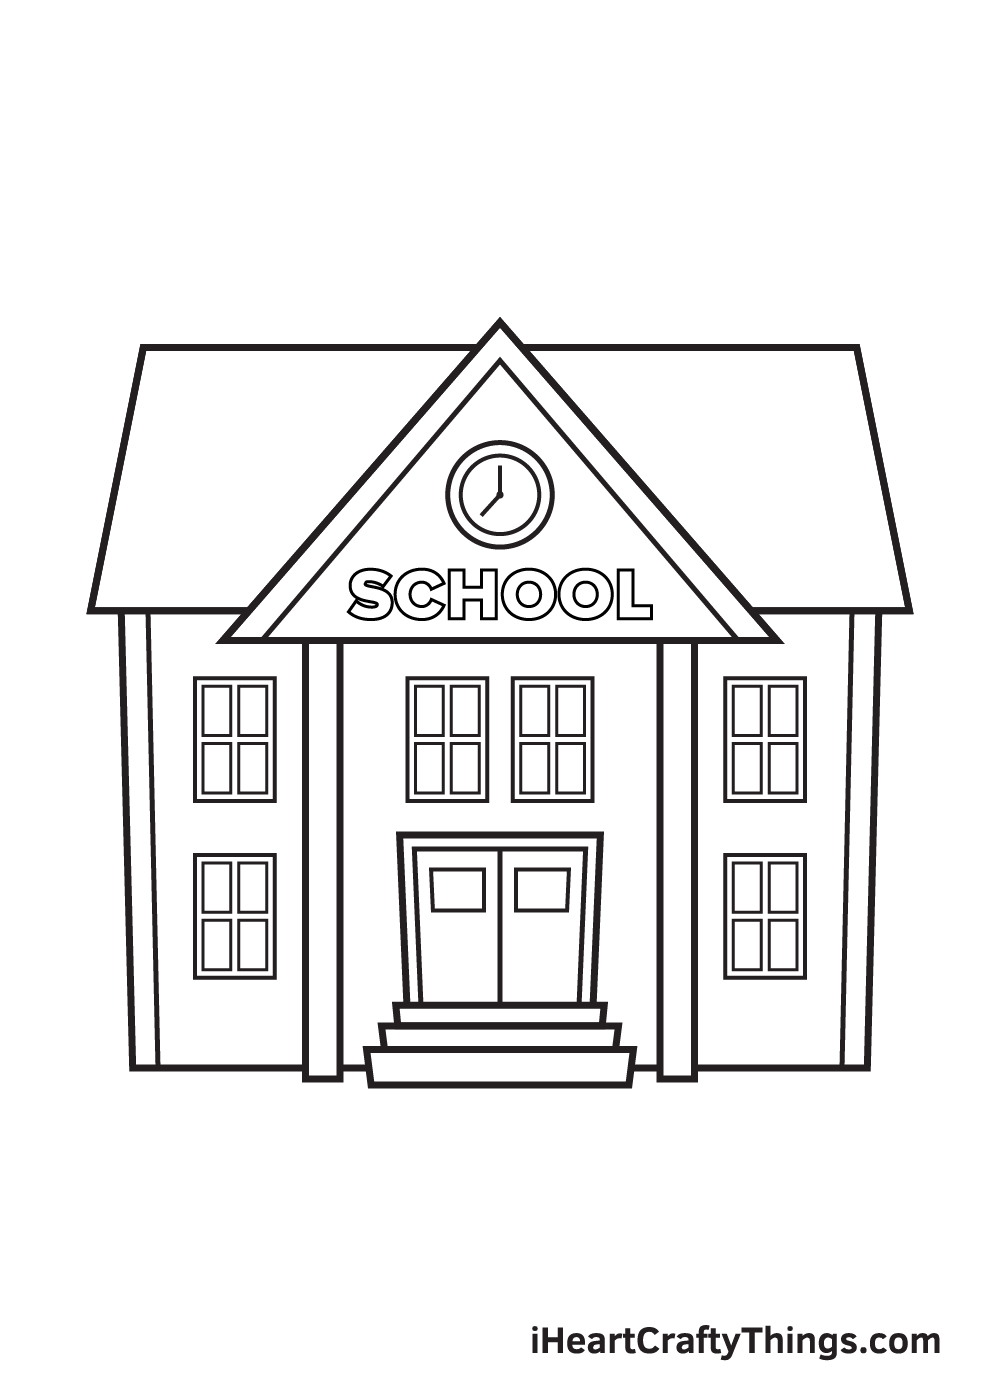
Draw the word “SCHOOL” right underneath the clock that we drew in the previous step. Keep all the letters capitalized to make it more visible, as shown in the illustration above.
As you can see, the school drawing is already finished. Now, all it’s missing is a splash of colors!
There you have it—we have successfully drawn a school! Finally, it’s time for the most exciting part that we’ve all been waiting for, which is coloring the school!
The colors you will be using for the school is entirely up to you! Feel free to use any color you like and customize the colors however you like!
Have fun playing with colors and watch as the school ultimately comes to life!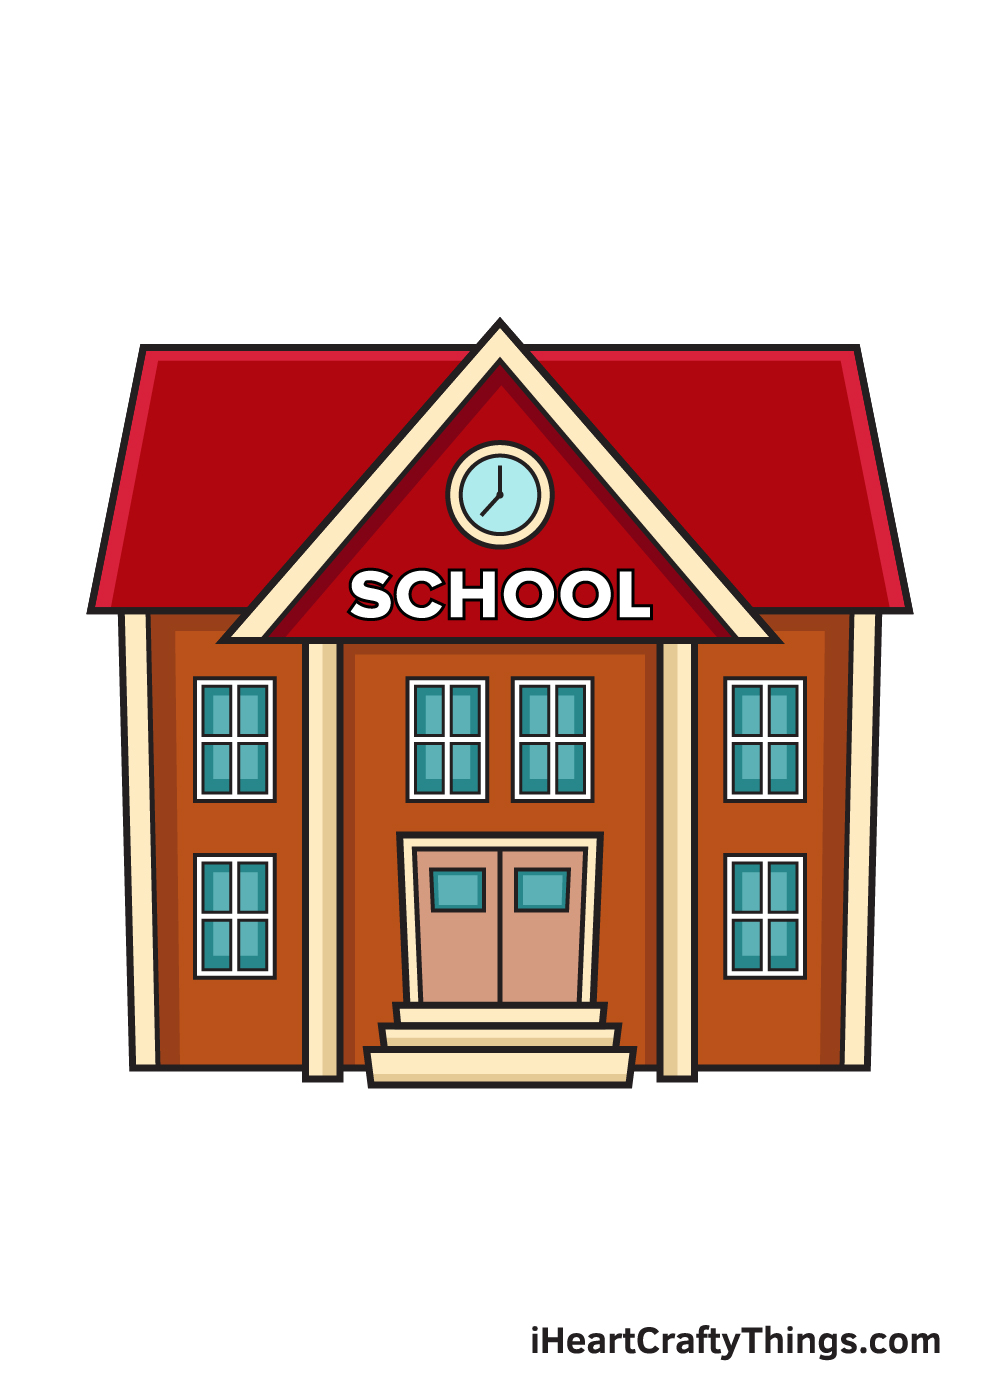
Here’s how you can make your school drawing even better…
Let’s all take part in a lesson on how you can make your school sketch look amazing!
The first way you can make your school drawing look even better would be by adding some more of the surrounding details.
These could include a yard in front of the school or maybe something like a basketball court to the side.
The details could also be as small as a few bushes or a pathway leading to the door. You could use your own school for some examples of what you could add!
Leading on from the previous step, you could also change the look of the school as a whole by changing a few details. By altering the shape and height of certain sections, you could easily make it look very different.
This would be a great way to make this drawing of a school look like your own school, for example. You could also use the opportunity to create your very own school design!
What are some features you would add to the school to change the look?
A school isn’t serving much of a purpose without some students, so you could add some life to this school! You could do this by adding lots of kids and teachers around the school.
By doing this, you can create all sorts of fun scenes to finish off this drawing of a school. Kids could be playing a game or just enjoying a peaceful break!
What kinds of activities would you draw happening around the school?
You can also make this school sketch even more amazing with the colors that you use. We showed just one way that you can color this school in our guide, but you should definitely feel free to get creative with it.
Not only that, but you can also play around with various art tools and mediums. You may want to mix up different kinds of paints and then use some colored pens or markers.
Do you want to make this school bright and colorful or keep it a bit more muted?
Your School Drawing is Complete!
We hope you had an enjoyable drawing activity with this step-by-step school drawing tutorial! What would you like to draw next?
Let us know and we’ll do our best to create a drawing tutorial for it. We always strive to fulfill our beloved readers’ wishes.
Now that you’ve successfully drawn a school, that means you’ve completed a milestone in drawing! So, make sure to show off your masterpiece and share it on our Facebook page and Pinterest.
Don’t be embarrassed, we’re sure it looks wonderful!
We can’t wait to see your impressive school drawing!
Here Is A School Coloring Page To Inspire You!

School is something that we all have to go through, and it is a time in life that will leave everyone with their own memories. This school coloring page for kids will help you to relive those memories!
Drawn by our artist Amanda, this page will help you to get your imagination flowing, and once it’s done you can add some of your favorite colors.
When working on the page, don’t be afraid to add some of your own details that make you think of your own school experience.
It could be the colors you use or some specific details you remember from those days.
There are so many ways that you can put your own spin on this picture, so it will be amazing to see how you represent your memories from your days at school!