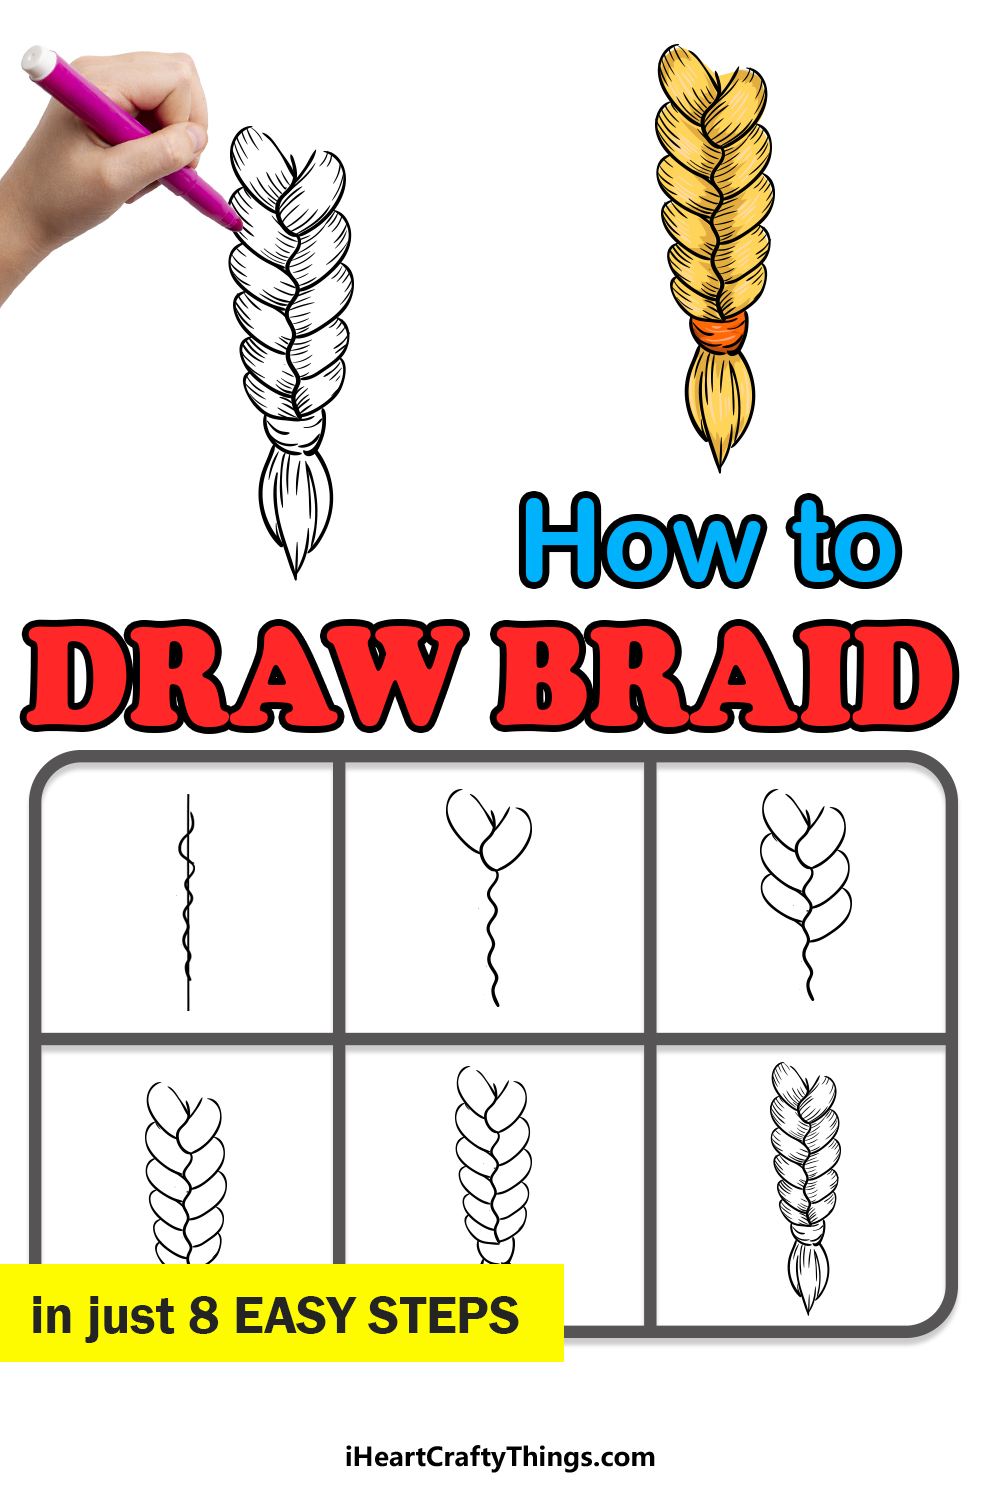
You won’t get tangled up as you work on this guide on how to draw a braid! Once you get through all of the steps, you’ll see how simple it is to depict this famous hairstyle.
Braids are more complex than they may appear! Even tying them in real life can be quite a challenge when you don’t know what to do.
If you thought that tying them was hard, then you should try drawing one! That is, it’s hard unless you know what to do.
After this guide, you’ll see that it’s simpler than you think when you know what to do. Once you have mastered this guide, you can then add your own ideas, such as putting the braid on a cartoon character, perhaps based on someone you know.
Watch And See How To Make Your Braid Drawing
How to Draw a Braid – Let’s get Started!
Step 1
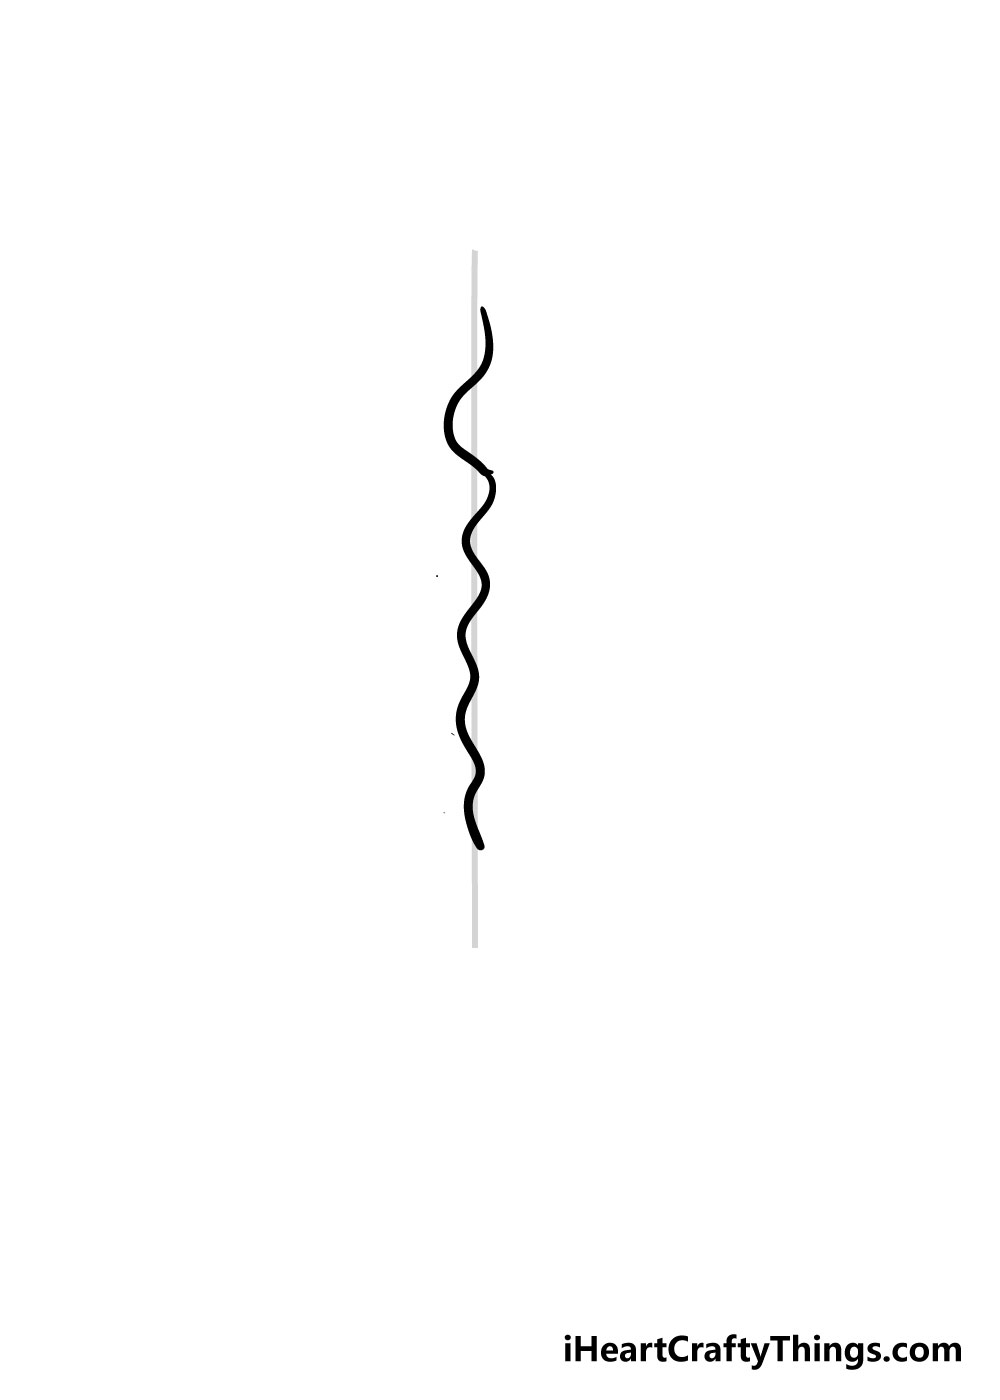
The first thing you’ll want to begin learning how to draw a braid is to use your pencil to draw a straight line down your page.
We’ll be using a pencil for this part, as it’s just a guide for you to use as you start to draw in the braid.
Once you have your pencil line drawn in, you can use your pen to draw a thick, wavy line down it as it appears in the reference image.
The reference image will give you a good idea of how wide the curves of the line should be.
Step 2 – Draw in the first braids
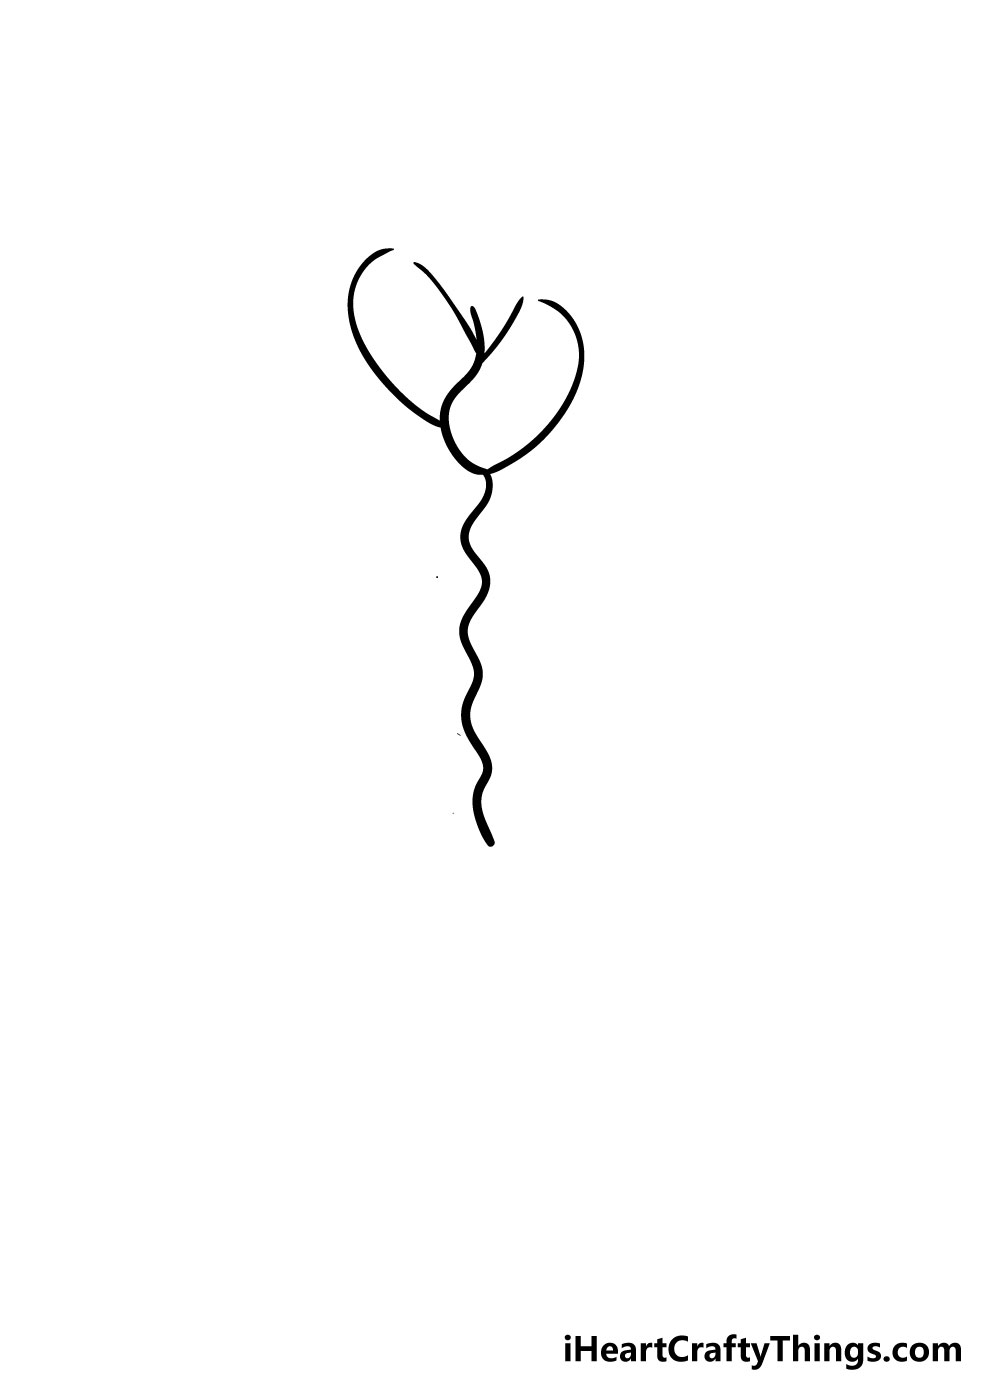
For the next step of your braid drawing, you’ll be adding in the first two braids. To do this, I would recommend starting with the one on the right.
To draw this in, simply draw in a long, curved line from the bend in the curvy line you drew in step 1.
Then, use another line further up to make the other side of the strand. You can see how this should be spaced out using the reference picture we’ve provided.
Once you have that one drawn, simply use the same process to draw the one on the left.
Once you’ve gotten the hang of drawing these two, you’ll be well prepared for the rest that will be coming next in this guide on how to draw a braid!
Step 3 – Next, draw in more braids
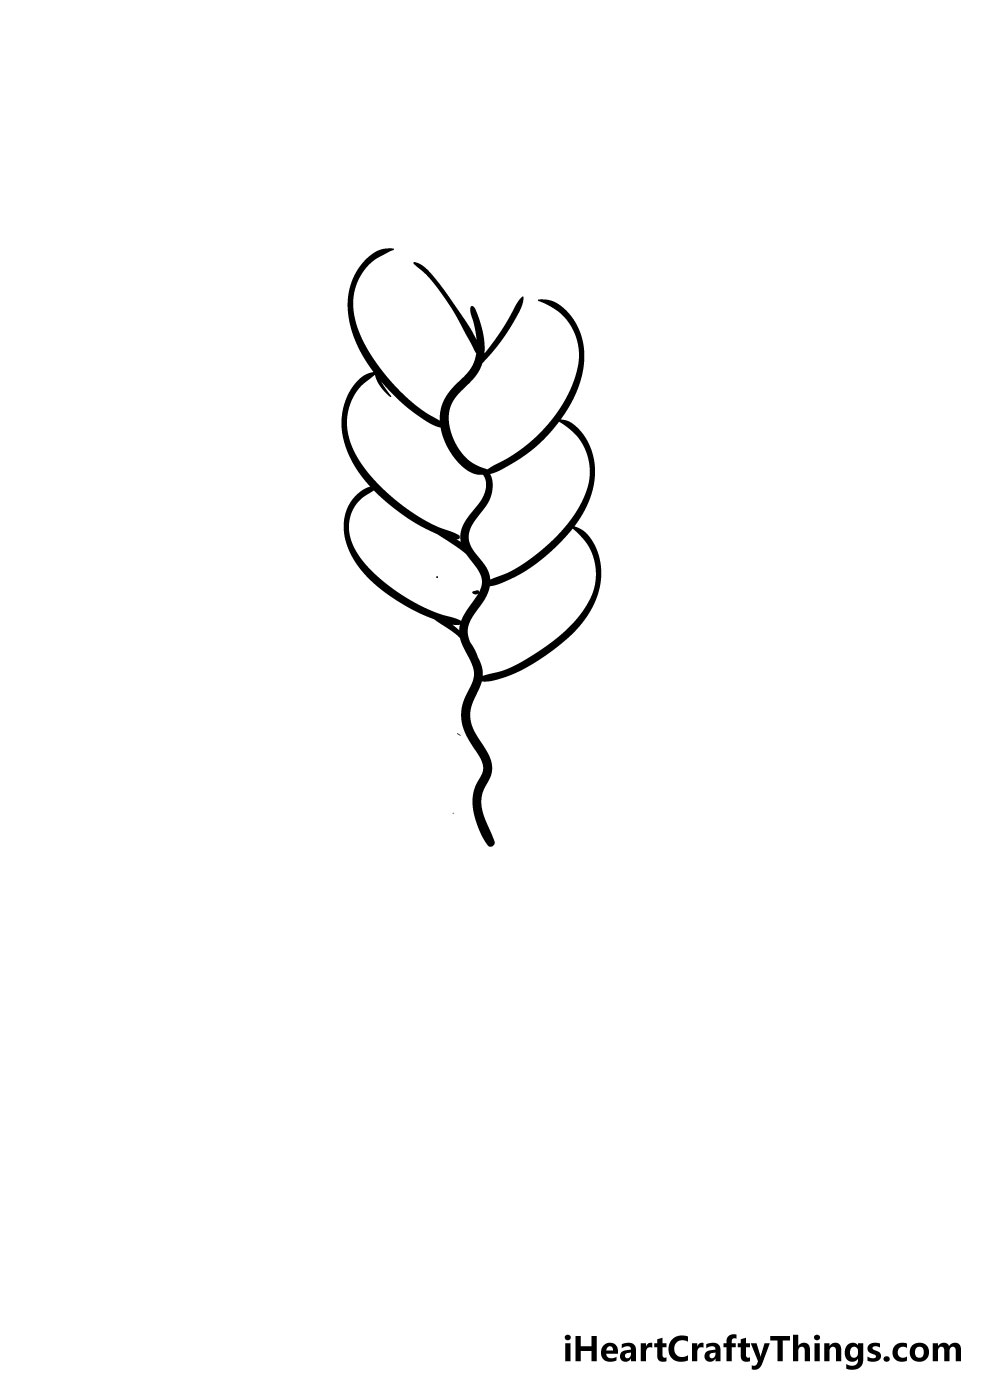
Drawing in the first two braids was probably the trickiest part of this process, so it only gets easier from here!
To continue your braid drawing, simply use some curved lines coming down from the braids you’ve drawn already and down to the curvy center line.
Don’t be afraid to closely refer to the reference picture as a guide!
Step 4 -Now draw in some more braids
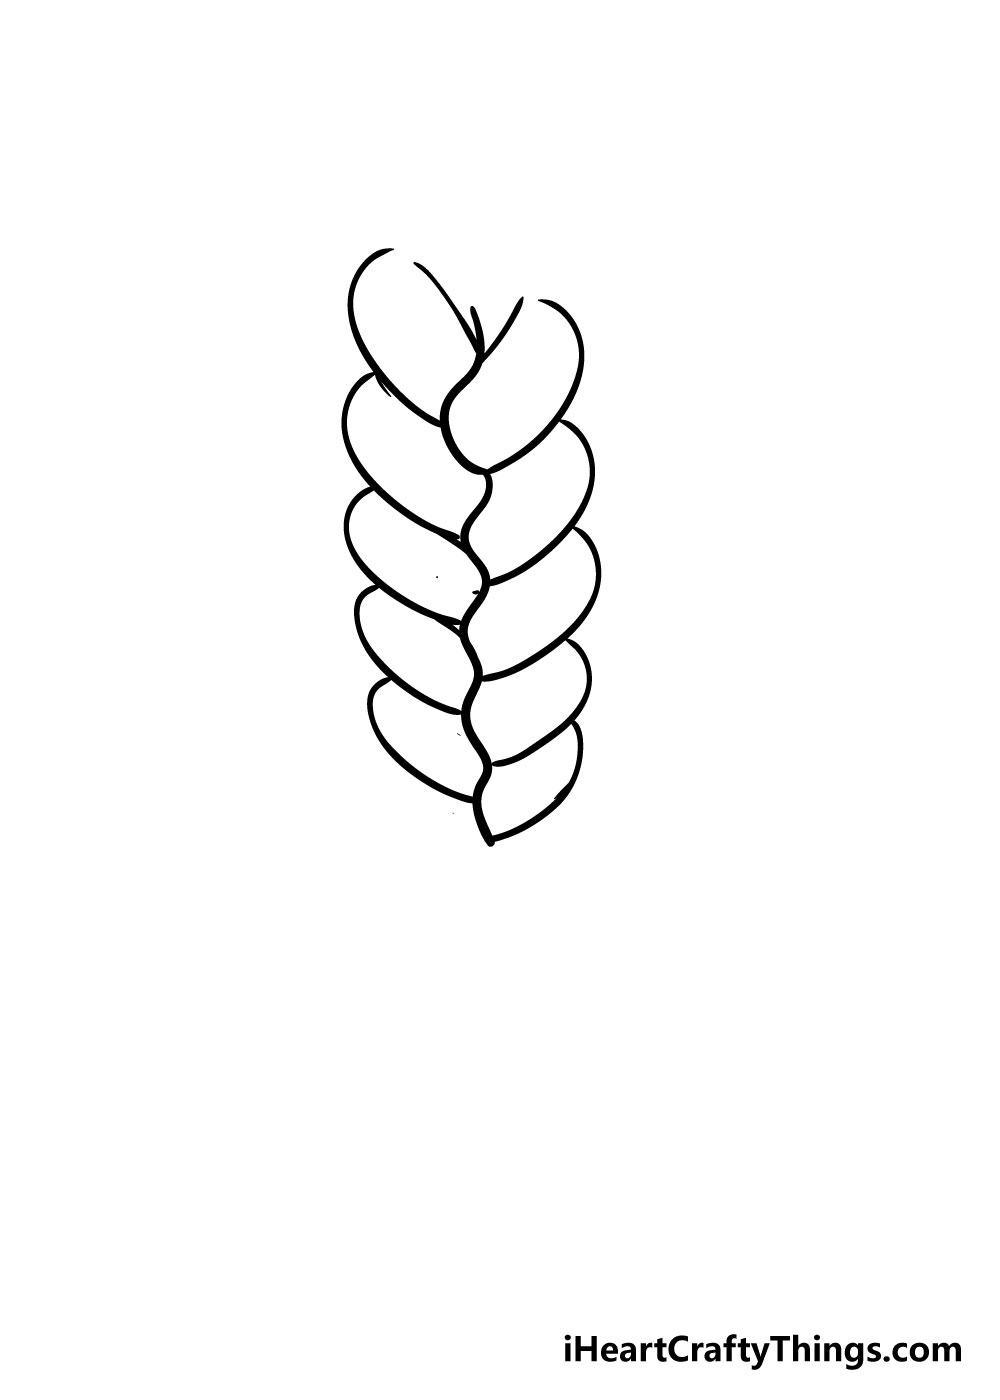
I’m sure you’re getting the hang of it now, so as you draw in the next four sections, be sure to make them a little smaller as you get nearer to the bottom of the braid.
You’re really doing a great job with this guide on how to draw a braid!
Step 5 – Next you will be adding the bottom of the braid
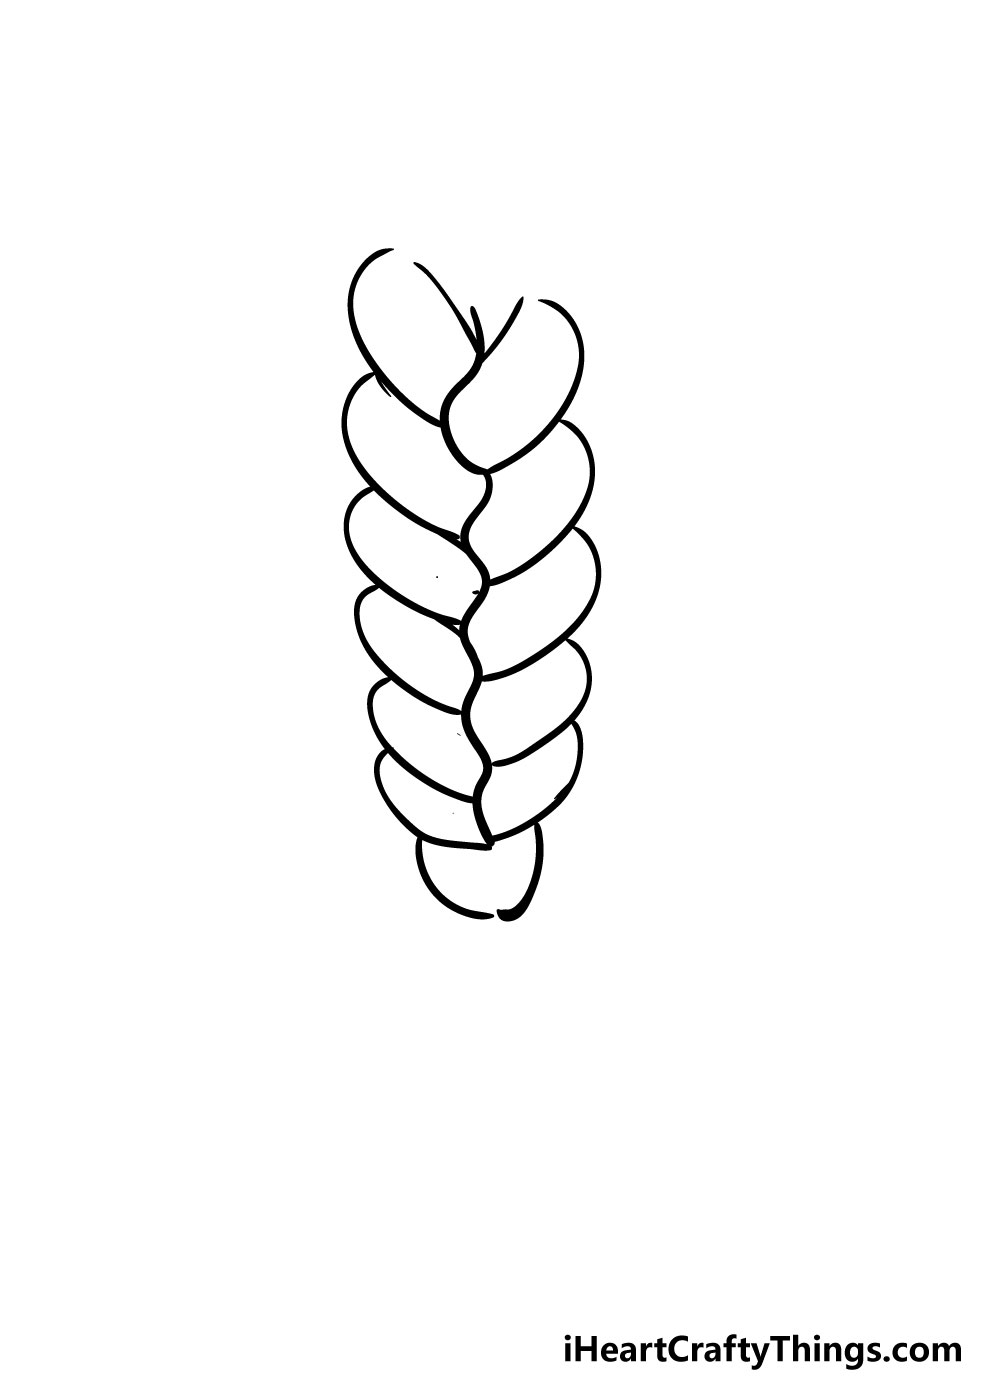
For this next step in this guide on how to draw a braid, you can add the final strand with one more curved line.
Once you’ve done that, you can draw in the bottom of the braid using two curved lines coming down that almost meet but don’t quite make it.
Step 6 – Add in the tail of the braid
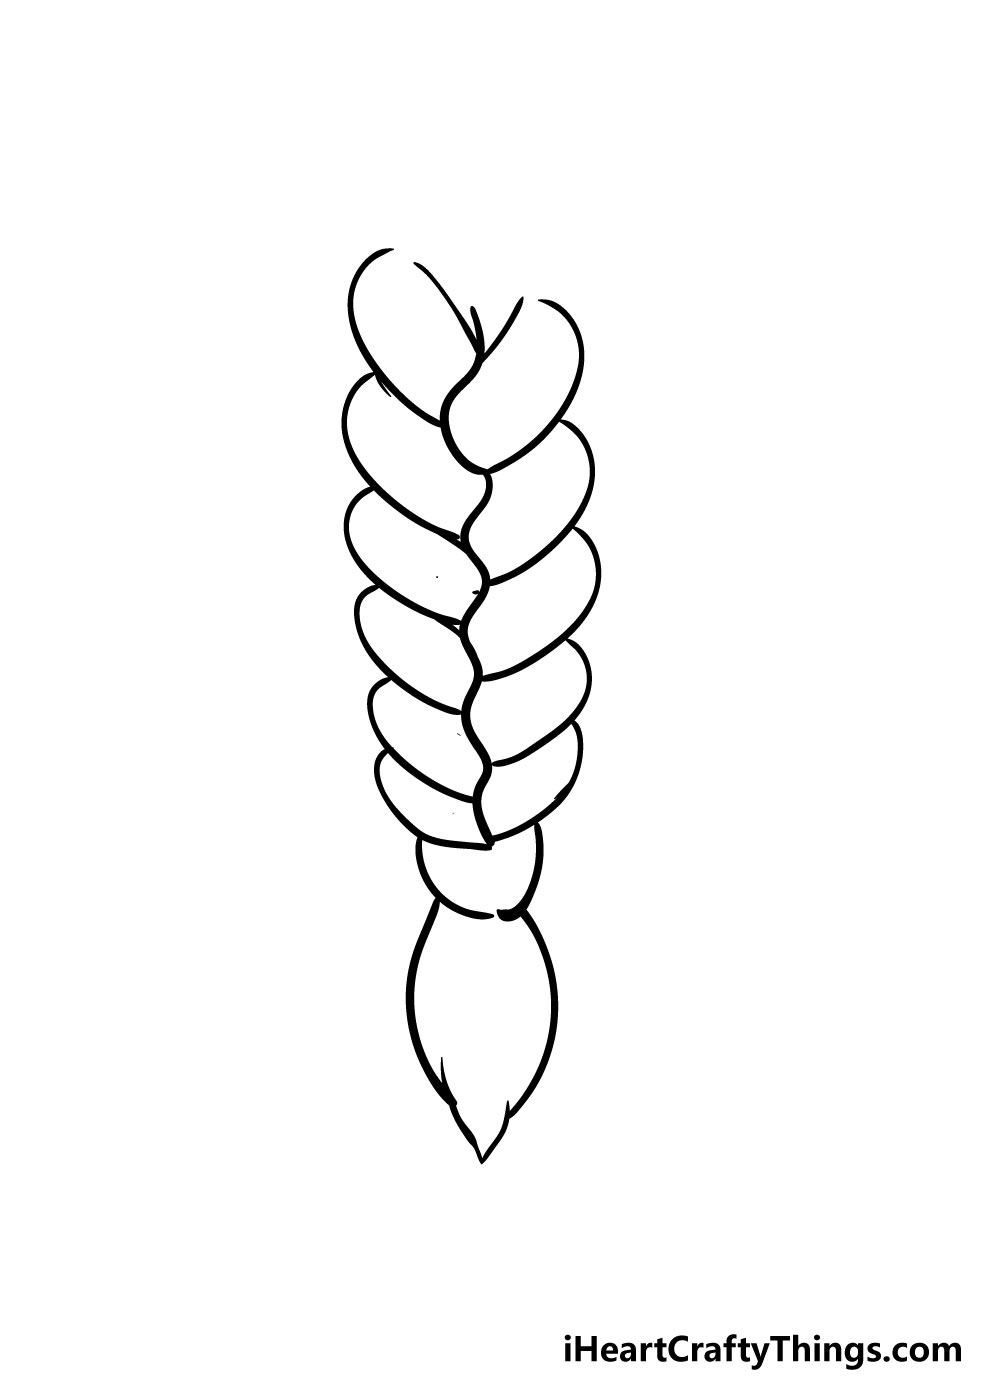
The main part of your braid is almost finished at this point! To finish it off, you can add in a ponytail shape at the end of the braid.
You can do this with a few curved lines and some straight ones as they appear in the reference image.
With the ponytail added, you’re almost there!
Step 7 – Now draw in the final details
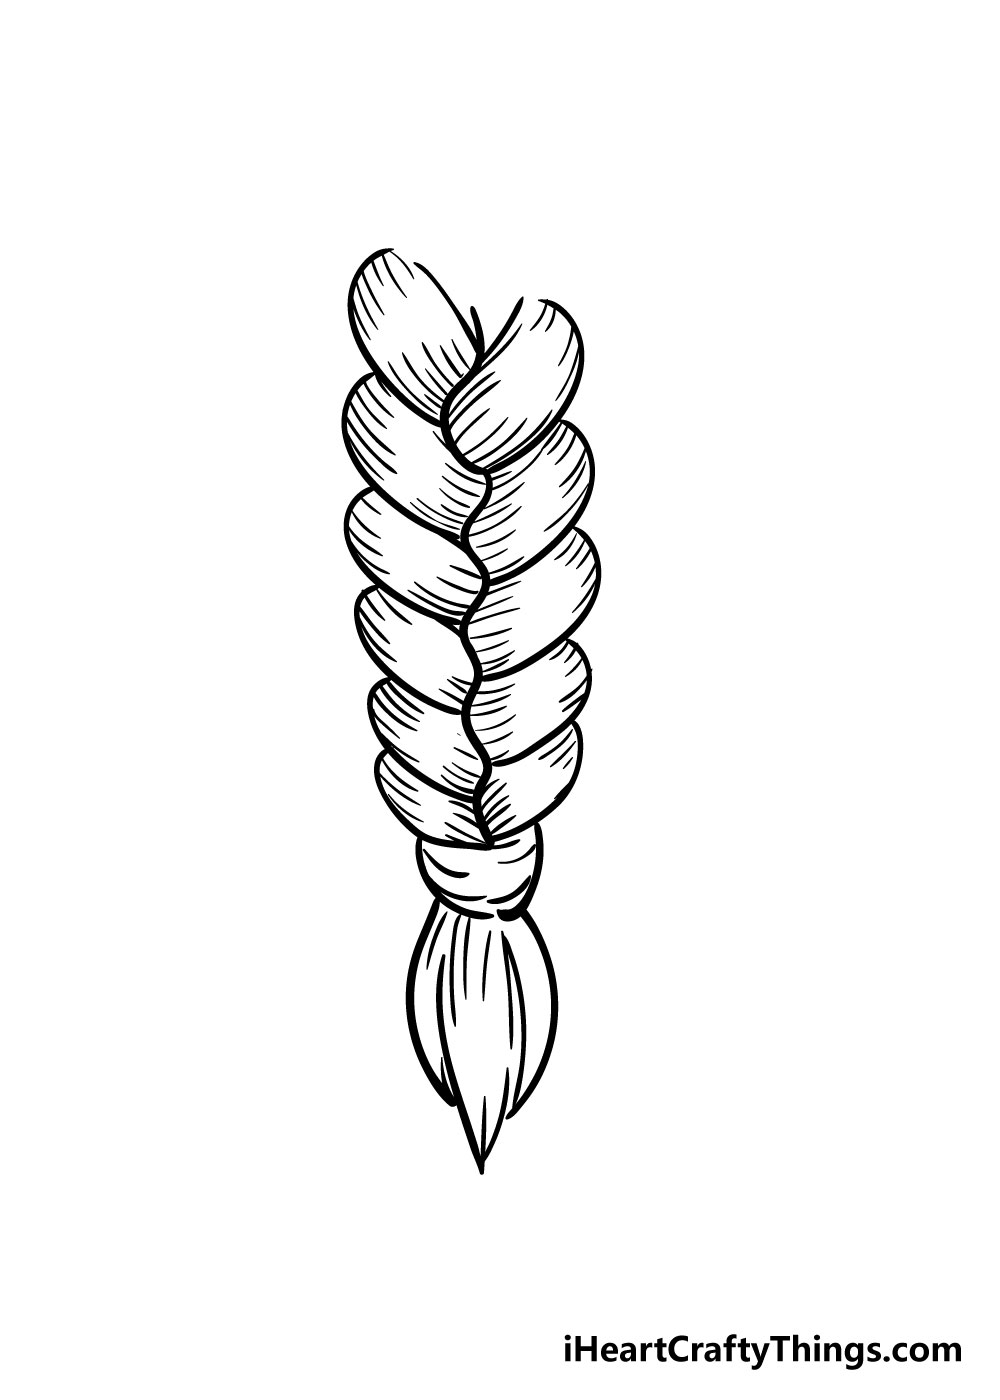
Your braid drawing is pretty much complete now, so all that remains is to add in some detail lines! As you can see in the reference image, these thin lines can give the appearance of separate hair strands.
You can see in the picture how you can draw in these lines, and while I would recommend following the way they look in the picture don’t be afraid to draw in the lines in a way that looks good to you!
There isn’t really a right or wrong way to add in details like this, so you should go with what looks best to you.
Bonus: Take Your Braid Drawing Even Further With These Ideas
For this drawing of a braid, we represented the classic shape and design for a standard hair braid. However, they can come in many different styles, shapes and sizes.
If you had fun drawing this braid but want some more to draw, then you could attempt to draw some more braid styles. If you need some help with this, you could look up some ideas online.
Once you have some pictures to work from, you can then use them along with the steps of our guide in order to draw these new styles. If you like the style as is, then you can change and add to it as well.
One way would be to draw some accessories in the hair. This could be hair clips, a ribbon or even little flowers.
There are so many ways you could customize the braid, and it can all depend on what you like the most. You can use your favorite colors, symbols and accessories from real life for this braid.
Lastly, you could make this drawing even more unique by adding the person who has this braid as a part of their hair. We touched on this idea briefly earlier, but there is so much that could be done.
You could draw a real person who is known for wearing braids, or you could create a brand new character. There are some ways and angles you could draw the character so that we could still see their face and the braid in the same picture.
You could even replicate a famous story like the Rapunzel fable, a story famous for the aspect of the character’s hair! These are just a few ideas, but how else could you customize this drawing?
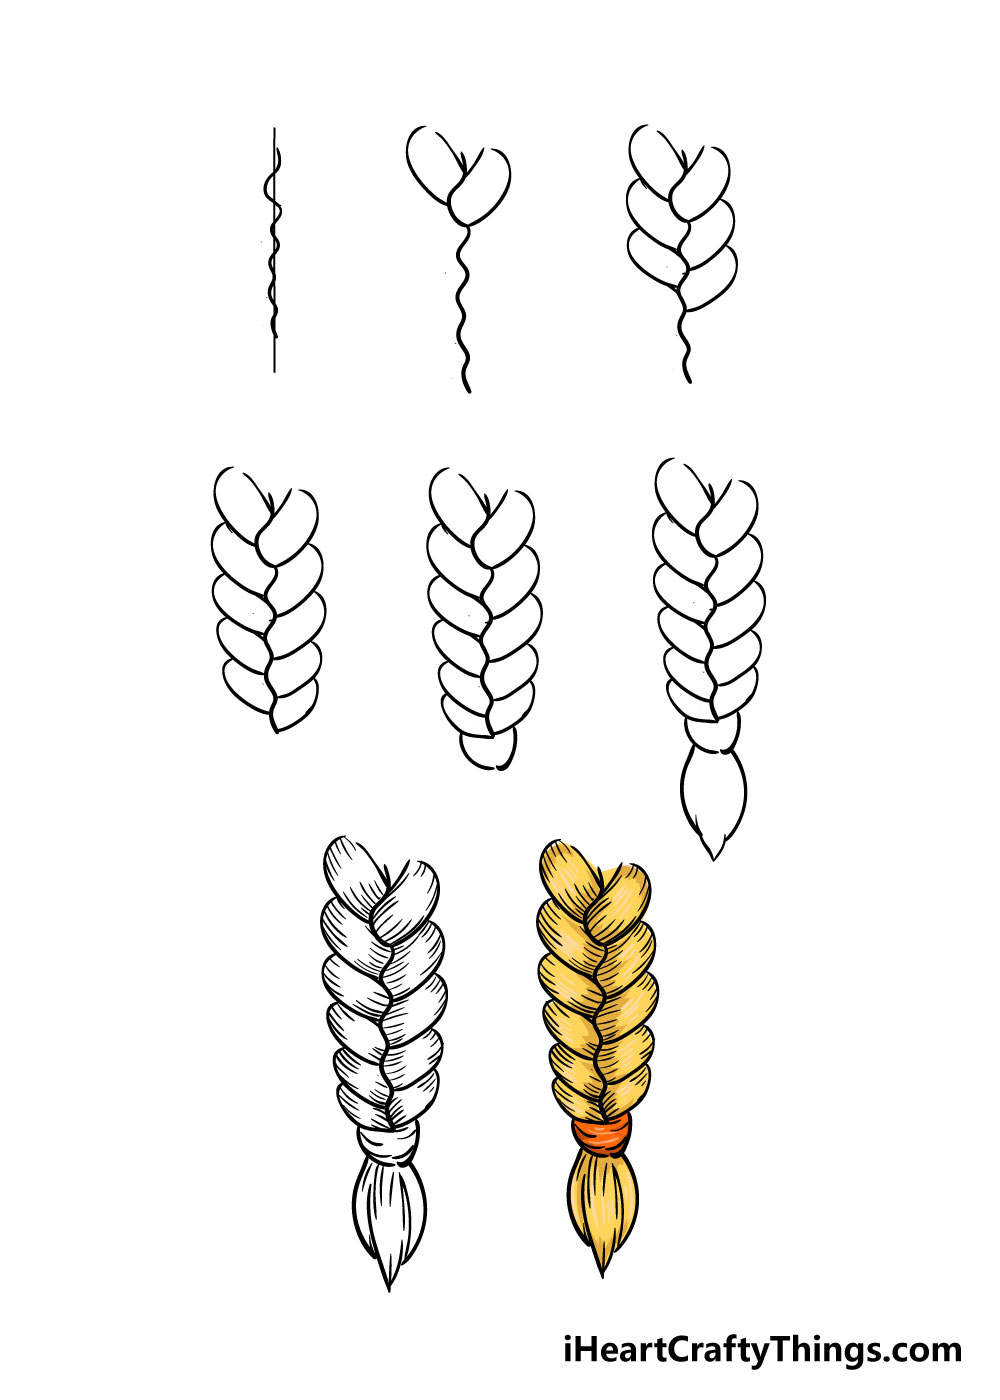
Step 8 – Add in some color

The final step in this how to draw a braid guide is possibly the most fun one: adding in some color!
We’ve shown one way that you could color it in with the picture we included, but this is a step where you can really show us your creativity!
A fun touch that you could add would be to use your own hair color for your braid drawing to give it a personalized touch!
You could also add some extra details, for example you could draw in and color your favorite hairclip on the braid.
To color in your braid drawing, you could also experiment with all kinds of different art coloring mediums.
For example, you could use tools like acrylic paints, watercolors, colored pens and pencils for some wonderful color looks!
The sky is the limit to finish off your drawing, and I know it will look stunning once you’re finished!
3 More tips to make your braid drawing easy!
See how you can make your braid sketch even easier to draw with these tips!
A braid may not look super complicated in real life, but it can be surprisingly tricky creating this drawing of a braid. If you are having a hard time drawing this braid, you could simplify the design.
This one we created in this guide has a lot of line detail to it, and this can make it more overwhelming to draw.
By making the braid look more cartoony, you could remove many of these details.
The change in design would simply make the braid look different, and it would look just as great in its own way! What other styles could you use to make the braid easier to draw?
Another way that you could make this braid drawing easier would be by incorporating it into a larger image. This could be done whether you made it more cartoony as we suggested or keep it the same.
For instance, the braid could be attached to the head of a cartoon character. Even if the face of this character is simple, the focus will be more on that than on the face.
If the focus isn’t on the braid, then you don’t have to worry about including as many details. This would also be a great way to have a more complete image!
One of the best ways to make this braid sketch easier would be by using the real thing to help you out. Of course, this would require knowing someone who has a real hair braid.
If you have long enough hair, you could get someone to tie it into a braid and then take a photo of it. Or, you could get a friend to tie their hair in a braid for you to reference.
If getting a real braid to use as a model just isn’t working out, then if all else fails you could use photos online to help you as you draw this braid design!
Your Braid Drawing is Complete!
With your drawing colored in, your braid drawing is now finished and looking great! We really hope that this guide on how to draw a braid in 8 easy steps was helpful and fun for you to use.
Drawing a braid may have seemed hard at first, but it’s so much easier when you have a step by step guide to follow.
There are lots of fun ways that you can personalize your braid drawing as well, so we’re sure to see lots of great and fun variations!
You can have a lot of fun trying out new ways to color in by using different color variations and art tools to get some stunning looks.
How will you put your own personal touch on your amazing braid drawing?
We will be uploading lots of new drawing guides such as this one, so be sure to check our site out frequently to never miss out on the fun!
Once you’ve finished drawing in and coloring your braid drawing, we hope that you will share it to our Facebook and Pinterest pages for us to admire!
We always love to see your incredible artworks, and we can’t wait to see your incredible drawings.