Everybody loves music, and there are so many genres to choose from. Music can be made in many different ways using lots of different instruments and tools.
The electric guitar is one of the most common instruments, and while it’s probably most associated with rock, an electric guitar can be used in pretty much any type of music.
They can make all kinds of tones and sounds, and they come in all manner of shapes and sizes as well.
Learning how to draw an electric guitar can be a great way to rock out from the comfort of your favorite chair!
We will show you how to draw an awesome electric guitar design as well as go over some ways that you can customize it.
After that, we also have a few suggestions on additions for the background that you can add.
With all that said, we’re ready to rock on with the first of these six steps we have for you! Grab your favorite art tools, put on some rocking tunes and let’s get started.
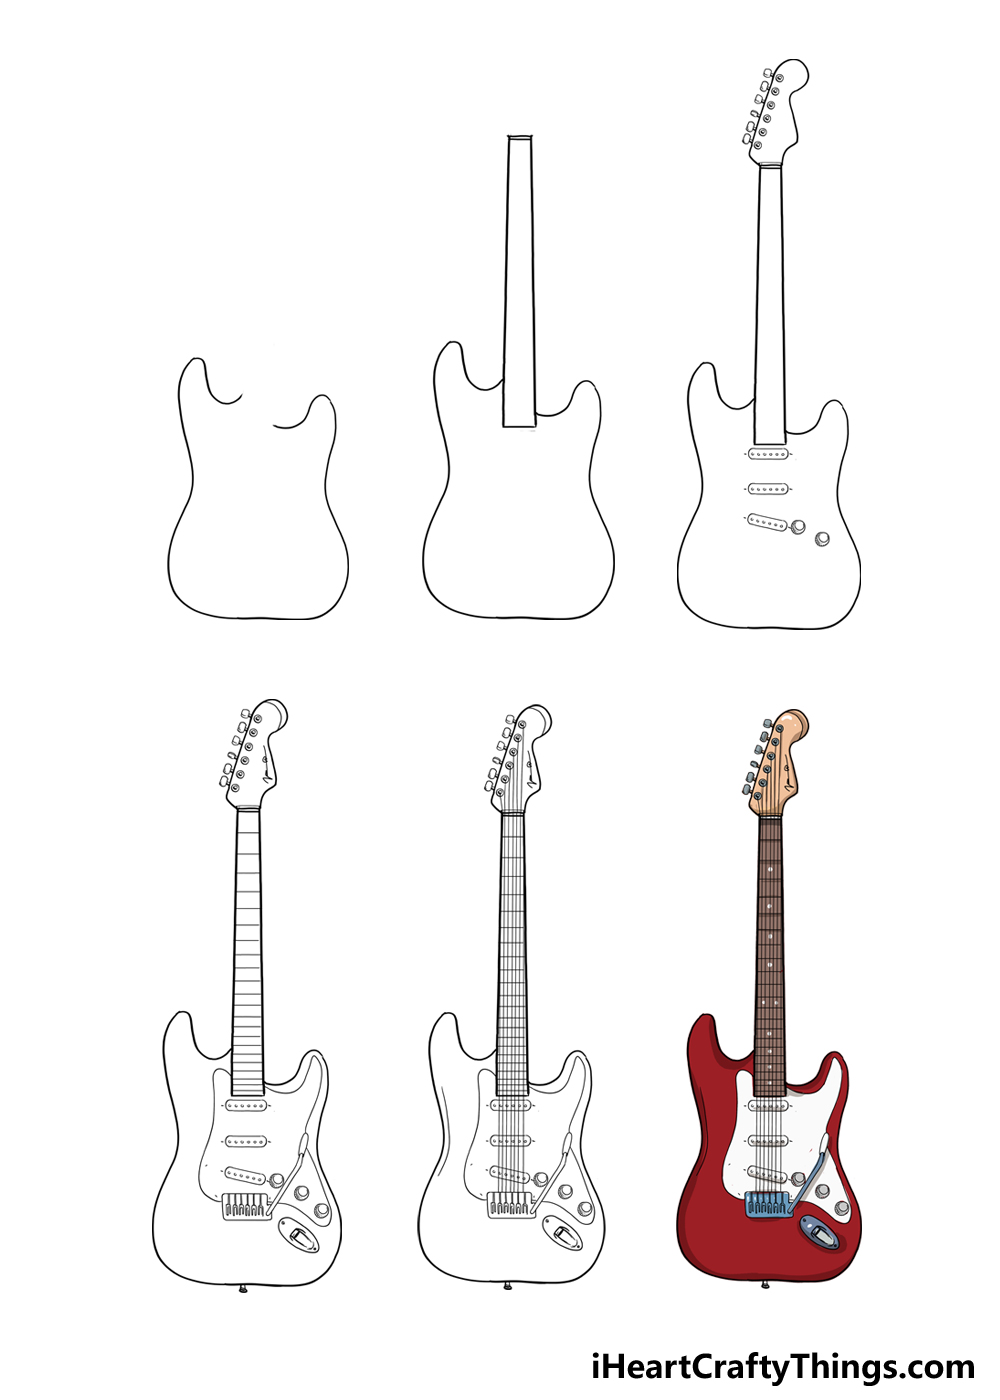
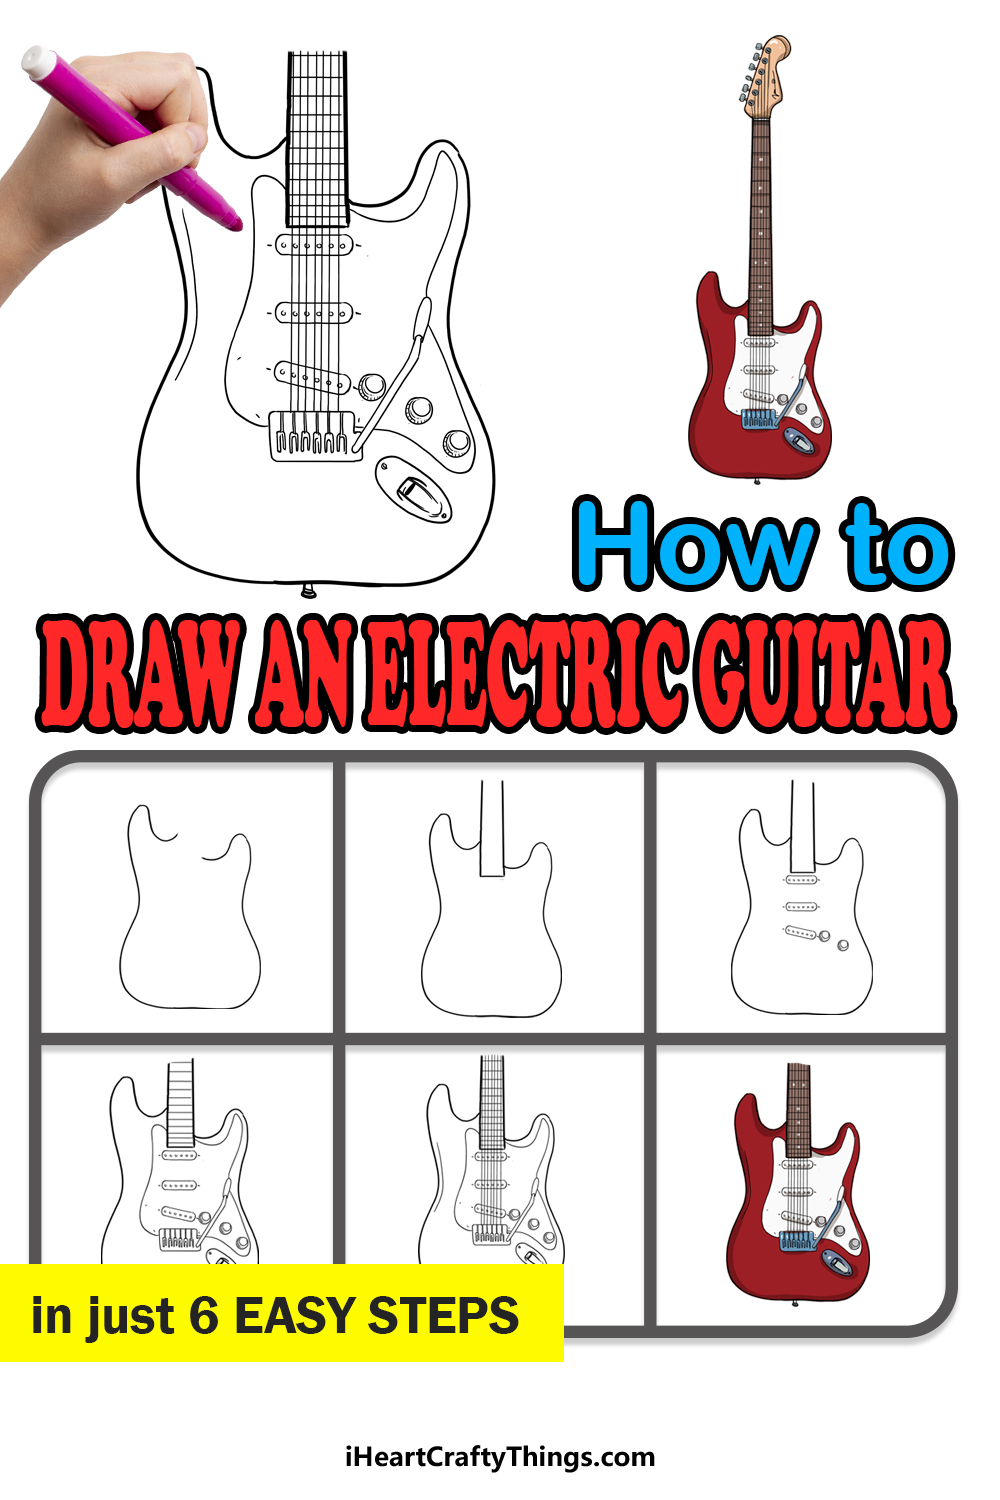
How to Draw An Electric Guitar – Let’s Get Started!
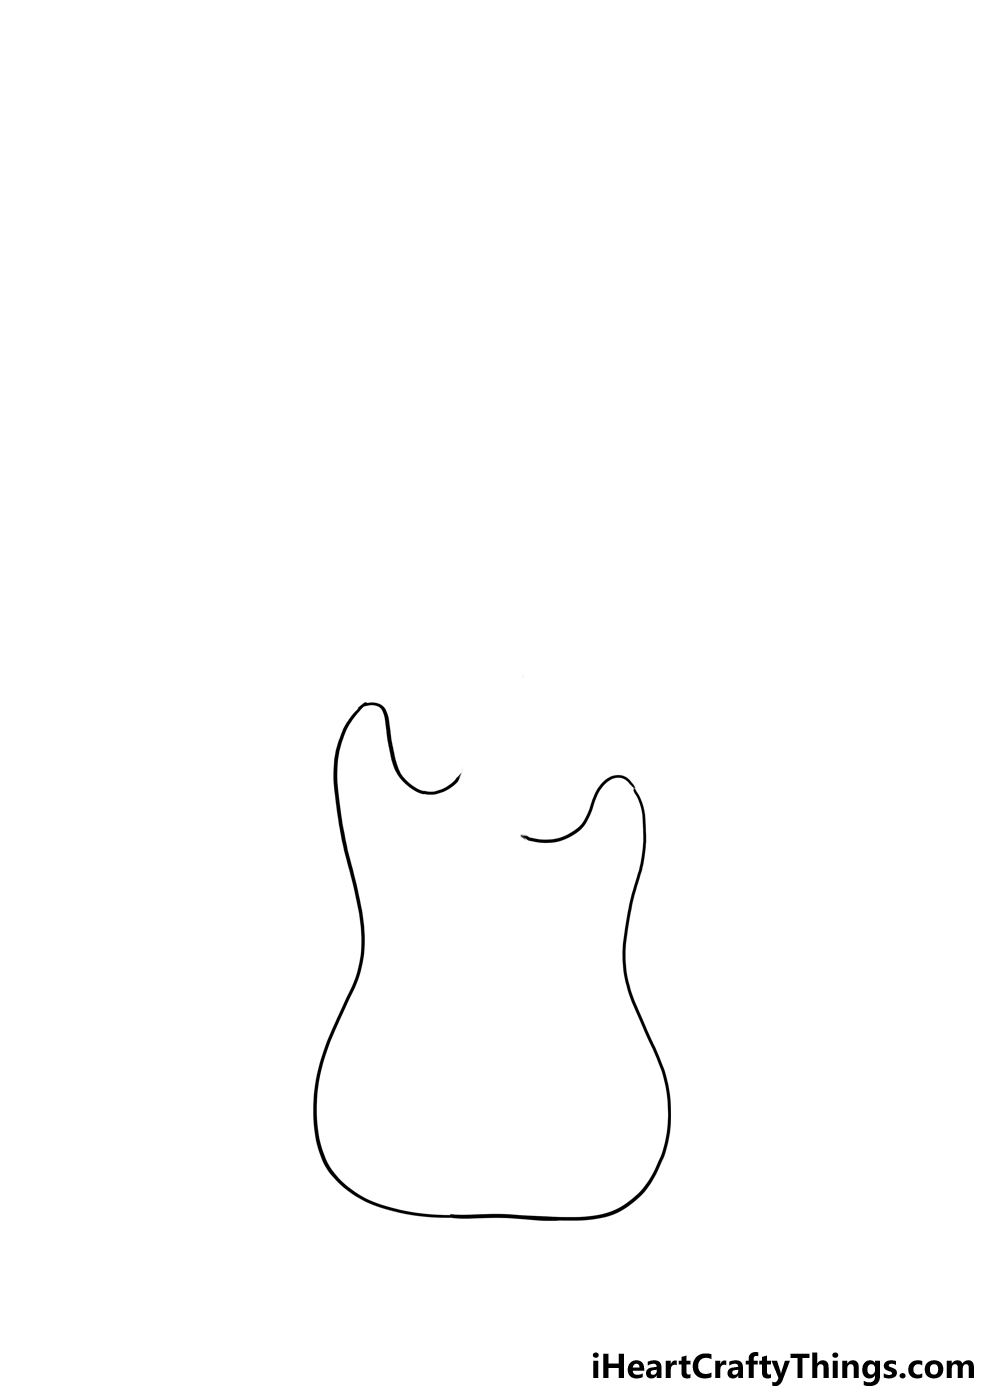
Step 1
Before we start this guide, there are a few different tools we would recommend having on hand before you start drawing. These would include the usuals, such as various pens or pencils.
We would also highly suggest having a ruler on hand, or at least something perfectly straight that you can trace with.
This is because there will be lots of straight lines for details such as the neck, frets and the strings.
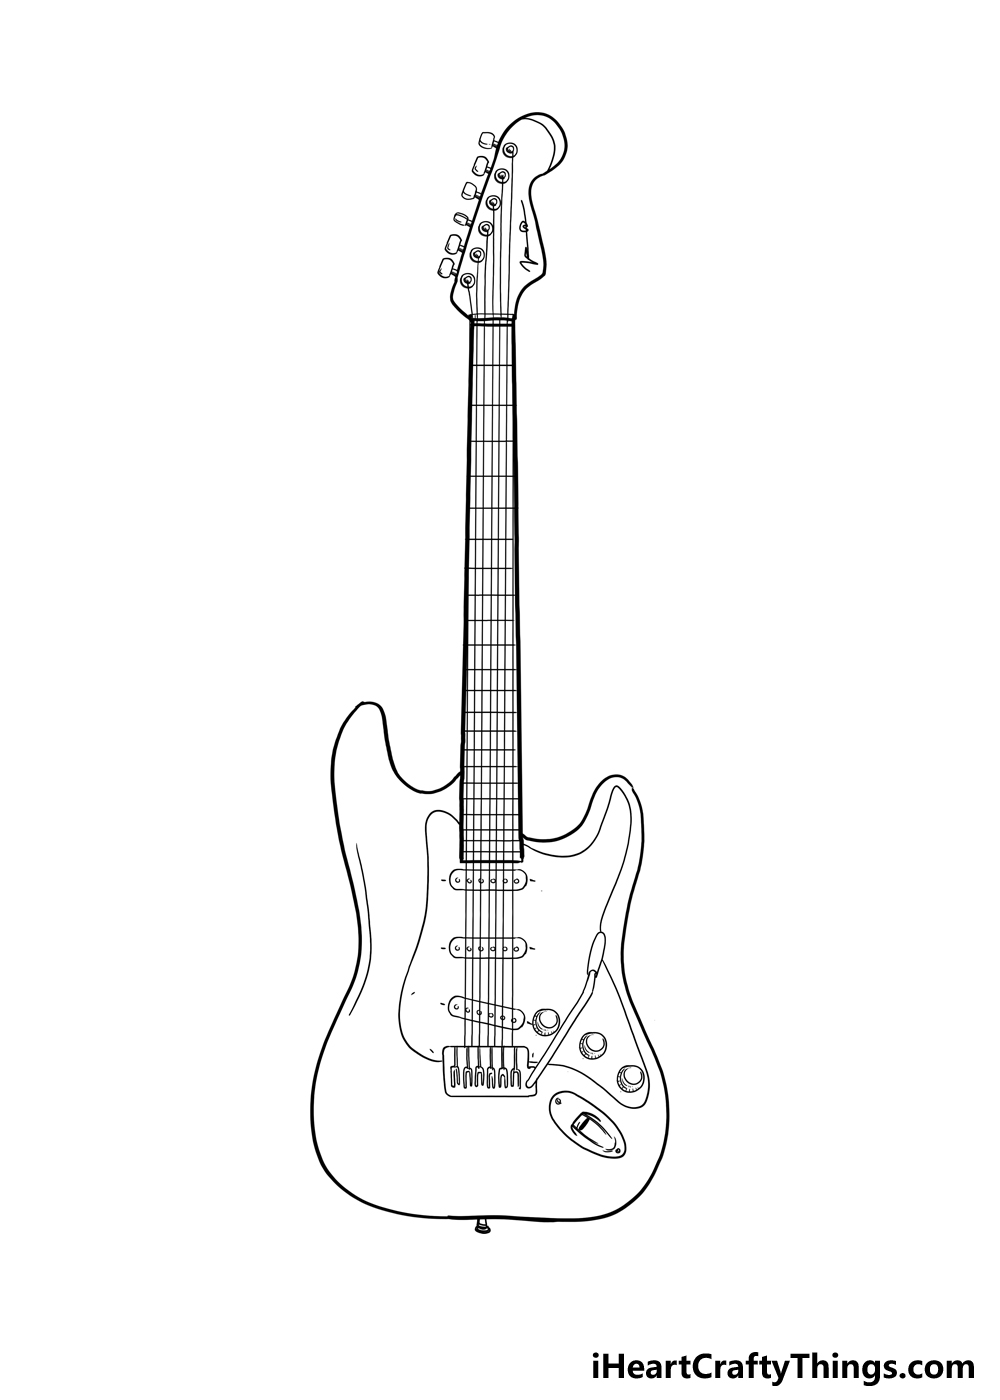
With that out of the way, we will start drawing the outline of the guitar’s body. A guitar’s body can come in many different shapes, but the one we are drawing has a fairly standard shape.
It has two rounded horns of sorts, and this allows the player’s hands to go higher on the neck to reach higher notes. The body of the guitar will be a single wavy line, and it can take a steady hand.
One way that you can make this easier is to draw a rough version of the shape with a pencil. If you have a light pencil, that would be ideal, otherwise you can use your regular pencil and press softly.
The horn on the left side of the guitar will be a bit taller, and it will extend down in a line that curves in and then out again. This will result in a wider base for the guitar’s body.
You will extend the wavy line back up from the base to eventually form the horn on the right, which will be a bit lower than the other.
Be sure to leave a space at the center, as the neck will go there soon.
Step 2: Draw the neck of the guitar
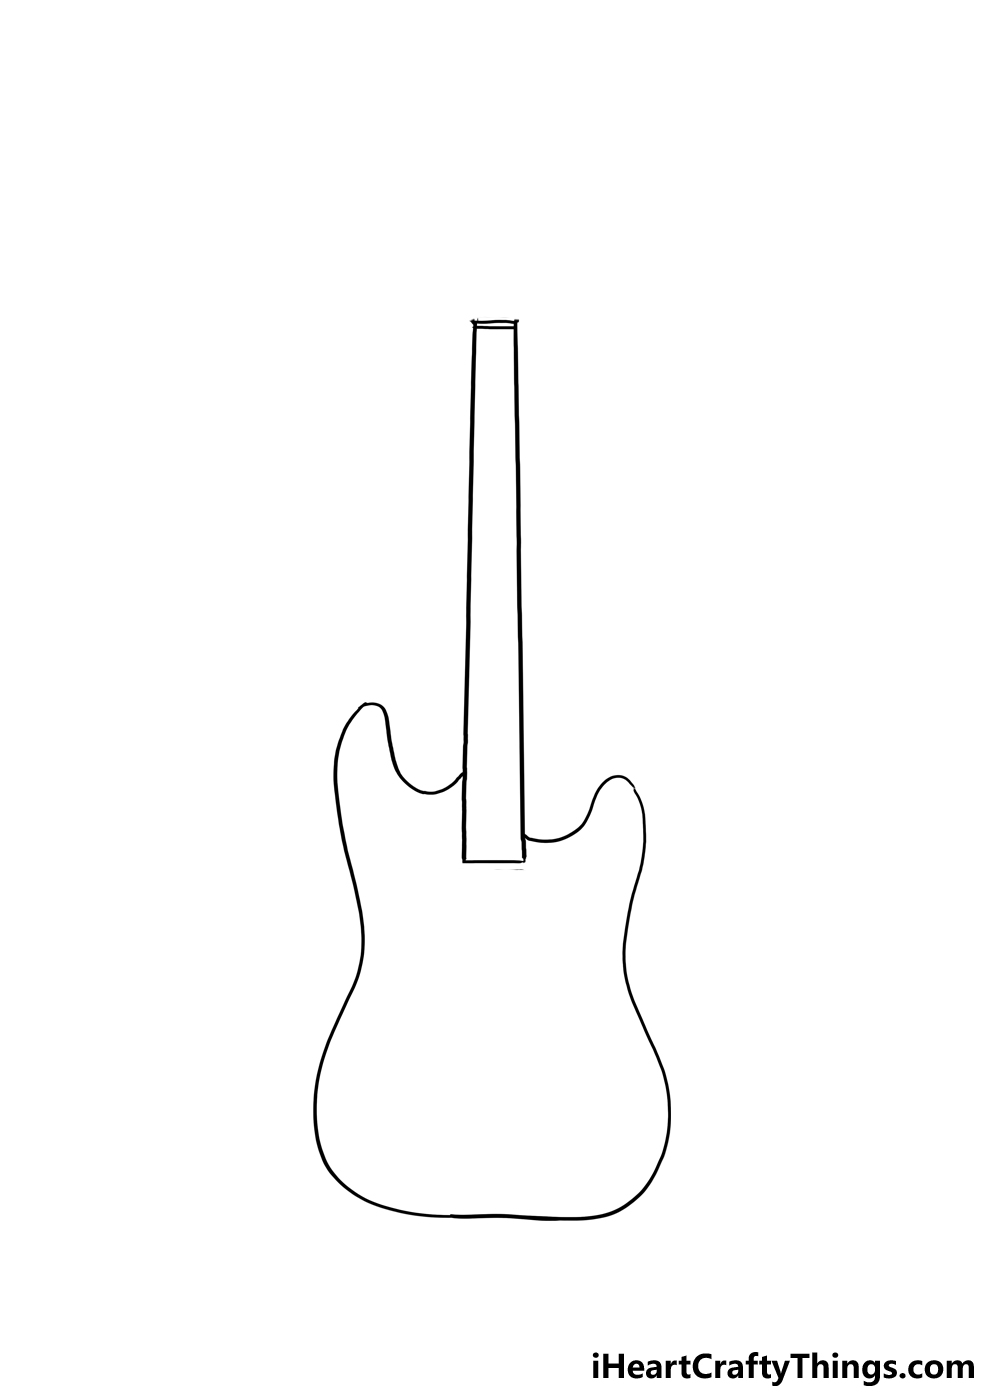
Every guitar needs a neck, and that is what we will be adding in this step of the guide. Drawing the neck without some kind of tool to help you would be quite tricky.
That’s because we ideally want the neck to be completely straight, which can be hard when you have to draw longer lines. That’s why we recommended using a ruler to help you.
You could also use any straight-edged object you may have lying around to work as a makeshift ruler if you don’t have access to one right now.
However you end up doing it, we are ready to start drawing the neck now. It will essentially be a long, thin rectangular shape.
As you will see in the reference image, it will be ever so slightly wider at the base and will get slightly more narrow the higher you get.
It will also slot into the space at the center of the body that we left previously.
We would suggest starting with the vertical lines of the neck that will touch both sides of that empty space. Then, connect them at the bottom with a horizontal line.
At the top, we will add a line and then another one really closely under it. There’s no specific length for the neck, but try to make it fairly long.
We will keep adding details as we proceed, so let’s head on to step 3!
Step 3: Add the head of the electric guitar and some smaller details

We will be adding a lot in this step of our guide on how to draw an electric guitar, so we will break it down into smaller elements! First, we will draw the head of the electric guitar.
This goes at the very top of the neck, and it has a rather unusual shape. The left side will be drawn with a fairly straight line that angles slightly to the left.
The top of the head will be a rounded line that angles to the right. Then, the right side of the head will have a more angular line to it.
It can sound a bit complicated when written out like that, but it will be easier if you refer to the reference image as you draw! Then, we will add the tuners to the head.
These will start with a row of small circles on the left side of the head. And each one will have a smaller circle inside of it. Then, you can add the tuners themselves.
These will be small little rectangles on the outer edge of the head, and each one will line up with one of the small circles you added previously.
Finally for this step, we will draw the pickups. These go on the body of the guitar, and they will be some long, thin rounded shapes.
The first two will be straight, while the third one will be drawn at an angle. Add some small dots inside each one, and then finish off with two small round knobs next to the pickup on the bottom.
Step 4: Now draw some smaller details

There are lots more details to add in this fourth step, but once again we will break it down. Let’s start with some of the more minor details on the head of the guitar.
We will start with a curved line on the upper right-hand side of the head. Many guitar makes will have a signature printed on the head, and you can draw one on this one.
We kept it vague, but you can make it match your favorite guitar maker or create your own. The next part could take a bit of patience, and you would be best off using a ruler again for this part.
We will be drawing the frets of the guitar on the neck, and these will be a series of straight lines across the neck.
Much like on a real electric guitar, the frets will get closer and closer to one another the further down you go.
Then, we have some more details to draw on the body of the electric guitar. This part will mimic the general wavy outline of the guitar body inside and surround the pickups we drew earlier.
It’s a part we would recommend studying closely on the reference image in order to see how it should look.
We then have a few more details to add below this section, including a lever and one more knob.
Once your electric guitar is looking like the one in the reference image, you can move on to step 5 where we will draw some final details, touches and ideas.
Step 5: Draw the final details for your electric guitar
This fifth part of your electric guitar drawing will be focused on the final details of this electric guitar.
Some of these will be ones you will see in the reference image, and others will be details you can add yourself.
For now, we will draw the strings of the guitar. These may seem simple, but it could prove to be one of the fiddliest bits of the design so far.
You’ll be used to us saying this by now, but you should consider using a ruler for this part. Each string will extend down from one of the small circles on the head of the guitar and down the neck.
If done right, they should all be evenly spaced and meet at the same point at the base of the neck. This will create a fine grid pattern on the neck as well.
Finally, add a simple curved line on the inner outline of the guitar body. Once you have added these final touches, you could add some ideas of your own!
Guitars will often have different patterns and designs on them, and you can add some cool details. For one idea, some guitars will have flame decals on them to create a fiery look!
Others may have specific branding or stickers. You could also draw a background to show where this electric guitar is being played, and you could show other equipment as well.
These are just a few ideas, but you could add any other fun details and additions that you want.
Step 6: Now, finish off with some color for this electric guitar
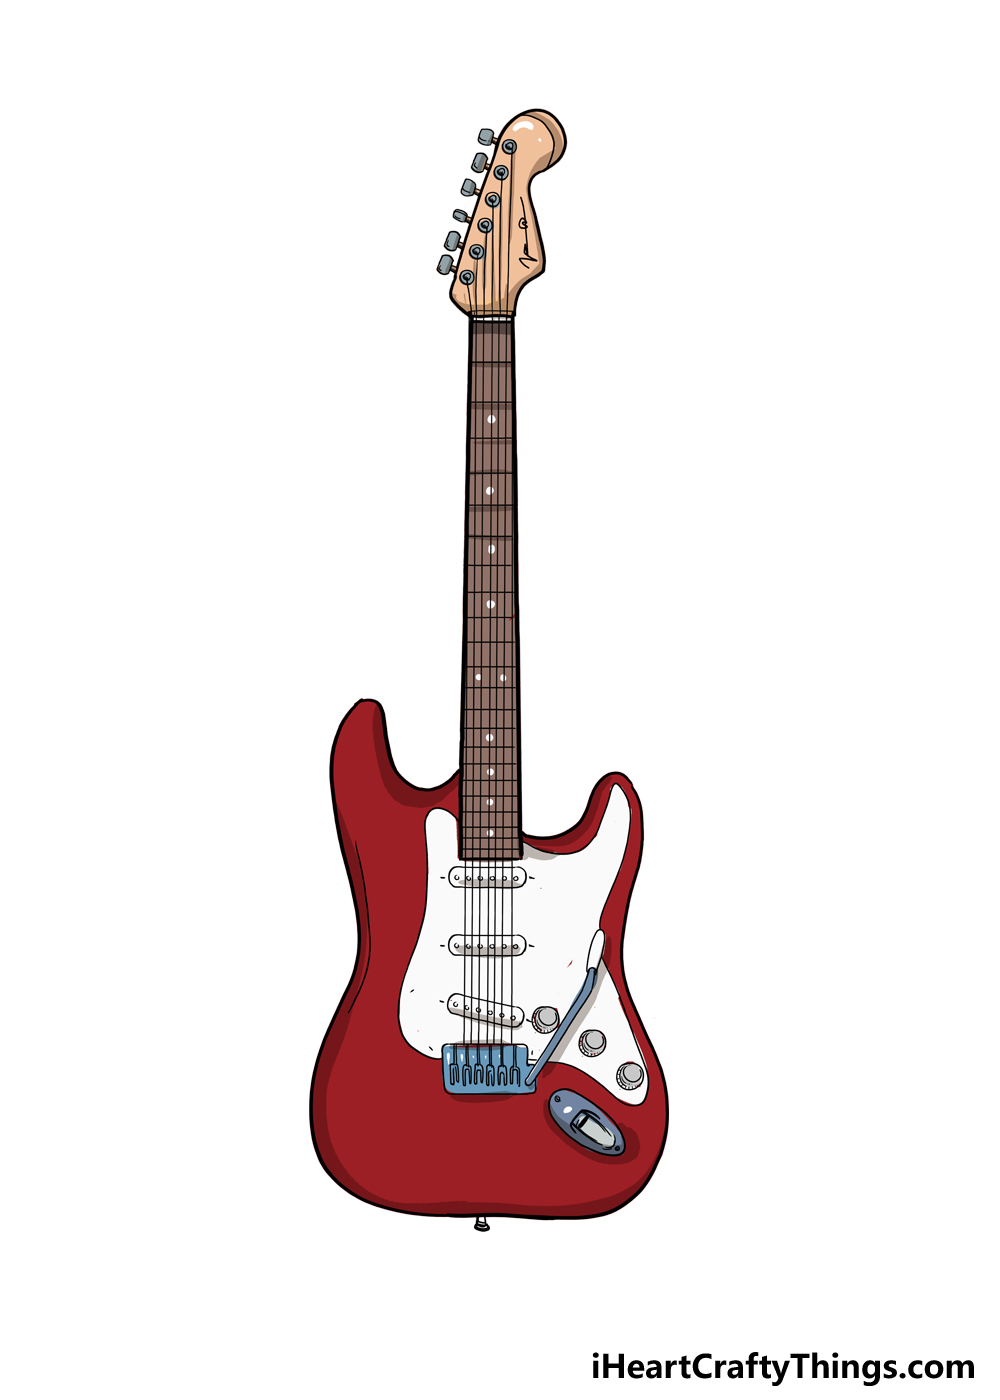
We used a classic color scheme for this version of the electric guitar, but this is one of the almost infinite ways that you can go about coloring this guitar.
We used a red and white color scheme for the body of the electric guitar, and it’s a striking look indeed. Then, we used simple browns for the neck and head with some silver for any metallic parts.
Now it’s up to you to decide how to color your own design, however! You could go for a similar color scheme to our example, or you could go for entirely unique colors.
When coloring, the colors you choose are not the only aspect to pay attention to. You can also have fun with the art tools and mediums that you use for the colors.
Colored pens and markers can be great for some brighter colors, whereas colored pencils and watercolors can work better for lighter colors.
You can also incorporate crafts like glitter or stickers to make it extra fancy.
Mixing mediums can be a great way to make the colors more dynamic and make them contrast with one another. It can be fun to experiment with different ideas, so be sure to have fun with it!
If you let your creativity flow, you can come up with a wonderfully unique design that is different from anyone else’s drawing.
We hope that you will have a lot of fun coloring your electric guitar artwork, and we can’t wait to see how it turns out!
Your Electric Guitar Drawing is Complete!
That brings us to the end of this guide on how to create a drawing of an electric guitar, and it was fun recreating this instrument!
There were certainly some challenges here, but we hope that the steps of the guide made it easier.
If you follow the steps of the guide and try yout best, then you will be able to create this drawing with ease in no time. If you struggled at all, remember that you can try as many times as you need to.
When you have the hang of it, you can then customize your own drawing with any ideas and extra details that you like. This can be a great way to create your very own unique electric guitar.
When it’s complete, we would love to see your finished drawing. You can share it on our Facebook and Pinterest pages for us to see!
It will be great to see what your awesome electric guitar looks like.