Art has gone through many different styles and movements.
Often, a new movement pioneered by revolutionary artists would be misunderstood and even reviled at the time, only to become influential and beloved as time went by.
Abstract art is one example of this, and artists such as Picasso would shake the art world to its core with their bizarre and expressive art.
Learning how to draw an abstract face is a great way to contribute to this famous artistic movement!
It can be hard knowing where to start when it comes to this style, however, and that’s what we’re here to cover in this tutorial.
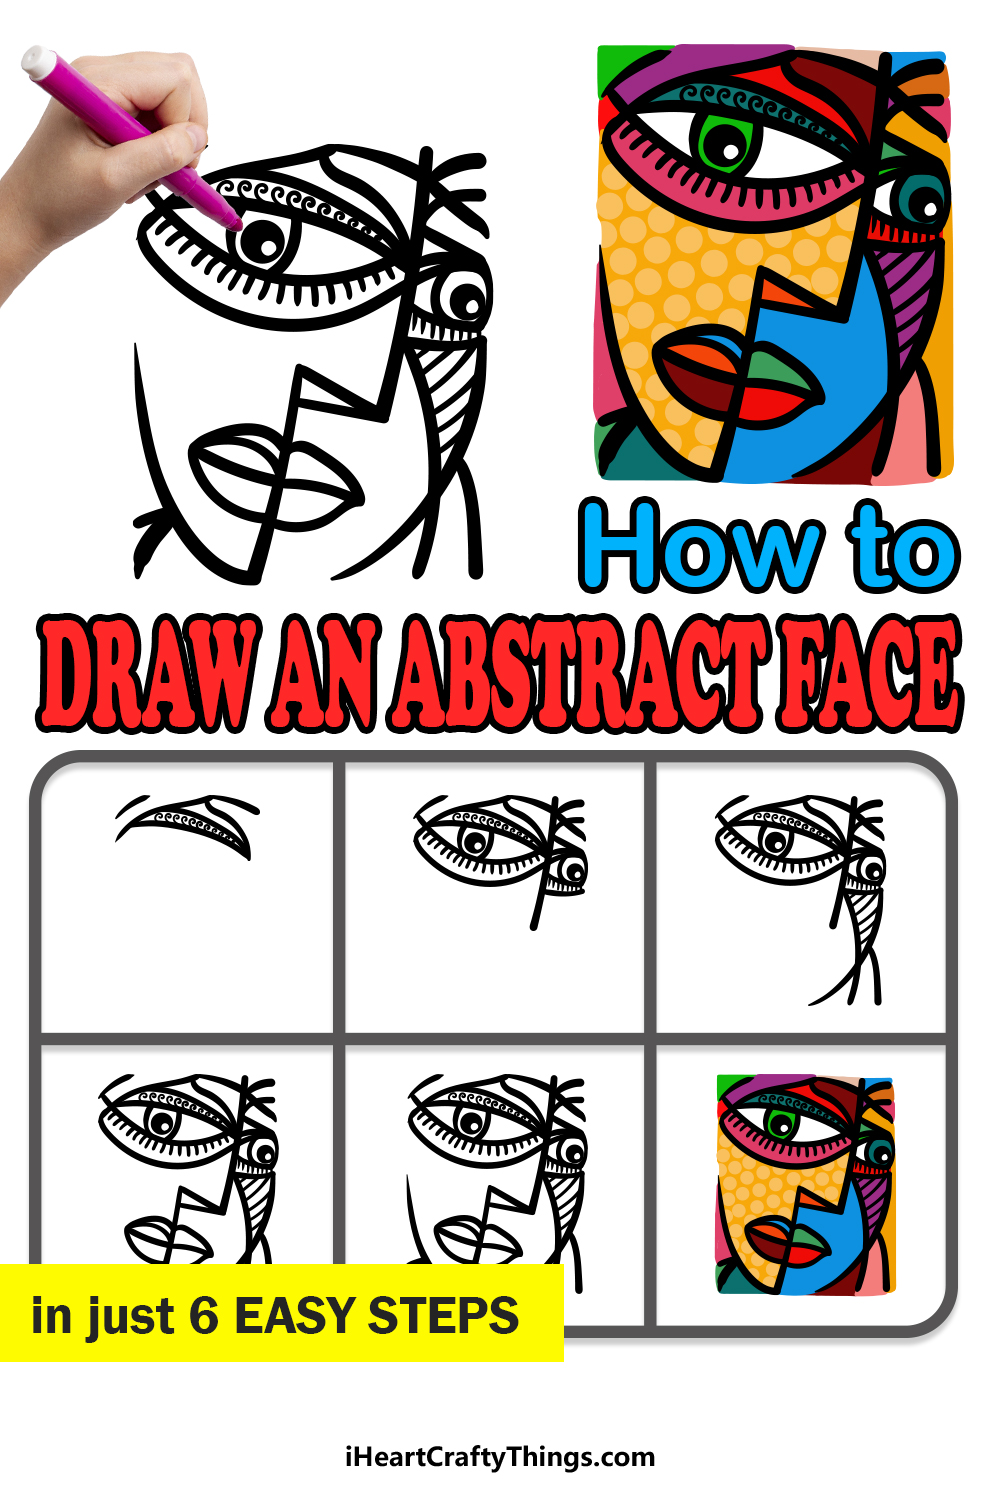
Our step-by-step guide on how to draw an abstract face in just 6 easy steps will show you how you can create one of these weird and wonderful artworks!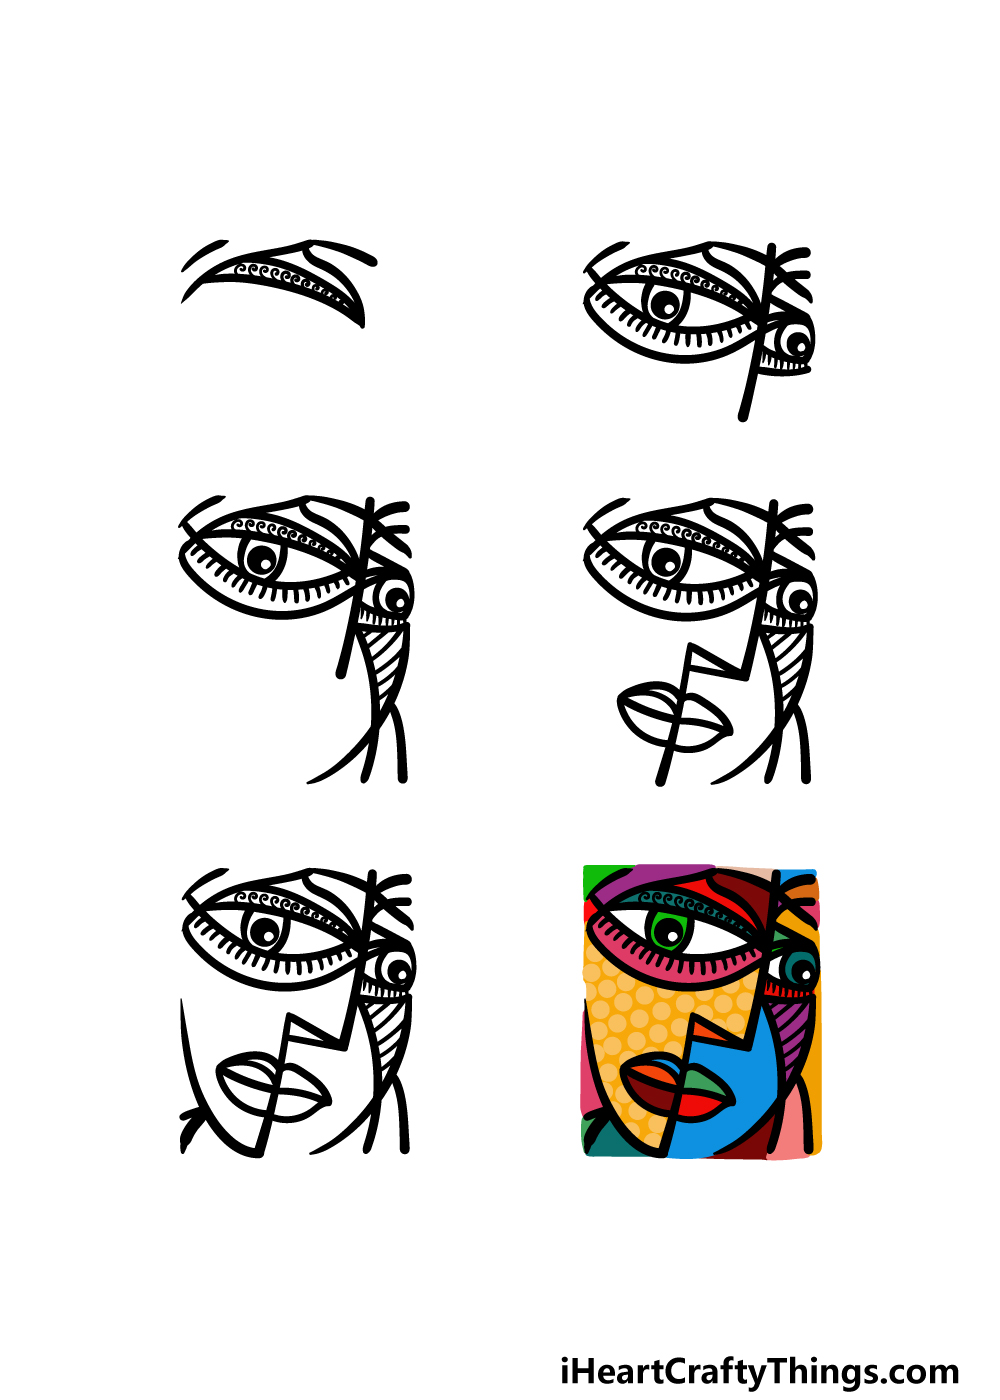
How to Draw An Abstract Face – Let’s Get Started!
Step 1

This style of abstract art s characterized by lots of shapes interacting with each other, and these shapes often have some smaller details working into them.
We shall start drawing and building up these shapes in this first step of our guide on how to draw an abstract face!
This first shape will be the eyelid above the eye, and it can be drawn using some curved lines to create a flat, rounded shape.
The eyelid will then have a series of small, curly lines drawn inside of it, and these will serve as the eyelashes.
You can then connect some more curved lines connecting to the eyelid and then add some more lines around these areas for some more detail.
Then it will be on to step 2 of the guide!
Step 2 – Now, draw the rest of the eyes
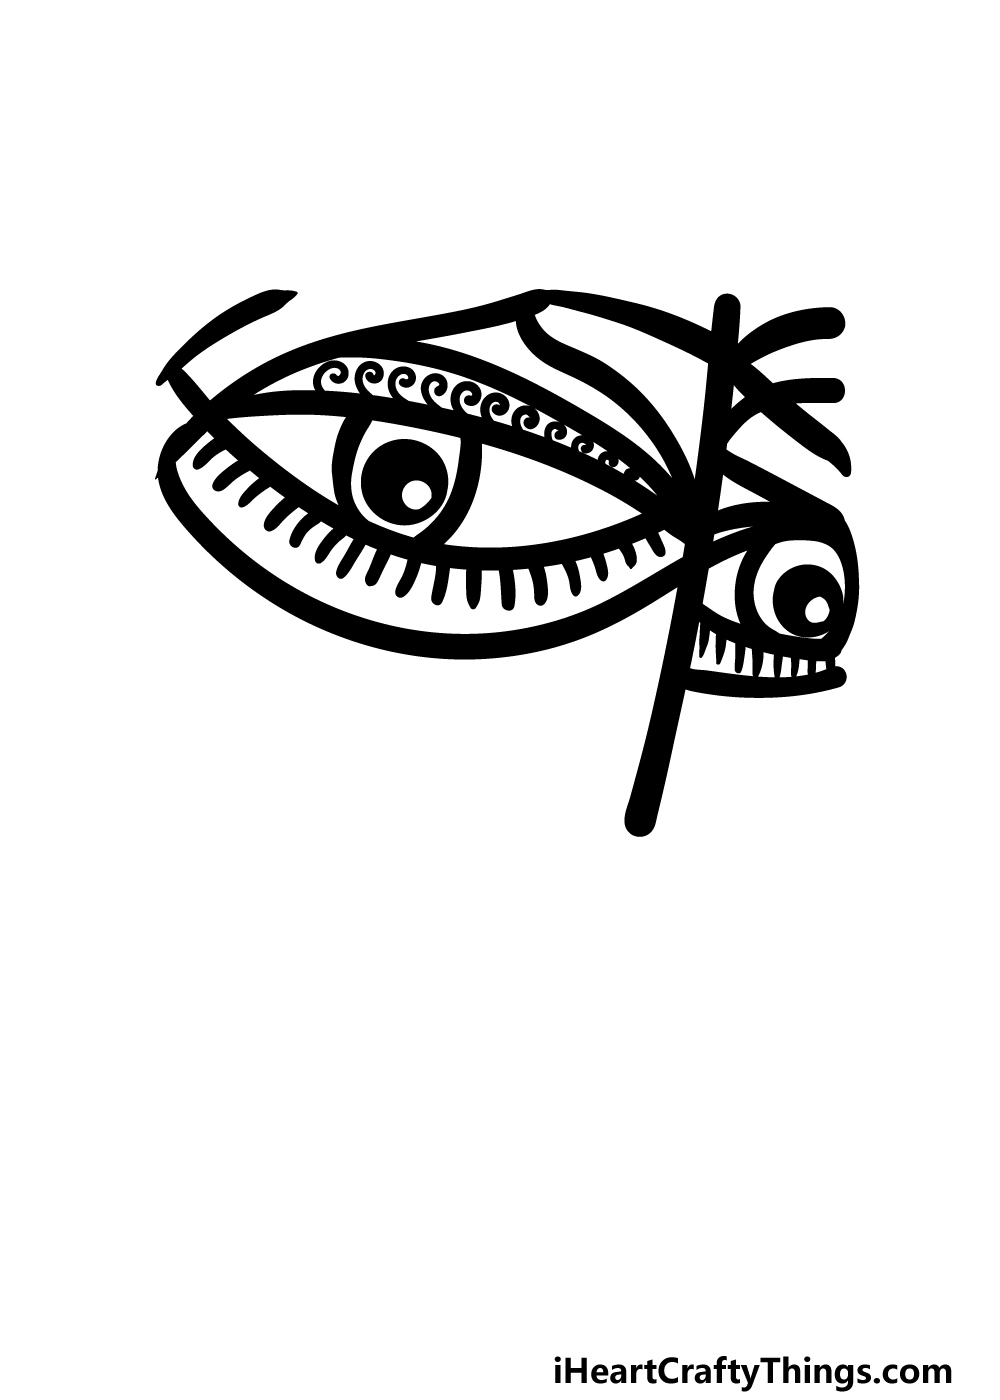
You started drawing some aspects for the eyes in the previous step of this abstract face drawing, and in this second part we shall finish off the eyes.
First, draw another curved line for the bottom edge of the eye. You can then add another line underneath this one for the bottom eyelid.
Next, draw a round, black shape with a small white circle within it for the pupil of the eye. This can then be surrounded by some curved vertical lines.
You can also add a series of small, slightly curved lines to the bottom eyelid for some more eyelashes.
Start the nose by using another curved vertical line, and then you can draw the other eye attached to it.
This eye will look rather similar to the first, but it will be significantly smaller. Once all fo these details have been drawn, we will head on to step 3 of the guide!
Step 3 – Draw the side of the face
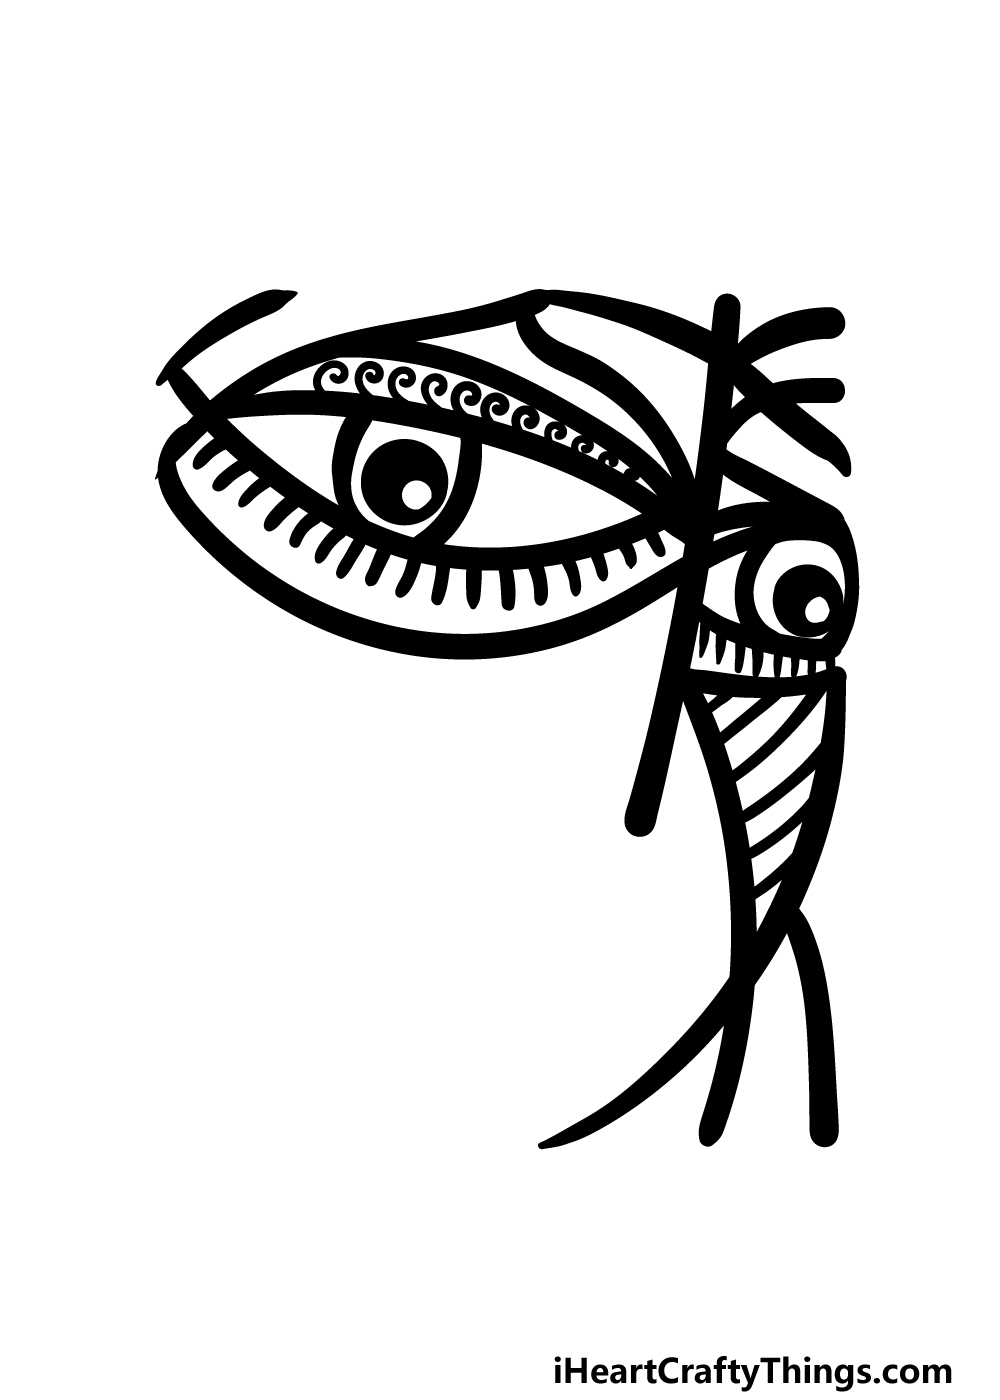
Moving on with this guide on how to draw an abstract face, we shall now be adding the side of the face.
Beneath the eye on the right, you can draw a curved triangular shape. This shape will then have some more curved lines going across it.
There will be a few more simple line details to add to this area, and then it’s on to the next step of the guide!
Step 4 – Next, draw the nose and mouth of the face
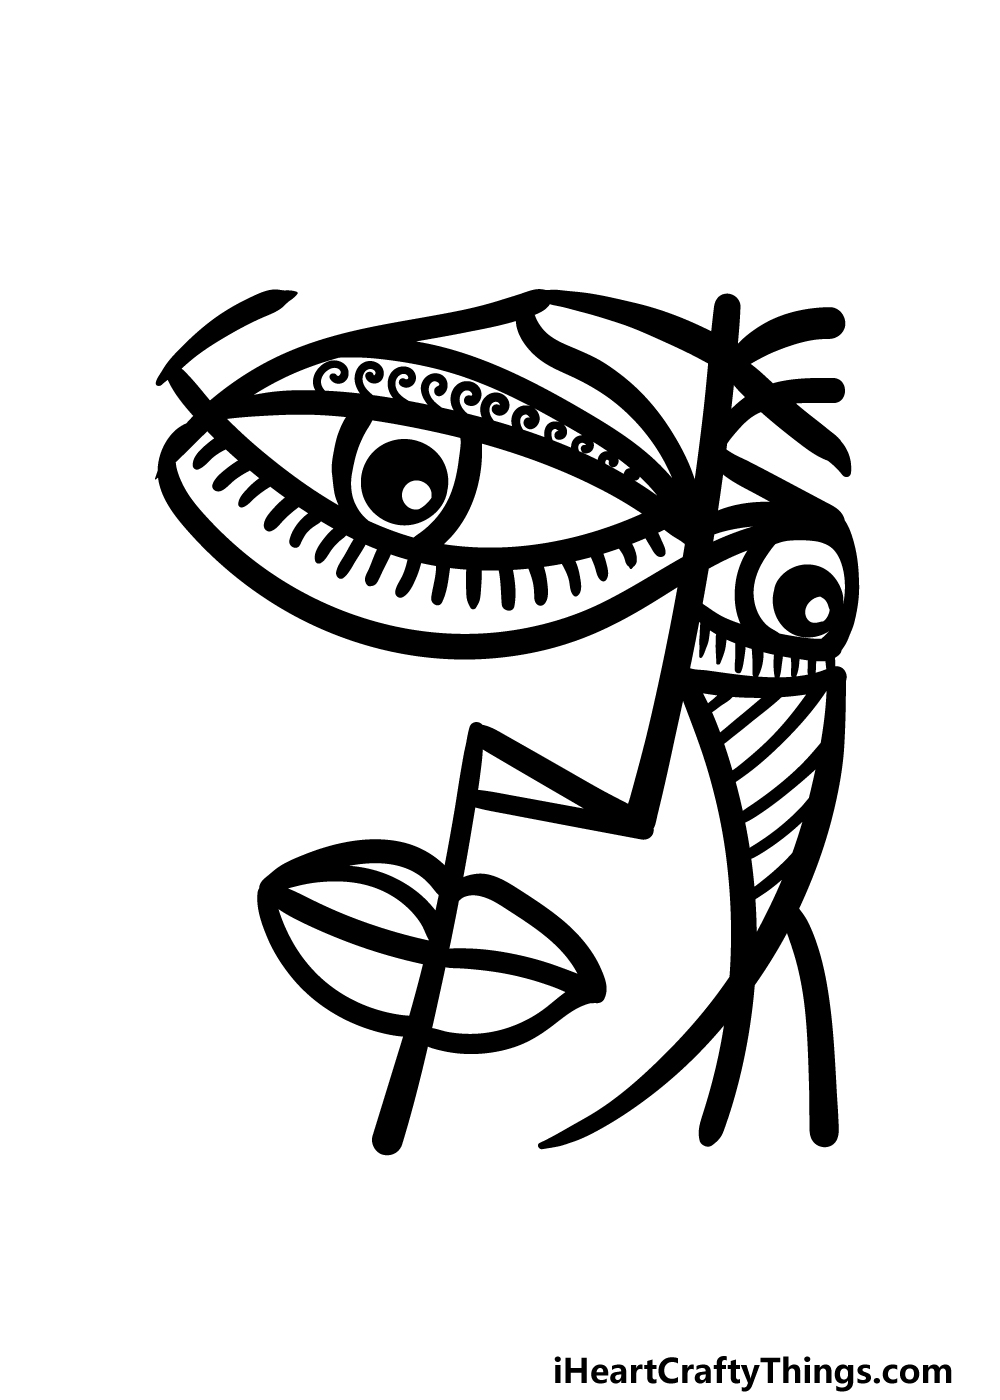
For this fourth part of your abstract face drawing, we will be drawing the nose and mouth for this face. The nose will be drawn using a sideways triangular shape attached to the bridge.
Then, for the lips we shall be using some rounded lines to draw them separated into several sections.
The mouth section will also have a straight line extending down from the nose and through the center of the mouth.
Once that’s drawn, we will be ready for the final elements and details of the drawing!
Step 5 – Add the final details to your abstract face drawing
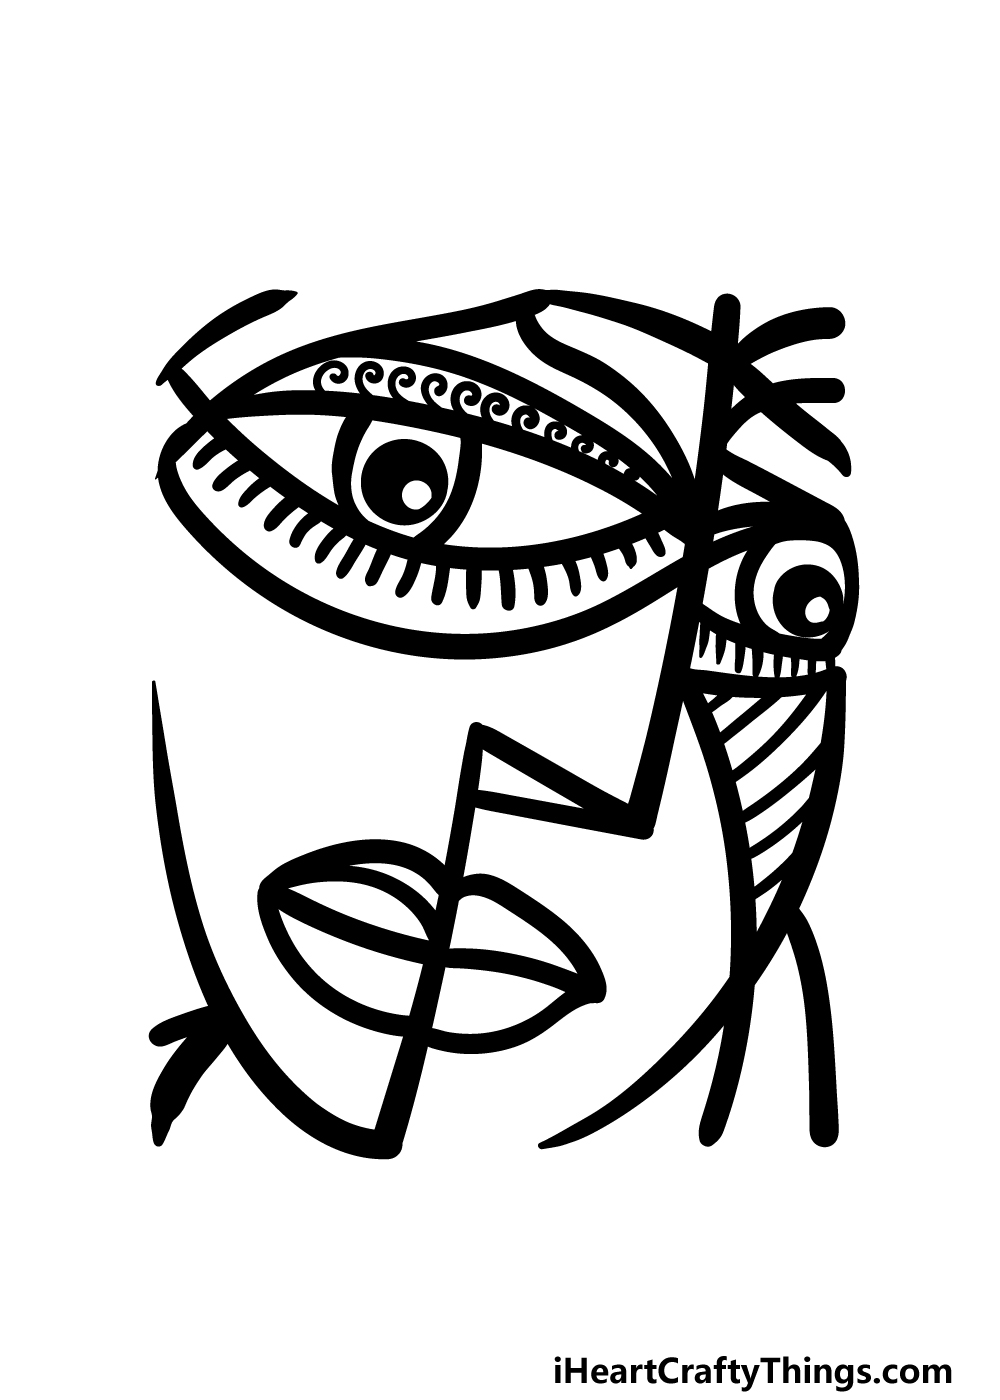
In this fifth step of our guide on how to draw an abstract face, we will be drawing the rest of the face to have you ready for some coloring fun in the final step of the guide.
Use a curved line for the bottom left-hand edge of the face to finish it off! Once that’s drawn, you could also add your own touches to the picture.
There are no right or wrong answers when it comes to abstract art, so you could add any shapes or small touches that you think would suit the composition.
This would be a great opportunity to not only show off your creativity but also to express yourself with your art.
We can’t wait to see how you finish off this incredible drawing!
Step 6 – Finish off your abstract face drawing with color
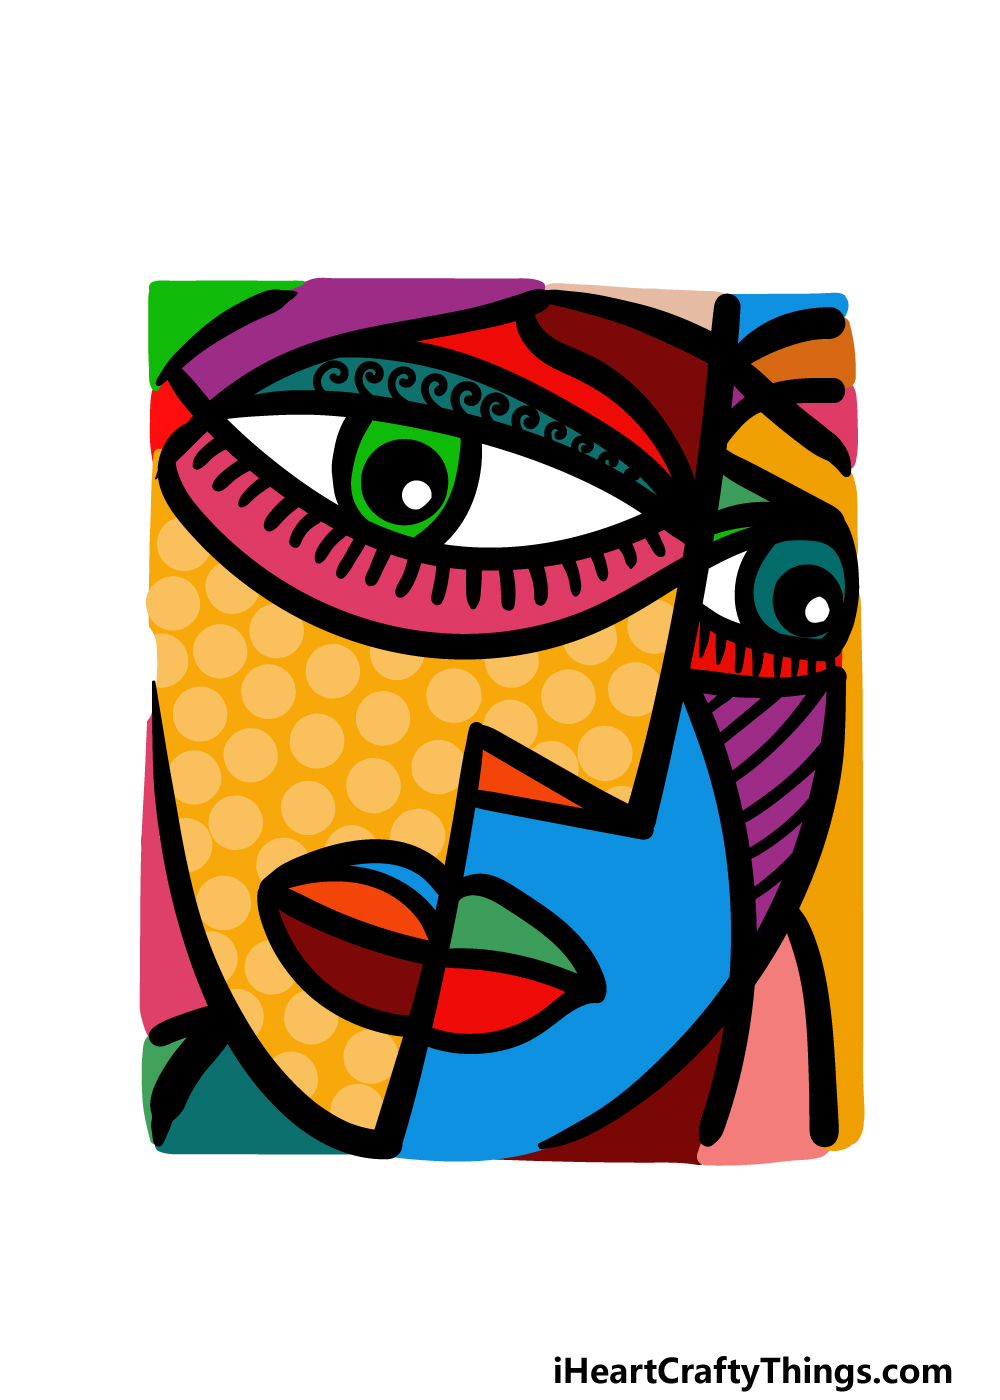
Now you’re ready to finish up this awesome abstract face drawing with some color! Much as we said with the previous step, there are no wrong ways to color this image.
We used a huge selection of different bright colors to finish off this image, and we tried to use a different color for every section.
For some of the sections, we even used different color shades to create some simple patterns.
Will you use similar colors to us or will you go for a completely different color scheme?
You can also have some fun choosing the various art tools and mediums that would best suit the color scheme you’re going for!
4 More Ways To Make Your Abstract Face Drawing Unique
Channel your inner Picasso as we make this abstract face sketch look even better!
This style of art is all about expression, and one of the best ways to express yourself is through colors.
This drawing of an abstract face shows you a set of colors you could use, but you should feel free to experiment.
It could involve not only the colors you choose but also the art tools and mediums that you use to achieve them.
This gives you a lot of freedom, and you can really have fun playing around with the possibilities!
Now that you have finished drawing this abstract face, you could try to make some variations. For example, you could have something as simple as a winking eye on one side.
Or, you could change the facial expression entirely or add some additional features such as a mustache. These are just a few of the ideas you could go for, but there are so many ways to make it unique!
What are some other features you could add?
Another fun challenge you could take on would be to make another abstract face drawing based on a real person. For example, you could use a mirror and try to draw your own face in this style.
Luckily, with this style there is no wrong way to do it, and the weirder it looks the better! Why not try to create some portraits of people that you know to see how different they will look?
Finally, you could extend your abstract face sketch by drawing more of a background setting. This could be done in the same abstract style that we used for the face itself.
To make this easier, try to think of some objects you could insert into the scene such as a vase or a bowl of fruit. Then, take what you learned in this guide and try to adapt these objects.
Once again, there is no wrong way to do this, so you can have fun and get experimental!
Your Abstract Face Drawing is Complete!
That brings you to the end of this guide on how to draw an abstract face! This is such an interesting and unique art movement that we hope was a joy for you to work in.
It can be intimidating to take on such a unique style, but by following the steps in the guide we hope it was made much easier!
When you have finished the design we have laid out, you can also keep it going with your own design elements!
Whether you do that with color choices or changes to the design, we know you will end up with an incredible artwork.
Then, you will want to head on to our website for more drawing guides to enjoy! We upload new guides frequently for you to enjoy, so make sure to check in often.
We also would love to see how your abstract face drawing turned out, so please share your finished artwork on our Facebook and Pinterest pages!