There are certain animals that have come to achieve certain reputations and associations. Phrases such as “stubborn as a mule” or “cunning as a fox” have become popular in modern language.
Another of these sayings is “strong as an ox,” and it’s easy to see why this saying came to be.
The ox is one of the hardiest and most powerful animals you can find, and many people also like to depict them in art because of their powerful appearance.
Learning how to draw an ox is a great way to start doing this!
If you love this powerful animal and are wondering how you can learn to depict it, then look no further than this very tutorial.
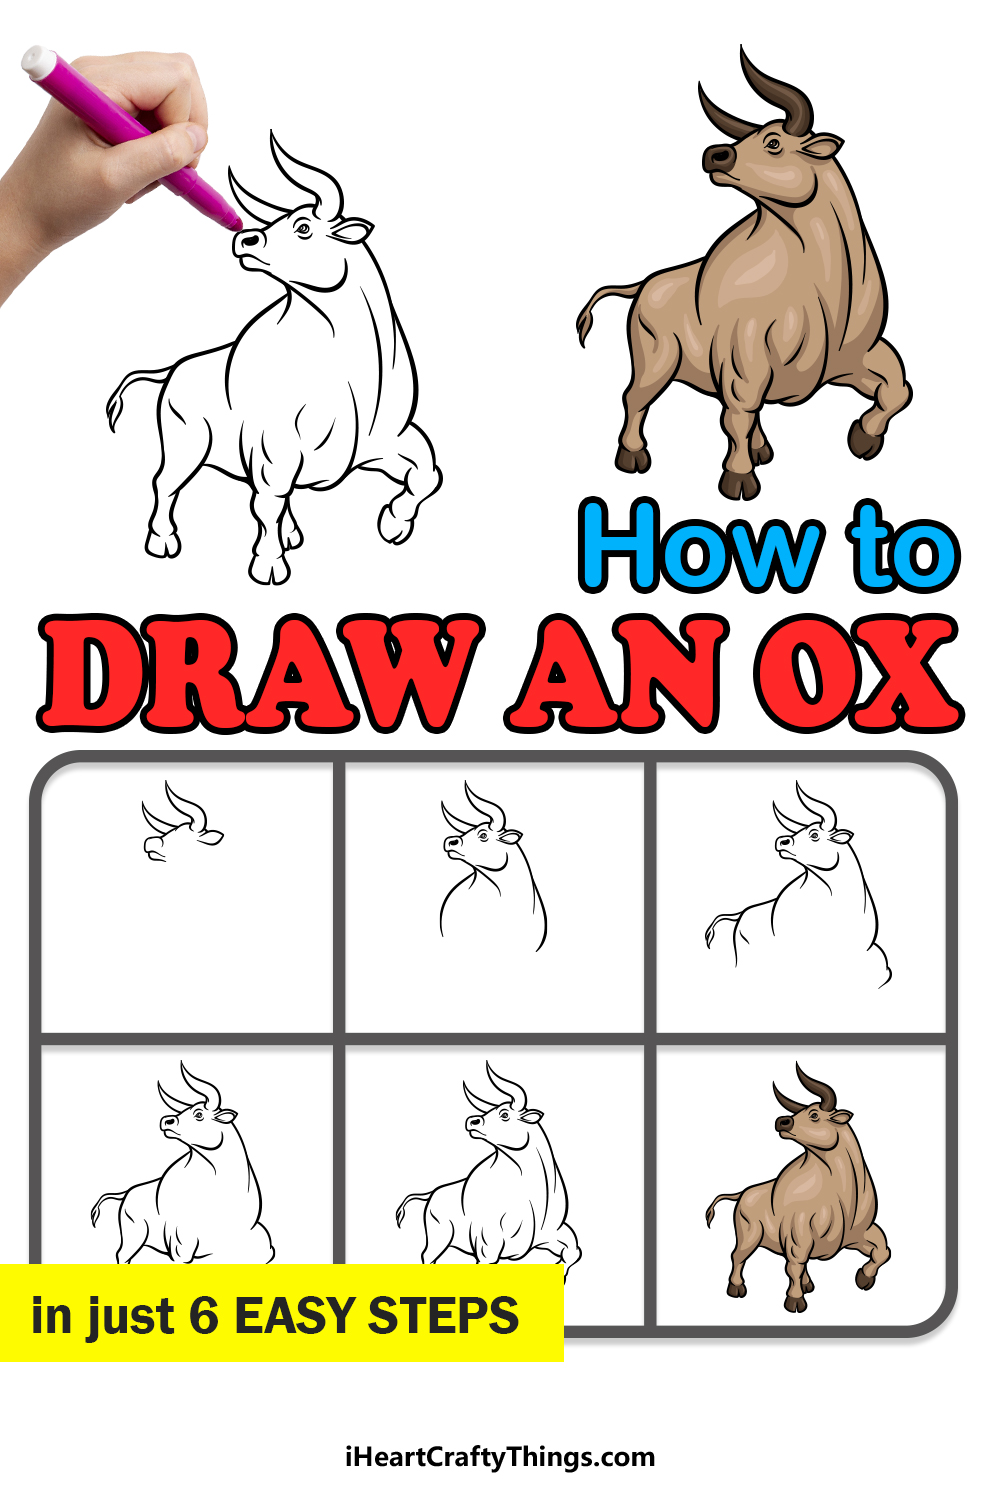
Our step-by-step guide on how to draw an ox in just 6 steps will show you how to recreate this incredible animal!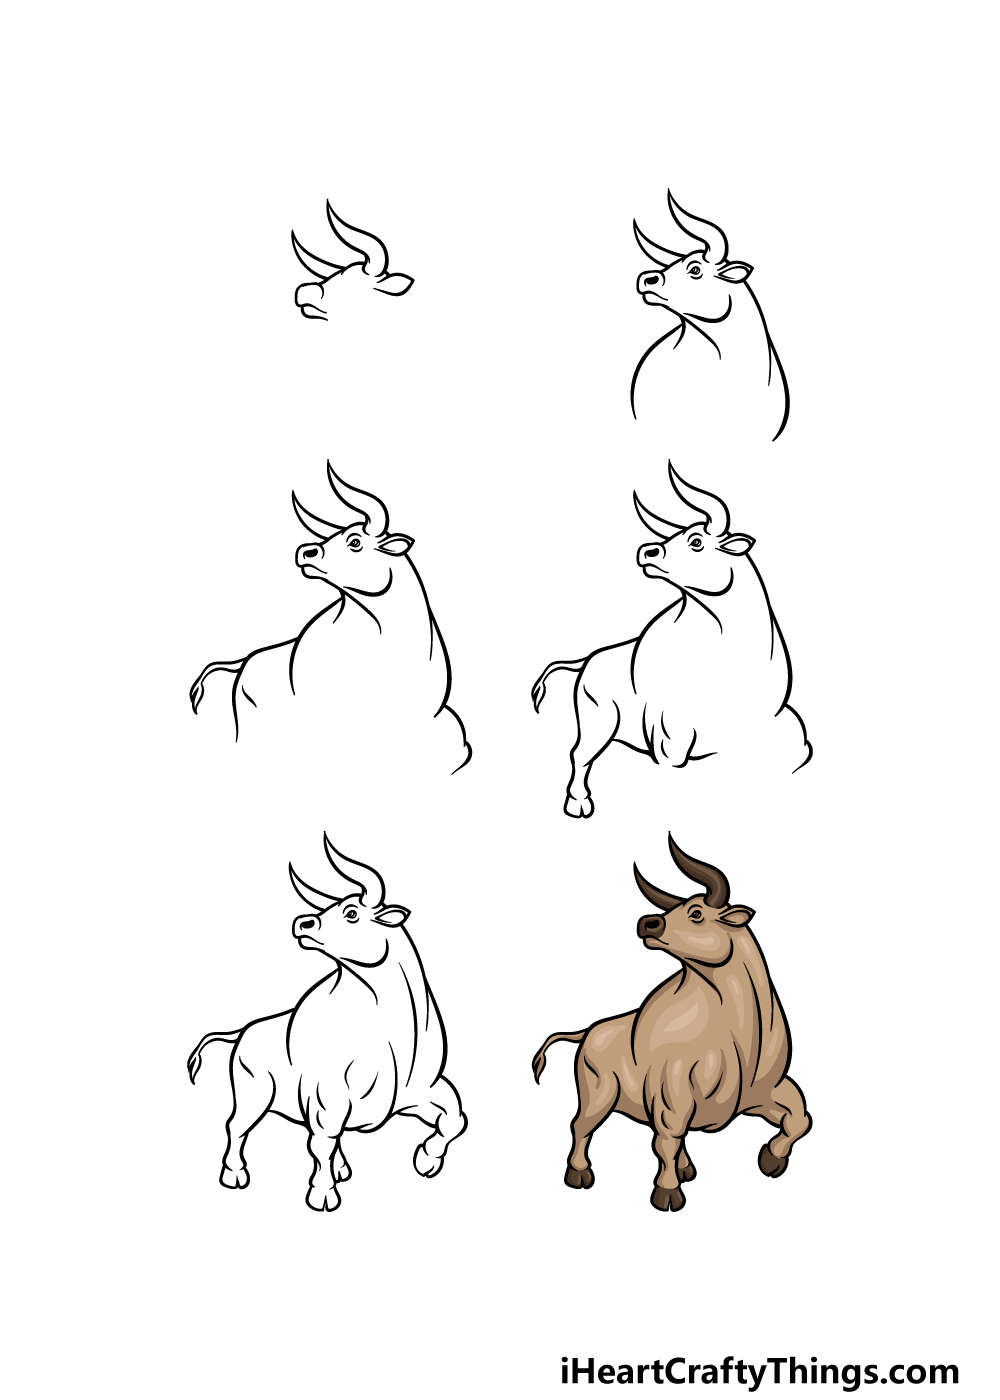
How to Draw An Ox – Let’s Get Started!
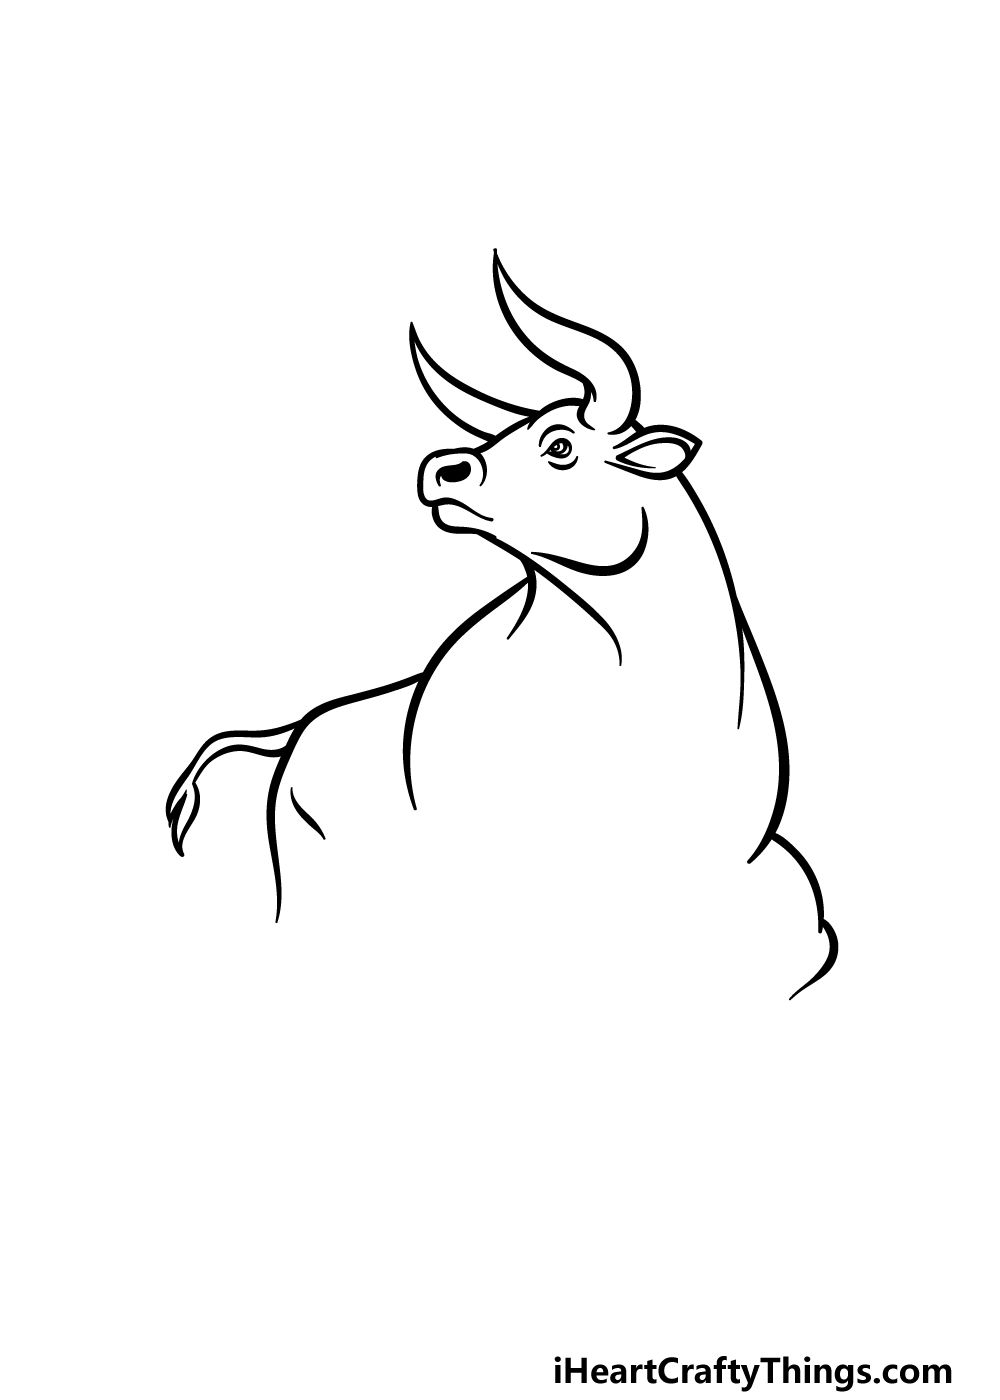
Step 1
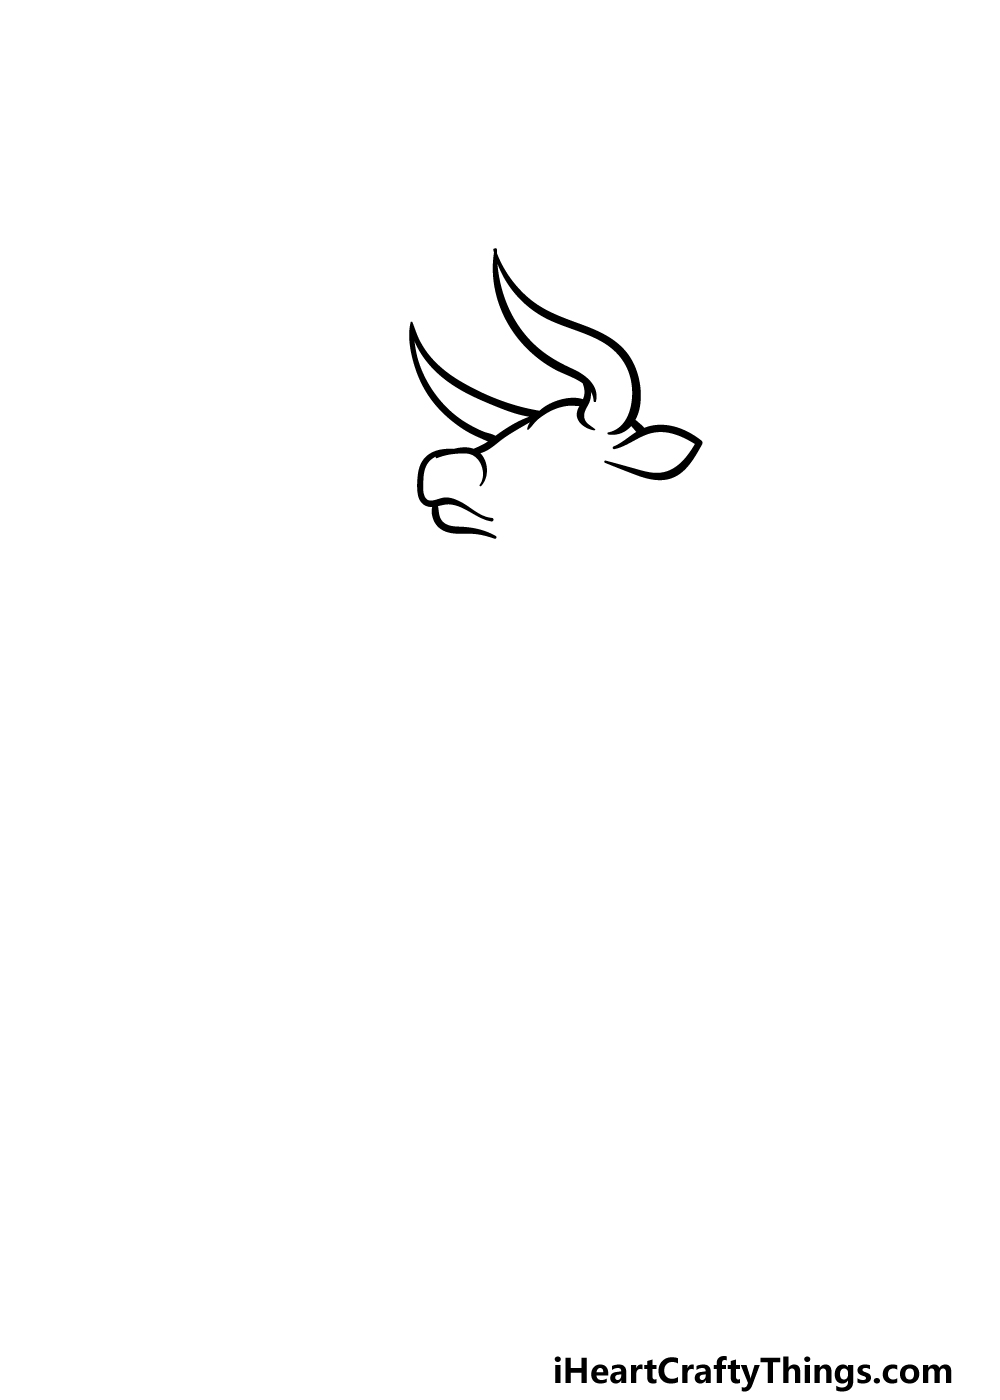
In this first step of our guide on how to draw an ox, we will begin with the head and horns of the animal.
First, use some rounded lines for the top of the muzzle and the base of the mouth, as shown in the reference image. Then, we will use some more rounded lines for the top of the ox’s head.
Then, using some wavy lines we will then draw the twisty horns on the top of the head that will end in some sharp pointy tips.
Finally, draw some small rounded ears on the sides of the head to finish up this part.
We will then be able to move on to step 2 of this guide!
Step 2 – Now, draw some facial details and the start of the neck and body
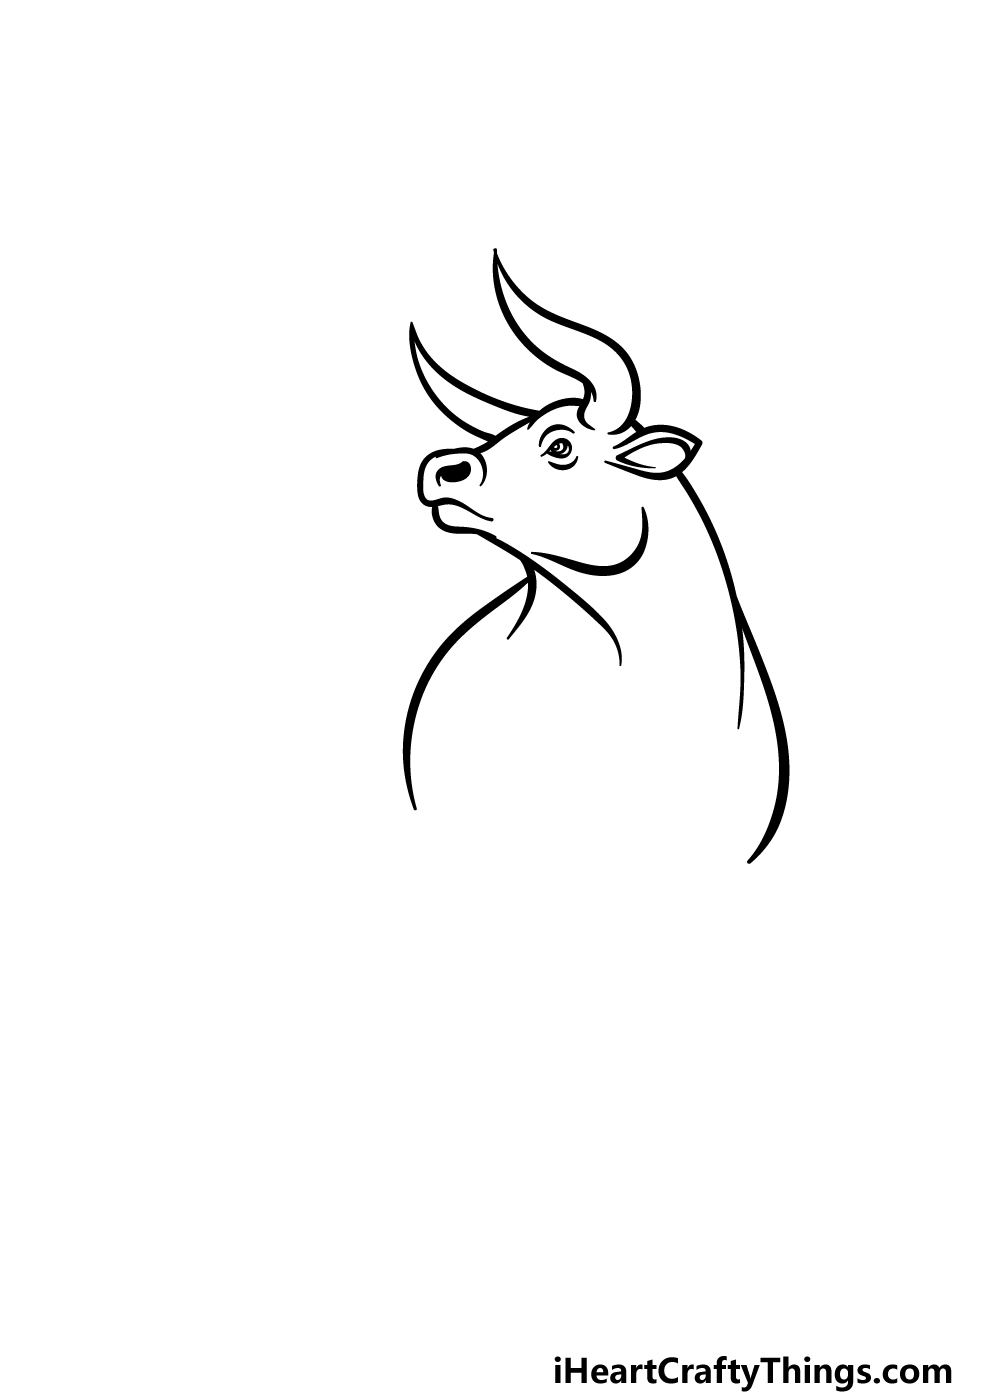
To continue this ox drawing, we will now be adding some facial details along with more of the neck and body of this mighty ox!
First, add a large black dot onto the nose for the nostril. Once that is drawn, you can then add a small circle with a dot inside for the eye.
Next, draw a curved line inside of the ear to show the inner portion.
Then, we will be using some more curved lines for elements such as the jaw, neck and shoulders of the ox.
As mentioned, the ox is strong and muscular, so for that reason we will be using a lot of smooth, rounded lines. When you’re happy with how it looks, it will be time for step 3.
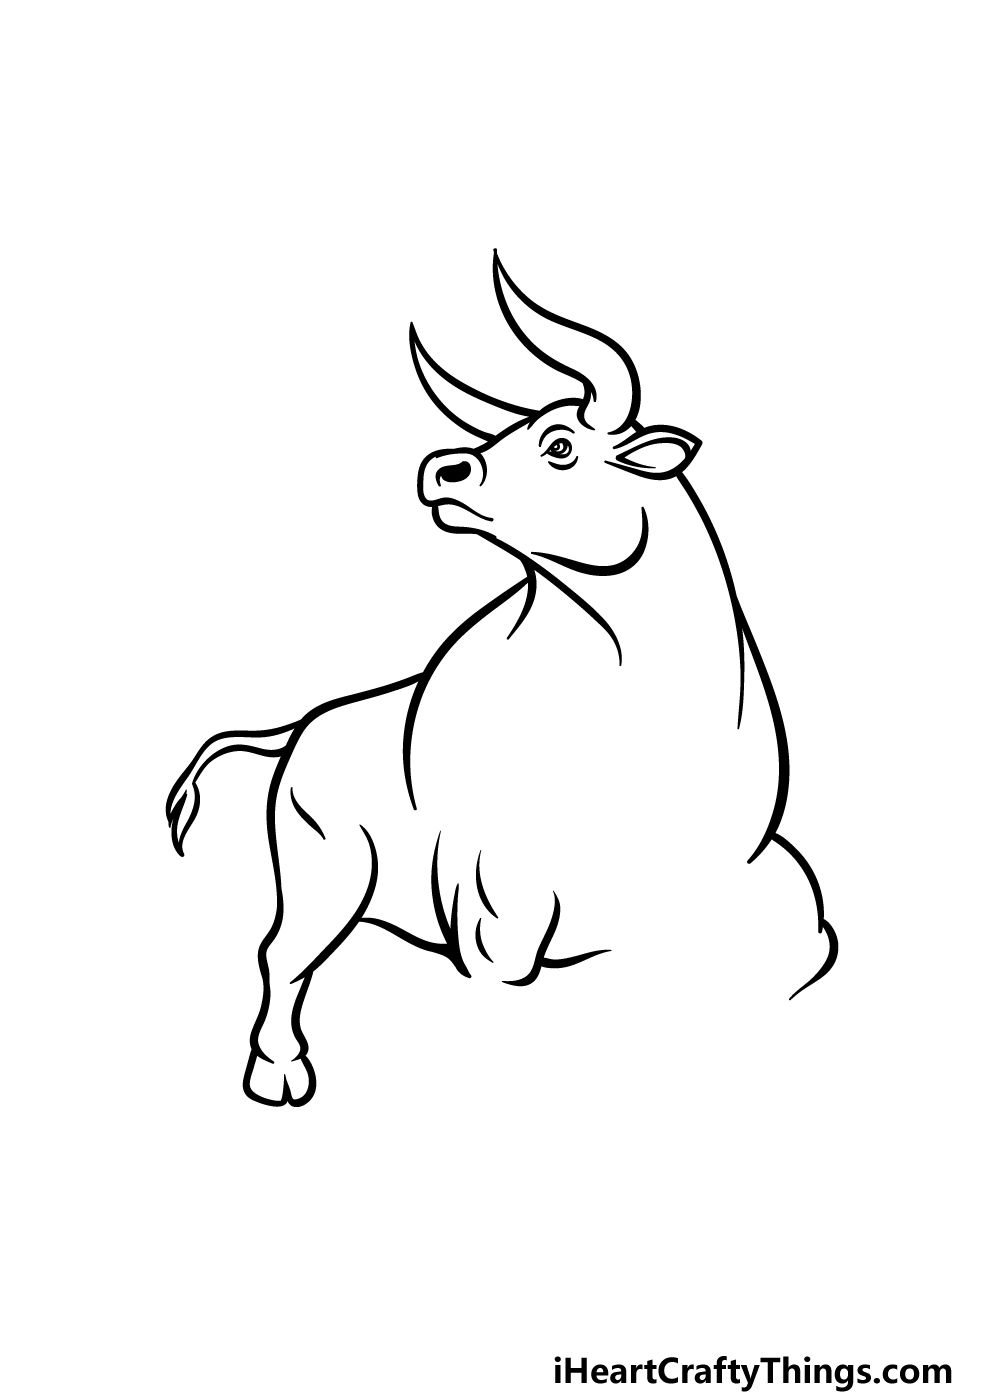
Step 3 – Draw some more of the ox
This third step of our guide on how to draw an ox will be focused on adding some more of the outlines for the body.
More specifically, we will focus on the back and the first leg of the ox. For the back, use a line that connects to the neck and then angles sharply downward.
You can then add a small wavy tail onto this back section.
We will draw the start of the first of the front legs in this step as well, and this will be drawn with some curved lines connecting to the chest.
We will finish drawing this leg and the other ones as well when we move to the next few steps.
Step 4 – Next, draw the first back leg and the start of the stomach
You added the start of the first front leg in the previous step, and in this one we will be drawing the start of the first back leg.
Use some more curved lines for the thick top of the back leg, and then you can draw the thinner, straighter second half of the leg with the hoof at the end.
Then, draw some simple curved lines for the belly, and you can also insert the rounded top of the other front leg.
Once these aspects are drawn, we will move on to the final details in the next step of the guide.
Step 5 – Add the final details to your ox drawing
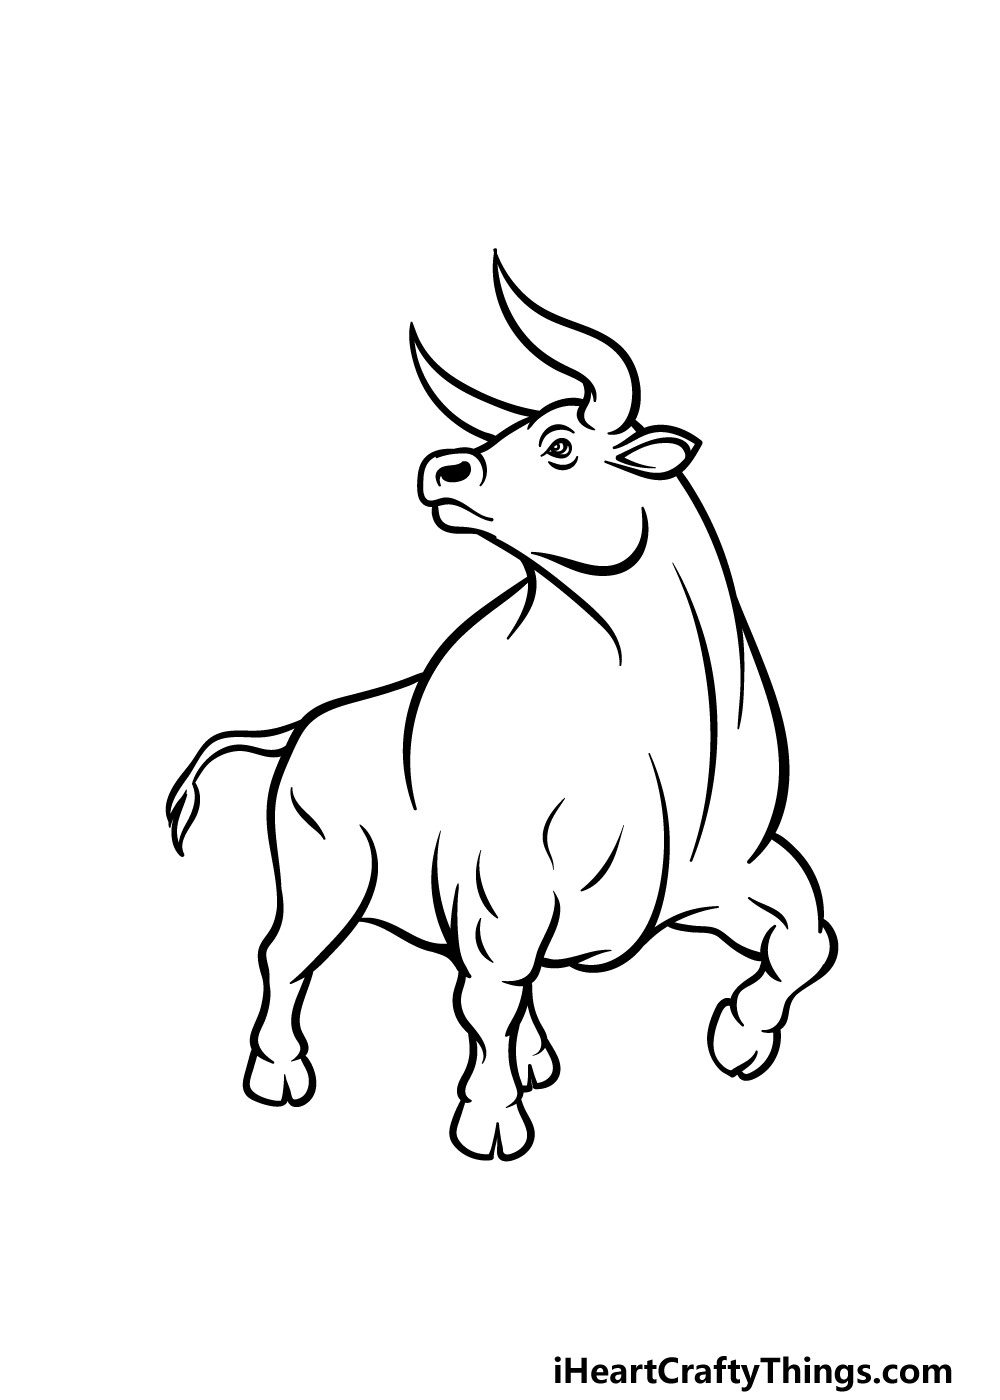
Now you’re ready to finish off the final details and elements of this guide on how to draw an ox! The main thing to do will be to finish drawing the legs.
Many of these will be at different angles, but they will all share the fact that they are thicker in the top half and thinner in the bottom half in common.
Once they are drawn as they appear in our reference image, you can then add some more curved lines to the chest to make the ox look even more muscular!
When you have finished the outlines, you can also add some more details of your own! These could include a background or maybe some smaller touches, so how will you finish up this picture?
Step 6 – Finish off your ox drawing with color
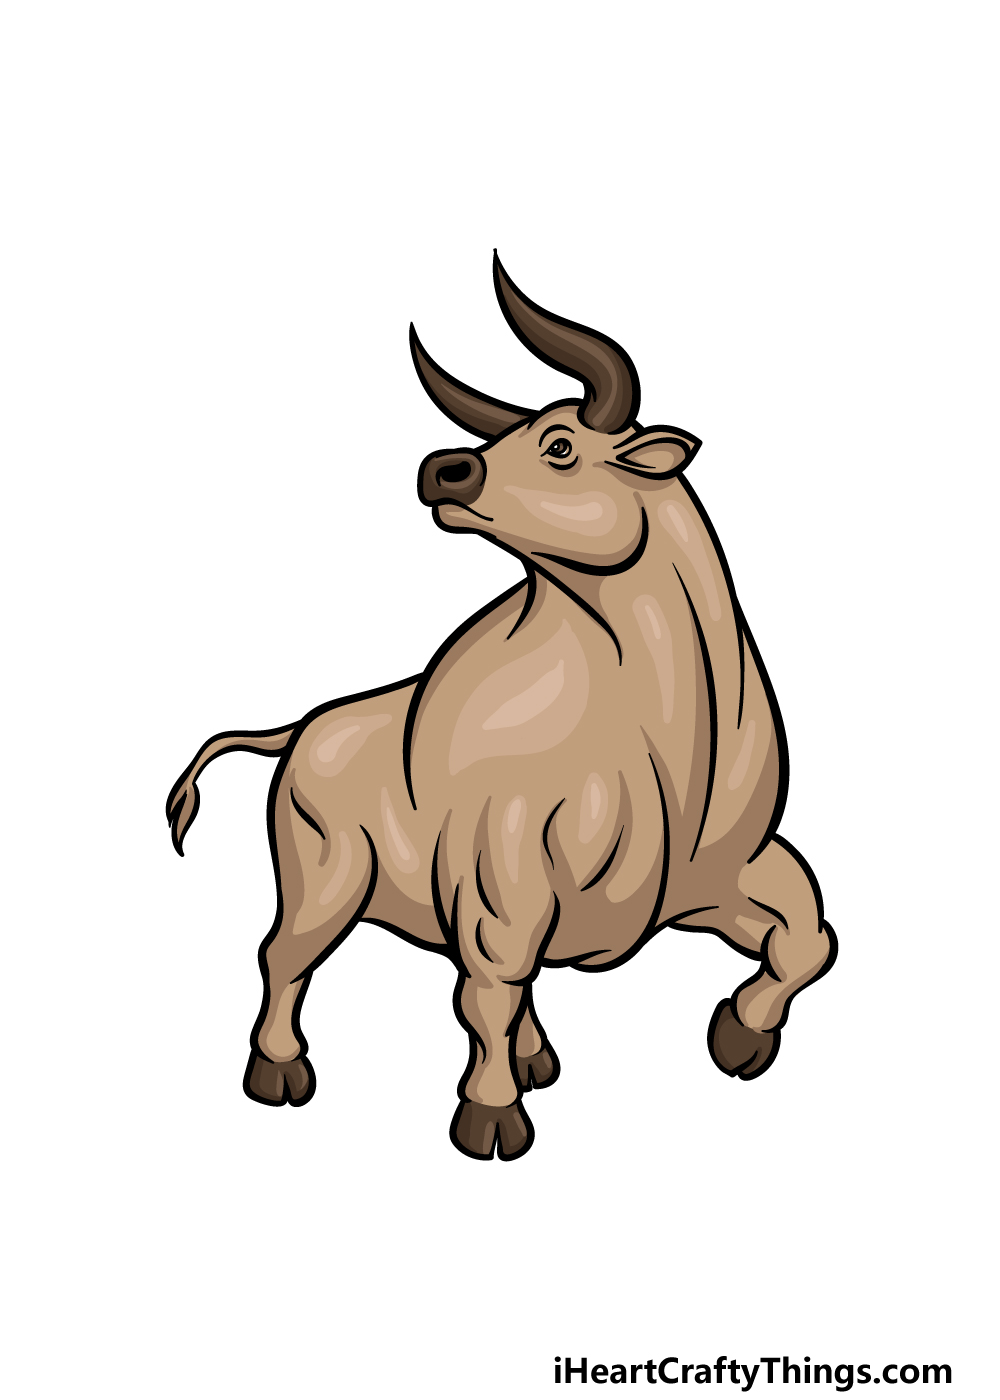
It’s time for the final step of this ox drawing, and in it we shall finish it up with some color!
The ox isn’t the most colorful of animals, and we went for this more realistic, muted approach in our reference image. We used various shades of browns when coloring this ox.
By using a mixture of light and dark shades, you can help to further enhance the muscle definition of the ox.
Will you go for a similar set of colors for this ox, or will you use entirely unique colors and techniques to finish it off?
3 More tips to make your ox drawing easy!
Make this easy to draw ox even easier with these fun tips we have for you!
When it comes to any drawing, the way you pose your subject can make a big difference. So, if you find yourself having a hard time with this ox drawing you may want to alter the pose a bit.
This would mainly be advisable if something in the pose we created is giving you trouble, but it could also just be fun to try out various poses!
For example, you could maybe have the ox looking straight ahead instead of with its neck turned. This would be an easy change to make, and you might find it makes it easier.
It’s one example, but feel free to alter the design in any way you wish!
The design we created for this ox sketch is both cartoony and fairly detailed. It’s a great design, but you may want to alter the style a bit to suit your strengths.
Different people are comfortable with various styles and ways of drawing, and you may have some you feel comfortable with. For example, maybe you like drawing in a wackier cartoon style in general.
If that’s the case, you could adapt this drawing of an ox to match the style you like. What are some different art styles that you could use for this picture?
Whether you stick to this design or use a new one, you can also use photos of a real ox to help you. Using photos is always a great idea, as it can help with the details and proportions of your subject.
You will find many photos online that could help with this ox drawing, and you could definitely use photos even if you portray it in a cartoon style.
With real photos, you would also be able to accurately match the colors to your drawing if you want a more realistic look. You could try to find photos that are close to this pose, but they could also help if you want to try out different poses.
Your Ox Drawing is Complete!
You have finished all 6 steps of this guide on how to draw an ox, and you really did a great job with it!
This picture is quite detailed and specific, so we tried to make sure it would still be fun and easy by breaking it down into smaller steps to tackle.
When you’re finished with the steps in our guide, you can keep the fun going by adding your own fun details and elements.
We spoke about adding a background or some smaller details, so what do you think would suit this image?
If you had fun drawing this awesome ox during the guide, you can head to our website for more awesome drawing guides to enjoy! We upload new ones often, so be sure to keep checking in.
To show off your finished ox drawing, you can share it on our Facebook and Pinterest pages for us to enjoy!