The African savannah is home to many incredible creatures. From the mightly lion to the adorable bushbaby, there is no end to the variety of wildlife that you can enjoy there.
Often the big cats get all the attention, but there are some canine creatures that are just as great. Hyenas are an example of this, and these scavenging animals are also known for their distinctive, eerie cackle.
They also have an interesting look to them, and learning how to draw a hyena is a great way to create some great artwork featuring them.
If you love this spotted canine, then this will be a great guide for you!
We hope that you find this step-by-step guide on how to draw a hyena both fun and simple to work through.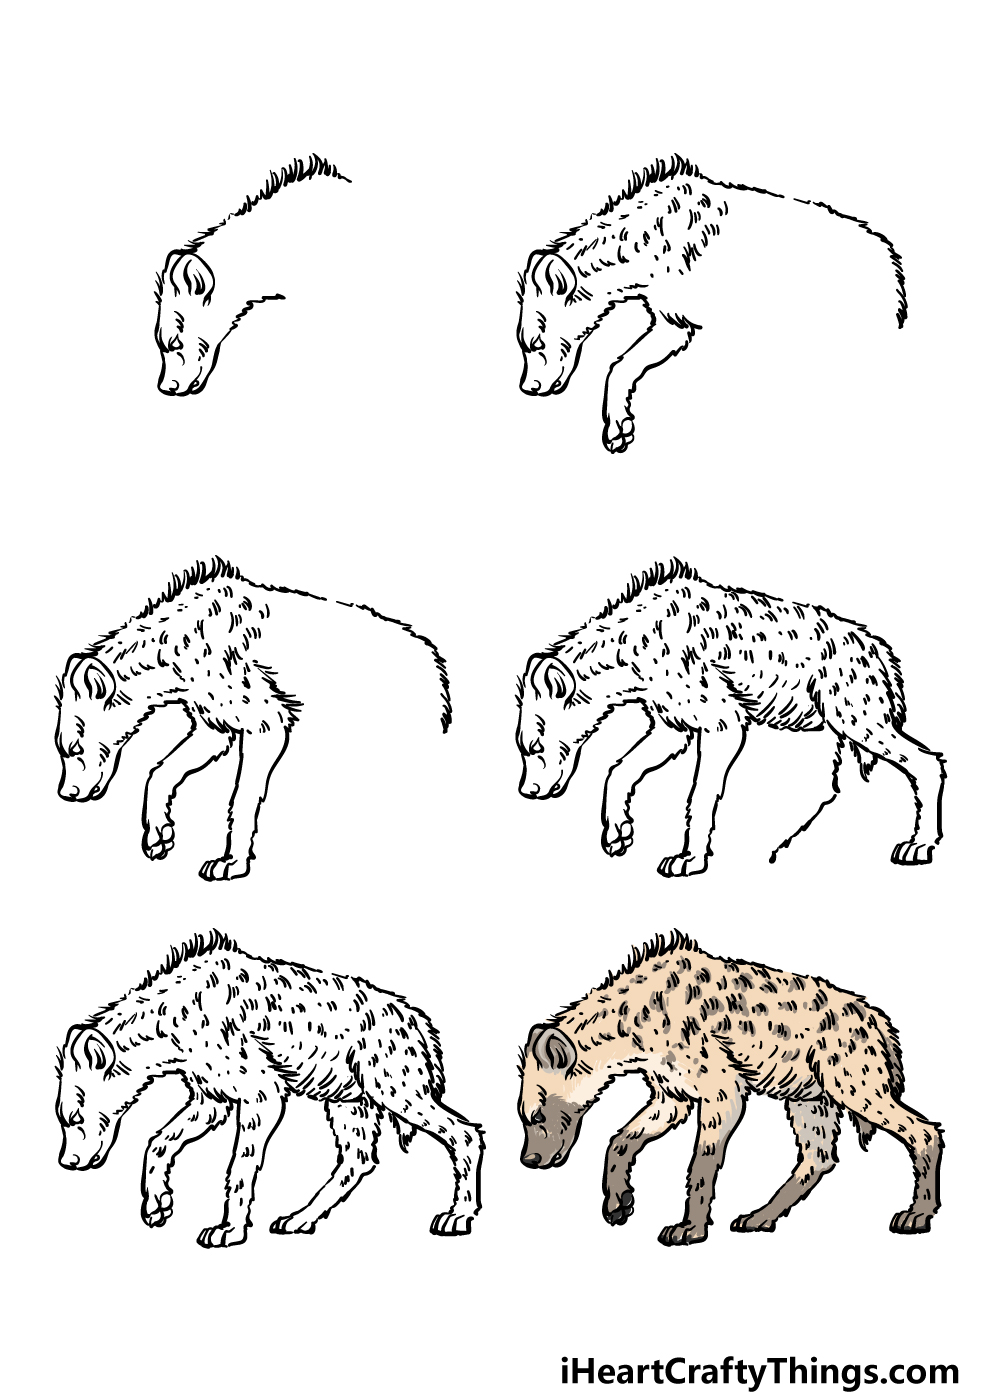
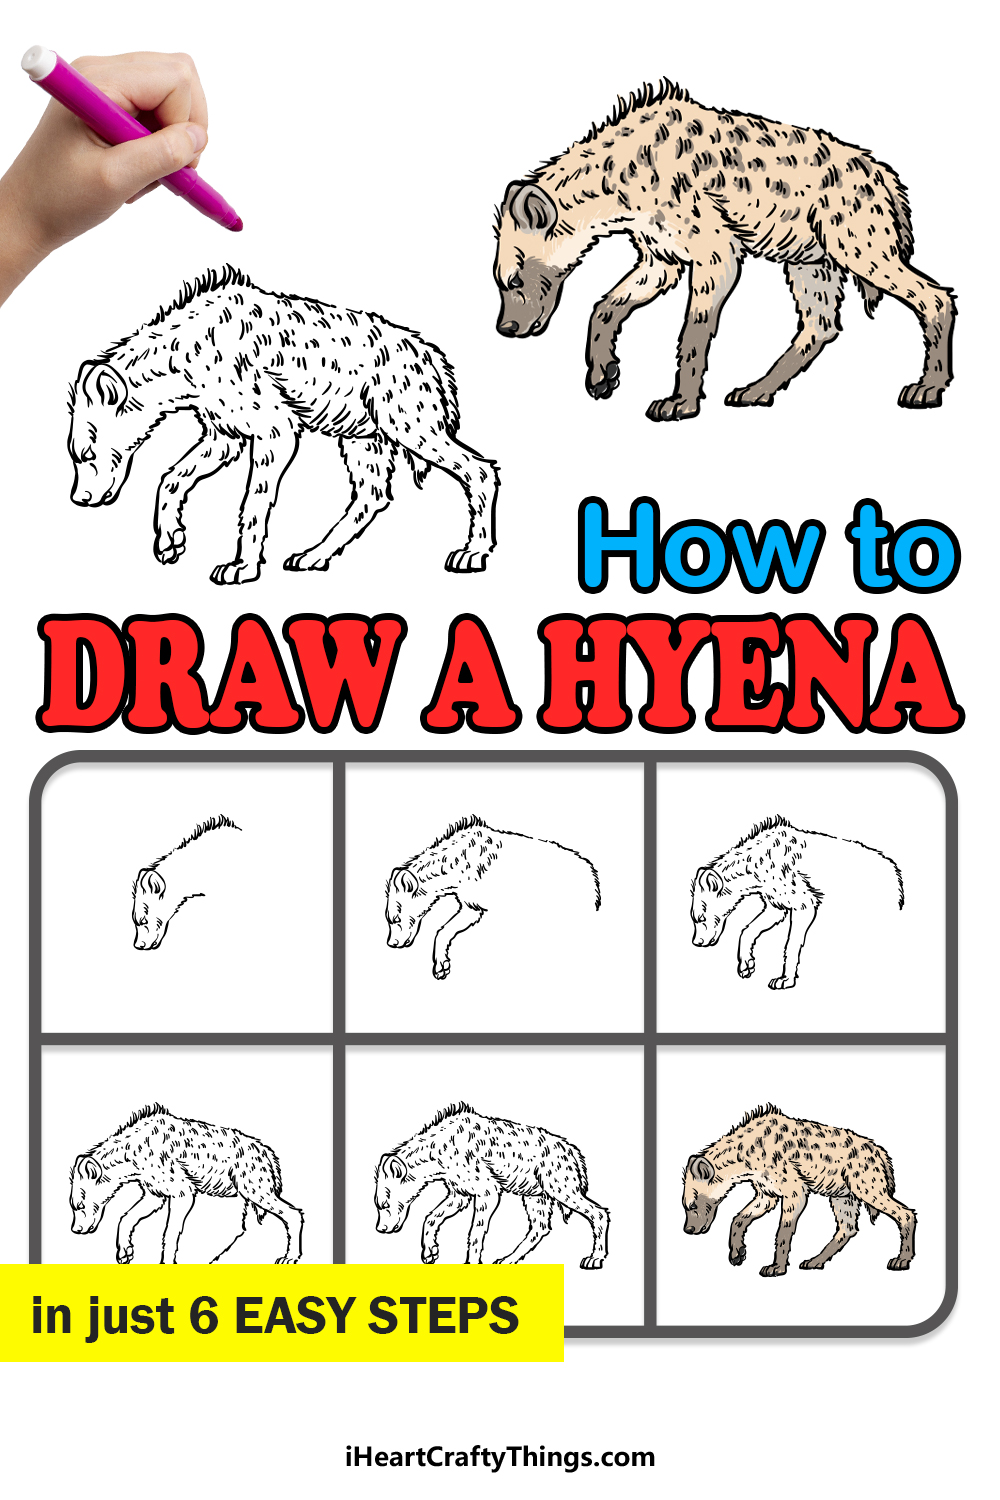
How to Draw A Hyena – Let’s Get Started!
Step 1
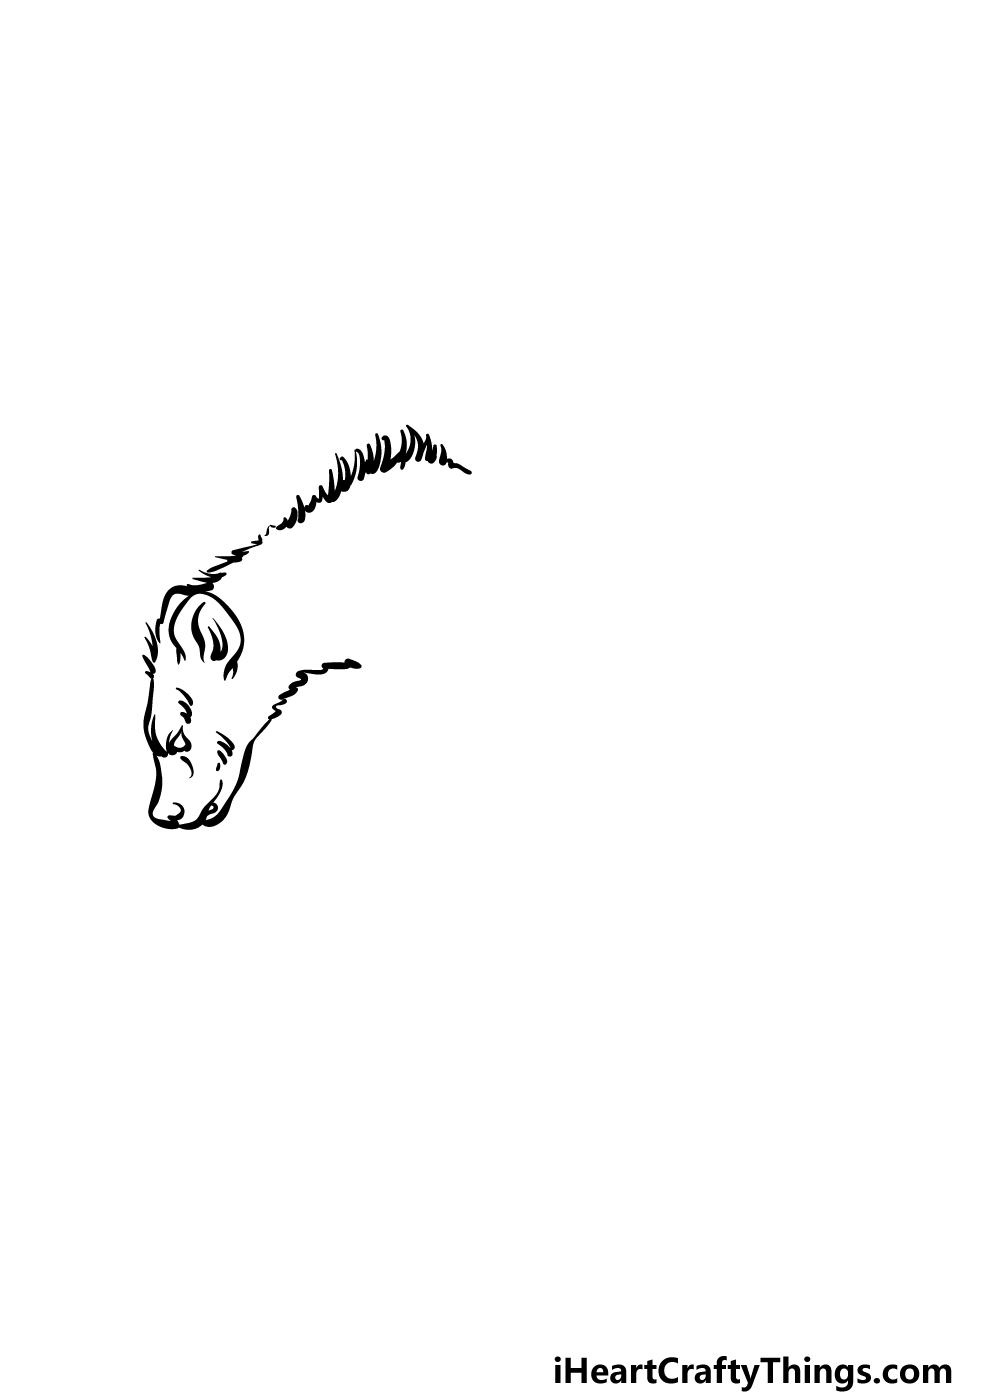
In this first step of our guide on how to draw a hyena, we will be starting with the head and neck of the hyena.
Hyenas often have their heads low to the ground with their necks arched down, and that is how we shall be drawing this hyena.
The head will be quite thin and pointed, and we will also be drawing the eyes to have a sharp point on top to give the hyena a more intense expression.
The base of the neck will have some jagged lines, and this will be to make it a bit furrier. For the top of the head, we will be drawing some large, rounded ears with some curved line details inside of it.
Then, we will finish off this step by drawing a larger pointy line at the top of the neck. By making this line have even more pointy parts, it will look even furrier than the base of the neck.
Step 2 – Now, draw the back and first leg for the hyena
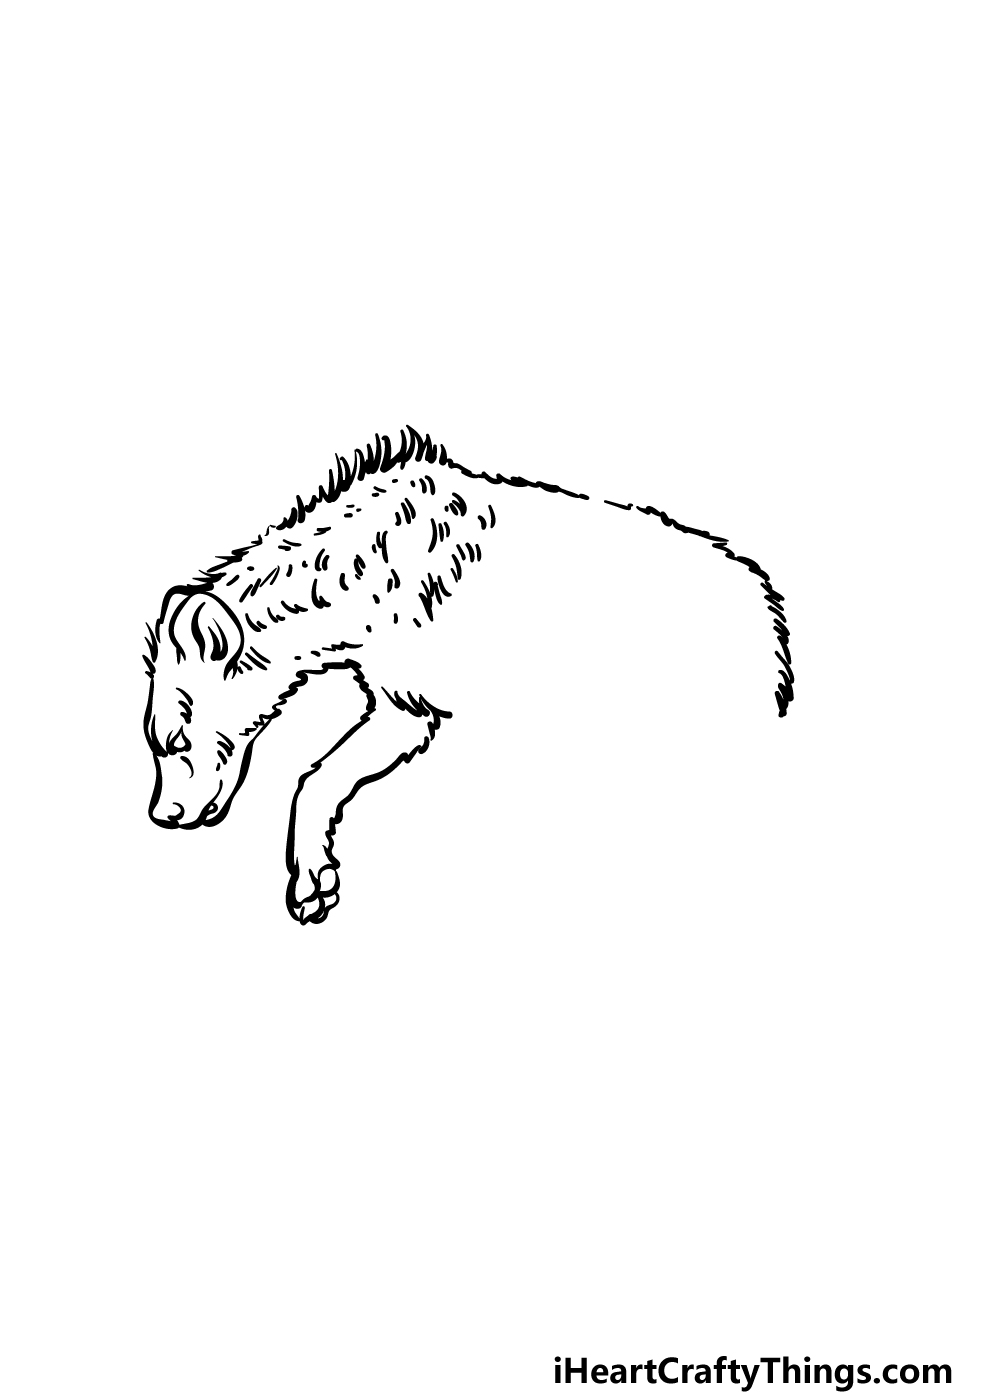
The head and neck are complete for now, so in this step we shall add a back and a leg for your hyena drawing.
The back will be straight and then extend into a curve, and it will be drawn with some similar jagged lines to also make it look nice and furry.
The next thing we will be doing is adding some small clumps of curved lines to the front of the body of the hyena.
Once again, this will be to create the look of fur. Finally for this step, we will be drawing a leg for the hyena.
This leg will go at the front of the underside of the hyena, and it will be slightly bent to make it look like it is walking.
Step 3 – Next, draw another leg for the hyena
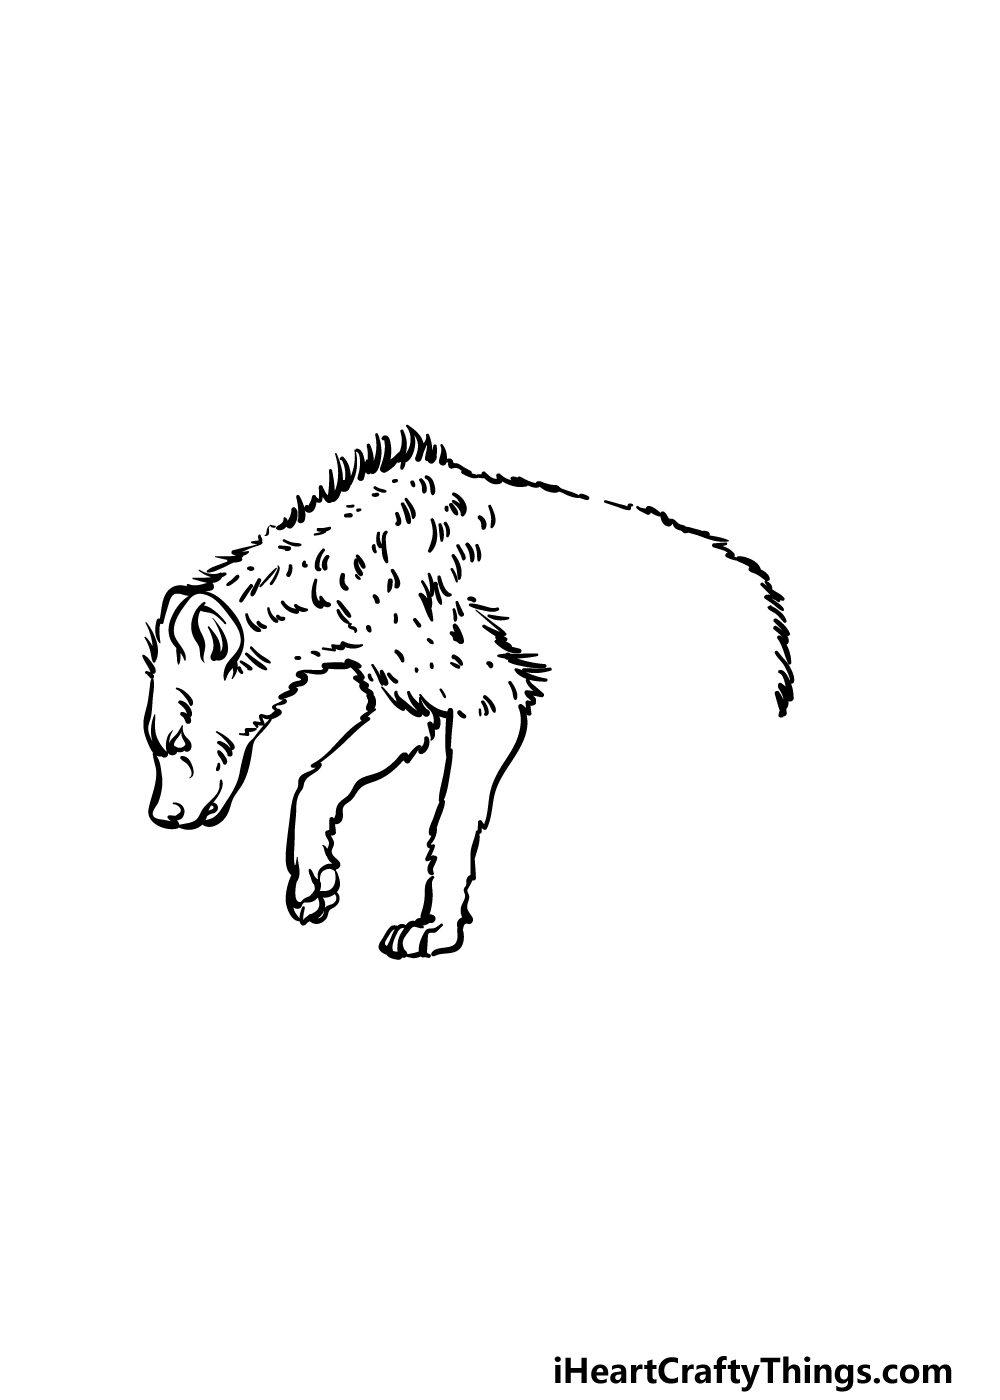
In this third step of our guide on how to draw a hyena, we will be adding the second leg for it. This leg will also go at the front of the hyena, and it will be beside the first one that you drew.
The top of this second leg will have some pointy lines there, and this will again be to give it a furrier base.
The other half of the leg will look much like the first one that you drew, with some relatively smooth lines to form the thin half of the leg.
This leg will be a lot straighter than the first one is, and this will also contribute towards making it look like it is walking.
Step 4 – Now, draw some more legs and fur details
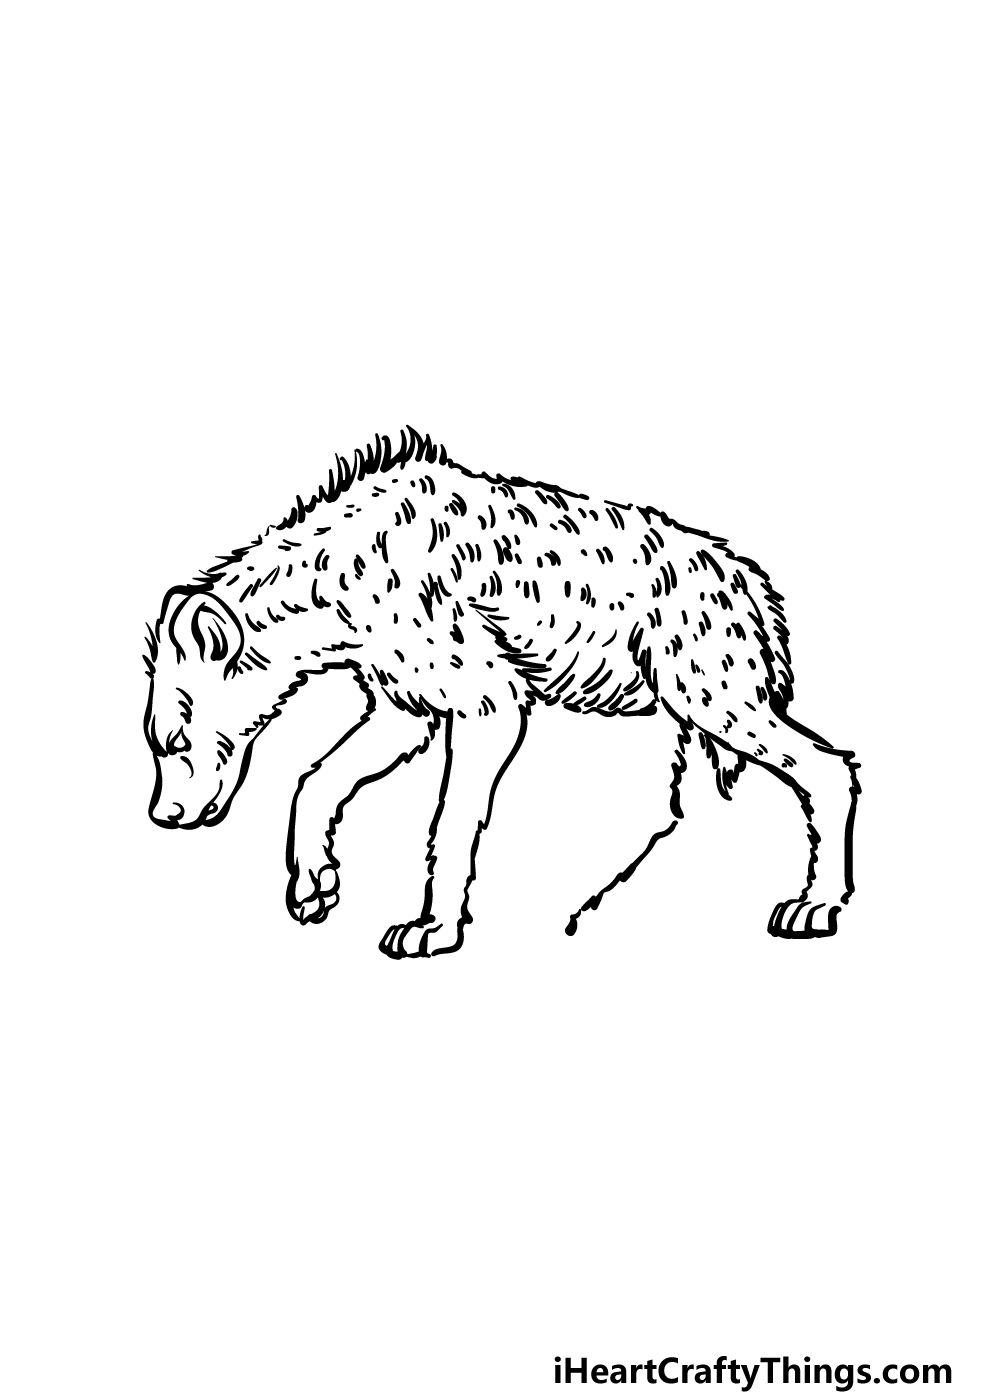
Now we will be adding another leg and some more fur details to your hyena drawing. This leg will go at the back of the hyena, and it will have a more rounded base than the other legs.
The thinner part for the bottom half of the leg will be more bent and angular than the front legs were.
Then, once that leg is drawn you can draw some more pointy lines to create a furry belly between the front and back sets of legs.
The final thing that we will be doing in this part od adding some more of those small, curved lines to the back of the hyena’s body and leg.
Step 5 – Add some final details to your hyena drawing
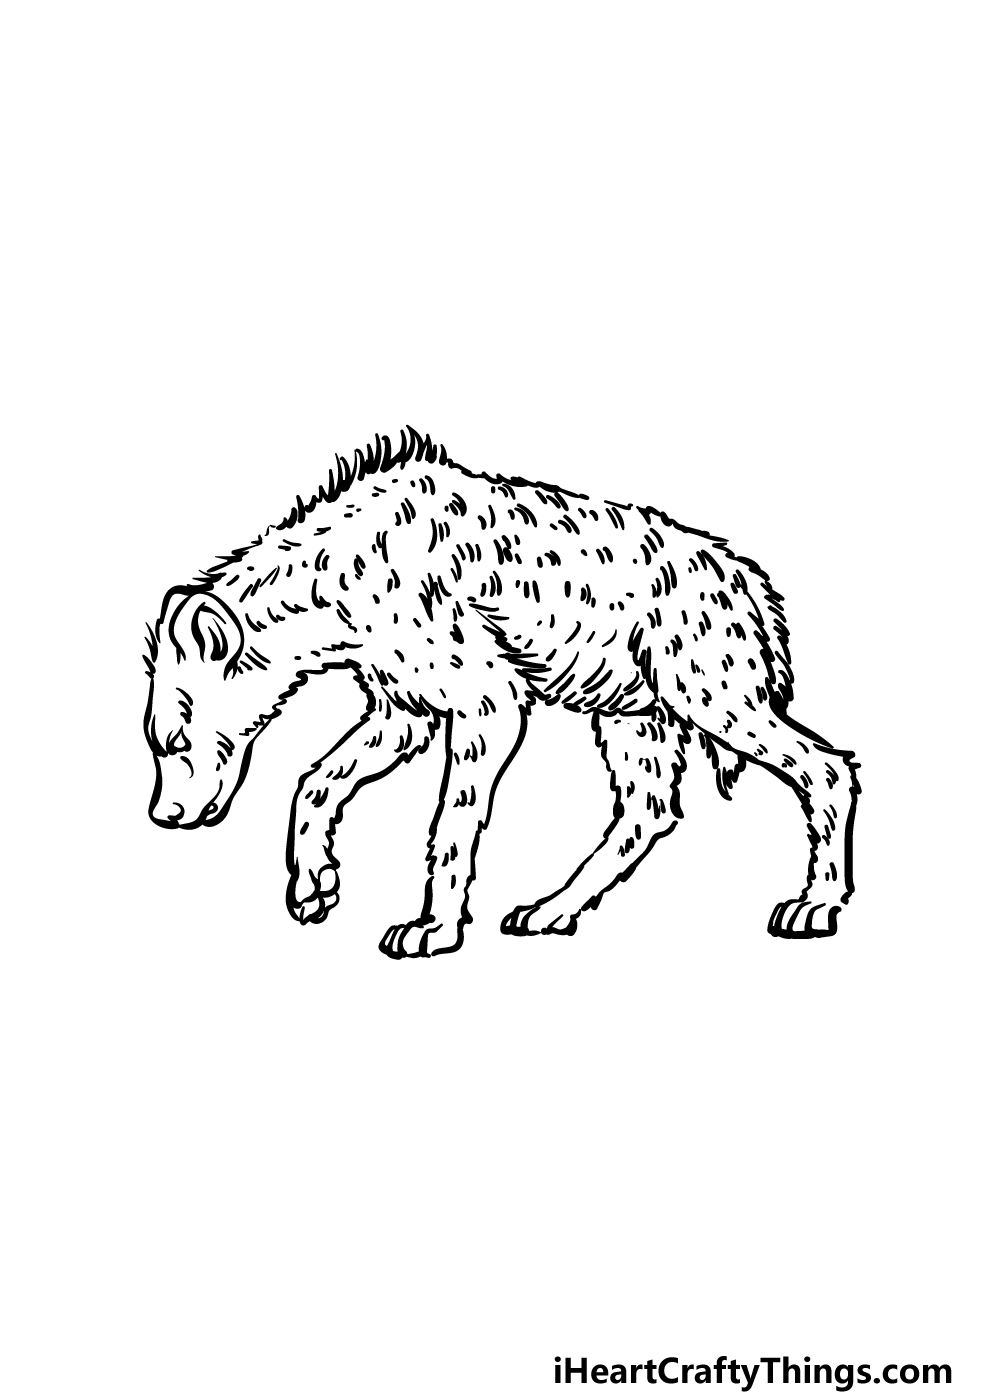
This fifth step of our guide on how to draw a hyena will be all about finishing off the final details and elements to have you ready for the final step.
The main thing that we will be drawing in this step is the remainder of the final leg. Once that is drawn, you will be ready to add some final details and elements!
You could add some smaller details to the hyena, but you could also have some fun drawing a background, perhaps with some more animals to go with it. How will you finish off this hyena?
Step 6 – Finish off your hyena drawing with some color
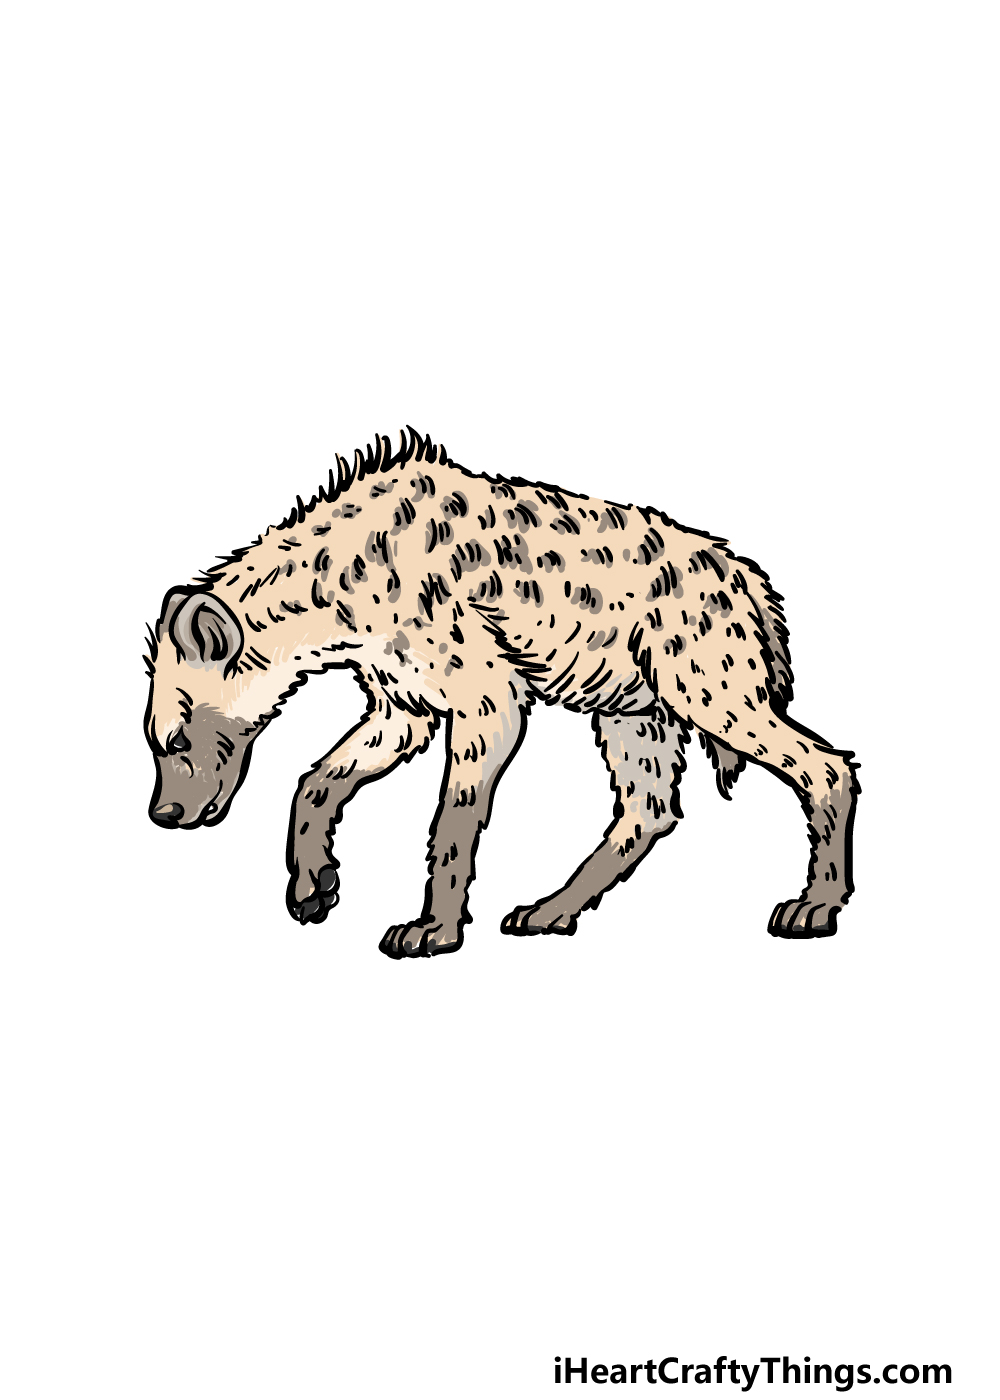
Hyenas aren’t exactly known for their bright colors, and that is the approach that we went for in this final step of this hyena drawing.
We used some different shades of light and dark browns to create a more realistic look for this prowling scavenger.
These are the colors and tones that we would choose for this image, but you should also feel free to incorporate any others of your own!
You could also play around with your favorite art mediums and tools to achieve the colors that you would like to go with. We can’t wait to see how you finish this off!
3 More tips to make your hyena drawing easy!
Make this easy to draw hyena even easier with the help of these fun tips!
This hyena drawing that we created in this guide is pretty realistic and detailed. This is great as it looks true to life, but it could be a bit tricky to draw.
While you get the hang of this drawing, you could incorporate fewer details until you feel more confident with it. A good place to start would be with the spots and the hair details.
These are some of the fiddliest aspects of the drawing, so they could be left out if they are giving you trouble.
That’s just one example, but you could leave out or change any other details you’re struggling with.
When you have the hang of the basics of the drawing, you could always add the details later!
If you want to stick to the design we created for this drawing of a hyena, you can use a pencil to prepare. Using your pencil, draw some basic shapes to map out the proportions of the body and legs.
This will help you to keep the drawing consistent with our example. Then, you can add layers of details until you have the base of your drawing.
Simply draw the final lines with a pen, erase your pencil lines and then you have your finished hyena sketch!
Using this guide is a great way to make this hyena drawing easy, but you can use other resources as well. The hyena is a dangerous animal, so you wouldn’t want to get close to one to observe it!
Luckily, there are tons of pictures of hyenas online that you could use to help you out. If you look hard enough, you may find some that are similarly posed to the one that we have in our image.
That would be ideal, as that way you can use the images in the guide along with the ones that you found. The more references you have for a drawing, the easier it will be!
Your Hyena Drawing is Complete!
You have finished all 6 steps of this guide on how to draw a hyena, and you have done an incredible job recreating this amazing creature!
Even though we went for a more realistic, detailed portrayal of this animal, we hope that this guide made it easier and even more fun than you may have expected it to be.
Now, be sure to show us what you can do by incorporating some of your own details, elements and background ideas. Also be sure to have fun using some creative art mediums and colors!
When you’re ready for your next artwork, be sure to check out more of our drawing guides on our website. We upload new ones often, so also make sure to keep checking in!
Once you have completed the finishing touches on this hyena drawing, please share it on our Facebook and Pinterest pages for us to enjoy!