


Learn how to draw Mario with this easy, step-by-step guide! Whether you’re a fan of the classic
Super Mario games, Mario Kart, or Paper Mario, this tutorial will break down Mario’s iconic look. From his signature mustache to his red cap and overalls, each step will guide you through creating a realistic Mario drawing.
Perfect for fans of all ages, this guide makes drawing Mario both fun and approachable.
Check out the video below for a hands-on approach, and follow along with the full written guide to bring your Mario to life!
Watch Me Draw Mario: Step-by-Step Realistic Drawing Tutorial
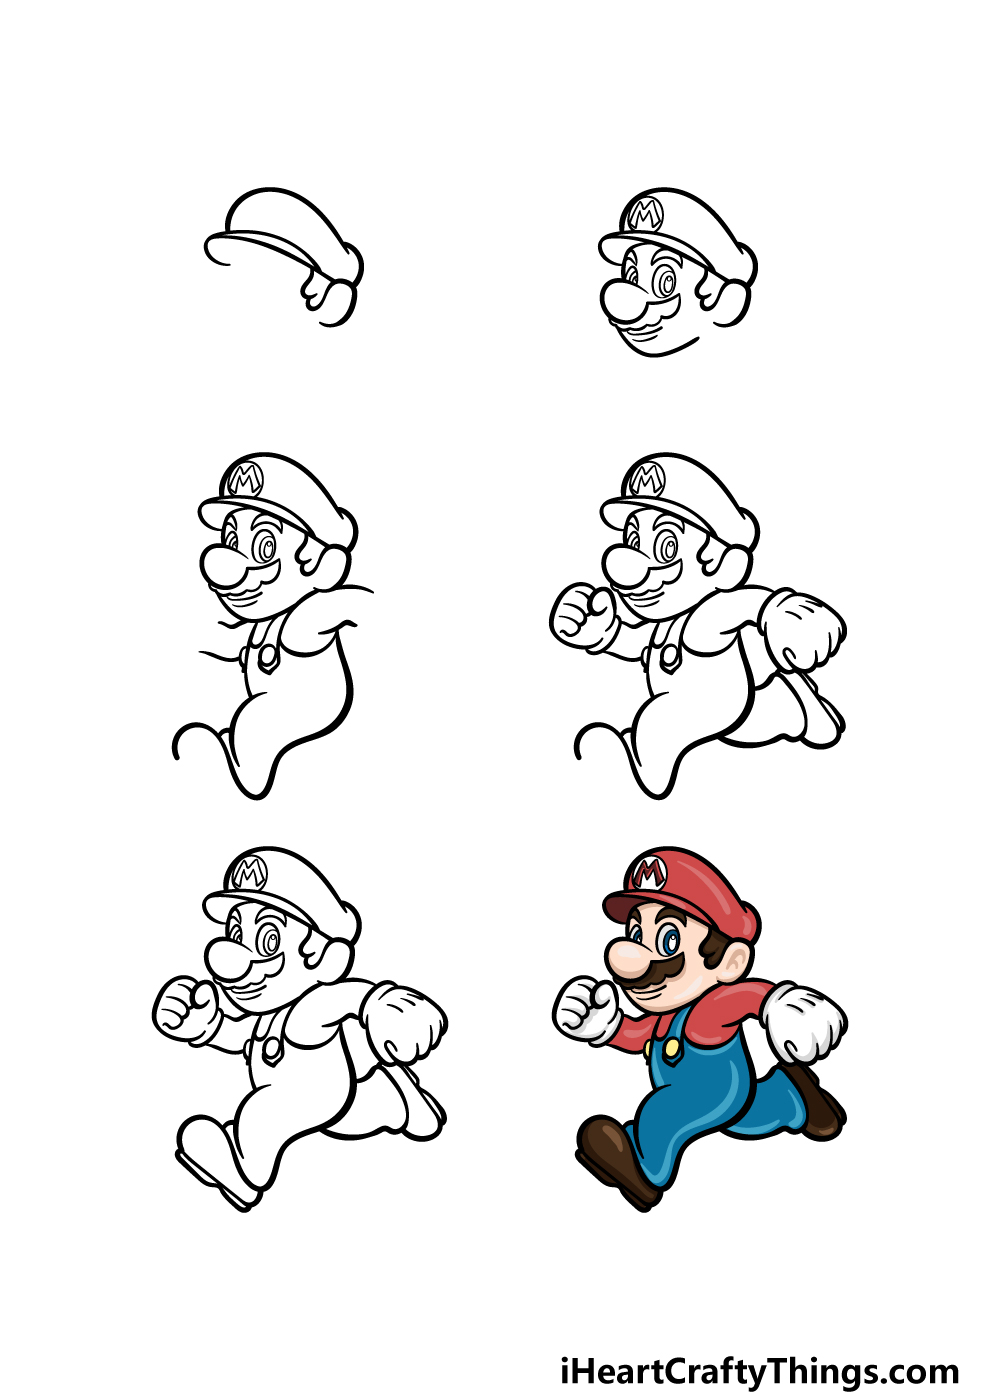
How to Draw Mario – Let’s Get Started!
Step 1
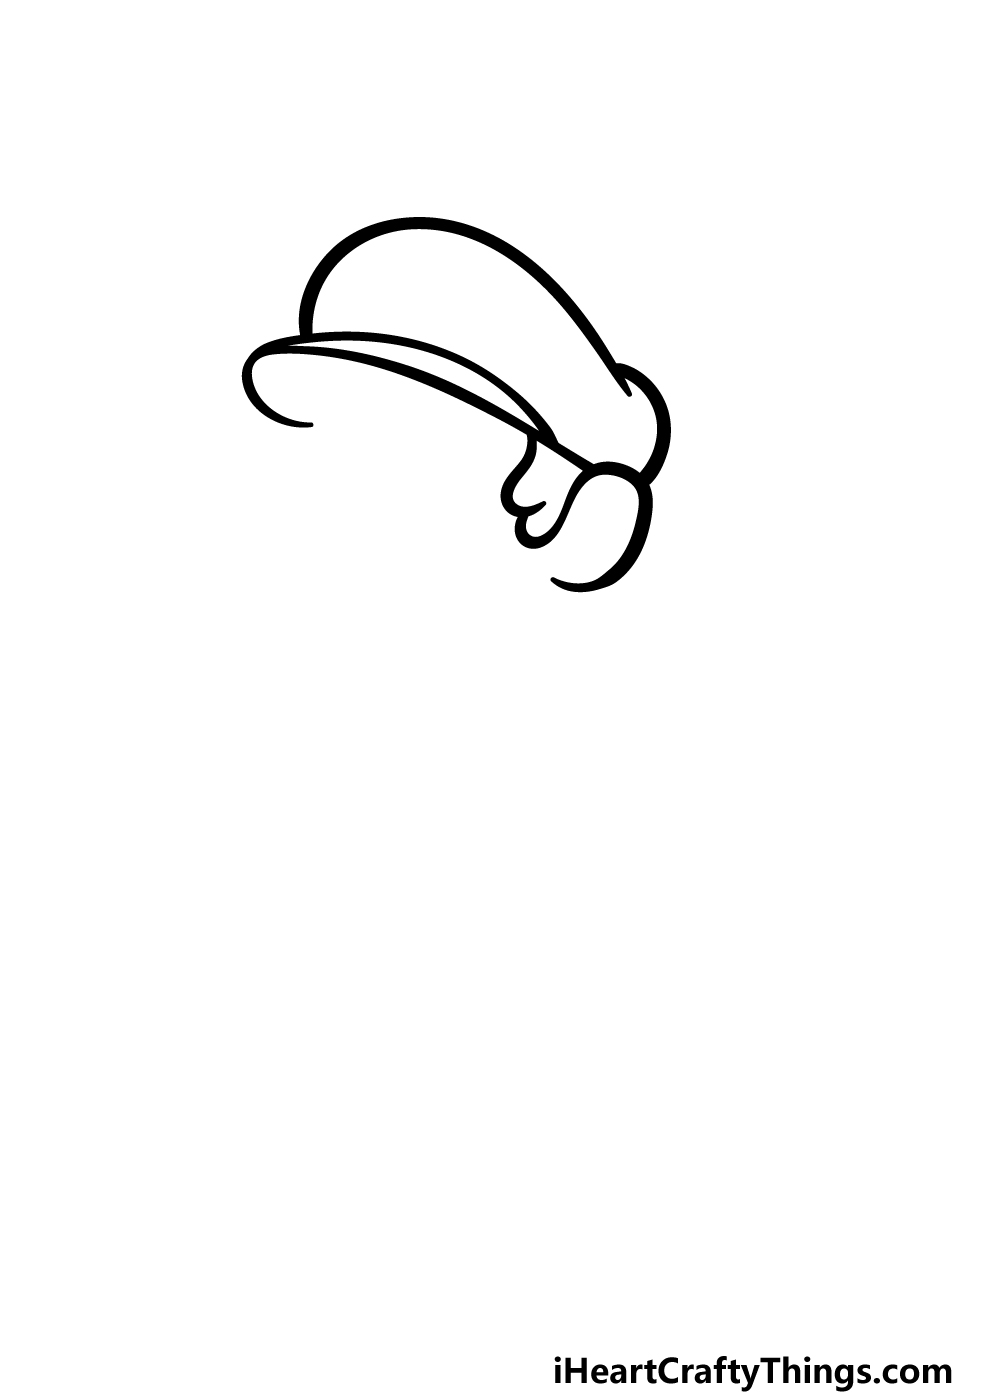
Mario is seldom seen without his iconic hat, so it makes sense that this is what we will start with in this first step of our guide on how to draw Mario.
First, use some curved lines to create the thin rim of his hat that curves above his face. Then, use some more curved lines to draw the large, puffy section of his hat on top.
Finally, we will use some more rounded lines for his bumpy hair and ear poking out beneath his hat. Then we can proceed to step 2 of the guide!
Step 2 – Now, draw his facial details and the M on his hat
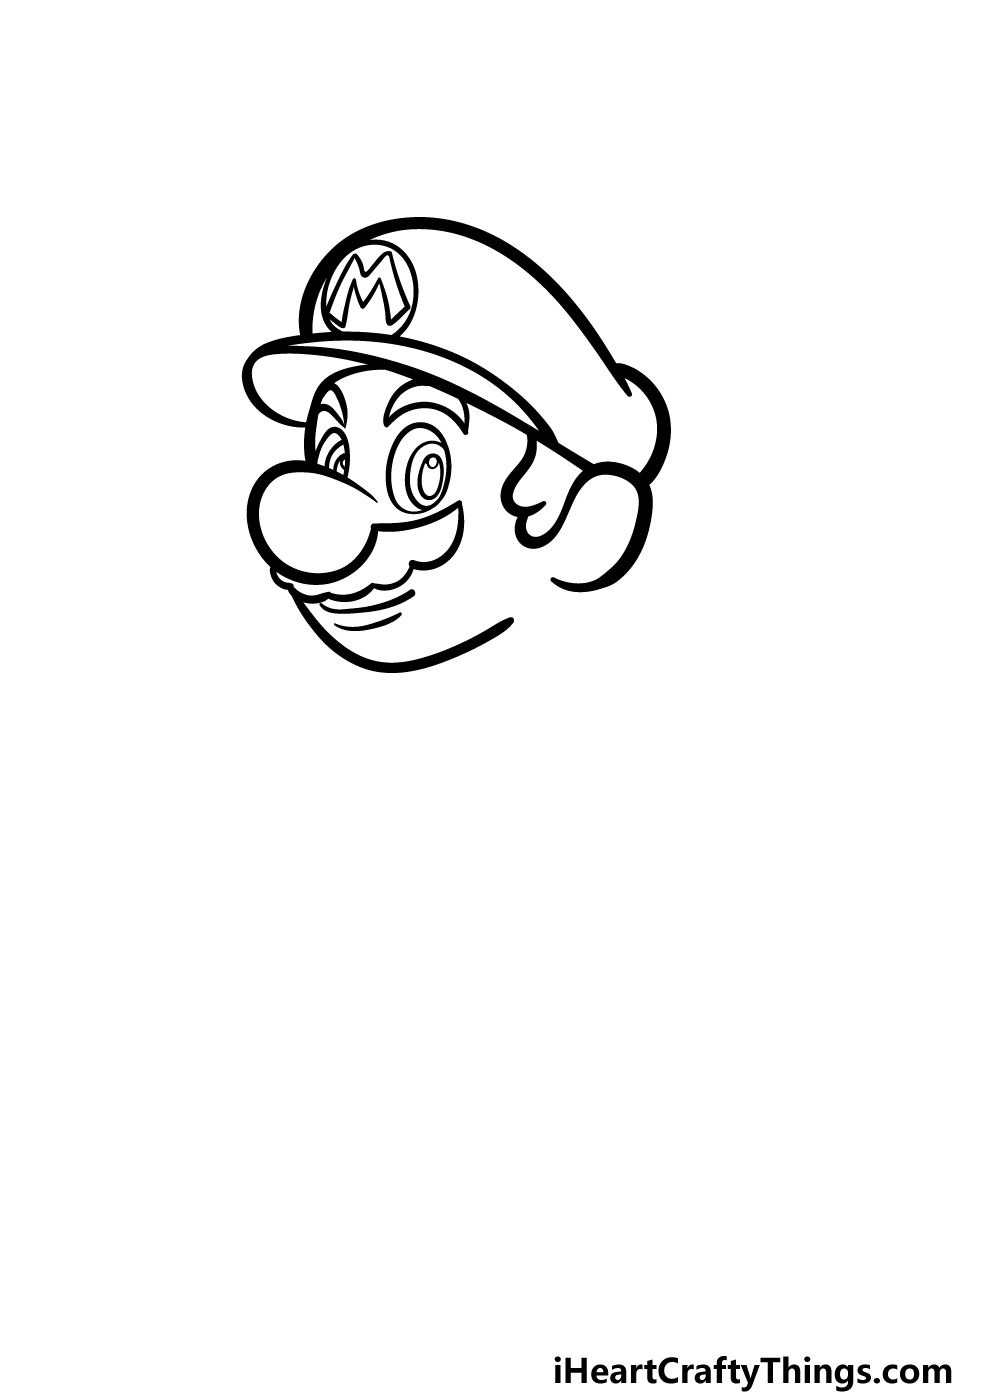
We will be adding even more iconic details to your Mario drawing in this next step. The first will be to draw the big M on his hat.
You can draw the letter in a thick, block letter format and then draw a circle around it.
Then, we will draw his face. His eyes are drawn as two thin ovals with rounded pupils inside, and his thick eyebrows sit above them.
His nose is big and bulbous, and can also be drawn using a bug rounded line.
It wouldn’t be a proper Mario representation without his famous mustache, so you can draw it below his nose using some bumpy lines.
Step 3 – Draw his arms and some of his body

Now that his head and face are drawn, we can start working on his limbs and body in this third step of our guide on how to draw Mario.
We are drawing him in a running position, and you can draw the start of his arms by using some curved lines coming out from his shoulders.
Then, draw some thin shapes with circles on them for the straps of his overalls.
Finally, finish off with some more curved lines for his leg raising ahead of him as he runs. Then it will be time for step 4!
Step 4 – Next, draw some more of his limbs
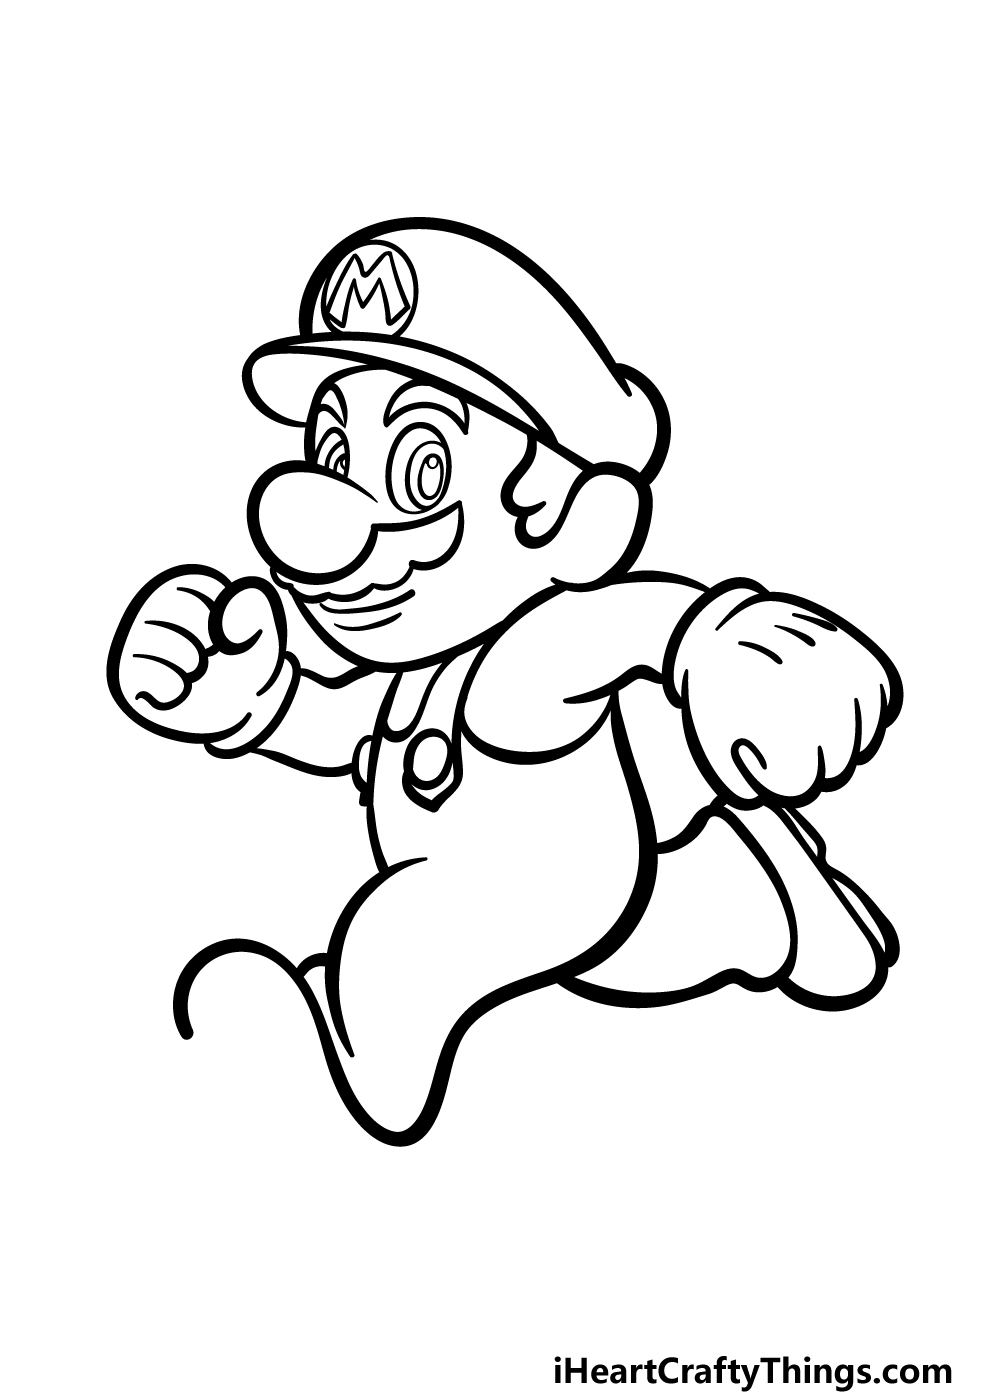
In this fourth part of your Mario drawing, you can add some more of his arms and legs before we move on to the final details in the next step.
First, draw his thick, white gloves curled into fists at the ends of his arms. Then, we will use some more curved lines extending back for his other leg, and then add his rounded shoe to the end of it.
Once all of these aspects have been drawn, we can then move on to those final details that we mentioned.
Step 5 – Add the final details to your Mario drawing
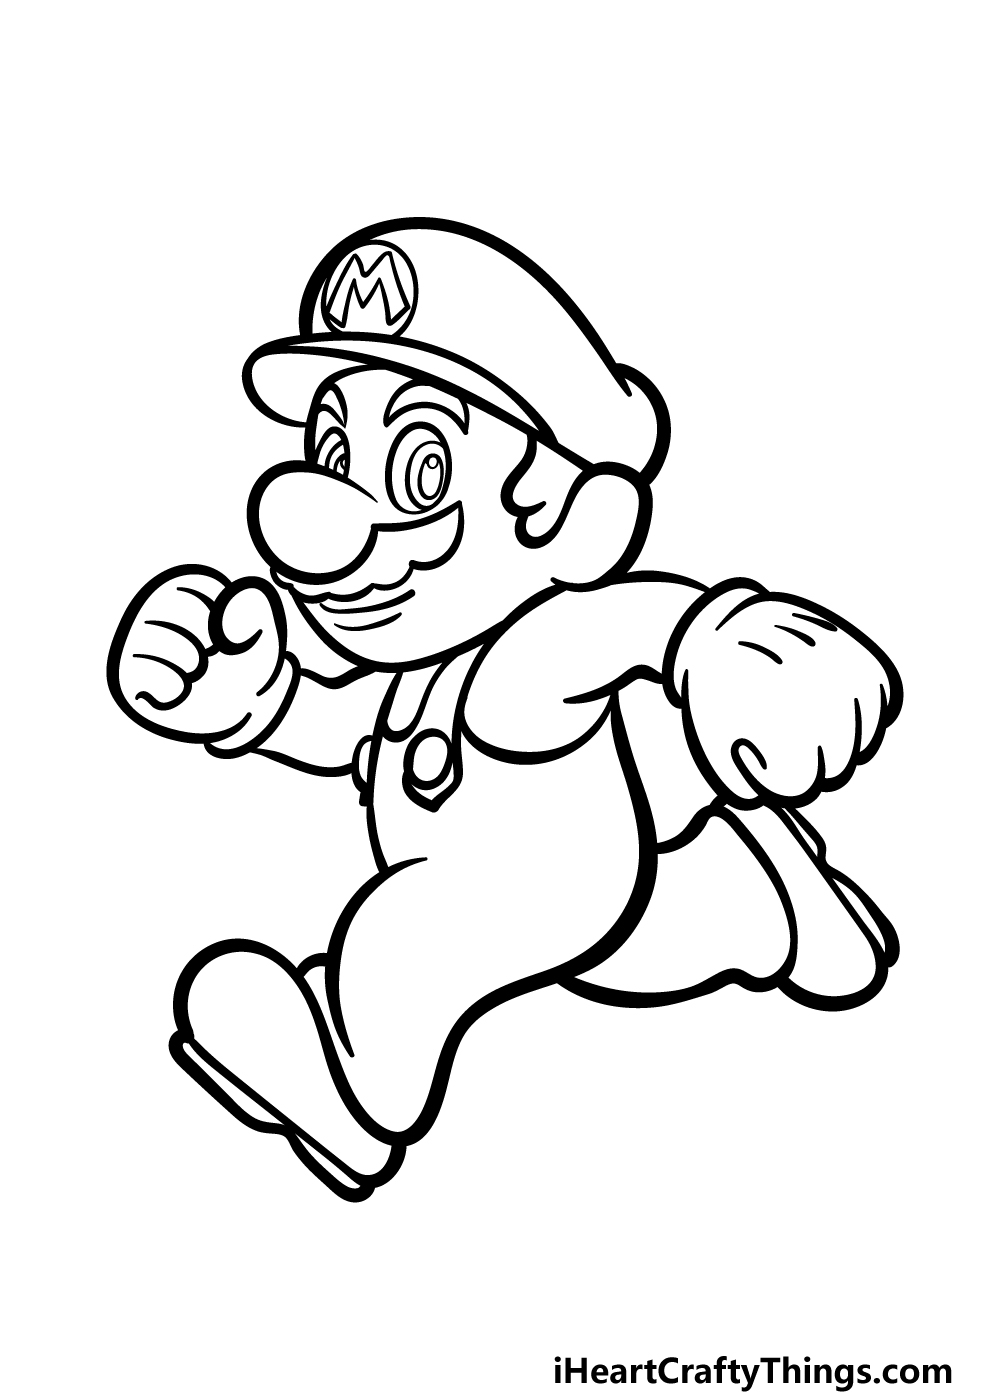
Now you’re ready to add some final details and touches in this step of our guide on how to draw Mario.
The main thing that you need to draw in this step is the rest of his shoe that’s in front of him. Once you have drawn that, all that remains before the final step is to add some extra details of your own!
Mario has been in many creative settings and environments throughout the games, so one idea would be to draw a background showing off your favorite Mario level.
You could even draw some more characters from the Mario universe! What other ideas do you have to finish this off?
Step 6 – Finish off your Mario drawing with color
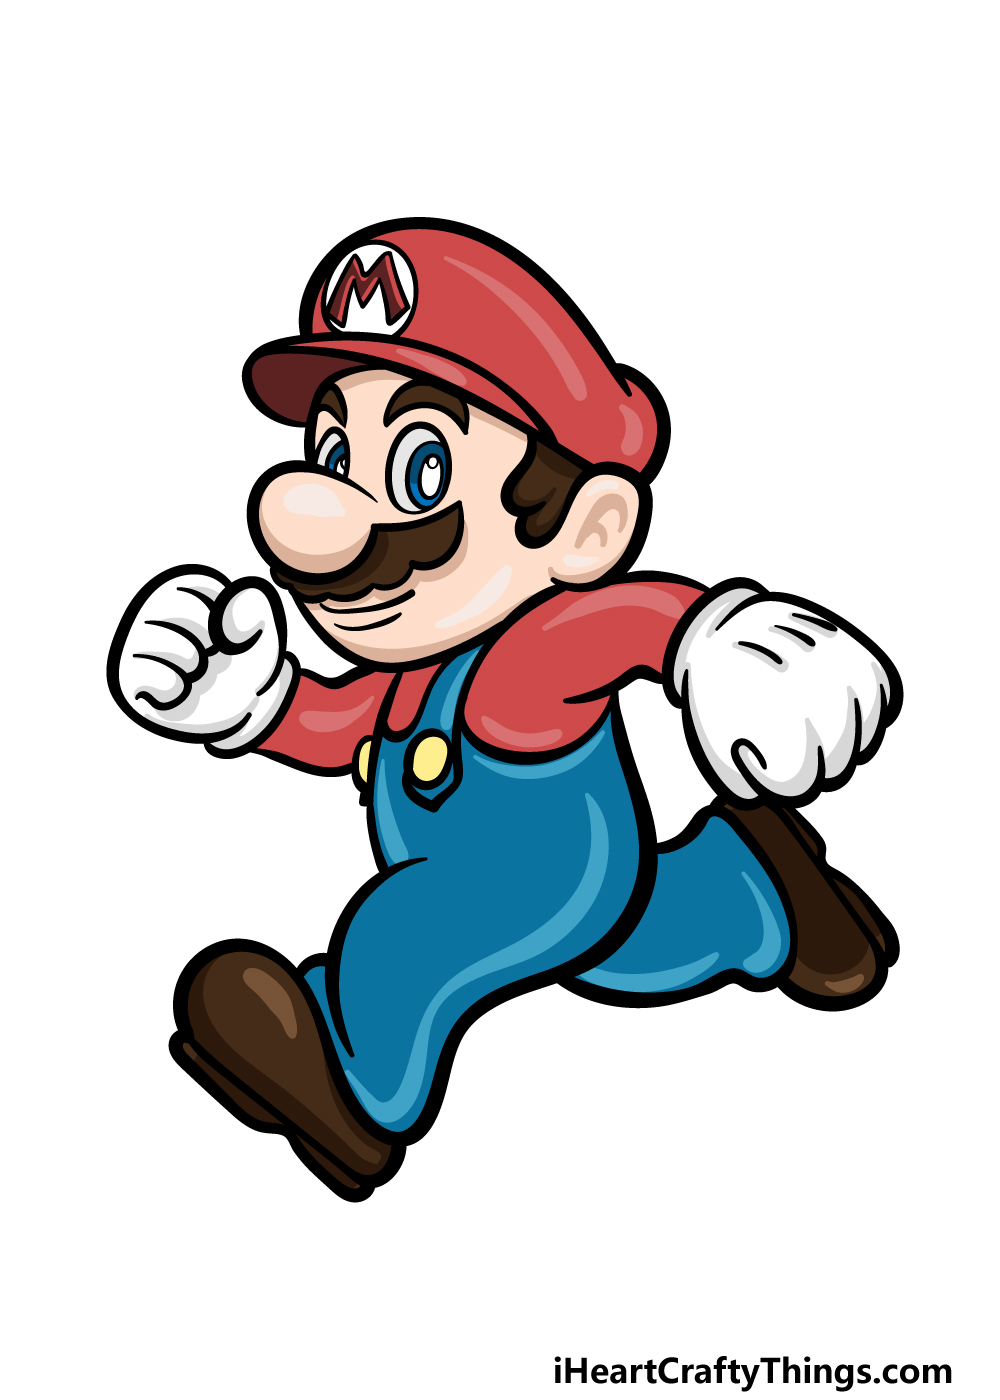
Mario is famous for his iconic color scheme, and we shall finish off this Mario drawing with some coloring fun.
In our reference image, we show you the colors that he is typically seen with in the games.
There are some instances where he has a different color scheme, and while you could go for those instead we wanted to use the classic colors for this example.
In this image, you’ll see that we used reds for his hat and shirt, and then we went with some blues for his pants and brown for his shoes, hair and mustache.
If you would like Mario to look as he usually does, you can use this example as a blueprint to help you!
We would recommend using some art mediums such as colored markers and pens to suit the bright colors of the games, but anything you use will look great!
Do This To Take Your Mario Drawing To The Next Level
Jump for joy as we cover 4 fun tips for your Mario sketch!
- Try Different Poses The drawing of Mario that we created in this guide shows him running into an adventure. This is an awesome pose for him, but you could also show him in different poses.
You could also show him in a more relaxed standing pose or maybe show him jumping onto a platform. If you need some ideas, you can look at some of your favorite moves and moments in the games! - Add Other Characters In the Mario games, he is joined by many other characters that help him in his adventures. These would be great to add to your drawing as well! For instance, you could add his cowardly brother Luigi.
Other characters would include Princess Peach, Toad, or maybe Yoshi. There are so many amazing characters to add, and any one will bring new life and color to your picture, so be sure to add any characters that you love!
- Include Villains Of course, there are also lots of villains in the Mario series, and these could be added to your Mario drawing to add some conflict.
The main baddie from the series would have to be Bowser, and he would make a great addition to this image. There are other lesser enemies such as the ghosts and goombas that you face off against in the games. You could even create a unique villain of your own design if you’re feeling extra creative!
- Draw A Background The Mario series is filled not only with amazing characters but also creative stages and levels. You could show off one of these settings by drawing a background for your Mario sketch!
This background could be based on your favorite levels from the Mario games, or you could design a brand new stage of your own by including some classy mario mushrooms. Most Mario stages have a theme to them, so if you want to create your own, picking a theme would be a good place to start.
Your Mario Drawing is Complete!
As we mentioned in the introduction to this guide on how to draw Mario, this is certainly one of, if not the most, famous characters in video game history.
Even though he is so recognizable, it can still be tricky to draw him, so we hope that this guide made it fun and easy for you to do!
As long as you follow all of these steps you’ll be drawing him like a pro in no time.
Then, you can have even more fun as you add your own flair and touches to the image. You could do this by drawing a background or by adding more characters from the Mario games.
These are just a few ideas, and there are many other ways you could go about it using your creativity!
Another way to keep the drawing fun going is to visit our website to check out the drawing guides we have for you there.
We also plan to release more soon, so you’ll want to check in often to never miss out!
Lastly, we would love to see how this Mario drawing turned out! You can show it off by sharing the finished picture on our Facebook and Pinterest pages.