There are many different types of dog breeds around the world, and dog lovers will often have a favorite breed as well.
One type of dog that has become very popular in recent years is the adorable Shiba Inu. Originating from Japan, these dogs are impossibly fluffy and hairy, and this appearance helped to propel this breed into internet meme superstardom.
Despite this fame, it is simply an adorable breed of dog, and learning how to draw a Shiba Inu is the next best thing to getting to meet one in person!
This tutorial is the place to be if you would like to know how you can do that.
Please enjoy our step by step guide on how to draw a Shiba Inu that we have prepared for you.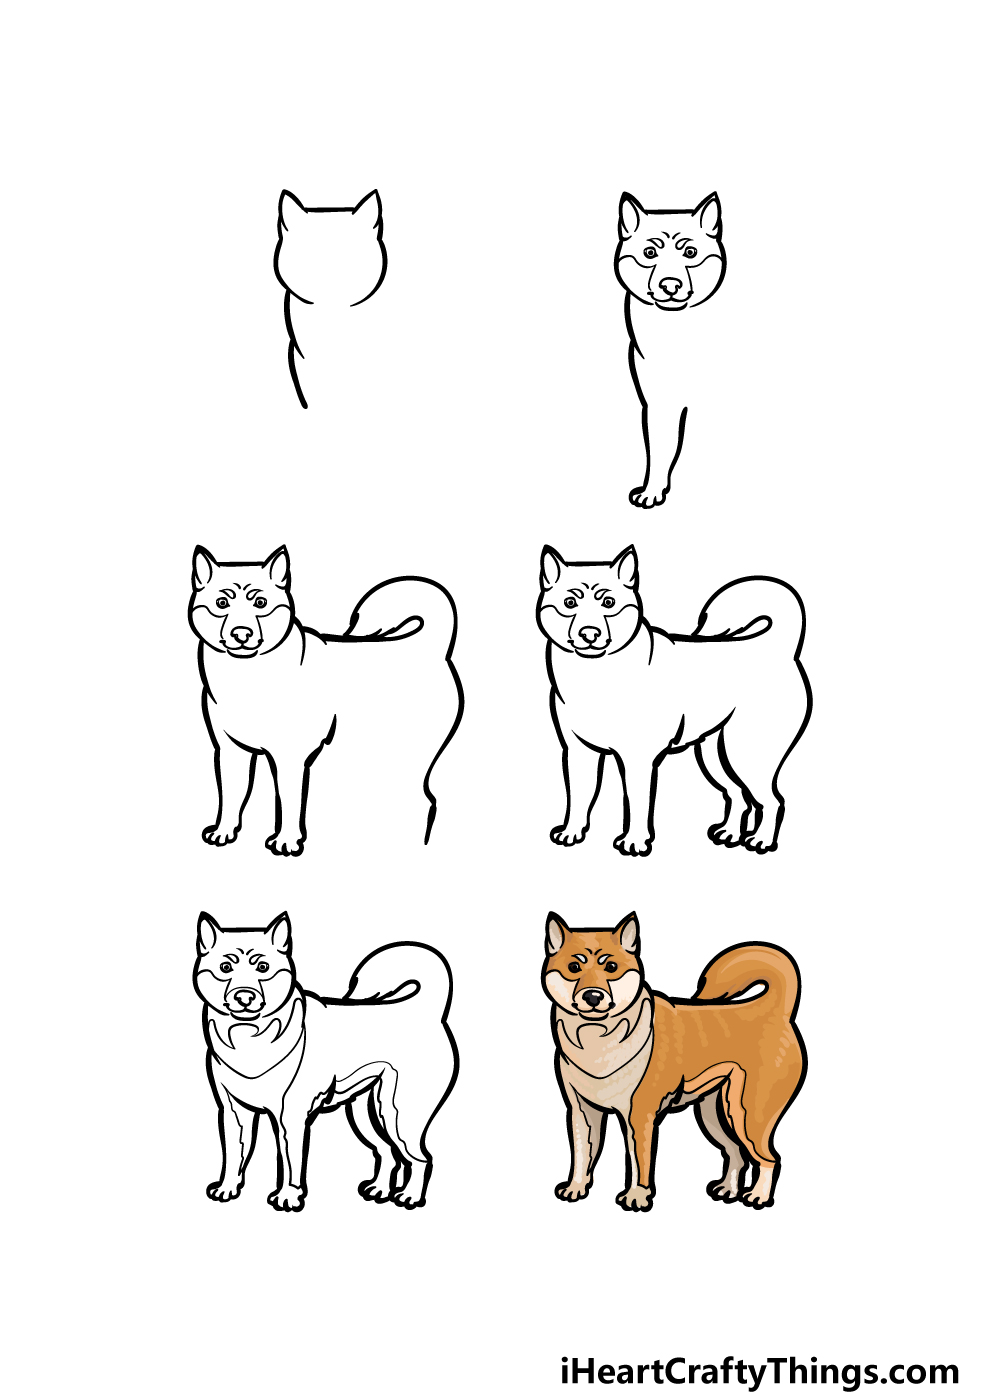
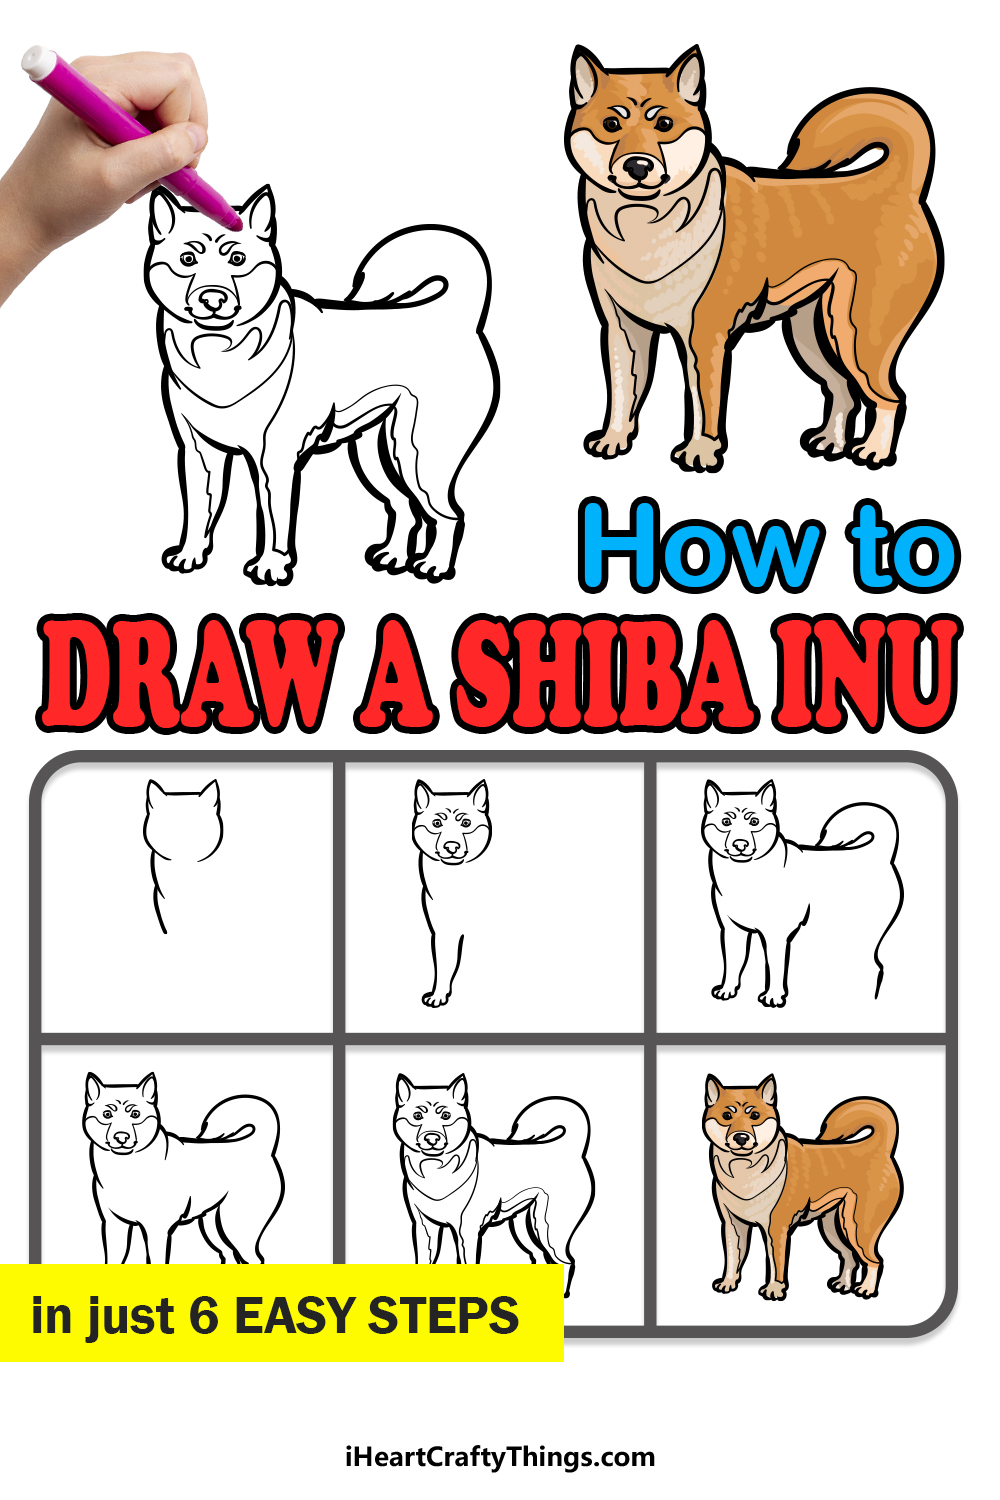
How to Draw A Shiba Inu – Let’s Get Started!
Step 1
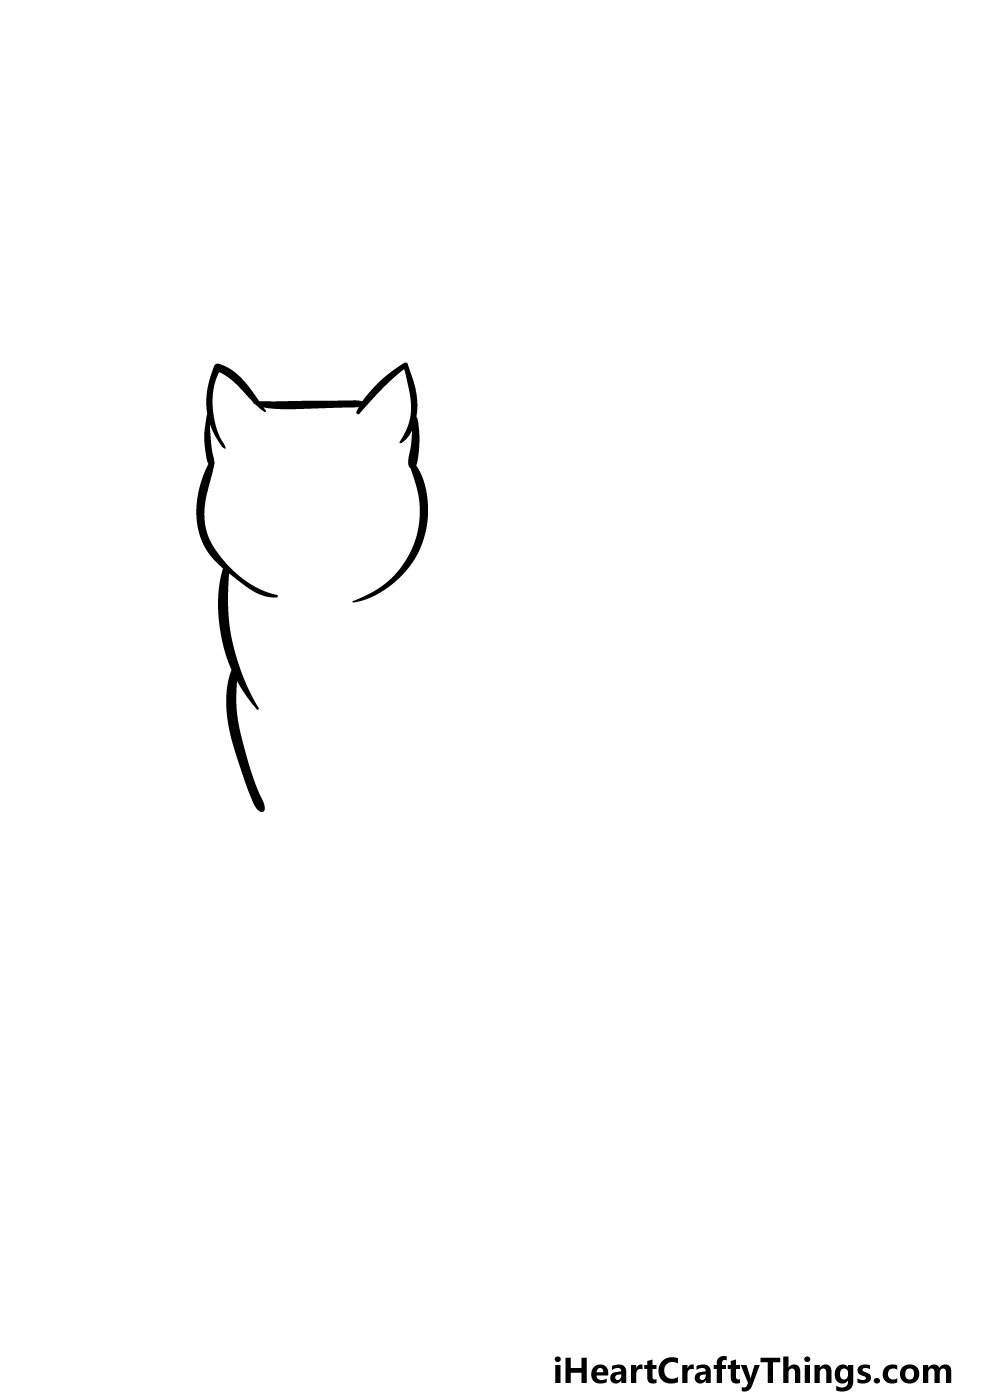
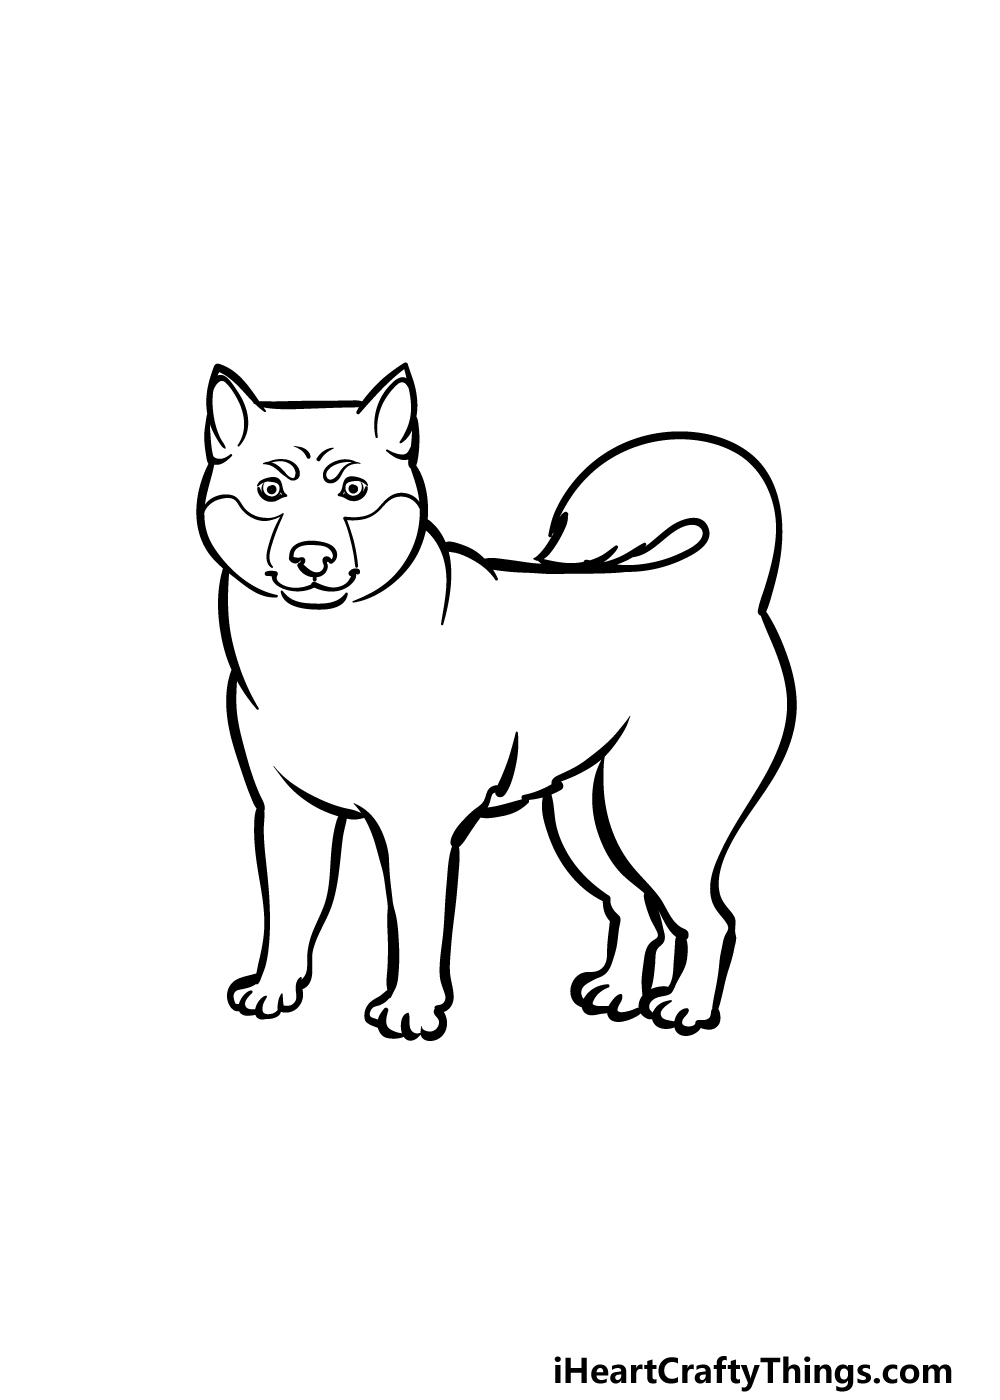
To start off this guide on how to draw a Shiba Inu, we will first start with the head and chest outlines for the dog.
First, let’s start with the head. The sides of the head will be drawn with some rounded lines, and then you can add the pointy ears on top of it. The ears will have a flat line in between them, as shown in the reference image.
Then, we will be drawing two curved lines coming down from the head and connecting to one another, and these will form the neck and chest of the Shiba Inu.
Once you have these outlines drawn, we can continue adding more in the next step of the guide!
Step 2 – Now, draw the first leg and some facial details

For the next stage of this Shiba Inu drawing, we shall start by drawing a leg onto the body of the dog.
Use some slightly wavy lines coming down from the body in order to create the sides of the leg, and then add the little paw at the base of it.
Then, we will add some facial details to the dog. Start by drawing some lines into the ears, and then draw some small circles for the eyes.
We will then draw some curved shapes above the eyes, and then you can finish off by drawing the nose and curved mouth underneath these aspects.
Step 3 – Next, draw another leg and add some more of the body
Now we can continue with this guide on how to draw a Shiba Inu by adding more legs and some more of the body.
You can add another leg next to the first one that you drew, and this one will look very similar to that first leg.
Then, you can use some more curved lines to draw the stocky back of the Shiba Inu.
We will also draw the tail for the dog in this step, and as you can see in the reference image it will be curled over the back. Finish off this step by drawing the back outline of the back leg.
Then it will be on to step 4 of the guide!
Step 4 – Now, finish off the outline for the body
This step of your Shiba Inu drawing will see you finishing off the outline for the body and legs before you add some final details in the next step.
First, draw the front of the back leg that you started in the prior step of the guide. Then, add another back leg right next to it.
You can then finish off this part by drawing a curved, jagged line for the belly of the Shiba Inu.
Once these are drawn, you will have the complete outline for the drawing done, and then we can move on to those final details that we mentioned!
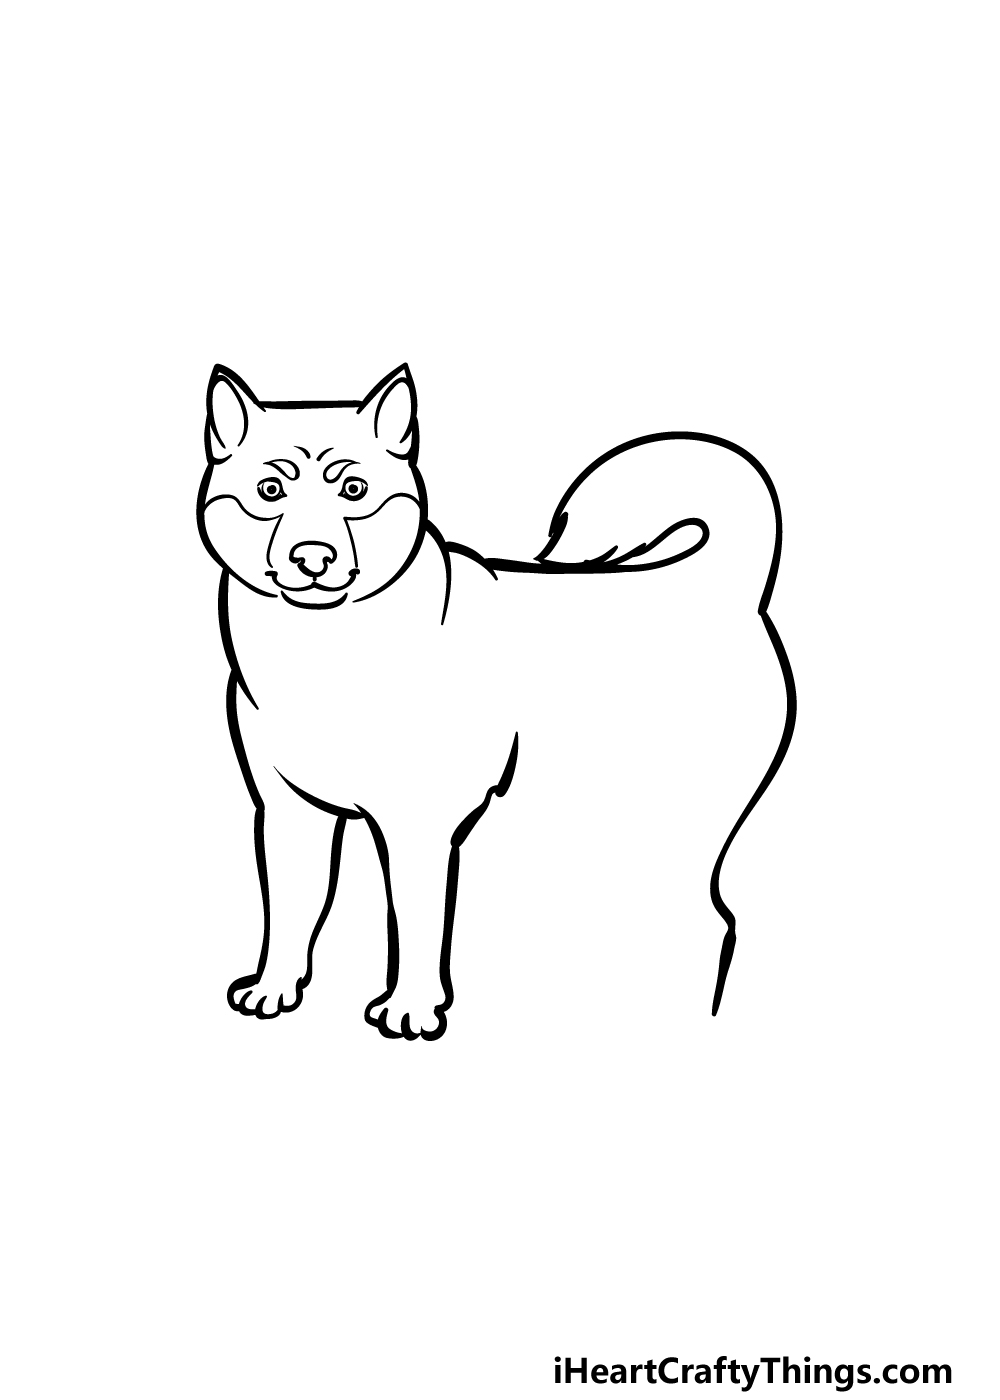
Step 5 – Add the final details to your Shiba Inu drawing
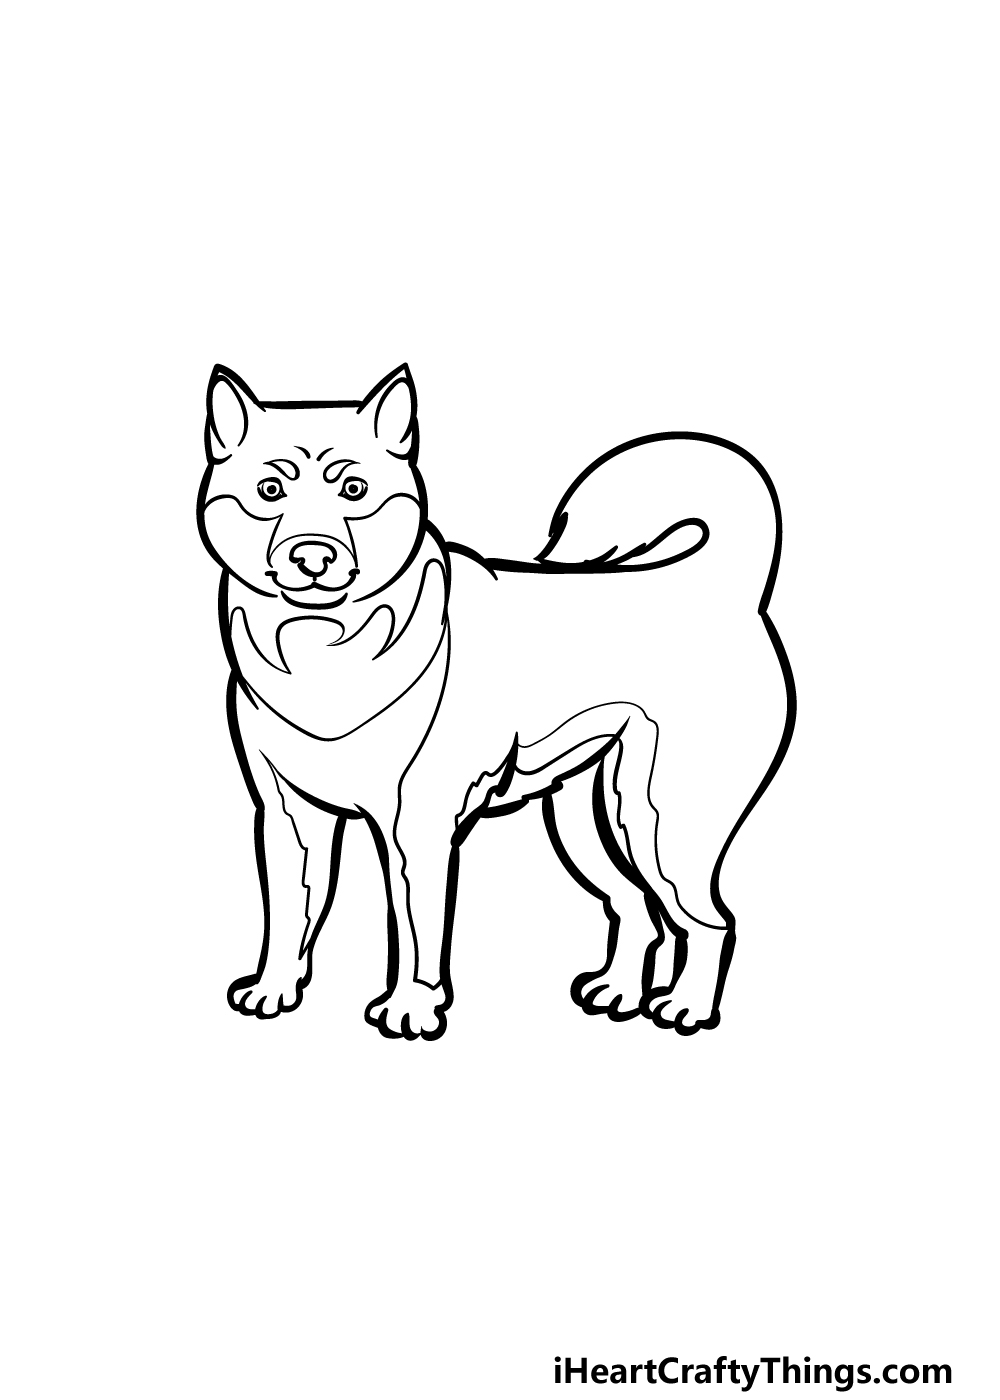
For the fifth step of this guide on how to draw a Shiba Inu, we shall finish off by adding some details to the dog.
To do this, we will be drawing some curved and rounded lines throughout the face, legs and body of the Shiba Inu.
These lines will be there to create a more dynamic look for the dog, and it will help make it look more realistic. This will further be emphasized when we add some colors later.
Once you have drawn these lines as they appear in our reference image, you will be ready for the final step of the guide.
Before you move on, maybe you could draw a background for the image! By doing this, you could draw another dog with it, add some toys or put it in a creative setting for just a few ideas.
How will you finish off the drawing before the final step?
Step 6 – Finish off your Shiba Inu drawing with color

Now we can finish off this Shiba Inu drawing by adding some color to it! In our reference image, we went with some realistic colors for the Shiba Inu.
That means that we used some light browns and shades of beige to color the various sections of the dog’s body.
You could use our reference image as a guide if you would like some similarly realistic colors for your own Shiba Inu, but you could also use some unique colors of your own!
When you know which colors you will use, you can also have fun picking the art tools and mediums that you use to finish it off. We can’t wait to see what you decide to use to color your creation!
3 More tips to make your Shiba Inu drawing easy!
Make this Shiba Inu sketch even easier with these fun tips!
This adorable drawing of a Shiba Inu is done in a fairly detailed style, and this makes it more realistic.
This breed of dog has been portrayed in many ways due to the fact that it was used for a popular internet meme.
Because of this, you could portray the Shiba Inu in some alternate styles that you may find easier. For instance, you may find drawing in a simplified cartoon style to be much easier.
If so, you could adapt that or any other style you like to this drawing in order to make it easier. Not only will it make the drawing easier for you, but it will also make it more unique and suited to your tastes!
Next, you could make this Shiba Inu drawing easier by using other references along with the steps of this guide. Thanks to the popularity of this dog breed, you should have no issues finding pictures online!
When looking for photos of real Shiba Inus, you would be best suited looking for ones that are at least relatively similar to the example image in our guide.
Look closely at this photo, and then try your best to replicate the details and proportions as they appear. This would also be helpful if you wish to portray different poses.
This guide made this Shiba Inu sketch much easier, but it could be broken down even further. This could be done using a pencil and some basic shapes.
First, look closely at the example images, and then try to break down the structure of the Shiba Inu into basic shapes. These could be circles, ovals or thinner shapes.
It really depends on you, and you can start building a basic outline for the Shiba Inu. then, once you have this to work with, you could then try adding layers of finer details to the drawing.
Once you like how it looks, finish off the final details with your pen and simply erase the pencil shapes!
Your Shiba Inu Drawing is Complete!
This is a truly adorable breed of dog, and we hope that you had a great time creating this artwork featuring one as you worked on this guide on how to draw a Shiba Inu!
Now that you have mastered this drawing by following the guide, you can take it even further by adding your own details and elements to it.
We mentioned a few ideas, but what other ideas do you have for this drawing?
When you’re ready for more fun, please visit our website, as we have some great drawing guides for you to enjoy there. We have more on the way, so definitely keep checking in!
We would love to see your adorable Shiba Inu drawing, so please share it on our Facebook and Pinterest pages so we can see it.