Our planet Earth is full of many distinctive biomes and environments. From scorching deserts to frozen tundras, there is so much environmental diversity to encounter.
One of the most vibrant of these environments would definitely be the lush jungles found in many places on the planet.
These jungles are full of vibrant plant and animal life, and some of them stretch on for great distances. Learning how to draw a jungle is the best way to create your own jungle paradise!
If you would like to know how you can do just that, then you’re in the right place.
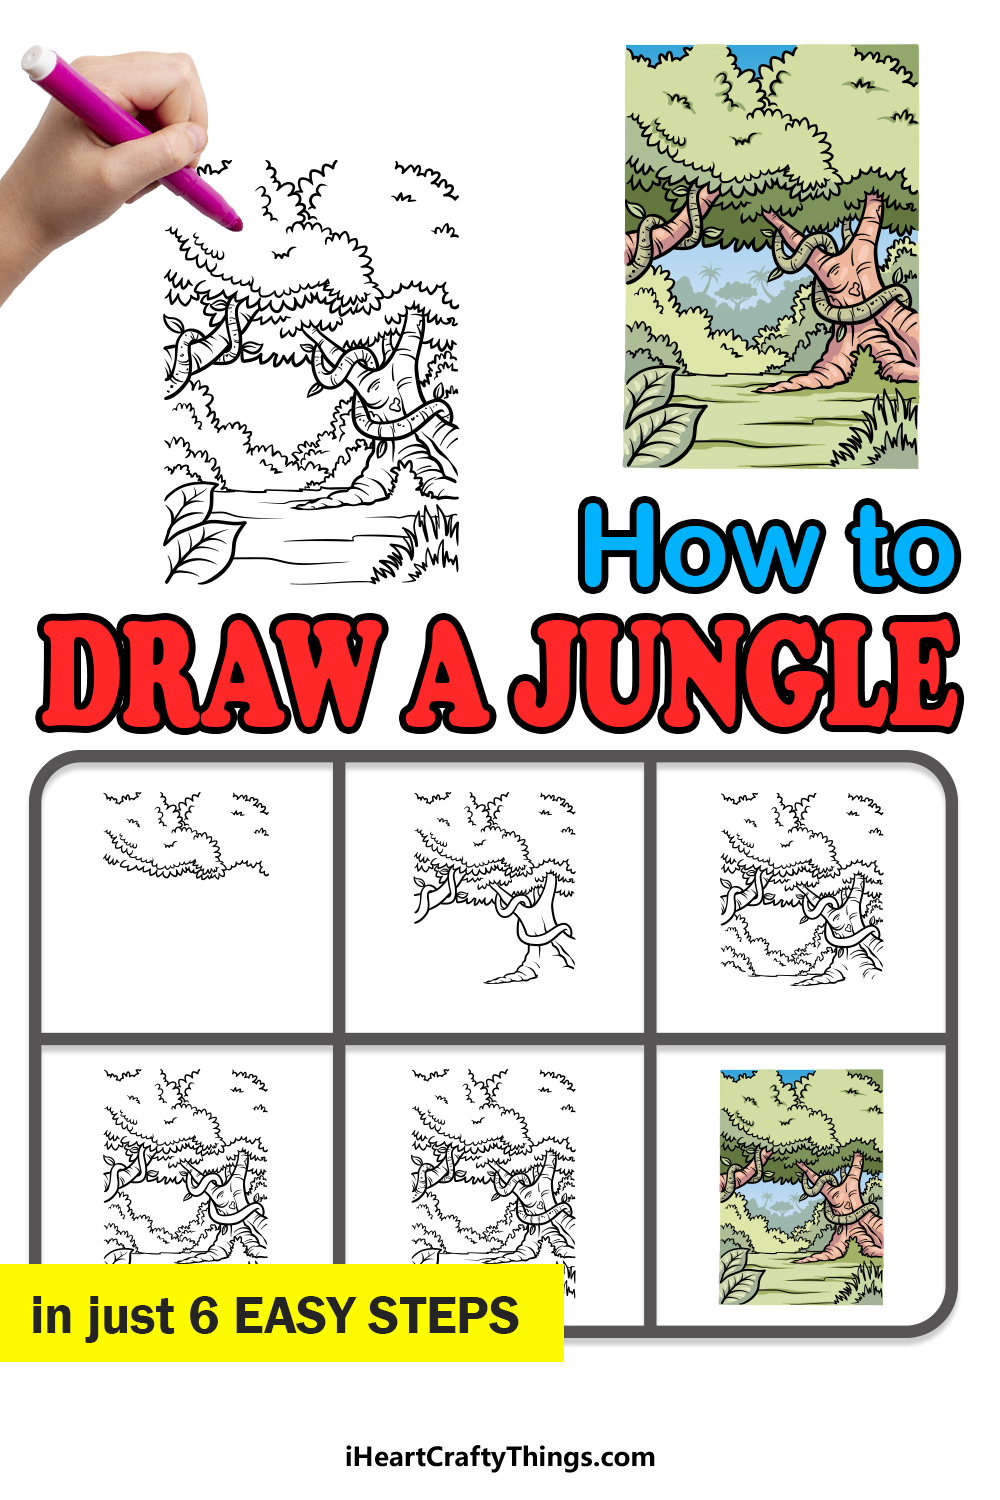
This amazing step-by-step guide on how to draw a jungle in just 6 steps will show you how it can be done.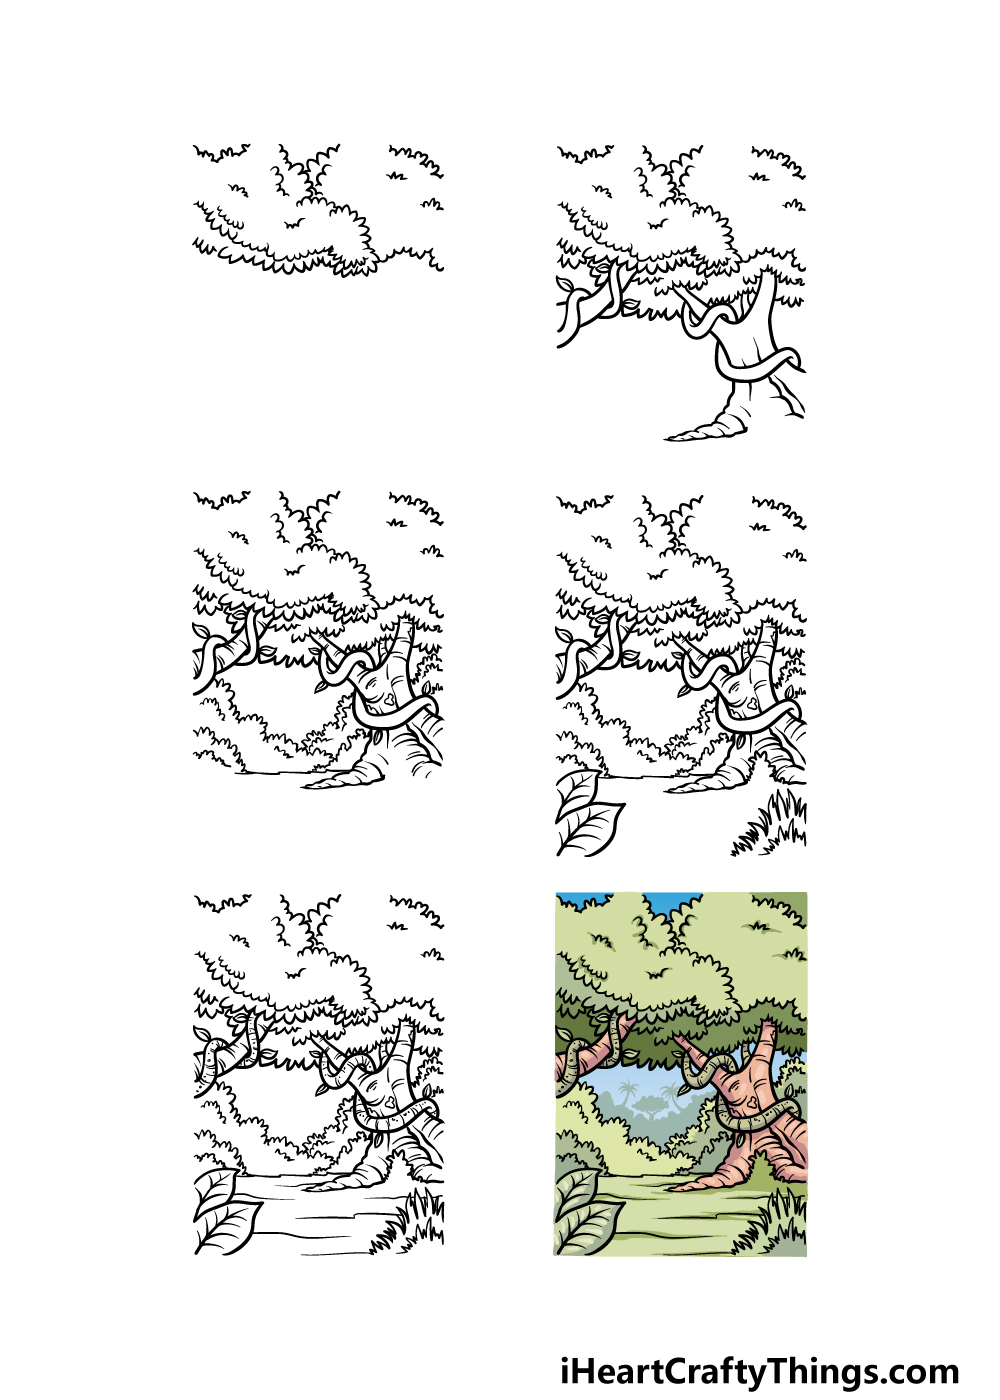
How to Draw A Jungle – Let’s Get Started!
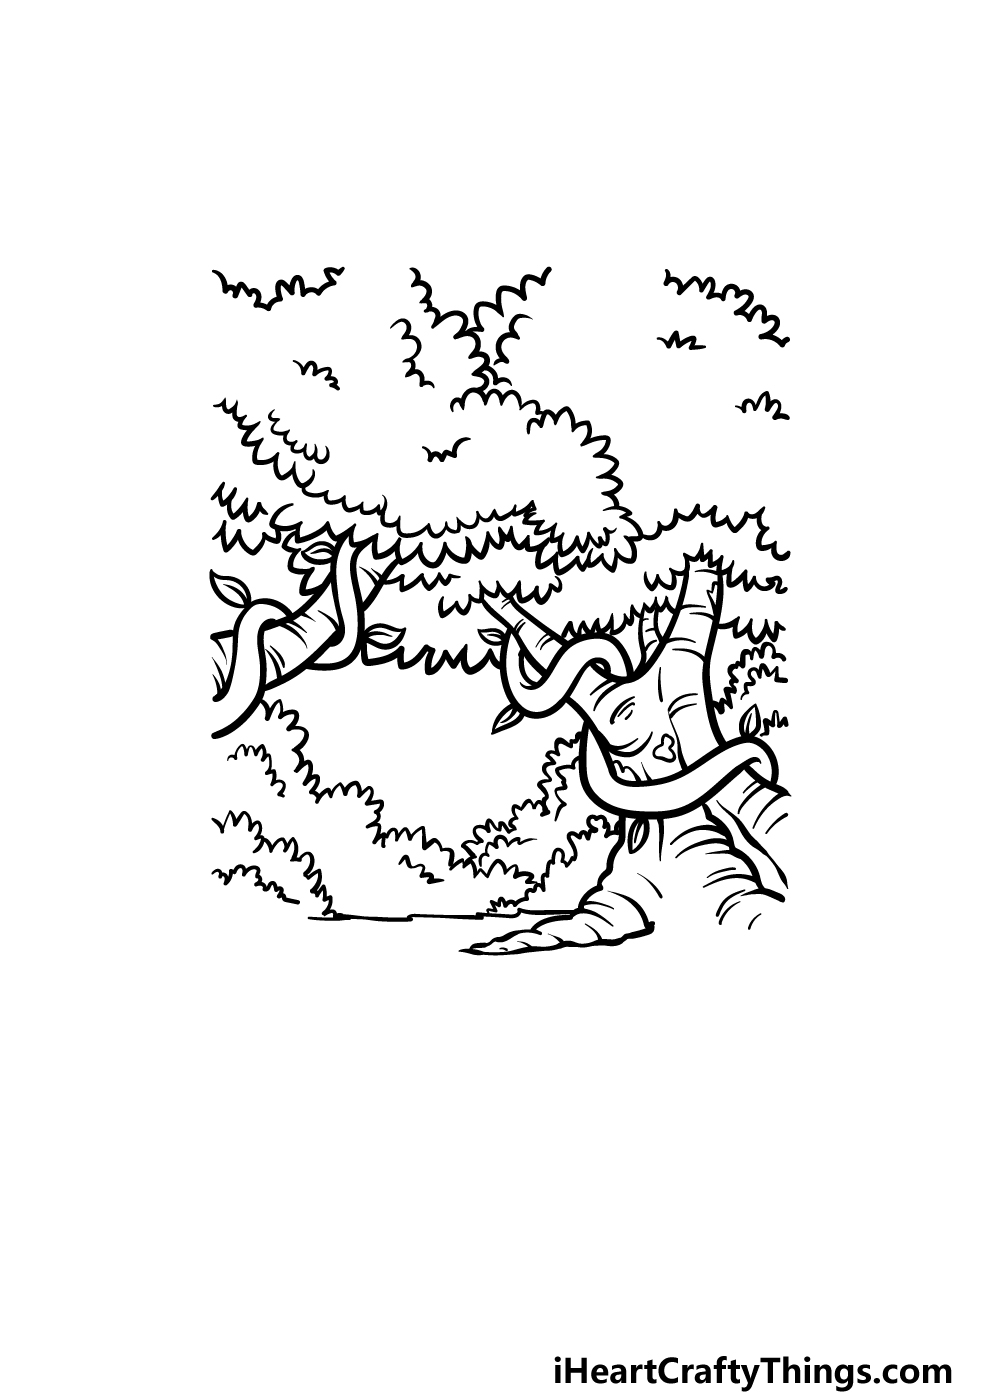
Step 1
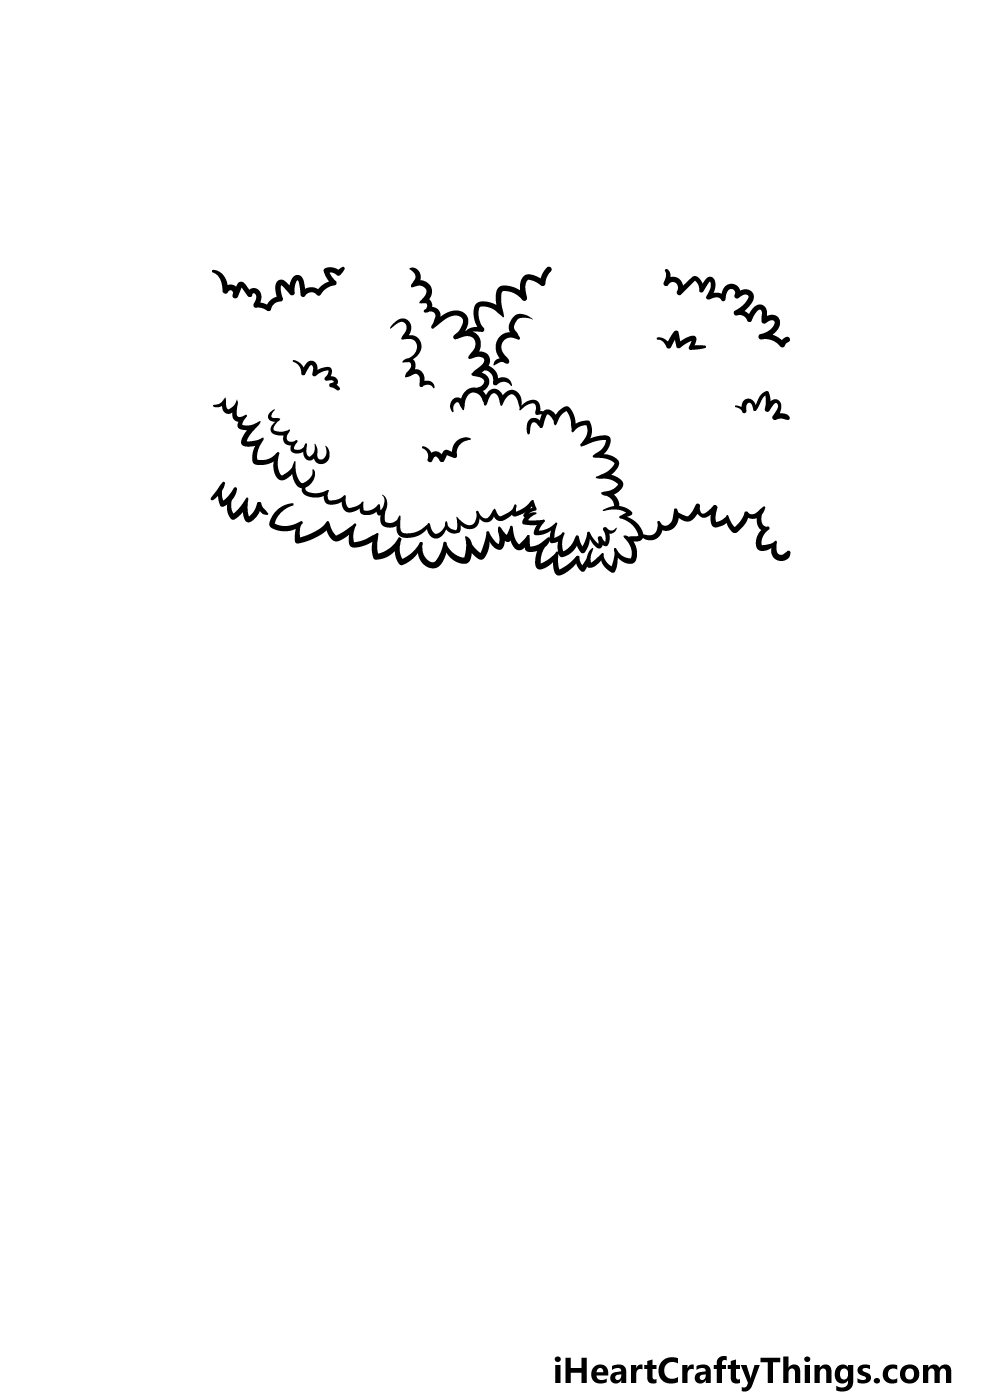
Jungles will usually have a thick canopy of treetops covering them that can be so thick that it becomes hard to see the sun or sky through it.
We shall start by drawing this leafy canopy in this first step of our guide on how to draw a jungle. To do this, we will be drawing an outline for the treetop that will be created using some bumpy lines.
Each of the bumps of these lines will have a very slight, rounded tip to it as well.
As shown in the reference image, there will be several sections of these canopies that connect to one another.
Once you have drawn the treetops, you can then move on to the second step of the guide!
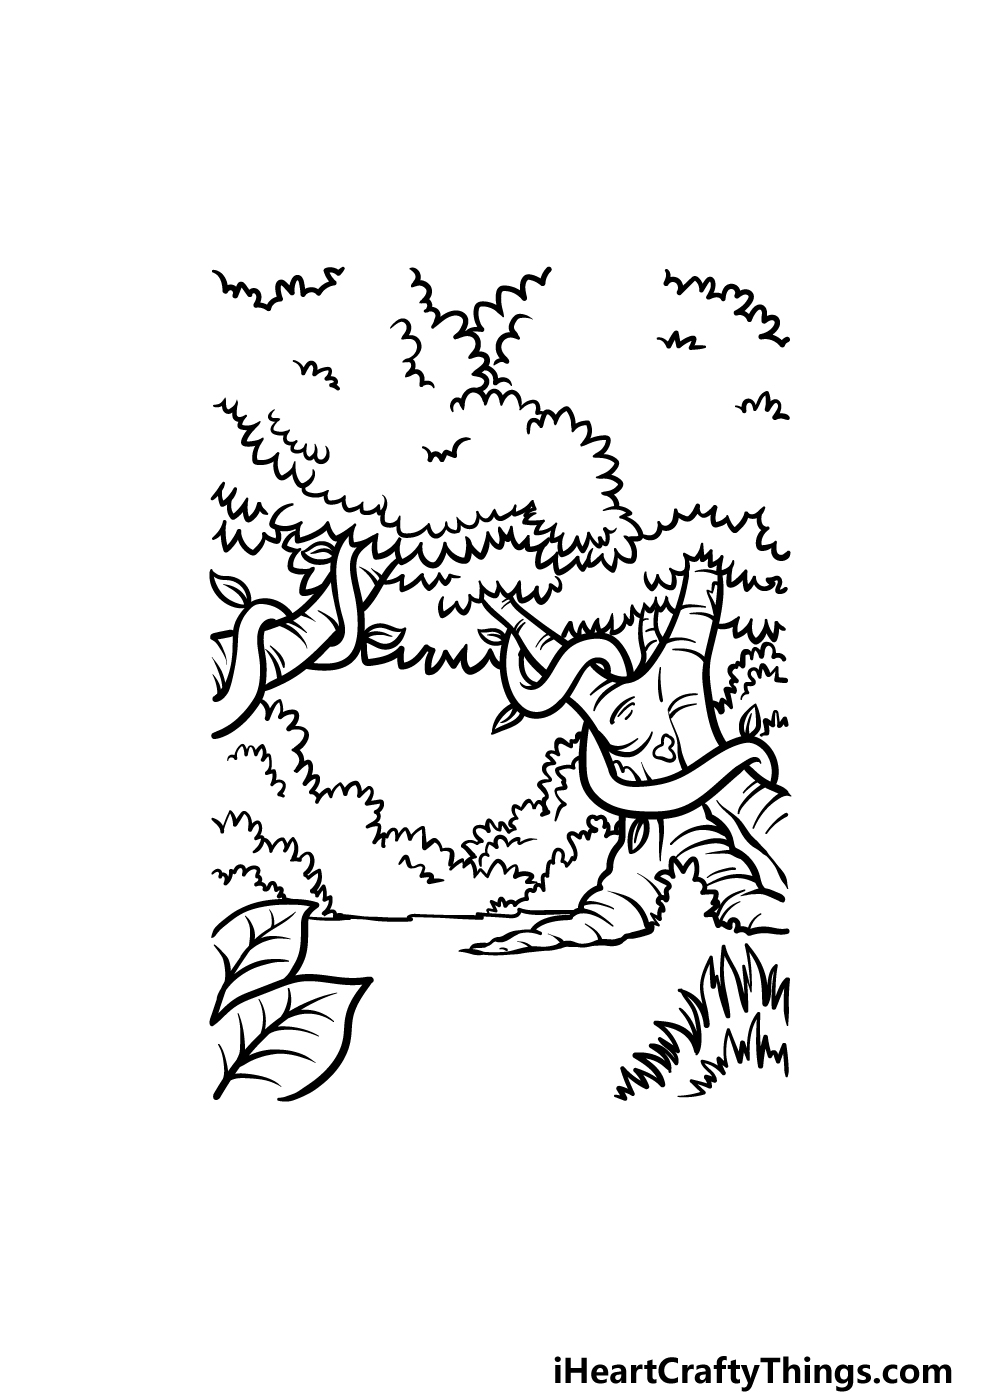
Step 2 – Now, draw more of the trees in the jungle
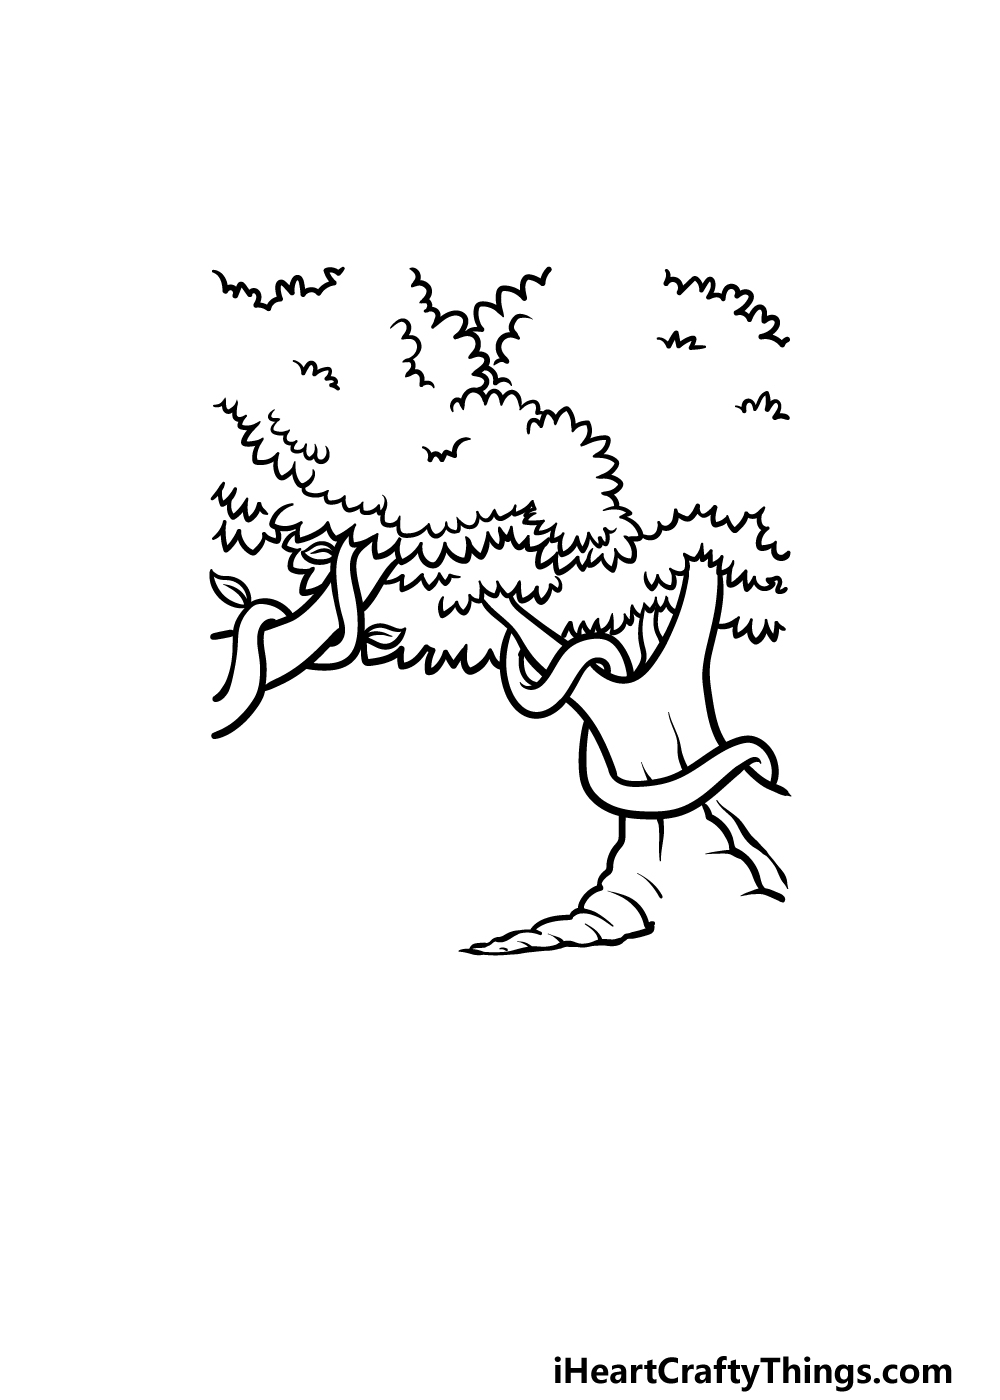
You drew the canopy for this jungle, and now you’re ready to add some more details to the trees in your jungle drawing for this step.
To do this, we shall be drawing a large tree trunk on the right-hand side of the drawing. You can do this by drawing some rounded lines to create the T shape of the trunk.
Then, there will be a thick, twisting vine snaking around the tree as well. There will also be another branch on the left that extends into the treetop, and this will also have a vine around it.
You can finally finish off by drawing some more bumpy lines for more of the canopy in the background.
Step 3 – Next, draw some more details for the jungle
In this step of our guide on how to draw a jungle, we shall be adding more to the ground of the jungle while also adding some details onto the trees that you have already drawn.
First, use some more bumpy lines that are similar to the ones that you used for the leaves of the tree to create some bushes in the background.
Then, you can add some lines and other small details onto the bark of the trees to make them look more textured and realistic.
Finally, you can also add some small leaves onto the twisty vines around the trees to make them look a bit more dynamic.
Step 4 – Now, draw some more plant life
Continuing on with your jungle drawing, we shall add even more plant life and other details to the picture.
We will be focusing primarily on the foreground of the image in this step, and you can start by drawing some large leaves on the left-hand side.
To draw these leaves, use some curved lines with sharp tips at the ends and then add some vein details onto them.
Then, we will use some pointy, jagged lines for the tuft of grass on the right-hand side of the image. Then you will be ready for the final details in the next step!
Step 5 – Add the final details to your jungle drawing
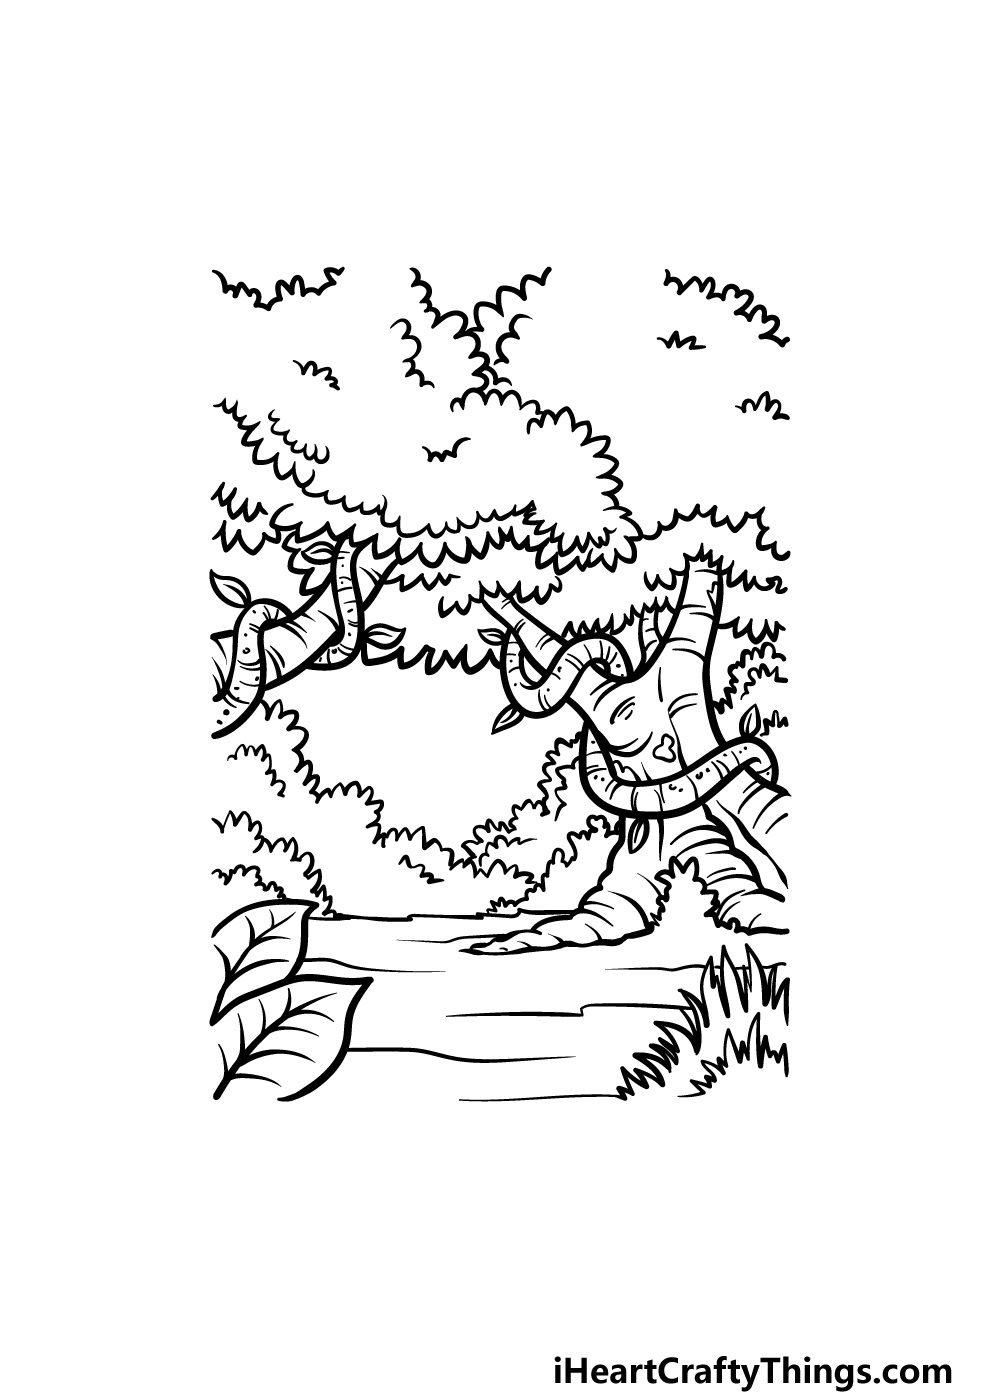
This fifth step of our guide on how to draw a jungle will see you finishing off with some final details to really finish it off before you add some color.
First, we will add some more details onto the vines twisting around the trees to make them look more textured as well.
To do this, simply add some small curved lines onto the vines, and then draw some small dots in between these lines.
The next thing we will be adding some lines onto the ground of the jungle. Once these have been drawn, you’re ready for the final step!
Before you proceed, there is a lot that you could add to personalize this picture.
Jungles are teeming with life, so you could draw some details such as tropical parrots, jaguars or monkeys or many others to your drawing. How will you finish off this lush picture?
Step 6 – Finish off your jungle drawing with color
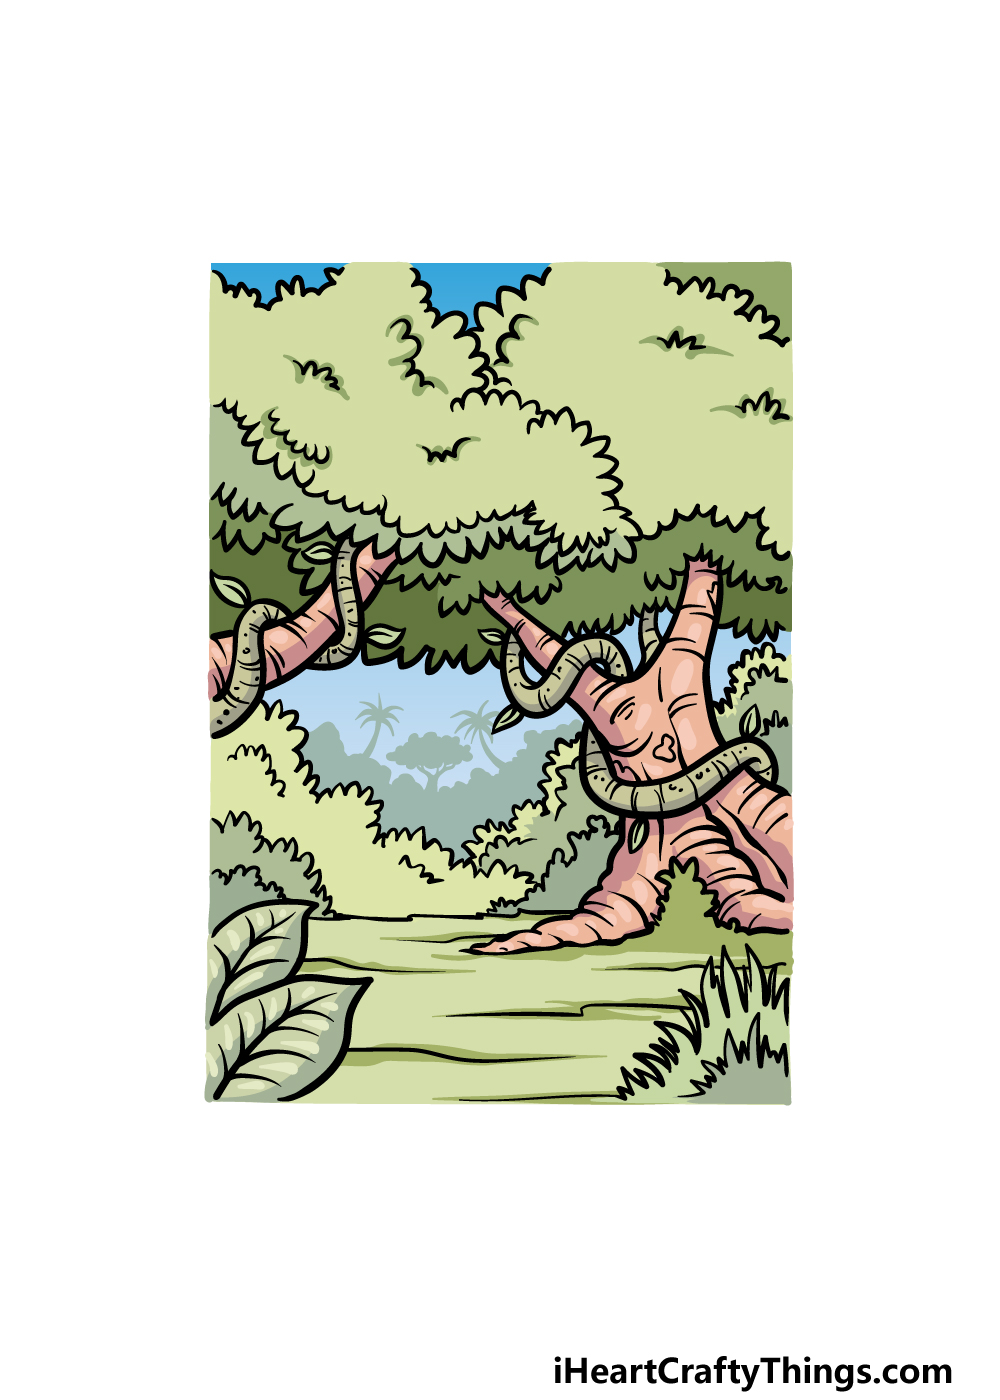
Now you’re ready to complete this jungle drawing by adding some amazing colors to it!
To color our example image, we used many different shades of greens and blues for the leaves, grass and other elements in the jungle.
By using as many different shades of your color scheme as you can, you can create a more dynamic look for your jungle and makes it look even lusher.
You can also help to create this vibrant look with the art mediums that you choose.
You could use painterly mediums such as acrylic paints and watercolors, or go with some colored markers and pens for a few ideas. What will you use for your jungle drawing?
3 More tips to make your jungle drawing easy!
Explore some ways to make this easy to draw jungle even easier with these tips!
This jungle drawing we created together is somewhere between being cartoony and realistic. Even so, there are lots of details that could prove a bit tricky to draw.
Most of these details are extras, so if you needed to remove some of them you could still maintain the spirit of the picture.
One example would be the pointy outlines of the tree canopies. These could get a bit taxing to draw, so you could use some simpler bumpy outlines instead.
That’s just one example, but this will also depend on what you find yourself struggling most with. We suggest trying to draw the design as best you can and then adapt it if you run into any difficulty.
Another way you can make this jungle drawing easy to do is by using a pencil to begin with. Pencil may not have the same impact as pen ink, but we will still get to do that!
First, you should try and use the lightest pencils you can in order to draw the initial lines. That way, you will be able to plan out the drawing without fear of making mistakes.
The more layers of detail you add, the more the drawing will start to take shape. Once that’s done, you can draw the final pen lines.
Make sure to wait for the pen ink to be completely dry before you erase the pencil!
Next, you can look at some real jungles to help you draw this particular one. Chances are you don’t live next to a jungle, but even if that is the case you can still find many pictures online.
These pictures will likely be rather different from the jungle drawing we created, but they will still give you an idea of the kinds of forms and details in a real jungle.
Using these pictures along with the ones in our guide can make it so much easier. It will also help if you would like to add unique features!
Your Jungle Drawing is Complete!
You have finished all six steps of this guide on how to draw a jungle, and you have a beautiful tropical jungle to show for it!
We hope that this guide made it much easier for you to create this jungle and the various details for it as well.
Now that you have finished the guide, you can also draw some more details and additions of your own.
We mentioned just a few ideas that you could go for, but this is your chance to show off some ideas of your own as well! We can’t wait to see what you choose.
We then have a huge selection of awesome drawing guides on our website for you to enjoy. We have many more coming soon, so keep on the lookout for those!
Please also be sure to share your finished jungle drawing on our Facebook and Pinterest pages so we can see how it turned out.