The British royal family is perhaps the most important British institution in the country. Every year, countless books, magazines, articles, TV shows and films are created around the famous royal family, and people can’t seem to get enough!
At the head of the family is the Queen, who has been reigning for almost 70 years, with no signs of slowing down.
For monarchy enthusiasts, it can often be fun to create some royal artwork, and learning how to draw the Queen can be a great way to do that.
This will be the perfect guide for you if you are one of those enthusiasts!
Why not settle in with a nice cup of tea as you enjoy this very royal step-by-step guide on how to draw the Queen in 8 steps.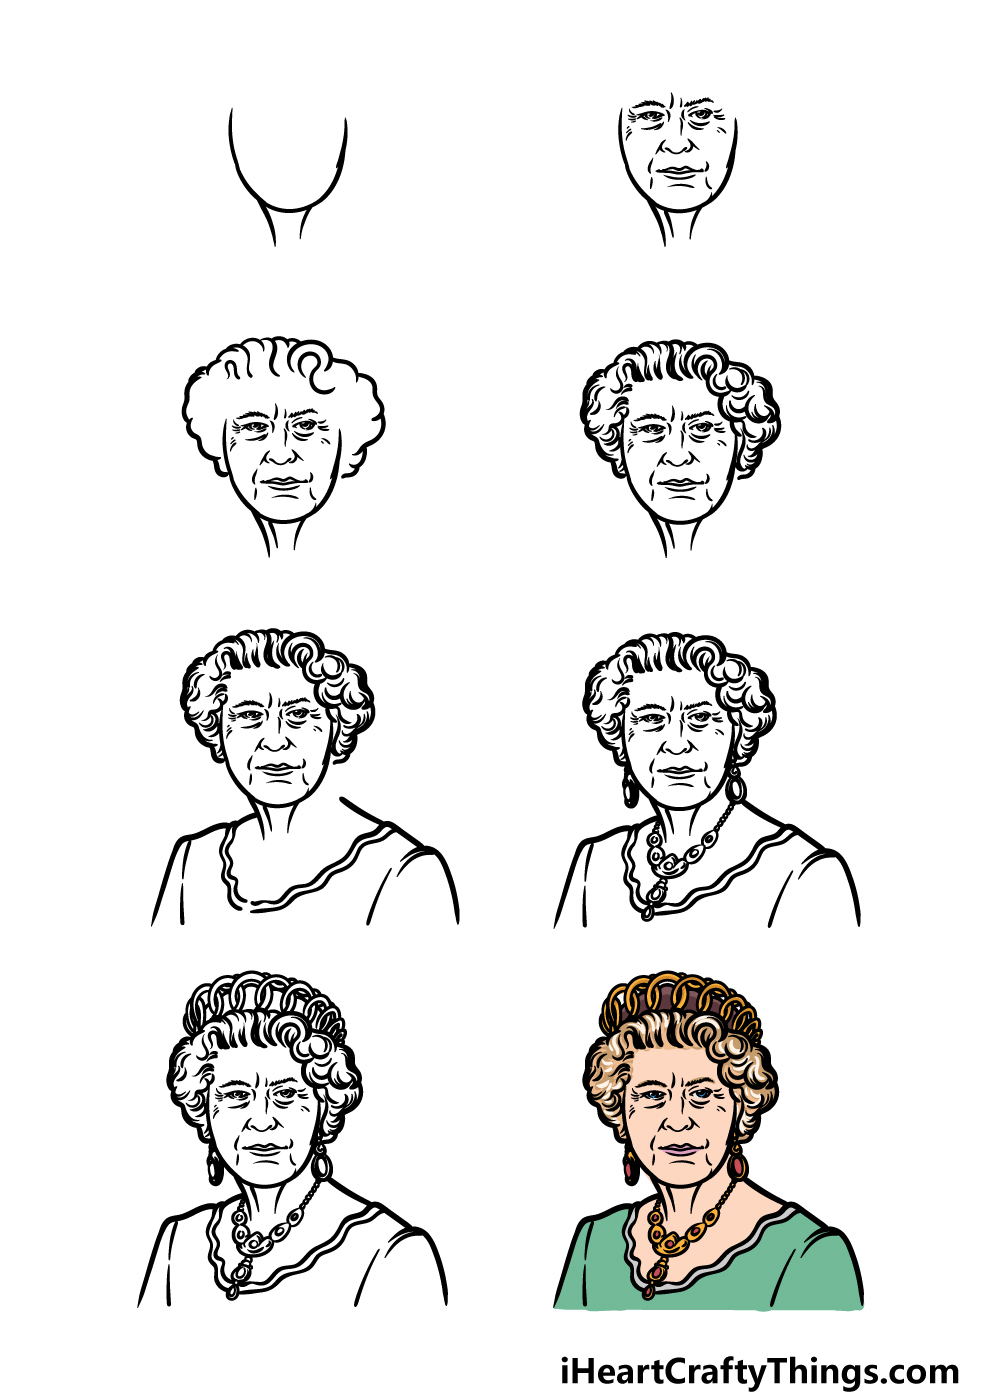
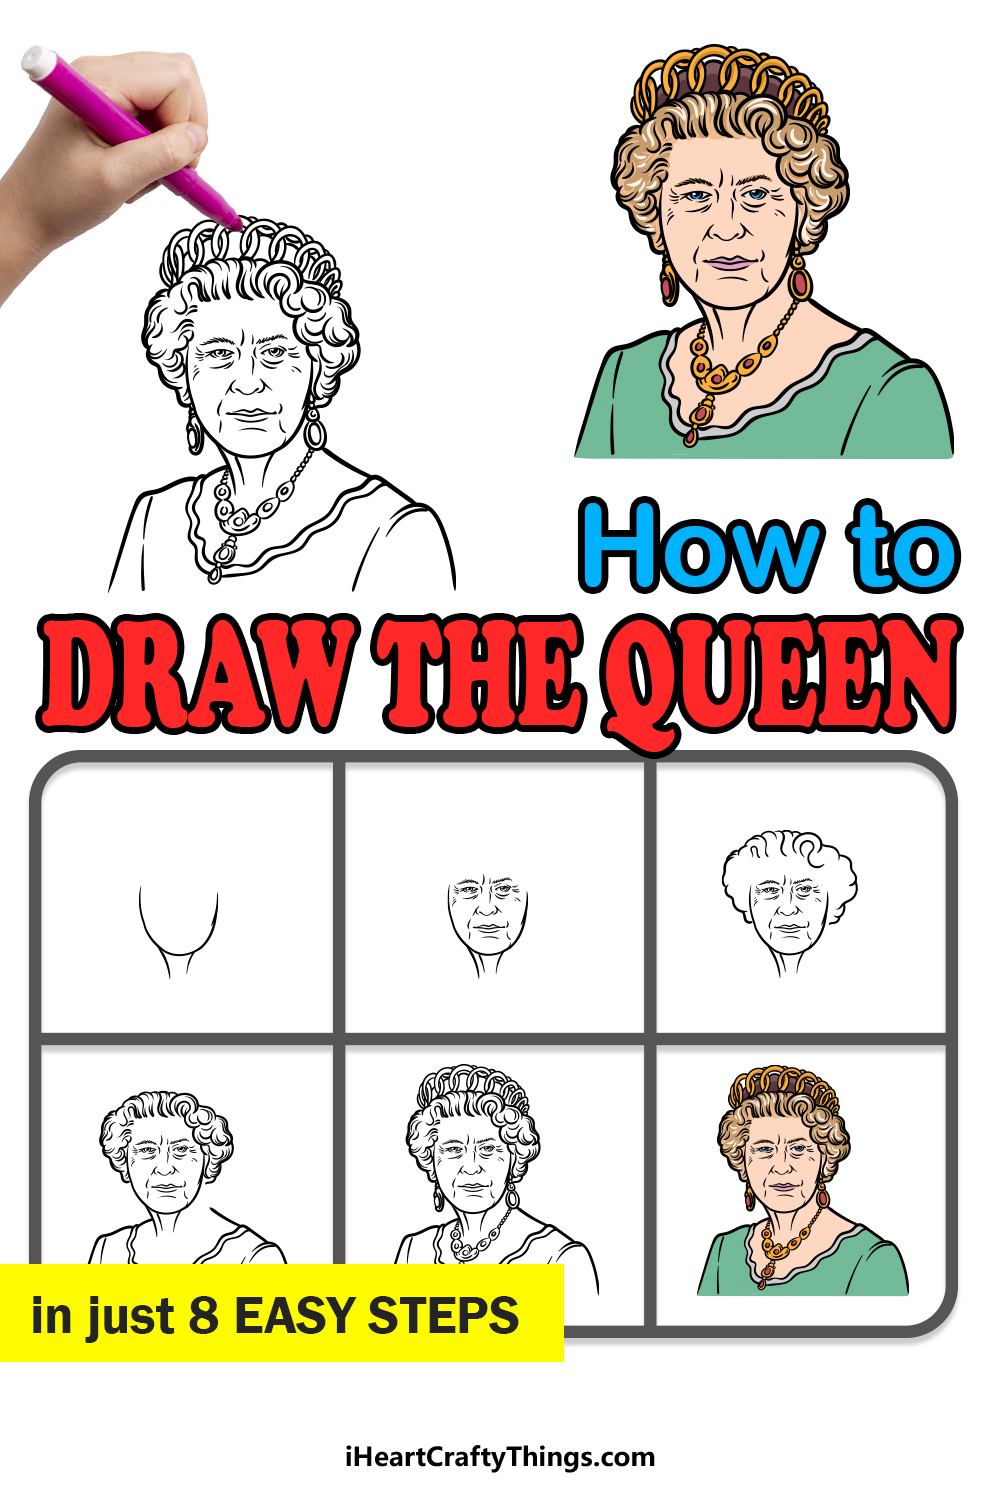
How to Draw The Queen – Let’s get Started!
Step 1
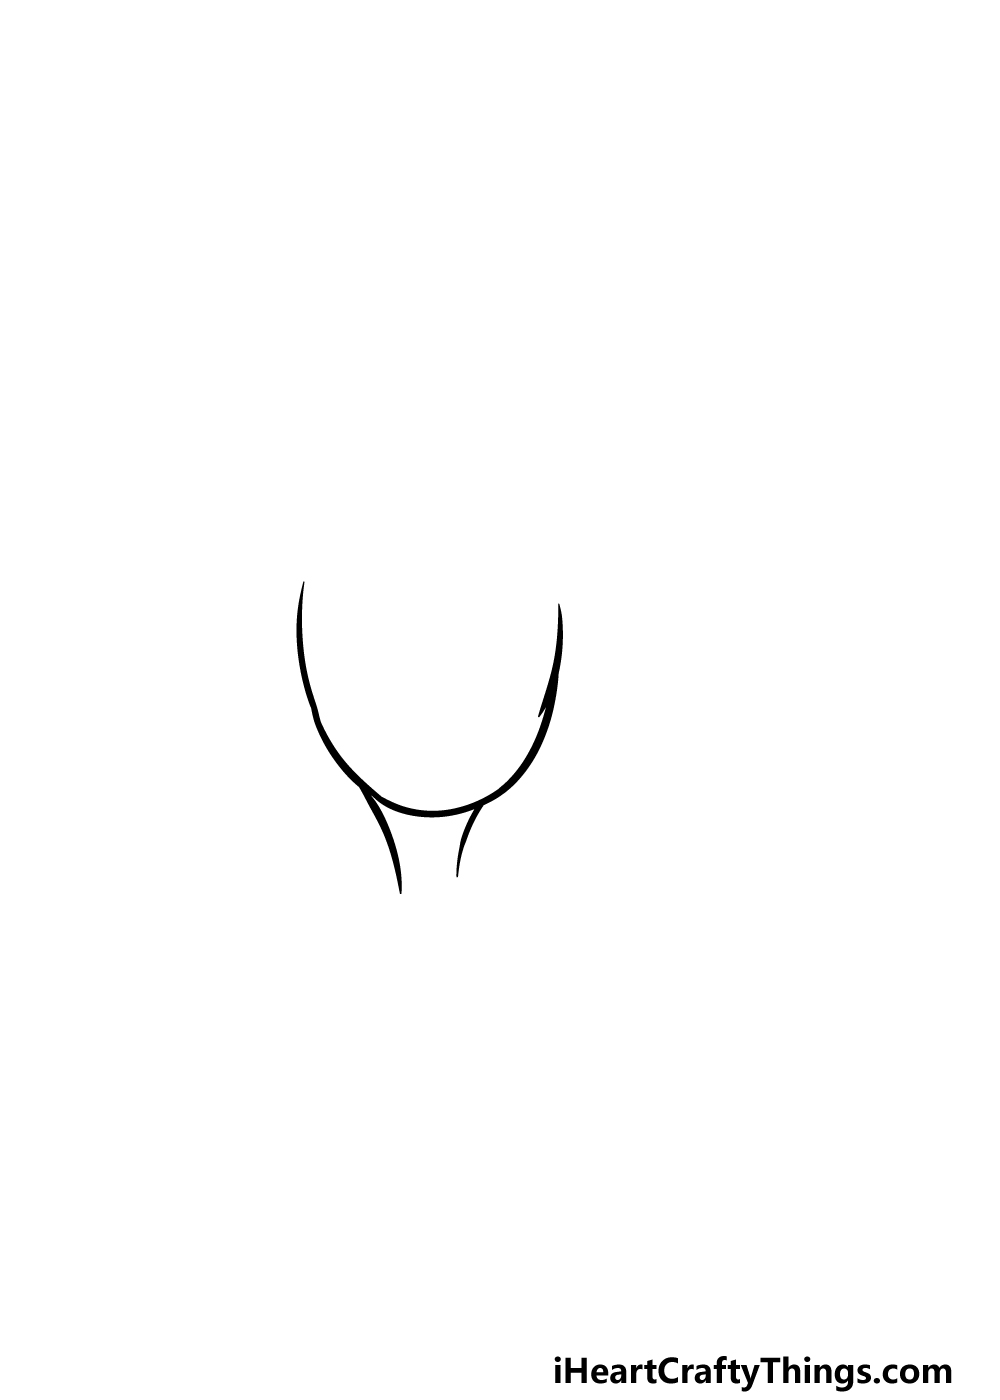
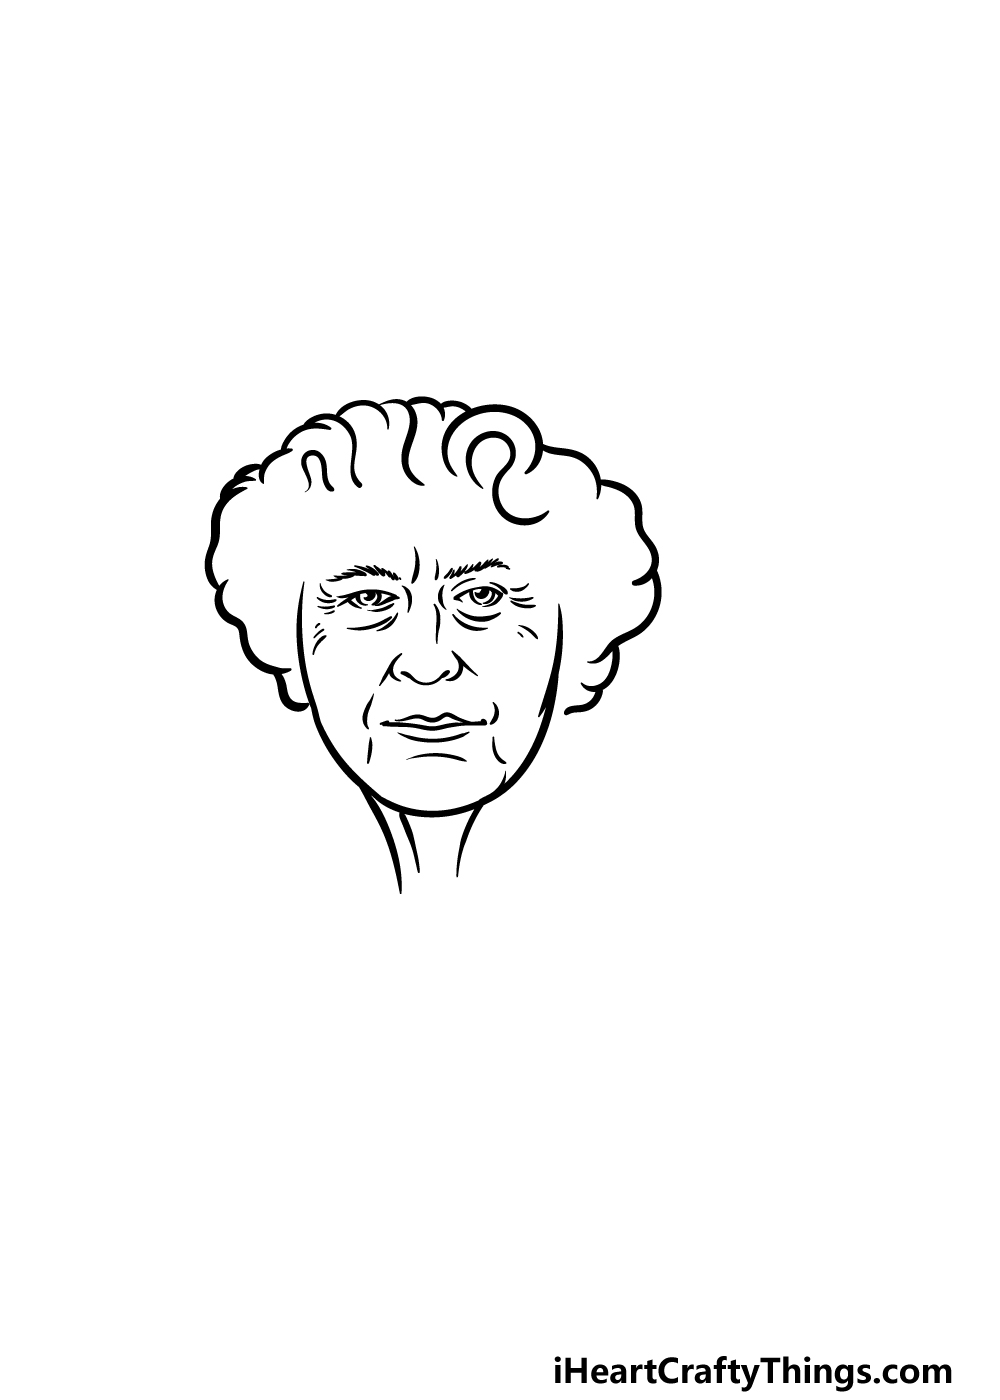
We will keep it simple for this first step of our guide on how to draw the Queen. For now, we will start with the outline for her face.
You can use a curved line for the face of her face, and then draw two curved lines extending down for part of her neck. That’s all there is to it for this first step, so when you’re ready we can move on!
Step 2 – Next, start drawing some facial details
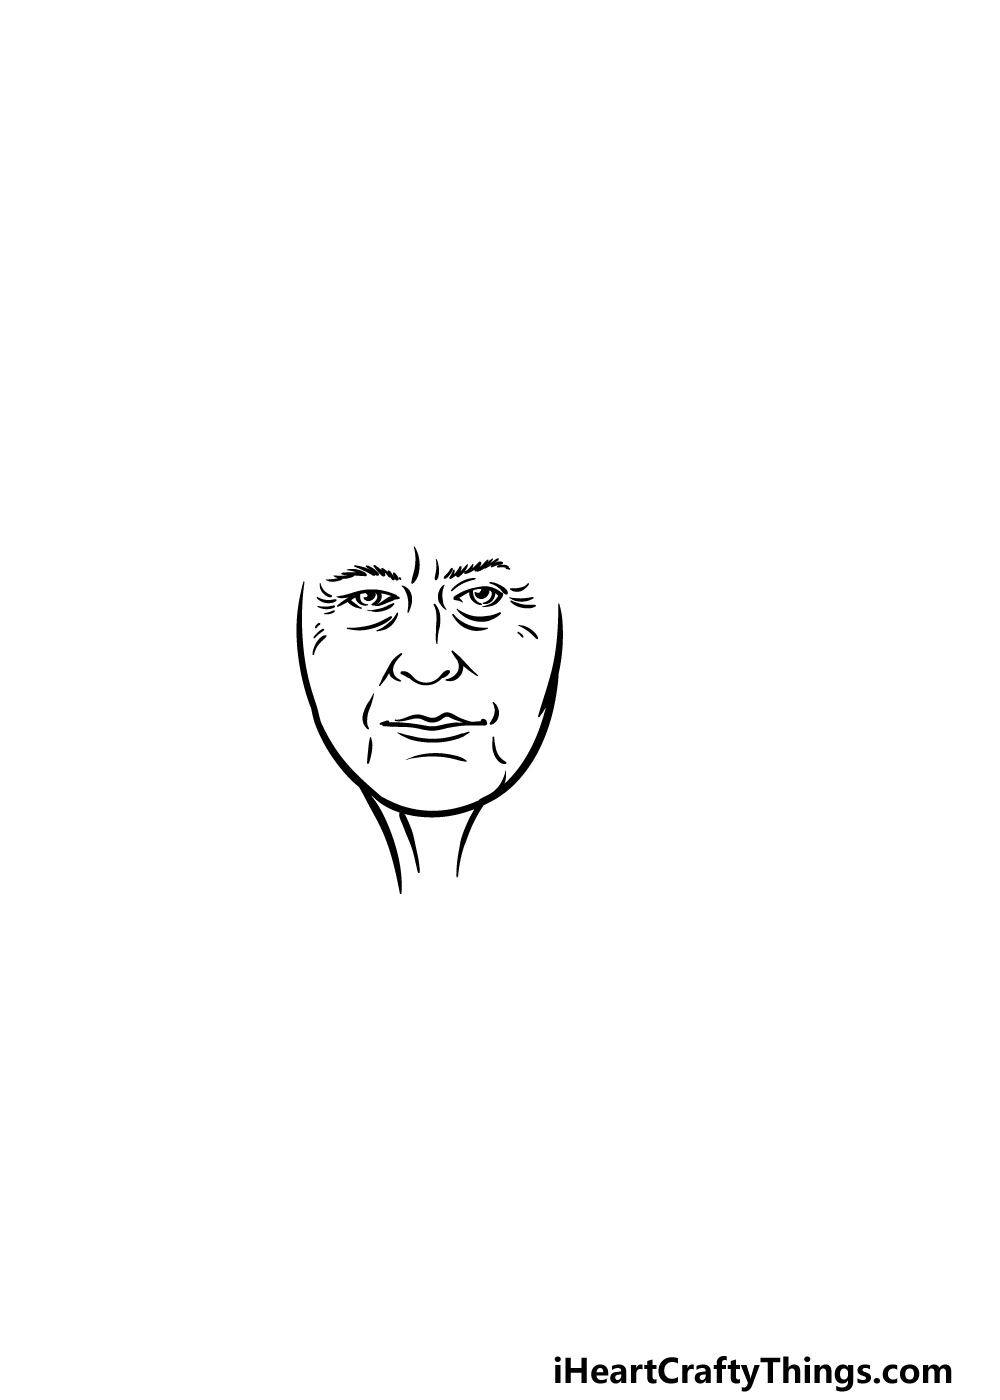
When drawing a picture of a real person, often the hardest part is getting the facial features looking right.
That’s why you may want to closely copy the reference image we have provided for you in this part of your Queen drawing.
You can start by drawing some simple curved lines for her nose and mouth. There will also be some lines around these parts to give her face some more detail.
Then we will draw her eyes, which will be narrowed a bit. They will also have some lines around them for more detail.
As long as you take your time and follow the reference image closely, you should easily be able to do it!
Step 3 – Now, draw the outline for her hair
Moving on in this guide on how to draw the Queen, we will next start drawing the outline for her hair.
This outline will start near to where her ears will go later, and you can draw it using some wavy lines connecting to one another.
Her hair bulges out a bit on the sides, but it will be a bit flatter on top as we will add her crown there soon.
Step 4 – Next, draw some more detail for her hair
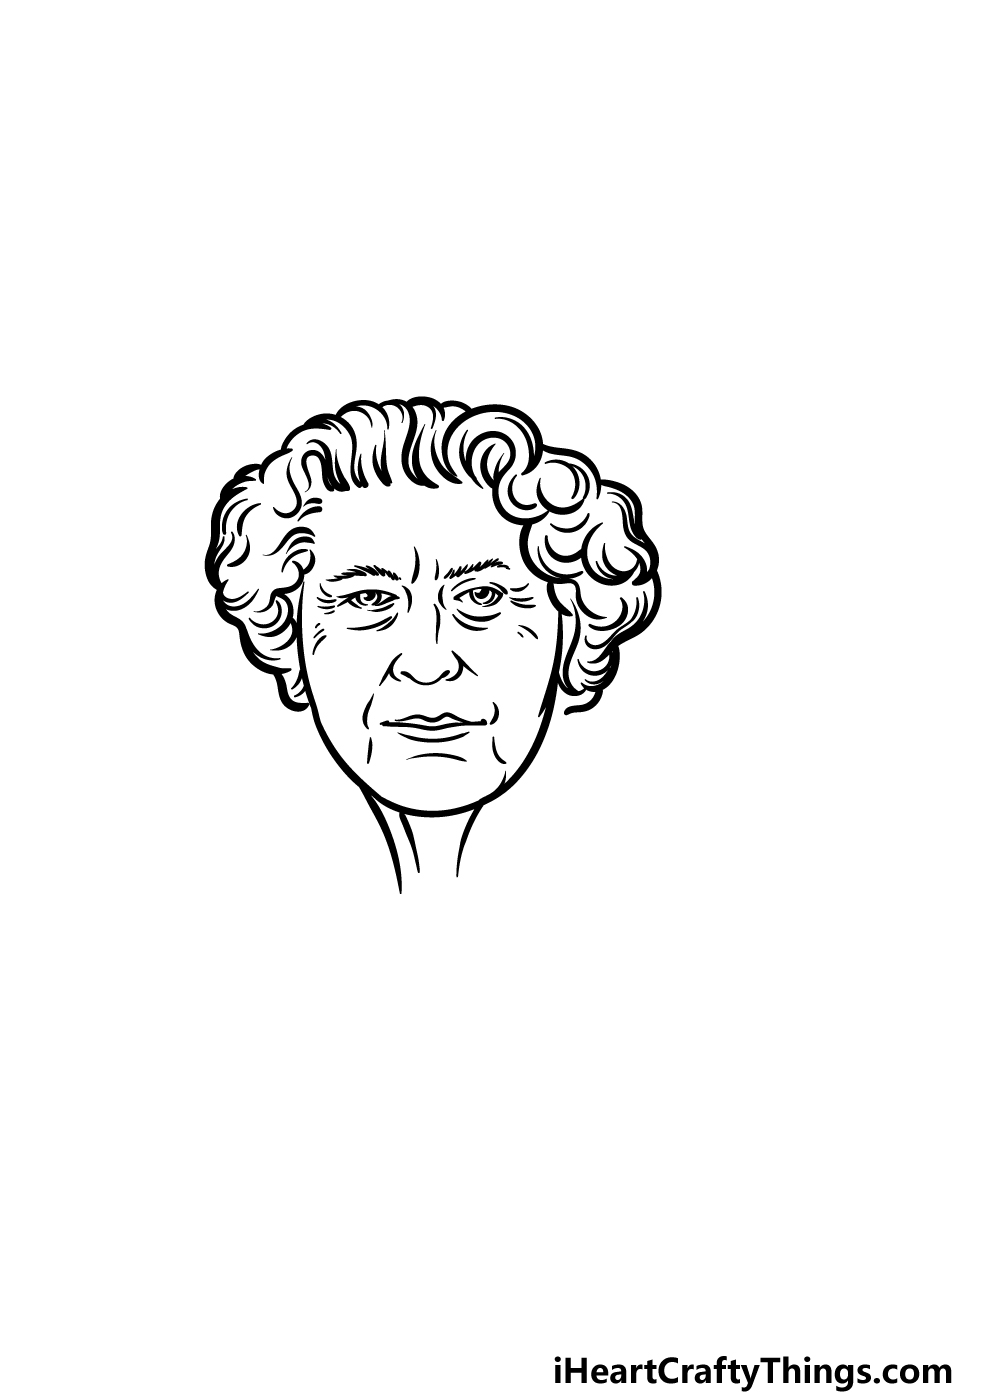
The hair outline is drawn, and in this part of your Queen drawing we will add some more details to make it even more realistic.
To do this, you will be adding lots of rounded and curved lines throughout the various sections of her hair to make it look curlier. Then we can move on to the fifth part of the guide!
Step 5 – Now, draw her shoulders and the start of her chest

For this fifth step of our guide on how to draw the Queen, we will be adding her shoulders and the start of the top that she is wearing. Extend some solid lines diagonally from the base of her neck for her shoulders.
There will then be a wavy collar around her neck, as shown in the reference picture.
Finally, add some more lines around her shoulders to show where her arms start and where the fabric is creasing.
Step 6 – Next, draw some of her jewelry
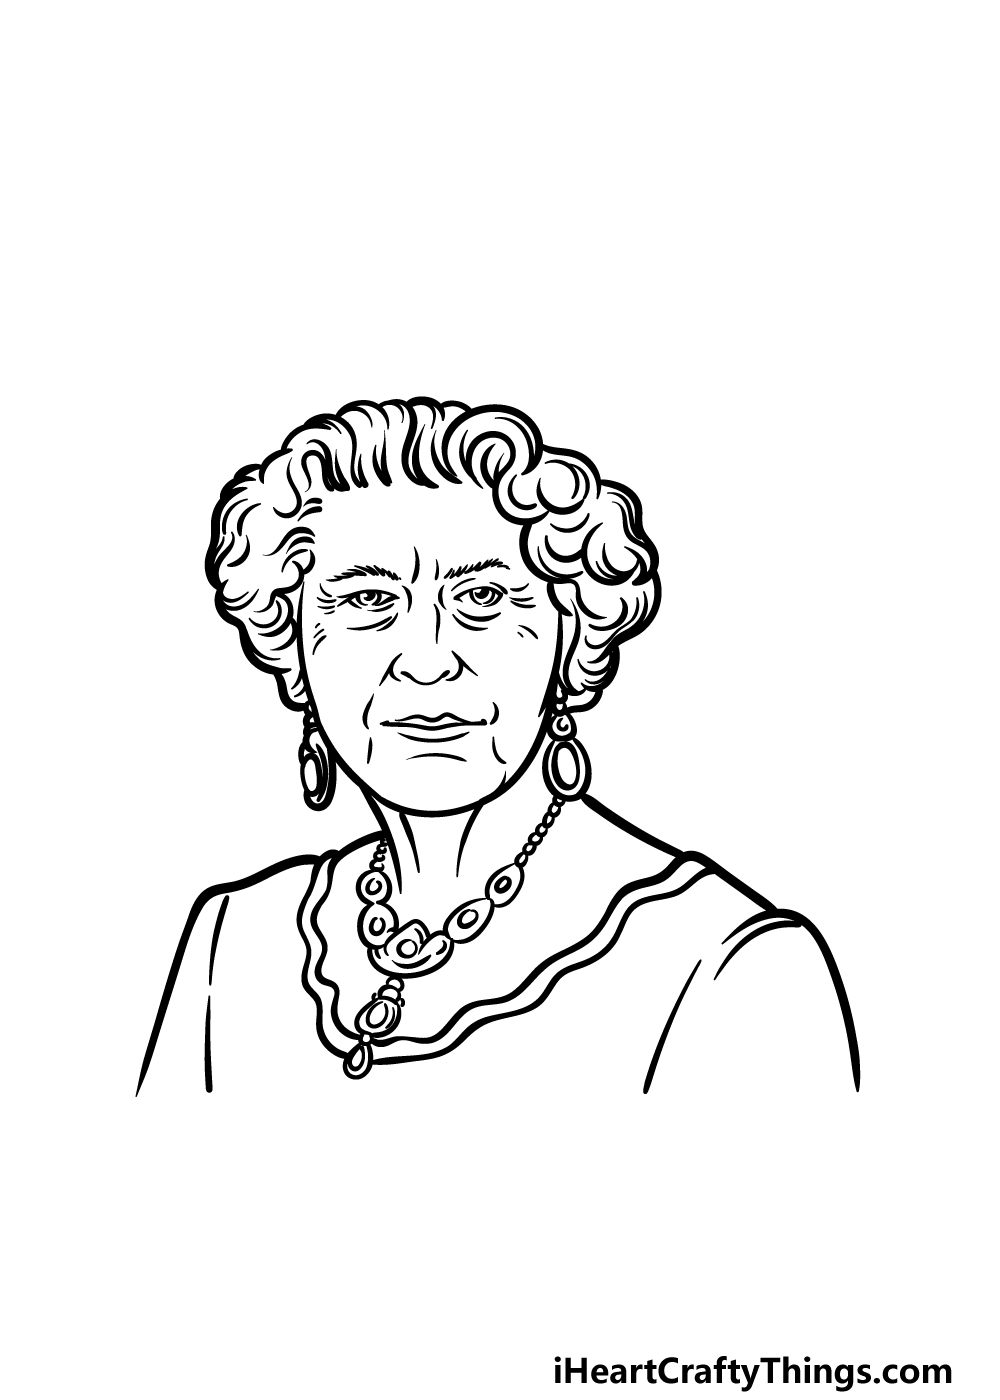
The Queen is well known for having some of the most expensive and elegant jewelry collections in the world.
We will be drawing some of this famous jewelry in this part of your Queen drawing. First, use some rounded shapes for her earrings hanging from her ears.
Then, for her necklace, you can draw lots of small shapes connecting to each other in a line for the chain of her necklace.
Finally, use some more rounded shapes for the jewels and setting for the various parts of her necklace.
Step 7 – Draw her crown in this step
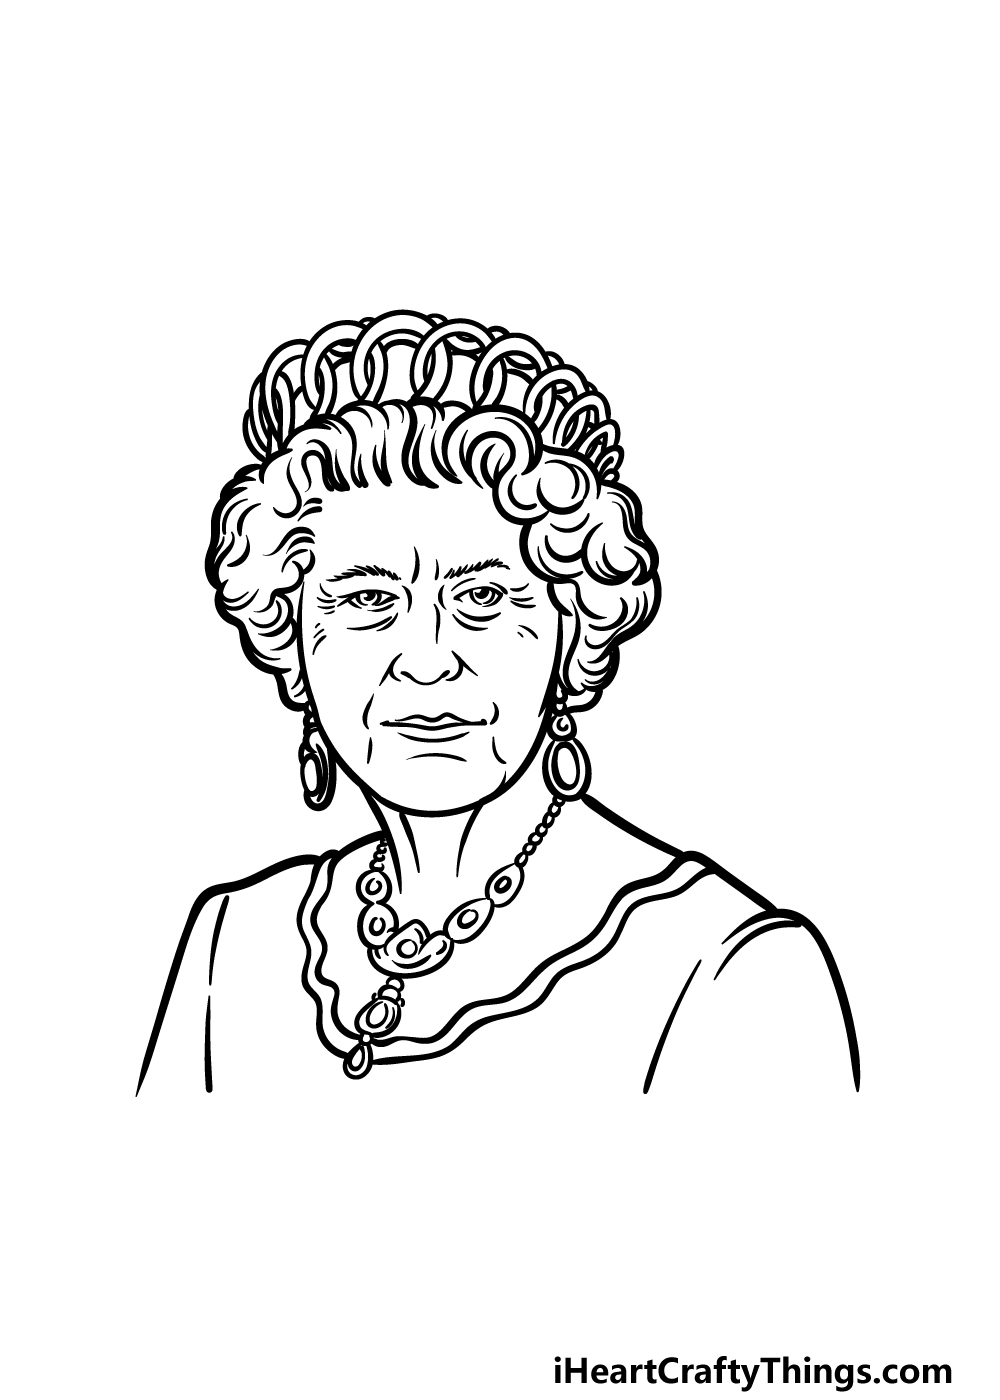
This depiction of the Queen would not be complete without a crown on her head, and we will draw that very crown in this step of our guide on how to draw the Queen!
This crown in rather unusual, and it will be drawn with several round shapes looping in and out of one another, as shown in the reference image.
Once the crown is drawn, you will be finished with this picture! Before you move on to the final step of coloring the image, you could also draw an elegant background or some detail additions to really finish it off.
Step 8 – Now finish it off with some color
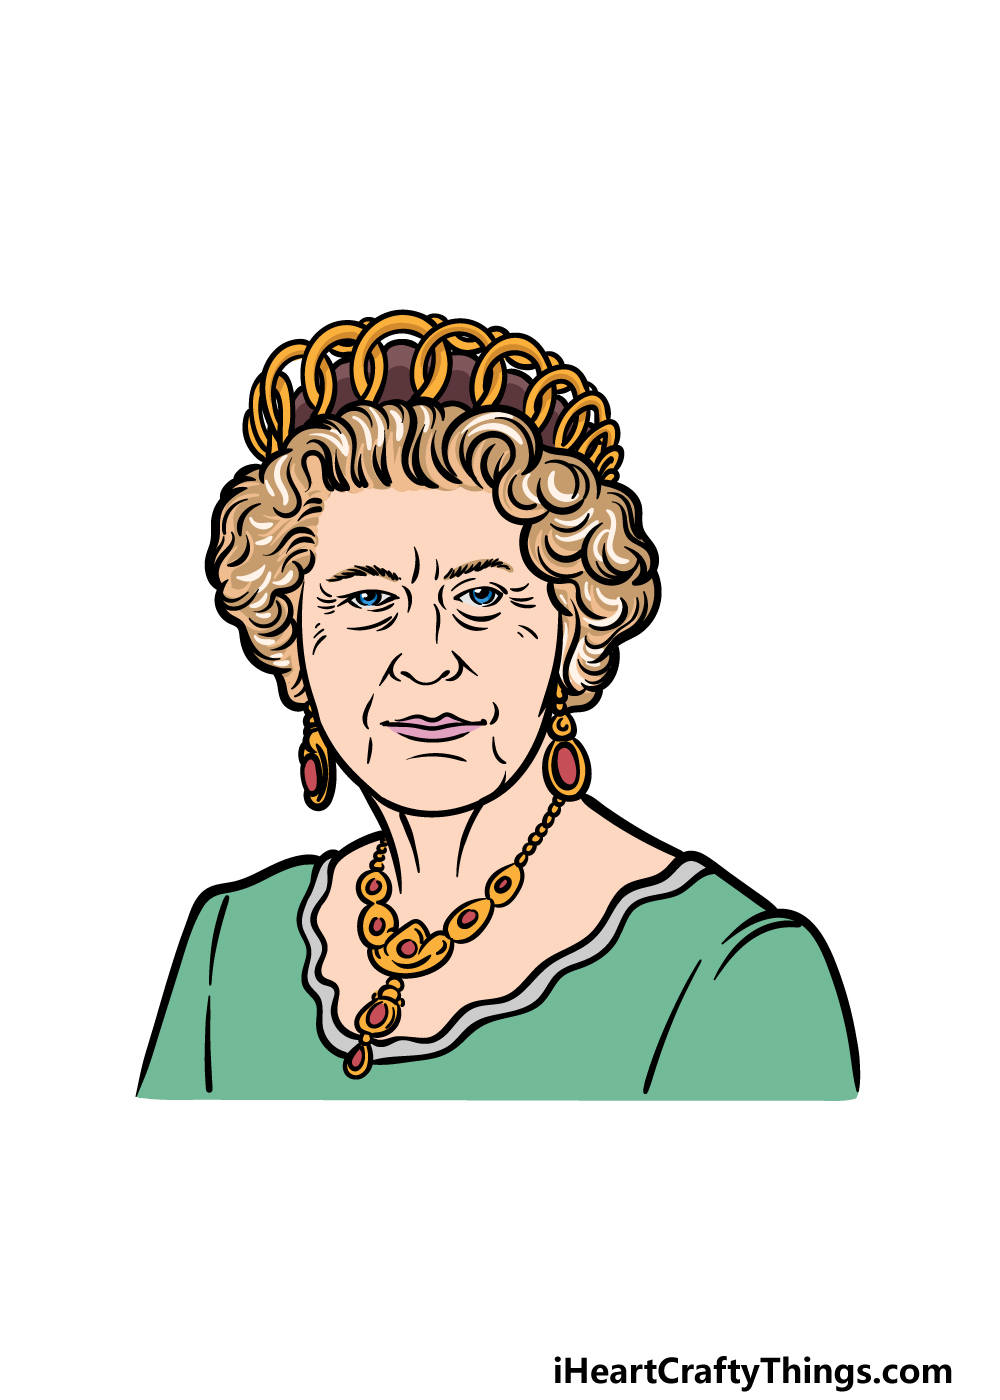
For the final step of your Queen drawing, we will be finishing off with some magnificent colors! For the gown she is wearing, we used some lovely shades of green for it in our reference picture.
Then, we used some nice gold colors with reds and browns mixed in for the various pieces of jewelry that she is wearing.
These are the colors that we would choose for this image, but there are many more that you could go for instead! This is your chance to really get creative and show off your idea of a royal ensemble.
Do this to take your Queen drawing to the next level
Celebrate this iconic monarch with these tips for your Queen sketch.
This drawing of the Queen shows her in the later years of her life. You could create a bit of contrast by portraying different eras of her life.
One way of doing this would be by drawing a cross-section with four sections that show her at various points of her life. You could look up pictures online to use to help you if you were to try this.
Which eras of her life would you use to celebrate her long and glorious rule?
In this depiction, we see some of the royal jewelry she wears, such as her crown and necklace. The Queen has a famously impressive array of royal jewelry though, so you could show different pieces.
For example, if there is a particular crown that she owns that you love, then you could add it to the drawing. Once again, using images online would be a great way to make it more accurate.
Do you have some famous royal jewelry or outfits in mind?
During her rule, the Queen visited many locations and places. Any of these could be used as a background for your Queen drawing.
Even if you stick to places she actually visited, you would have many to choose from. Most of these visits were documented, so you would have references to work from as well.
Or, you could imagine a new place she could have visited that she never went to in her lifetime. Where would you choose to set this background?
Finally, you could also make this Queen sketch more special by adding some more members of the Royal Family. This could include any members of the monarchy that are alive or that have passed.
Prince Philip or King Charles would be some great examples of members you could draw.
Of course, you could also incorporate one of the Queen’s beloved corgis to add a fun touch to this depiction of the Queen.
Who else could you add to the drawing?
Your Queen Drawing is Complete!
We hope that you had a royally fun time working on this guide on how to draw the Queen! As we mentioned earlier in the guide, drawing real people can often be quite a challenge.
That’s why we tried to break it down into smaller steps for you to follow so that it would be less of an intimidating task.
Now be sure to show off what it would be like if you were the Queen’s personal stylist! You can show what jewelry or clothing choices you would pick for the Queen by adding your own details.
When you are finished depicting the Queen in your picture, you can then move on to our website where we have many more drawing guides for you to enjoy and more are on the way!
Also, please remember to share your finished Queen drawing on our Facebook and Pinterest pages when it’s done. We would love to see it!