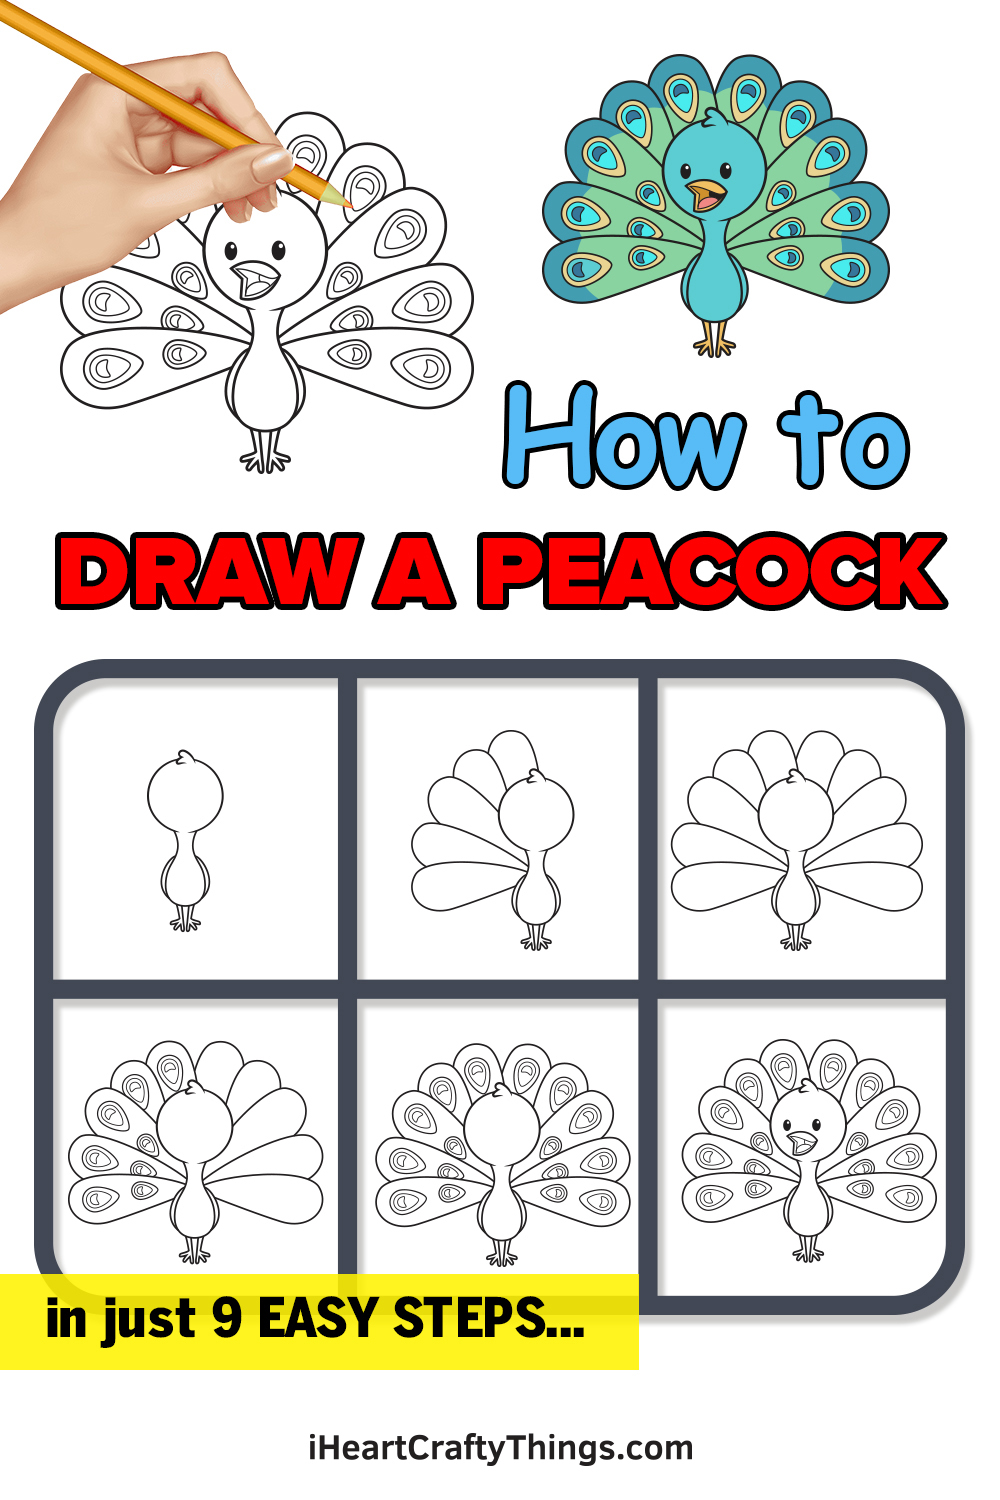
If you want to know how to draw a peacock, then this is the place for you! You’re just a few steps away from seeing exactly how it’s done.
Peacocks are so beautiful, as the males of the species have stunning tails that they can fan out and show off. They are often associated with pride in a negative way, but I don’t blame them for being proud of their beauty!
Their looks make them a common subject for people who love to draw, but recreating them can be easier said than done. In this guide, I will take you through the steps to see how to make your own peacock pal.
You will see how to draw a cartoony version of this famous bird, and then you can take it even further with your own ideas and elements that you want to add.
See How To Make Your Peacock Drawing By Watching This
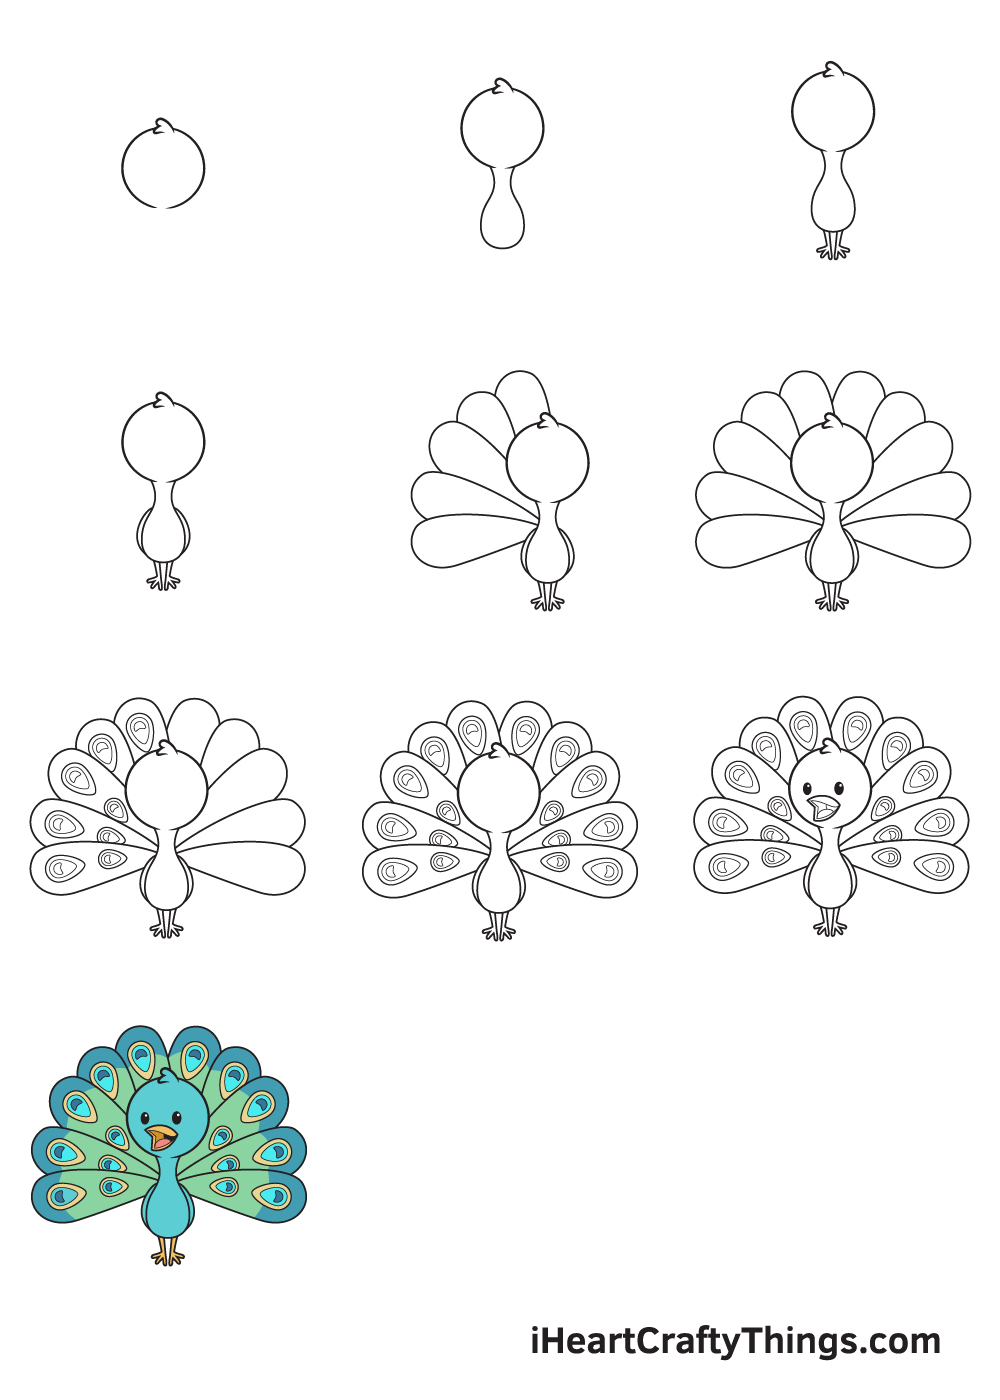
How to Draw a Peacock – Let’s get started!
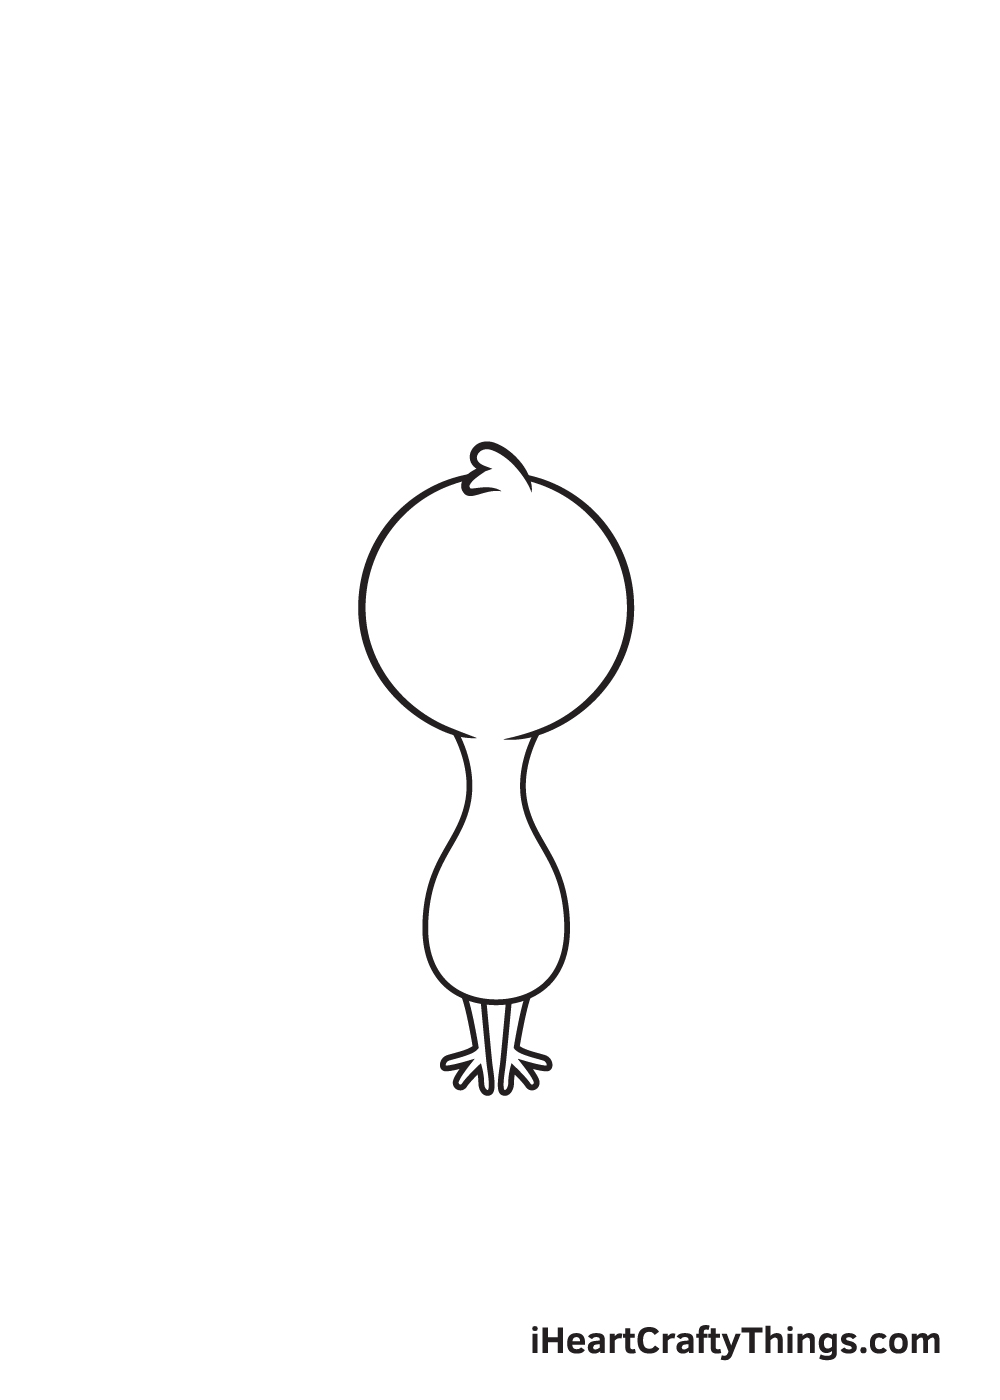
Step 1
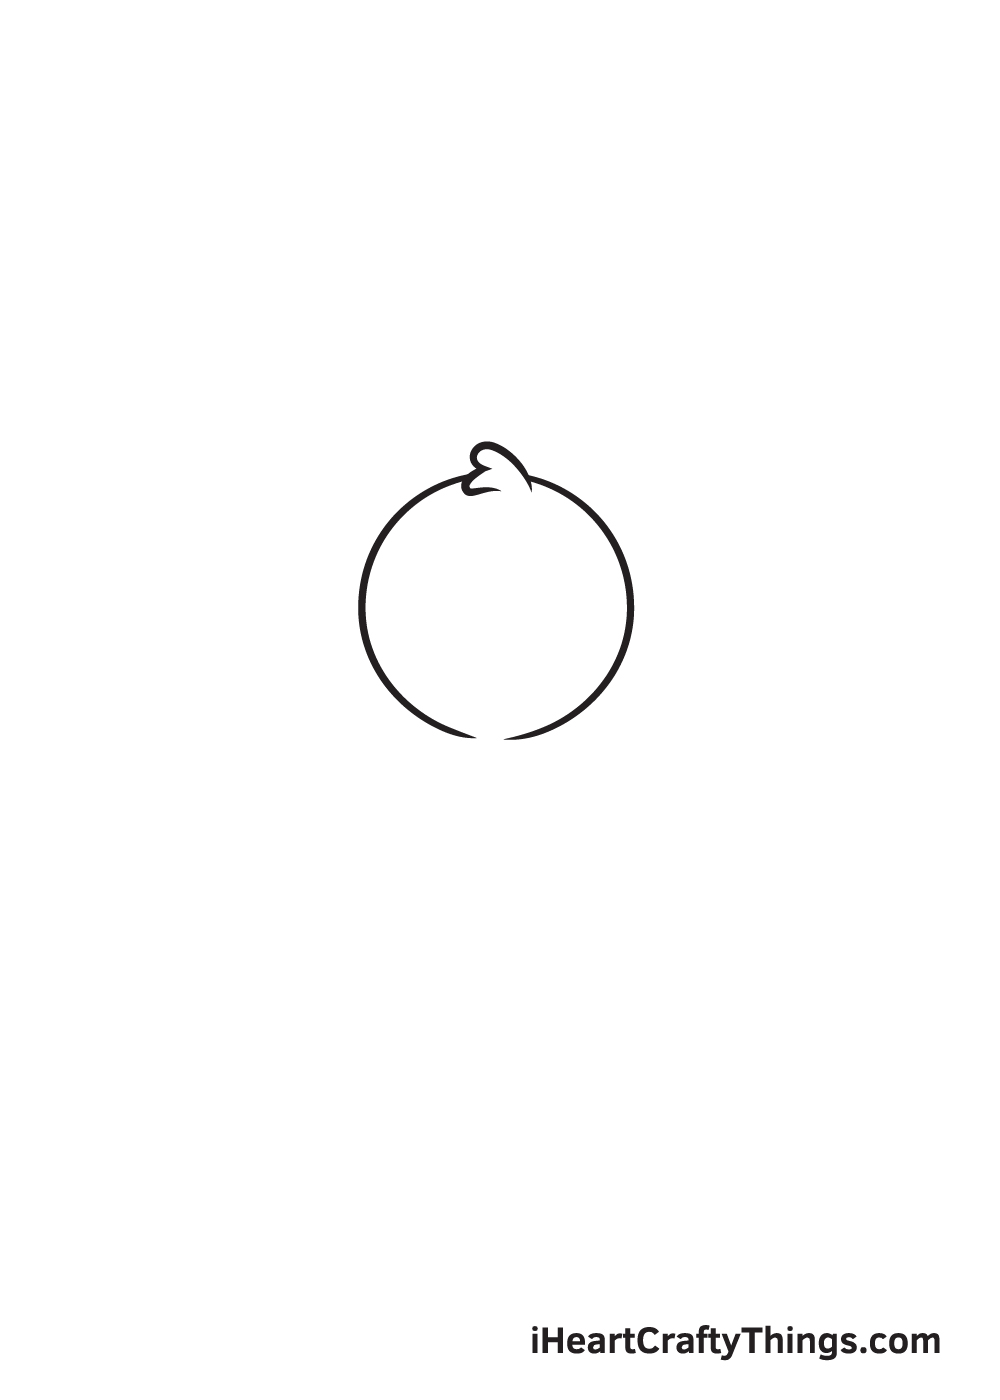
Begin by sketching a perfect circle just slightly above the middle of your paper. Then, draw a tilted W-shaped line to create a feathery texture at the top of the head.
Remember, draw with light strokes when creating outlines and rough sketches. This is to ensure that you can easily get rid of any lines from the outline that you no longer need later on. This also helps keep your drawing refined and neat.
Step 2 – Outline the Peacock’s Head and Body
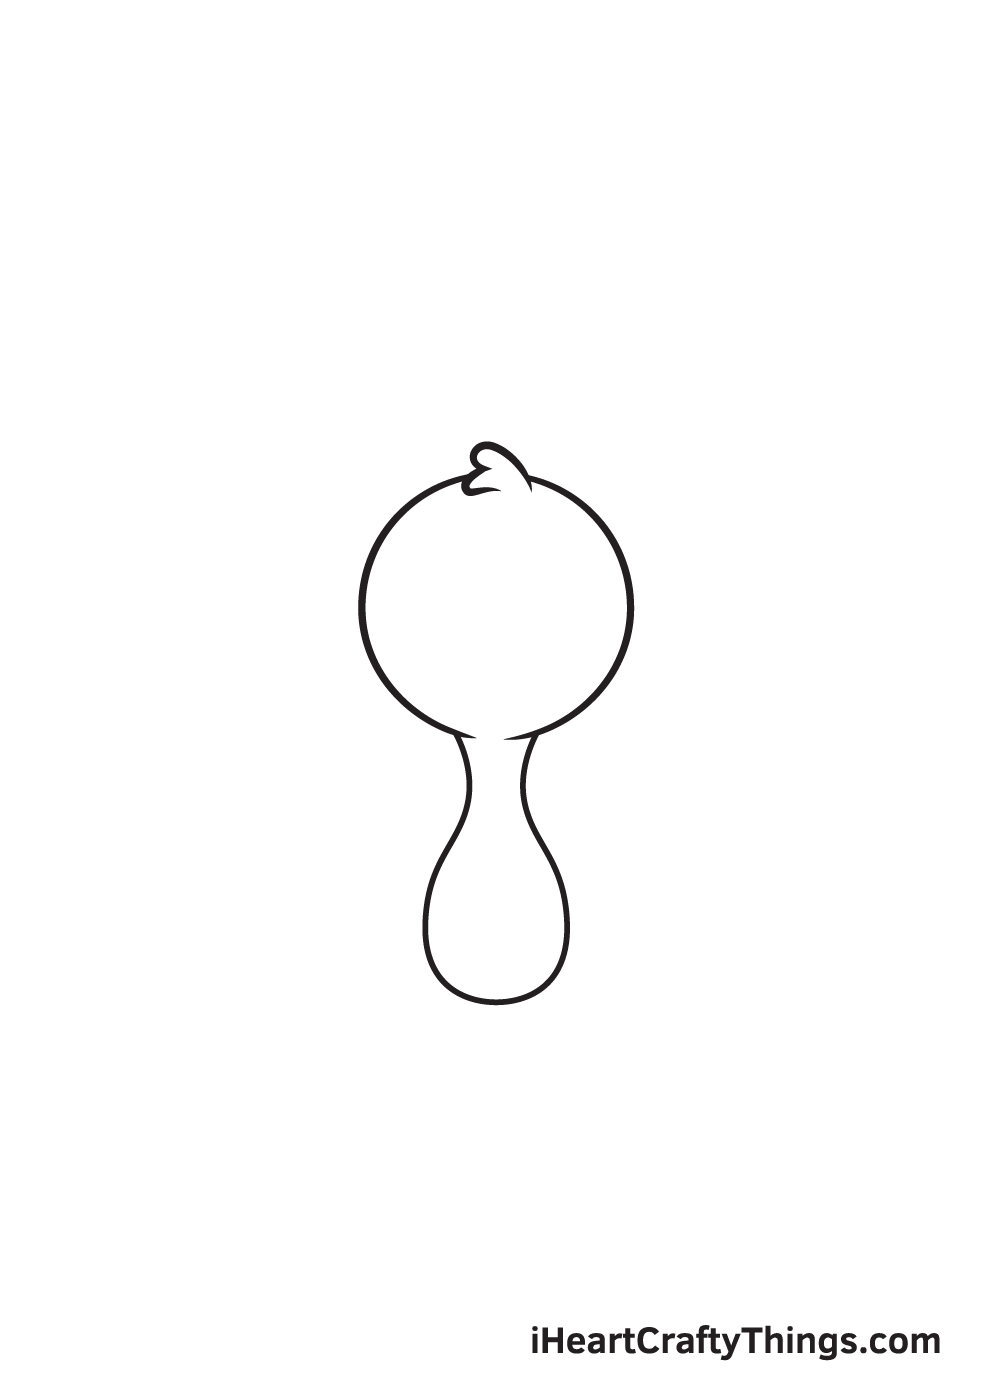
Right underneath the head, draw an elongated shape with a narrow upper part and wider bottom to create the body.
When drawn correctly, the shape of the body should look quite similar to a vase.
Step 3 – Next, Draw Both Legs of the Peacock
Draw thin legs side by side underneath the body of the peacock. Don’t forget to add a foot with three claws at the bottom of each leg.
Try to make the legs and the feet of the peacock identical as much as possible.
Step 4 – Then, Draw the Wings of the Peacock
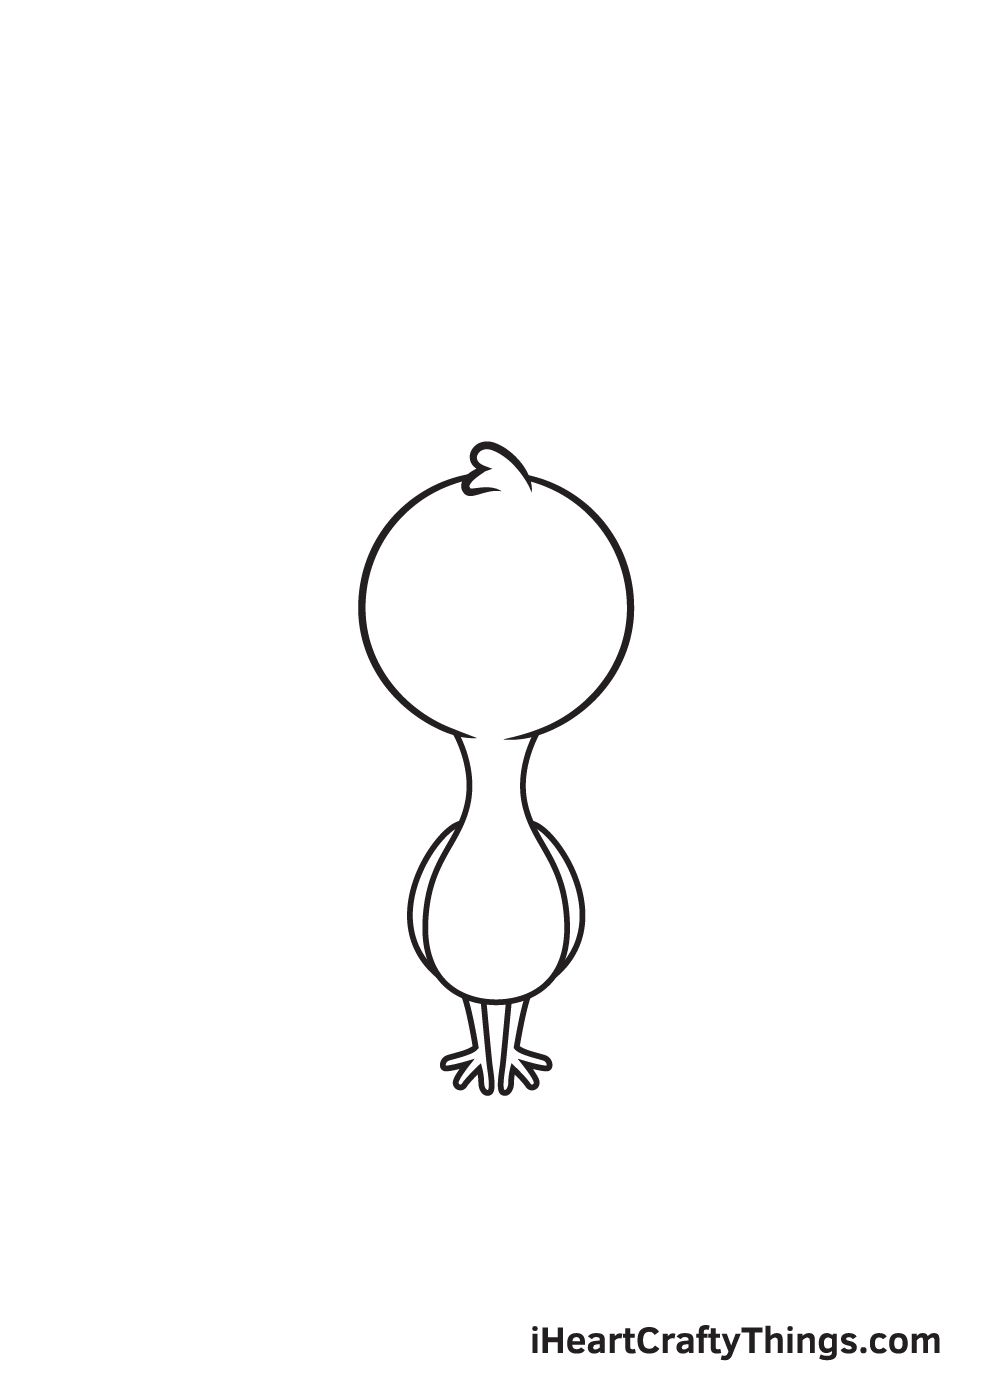
Enclose a curved line on each side of the peacock’s body.
The curved line should follow the outline of the peacock’s body, creating the appearance of a pair of wings perfectly still on the sides of its body.
Step 5 – Afterwards, Draw Half of the Feathers
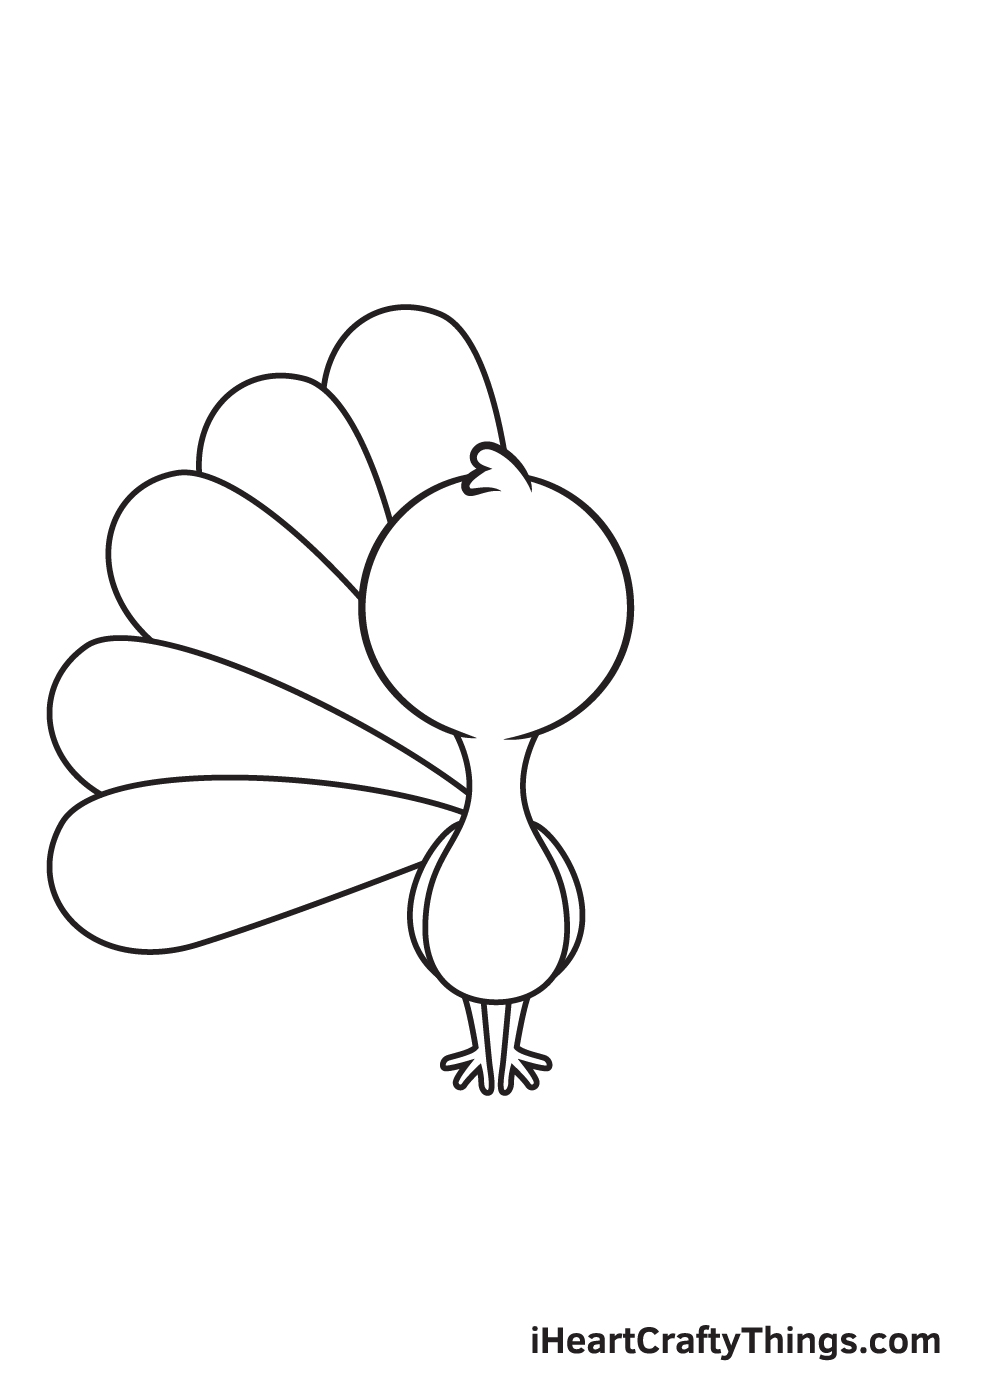
Now, it’s time to draw the most distinct physical features of the peacock, which is the feathers on its back! It looks especially beautiful when it’s spread apart, so that’s exactly what we’ll be drawing in this step.
Continue by an elongated shape with a round bottom to create the first feather attached on the back of the peacock.
Then, repeat the same steps until there are five feathers side by side. This forms the first half of the peacock’s set of fanned out feathers.
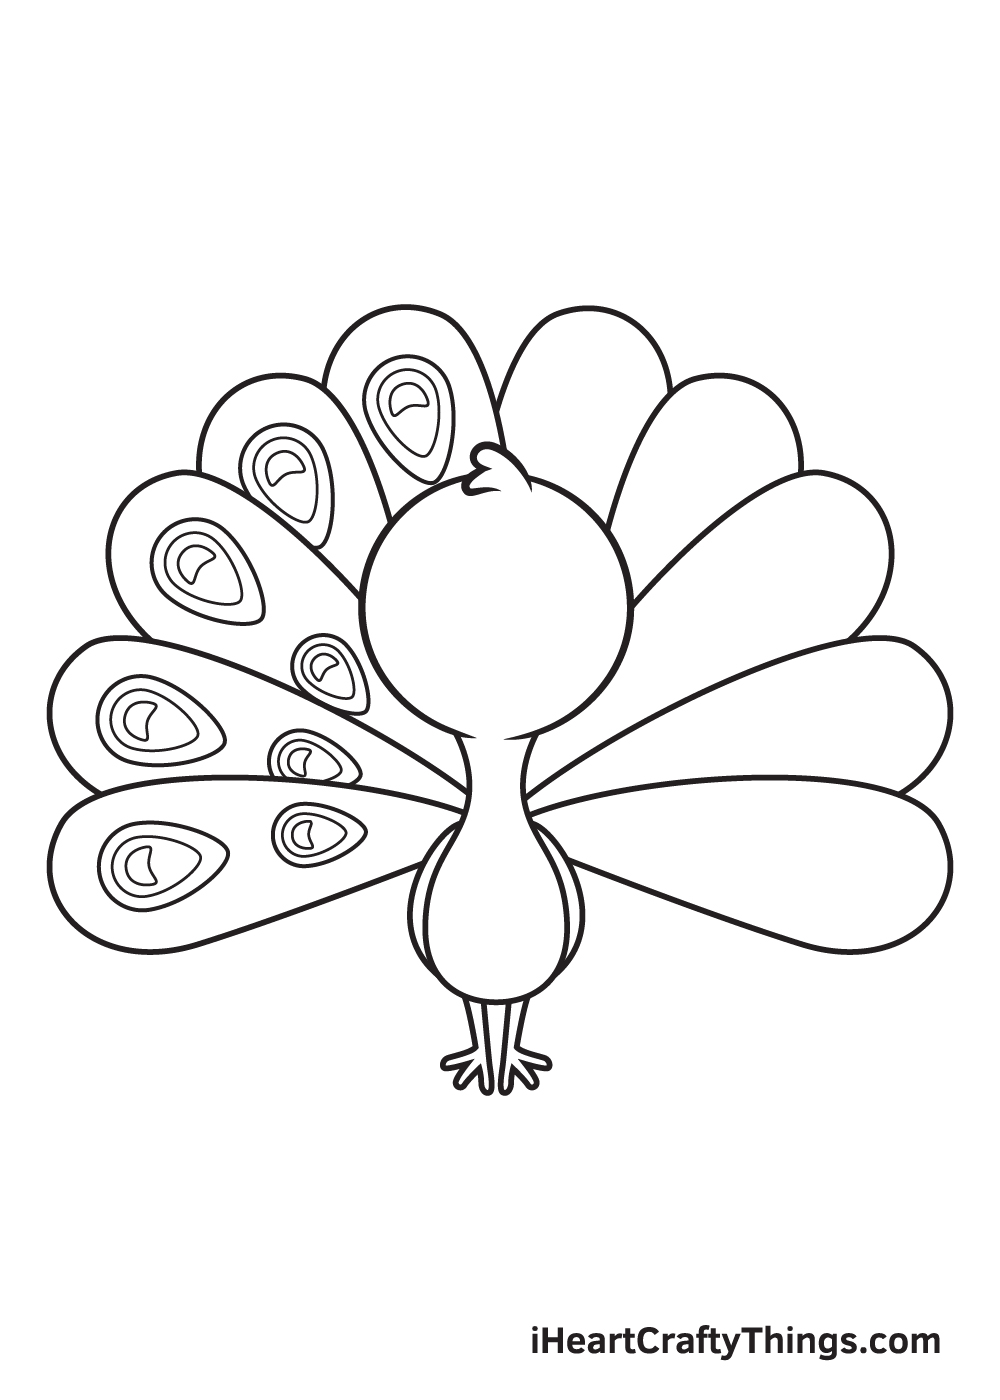
Step 6 – Now, Complete the Fanned Out Feathers
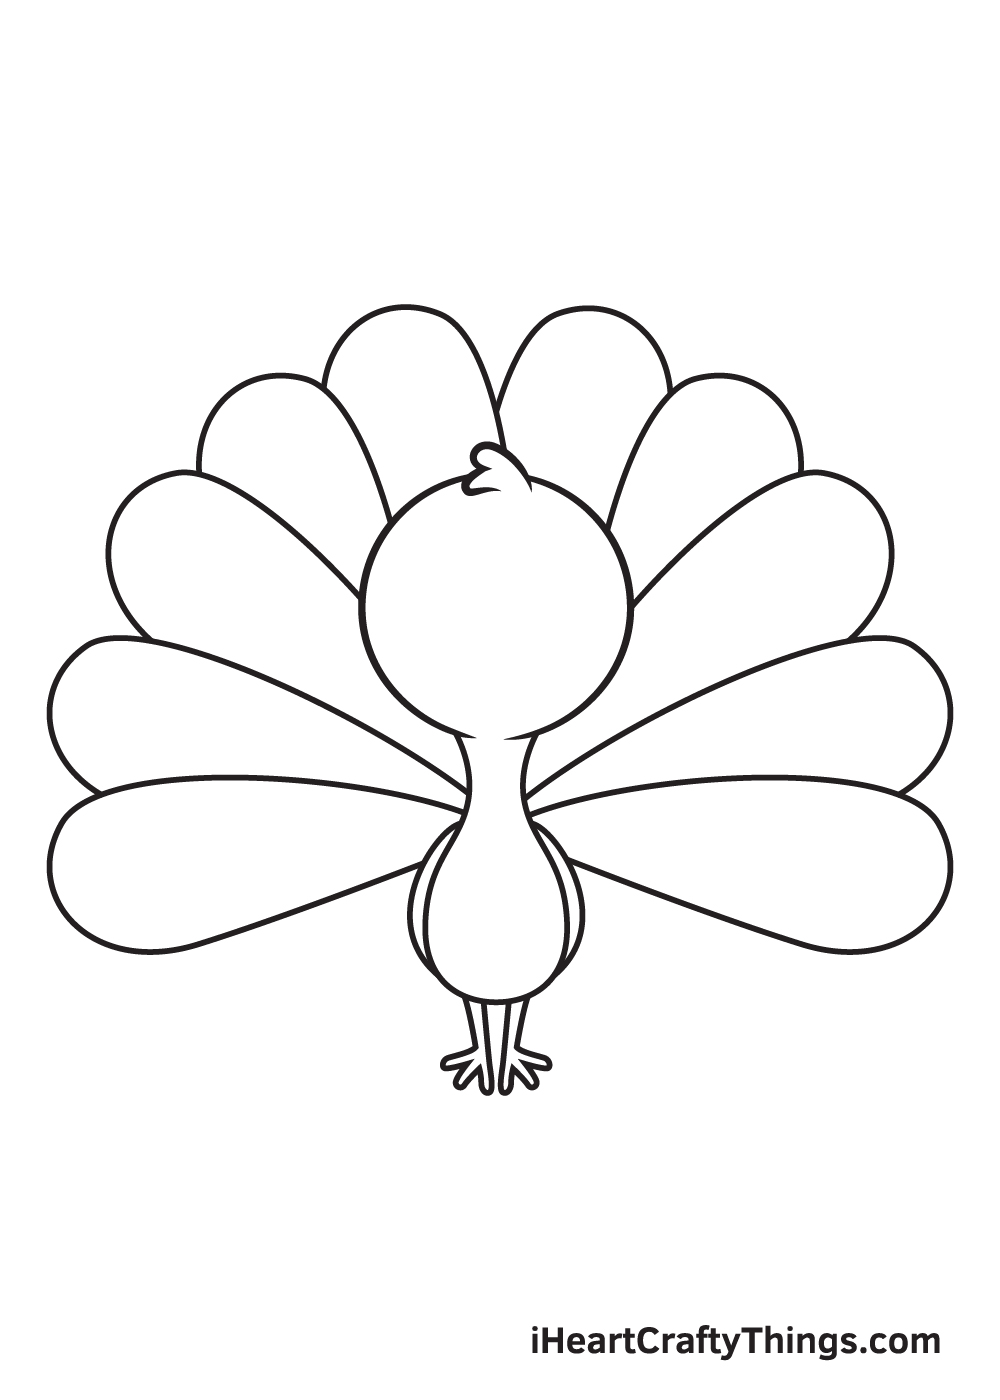
Draw another five feathers on the other side. Keep in mind that all feathers should have the same width and length.
After completing this step, there should now be a total of ten feathers on the back of the peacock.
Step 7 – Add Patterns on the First Five Feathers
The pattern can be created by simply drawing an upside down narrow droplet shape. Then, draw a smaller shape with a similar form inside the one we drew just now.
Afterwards, draw a semicircle within the shape. That’s it! See, the patterns may look complex, but drawing it is as simple as that!
Draw two patterns on each feather: a big one at the top and a smaller one at the bottom. Take note that only the top pattern will be visible on the feathers in the middle, as shown in the illustration.
Step 8 – Next, Add Details on All of the Feathers
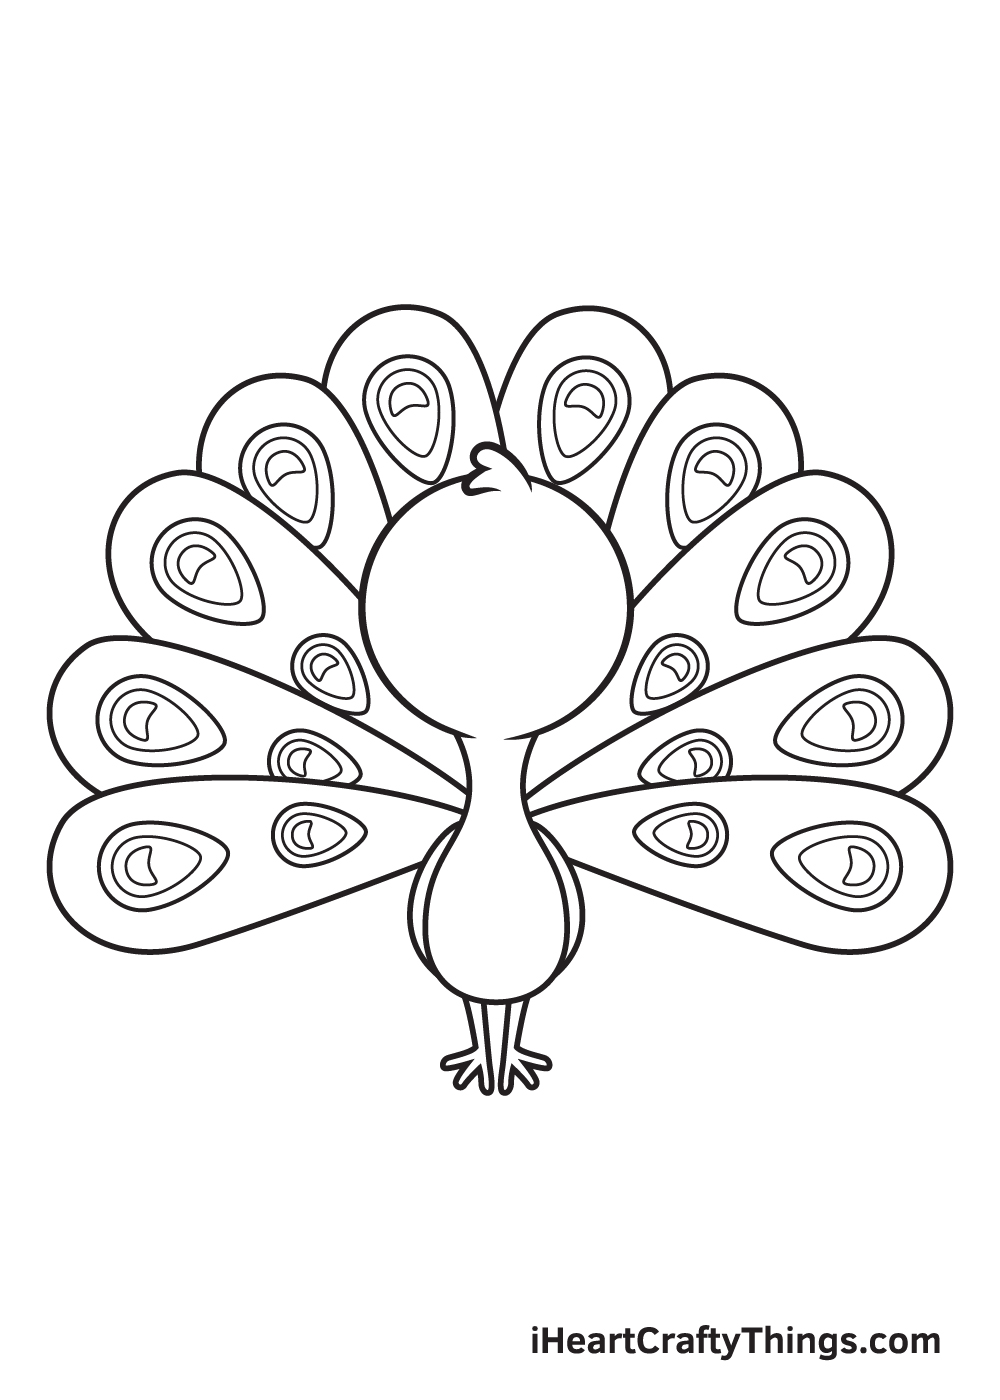
Repeat the previous step and keep drawing the same pattern on each feather.
In this step, you should finish drawing the patterns on all ten feathers of the peacock.
Step 9 – Now, Draw the Peacock’s Facial Features
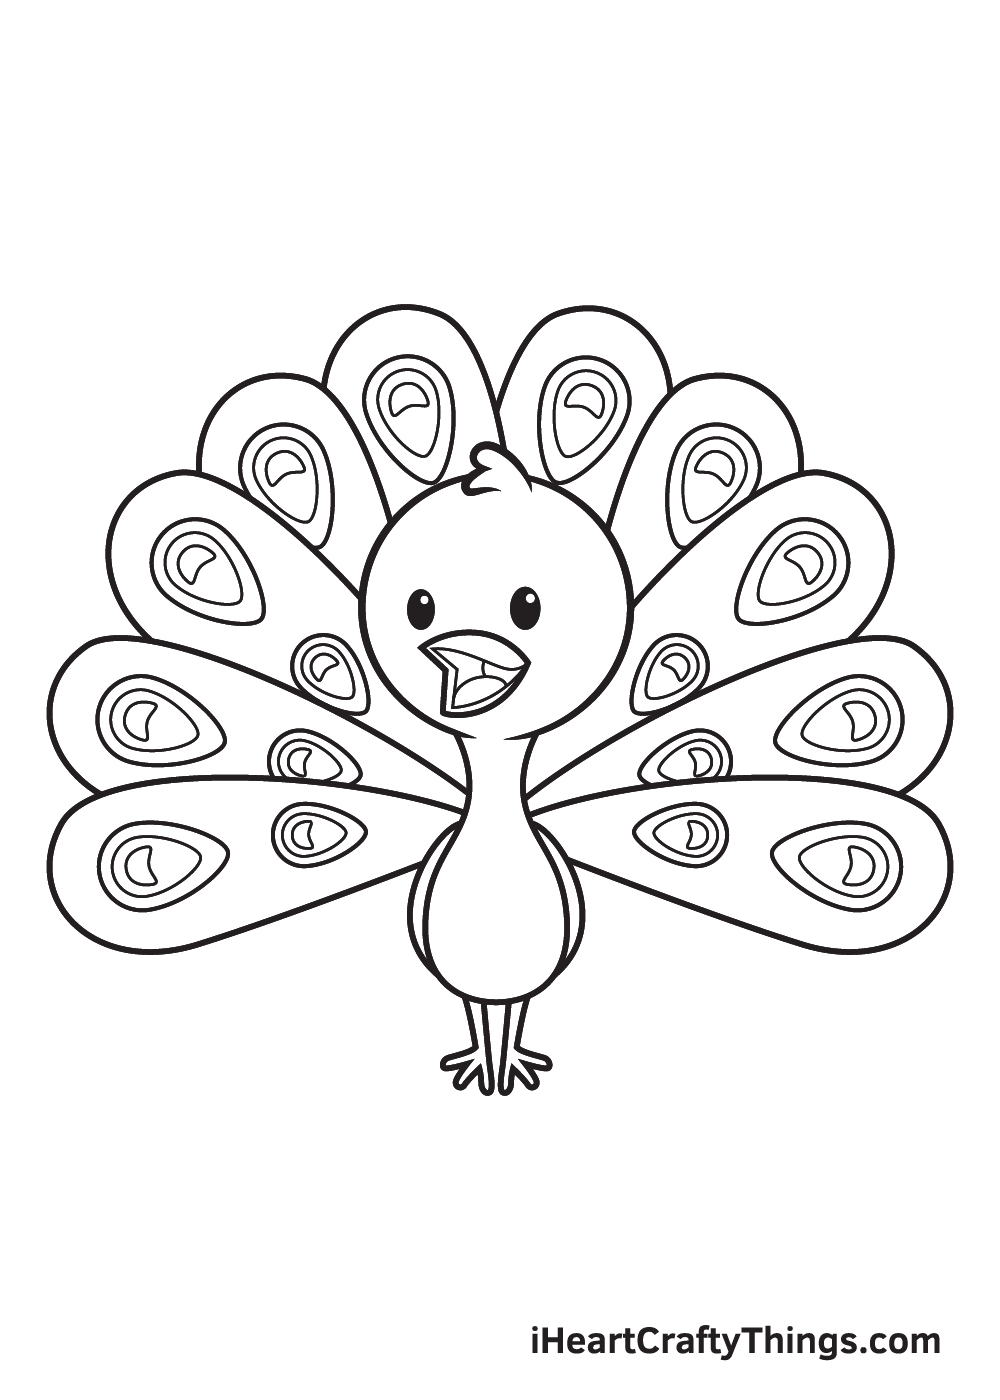
To complete your drawing, draw the eyes and the beak of the peacock.
Proceed by drawing two standing oval shapes inside the peacock’s face to outline the eyes. Then, draw two small circles within each eye.
Now, shade the entire eyes except for the tiny circles inside. This adds a dramatic effect and makes the eyes look like it’s sparkling!
To create the beak, simply draw a shape with a pointed edge on the right side and two on the left side.
Don’t forget to add an outline inside the beak to refine the shape and create the appearance of a tongue!
There you have it—you have successfully drawn a beautiful peacock! Now, it’s time for the part that you’ve probably been waiting for, which is filling in the colors of the peacock!
Peacocks typically have iridescent blue bodies and the feathers on their backs are a combination of metallic blue and green hues.
However, there are a few unique species of peacocks that have pink, purple, and other vibrant pigments.
Coloring a peacock will surely be fun because there’s a wide range of color options to choose from.
You can choose to color the peacock using their original colors or use a customized set of colors to create a one-of-a-kind peacock. Either way, we’re sure the colors will turn out beautifully!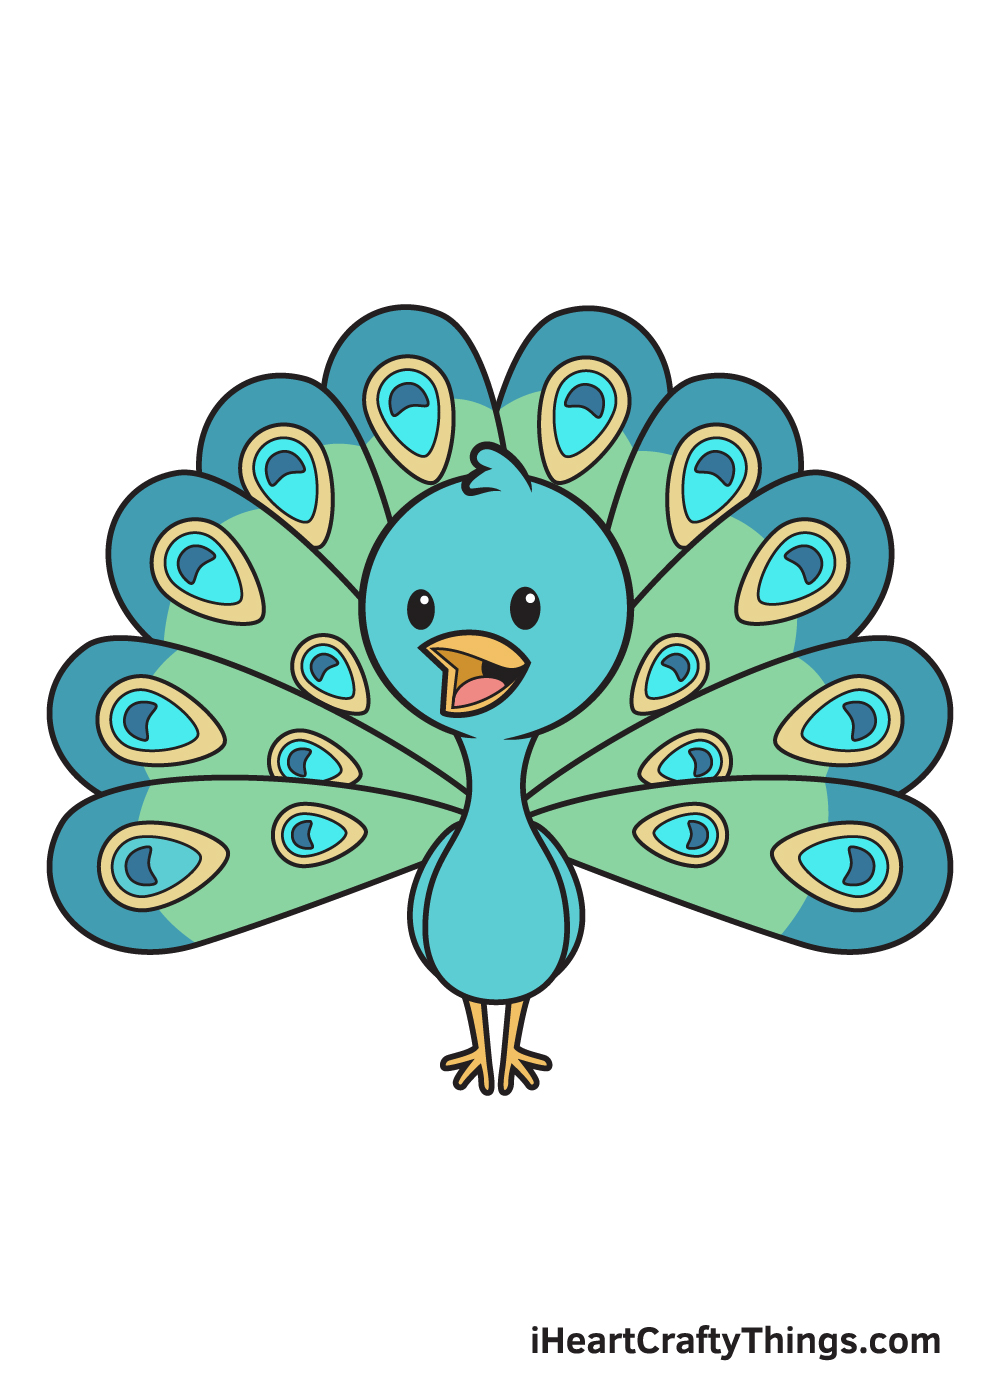
Bonus: Here Are Some More Ideas For How You Can Color Your Drawing
In the final step of this guide on how to draw a peacock, we briefly covered how you can color in this cute peacock. We showed you some colors you can use as inspiration, but how can you apply these colors?
If you’re someone who loves to color in pictures, then you probably have your collection of go-to mediums. These could include common mediums like crayons, colored pencils or pens.
There is nothing wrong with figuring out what works for you and sticking to it. However, sometimes it can also be nice to try out some unique mediums.
Peacocks are famous for their beautifully colored feathers, so it could be fun to try out some unique ways of bringing color. We always like to use paint for images that call for bright colors.
Specifically, acrylic paints are lovely to use as they are easy to use, dry quickly and can portray some beautiful colors. If you prefer a more subtle approach, then watercolor paints may be more your medium.
They can be a bit more difficult to use and can take some getting used to, however. You also don’t need to stick to more traditional coloring mediums.
For example, you could find some fake feathers at a craft store. Using some strong glue, you could stick the stalks of the fake feathers to the image.
That way, the feathers of the peacock will not only look amazing, but they will have some real texture to them! It’s just one example of how you can think outside of the box to portray the colors.
Now that you have some ideas to work with, what are some other ways you could bring some color to this peacock drawing?
4 More Ways To Make Your Peacock Drawing Unique
Create a stunning portrayal of this beautiful bird with these tips for your peacock sketch!
The picture we created for this peacock drawing is so cute, but it is just one example of a style you could use for the image. We love the cartoony style, but you could also make it more realistic.
That would be one way to go, but making it even more cartoony would be another. It depends on your preference, so you could change it to any style you like or keep it as is!
Do you think you will go for a different style?
When you know what kind of style you would like to portray, you could then think about adding some more peacocks. Now that you know how to do it, you should find it much easier!
The peacock we drew is a male one, but you could also create a female one by changing the colors and removing the big feathers. How many peacocks do you think you would like for this drawing of a peacock?
Adding some more peacocks is one way you can populate this drawing, but you could have other additions! For instance, if you love different kinds of birds, you could add them to this peacock sketch.
Alternatively, you could add different kinds of animals or even some human characters. There is no reason why you should stick to just peacocks, so what could you add for this scene?
You can create all kinds of fun scenarios!
Male peacocks are known for their amazing colors, and we showed that off in our example. You could really play around with the colors of your own peacock drawing, however!
One way to do this would be by looking at pictures of real peacocks so you can add the various colors they show off. You don’t have to make it look realistic, though. You could also just use any colors that feel right to you.
Using art tools like colored pens and markers can also help the colors to pop!
Your Peacock Drawing is Complete!
If you enjoyed this drawing tutorial, then you’ll surely enjoy our drawing tutorials of other kinds of birds such as a parrot and a hummingbird.
Go ahead and check out our “How to Draw” catalog to explore more fun drawing tutorials like this one. What kind of bird would you like to draw next?
Don’t forget to show off your masterpiece once you’ve finished drawing and coloring the peacock!
Don’t be shy—you’ve worked hard in creating that artwork so it’s definitely worth sharing. Don’t worry, we’re sure it looks breathtaking!
We can’t wait to see your impressive peacock drawing!
Here Is A Cute Peacock Drawing To Inspire You!
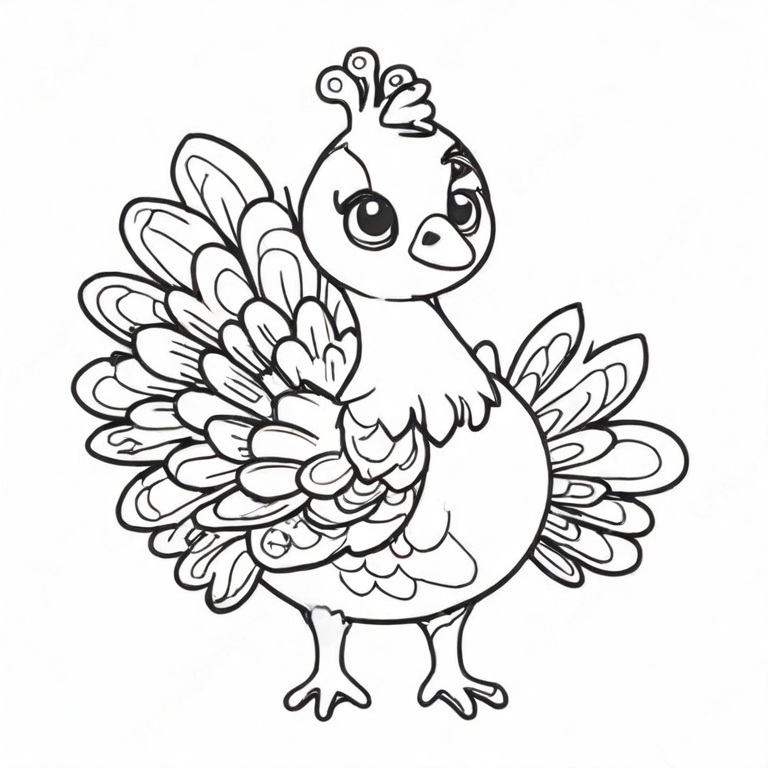
Is there any bird as majestic as a peacock? These beautiful birds wow everyone with their amazing feathers and colors, and so it’s understandable to want to make a drawing of one.
We asked our artist Freddy to make a cute peacock drawing for kids to help you as you work on your own artwork.
He added a lot of amazing feather detail, and it helps to make it more visually interesting.
When drawing so many details, it can be easy to get frustrated, so our tip for this drawing is to take it slow! Don’t rush and have fun with it as you slowly draw the feather details.
You could also simplify these details a little if you wanted to make it a bit easier on yourself. It’s up to you to go with whatever you prefer for this cute peacock sketch!