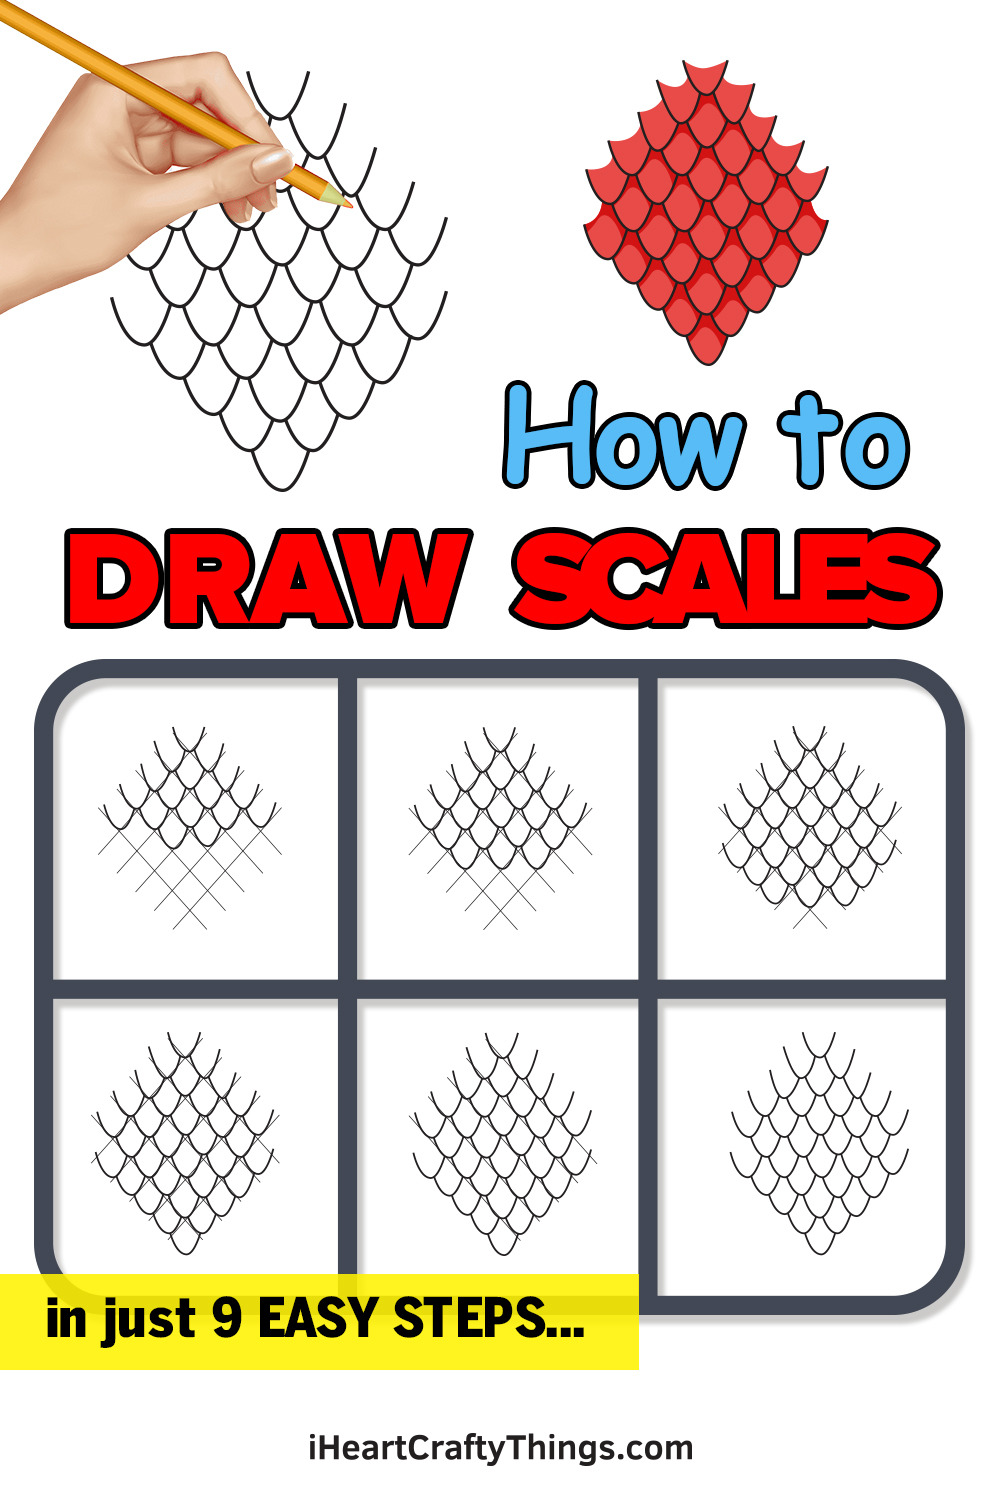
There’s nothing fishy about this guide on how to draw scales! Even though scales are really complex, this tutorial for kids will show you the easiest way to make a convincing scale pattern.
Scales can be found on many different kinds of animals from fish to reptiles and many more in-between. They’re usually evenly spaced and sized, forming a uniform pattern that covers a surface.
Drawing them can be quite tricky, as some patience and planning is necessary to get it right. In this guide, I’ll show you the best way to draw them from the beginning.
This will include planning the drawing with your pencil and then adding the finishing touches with your pen. Once you have the hang of it, you could make all kinds of cool drawings with these scales!
Watch And See How To Make A Scales Drawing
How to Draw Scales – Let’s get started!
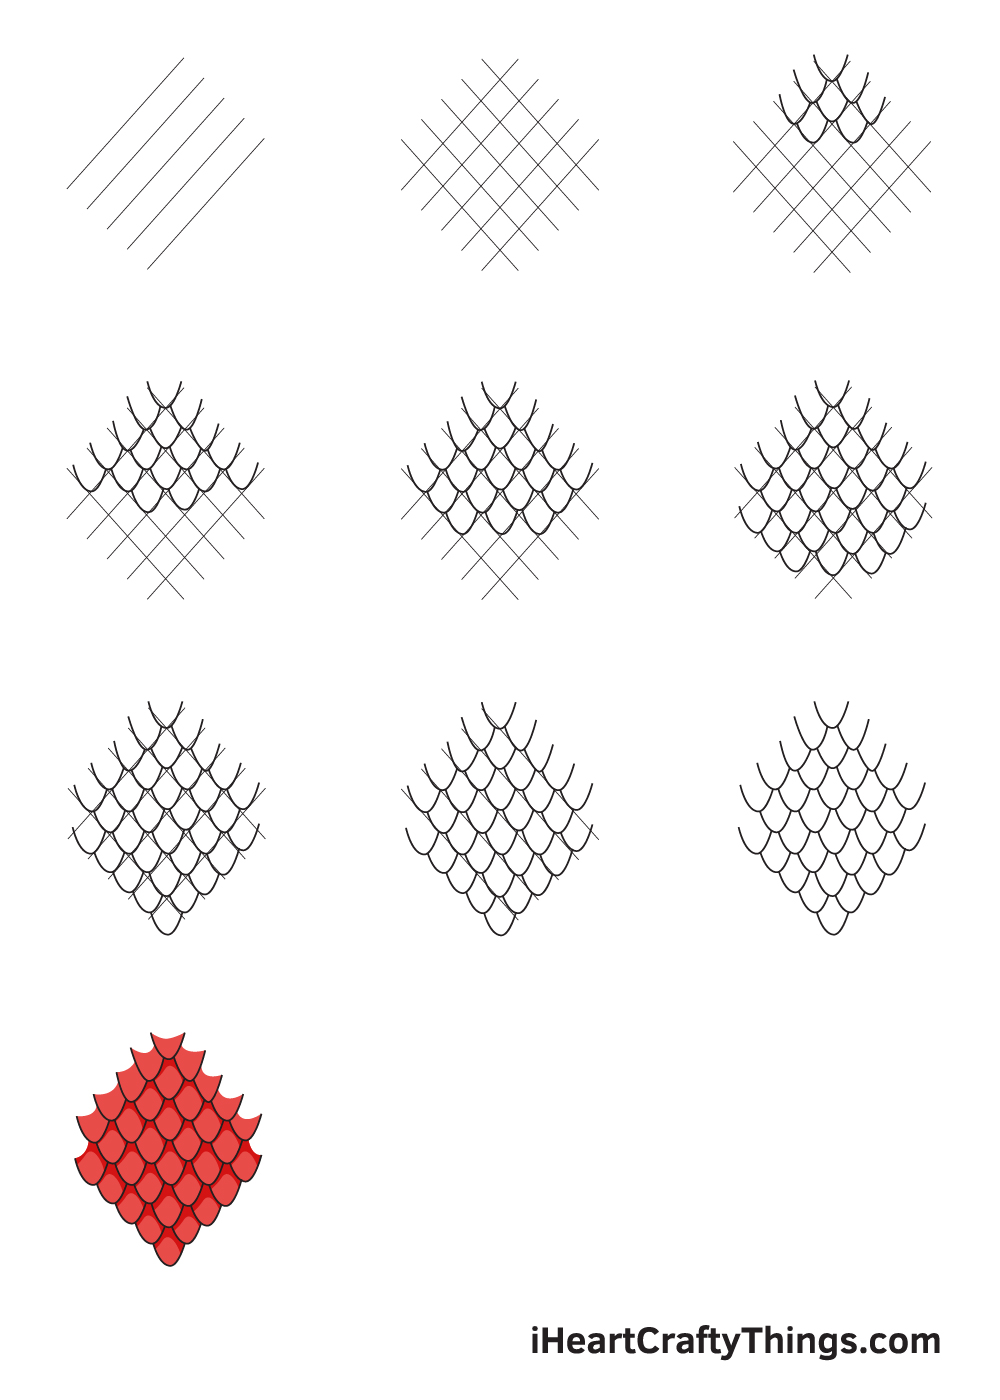
Step 1

Starting on the upper right portion of your paper, draw five parallel diagonal lines headed downwards to the lower left corner. Keep in mind that all lines should be uniformed.
If you need help drawing straight lines, feel free to use a ruler. It is a drawing tool that enables you to draw even lines perfectly and easily.
Step 2 – Create a Diagonal Criss-Cross Pattern
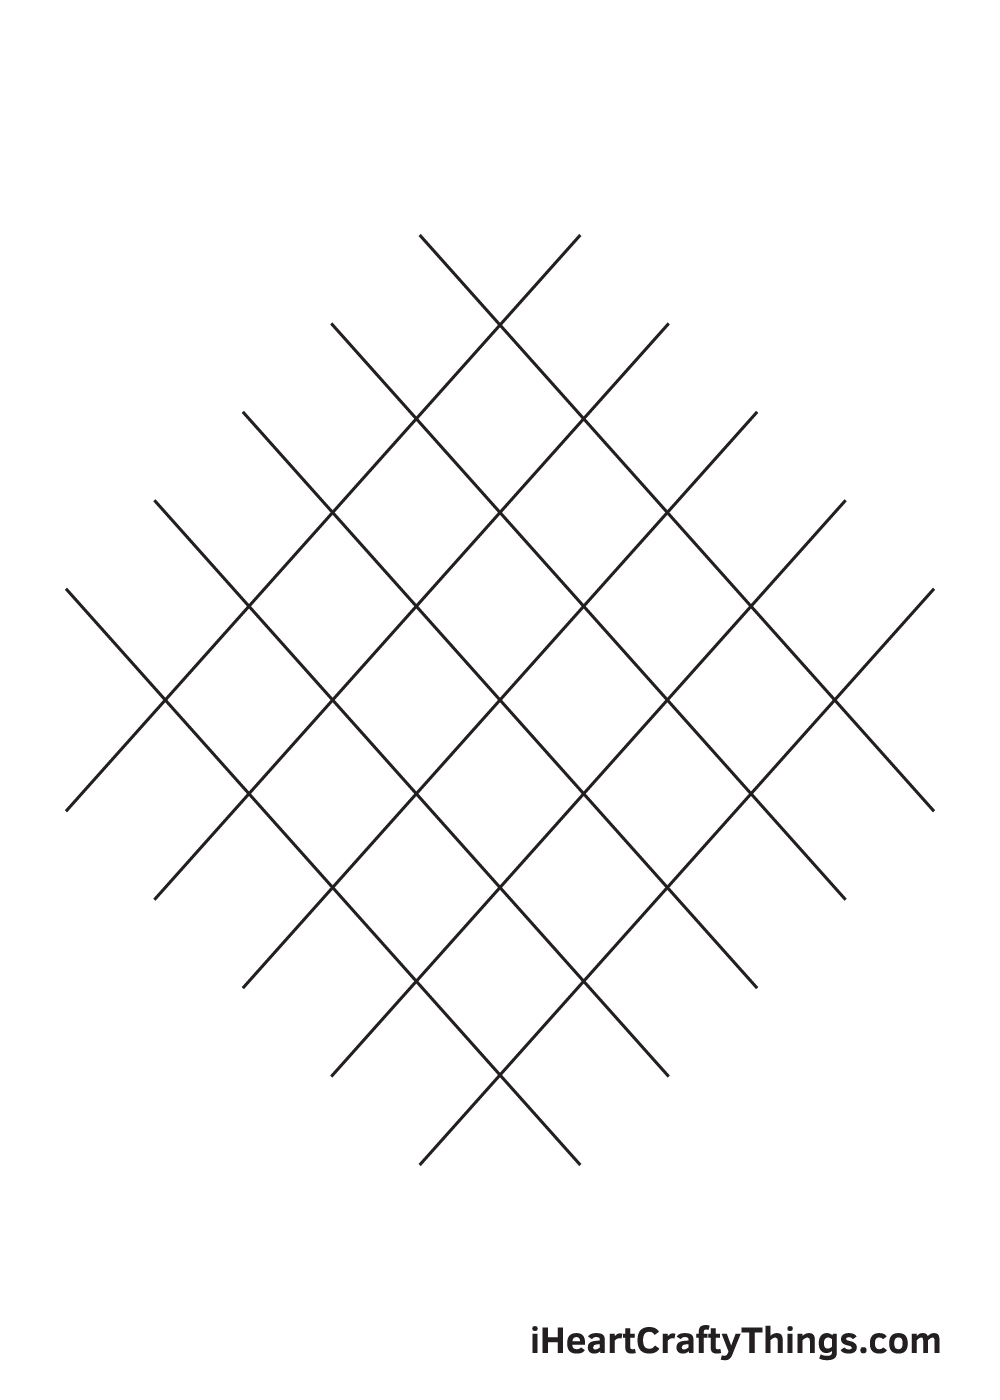
Draw another five parallel diagonal lines beginning from the upper left corner going to the lower right corner. These lines should intersect with the first five diagonal lines that we drew in the previous step.
After completing this step, the lines should now form a symmetrical criss-cross pattern in a diamond form. This serves as your guideline when drawing the scales.
Also, keep in mind to draw the pattern with light strokes. Avoid pressing down too hard with your pencil so you can easily remove the lines when you no longer need them later on.
Step 3 – Fill In the Diamond Spaces With Scales
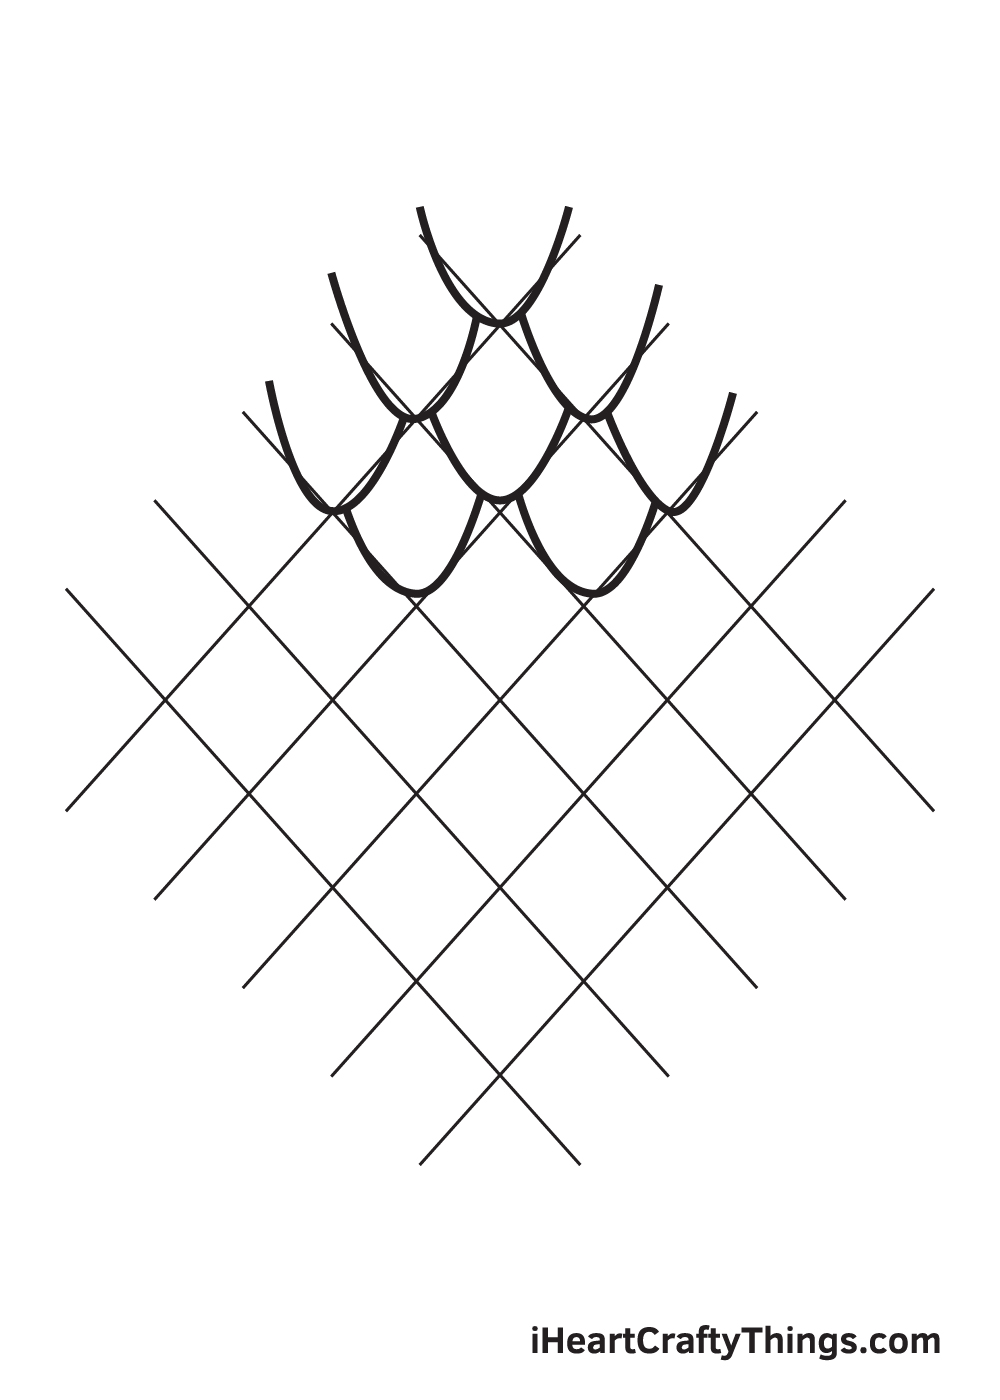
Starting from the top to the bottom, draw a U-shaped curve on each space within the criss-cross pattern. This creates separate scales, one for each diamond space.
In this step, we’ll be drawing the scales on the first four layers at the top. That means, we should have a total of 8 scales at this point.
Step 4 – Draw the Scales in the Middle Portion
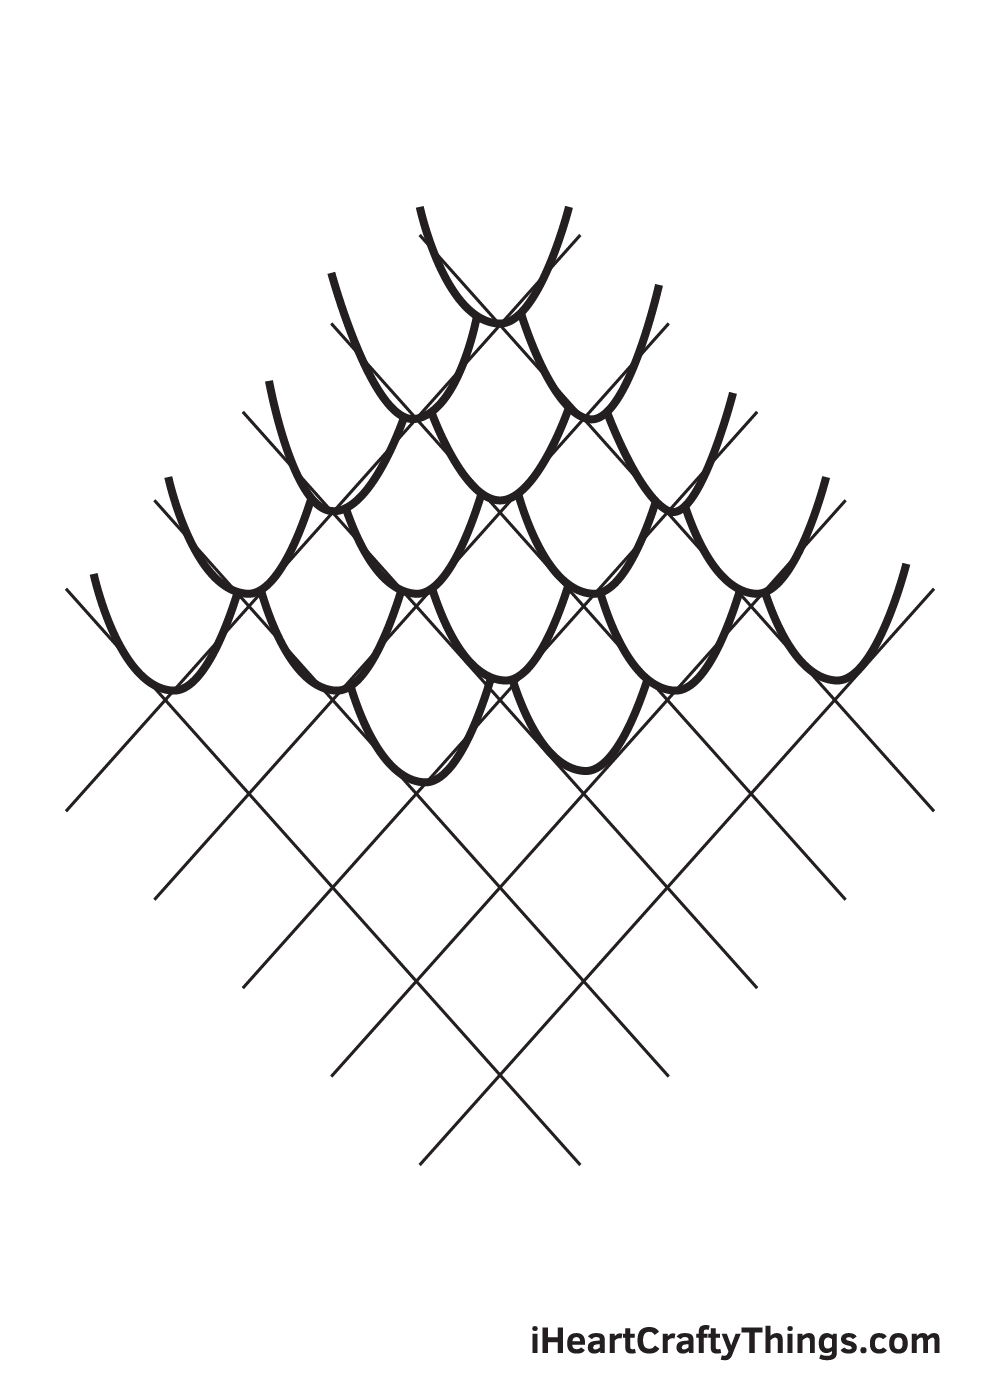
Proceed to the next layers and fill in the diamond spaces with U-shaped curved lines to create the scales one by one.
After completing this step, you should now have a total of 17 scales including the first 8 that we drew previously.
Step 5 – Afterwards, Add Another Layer of Scales
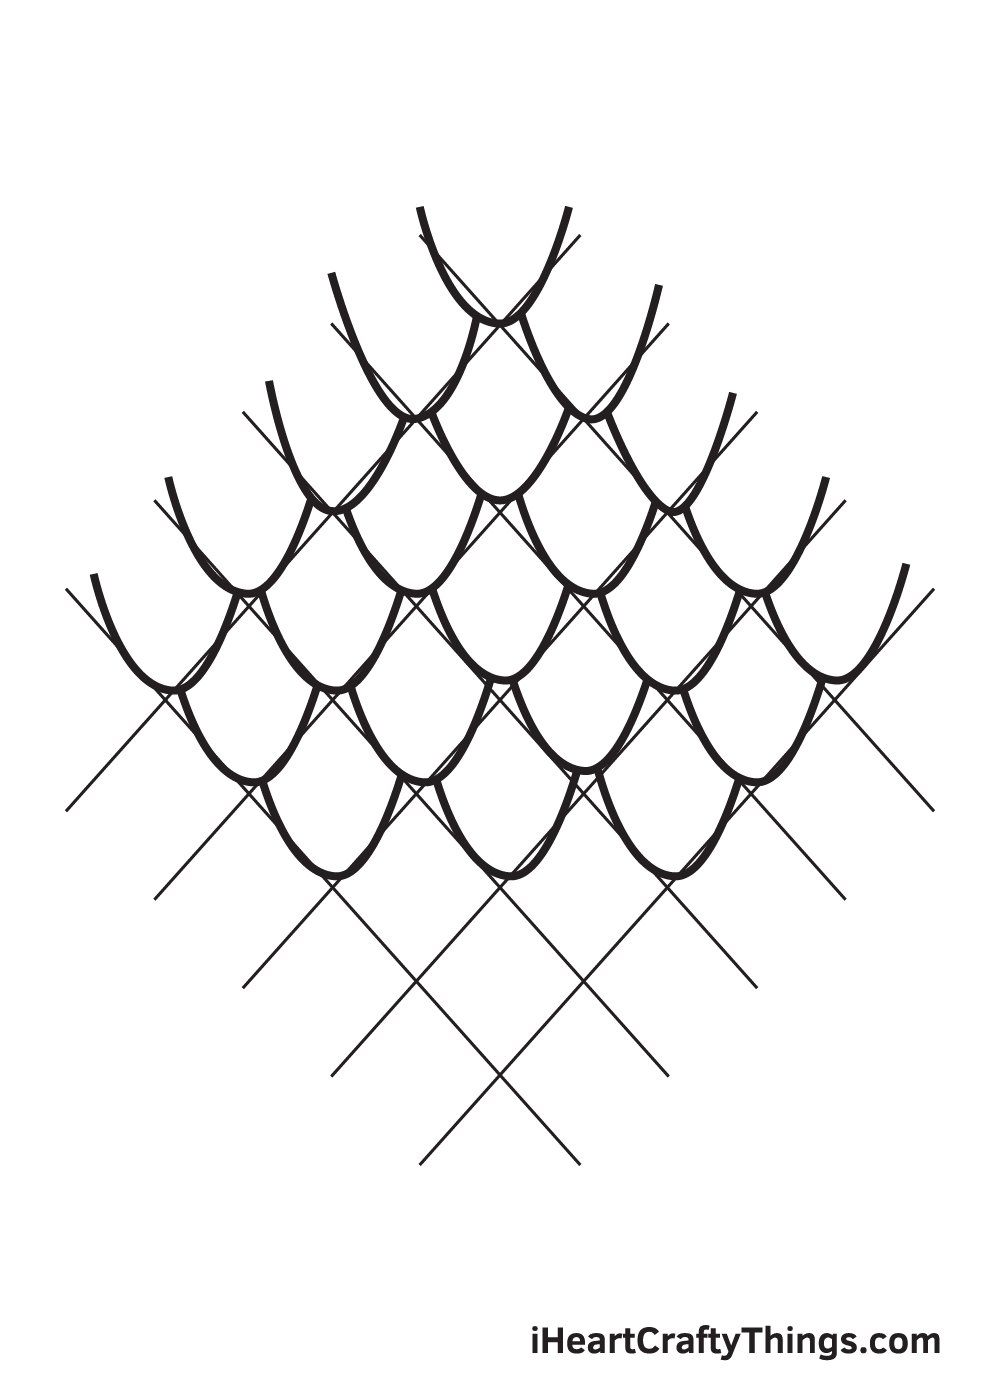
Repeat the previous step to create the scales on the middle layer of the criss-cross pattern. Don’t worry if the scales aren’t completely identical.
They don’t necessarily have to be uniform as long as they all have the same U-shaped form.
Step 6 – Next, Draw the Bottom Layer of Scales
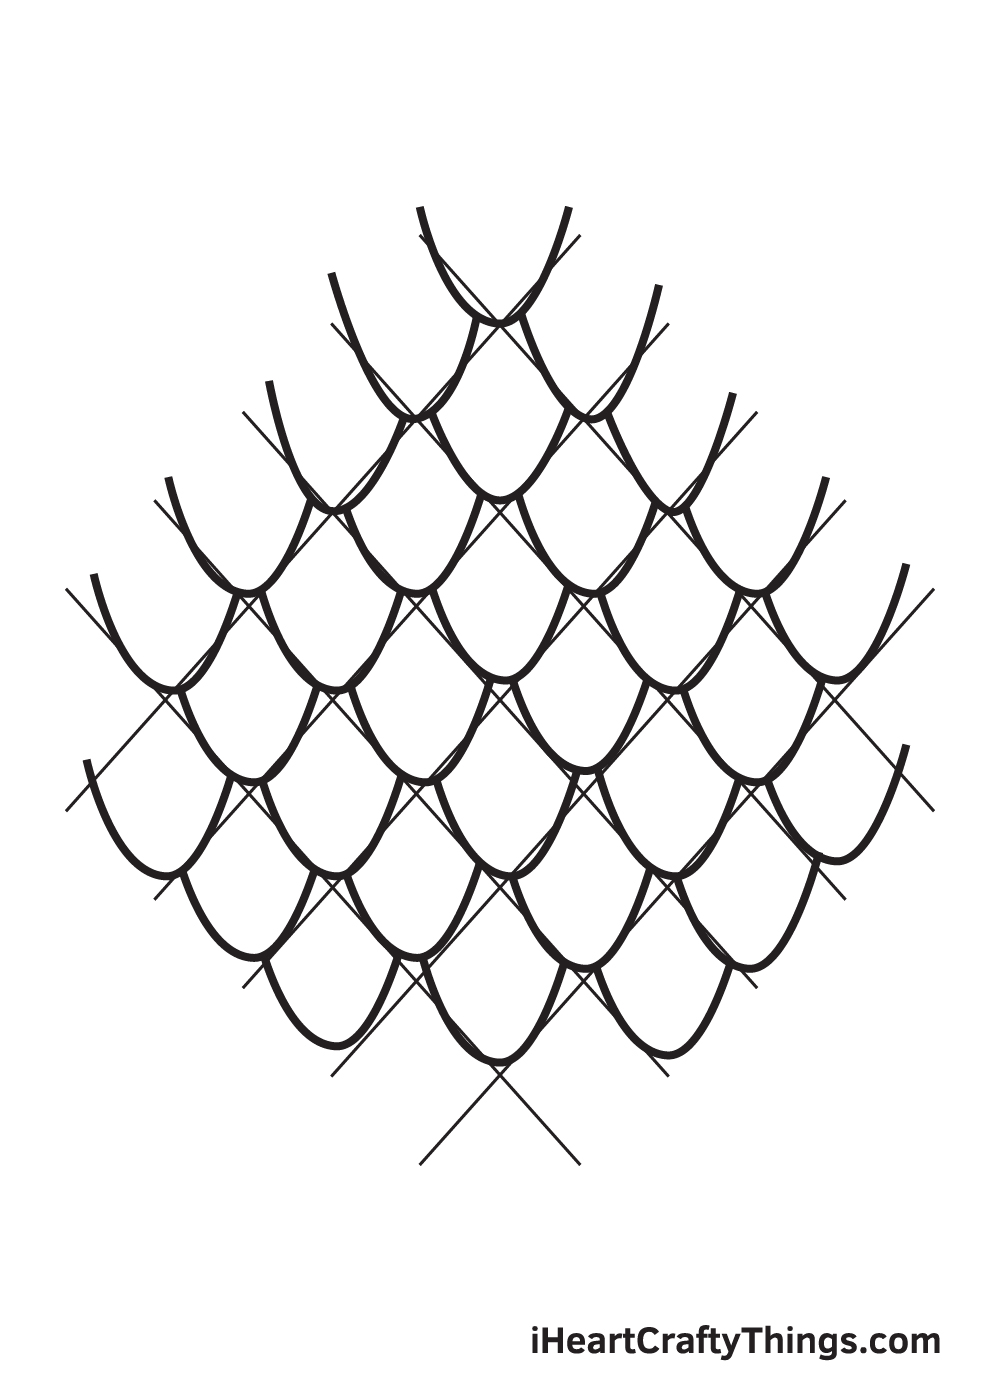
Add two more layers of scales by drawing a U-shaped curved line on each space within the pattern. By now, you should have 31 scales in total.
After finishing this step, there should only be three remaining blank spaces at the bottom of the criss-cross pattern.
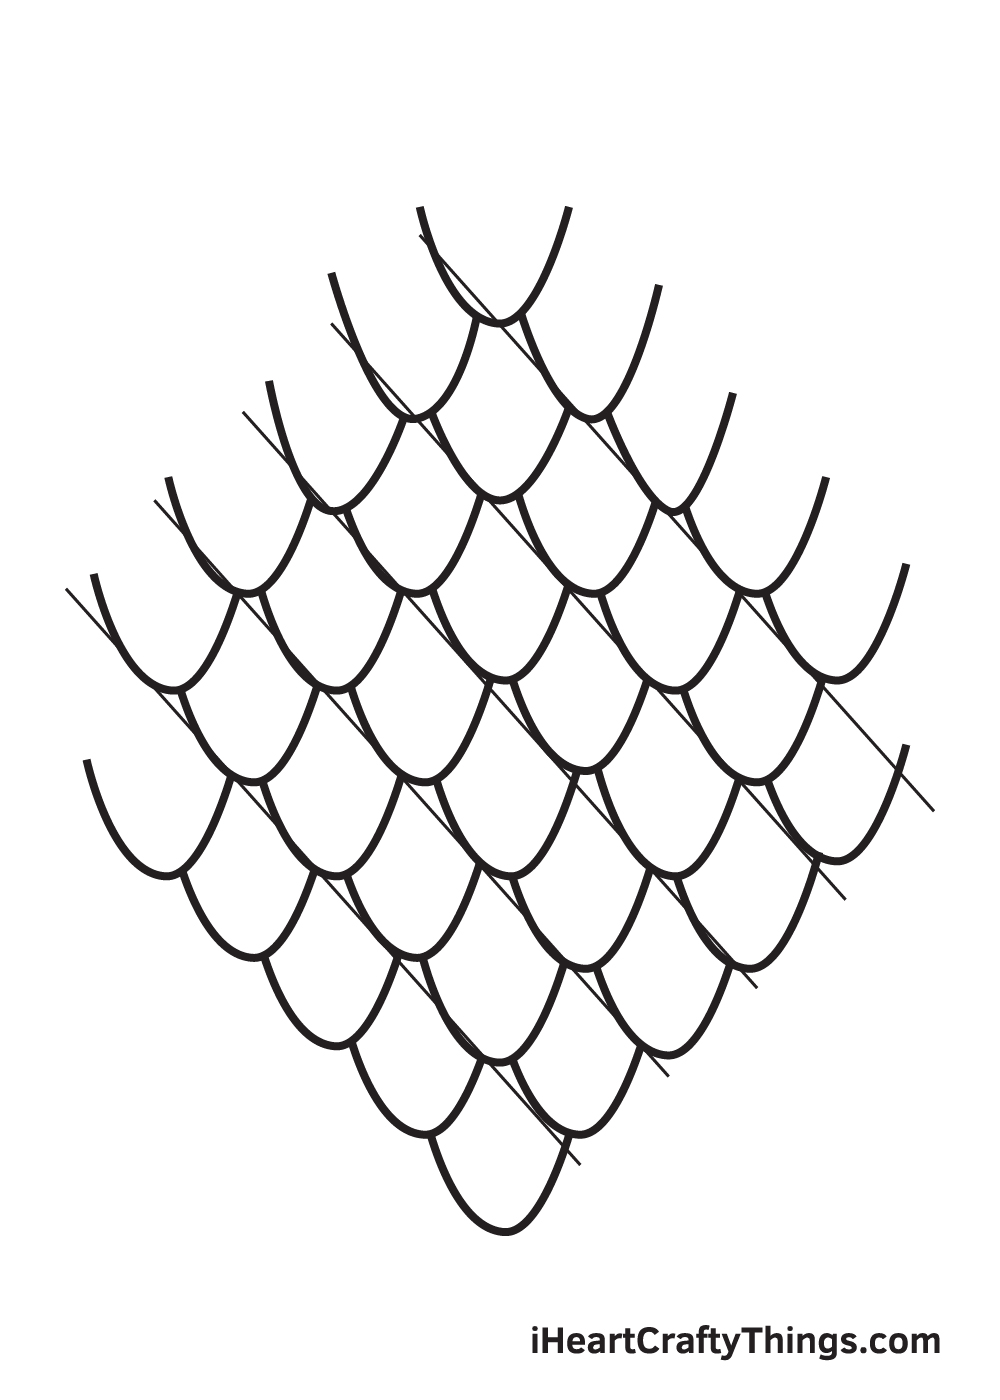
Step 7 – Complete Drawing All Layers of Scales
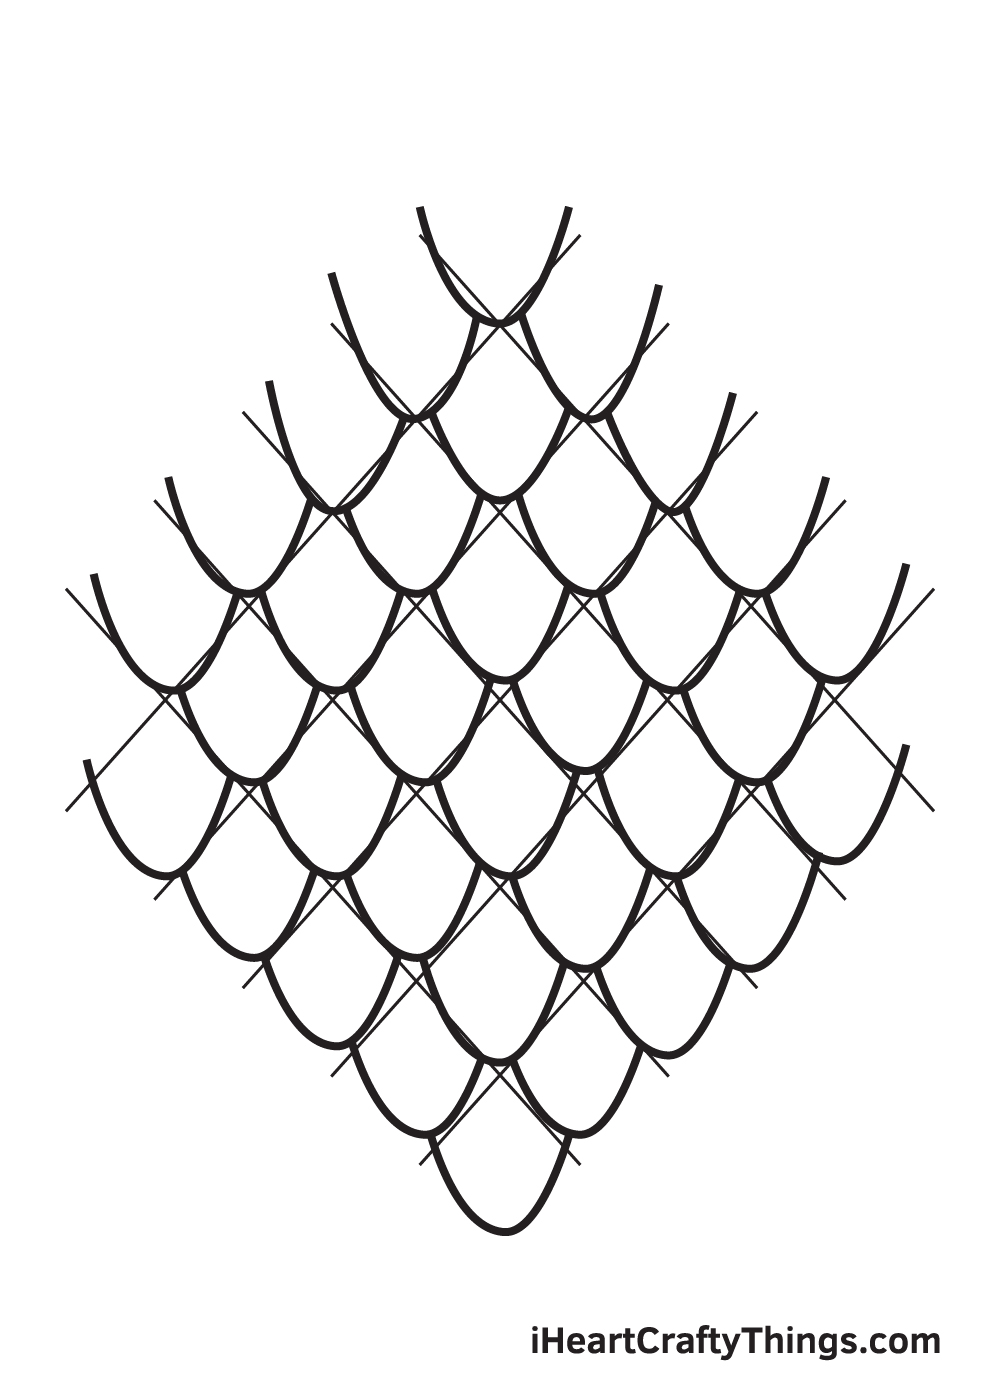
Keep repeating the previous step and adding the U-shaped curve on the remaining blank spaces until there’s none left. Do not stop until you reach the space at the very bottom of the criss-cross pattern.
After finishing this step, all spaces should be filled with the same pattern. Thus, all 34 scales should be completed by now.
Step 8 – Then, Get Rid of the Criss-Cross Pattern
Now, it’s time to polish up the shape of the scales by removing the diagonal lines one by one. Start by removing the lines pointing on the upper right corner and the lower left corner.
Make sure to erase the lines carefully to keep the scales from getting wiped out too.
Step 9 – Now, Refine the Shape of the Scales
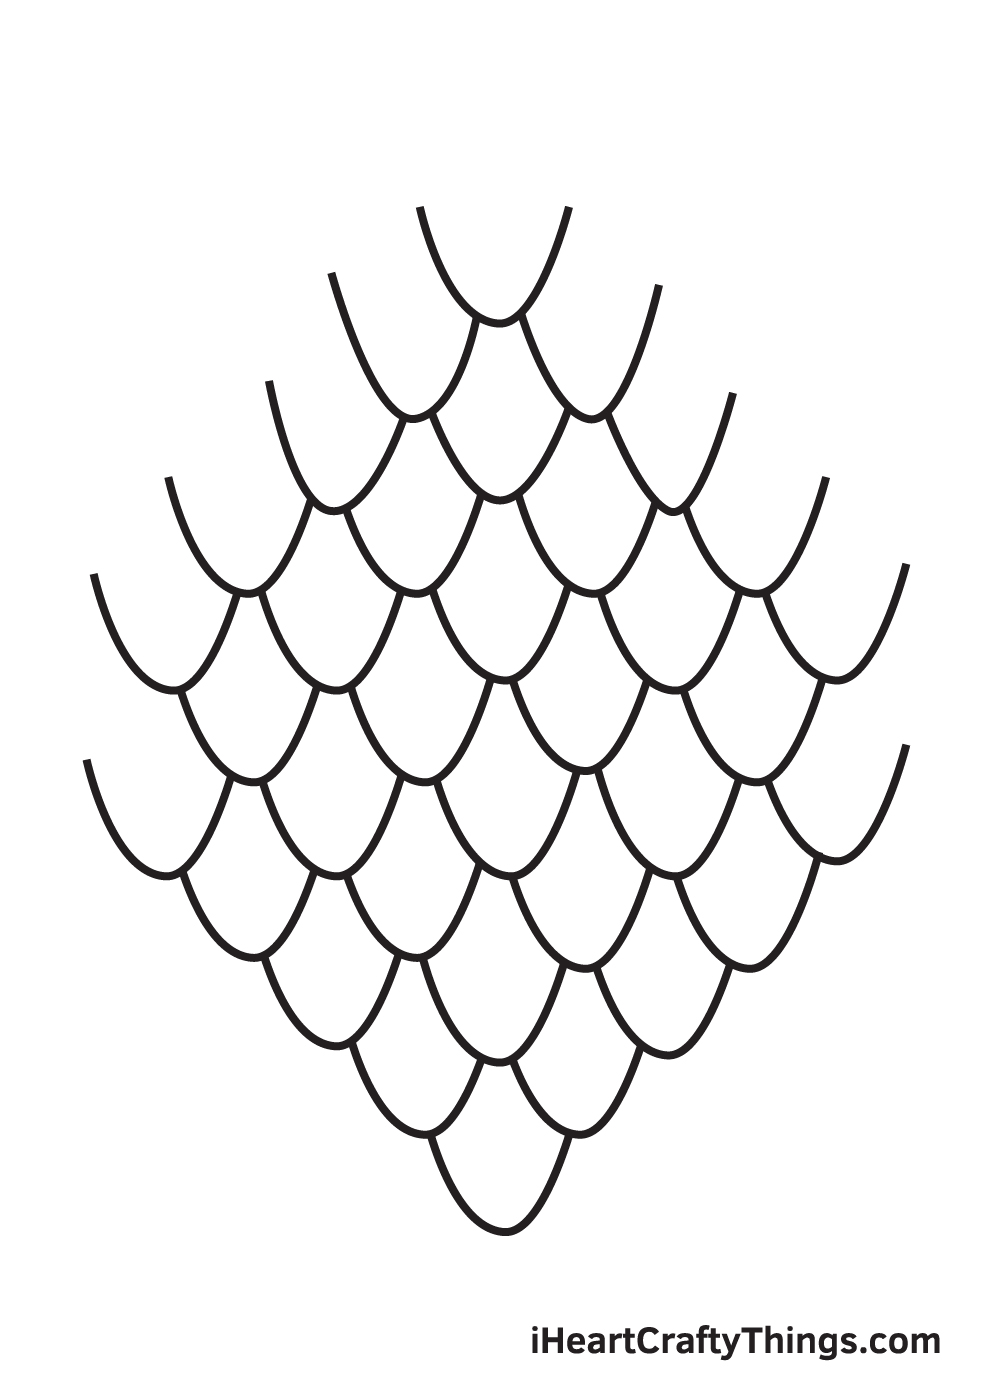
Remove the remaining diagonal lines in the opposite direction.
The purpose of getting rid of these lines is to make the scales look more refined and keep your drawing neat and tidy. Make sure that there’s no more visible diagonal lines underneath the scales.
After completing this step, the shapes of the scales should now be more elaborate.
There you have it—you have successfully drawn scales! Now, it’s finally time for the part we’ve all been waiting for, which is choosing the colors and coloring the scales!
The colors of the scales vary greatly depending on the color of the animal’s skin that the scales are attached to.
This gives you a lot of color options to choose from when coloring the scales. However, keep in mind the primary factor that you should consider: the color of the animal you’ll be putting these scales on.
Have fun playing with various colors!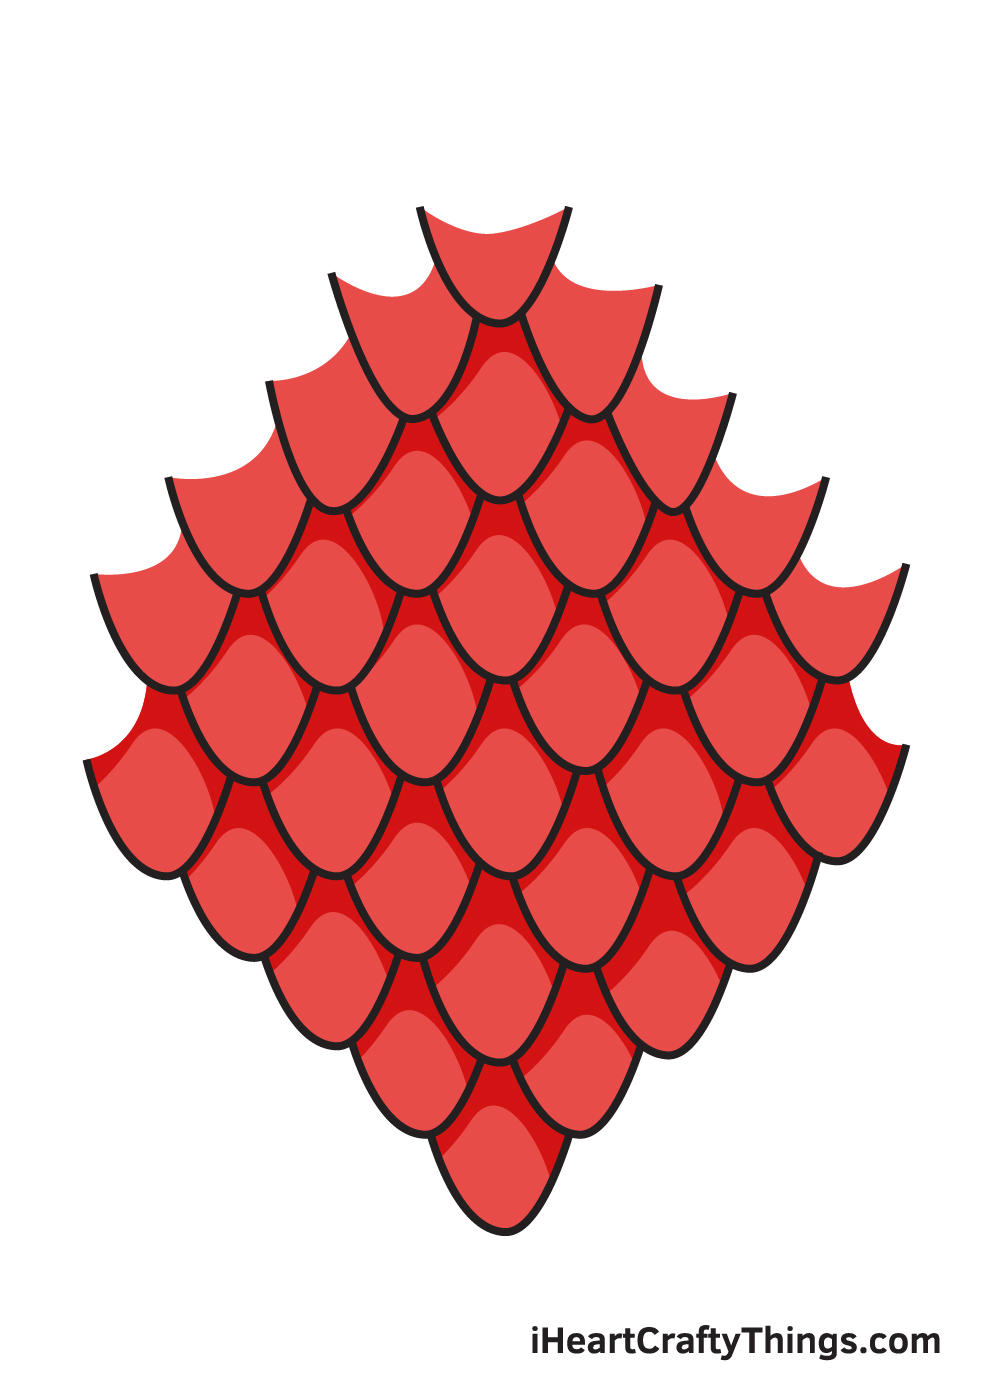
Here’s how you can make your scales drawing even better…
These tips for your scales sketch will make them look even more incredible!
For this drawing of scales, we made just a small patch of scales to make it easier to learn. Now that you can do it, you could make the area the scales covers as big as you like!
If you have a lot of patience, you could even challenge yourself to fill your page with these scales, which would result in a really interesting image to look at.
How many scales would you like to add to this patch?
Another way you could play around with this design would be to create different designs for the scales. The ones that we drew are rounded yet pointy, and you could play around with this.
For example, maybe they could be even pointier, or you may want to go in the other direction and make them small and rounded. Why not try out a few different takes to see what appeals to you the most?
We’re sure you can come up with all sorts of amazing designs!
Once you have settled on the design of your scales drawing, you could put them on a real creature design. This could be something that is real such as a snake or maybe an alligator.
Or, maybe these scales could be on the back of a giant and fearsome dragon. That is just a small selection of ideas you could try, but there are loads of interesting possibilities.
What other creatures could you put these scales on?
Finally, you could also try out some fun crafts on this scales sketch. For example, you could cut out lots of scale shapes from an old ice cream container.
You would just need to have an adult help you with the cutting part of this, but once you have these scales then you could stick them on the drawing.
Stickers, beads and even thick paint could also be options to try out to make the scales stick off the page a bit.
Your Scales Drawing is Complete!
We hope you enjoy this step-by-step scales drawing tutorial. Now that you’re capable of drawing scales, you can incorporate this when drawing animals that have scales on their skin.
This adds texture on the animal you’re drawing, making it look more realistic!
Check out our “How to Draw” catalog to explore many more drawing tutorials on different animals. Perhaps you would like to draw a lizard or a fish next?
Whichever scaled animal you choose to draw, make sure to add the scales to make it come to life!
Once you’ve finished drawing and coloring the scales, don’t forget to show off your masterpiece!
Take a picture of your artwork and share it on our Facebook page and on Pinterest. Don’t be shy. You’ve worked hard for it, so we’re sure it looks awesome!
We can’t wait to see your colorful scales drawing!