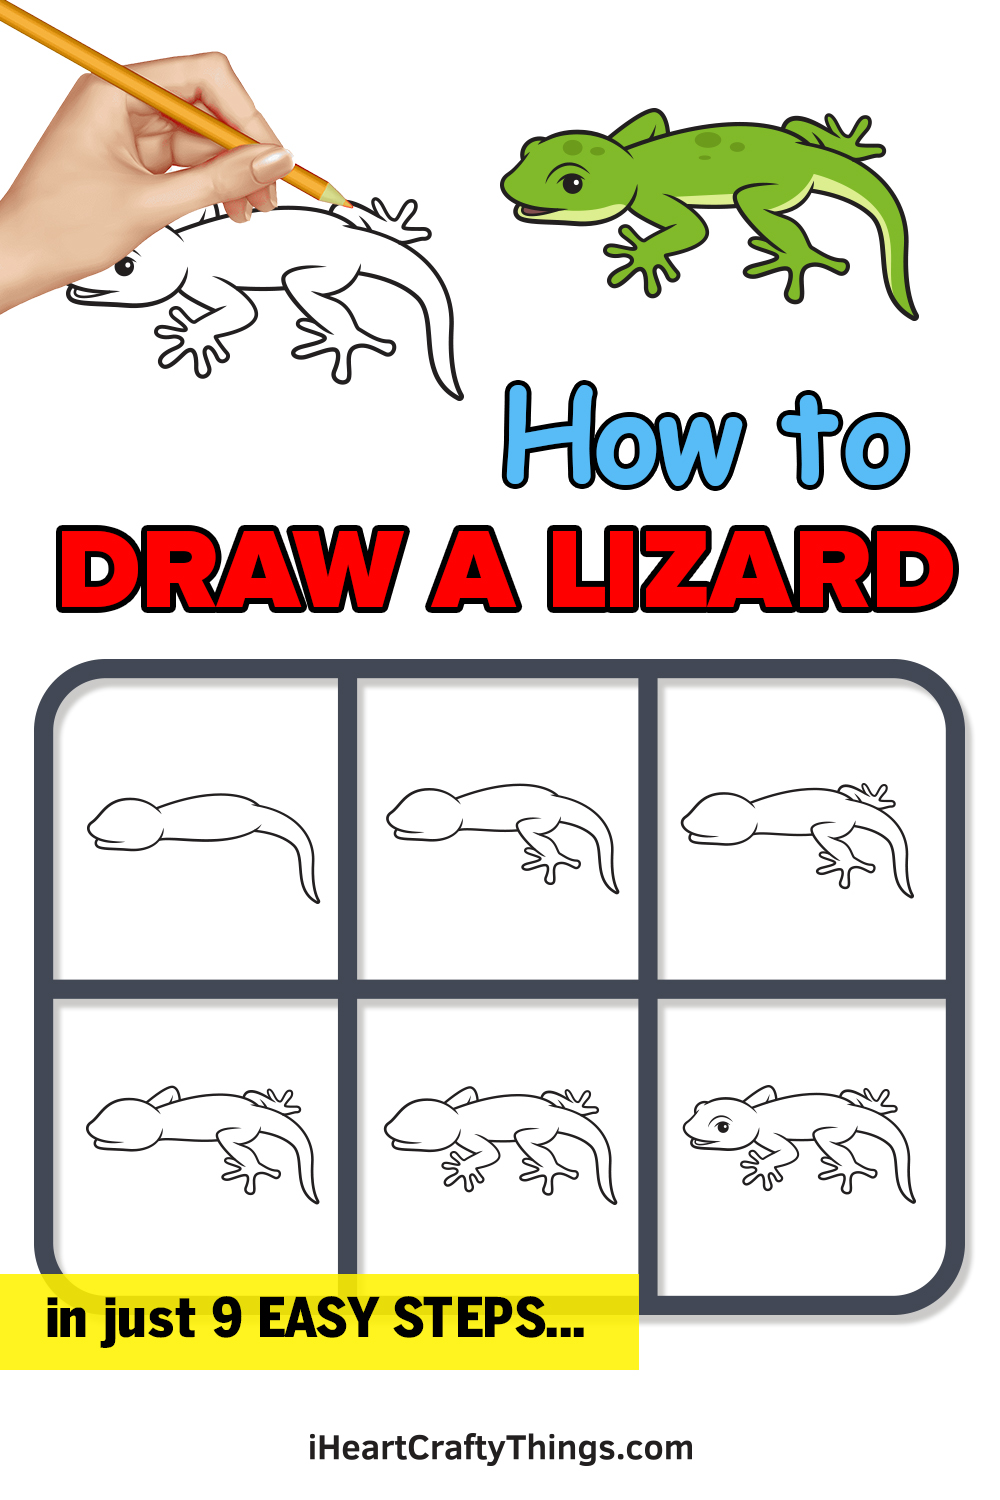
Anyone wanting to learn how to draw a lizard will love this tutorial for kids! You’re moments away from learning how fun and easy it is.
I’ve always thought that lizards are really cute. From humble geckos to massive Komodo dragons, these reptiles come in many shapes and sizes.
In this guide, we will be working on a cute little lizard design. This cartoony lizard is simple enough for anyone to learn it, but you can add some additional details if you prefer to make it more realistic.
You could even design a background to provide a place for this lizard to inhabit. There are so many ways you can make this drawing more unique to you.
So let’s embark on these steps together to see how you can recreate this little guy on your own
See How To Make Your Lizard Drawing By Watching This
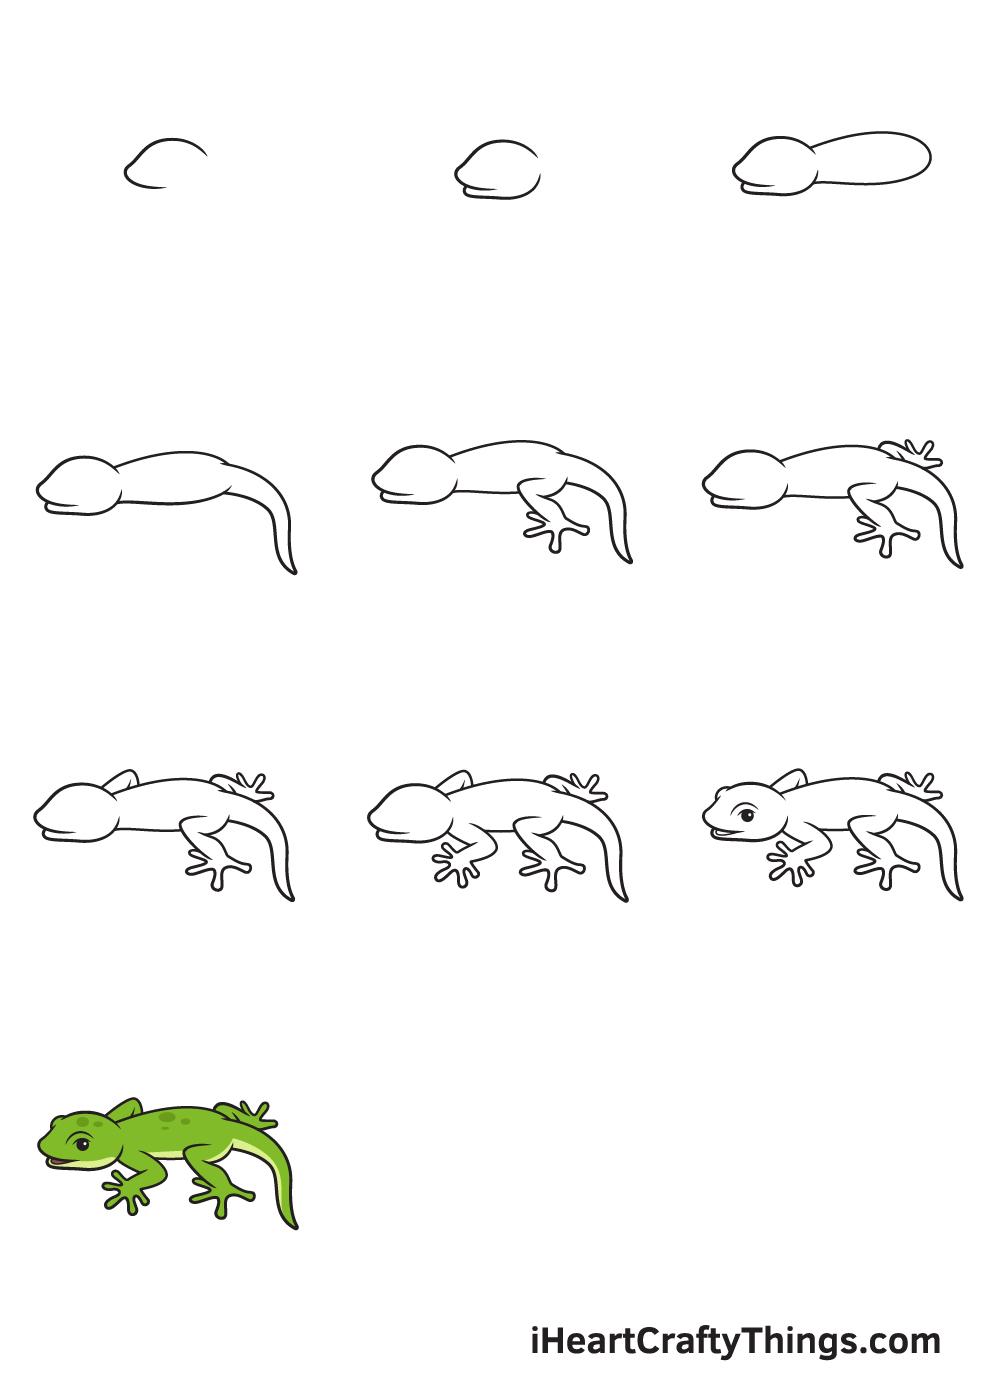
How to Draw a Lizard – Let’s get started!
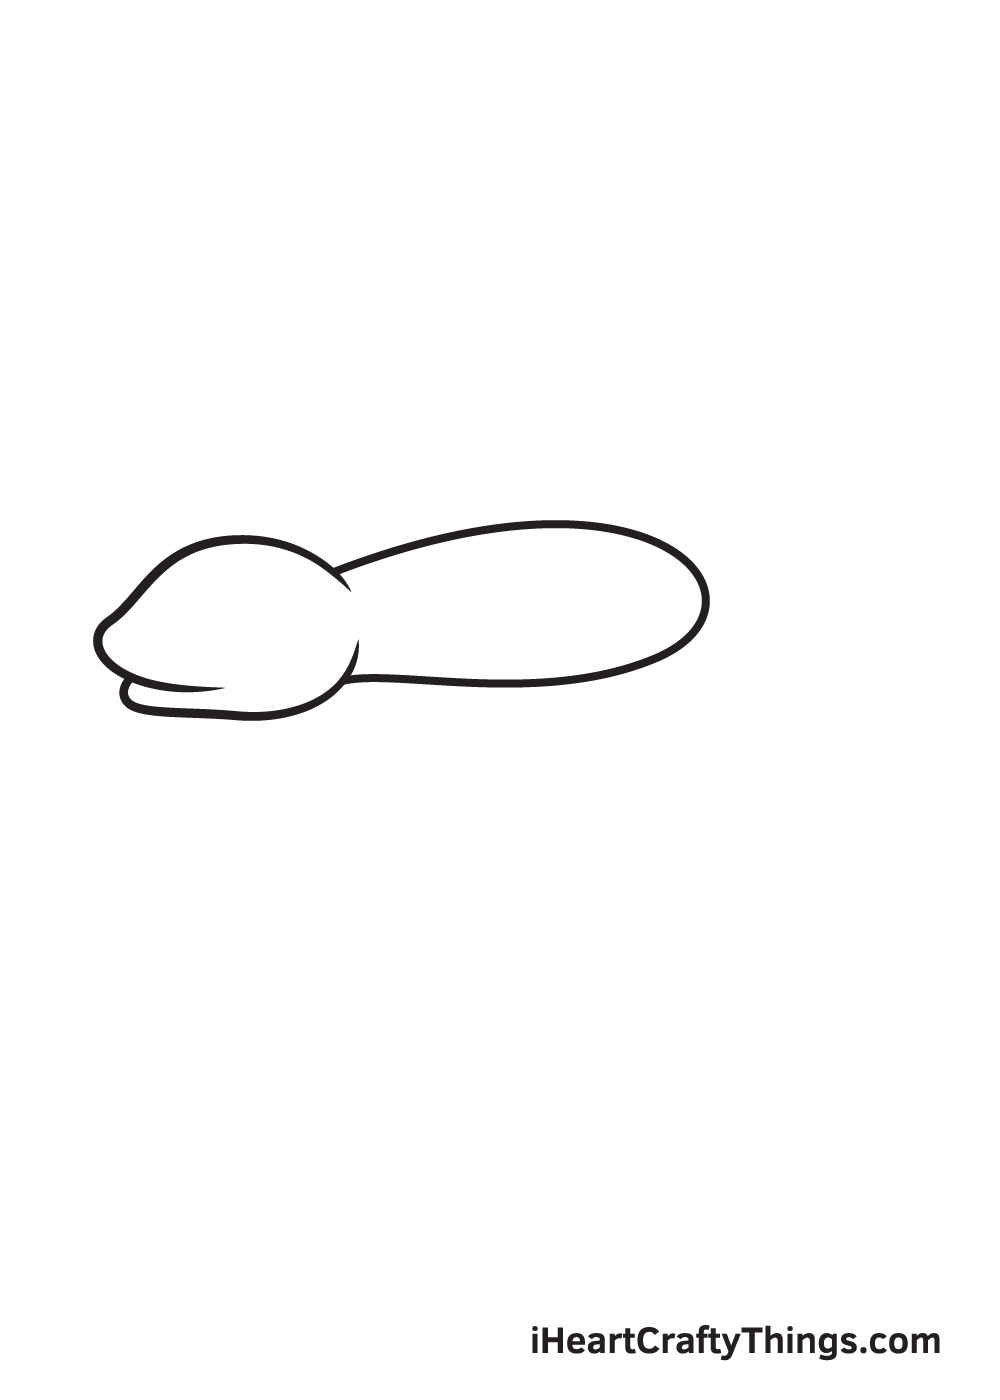
Step 1
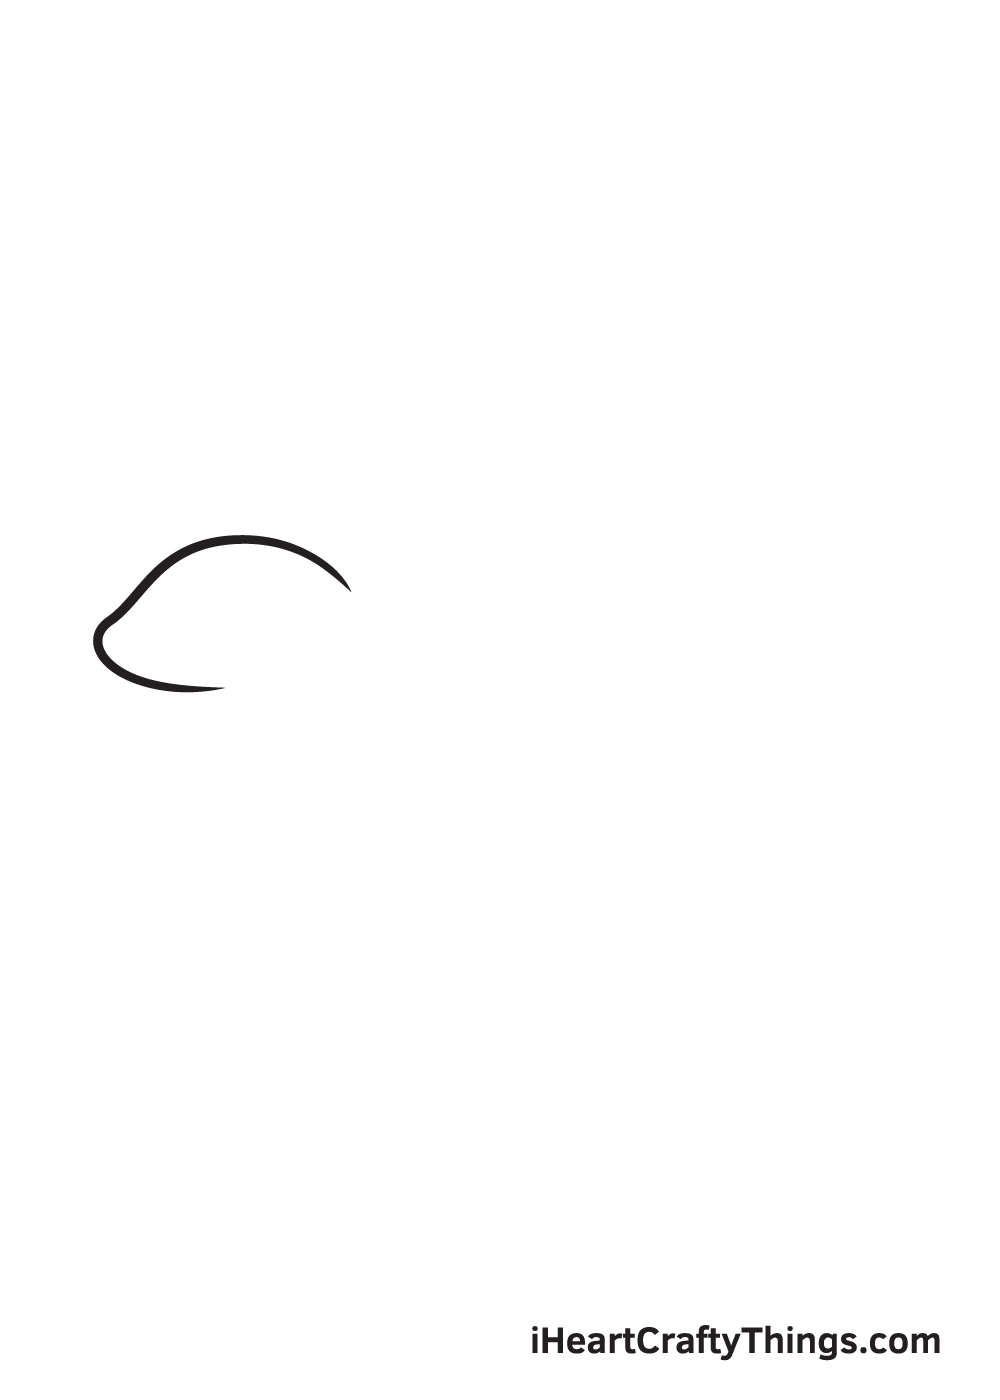
When drawing animals, starting from its head and working your way towards its legs is the key. So, that is exactly what we will be doing in this step.
Draw an outline of the lizard’s head on the spot where you want it to be facing. For example, if you want it facing towards the left, then draw the outline on the left side of your paper, as shown in the illustration.
Step 2 – Draw an Outline of the Lizard’s Head
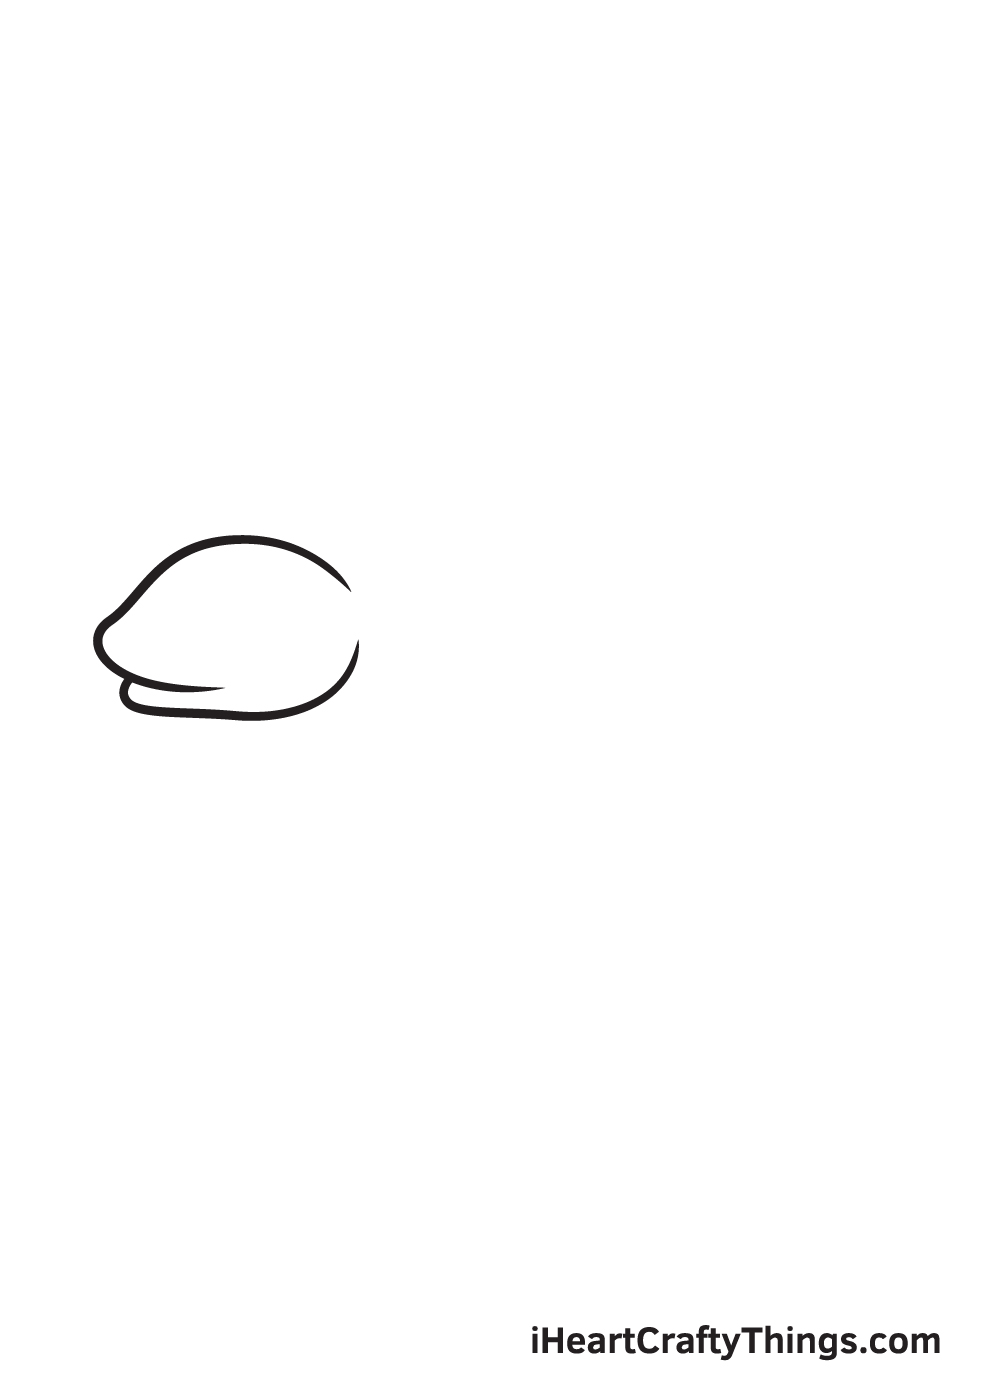
Extend the lines of the outline we drew in the previous step to fully structure the head of the lizard. Don’t forget to draw a line overlapping at the bottom inside the head to create the lizard’s distinct pointed mouth.
Remember, both the upper lip and the lower lip of the lizard must be slightly pointed. Use the illustration as a guide to help you form the lizard’s mouth quickly and easily.
Step 3 – Create a Rough Sketch of the Lizard’s Body
Draw an elongated oval shape attached to the head of the lizard to outline its body. While you’re at it, don’t hesitate to draw various shapes and patterns on the surface of the lizard’s skin if you’re feeling a bit more artistic! Did you know that some lizards do have distinct patterns imprinted on their skin?
Avoid pressing down too hard with your pencil when drawing an outline. It’s important to sketch with light strokes so you can easily erase some unnecessary lines from the outline later on.
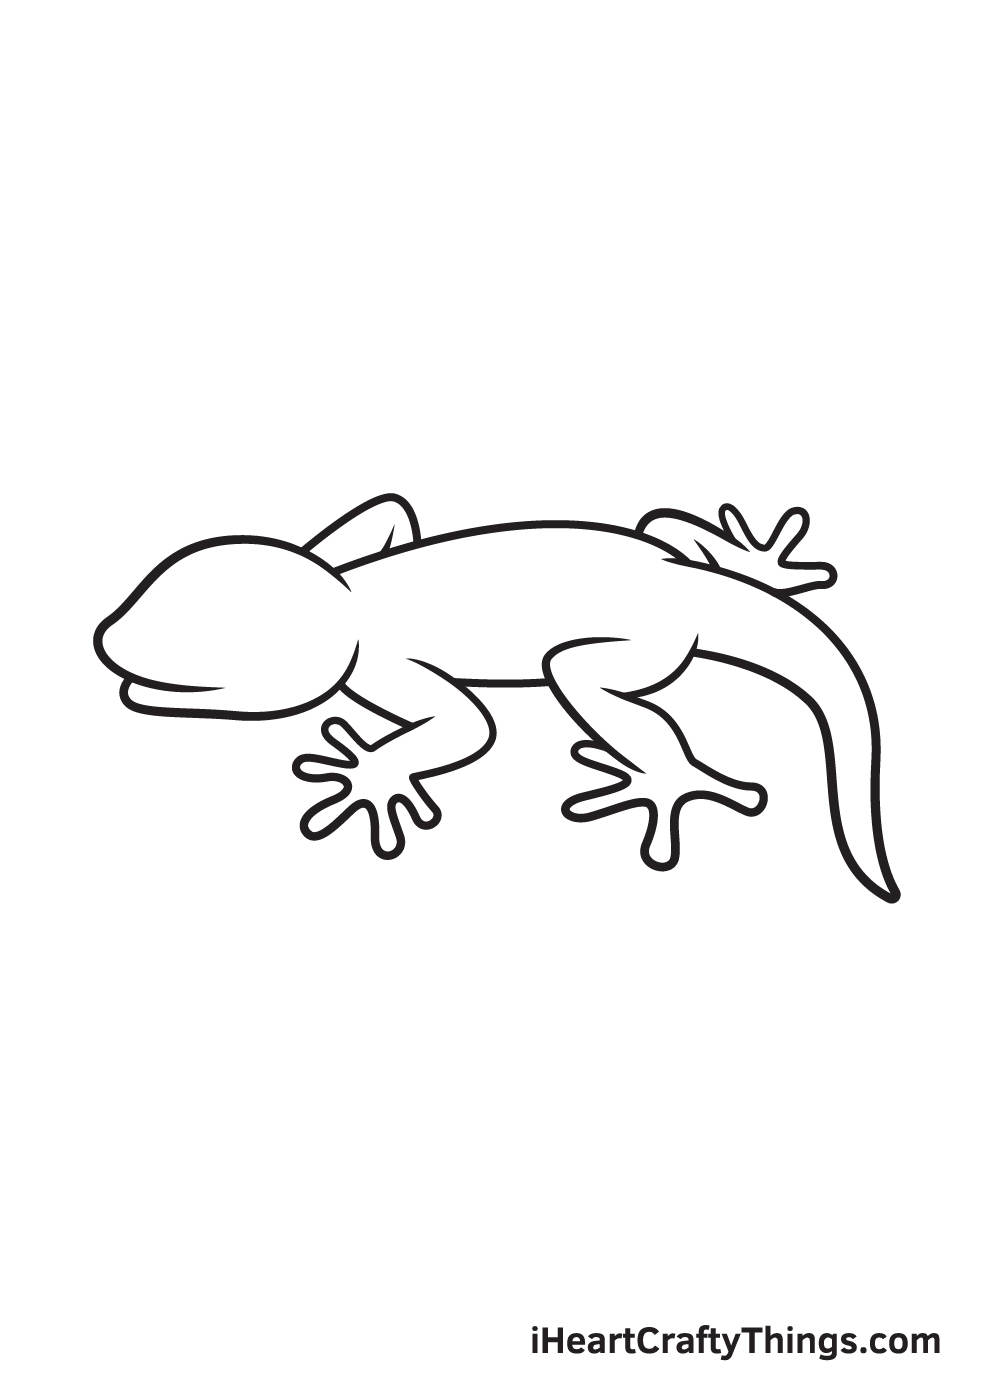
Step 4 – Now, Draw a Tail Attached to the Body
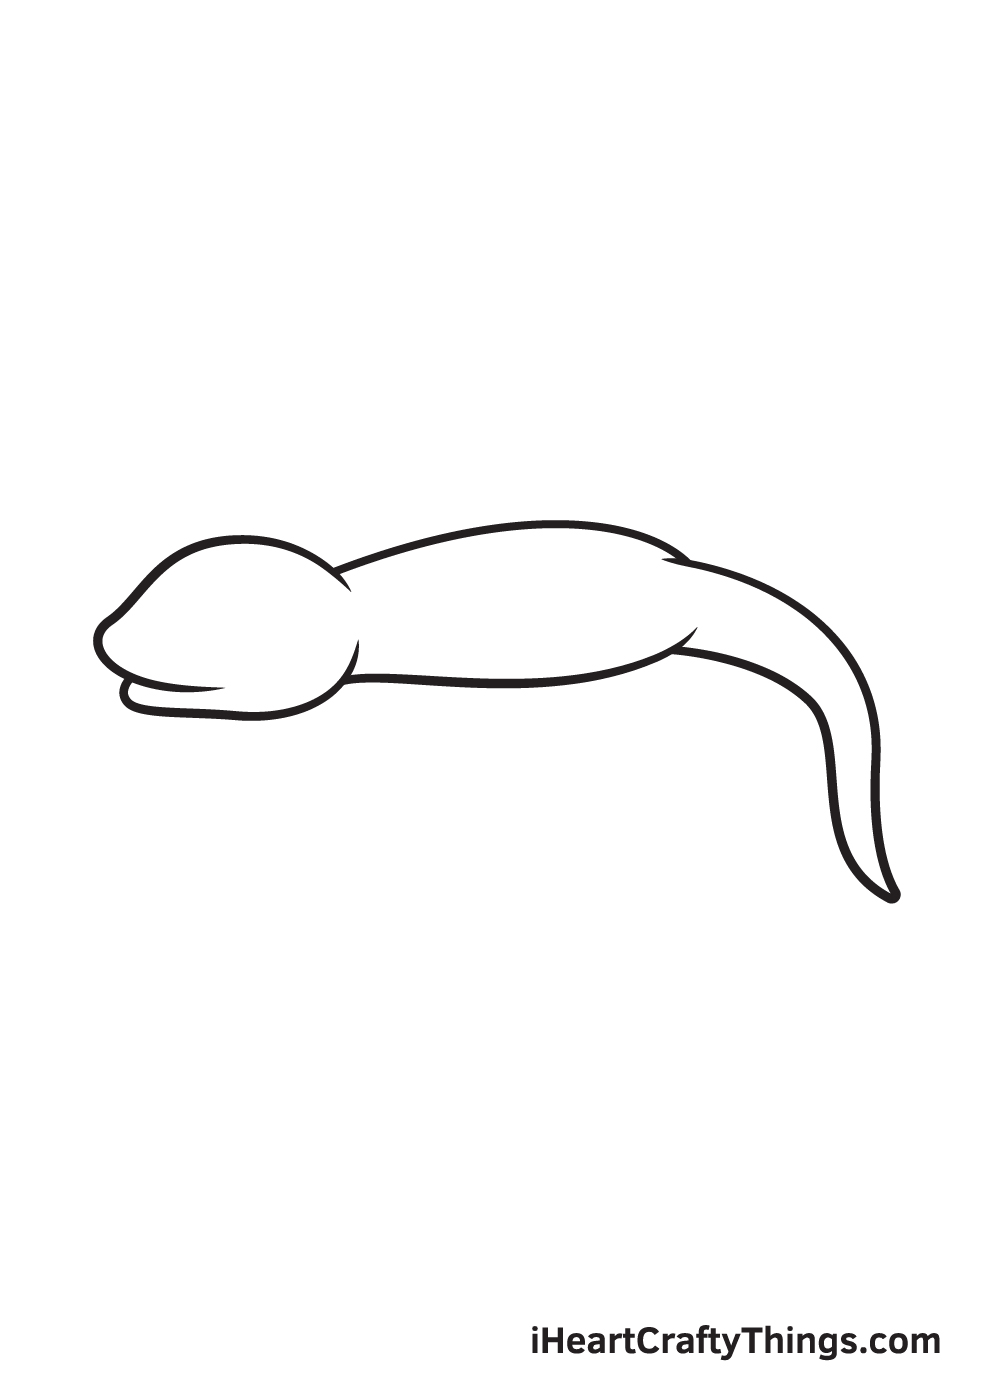
To structure the tail of the lizard, draw an elongated narrow shape with a pointed tip emerging from the bottom back of the lizard’s body.
Bear in mind that the tail should be thick at the top and gradually get thinner and thinner on the tip, as shown in the illustration.
Step 5 – Then, Draw the Lizard’s Right Hind Leg

Structure the lizard’s right hind leg by drawing an angled line with four visible toes at the bottom. Make sure to draw the leg in a 45-degree angle to make it look like the lizard is crawling.
Lizards typically have five toes on each leg. But in this case, only four of its toes are visible. Keep in mind that each toe of the leg should have rounded tips, similar to the illustration shown above.
Step 6 – Now, Draw the Lizard’s Left Hind Leg
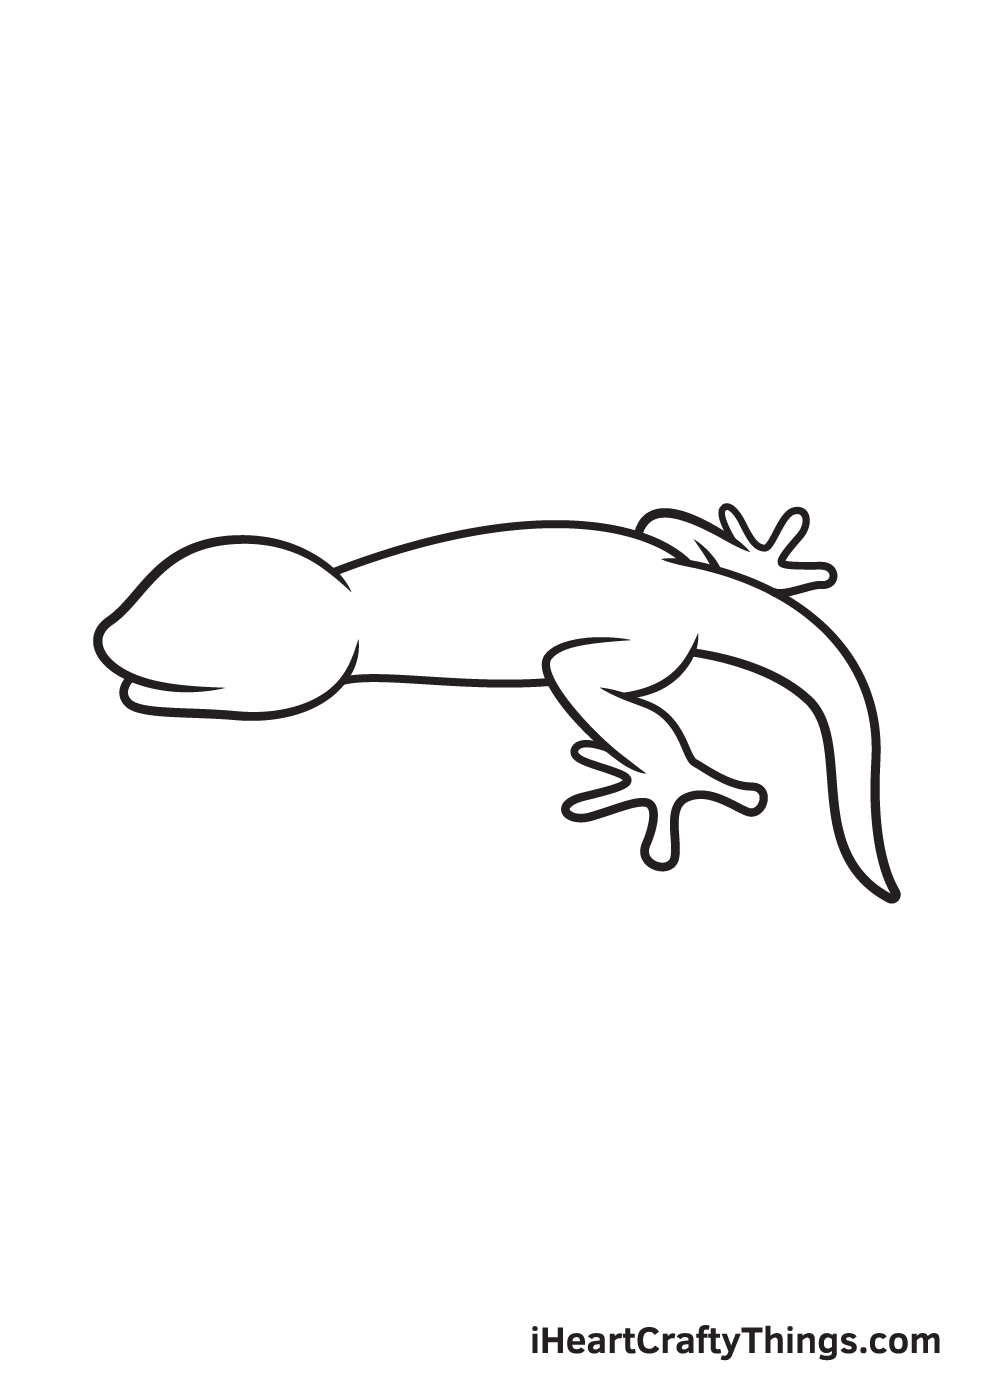
Now, draw the hind leg on the opposite side by drawing a curved line with three visible toes attached to it.
Since the lizard is drawn sideways, the hind leg on its right side will not be fully visible, as shown in the illustration.
Step 7 – Next, Draw the Lizard’s Left Front Leg
Draw another leg at the front of the lizard’s body. Similar to the hind leg we drew in the previous step, the leg must be in a 45-degree angle.
This time, however, the angle of the leg should be facing towards the rights side, as seen in the illustration above.
Step 8 – Complete All Four Legs of the Lizard
On the opposite side, draw a curved triangular shape above the space in between the lizard’s head and its body.
There’s no need to draw the fingers or the toes in this step since it’s covered by the body of the lizard, thus it’s not visible.
At this point, all four legs of the lizard should now be complete.
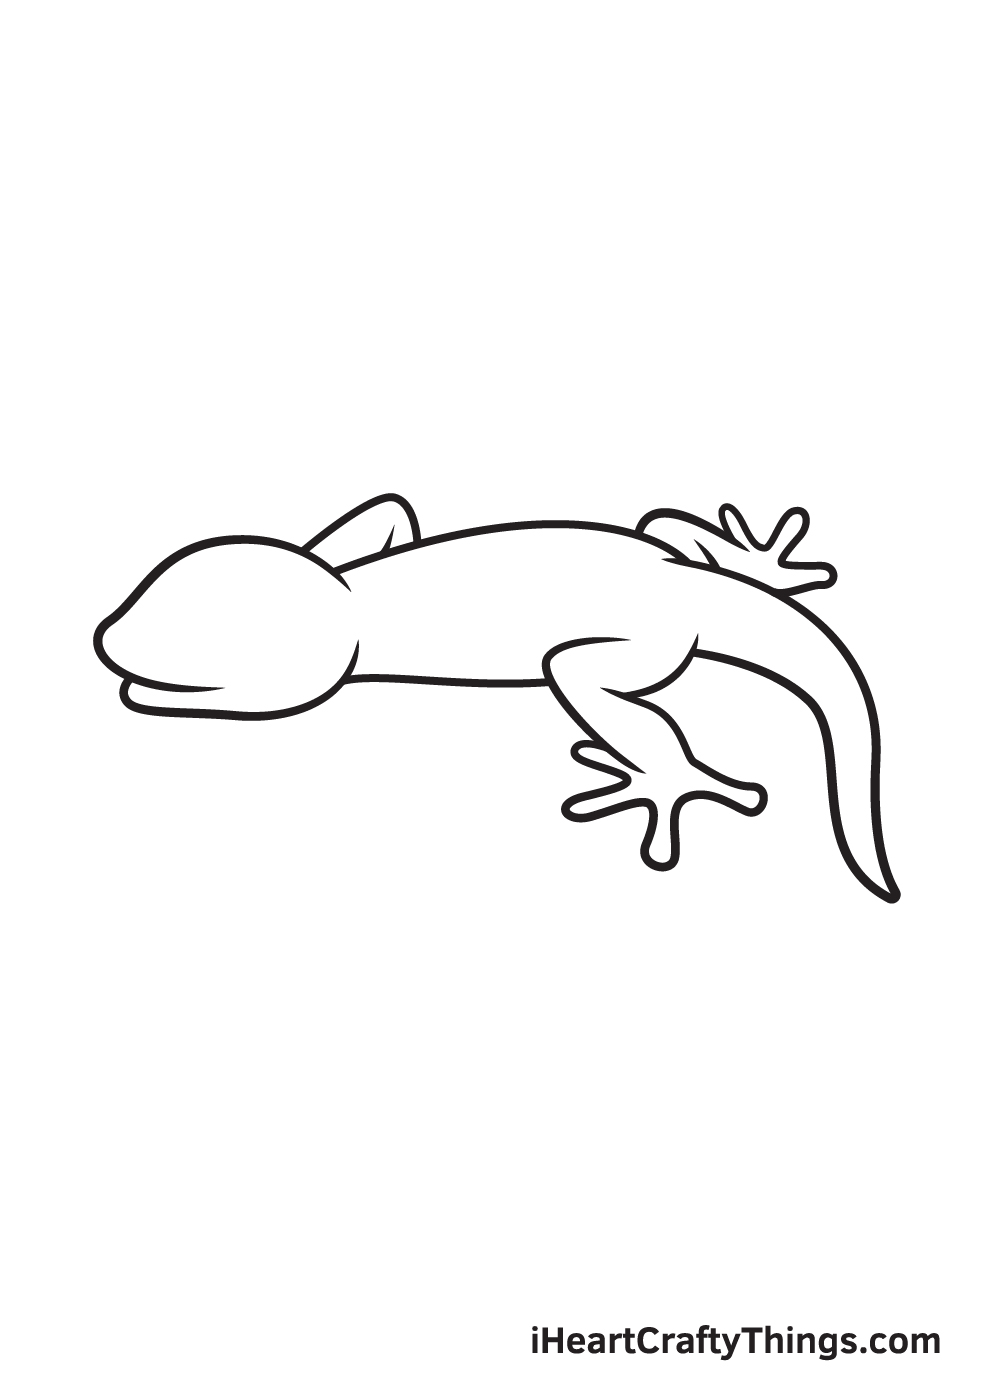
Step 9 – Now, Draw the Lizard’s Facial Features
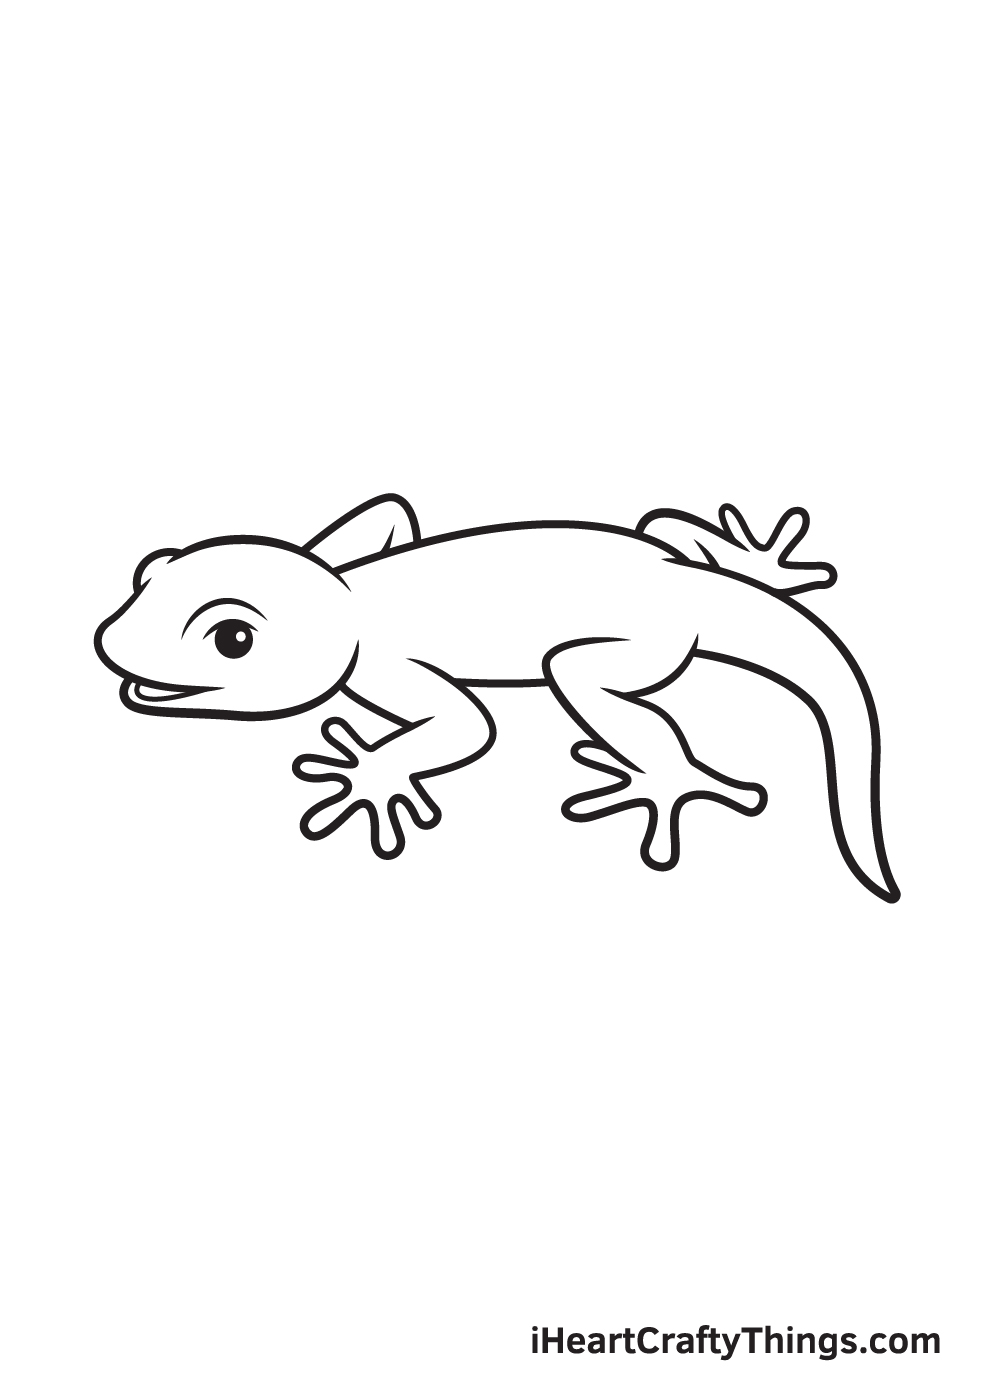
Make your lizard look happy by adding the facial features. Start by drawing a curved line on both sides of the face to create the bulging eye socket—one of the most distinct physical features of a lizard.
Right underneath the eye socket, draw a circle with another tiny circle within to create the eye. Then, shade the entire eyes except for the small circle inside. This creates a dramatic “sparkling eyes” effect.
Lastly, draw a curved line underneath the roof of the lizard’s mouth. This creates an illusion of the tongue, making it look like the lizard’s mouth is wide open.
Now that we have successfully drawn a lizard, it’s time for the part we’re most excited about, and we’re sure you are too! That is choosing the colors and coloring your drawing.
This is an enjoyable part because it allows you to hone your ability to mix and match various colors.
The color of the lizards varies from bright, vivid green to deep, chocolate brown. There are also lizards that have distinct patterns and shapes imprinted on their skin, thus they may have more than one color.
It’s also important to take note of the species of lizards that have the ability to change colors, such as the chameleons and the anoles.
You can opt to color your lizard drawing exactly as how they look in real life or use a unique set of colors. Either way, we think your drawing will turn out beautifully!
We can’t wait to see which colors would you pick for the lizard!
4 More Ways To Make Your Lizard Drawing Unique
See how you can make your lizard drawing even better with these tips!
Lizards can come in many different forms, and some have distinct markings on their bodies and tails.
You could add some of these markings onto this lizard sketch in order to make it a bit more unique. These could be realistic markings you would see on a real lizard, but don’t feel like you can’t add polka dots if you want!
This is your drawing, and you should make it look as you want it to. What kinds of markings would you like to add to this cute lizard?
Another way to make this drawing of a lizard more unique is by adding a background. Lizards can live in many different kinds of environments, so you have options.
It could be in a lush forest, or maybe it could be in a desert environment. Or, you could put it in a wacky and imaginative setting that will give the image a fun feel! It’s up to you, so what kind of background do you think would look best?
Now that you know how to create a wonderful lizard drawing, you can add some more lizard buddies for this one.
It would be a lot of fun to have a bunch of lizards together, and it would give you a lot more to add some color to.
If you wish to do this, simply follow the steps of the guide and change a few details to create some unique lizards.
We mentioned that lizards can come in many different patterns, and the same is true for colors. If you name any color, chances there are that there is a lizard with that color.
Even colors like red and blue can be observed! That means that even if you keep this lizard looking realistic, you have a ton of different colors you can use.
Also, try to shake up the art tools and mediums you use. Doing so is an easy and fun way to get some amazing colors!
Your Lizard Drawing is Complete!
It was a lot of fun learning how to draw a lizard, isn’t it? All of our crafts, printable sheets, and tutorials are 100% free for you to use and enjoy.
And remember, we are always updating our catalog of “How to Draw” guides, so make sure you keep checking back to continuously enjoy all-new drawing tutorials just like this one.
What are you looking forward to drawing next?
Once you’ve drawn and colored a lizard, make sure to show off the results of your hard work by sharing your masterpiece on all social media platforms!
While you’re at it, don’t forget to like our Facebook page as well. We have more kids crafts and guides posted on our Facebook page that we think you might enjoy, so make sure you check those out!
We are excited to see your incredible lizard drawing!
Here Is A Lizard Drawing For Kids To Inspire You!
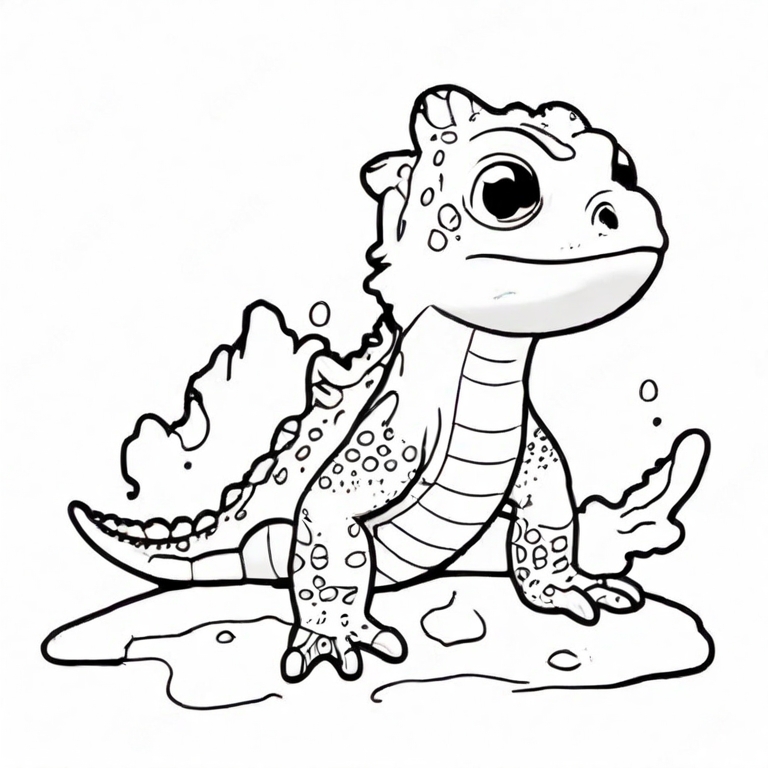
The details on this lizard drawing for kids by our artist Freddy are really something to behold! If you look at a real lizard, you will see that they have rough, textured skin.
Freddy has really captured this in his image, and you will see that he achieved this scaly look with lots of small circles and other shapes.
These may be simple, but they’re effective in making that textured look.
You can use this same technique for your own image, and it will help to add some realism to your lizard sketch.
If you want the lizard to look more cartoony, then you could remove some of these details as well.
When you’re happy with the lizard, you could also add a background to the image to give it more of a sense of place.