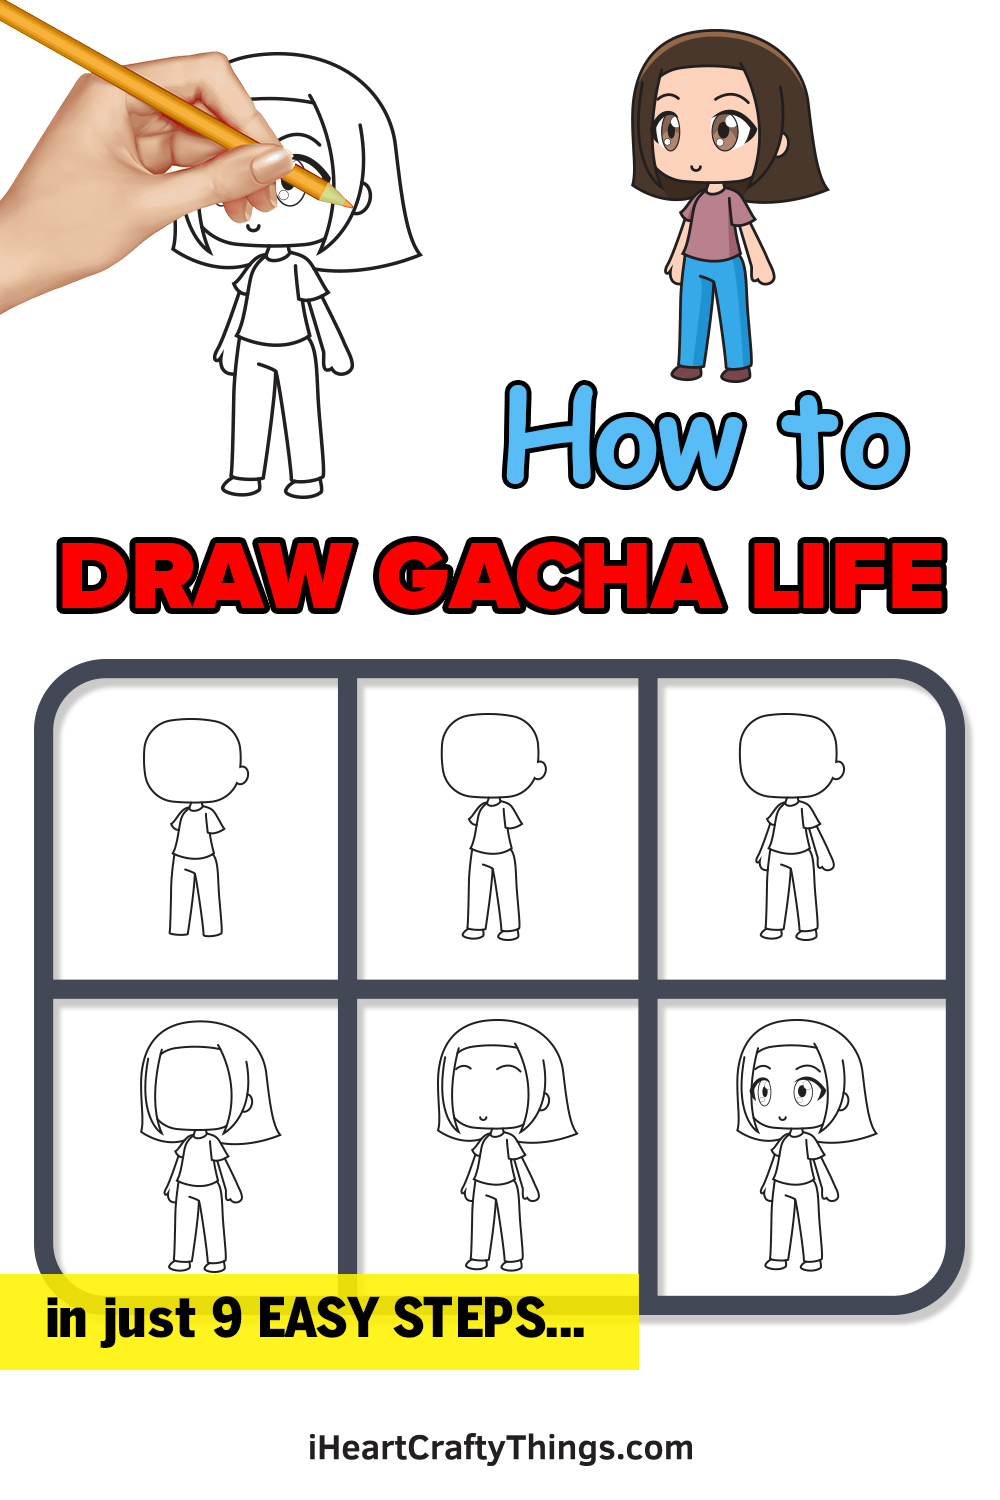
Developed in 2018, Gacha Life is a video game that allows players to create and customize their own anime-style characters.
The players can completely personalize their characters, from the shape of its eyes and its hairstyle to the clothing and the shoes it is wearing.
The extreme popularity of this game has created a huge demand for a free Gacha Life drawing tutorial.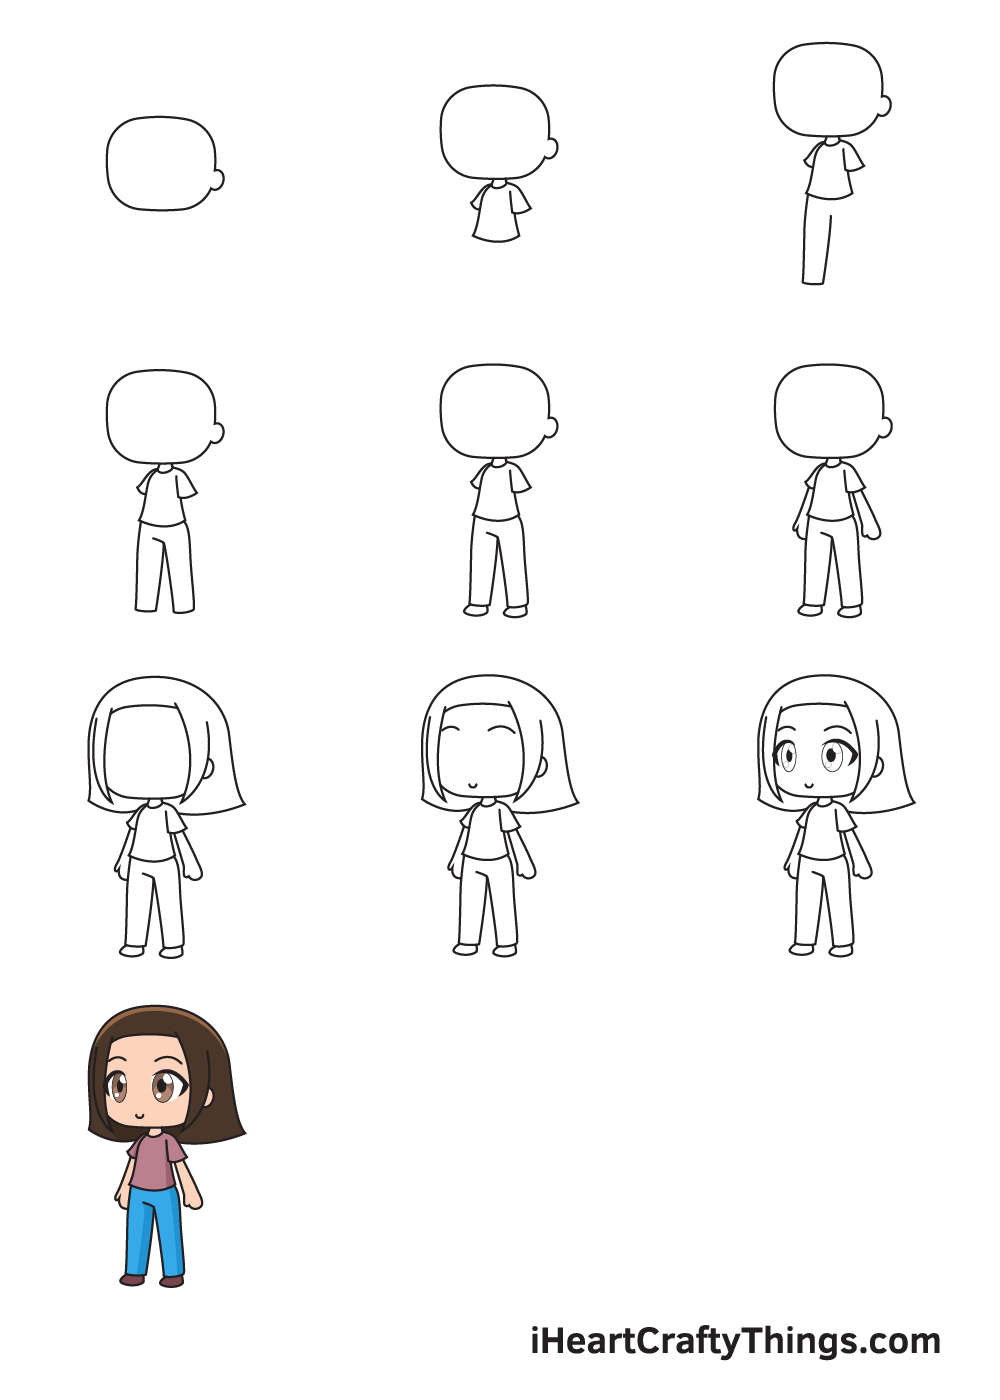
To fulfill your wishes, we have created a step-by-step tutorial on how to draw Gacha Life, summarized in 9 easy and quick steps.
What’s fun about this tutorial is that—similar to the actual video game—you can even make the character look like an animated version of you by drawing your distinct physical features!
It’s like playing Gacha Life, but on a piece of paper!
Have fun and use your artistic skills!
How to Draw Gacha Life – Let’s get started!
Step 1
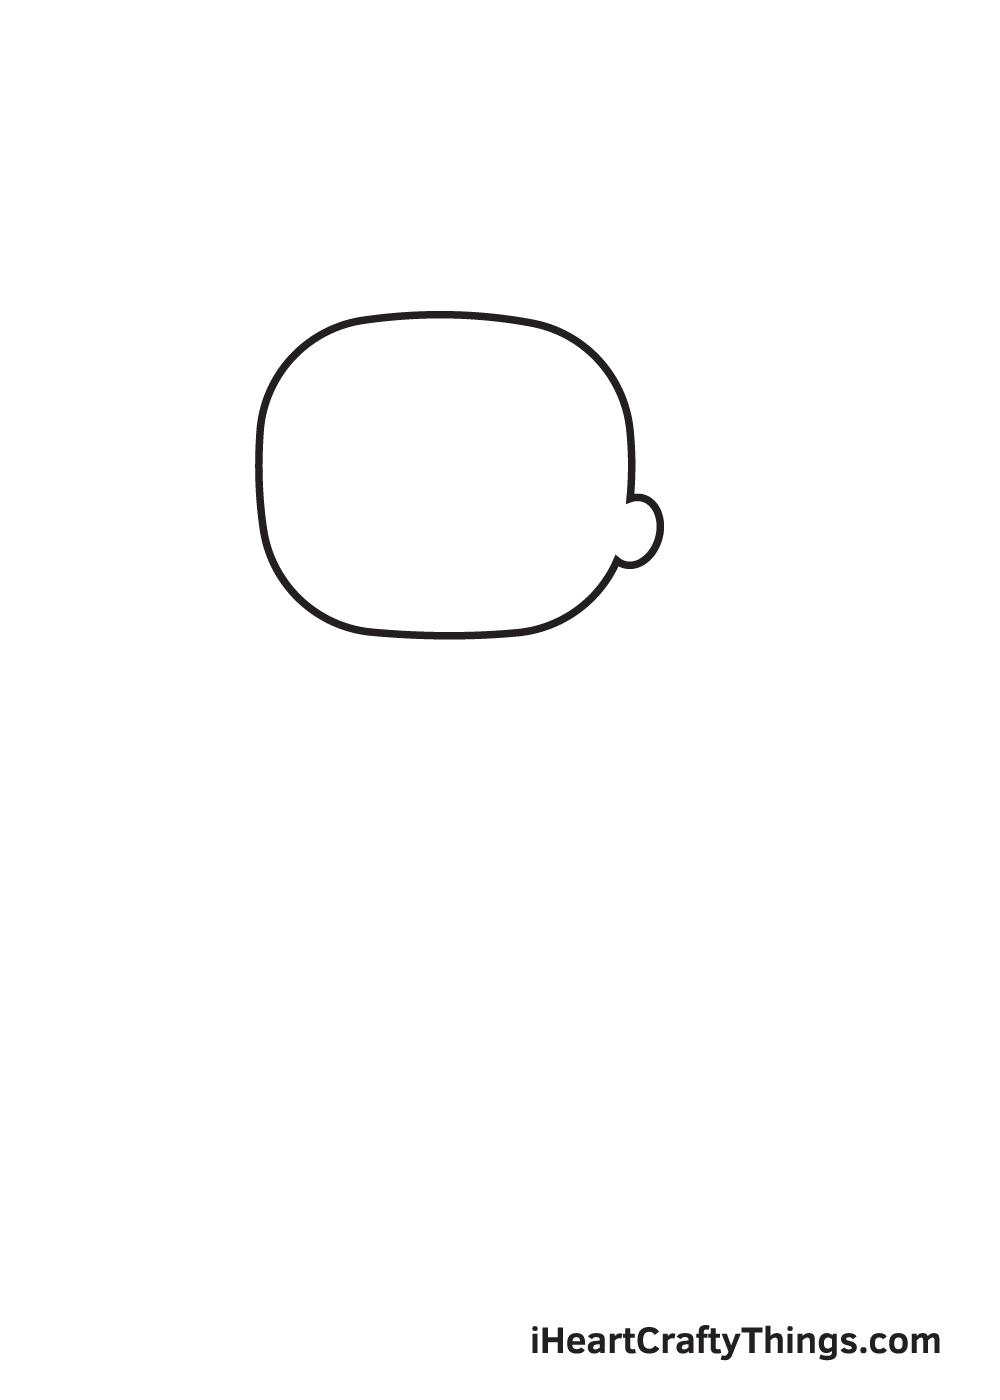
Start by drawing a square shape with curved edges to form the head of your character. Then, draw a semicircle attached on the right side of the head to create the ear.
Since the character is slightly facing sideways, only one ear is visible.
Make sure that the head is drawn just right above the middle of the paper. This ensures that there’s sufficient space for the entire body of your character.
Step 2 – Outline Your Character’s Head and Body
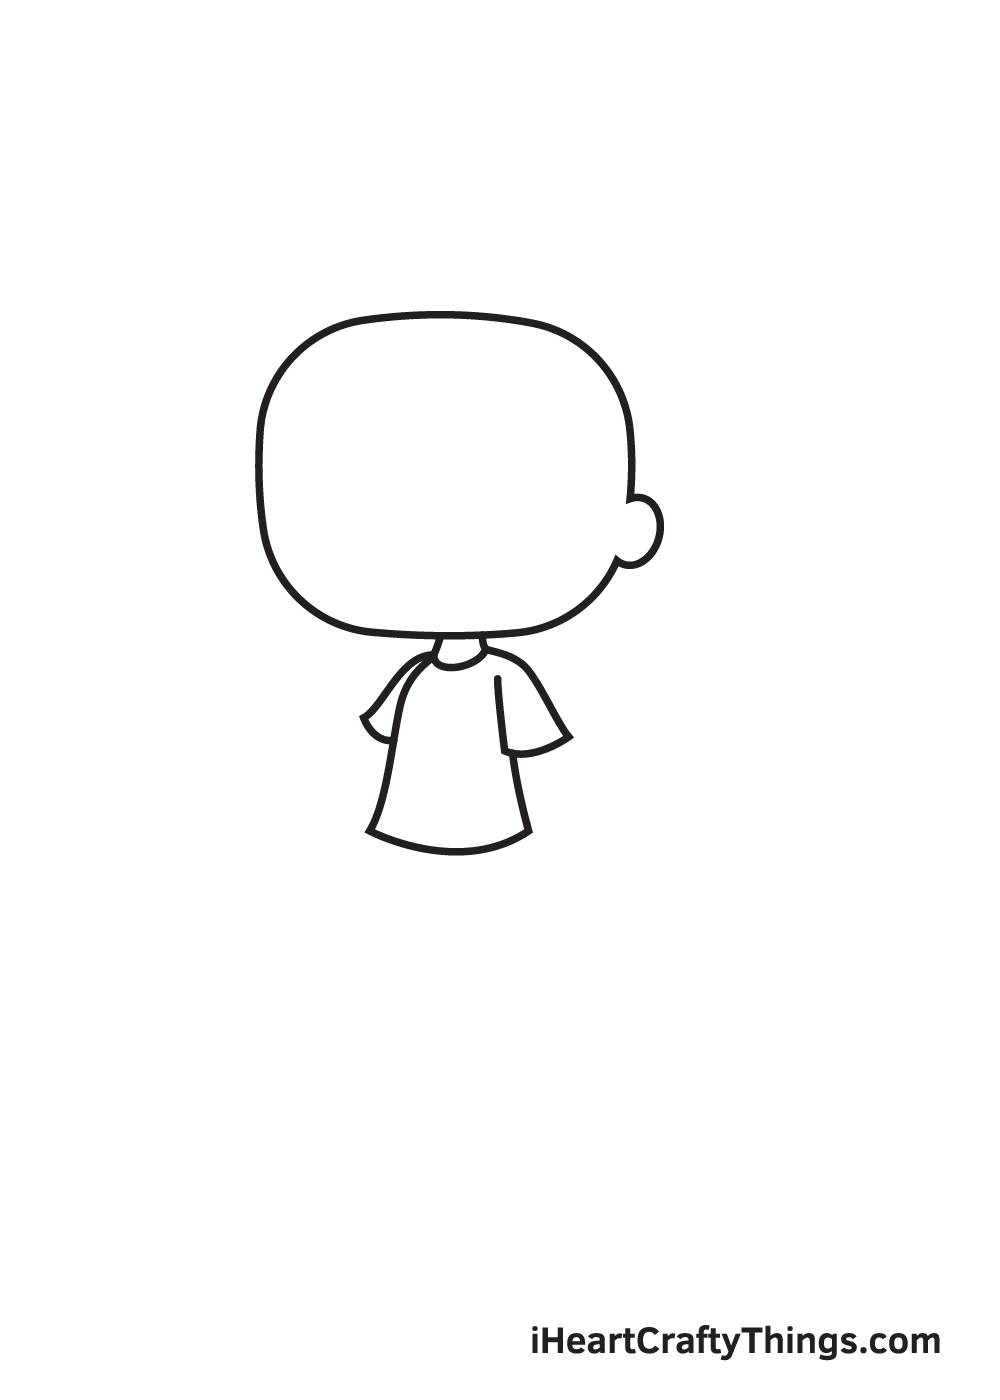
Right underneath the head, draw two short curved lines with a small gap in between to create the neck of your character.
Afterwards, proceed by drawing the shirt your character is wearing.
Step 3 – Next, Draw the Left Leg of Your Character
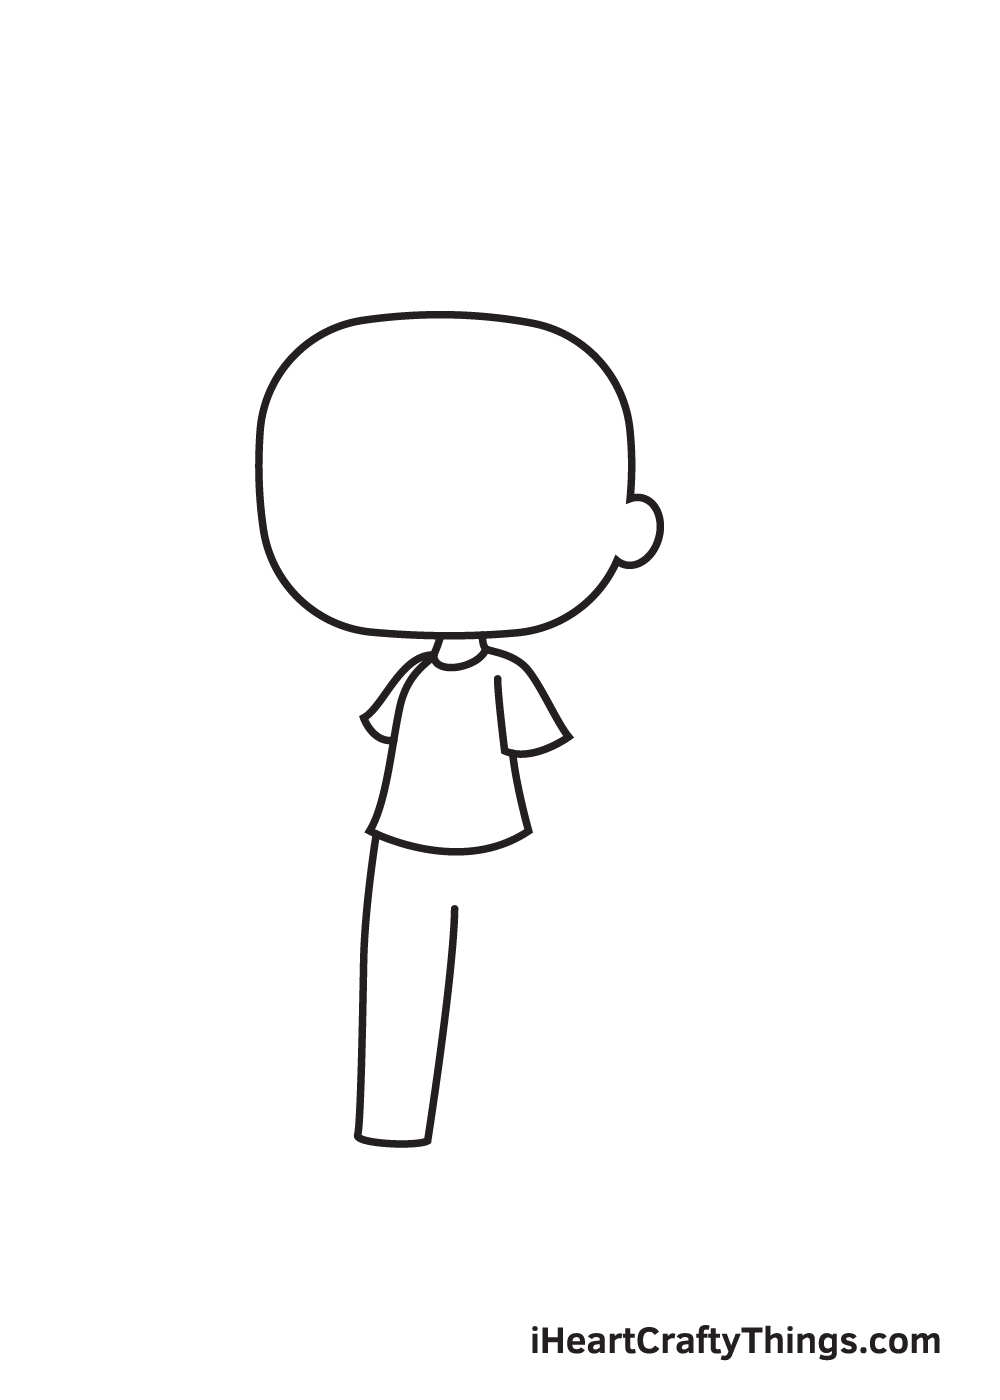
Draw a vertical line on the left side below the shirt. Then, draw a shorter vertical line parallel to it.
Afterwards, draw a horizontal line at the bottom, connecting both endpoints of the vertical lines. This creates the left leg of the trouser your character is wearing.
Step 4 – Complete Both Legs of Your Character
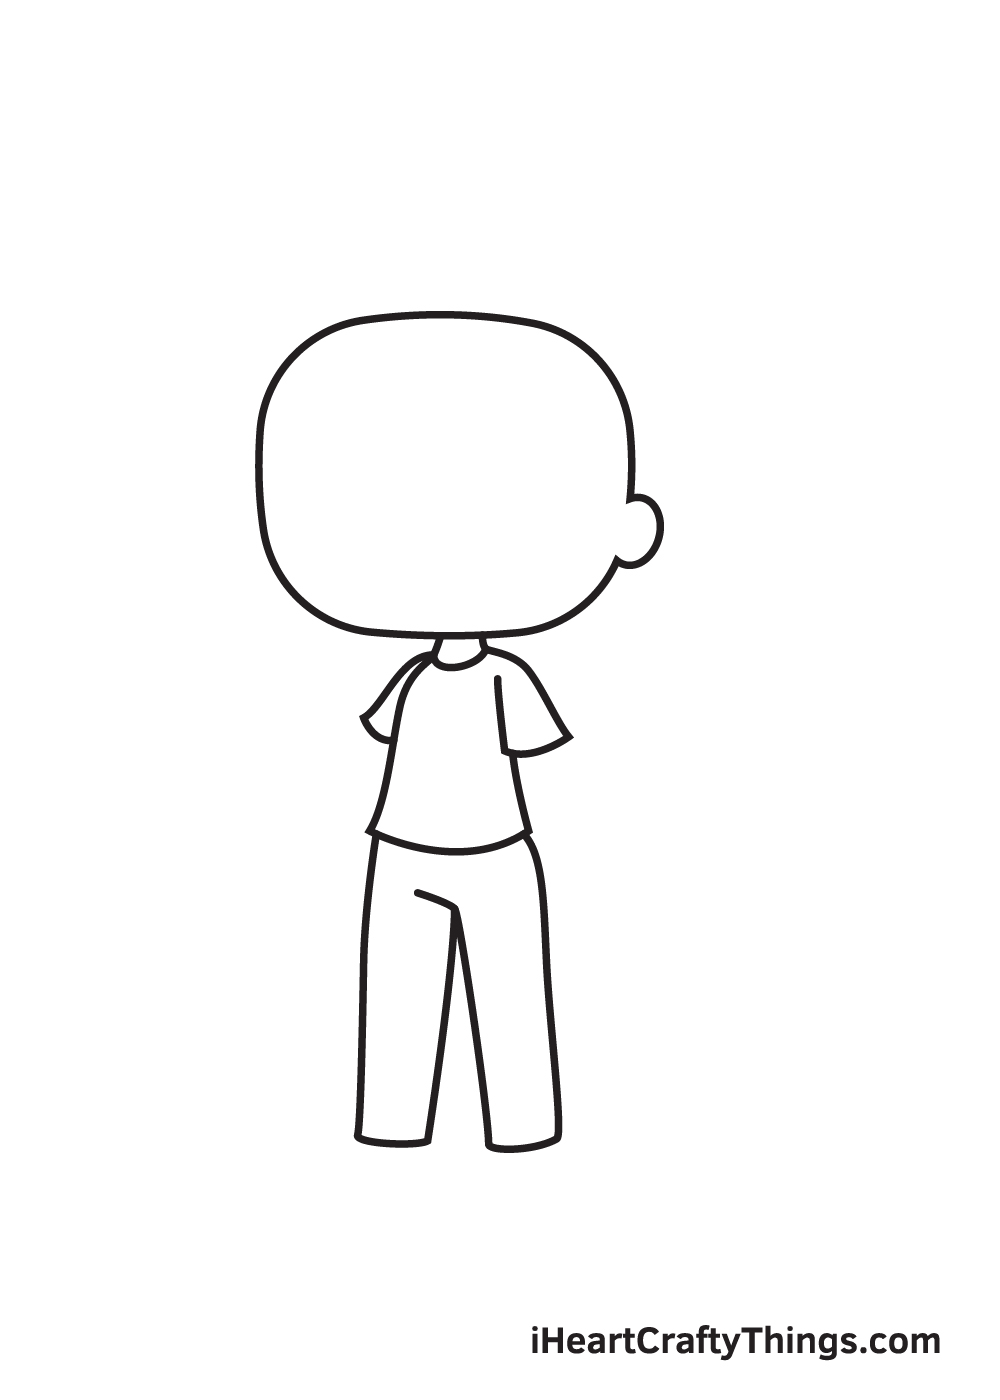
Repeat the previous step on the opposite side to complete the pair of trousers. At this point, your character should be fully clothed, all it’s missing is a pair of shoes to match with the outfit!
We kept the outfit simple, as you can see in the illustrations. However, feel free to draw any type of clothing you like! After all, it’s your own Gacha Life character!
Step 5 – Draw a Pair of Shoes for Your Character
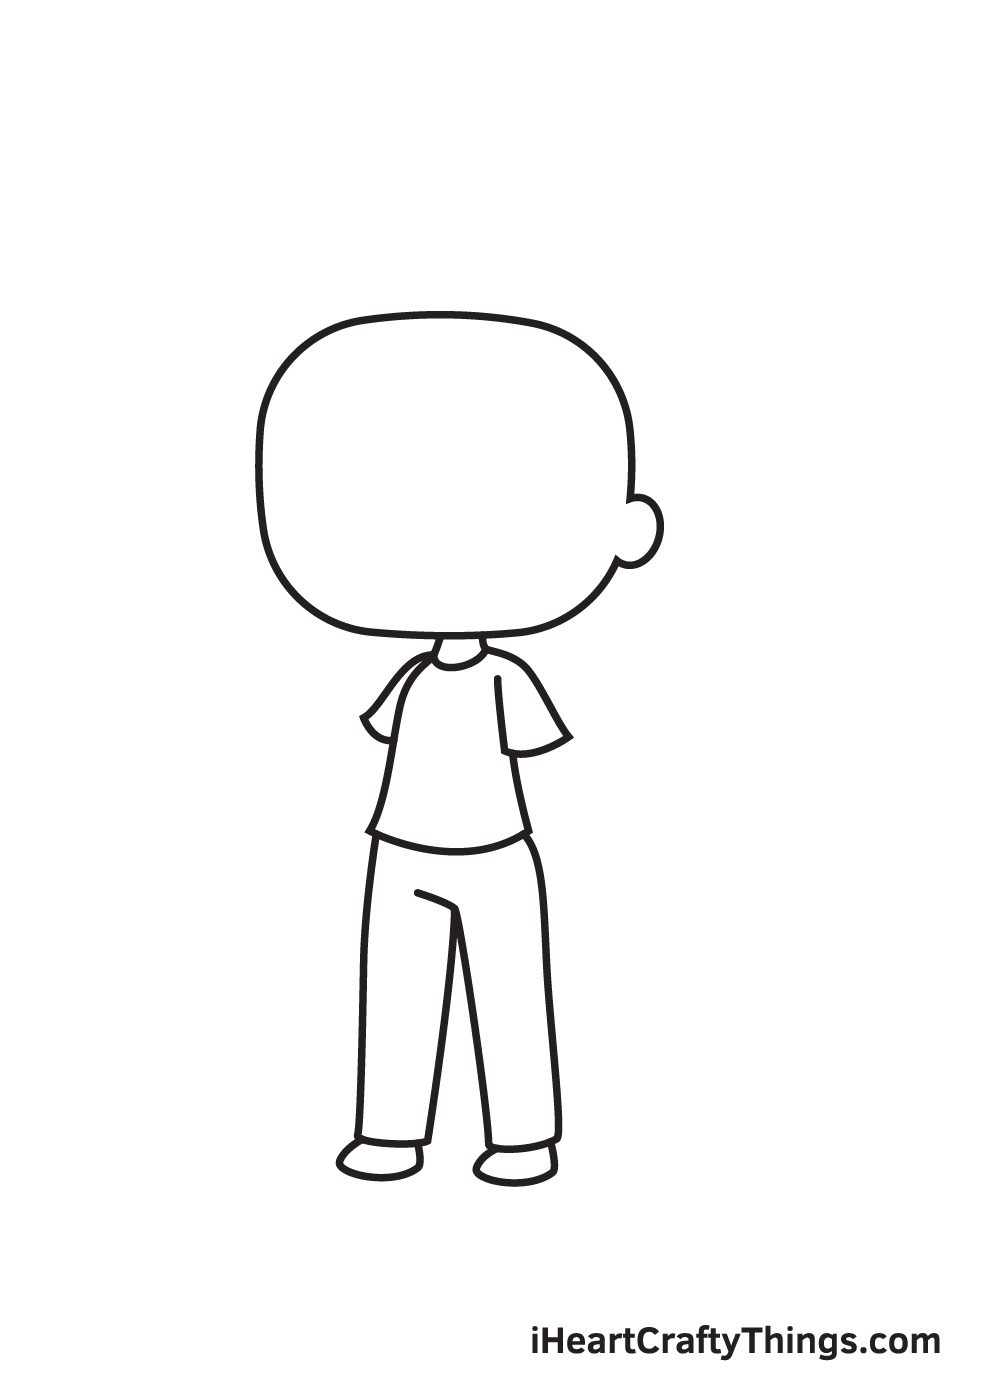
Draw a curved shape at the bottom of each leg to create the shoes. As you can see in the illustration, both of the feet are facing towards the left side because the character is facing that direction. Keep that in mind to avoid inaccuracy!
Similar to your character’s clothing, you can also customize the shoes your character is wearing.
Step 6 – Draw Your Character’s Left and Right Arm
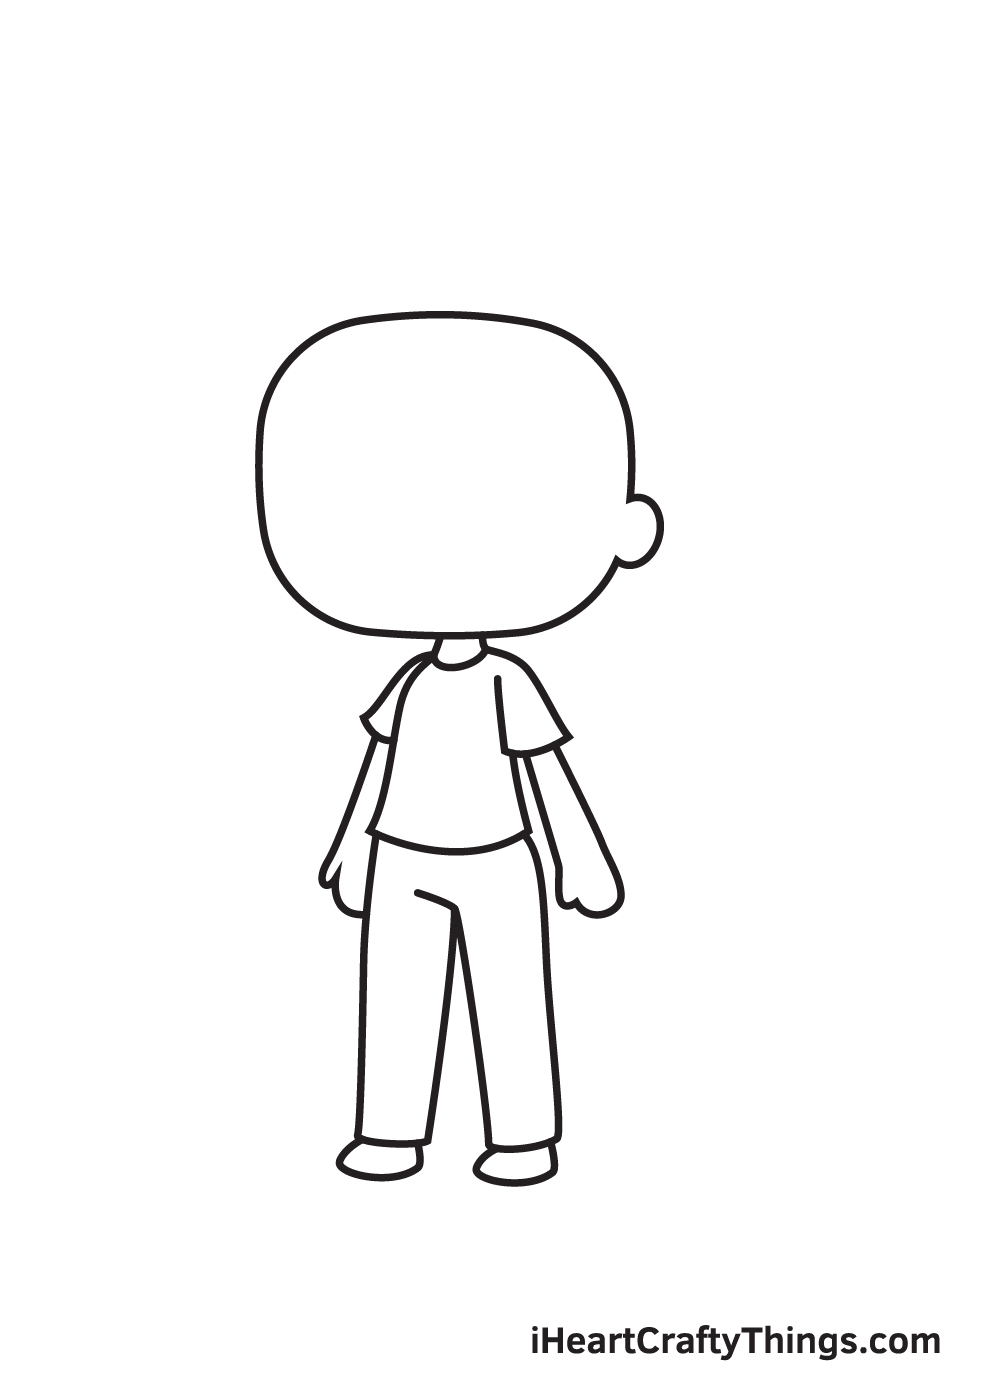
Draw an elongated narrow shape underneath each shirt’s sleeve to create both of the character’s arms.
Don’t forget to create a separate curve at the bottom of both arms to create the thumb!
Step 7 – Then, Draw the Hair of Your Character
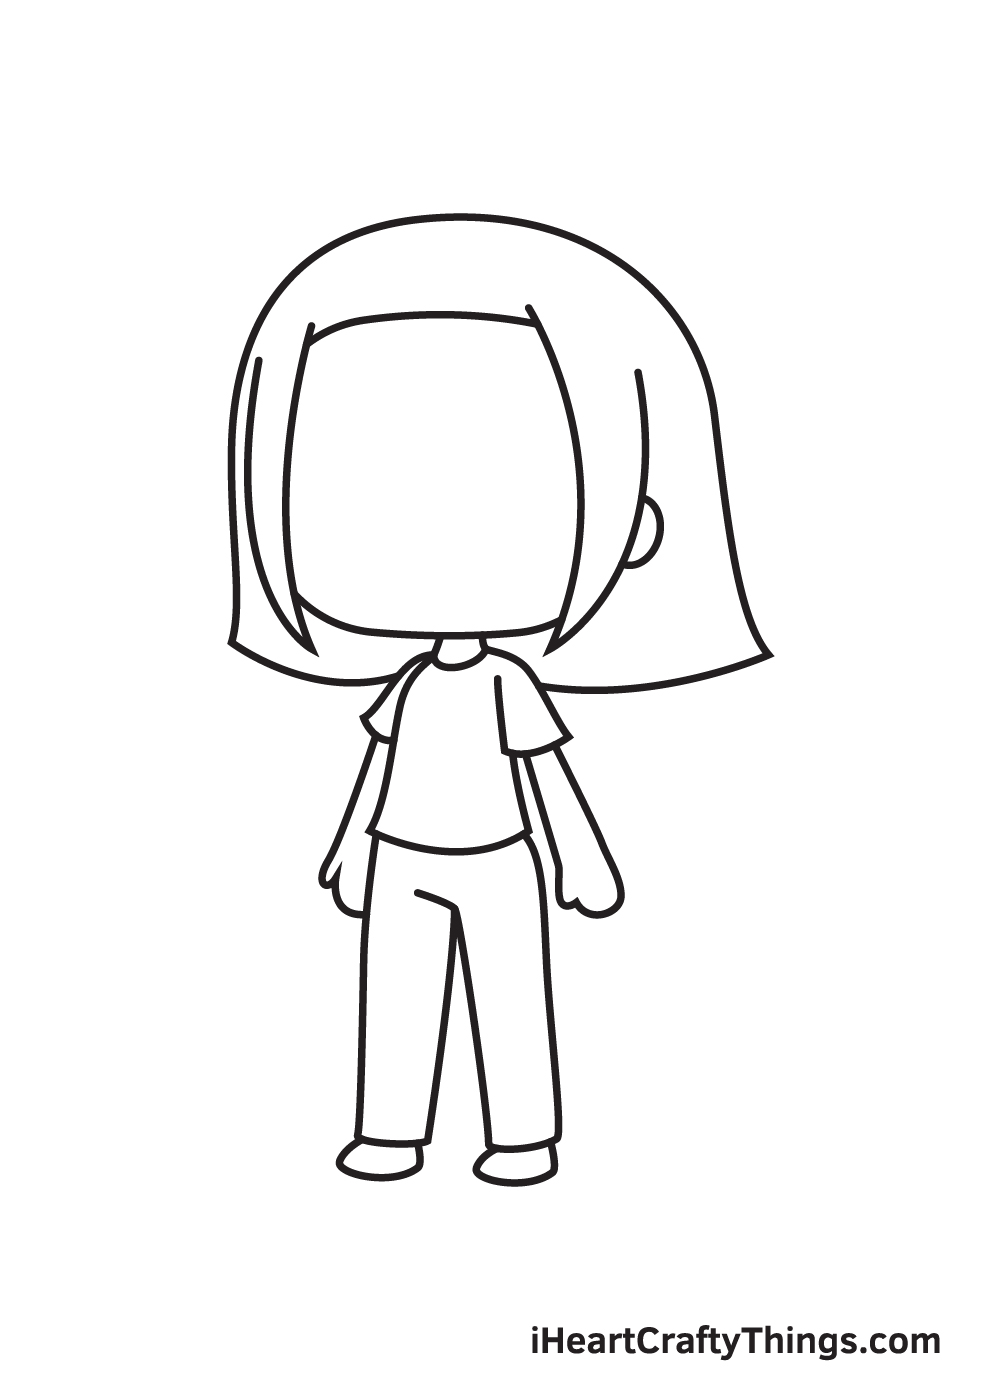
Continue by drawing the hairline of your character, which should be above the forehead. Then, draw the outline of the hair surrounding your character’s entire head.
Needless to say, you can also personalize the hair! You can draw short bob hair, long curly hair, or any type of hair that you like.
You can also put the hair on a ponytail, braid, and any other cute hairstyles. This will make your character more unique!
Step 8 – Next, Draw the Eyebrows and the Mouth
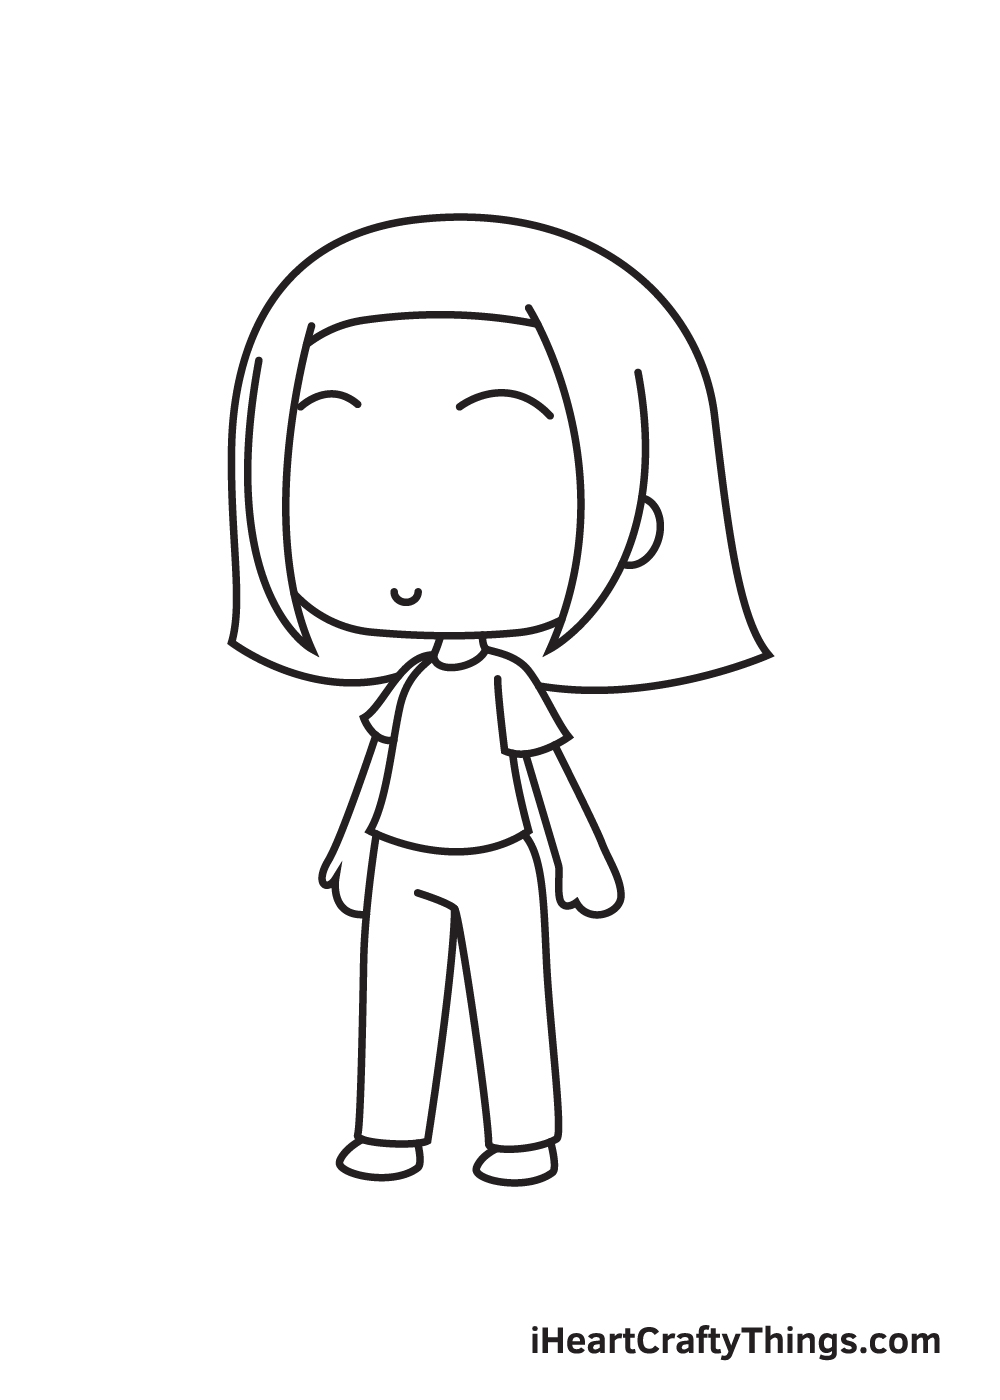
Now that we’ve finished drawing the head and the body of your character, it’s time to finish off the look by drawing your character’s facial features.
Proceed by drawing two downward curved lines near the forehead to form the arched eyebrows. Afterwards, draw a smaller upward curve to put a smile on your character’s face.
Step 9 – Now, Draw a Pair of Huge Sparkling Eyes
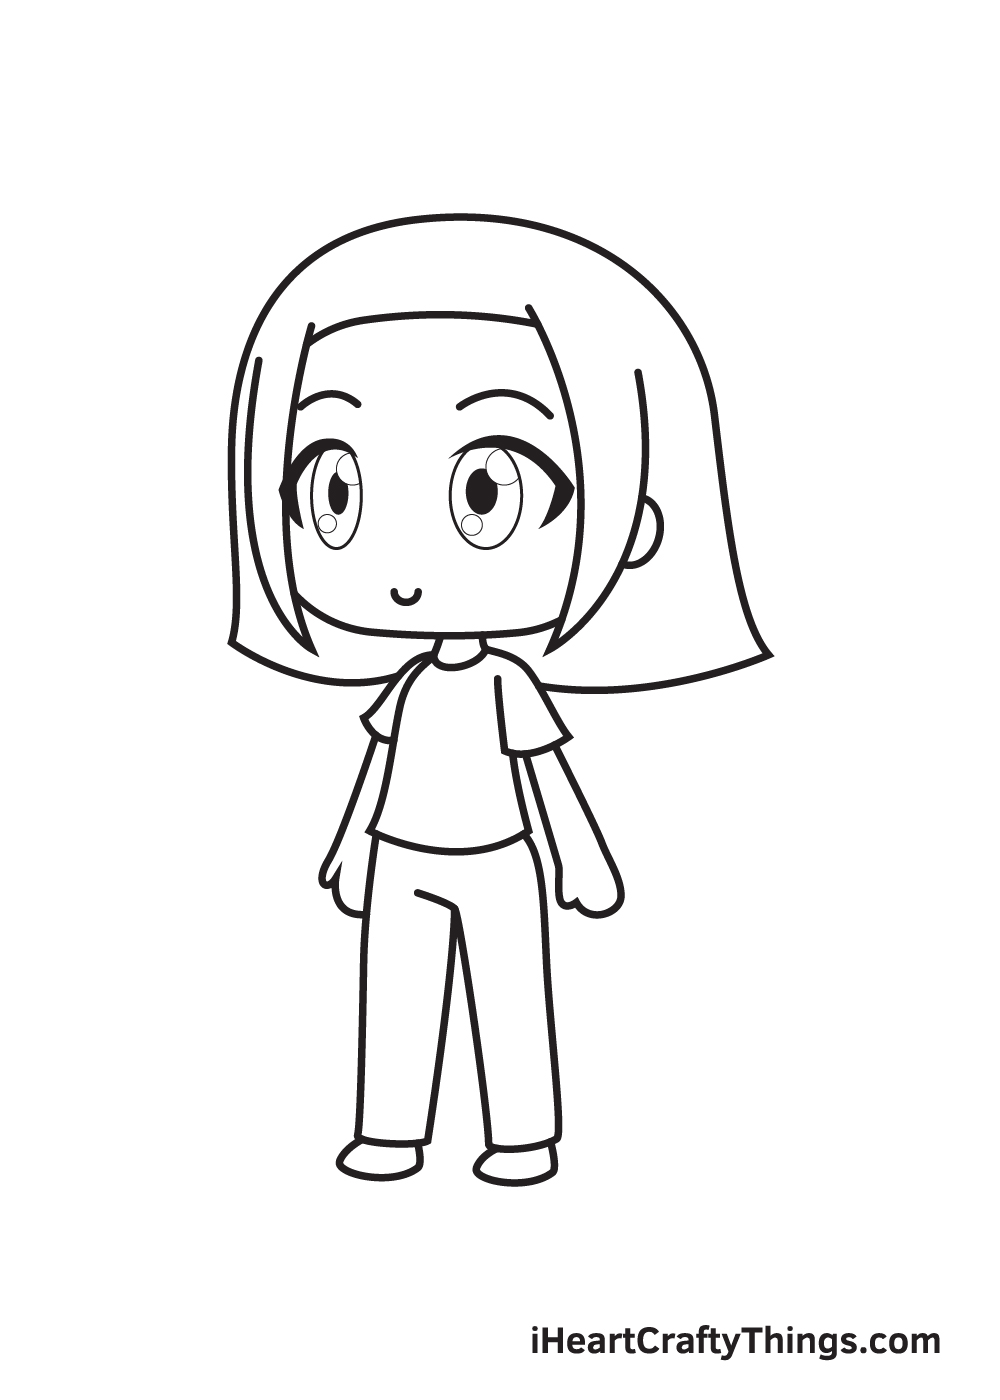
Moving on to the eyes, draw two enormous standing oval shapes underneath each eyebrow to form the pupils.
Then, enclose the shape with an angled line above each oval shape to create the upper lid of your character’s eyes.
Afterwards, draw three more shapes inside the pupil: an upright oval in the middle, a small circle on the bottom left, and a semicircle on the upper right corner.
Now, shade the entire oval shape that we drew inside the pupil to add emotion to the eyes!
It’s time for the long-awaited part at last! If you found drawing your character, then coloring it is surely much more enjoyable.
This is the part where you can showcase your artistic skills and your ability to mix and match colors.
The colors you will choose for your character is entirely up to you! But here’s a useful tip: to create a skin tone color, simply combine the colors white, yellow, blue, and red.
Depending on the complexion you’re trying to achieve, you may need to add more of a specific color.
Take note that skin tone colors are best achieved when using coloring materials that are fairly easy to blend like watercolor or acrylic paint!
Have fun playing with colors and watch as your character ultimately comes to life!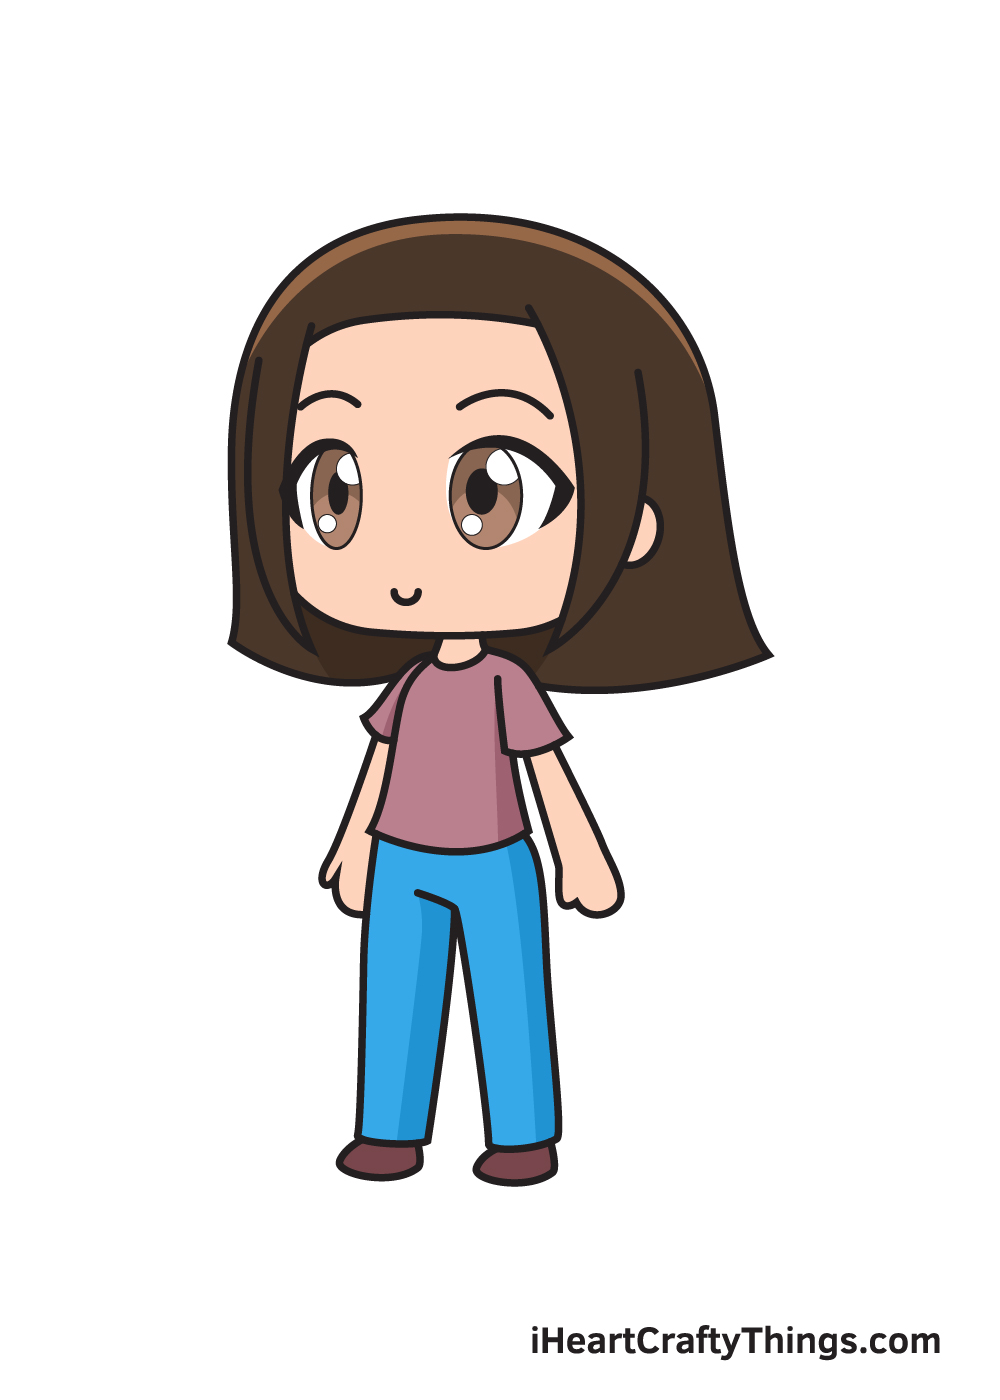
Bonus: Use These Tips To Make This Drawing Easier
The style of Gacha Life means that this drawing wasn’t the most complex or detailed drawing to take on. That being said, it can still present some challenges that can make it tough!
We wanted to present a few ideas to make this Gacha Life drawing a bit easier if you find yourself struggling. Even though this character doesn’t have realistic proportions, you can use the same tricks you would for a realistic drawing.
One trick artists will use is to make a basic stick figure version of the character using some simple lines. This is to get the posing mapped out in your head before you draw.
Then, you can add simple shapes to represent the head, body, limbs and any other aspects. These will help you to keep the proportions in mind as you draw the final lines.
When doing this planning, it is best to use a light pencil and not press too hard on the page. That way, you can easily erase these planning lines later on when you draw the final lines.
Practice makes perfect is a popular saying, and it is an apt one when it comes to drawing. Many people feel pressure to get a drawing right on the first try, but you can make some practice attempts.
You can take some spare pieces of paper and try sketching out the drawing quickly without being too concerned with getting it right.
These can be like practice runs that you can use to determine which aspects of the drawing will be the trickiest for you. You can then slowly start honing the drawing until you begin the final attempt.
Using these tricks will hopefully help you and show you how to get past any hurdles you run into!
Do this to take your Gacha Life drawing to the next level
Make this Gacha Life drawing even better as we show you some creative tips!
Now that you have designed this character, why not give her some accessories? The game is all about expressing your creativity, so you could add accessories that best represent your own fashion taste.
These could include a handbag, a hat, some cool sunglasses or maybe some big earrings! There are no wrong answers, and you could add anything you can imagine to your Gacha Life sketch. These extra details will also give you more elements to color later on.
We mentioned colors in the previous tip, and that is something we would like to focus on. We kept the colors fairly muted for this design, but you could make them as bright or as dark as you like!
You could use some colored pens, markers or paints to make the colors of her outfit really pop. Or, maybe you would prefer a darker, goth look for the character.
It’s totally up to you, and you should definitely let your creativity run wild as you work on the colors.
Next, we would recommend adding a background for this Gacha Life drawing. Adding a background is a simple yet effective way of creating a scene around this character.
In adding one, you could make it look like a screenshot from the game, but you could also create an entirely unique setting instead if you prefer. What kinds of locations do you think this character would like to hang out in?
Now that you have completed this drawing of Gacha Life, you can change up some of the details to make your own creation.
By changing details such as the hair, clothing and facial features, you can create an entirely new person!
Or, you could keep her looking as she does and surround her with some Gacha Life friends with different designs.
Simply keep following the steps you followed up till now and change some of the details to see what you come up with!
Your Gacha Life Drawing is Complete!
There you have it—you have successfully created your very own unique character in Gacha Life! That was a lot of fun, isn’t it?
Feel free to check out our “How to Draw” catalog to explore many more enjoyable drawing tutorials like this!
Remember, all of our drawing tutorials are completely free for you to use as learning materials to help you draw interesting objects, animals, and characters in quick and easy steps!
Once you’ve finished drawing and coloring your character in Gacha Life, don’t forget to take a picture of your artwork!
Make sure to share it on our Facebook page and on Pinterest. You’ve worked hard for it, so it’s definitely worth sharing! We’re sure it looks awesome!
We’re looking forward to seeing what your Gacha Life character looks like!