


You’ll be amazed at how easy it is to learn how to draw a forest when you follow this guide for kids! I’ve broken it down to make it easier than ever to make your very own tranquil forest.
There’s something about forests that has always captivated me. They’re so beautiful and peaceful with so many different plants and animals to admire.
I don’t get to visit forests as often as I would like, so creating some art featuring one can be the next best thing. This guide will show you how to draw a section of a forest with some trees, plants and even a babbling brook!
Once you have finished the guide, you can also add a lot of your own details in order to make your own perfect forest getaway.

Watch These Steps To Make Your Forest Drawing
How to Draw A Forest – Let’s get Started!
Step 1
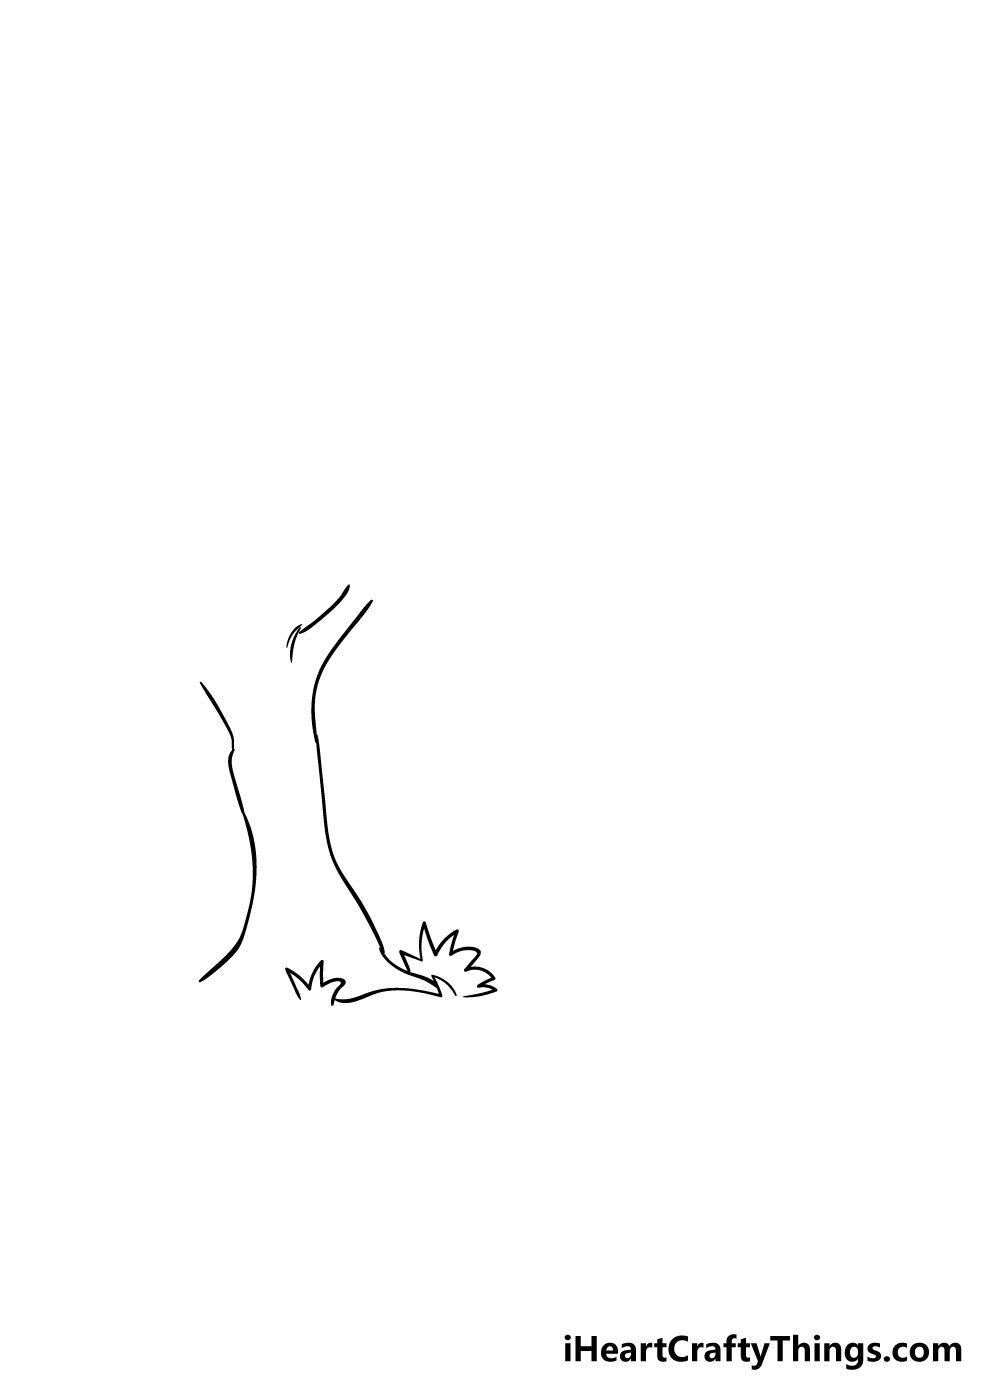
To begin our guide on how to draw a forest, we shall start with a tree in the foreground of the image.
To do this, you can use a slightly curved line with a couple of jagged edges for the left-hand side of the tree with a similar line on the right.
Each side of the tree will extend outwards as well. You can then add some more jagged lines for grass at the base, and then draw a branch extending from the upper right of the tree.
Step 2 – Add some treetops and other details in this step
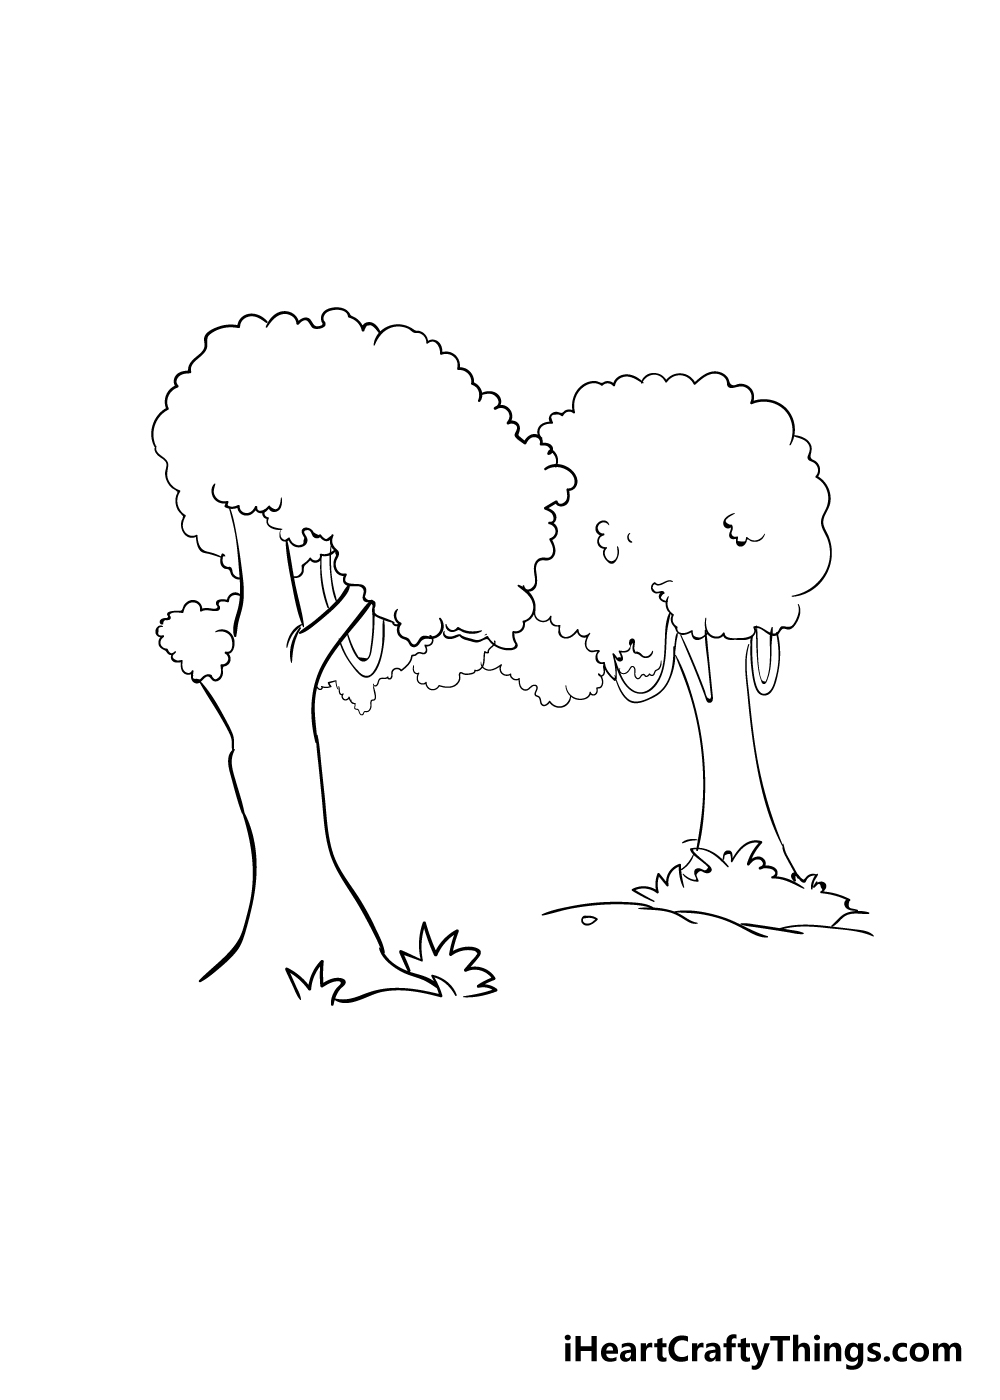
We will be adding a lot in this step of your tree drawing, so be sure to take it slow and follow the reference image closely!
First, add a thick central branch coming up from the middle of the tree. You can then draw a big, rounded shape with a bumpy line to create the leafy treetop.
Some curved lines coming down from the leaves will form some vines hanging down. Then, a bit to the right, you can repeat what you did to create a second tree.
This one will be slightly smaller to show perspective, and also has a few minor differences.
It will also have a grassy base made of jagged lines with a smoother ground space beneath that.
Finally, you can add some bumpy lines below the treetops that you drew to start showing some trees in the background.
It may all sound complicated, but with the reference image to guide you it will be easier than you think!
Step 3 – Now, draw some layers of ground
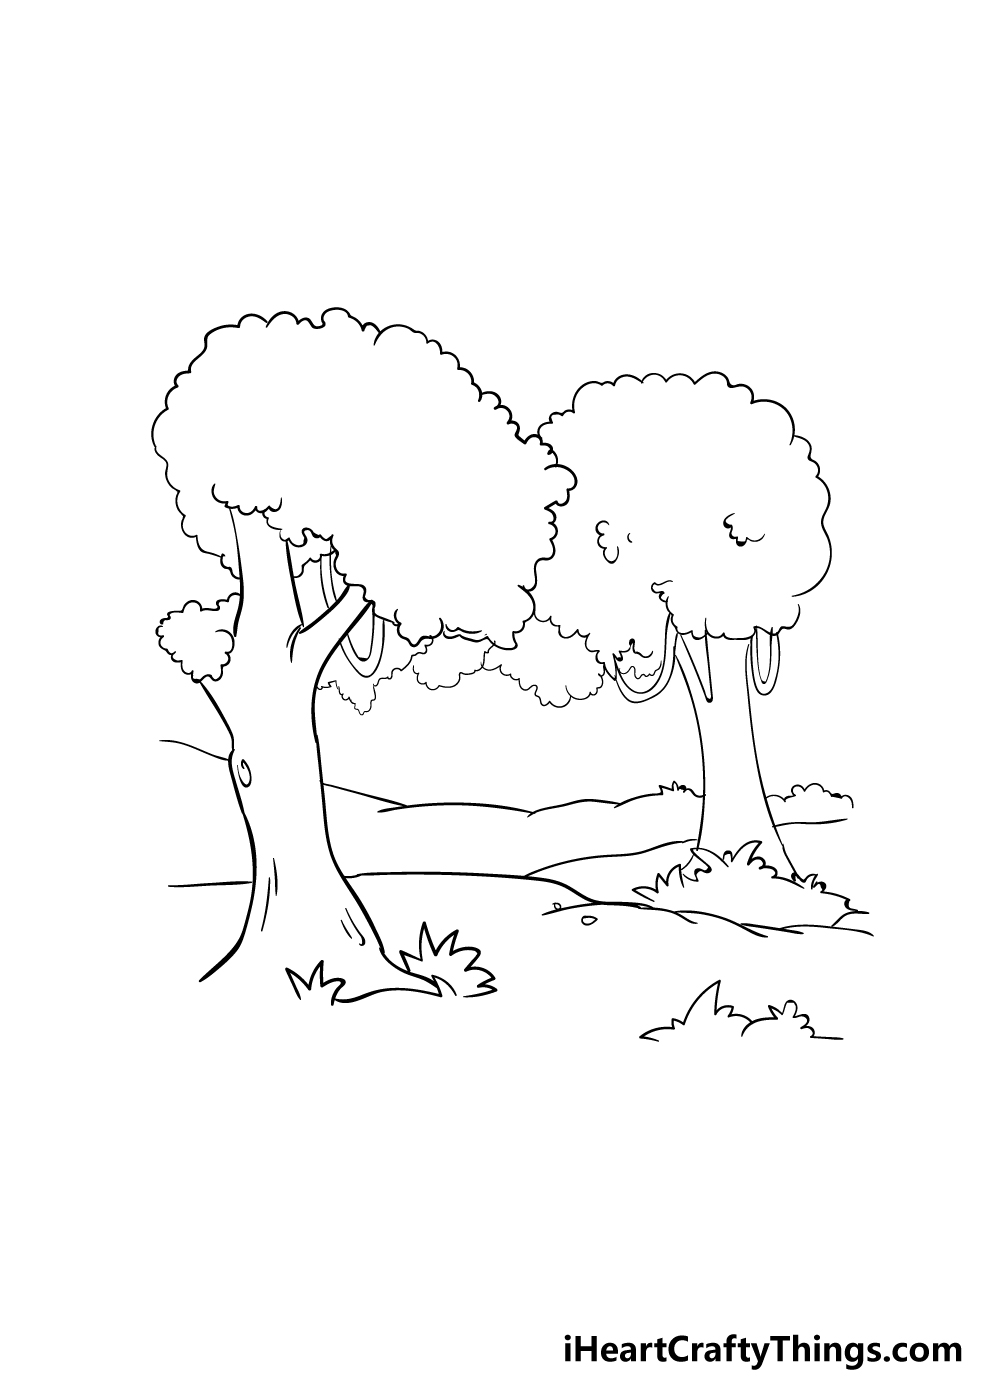
In this next step of this guide on how to draw a tree, you can focus on the ground of the forest for a bit.
You can draw these elements using some slightly curved lines on various layers of the empty space between the trees.
This will create a slightly hilly appearance for your forest. Some more jagged lines for some grassy areas will finish this step off nicely!
Step 4 – Start adding some tree trunks in the background
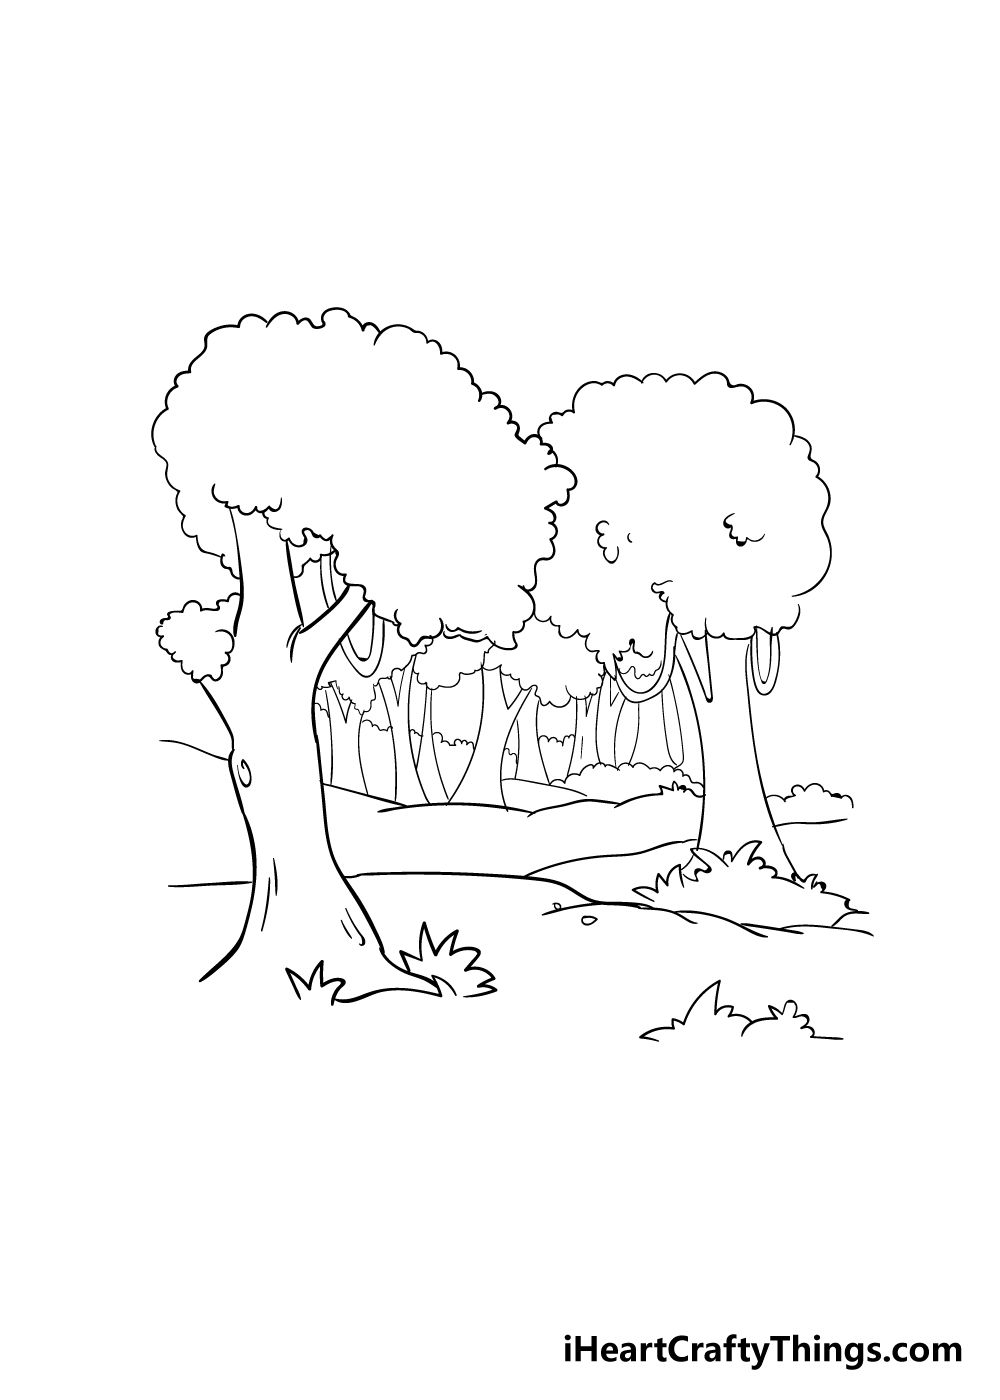
Your forest drawing needs a lot more trees in it to be a true forest, so let’s add some now! You can draw some tree trunks in the background between the two main trees to do this.
They will look similar to the trunks of the main two trees, but as you may imagine they will be much smaller as they are further away.
Once you have these extra trees drawn, we shall finish off the final details in the next step!
Step 5 – Now, you can add some finishing touches and final details
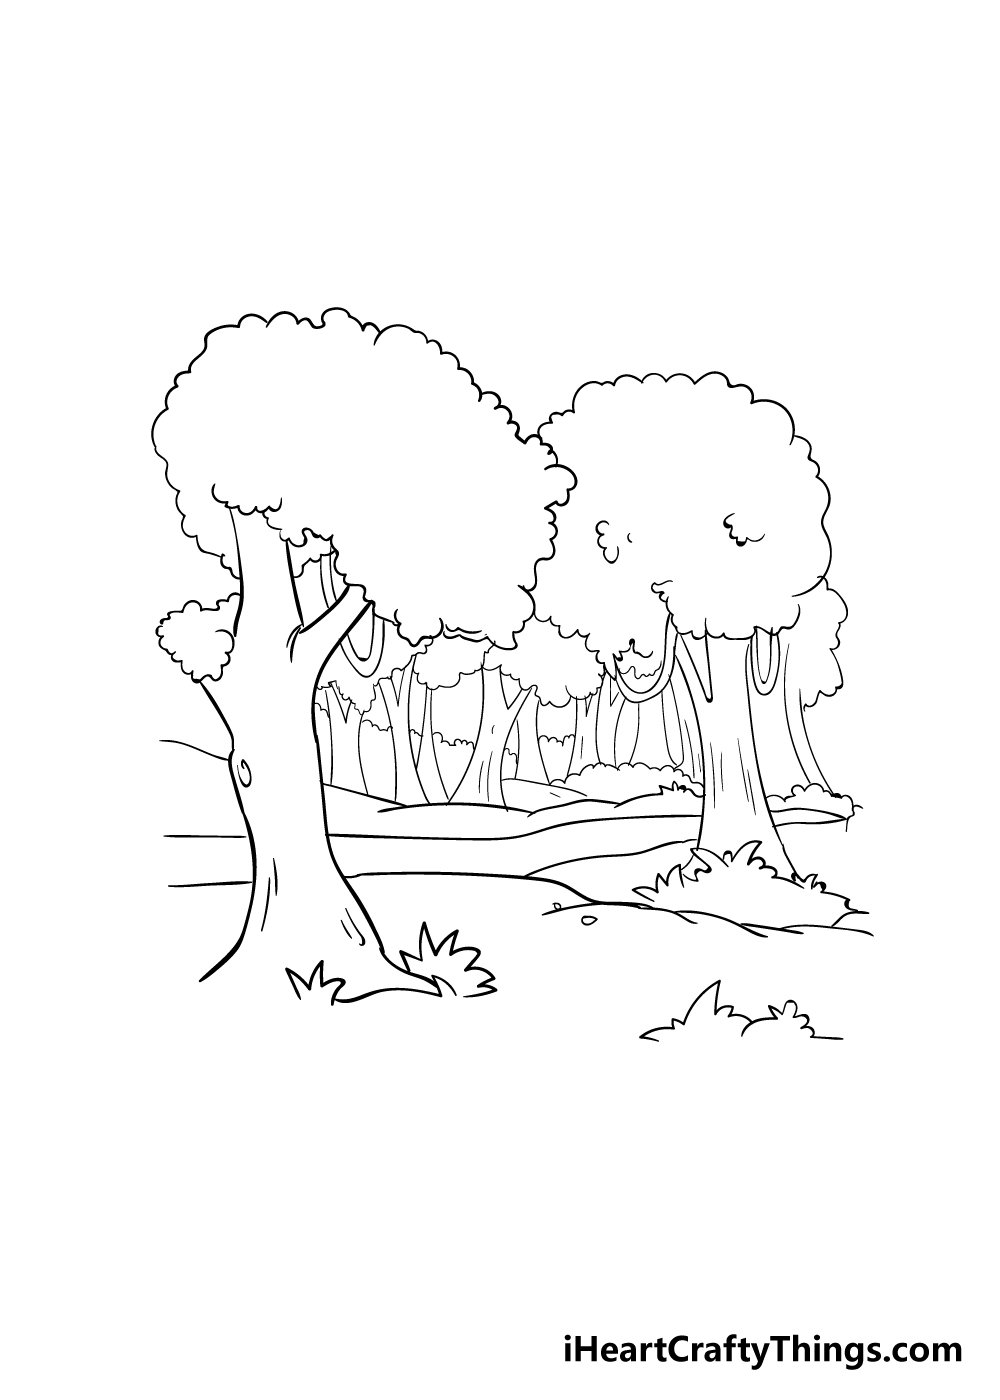
This forest of yours is already looking amazing! Before we move on to the final step of this guide on how to draw a forest, we shall first add some final touches and details.
As you can see in our reference image, you can draw some thin lines onto the branches and also add a few more layers of ground.
With those details added, you have technically finished the drawing! Before you move on, be sure to add any extra details that you would like.
Some wildlife would be a great way to bring some life to this forest.
You could draw some squirrels or raccoons or go bigger with some horses! Perhaps this is a magical forest with a unicorn living in it?
You could also represent different seasons by drawing snow on the trees, by making the trees barer or by adding lots of beautiful flowers.
There are so many ways that you can put your own spin on this drawing, so be sure to show us what you can do!
Step 6 – Finish off your forest drawing with some color
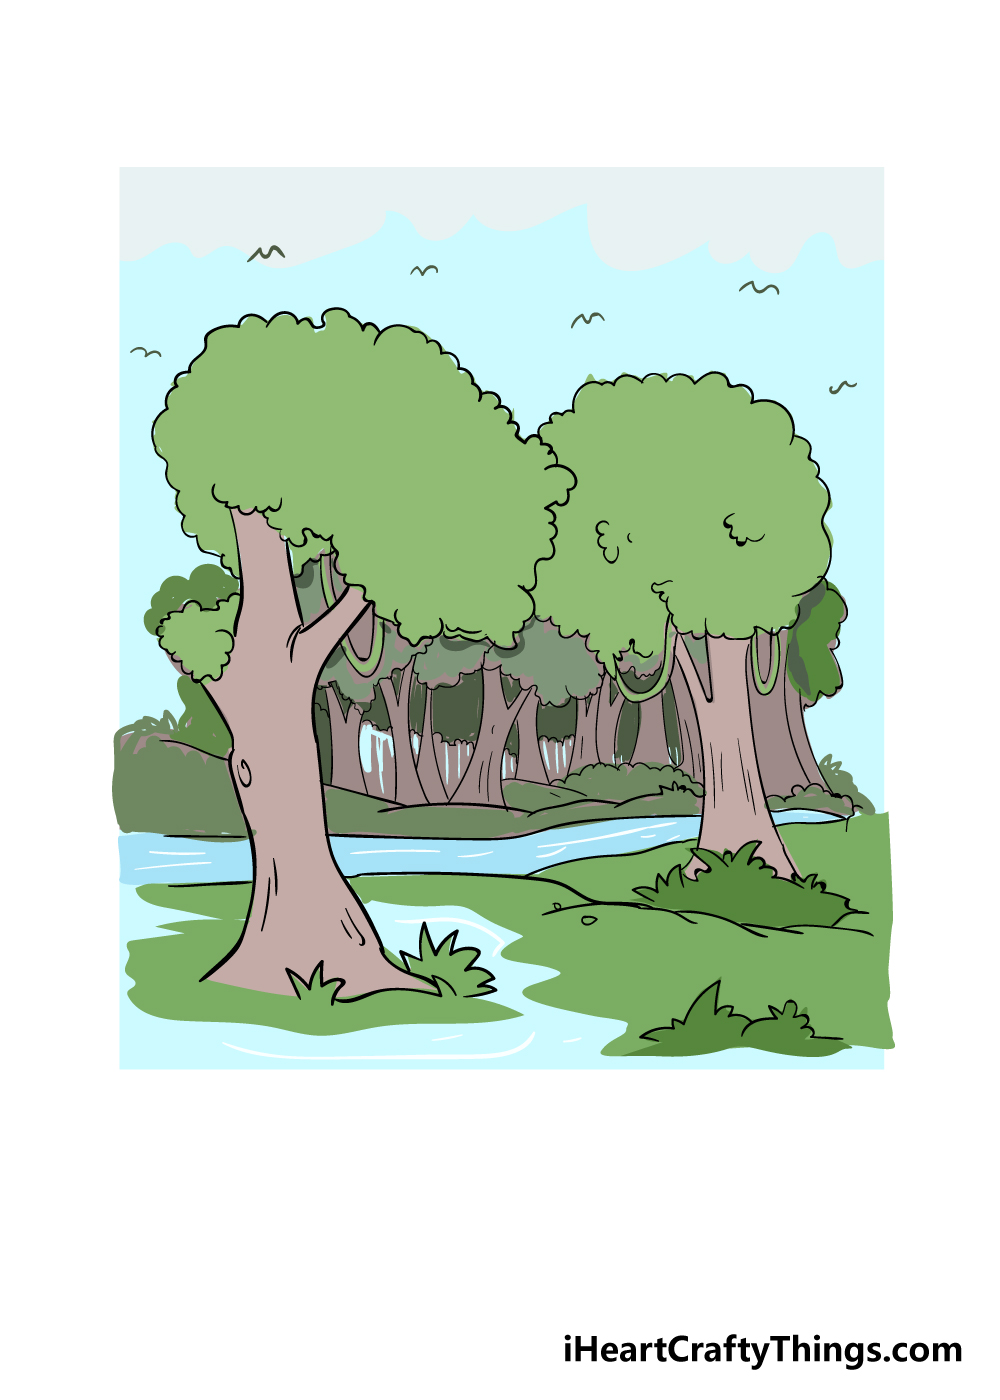
You have almost finished your forest drawing now, so all that remains is to add some beautiful colors to it!
Forests can be beautiful, lush places with lots of wonderful animals and plants providing some color.
You could also go for a different mood, though. By using darker colors with a purple sky and white paint for mist, you could make this a spooky forest setting!
If you took our previous suggestion of making seasonal variations, then you could incorporate reds and yellows for the Fall or whites and blues for Winter.
I think that watercolor paints would make for a lovely soft image here, but there are many other art mediums you could go for!
Whatever you go with will look amazing, so we can’t wait to see what you come up with!
Add Some More Life To This Forest Drawing
You’ve reached the end of this guide on how to draw a forest, and it’s looking absolutely incredible! You did an amazing job, but you don’t have to be done just yet.
For this guide, we kept the focus on the forest itself. Forests are filled with life and details, however, so this gives you a lot to add to your drawing.
In the reference image, we drew some simple lines to represent birds in the sky, and while this does the job, you could also make some more detailed birds.
These could be any species you like, and they could be realistic or cartoony, depending on your own preferences. There are also so many other animals you could add!
It would be lovely so see some deer grazing or some squirrels scuttling up the trees. Basically, anything you can think of that would finish off this tranquil scene would be perfect.
There could also be some signs of human life in this image. Once again, it could be as simple or as complex as you like.
For example, it could be more subtle like a small birdbath on the grass, or as complex as a cabin in the forest. If you wanted to, you could even have some human characters wandering around.
Changing the weather to maybe make this picture more dark and stormy would also be an interesting change to the picture. That would also be quite easy, as it could be as simple as changing the color of the clouds.
As you can see, there are so many ways to add some life! Now that you have some ideas, you may want to come up with some of your own and see how you can add some life to this beautiful forest.
Your Forest Drawing is Complete!
We really hope that you had an amazing time working through this step-by-step guide on how to draw a forest!
This was quite a detailed drawing, but we hope that by having this guide to follow you discovered that it’s easier than you thought to create a beautiful forest drawing.
Now that you know how to draw a forest, it’s up to you to make it your own!
We have suggested a few ideas you could use, from changing the seasons to making a spooky atmosphere or even with adding some mythical creatures!
There are tons of creative ways that you can personalize your drawing, so let your creativity run wild!
You’ve mastered this drawing, but the good news is the fun is not over! We have many more drawing guides like this one on our website for you to enjoy!
Be sure to visit us there often, as we upload new guides frequently.
We’re very curious to see the creative ways you completed your forest drawing! We hope that you will share your amazing artwork on our Facebook and Pinterest pages for us to admire.
Here Is A Cute Forest Drawing To Inspire You!

Pictures can really help to create a sense of adventure, even when they’re simple. Our artist Amanda has created a real sense of fun and adventure with this cute forest drawing for kids.
This picture was made to give you some inspiration for your own drawing.
Amanda really went to town with the trees, flowers and plants, and it shows you how you can make a complex scene with simple details.
It would also be easy to customize this design in some simple yet effective ways. For instance, you could add even more flowers, plants, trees or even other characters.
Using colors to create a Winter, Fall, Spring or Summer scene could also be used to great effect.
This drawing is here to inspire you, so be sure to go with whatever details and additions you want for it!