It’s always a wonderful thing to have a canine friend at your side!
There are an almost infinite amount of different types of dog breeds, and each has its own unique appearances and personalities.
You can always tell a dog has been around by its distinctive footprint. Dog lovers may be wondering where they can learn how to draw a dog paw, and we have the answer!
You’re in the right place to learn this for yourself, so dog lovers will want to read on!
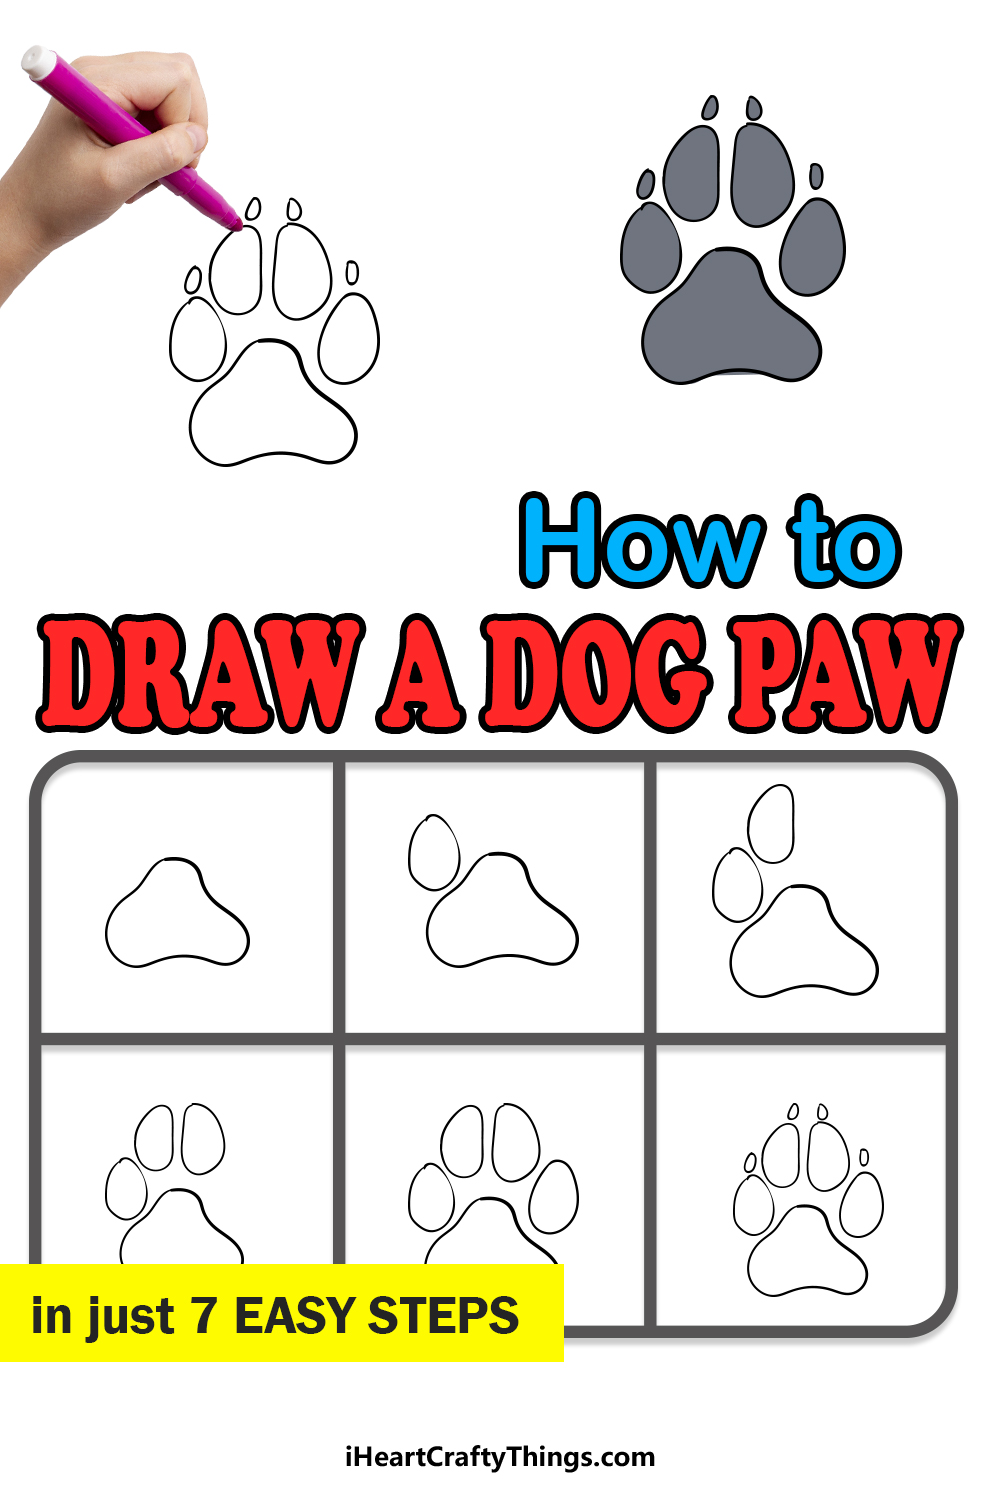
Our step-by-step guide on how to draw a dog paw in just 7 steps will have you drawing this doggy signature in no time!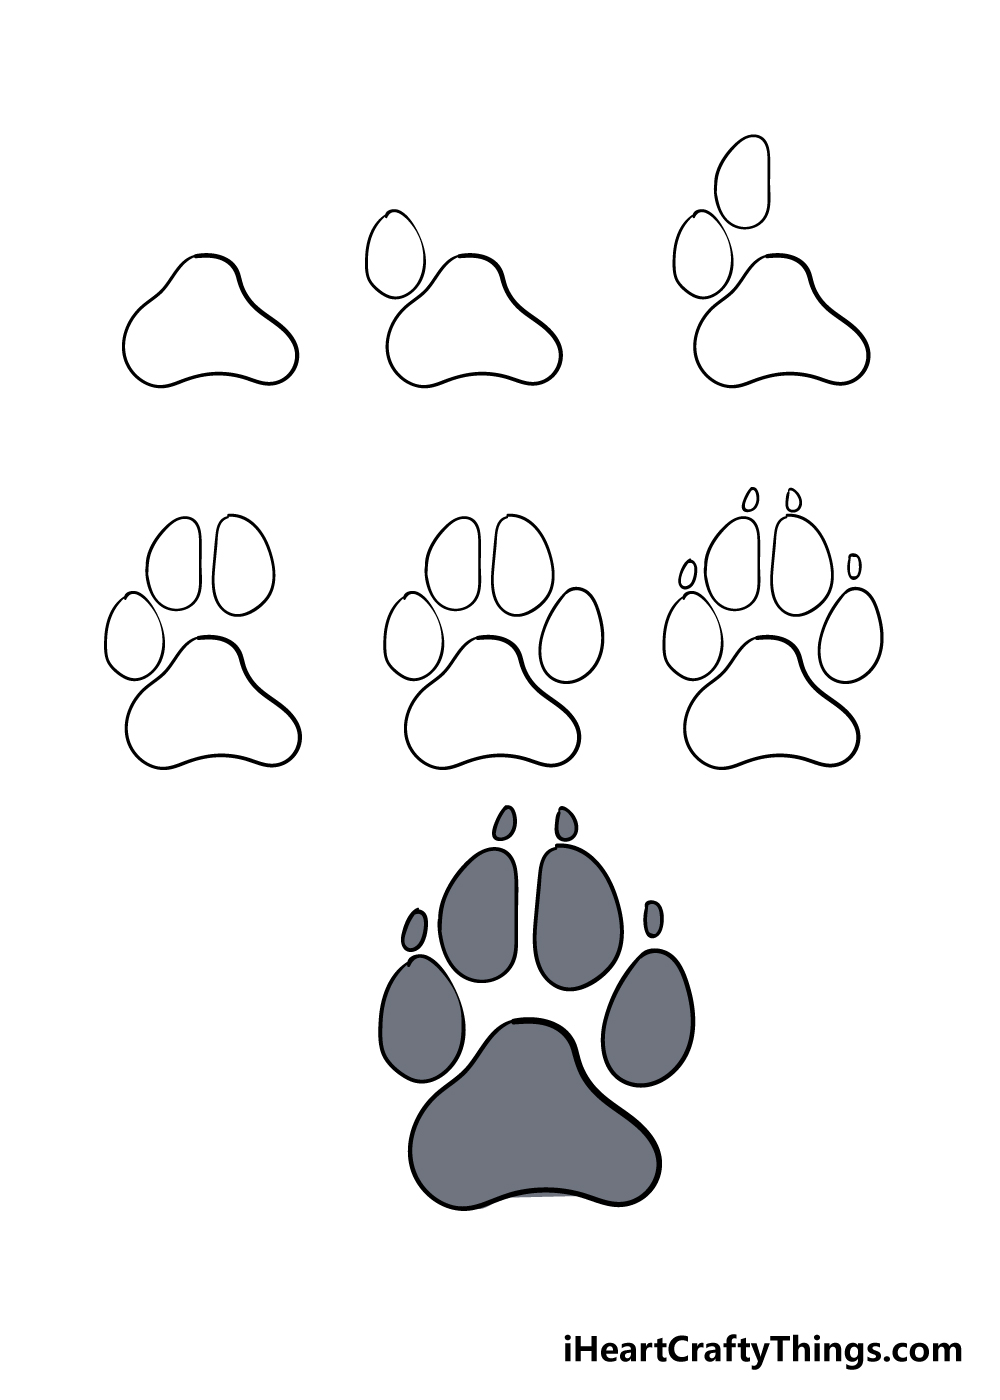
How to Draw A Dog Paw – Let’s get Started!
Step 1
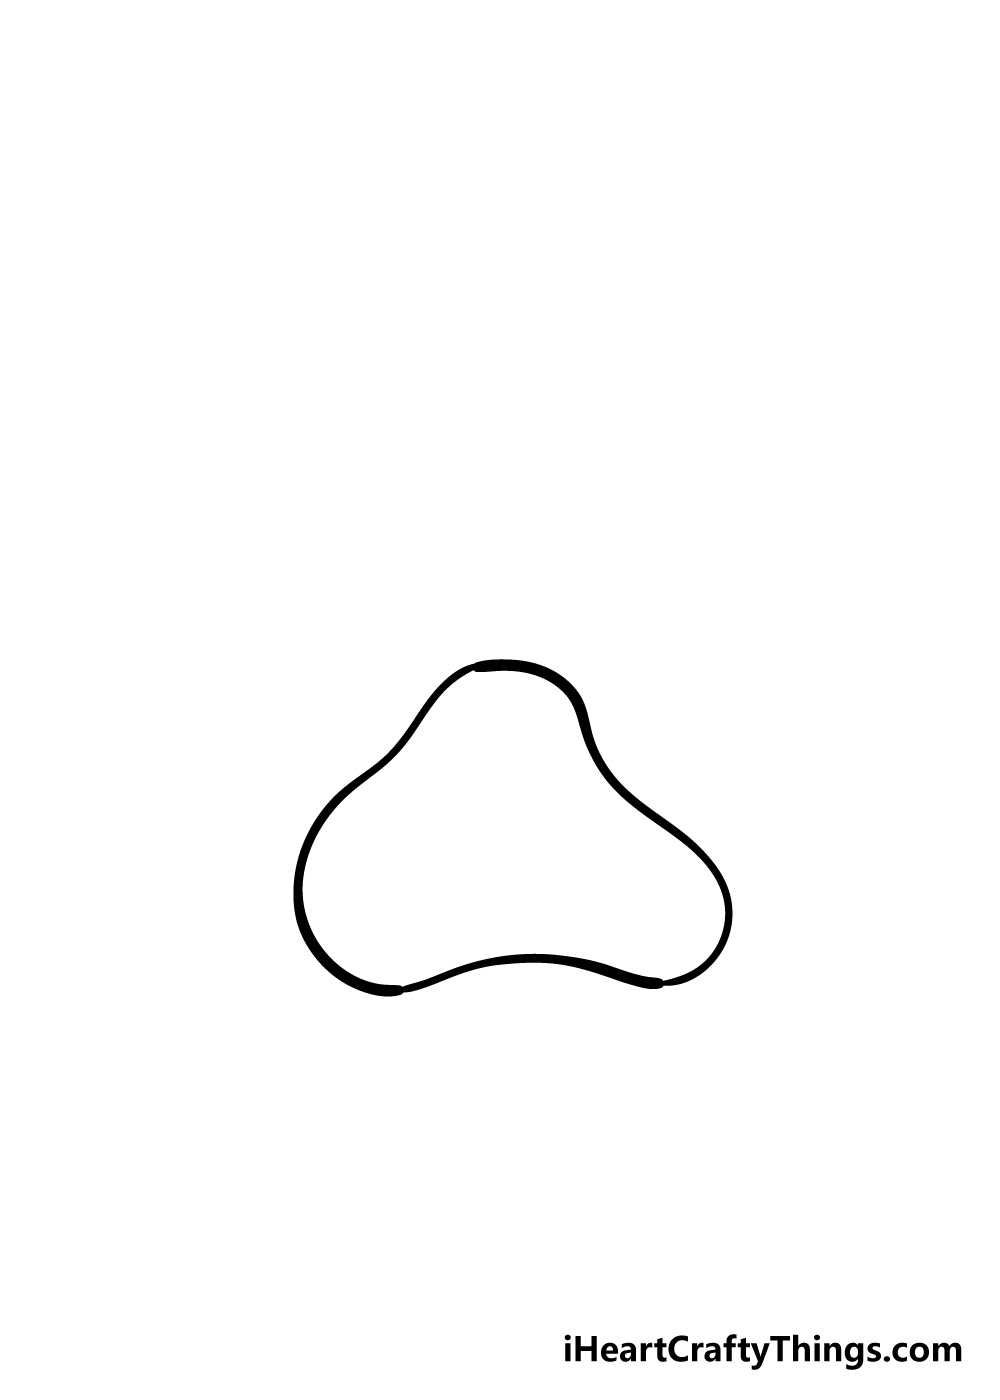
We shall get this guide on how to draw a dog paw started by drawing the largest, central pad of the dog paw.
The central pad will look very rounded and have three sides to it. There will be one on top with two more on the bottom.
The reference image will help you to make sure it’s looking correct so you can move on!
Step 2 – Draw the first of the toe pads
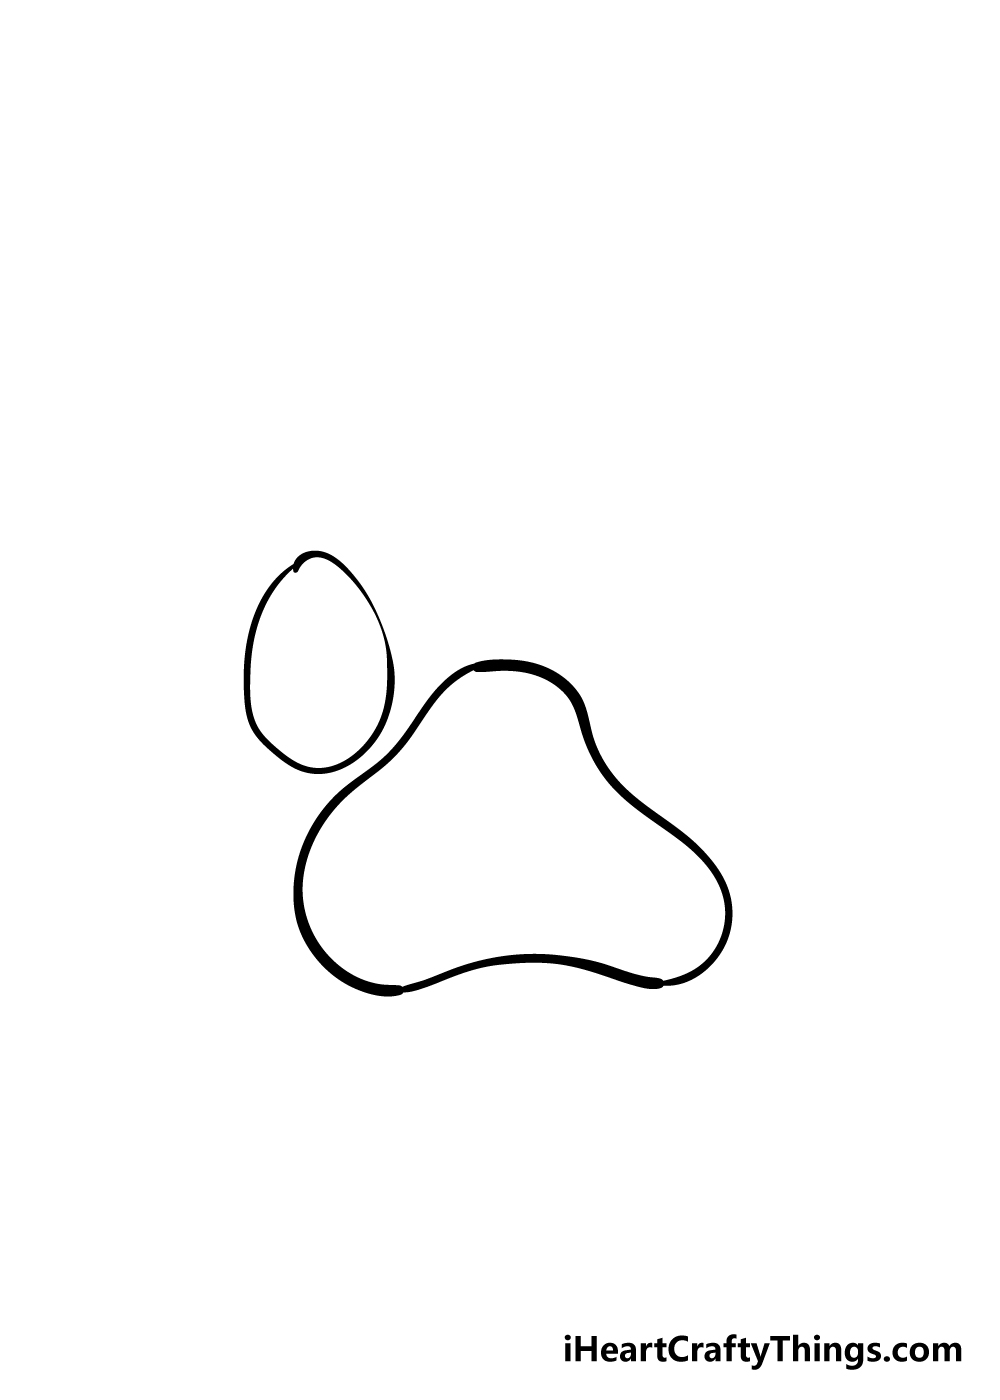
Now that you have the central pad of the dog paw drawing done, we can start to draw the toe pads.
To do the first of these, you can draw a rough oval over the left-hand side of the central pad. We shall be drawing more of these toe pads in the next few steps of the guide.
Step 3 – Add the second toe pad
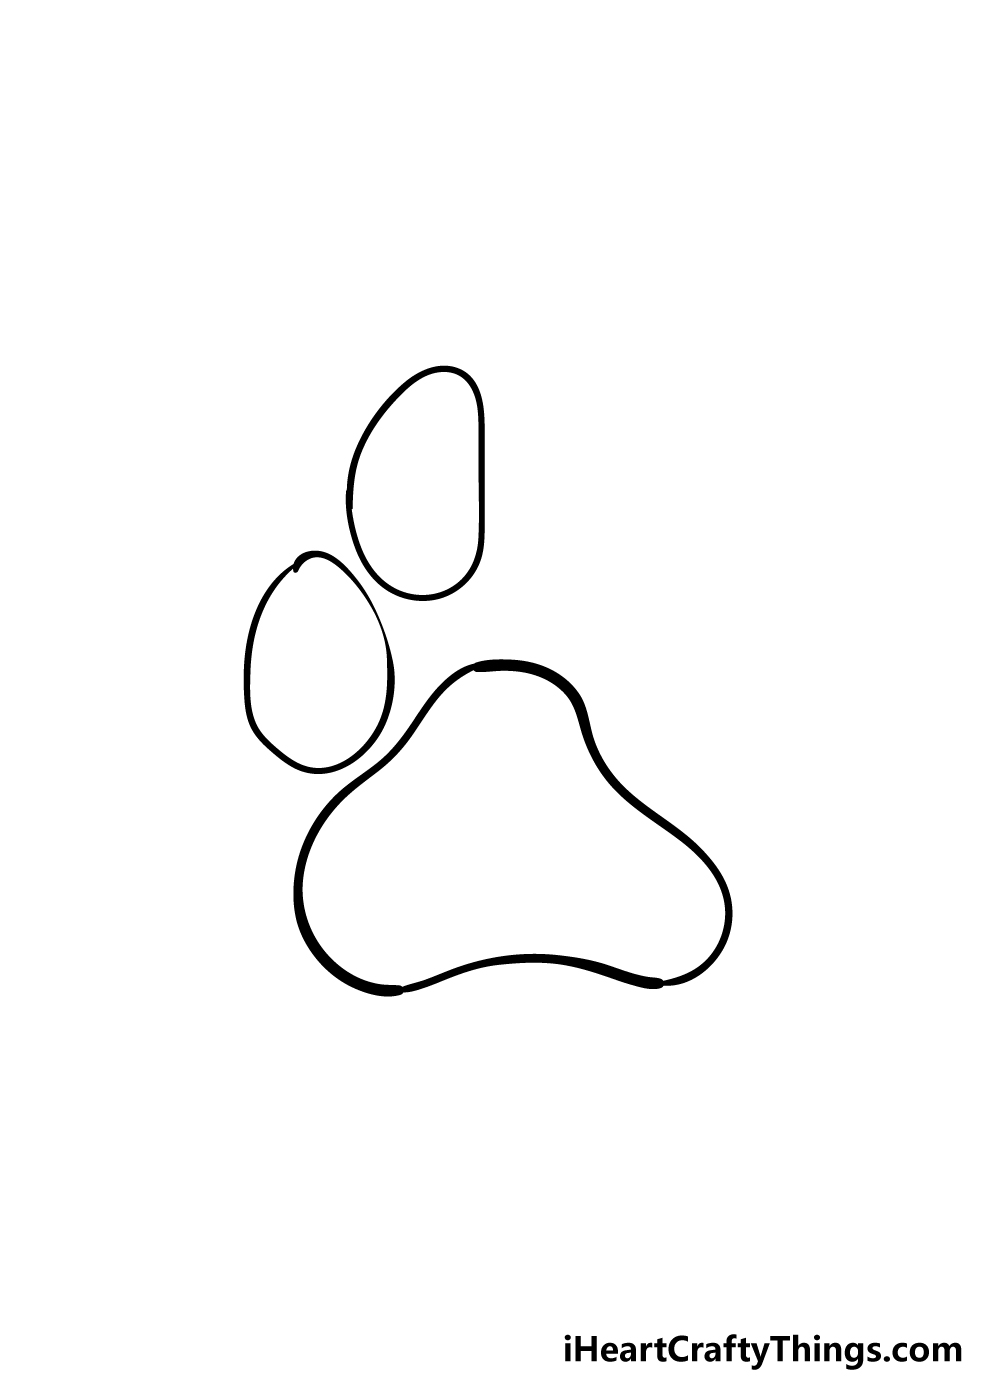
You’re ready to draw the second toe pad in this step of our guide on how to draw a dog paw. This toe will go to the right of the first one and will also be made of an oval shape.
This particular toe will be less rounded on the right-hand side where it will have a slightly straighter edge.
As you can see in our reference picture, this toe will have a curve to the right generally and will also be slightly longer than the first one.
Step 4 – Now draw the third toe pad
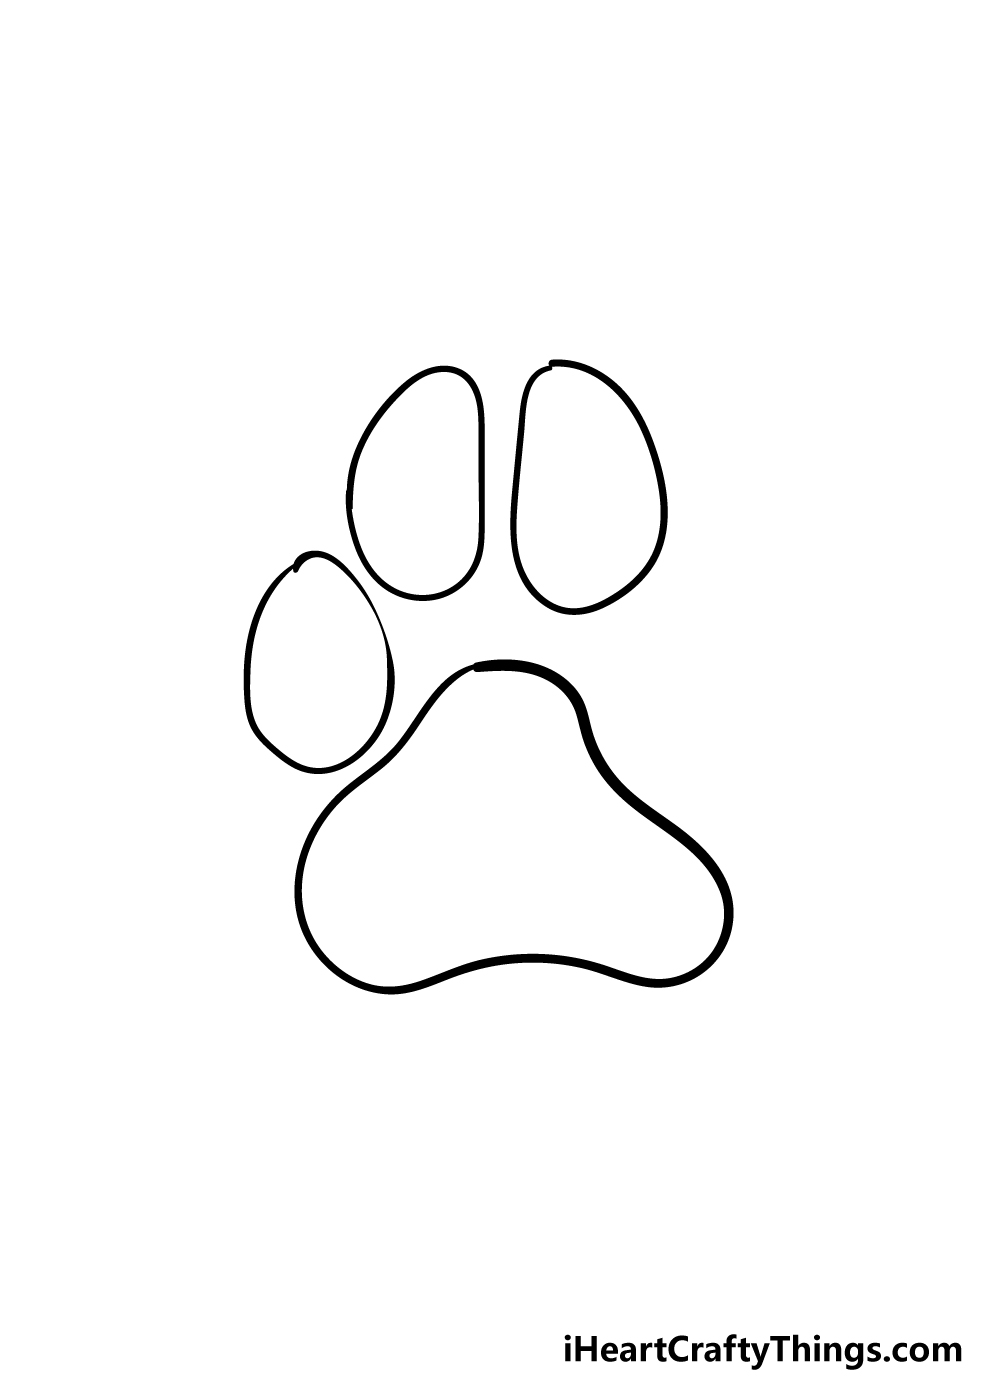
We’re getting into a nice rhythm for this dog paw drawing by now! You can draw the third toe pad in this step, and it will be an almost mirror image of the previous toe.
It will have a similar curvature to the other toe, except this time will be bending to the left.
This toe will also be larger and longer than the first one you drew, and you can make it ever so slightly larger than the second one.
Step 5 – Draw the final toe of the dog paw
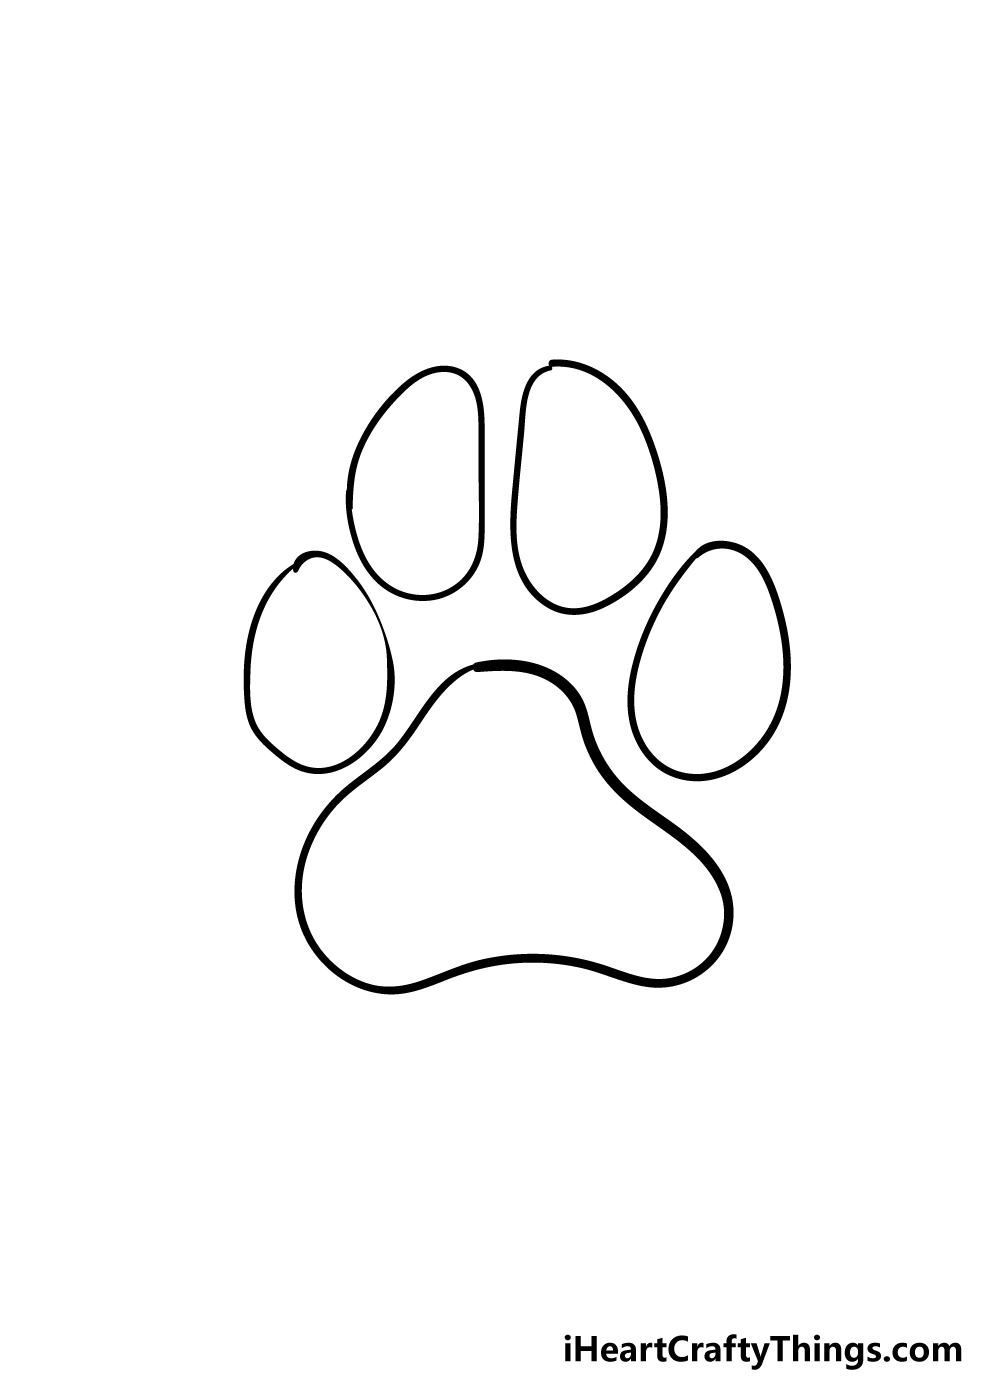
It’s time to add the final toe of this guide on how to draw a dog paw. This toe will be more similar to the very first toe that you drew in this tutorial.
It will be oval and rounded like that one was, and it will be around the same size as it as well. With that toe drawn, we can move on to some final details!
Step 6 – Now, add the nails and final details
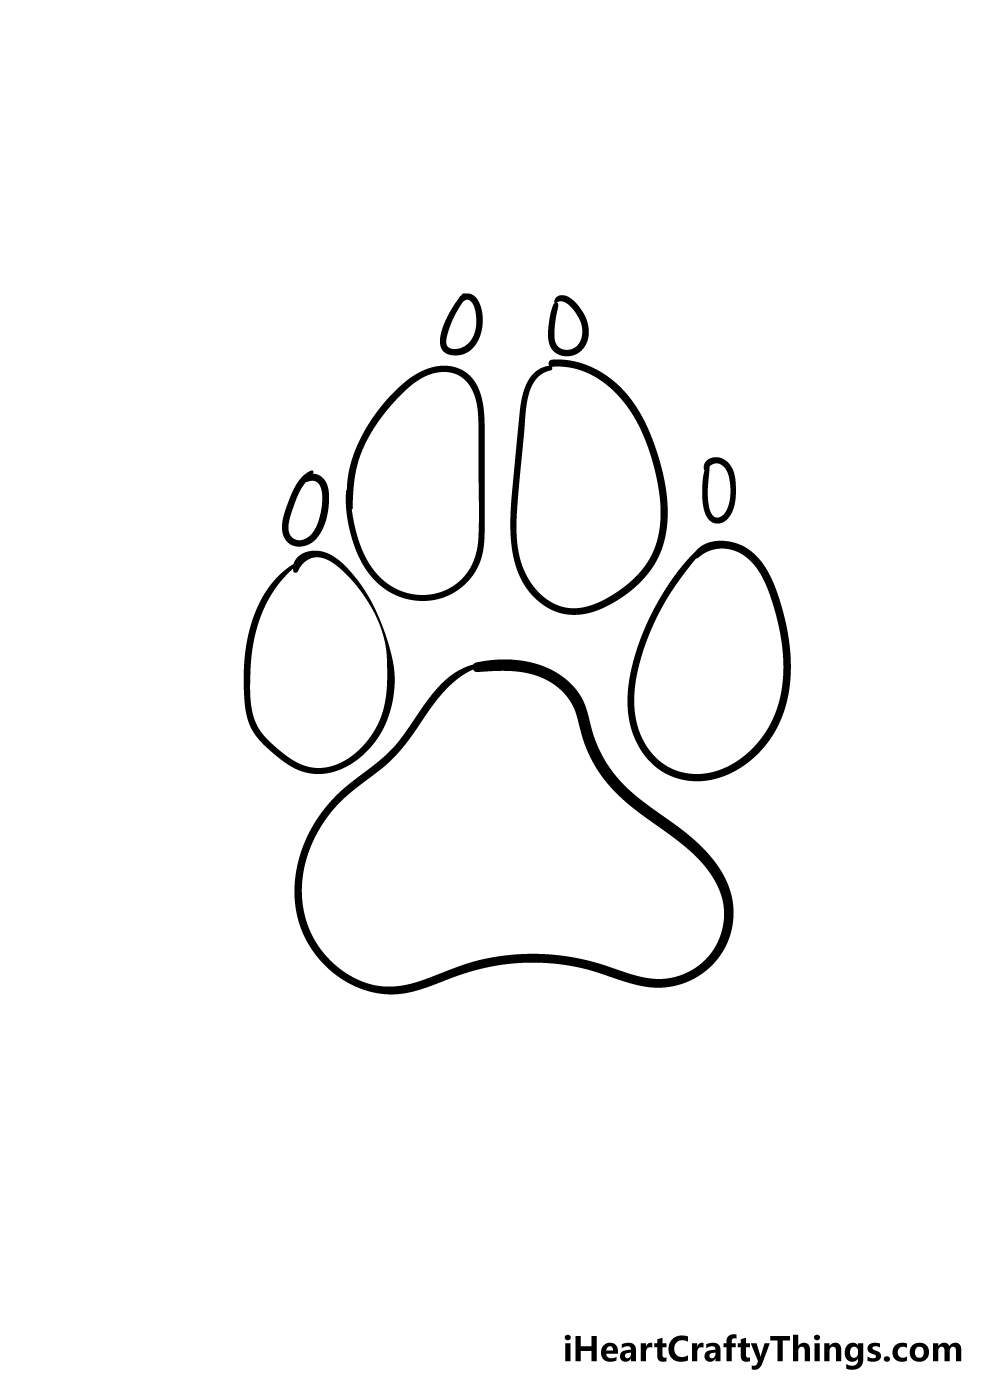
You will get to bring some amazing colors to your dog paw drawing very soon, but before we get to that we shall add some final details.
To add the nails of the dog paw, simply draw a small oval above every toe of the dog paw. These can be somewhat rounded with a slight point at the top, as can be seen in the reference image.
With that, you’re ready for the final step! Before you move on to that step, you should feel free to add any extra details or background that you would like.
There are many ways that you could go about this, so you should really get creative with it! Perhaps you could make it look like this dog paw is a print in mud and then draw a dog toy next to it.
You could also draw a pattern made up of these dog paw shapes for a fun design. How will you finish off this dog paw drawing before coloring it in?
Step 7 – Finish off your dog paw drawing with some color
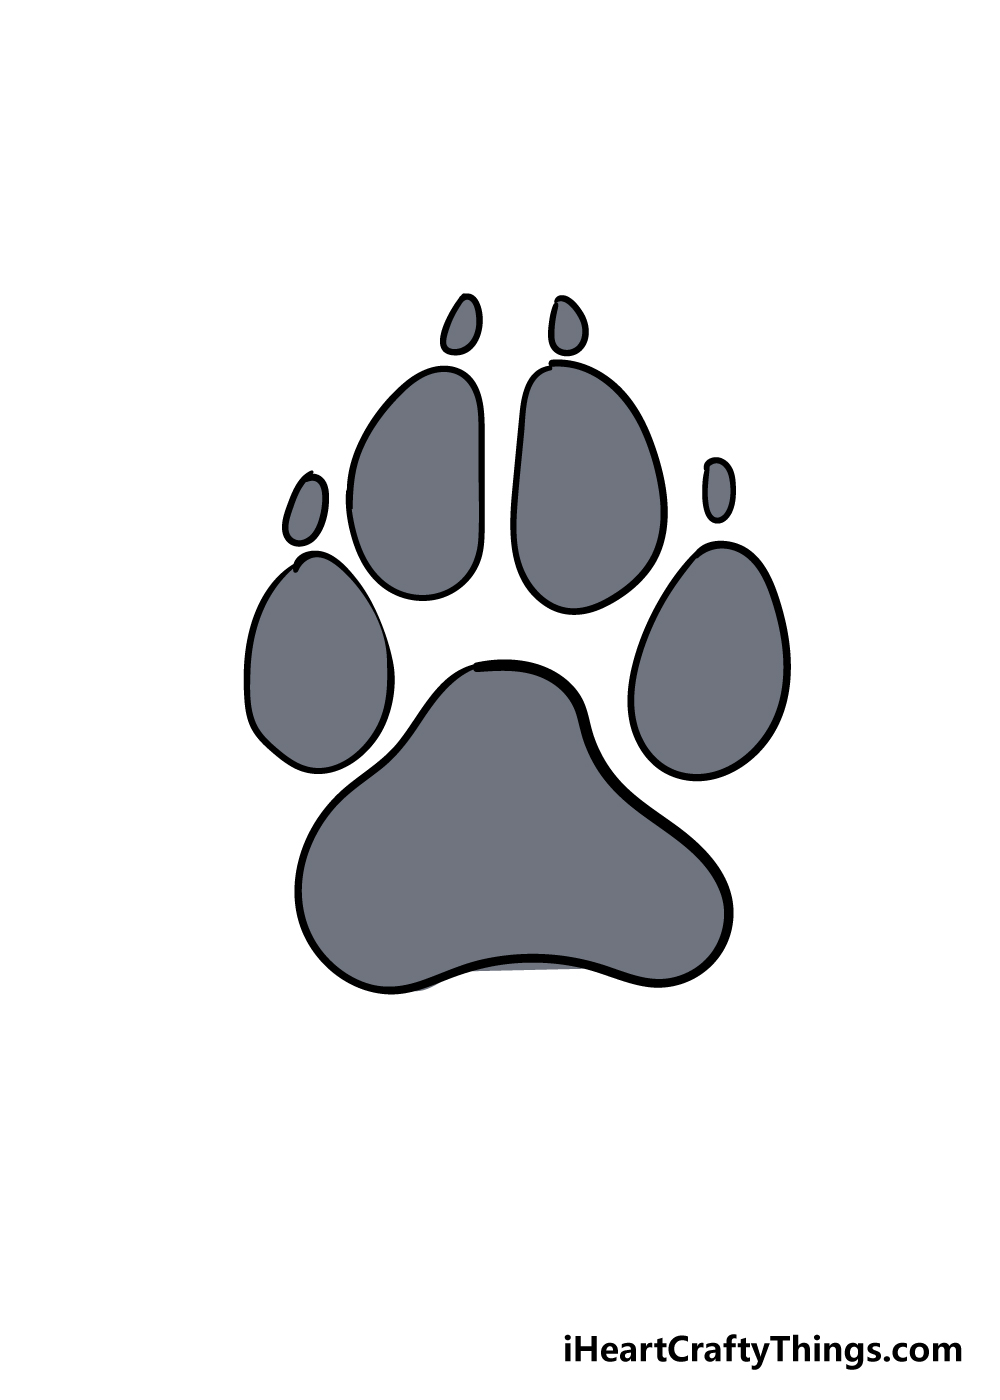
That brings us to the final step of our guide on how to draw a dog paw. With this step, you get to show off your creativity by incorporating some beautiful colors into your drawing!
We used a more muted grey for our reference image, but this is just an example and is by no means the only way to go about it!
There are a few different approaches that you can take when bringing some color into your picture.
You could go for a more realistic look by perhaps using some browns to make this look like a print in the mud.
You could also add some texture details to make this look like the bottom of a dog’s foot while using some shading to accentuate the effect.
You could also go more stylistic with it and use some bright and vibrant colors for a striking image! Which colors and art mediums will you use to finish off your picture?
4 More Ways To Make Your Dog Paw Drawing Unique
Make your dog paw sketch even better with the help of these fun ideas!
This drawing of a dog paw has a simple outline and color to it, but you could change it to make it look like it was made in a real substance. There are a few that you could choose from!
For example, you could make it look like this footprint was made in some mud. In order to prepare for this, you could make a footprint in some mud the next time it rains.
Try to pay attention to how your shoe print looks in the mud and thentry to portray that for this dog paw.
Another way you could portray this dog paw would be to show it on a specific surface.
Instead of making it look like the print is in some mud, you could make it look like the dog has left some muddy tracks on a surface.
Try to find a floor surface in your own house and then replicate it in the background of this image. Perhaps a nice clean kitchen floor would be a good one to use!
Next, we think it would be fun to actually show the leg and foot of the dog that created the print in this dog paw drawing. If you have a dog in real life, then gently look at the underside of its foot.
You could then draw what it looks like in your artwork to show the foot that made this print. How else could you show the dog that made this print?
You can also go for something less realistic when decorating this dog paw sketch! We have spoken about a few ways you could make it look like a real paw print, but you could also use some patterns.
For example, maybe you could color it with some bright colors. Then, you could use small shapes and patterns inside the outline to make it look really cool and vibrant.
What are some shapes you could use?
Your Dog Paw Drawing is Complete!
You set out on this guide to learn how to draw a dog paw, and you have definitely succeeded in this endeavor!
We hope that this guide showed you an easy way that you can use to draw a dog paw with no trouble.
If you follow this guide closely and take it slow then there’s no doubt you’ll be a master at it in no time!
Once you can draw this dog paw with ease, that doesn’t mean the end of the drawing fun.
You can still bring some more of your creativity to this image with the extra details, backgrounds and colors you bring to the mix. Be sure to let your creativity flow and have some fun experimenting!
When you’re ready for more drawing fun be sure to visit us on our website! We have plenty of awesome guides for you to enjoy, and we will be uploading more all the time for you to enjoy.
We would love to see your finished dog paw drawing, so please feel free to share it on our Facebook and Pinterest pages for us to admire!