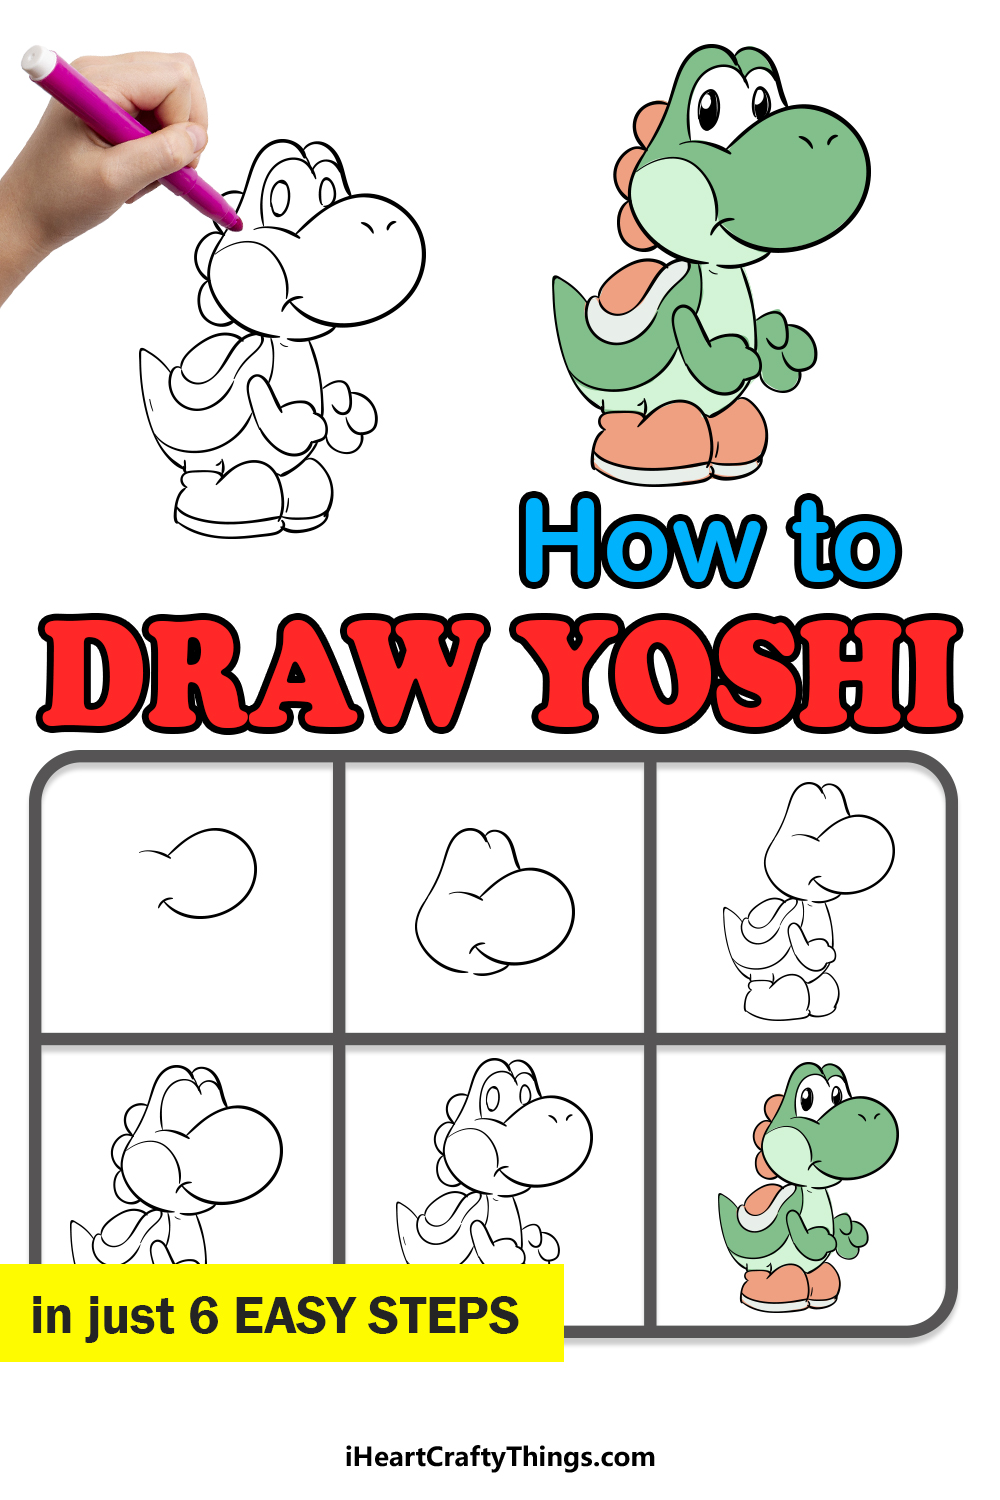
There are so many iconic video game characters out there, and Yoshi stands tall among them as one of the most iconic of all!
This little green dinosaur has starred in many beloved games and won over many fans with how adorable he is. Many of these fans may want to learn how to draw Yoshi but not know where to start.
If you’re one of these fans then you have chosen the perfect guide to show you the way!
Our step-by-step guide on how to draw Yoshi in just 6 steps will have you taking colorful adventures with this little guy in no time!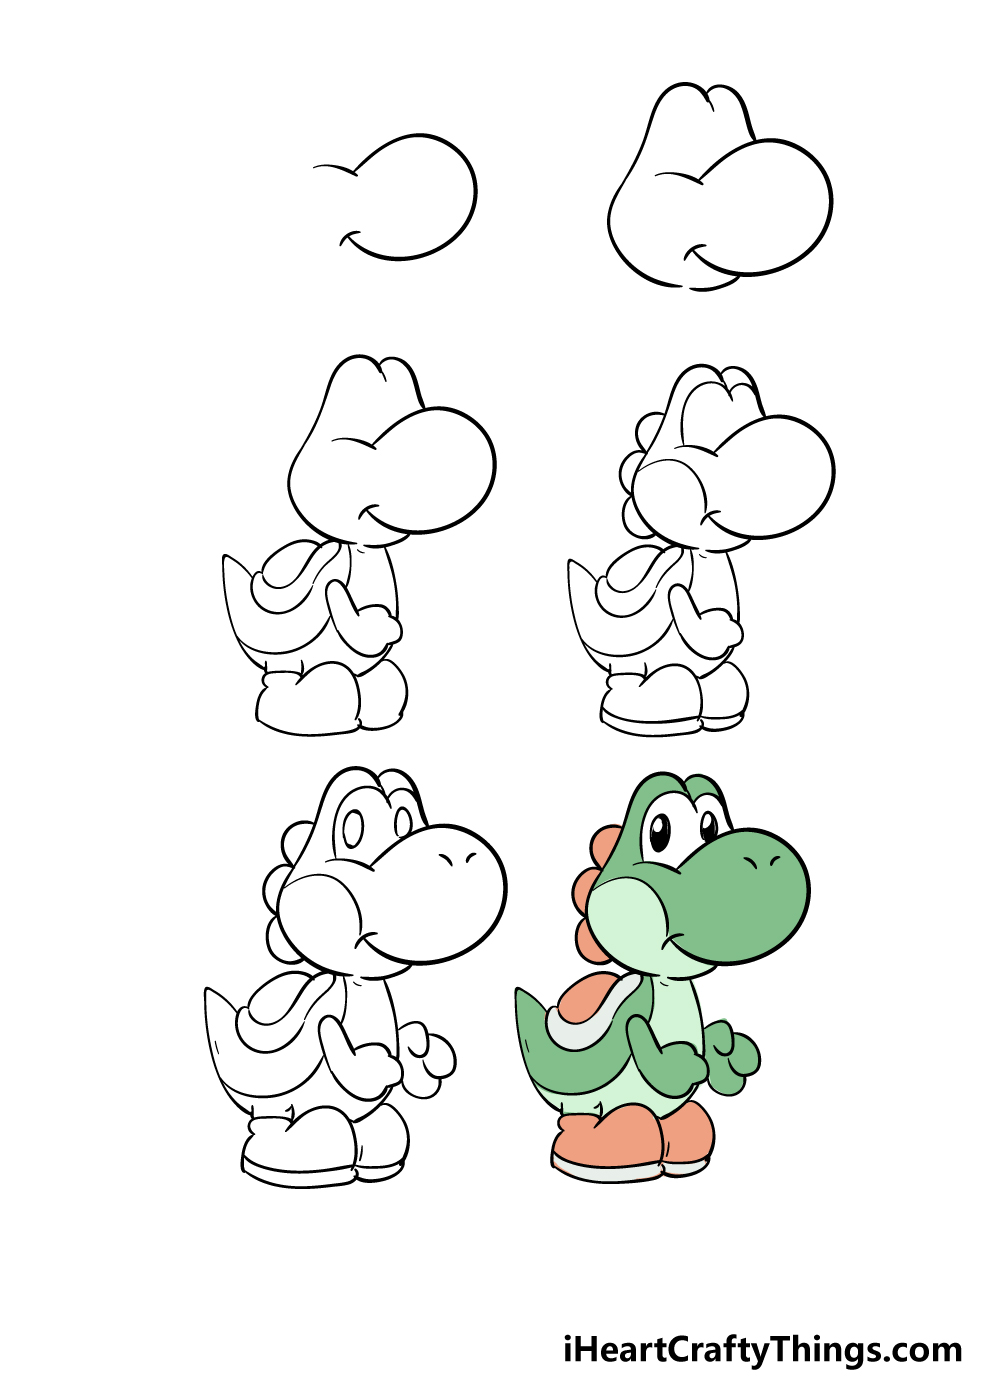
How to Draw Yoshi – Let’s Get Started!
Step 1
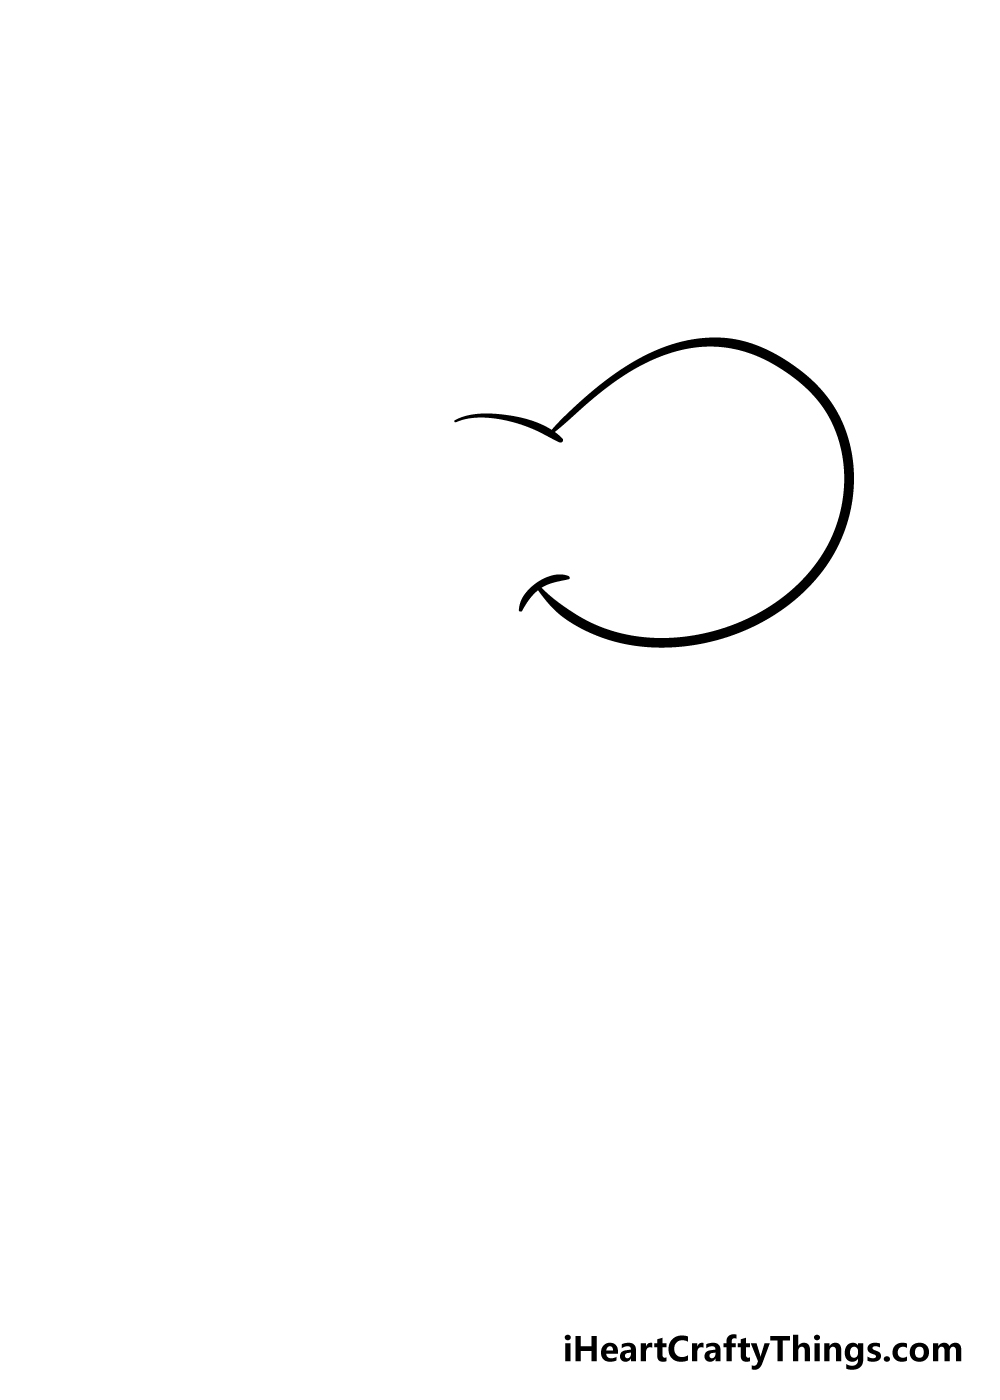
To get this guide on how to draw Yoshi started, we will be focusing on his big round snout. To do this, you will start will a smaller curved line for the top of his face.
Then you will use another much larger rounded line for the front of his snout. Be sure to add a small line on the end of the snout line to create a smiling mouth.
That may sound confusing but you’ll see what we mean when you refer to the reference image. Once you have this part of his face drawn then you’re ready for step 2!
Step 2 – Draw the rest of Yoshi’s head
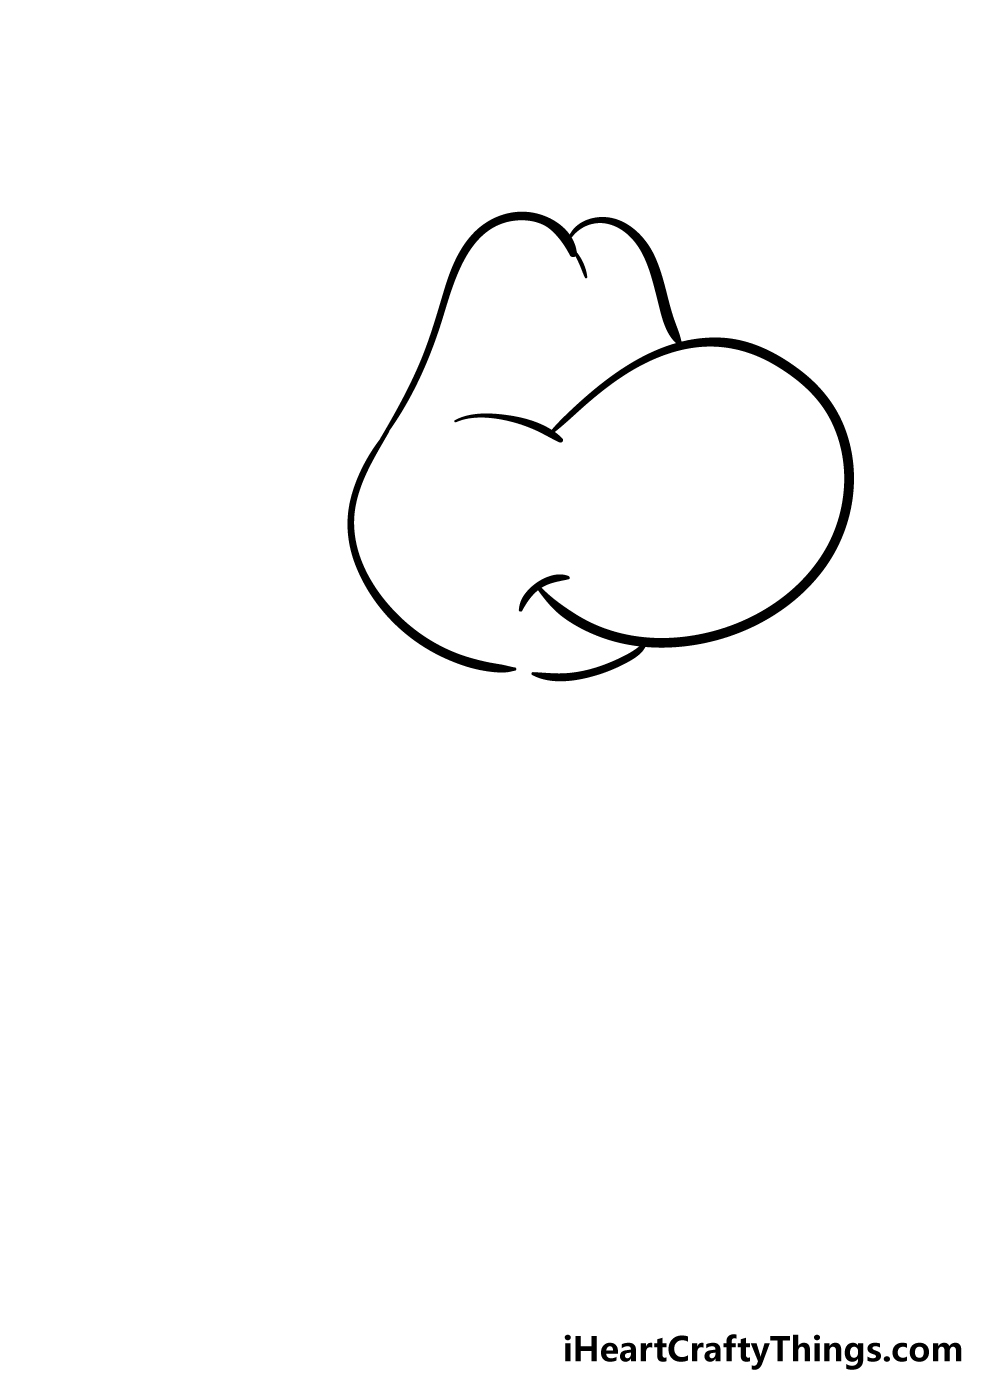
We will be adding the rest of Yoshi’s face in this step of your Yoshi drawing. You can use two curved lines coming up from his snout for the top of his head as it’s shown in the reference image.
This top of the head will then extend down to form the left-hand side of his head. Finally, you can finish off with a small curved line for his chin.
Step 3 – Now, draw the body for Yoshi
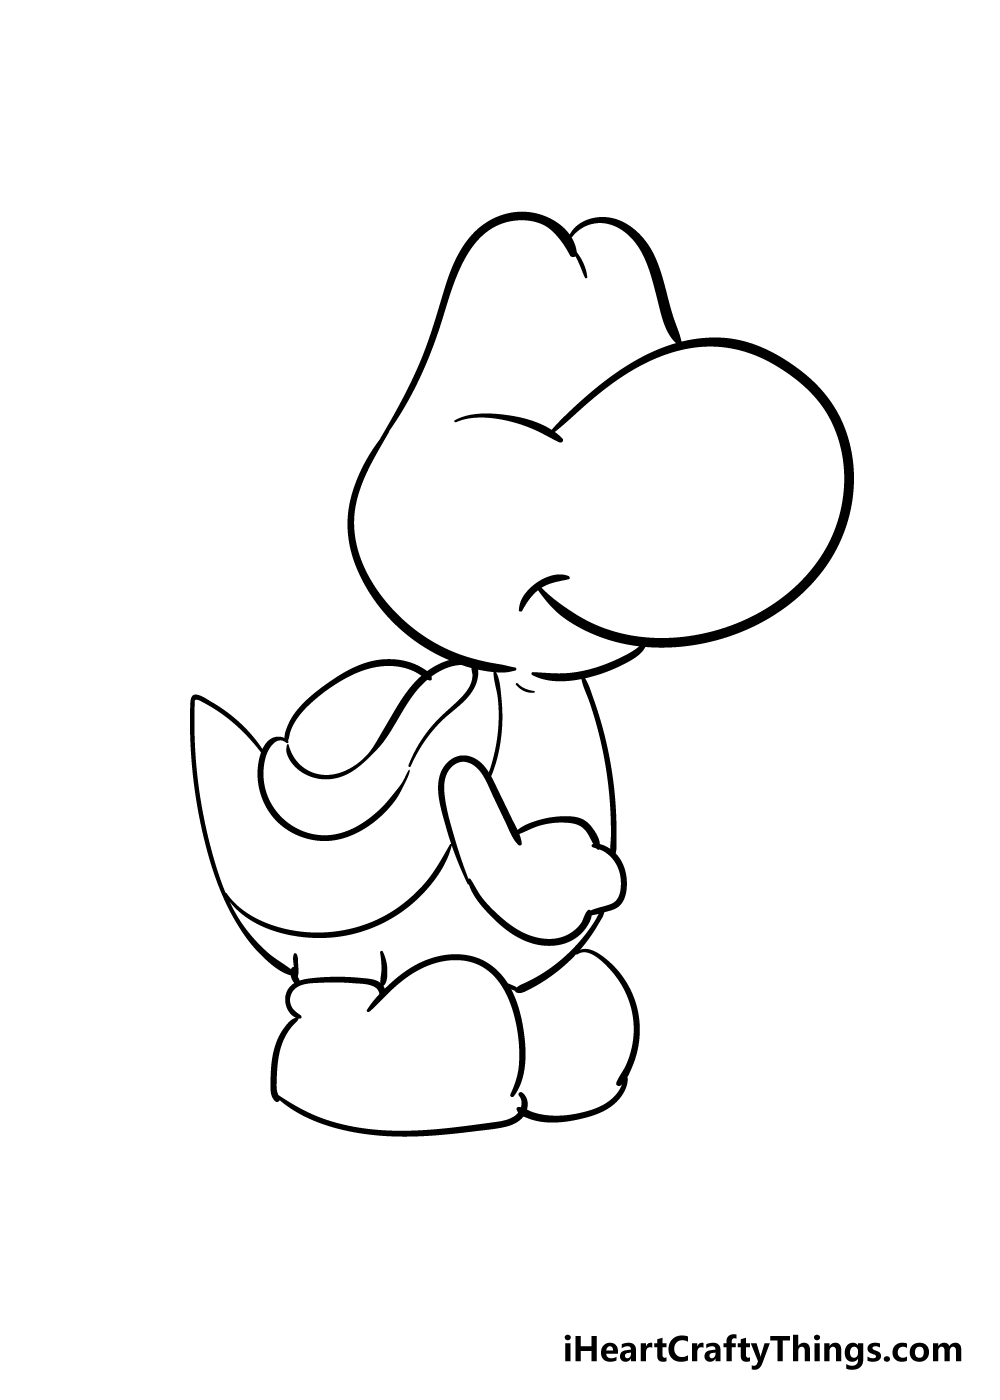
This step of our guide on how to draw Yoshi looks a bit complicated, but it doesn’t have to be if you take it slowly and follow the reference guide closely.
His body is very rounded, and it’s thin at the top where his neck connects to his head. You can then use some curved lines for the shell on his back, and then draw his arm and hand on the side of his body.
He will also have a pointy tail, and then finally you can draw his legs and big shoes.
It seems like a lot, but if you concentrate on each element one at a time and follow the reference image closely then you’ll be able to do it!
Step 4 – Add some details to Yoshi in this step
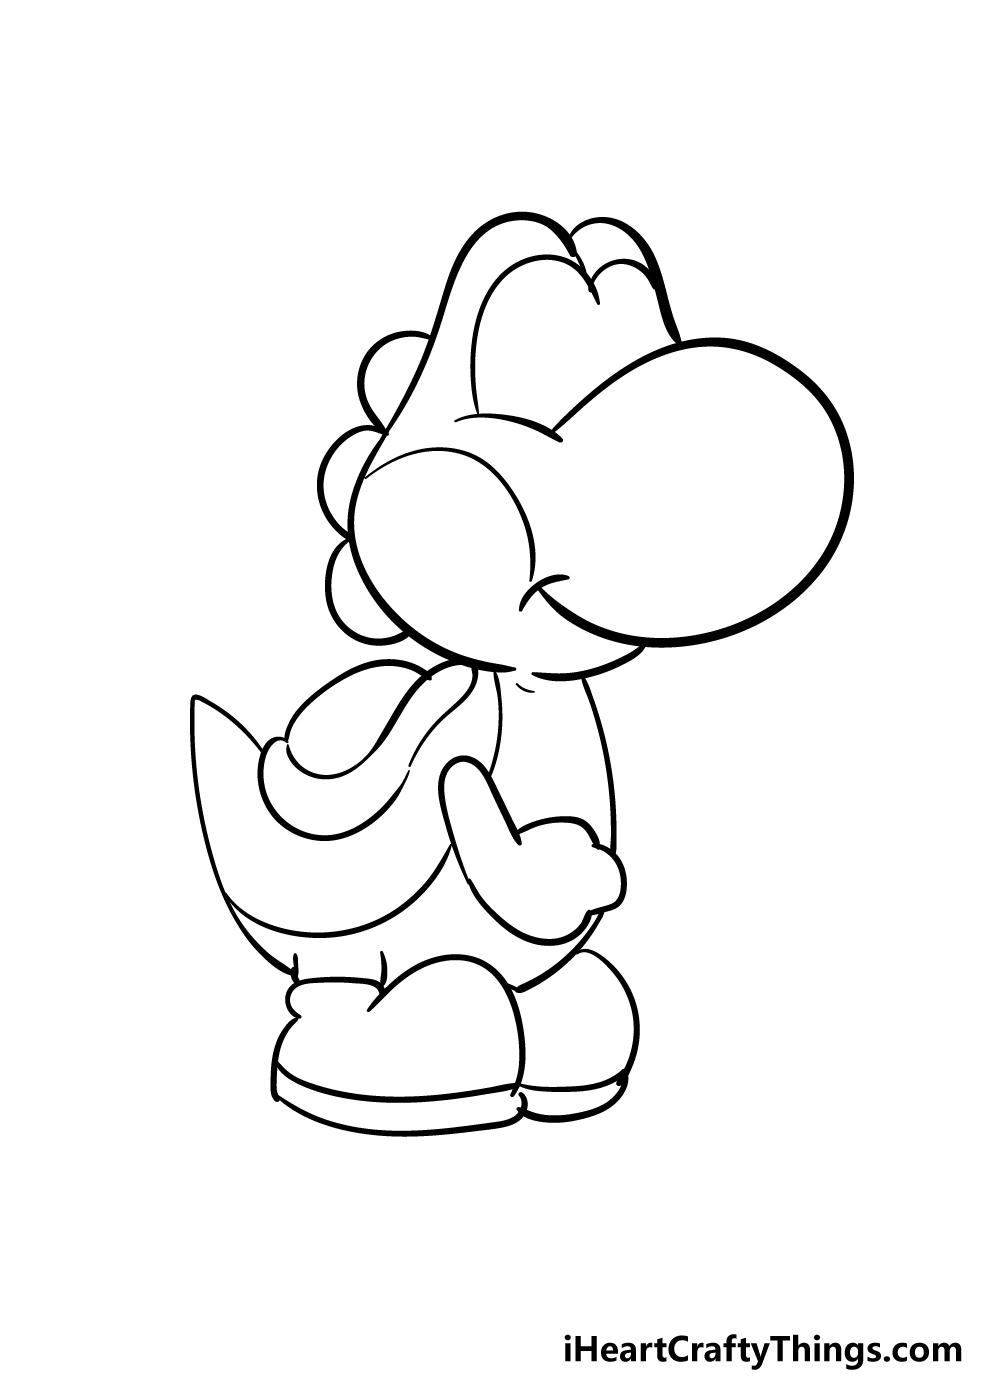
In this part of your Yoshi drawing, you will be drawing some simple details throughout his body. These will include some rounded lines for his eyes.
His eyes are connected without a gap between, almost as if they were one large eye. Then, you can draw three rounded scales onto the back of his head.
Finally for this step, simply draw a line above the base of his shoes for the soles.
Step 5 – Now, you can add some final details and touches
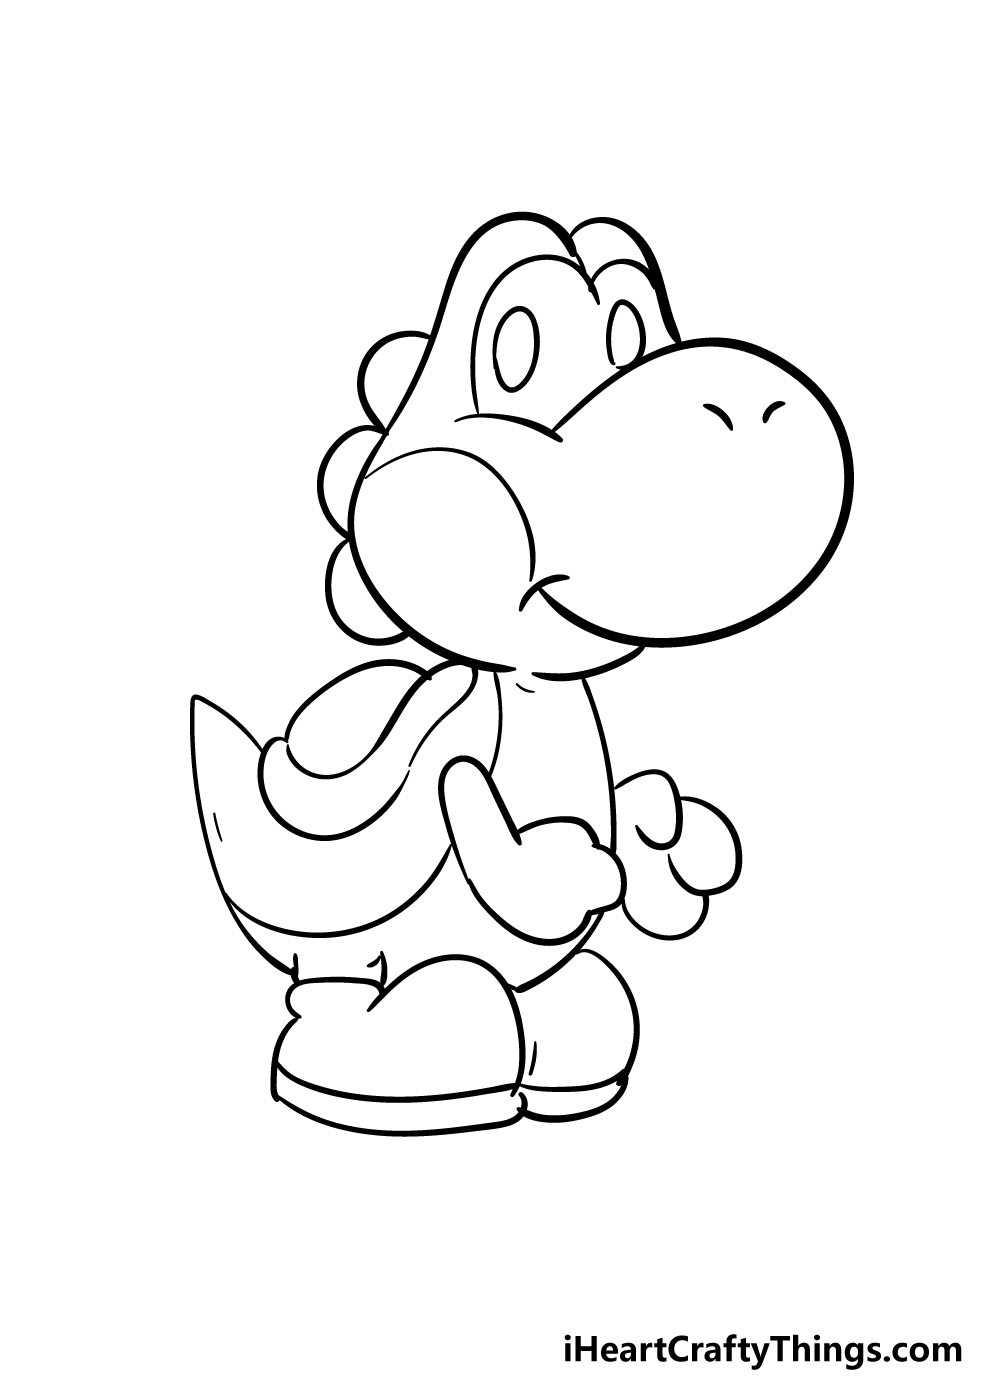
This step of our guide on how to draw Yoshi will see you adding the final elements to the drawing while also adding some final details.
First, you can draw the other arm coming out from where his belly is. Then finish off his eyes by drawing two ovals within his eye outlines.
Then you can finish off the details with a few lines around his body. Two lines on his snout will do for his nostrils to finish off his face.
That will do it for the details that we want to add, but you should feel free to add any of your own that you may want for your picture!
Maybe you could add some details to Yoshi to make him look as he did in your favorite game that he’s in.
Or maybe you could draw a background to show off a memorable level that you have played through as Yoshi.
There are many ways that you can be creative with it and we can’t wait to see what you do!
Step 6 – Finish off your Yoshi drawing with some color
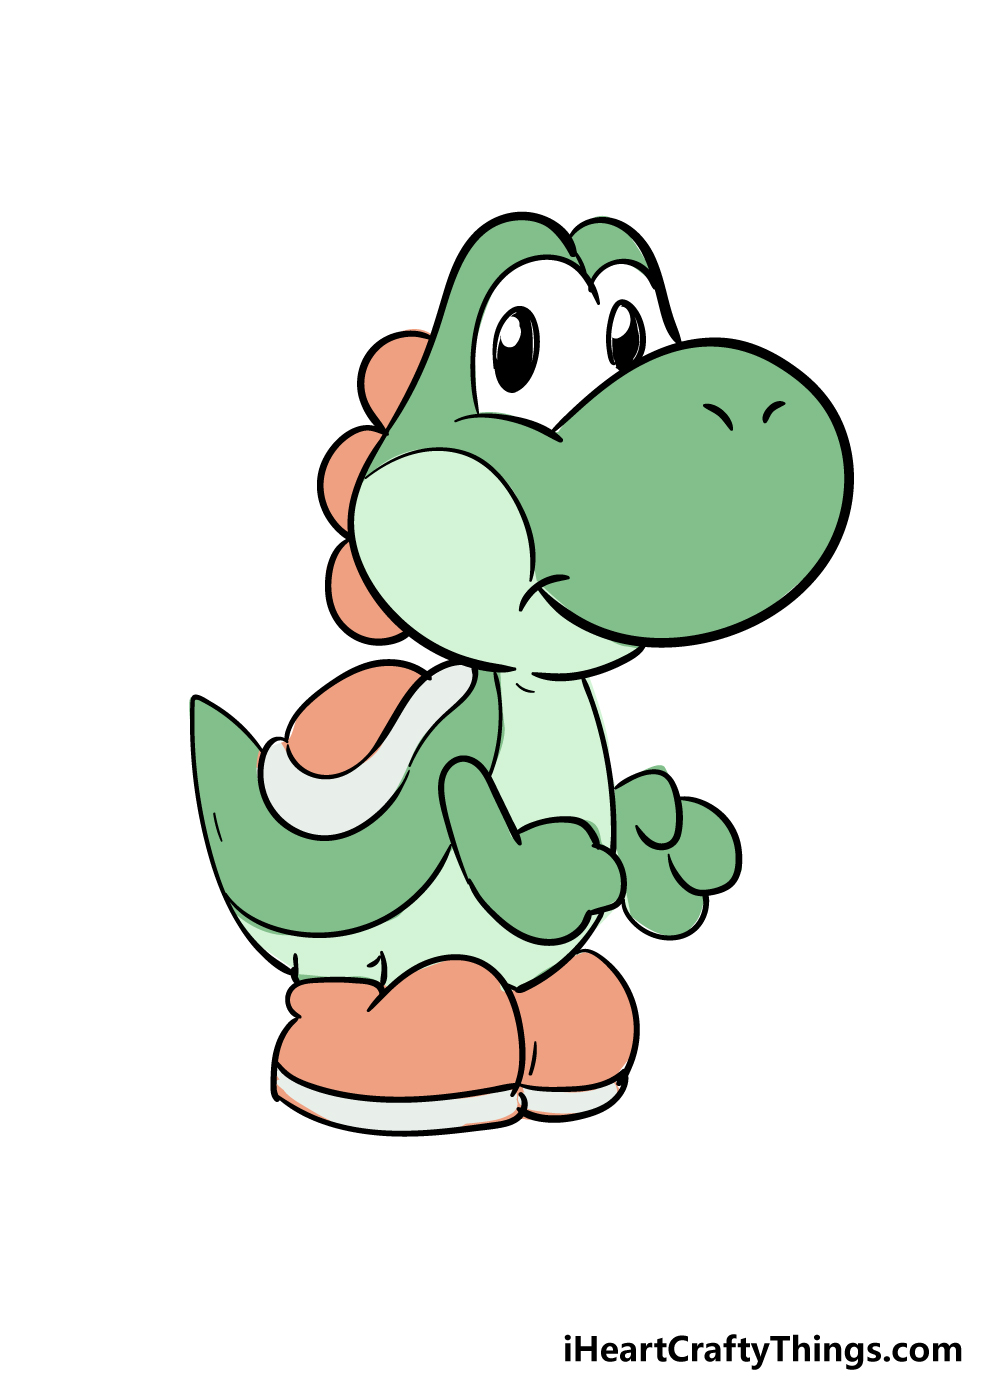
Now that your Yoshi drawing is complete, all that remains is to bring some beautiful colors to it.
We colored him in with his typical coloring of primarily green and red, so you can use that as a guide if you would like to have Yoshi in his classic look.
This is just one way that you could go about it though, and you can use any other colors that you would like for your drawing!
Yoshi has had many different appearances throughout all the games he has been in so that gives you options for how you can color him in.
You can also vary the look of the colors you use with the art mediums that you choose for the image.
Brighter colors can be achieved with mediums such as acrylic paints, colored pens and markers.
If you want more muted tones, then you can go for watercolor paints, colored pencils or crayons for a few ideas. How will you choose to color in your Yoshi drawing?
5 Tips To Make Your Yoshi Drawing Even Better!
Make your Yoshi sketch even more amazing with the help of these tips!
Yoshi is one of many iconic Nintendo characters, and you could include some more in this drawing of Yoshi! Some characters you could include would be Mario, Luigi or maybe Princess Peach.
Most of these characters have fairly simple designs, so they would be perfect for this image. Which heroic characters from the various games Yoshi features in would you like to include here?
Of course, there are many villainous characters that you could add as well. For some smaller characters, you could include goombas or maybe some ghosts.
Bigger villain characters would include Bowser and his son, Bowser Jr. These are just a few adversaries that you could include in the picture, but there are many more!
What other villains could be included here?
This Yoshi drawing shows him in a fairly relaxed pose, but you could also show off some of his powers. For instance, he could be shooting his tongue out.
He is also known to be able to breathe in objects and other characters, so this is something you could use for a fun scene. Using the games to help you, there are so many fun poses to create!
Yoshi has been portrayed in many different styles and outfits in his game history. Some games even have him being depicted as if made from various craft supplies.
Some examples would be construction paper and wool, and you could make this drawing look like it is made of these crafts. Using the actual crafts and sticking them on would be a great way to do this!
In the games, Yoshi travels through many different levels and environments. You could use some of these as backgrounds for this Yoshi sketch.
Which levels you use could be based on any of your favorites from the games. Or, you could make an entirely new background to show what your own Yoshi game might look like.
Will you use an existing location or go for a unique one?
Your Yoshi Drawing is Complete!
You’ve finished all the details, added your own elements and brought it to life with your colors. That means that you have successfully completed this guide on how to draw Yoshi!
We hope that by breaking it down into smaller, more manageable steps that this was not only much easier for you to do but also lots of fun as well!
Now that you have mastered this guide you can make it your own even further by adding your own elements, details, additions and backgrounds.
You can also experiment with some fun color and art medium variations to really put your own spin on it. Be sure to let your creativity flow and see what you can come up with!
When you’re ready for more drawing fun, then you can visit our website for more awesome guides like this one! We upload new ones all the time so be sure to check in often to never miss out.
We would also love to see your finished Yoshi drawing, so feel free to share it on our Facebook and Pinterest pages for us to enjoy!