When thinking of animals, often it’s the big and impressive ones that get mentioned first. While they may get the most attention, there are also tons of incredible little creatures to observe when you get closer to the ground.
Worms would be an example of this, as while they may not be super impressive in scale, they’re actually quite interesting when you really look close. Learning how to draw a worm can also be a surprisingly tricky task to take on!
Luckily, this tutorial will make sure that it is easier than expected.
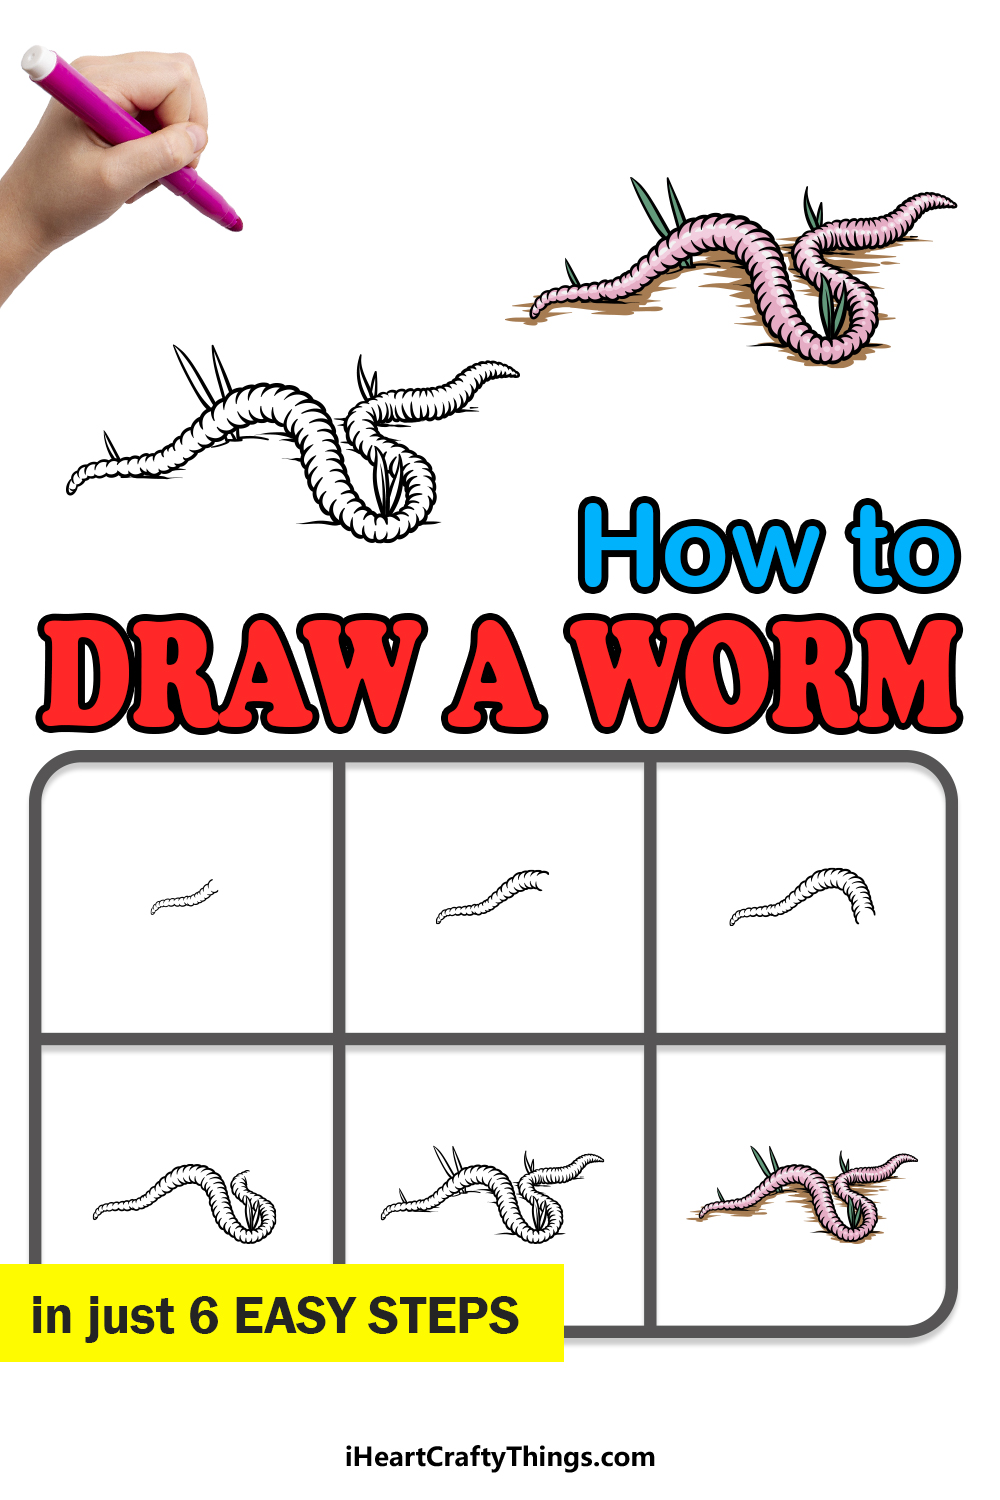
Get ready to learn to draw one of these wiggly little guys in this step-by-step guide on how to draw a worm in just 6 easy steps!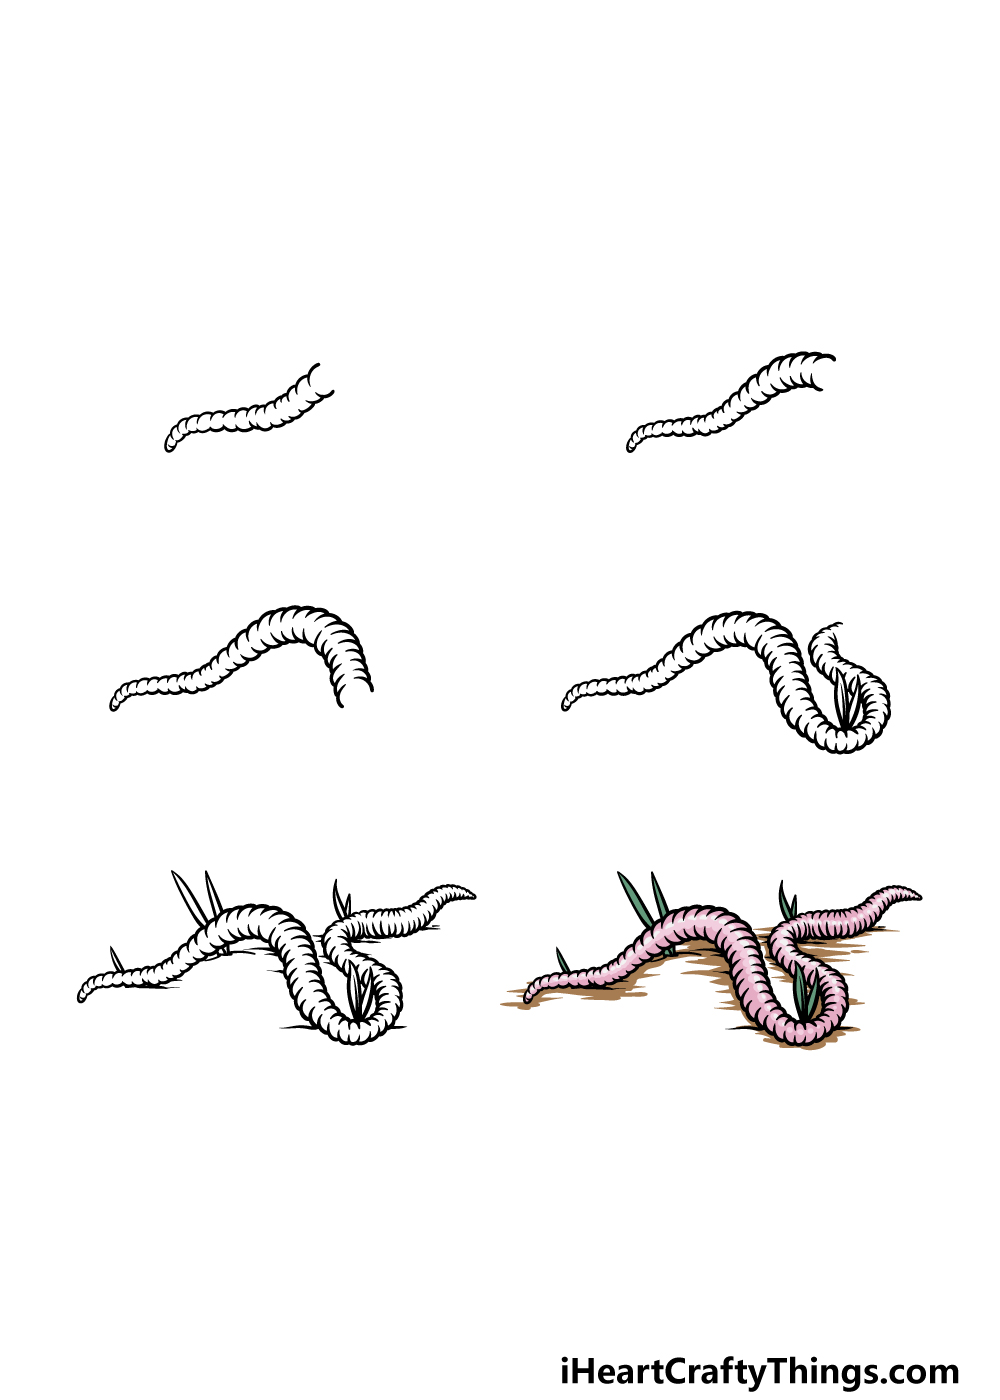
How to Draw A Worm – Let’s Get Started!
Step 1
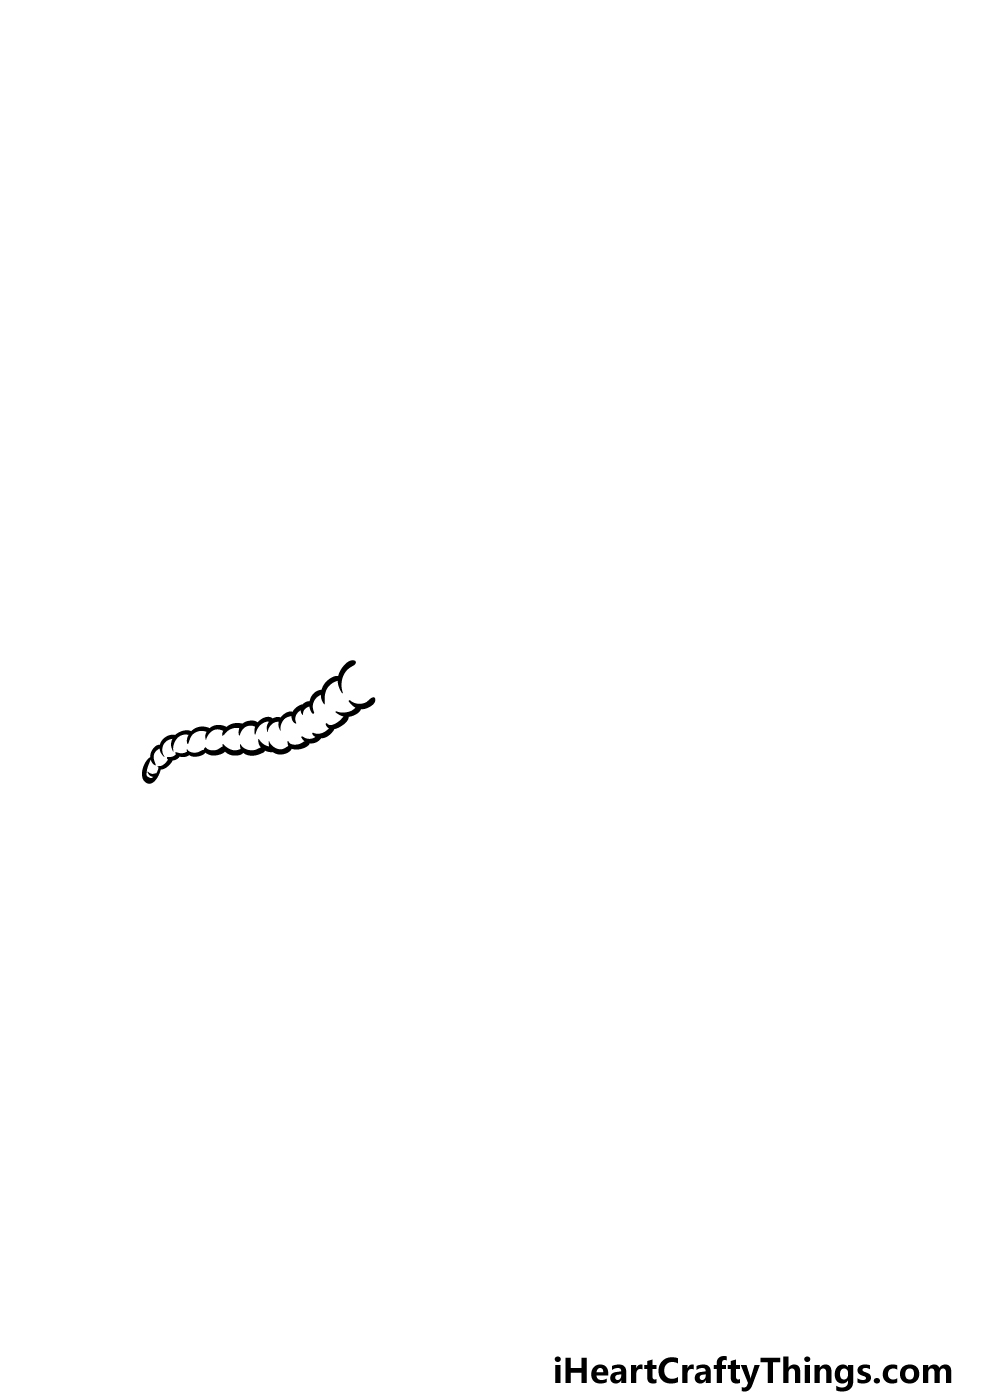
You may think that learning how to draw a worm would be easy, as there are no limbs or distinguishing features to draw, however this is not necessarily the case.
The kind of worm that we will be drawing is made up of lots of small sections that allow it to slither and wiggle about, and we will be drawing all of these little sections.
For this first step, we will begin with the tail of the worm. The tip of the tail will be the thinnest part of the worm, and you can draw it as a small rounded shape.
Then, we can start adding more sections to the body. Each section will be drawn with a similar rounded line, but there will be a small space in the center where each shape will end. The reference image will show you what we mean!
Make each section a little larger as you go, and once you have finished this section we can move on to step 2.
Step 2 – Now, draw the next section of the worm
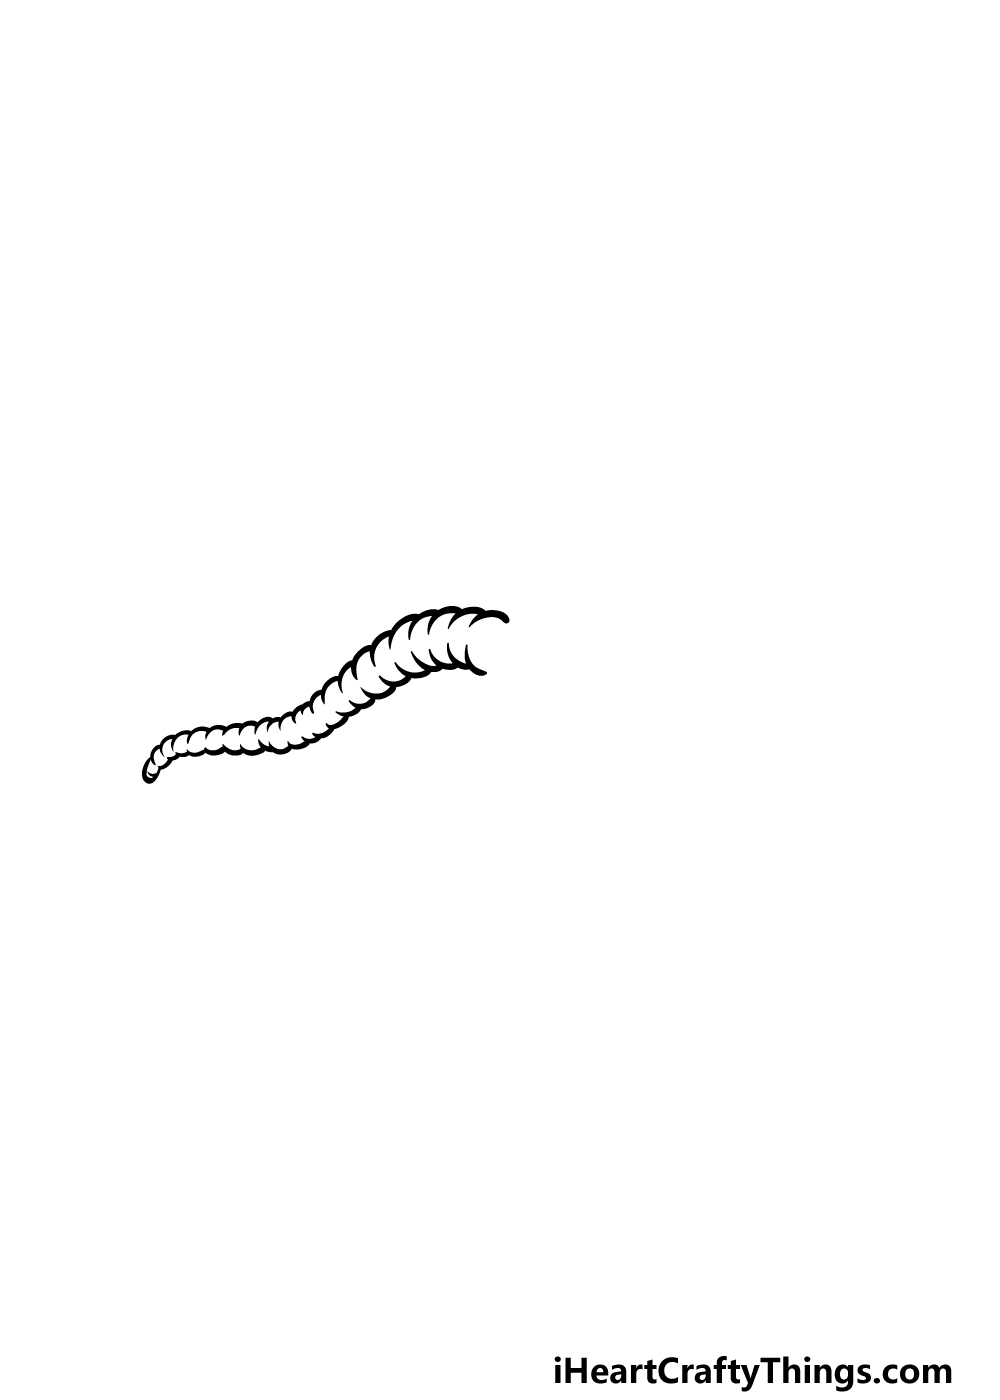
Now that you’ve drawn the tail of the worm drawing, we can start to draw the next section. To draw this midsection of the worm, we will continue what you started in the previous step of the guide.
That means drawing some more rounded lines to create the sections of the worm’s body. Also like the previous step, each of these sections will get a little larger the further you go along.
That’s all there is to it for this step, so when you’re ready then we can move on to step 3.
Step 3 – Next, draw another section of the worm
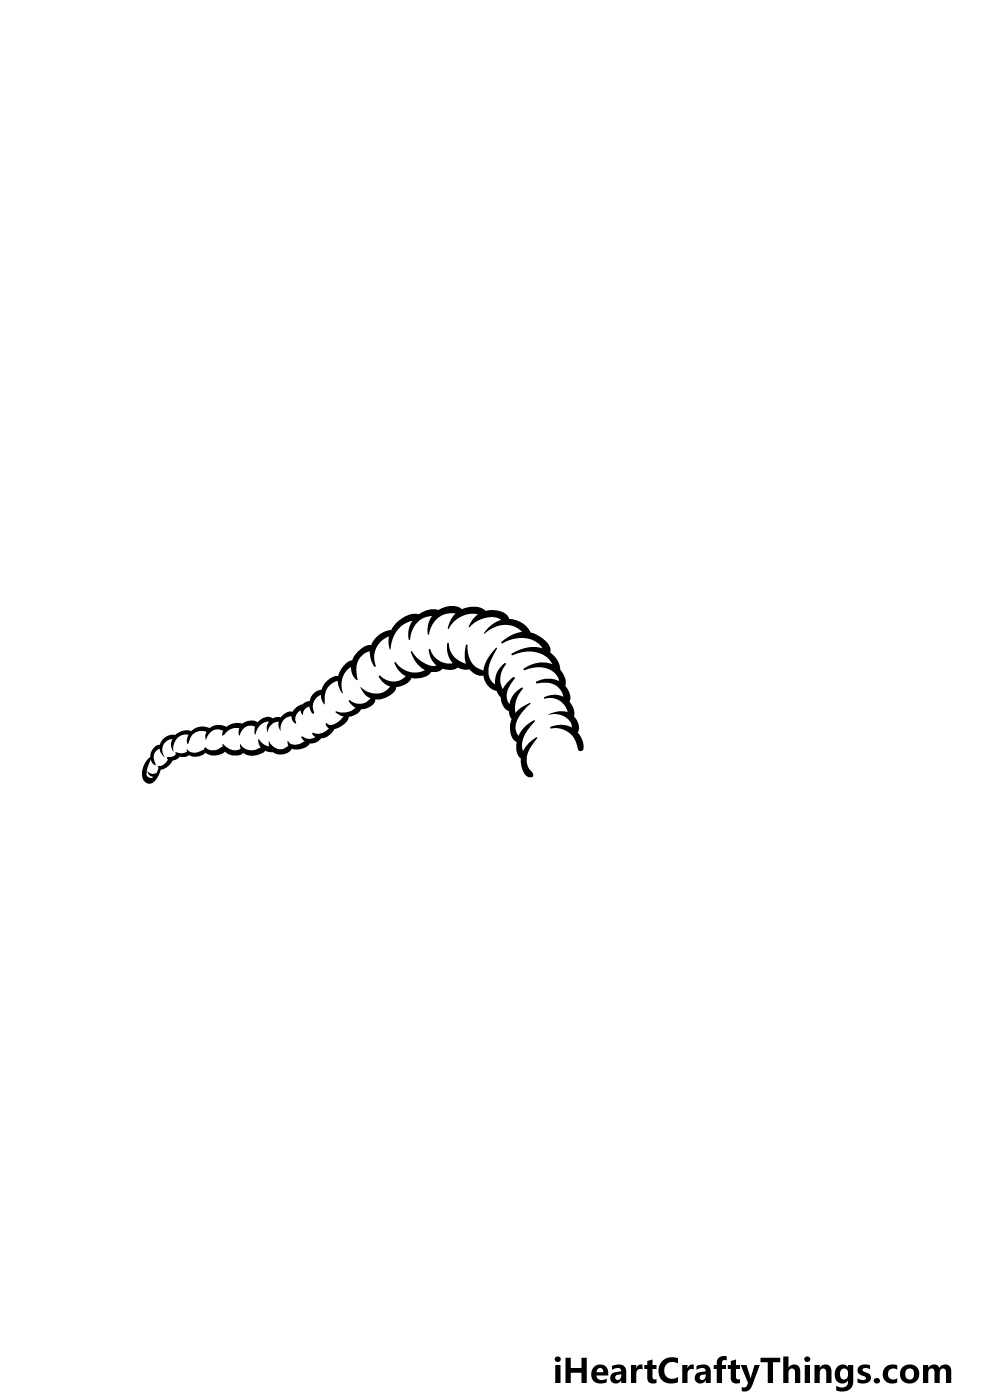
You’re doing a great job on this guide on how to draw a worm so far! In this third step, we will again be drawing another section, but this one will be a bit different.
Worms often flop around as they move, and we will be portraying this as we draw a curve in the body. This next section will bend downwards on the page a bit, as shown in the reference image.
The main difference for this section will be that seeing as the worm is bending, the sections will be a bit closer together. This will show that the body is bending and constricting in this area.
Step 4 – Add some more of the worm’s body

We’re getting close to finishing off this worm drawing! For now, we will be adding the second to last section of the worm.
This section of the body will curl up and around almost as if it were starting to form an S shape.
Once again, there will be a slight difference here, as the body will get smaller and thinner at the first curve and then get a bit thicker as it curls around again.
We will also start drawing a bit of the background in this step, and you can do this by drawing some rounded lines with sharp points at the tip.
These will function as some blades of grass that the worm is slithering around. Then it’s time for the final details in the next step!
Step 5 – Add the final touches for your worm drawing

In this step of our guide on how to draw a worm, we will not only be finishing the body of the worm but also adding the rest of the background details.
Draw some more of those rounded sections to add the final twisting section of the body. Be sure to make the tip of the worm quite small and pointy!
Then, once the worm is completed we shall add the rest of the background details. You can add more of those blades of grass along with some line details on the ground around the worm.
These are the details we would add, but what else can you think of to complete this image?
Step 6 – Finish off your worm drawing with some color
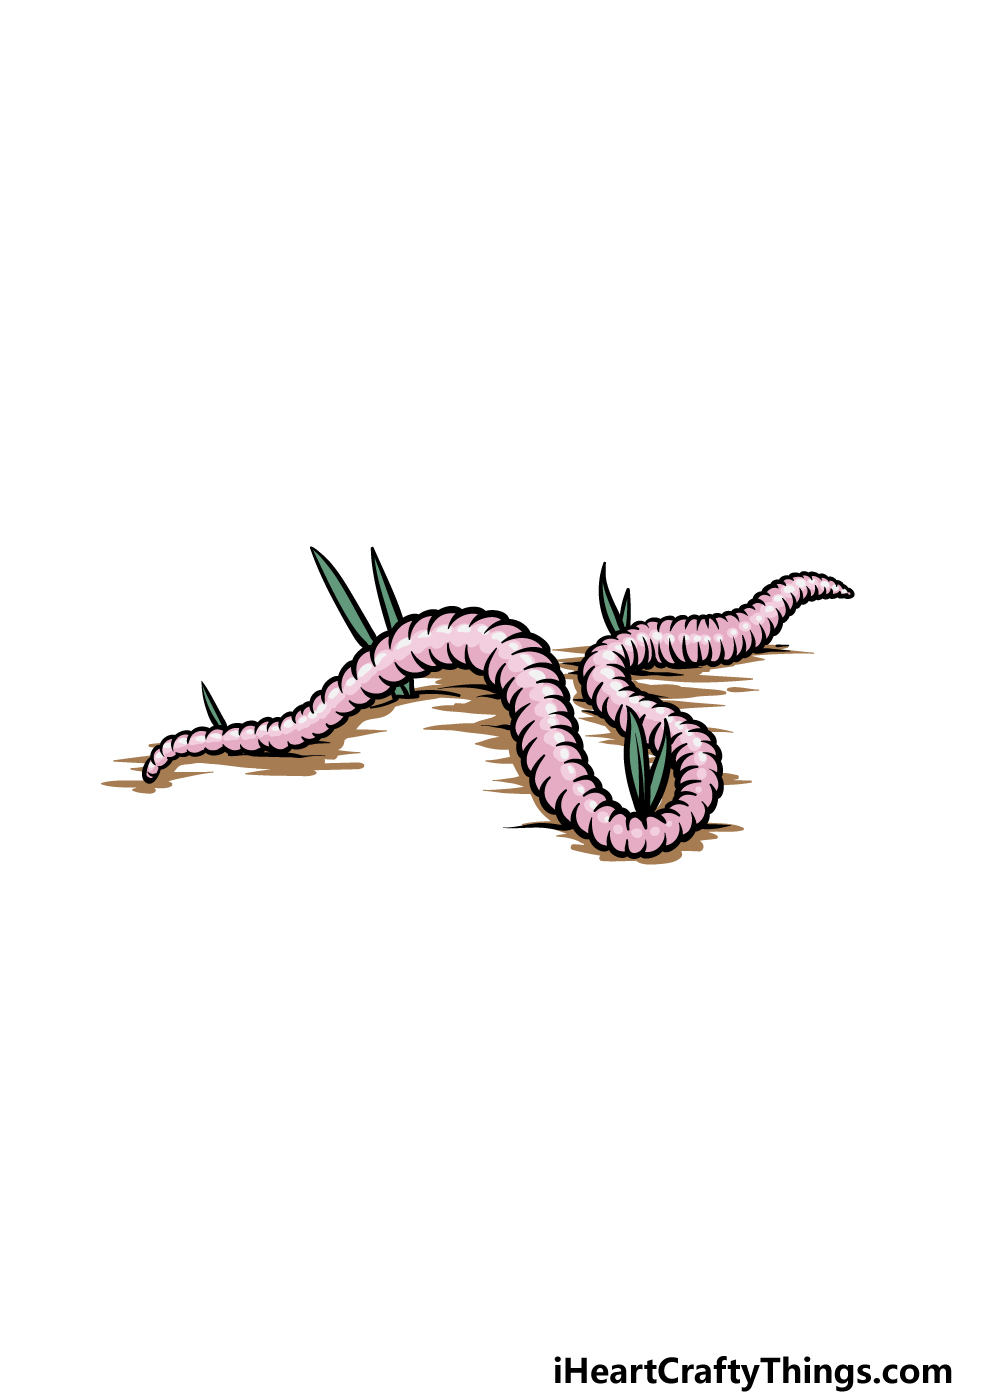
Now you can finish off this worm drawing with some amazing colors! In our reference image, we used various shades of pink for the body of the worm.
By using some dark and light shades of pink, we are able to create some texture details for the worm.
We also used some browns for the dirt, and then finished off with some green for the grass. There are some cool additions that you could also do!
One example would be to spread a thin layer of glue around the worm and then sprinkle some dirt from your yard onto it.
What else can you think of to bring this worm to life with color?
4 More Ways To Make Your Worm Drawing Unique
Make your worm sketch even better with these fun ideas to try out!
This drawing of a worm is quite detailed and realistic, but you could make it a bit more fun by making it more cartoony in style. This could be as simple as adding a cartoon face to the worm.
You could also take it further by simplifying the design of the worm’s body and making it smoother.
When you really have the hang of it, you could portray the worm in all kinds of fun poses and scenarios!
Whether you decide to keep this worm realistic or make it more cartoony, you could add some company for it by drawing some worm buddies for it to hang out with.
The amount of worms you add to the scene would depend on your preferences and patience, but you could make a huge mass of squirming worms if you wanted to!
If you went for a cartoony style, then maybe the worms could be having a worm party or some other kind of fun occasion.
Adding more worms would be one way of adding life to this worm drawing, but there are millions of other creepy crawlies you could also add to give the worm some company!
These could include some insects, small organisms or maybe some tinier mammals such as mice or rats.
Once again, these could be drawn in any fun style you like, and there are some great scenes and settings you could create.
This worm sketch we created has some minimal background details such a some small dirt patches and grass poking up. You could take these elements further by drawing a more realized background.
This could be done by drawing more details that suggest that this worm is crawling through some grass. Or, you could come up with a completely unique environment or setting.
It would be fun to draw some everyday objects into the scene, as you could show how massive they would appear to this worm!
Your Worm Drawing is Complete!
We mentioned at the start of this guide on how to draw a worm that it can be surprisingly difficult to draw what appears to be quite a simple creature.
Our goal with this guide was to show you that even though it can get tricky, it can also be much easier if you have the right steps to follow!
Now that you have completed this worm, can you think of any additions of your own? You could draw a background, add some more worms or use some creative colors and mediums for some ideas.
Then, when you’re finished we hope to see you on our website! We have some awesome drawing guides for you there, and more are on the way soon.
Please also be sure to share your finished worm drawing on our Facebook and Pinterest pages so we can see how it turned out!