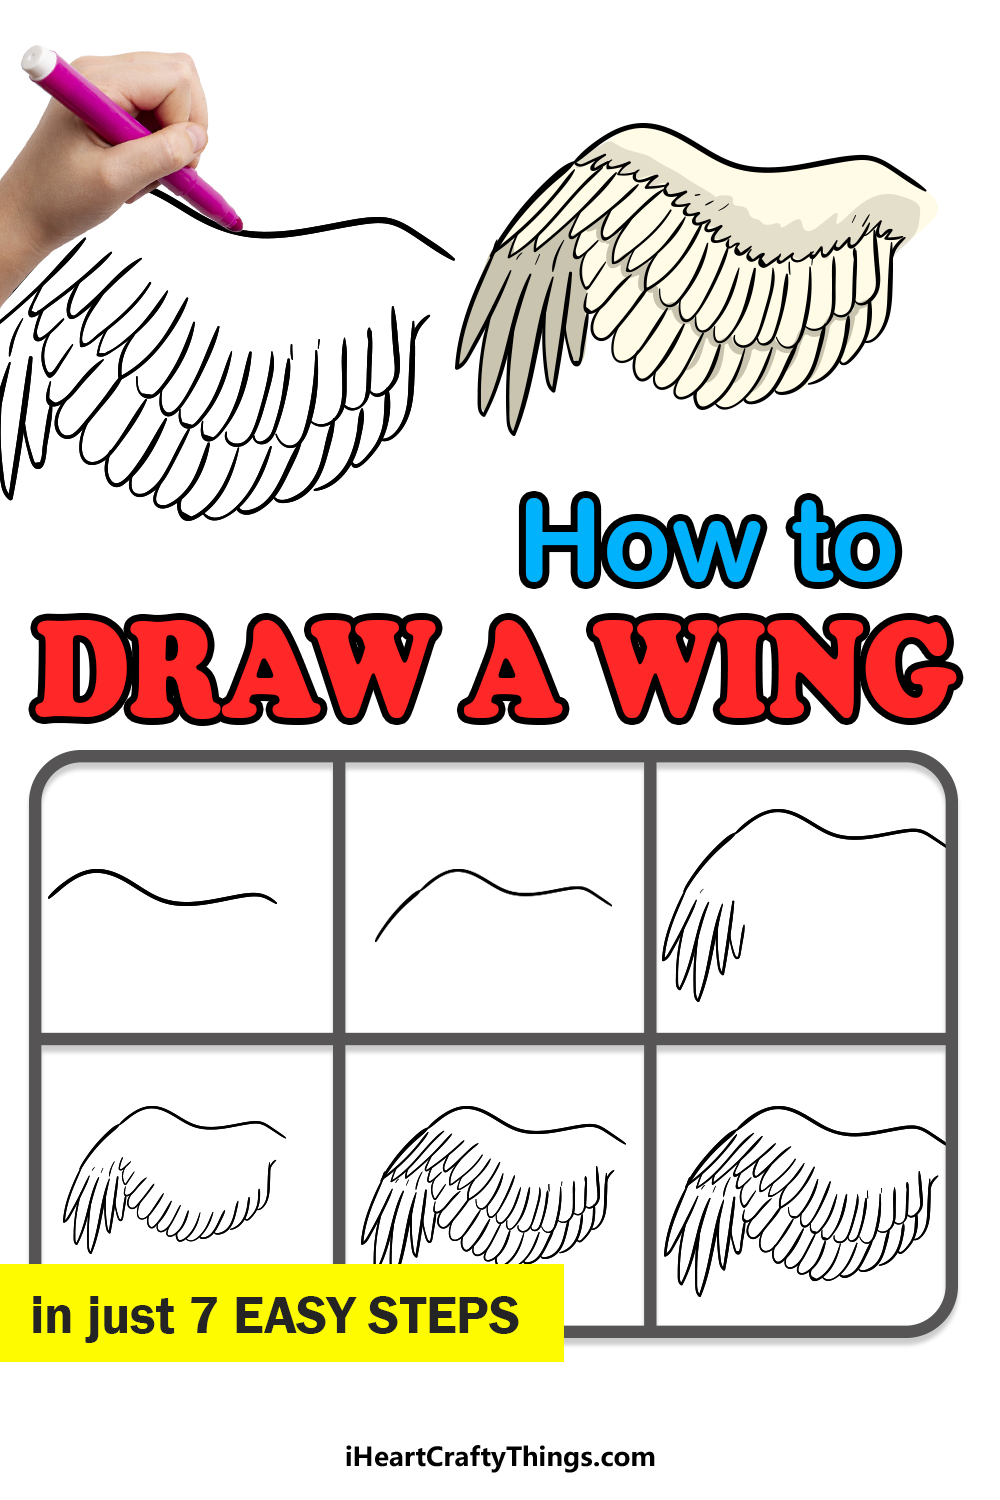
Find out how easy it is to learn how to draw a wing by following this fun guide for kids. This complex drawing can be much simpler when you follow these steps.
Wings are so delicate and beautiful no matter what kind of bird you are looking at. That beauty can be a double edged sword though, as it can make it hard to draw them.
You need to depict the shape, structure and finer details such as the feathers. Bringing it all together into a cohesive whole is often easier said than done.
It was with that in mind that I broke it down in this guide. Instead of tackling the design as a whole, I will guide you through simplified steps that come together to form the final product.
By the end, you could even add more of the bird that this wing is attached to! It’s going to be so much fun to work on this, so let’s begin.
Watch This Guide On How To Make Your Wing Drawing
How to Draw A Wing – Let’s get Started!
Step 1
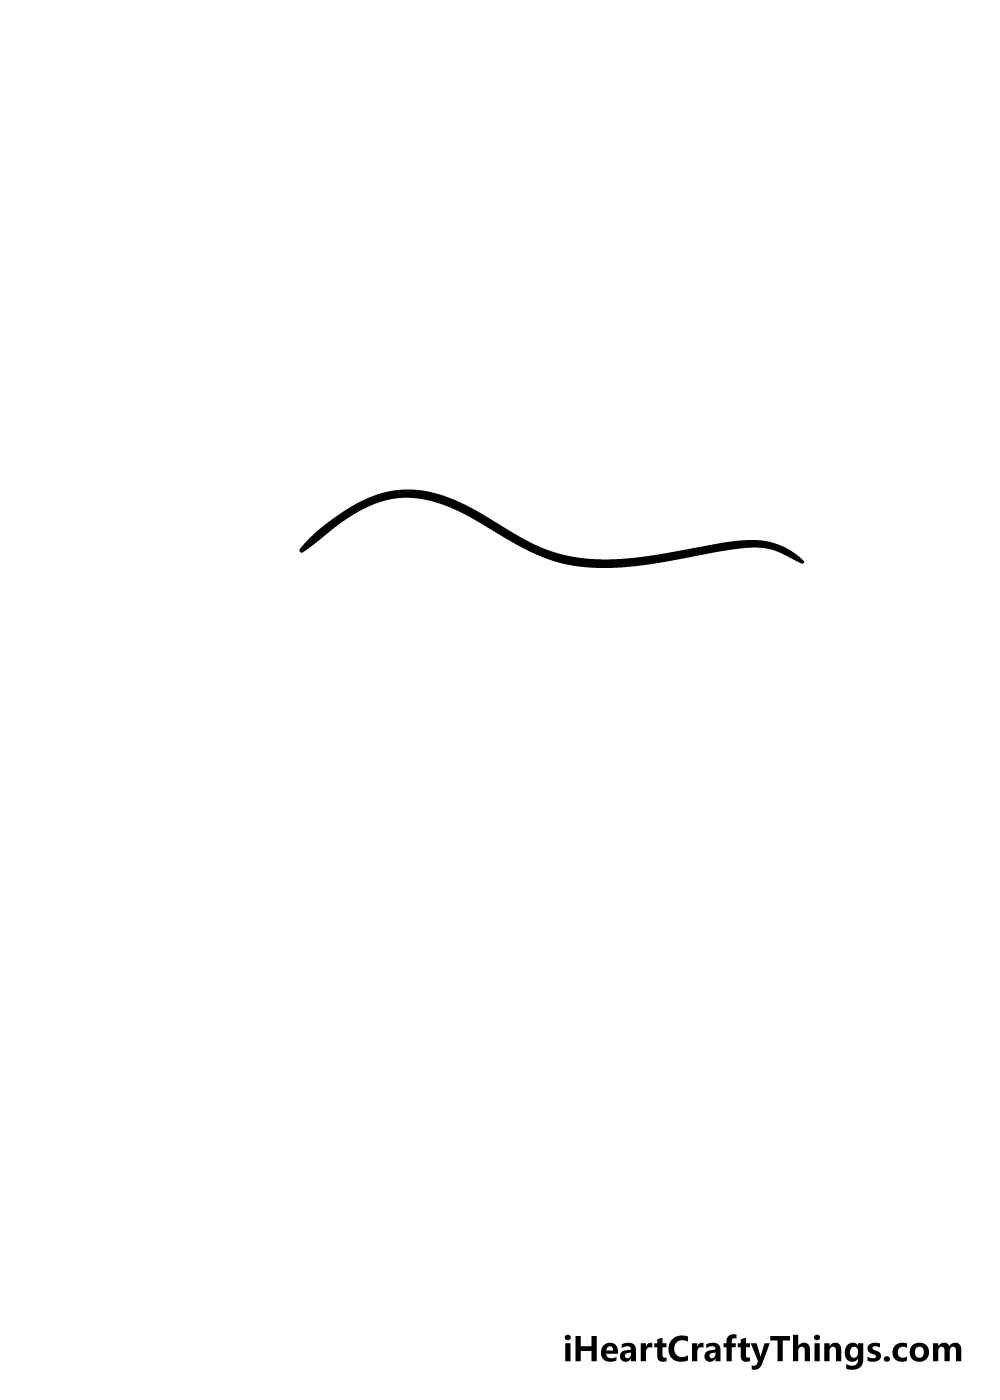
In this first step of our guide on how to draw a wing, we will begin with a curvy line like the one you see in the reference image.
It may not seem like much of a start to a wing now, but you’ll see that it will form a great base for your wing in the next few steps!
Step 2 – Extend your first line

Now that you have the first line of your wing drawn, we can start to add more to it.
For this step of your wing drawing, extend the left hand side down a fair amount, and then you can extend the right hand side a bit as well.
The reference picture will show you how this should look before you move on to step 3.
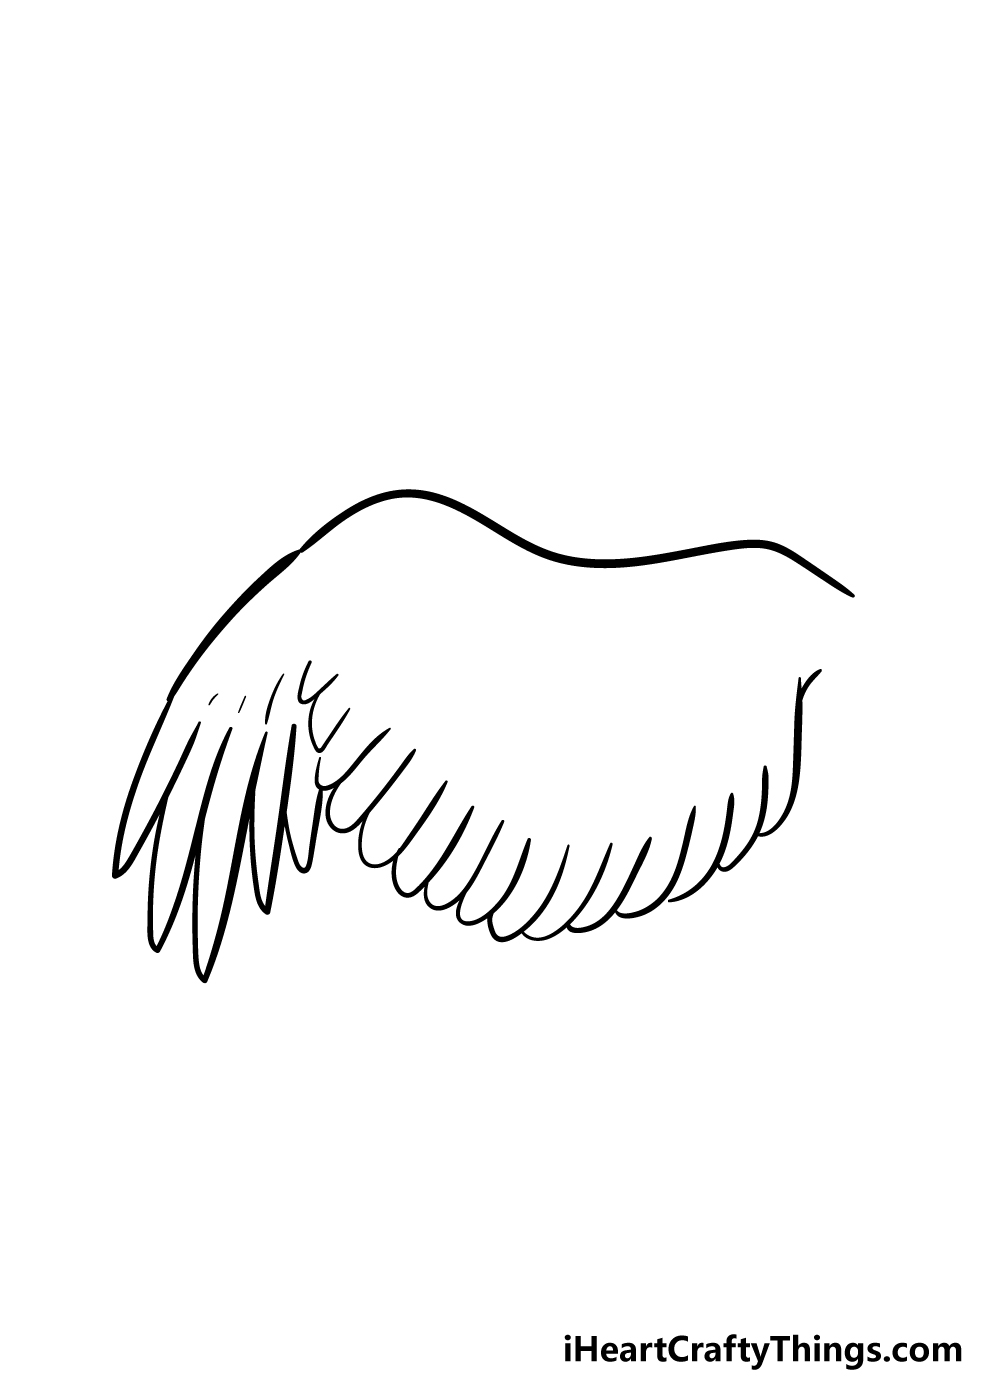
Step 3 – Next, draw in the first tips of the wings
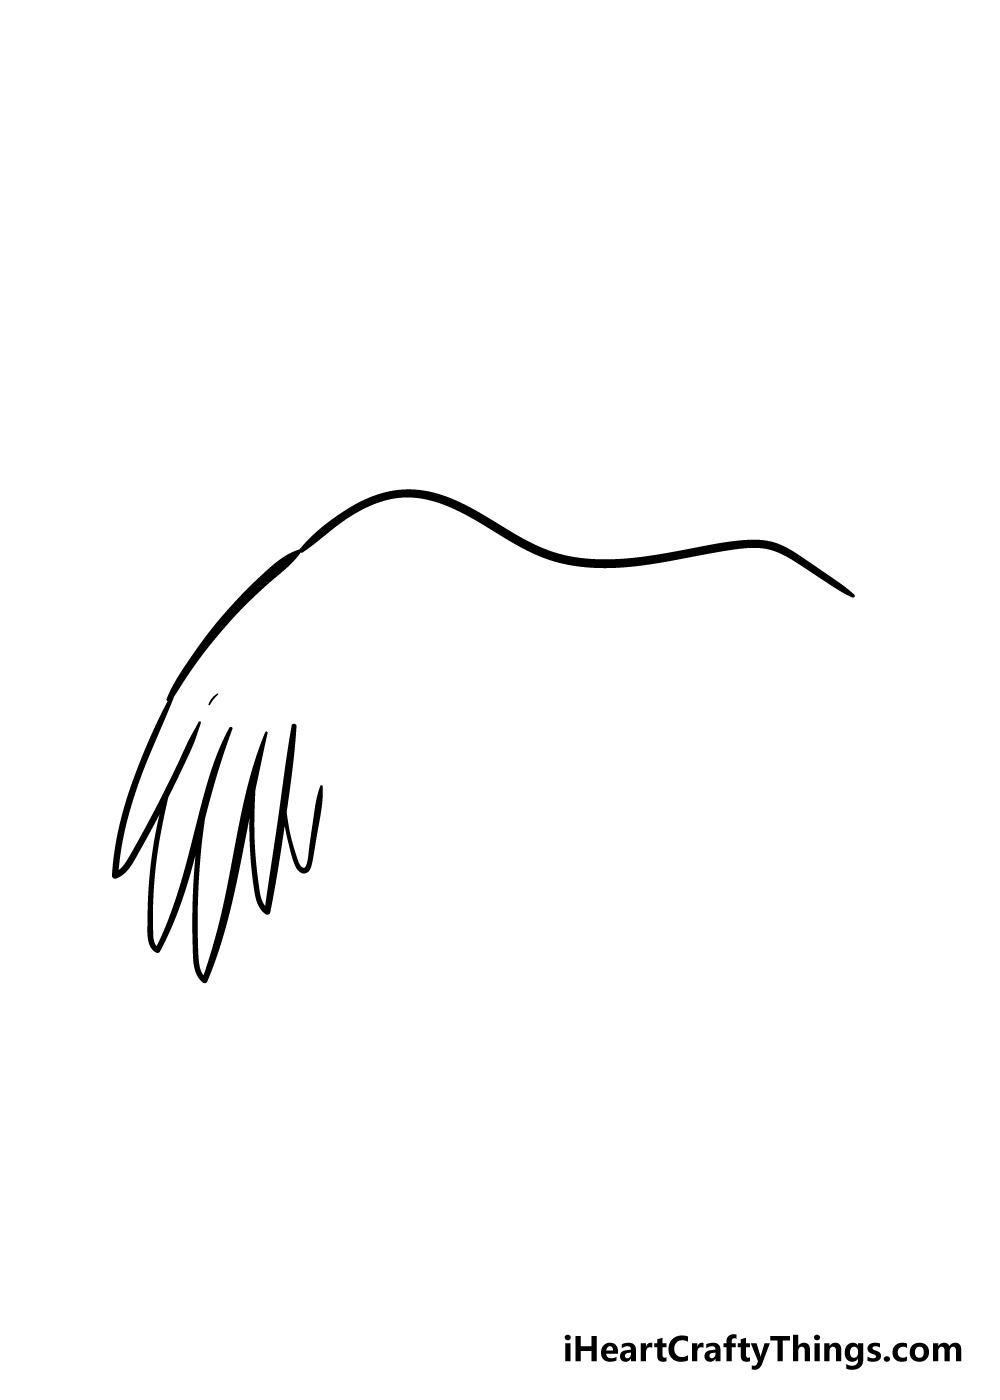
The lines that you have been working on so far in this guide will form the upper section of the wing, and in this step we will begin to add in the tips of the wing.
Do this, extend a line down from the left-hand side of your line and then bring it up in several long, jagged shapes.
The reference image will give you an idea of the lengths these tips should be, as some should be longer than others for a more realistic appearance.
Step 4 – Now we shall draw in more of the lower wing
This next step in our guide on how to draw a wing could be a bit tricky, so to make things a bit easier for you, you might want to use a pencil to help you out.
Use the pencil to draw in a sharply curved line coming from the left side of the wing to the right.
Once you have that line drawn in as a guide, you can use your pen to add in some more sharp shapes as the tips of the wing extending along it.
Once you have the tips drawn in, you can erase the pencil line that you drew as a guide.
Step 5 – Draw in another layer of the wing
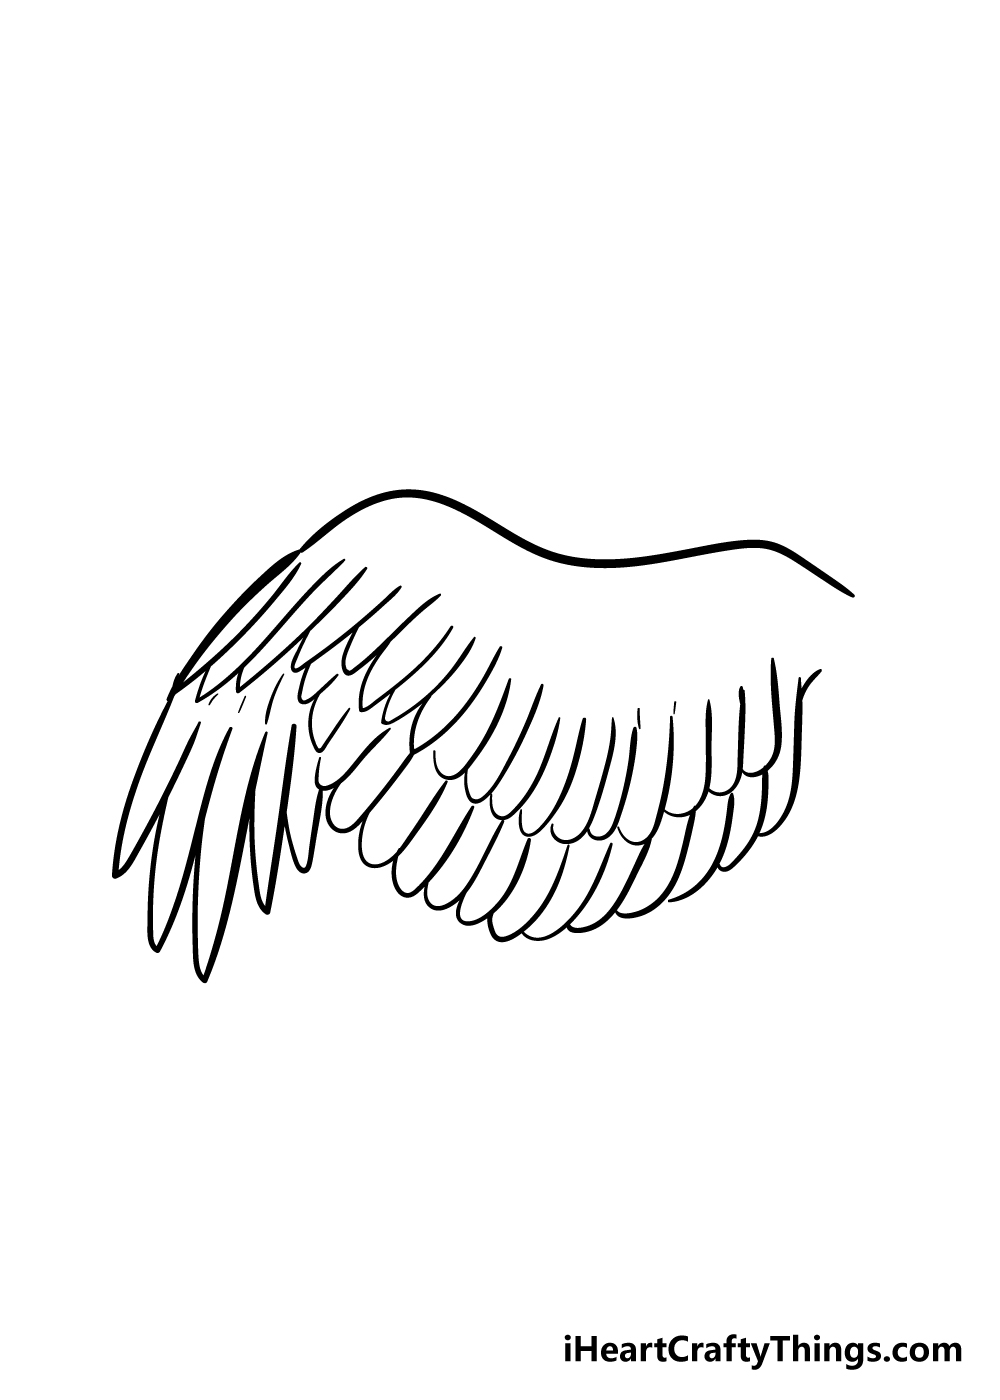
Your wing drawing is already looking good so far! In real life, wings are made up of several layers of feathers, so to make your drawing even more realistic we shall add in another layer for your wing.
In this step, we shall add in more sharp and jagged lines similar to the ones you drew in the previous step.
These ones will be above the row of wings that you drew previously and will extend all the way to the lefthand side of the wing.
This is another step where referring closely to the reference picture will be very helpful in getting the spacing and positioning looking good.
Step 6 – Next, draw in another layer of the wing
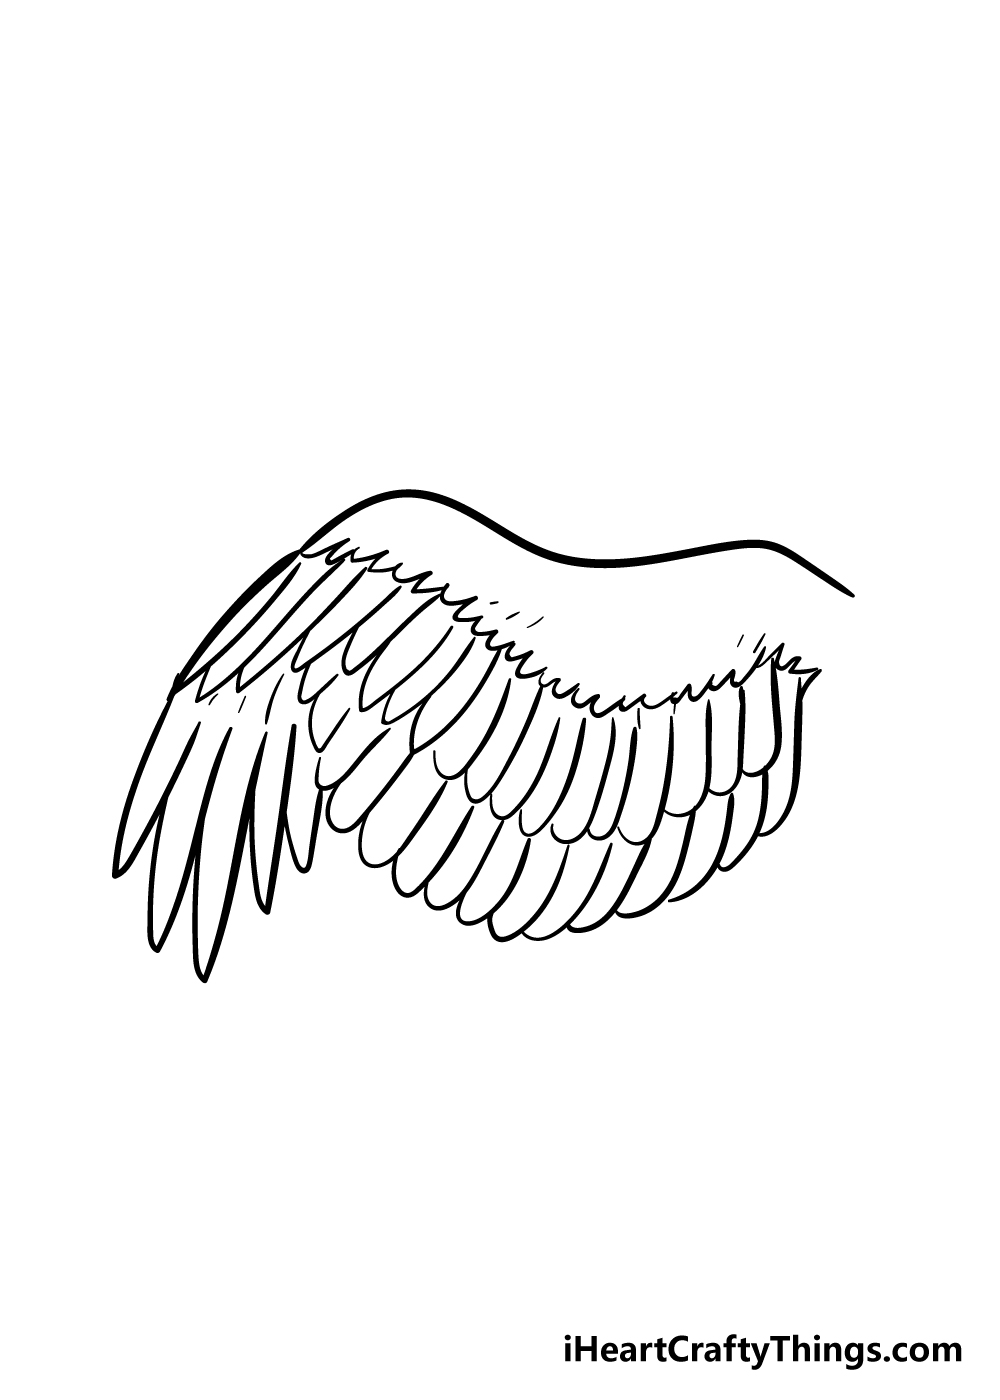
You’re very close to completing this guide on how to draw a wing now! As we mentioned in the previous step, wings are made up of several layers, and for this step we will add in the final one to really bring this drawing together.
To finish it off, simply add in one more row of much smaller jagged lines along the top of the previous row that you drew.
Those are the final details that we have for this wing, but you could also add in more lines and small details to further personalize your drawing.
Once that row is drawn in, then your wing is ready to go for the final step of this guide!
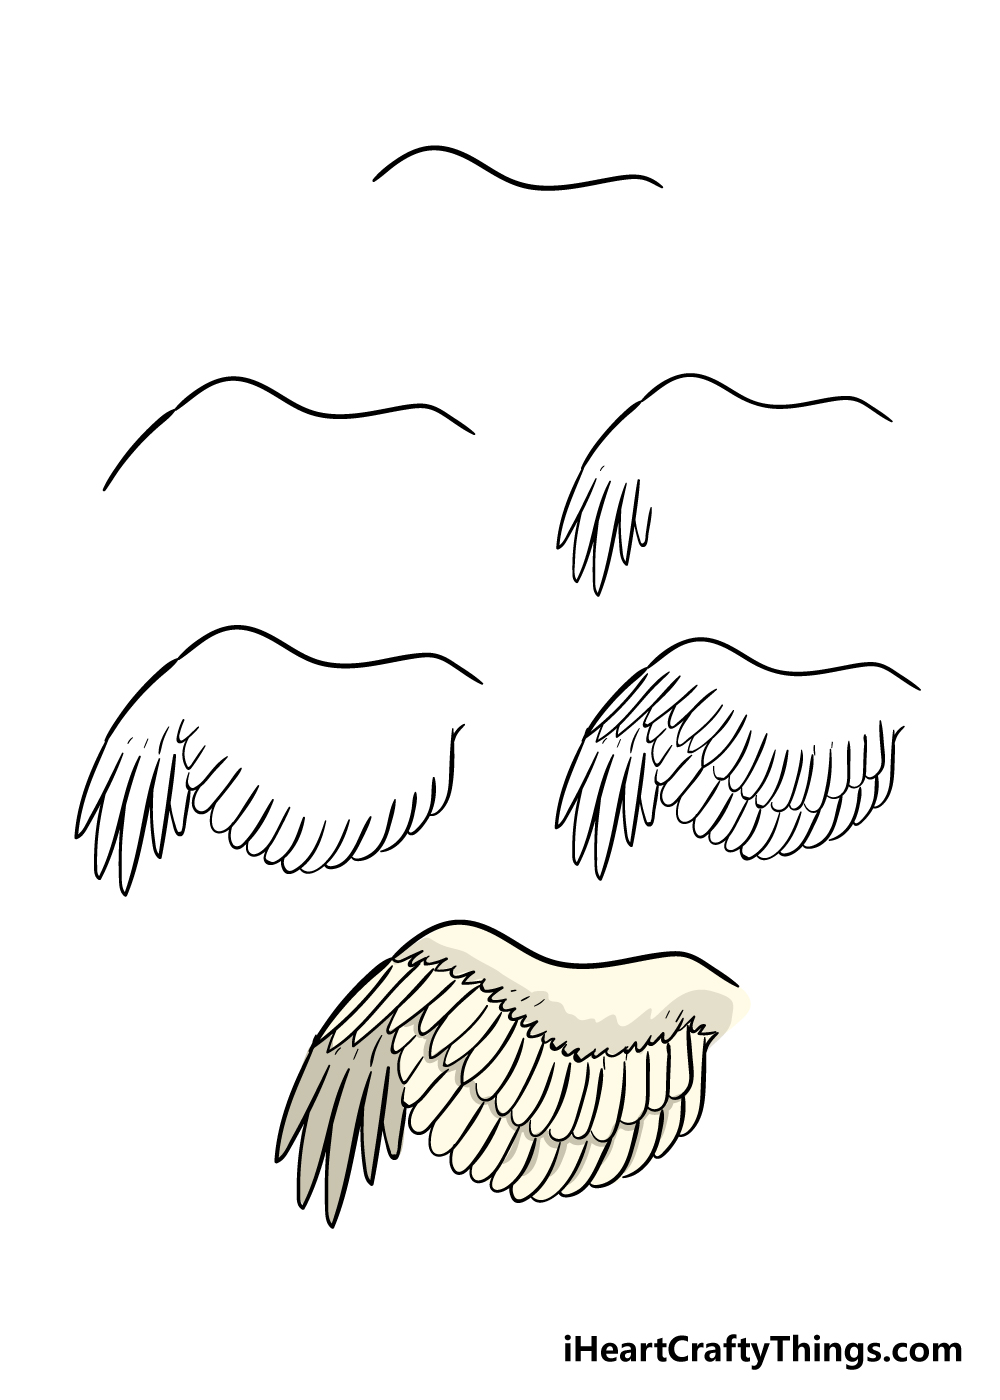
Step 7 – Finish off your wing drawing with some color
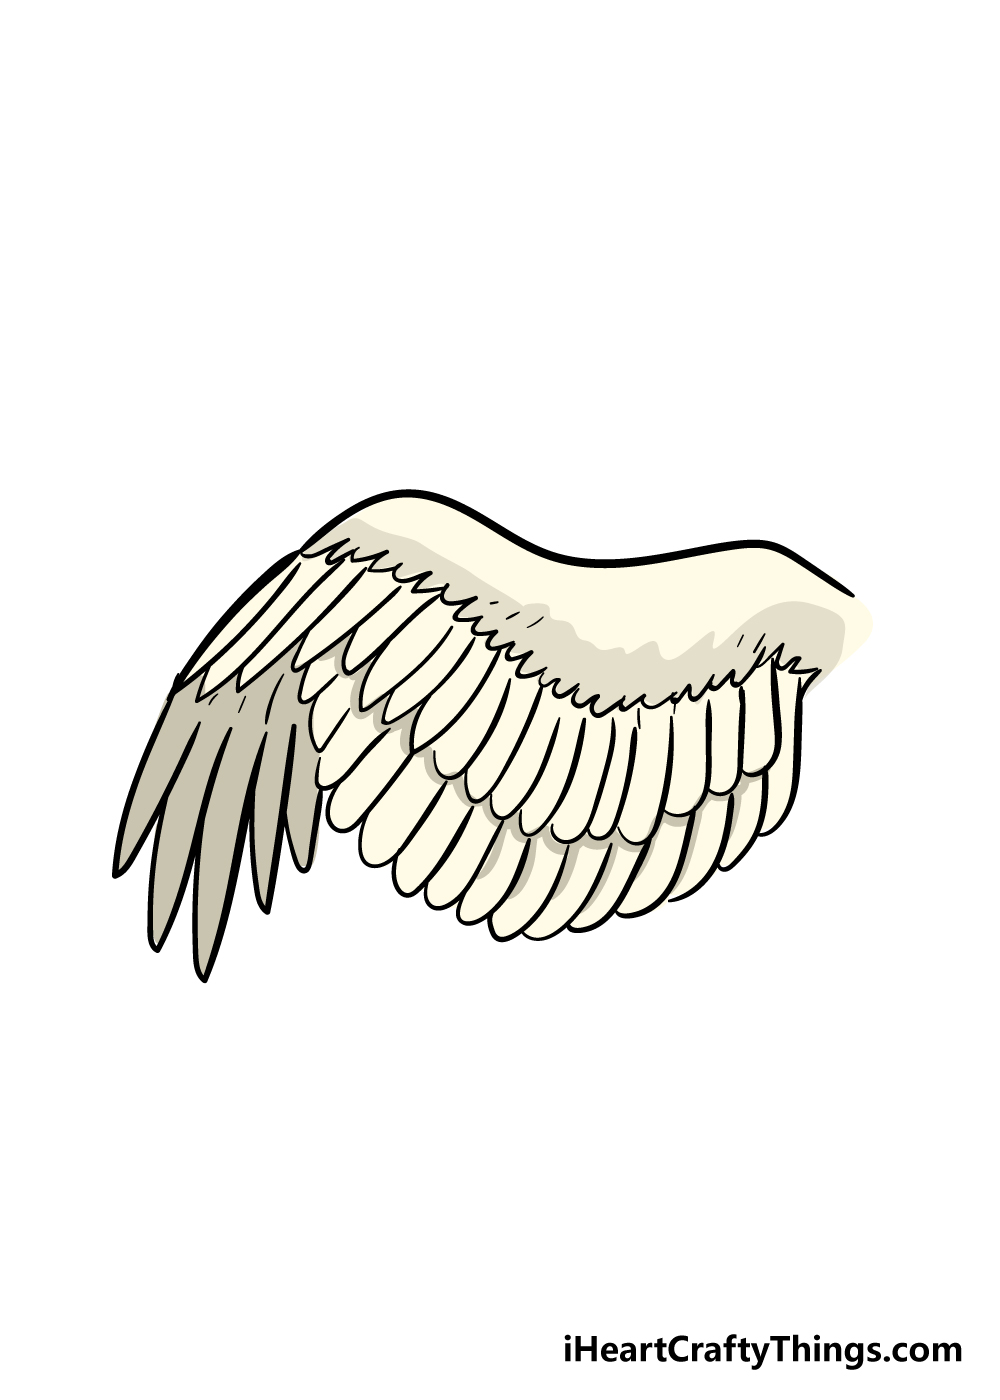
With your wing drawing completed, you’ll be happy to know that it’s time for the final step of our guide on how to draw a wing, and it’s one of the most fun steps of them all! In this step, you get to show all of us how creative you can be with some wonderful colors!
We have shown you just one way that you could color in your wing in our image, but for your drawing you should let your creativity shine!
Birds come in every color imaginable in nature, so this gives you a lot of freedom to choose your favorite colors for your wing.
Once you have your colors chosen, what art mediums will you use to finish it off?
If I were coloring in this wing, I would personally use some acrylic paints for some extra vibrant color detail, but anything you use will look amazing! We can’t wait to see what you end up going with.
3 More tips to make your wing drawing easy!
Make this wing sketch a bit easier with the help of these 3 handy tips!
We tried to keep the details of this drawing of a wing to a minimum to make it a bit easier to draw.
It could still prove a bit of a challenge, however, and if so you could simplify some of the details even further.
A good place to start would be by removing some of the feather details. These will likely be some of the more time-consuming details that you will need to work on.
If you remove these details, it could be good to do some practice drawings. Then, as you get more confident with the design, you could start adding more detail back into the image.
Another way you could make this wing sketch a bit easier would be by referring to real bird’s wings. A good way to do this would be by looking up pictures online.
That way, you will get a great look at some wings to help you as you draw this one.
Using these kinds of pictures along with the steps in our guide will make it so much easier to get the shape and details looking accurate.
It would also potentially allow you to create different kinds of wings for other drawings, so you could have a wing drawing collection!
Finally, we would also recommend using other art tools and mediums to prepare your artwork. For instance, many artists will use a light pencil to prep their drawing before they commit to darker mediums.
By using a pencil, you can erase any mistakes, so the pressure won’t be as strong to get it right on the first try.
You could use this tip along with the others we suggested so that by the time you’re ready to use a pen, your picture will look exactly as you want it.
When you use your pen, be sure to let the ink dry before you erase the pencil lines to finish off this drawing of a wing.
Your Wing Drawing is Complete
With the colors added in and the final details drawn, you have reached the end of this guide on how to draw a wing! You should be very proud of your drawing, as this was quite a tricky one to take on.
Our aim with this guide was to show you that even if a drawing looks difficult, it can be made much easier if you use a guide and break it down into steps.
We really hope that you had fun while learning to draw a beautiful wing!
Now that your drawing is finished, will you add in some fun extra details or maybe incorporate some crafts and creative art mediums to give it some extra flair?
This isn’t the end of the fun though, as we have many more great step-by-step drawing guides for you to enjoy, so be sure to check out our site often to make sure that you never miss out!
We would love to see how you finished off your amazing wing drawing, so please share it to our Facebook and Pinterest pages so we can marvel at your creativity!