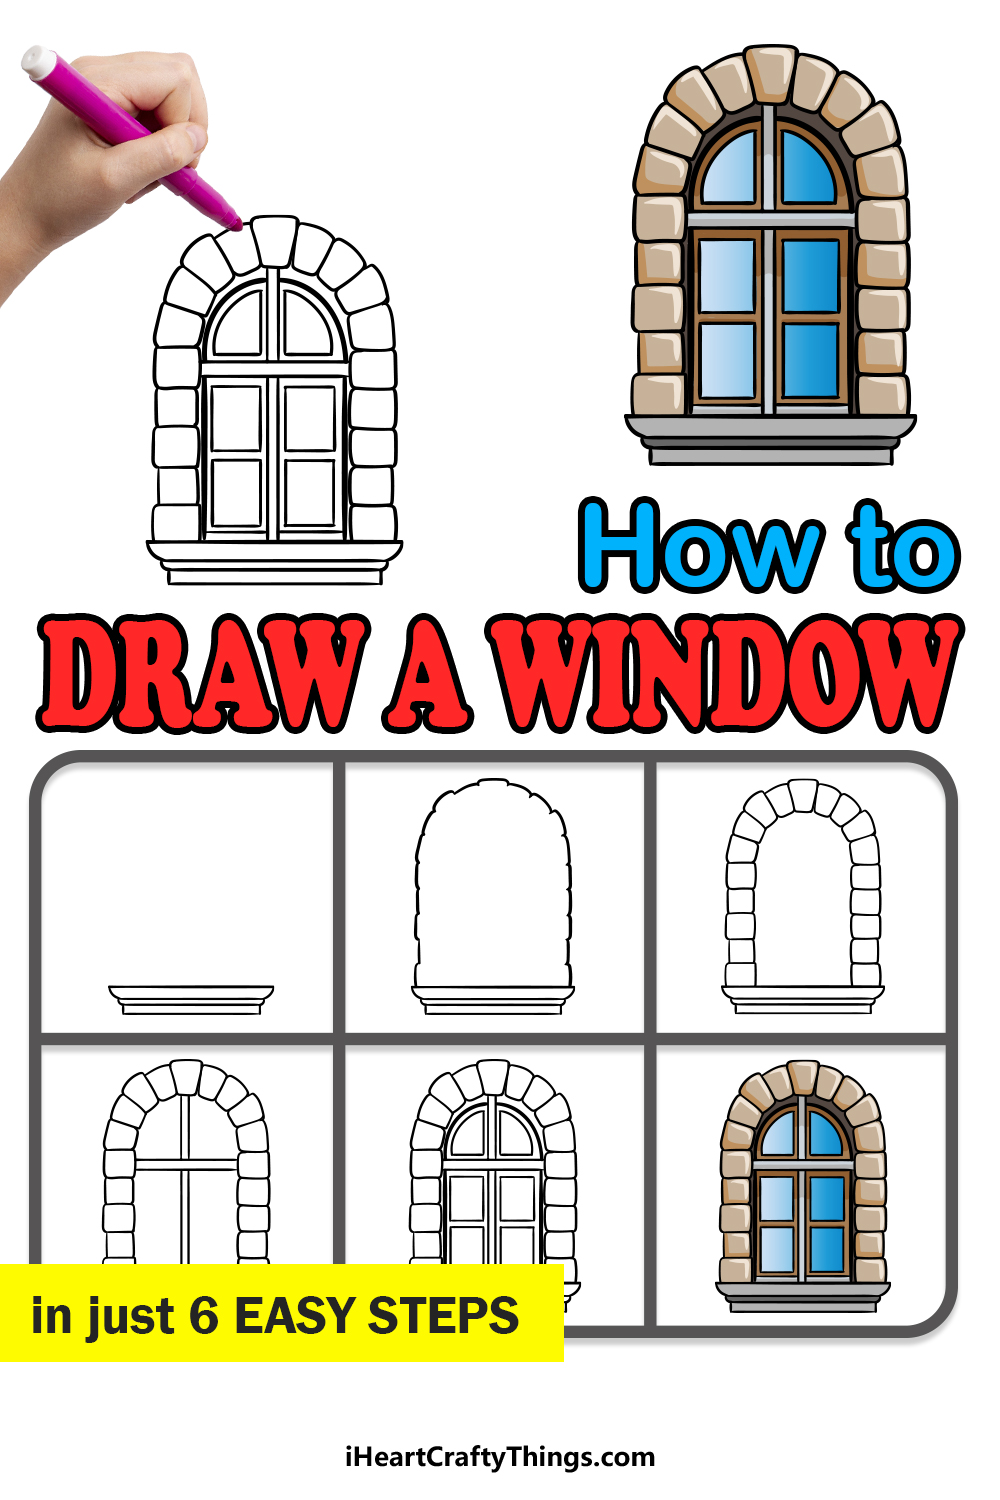
This guide on how to draw a window will open up a whole world of creative possibilities for you! Get your favorite drawing tools ready, as this guide for kids will make it fun and simple for all ages.
Windows can come in any shape and style you can imagine, and most buildings will have them in some form or another. Chances are that you can probably see at least one window from wherever you’re reading this!
They allow us to see the world outside and to bring in some fresh air and sunshine. In this guide, we will be drawing a charming window with a vintage stone arch over it.
Once you have truly mastered the design, you could even change it to match a different style of window that you like.
Find Out How To Make Your Window Drawing
How to Draw A Window – Let’s Get Started!
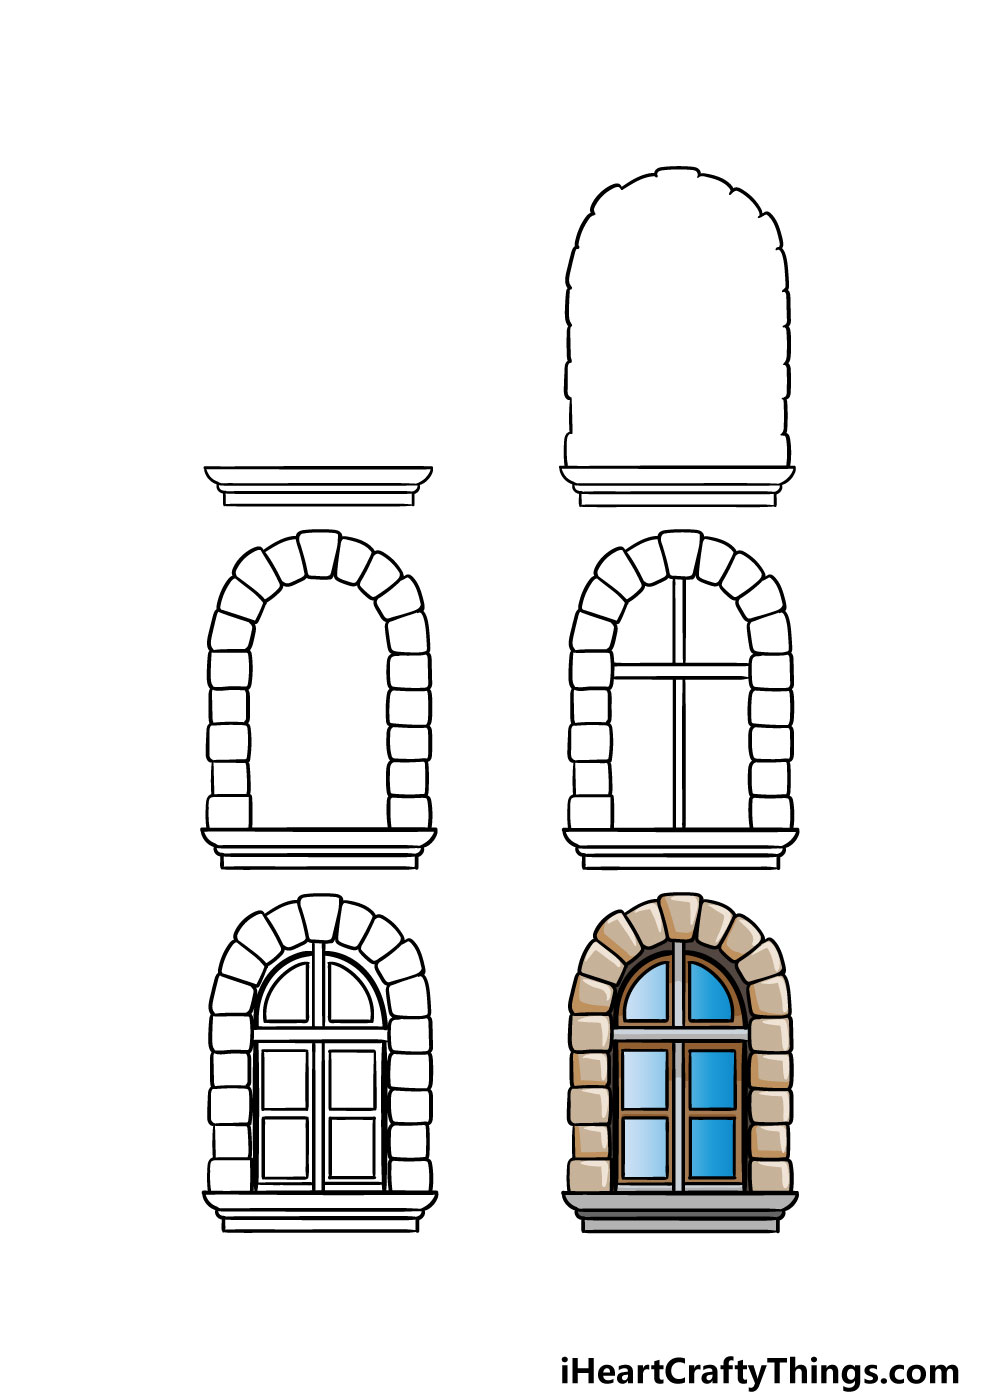
Step 1
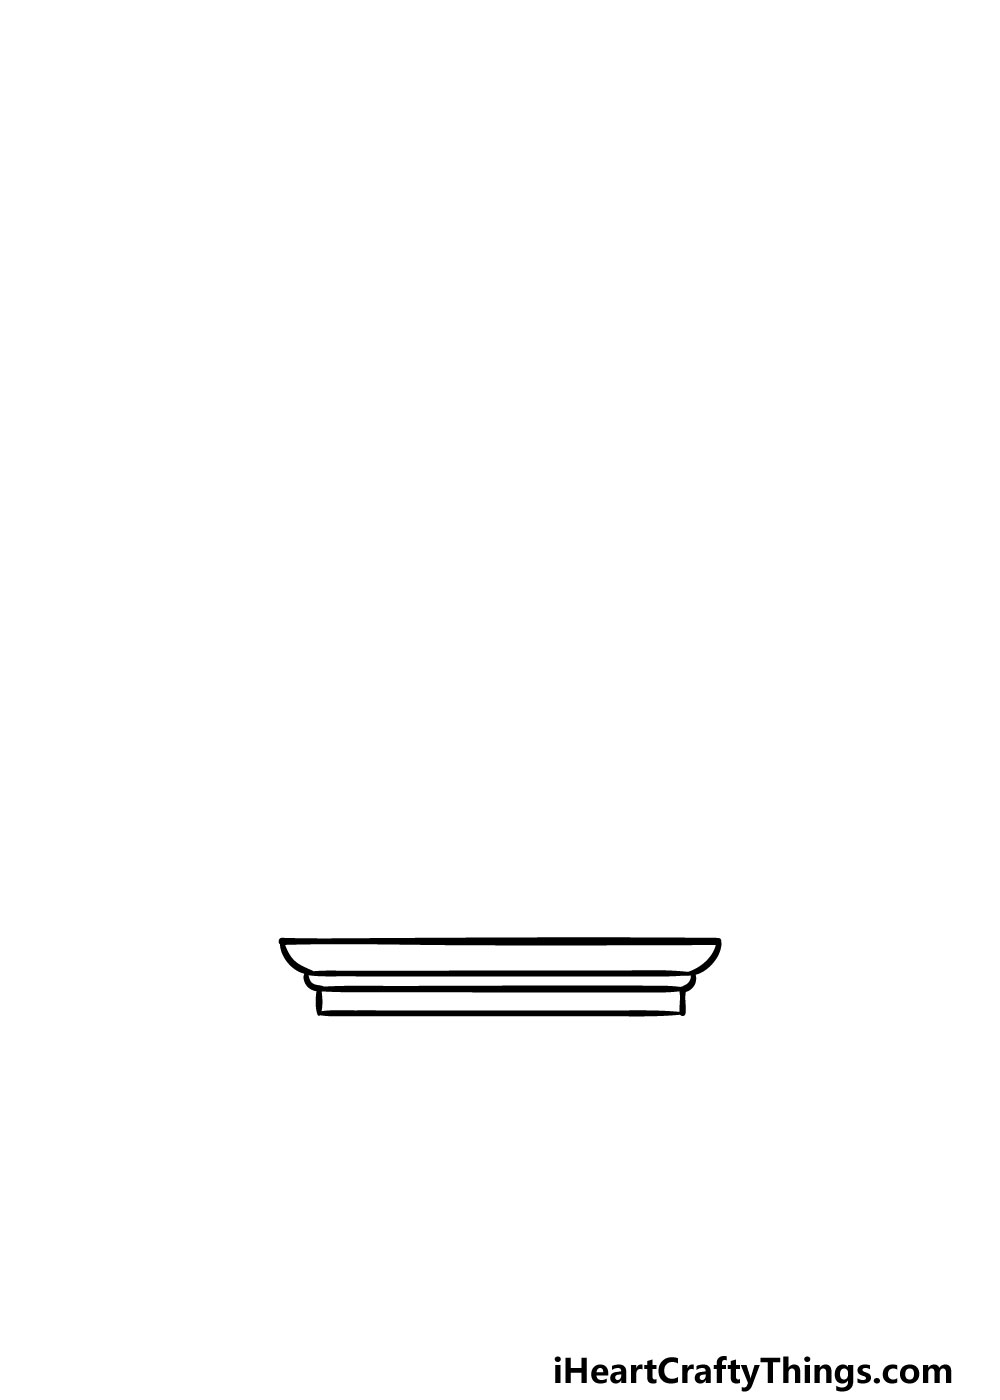
In this first step of our guide on how to draw a window, we will be starting with the windowsill. For this and most of the steps to follow, you will find it much easier if you have a ruler on hand to help you out.
For now, the windowsill will have three levels to it. The first one will be the longest and have a flat top to it. The middle one will be the thinnest of the three, and will also be shorter than the first one.
Finally, the last one will be the shortest of them all, and it will also be the most angular of all the sections. With the windowsill done you’re ready to move on!
Step 2 – Draw the outline of the window
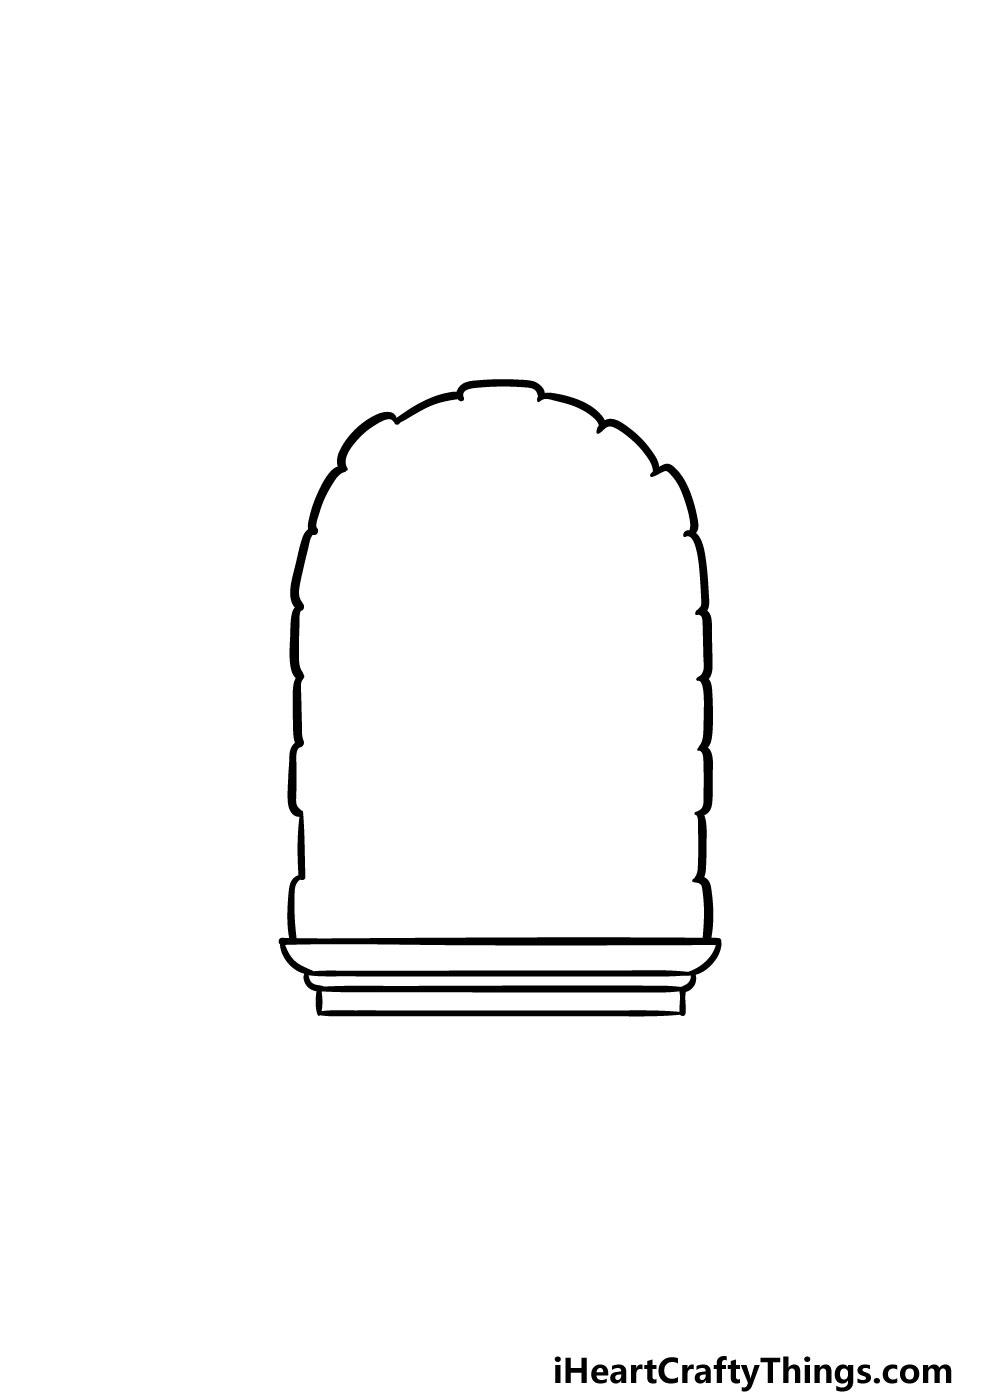
As you can see in the final image we’re working on, this window drawing will be portraying a somewhat old-fashioned window that has a stone frame.
We will start this stone frame in this step of our guide. It will be forming a long, rounded arch over the window, but we won’t be using a solid line to draw it.
Instead, the line will be quite jagged with lots of small square segments coming off of it. If that sounds a bit confusing then the reference image will guide you as to how it should look!
Step 3 – Finish off the stone frame
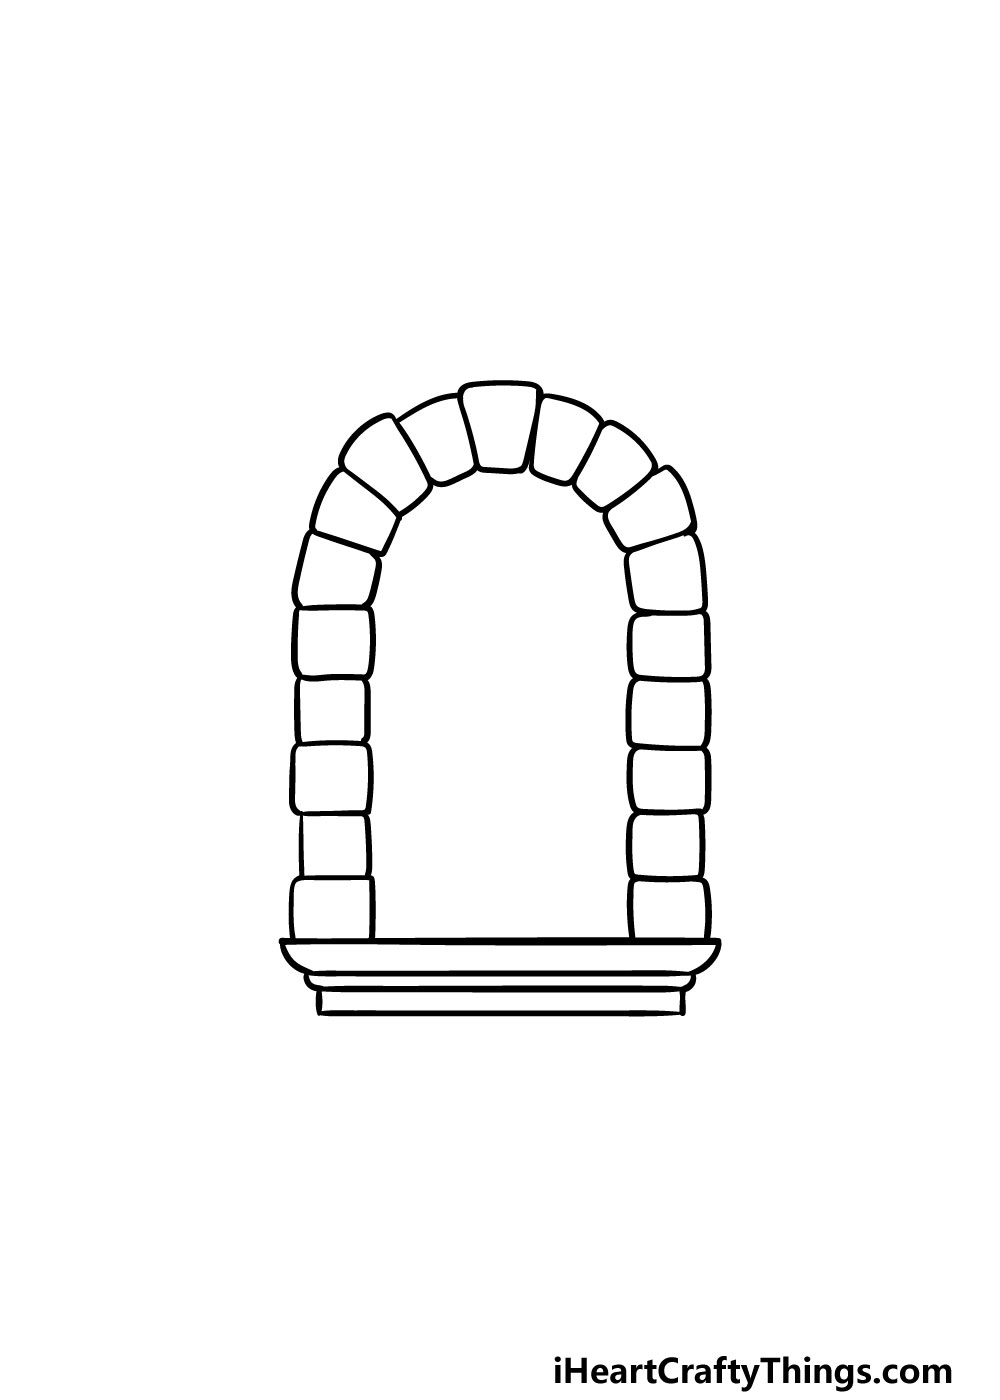
In this part of our guide on how to draw a window, we will be finishing off the stone frame of the window that you started in the previous step.
This step may require a bit of patience, but it will be worth it in the end! All you need to do is draw the individual stone sections of the window frame.
There will be quite a few stones in this frame, but it will look great once they’re all in place!
Step 4 – Now, add some detail to the window
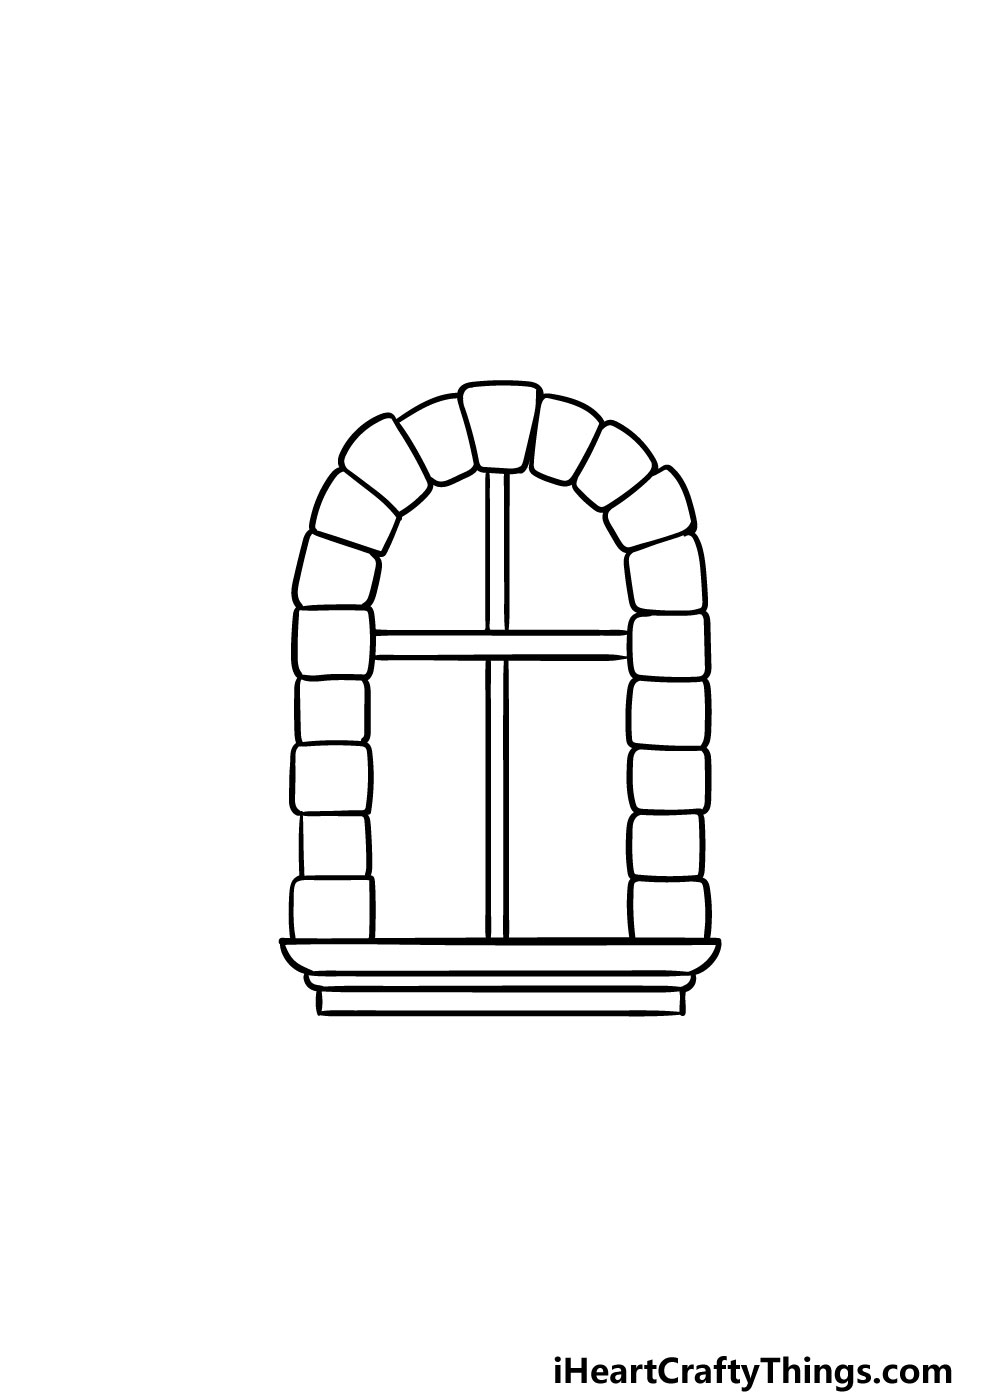
Windows often have bars of wood or metal between the panes of glass. These are called muntins, and we will be drawing them in this step of our guide on how to draw a window.
We mentioned earlier how you may want to have a ruler on hand for this guide, and this step will show you why! All you need to do is draw a thin vertical bar going down the center of the window.
Then, draw another similarly thin bar going horizontally near the top of the window. Then, there are just a few final details to add in the next step, and then you’ll be ready for some coloring fun!
Step 5 – Add the final details for your window drawing
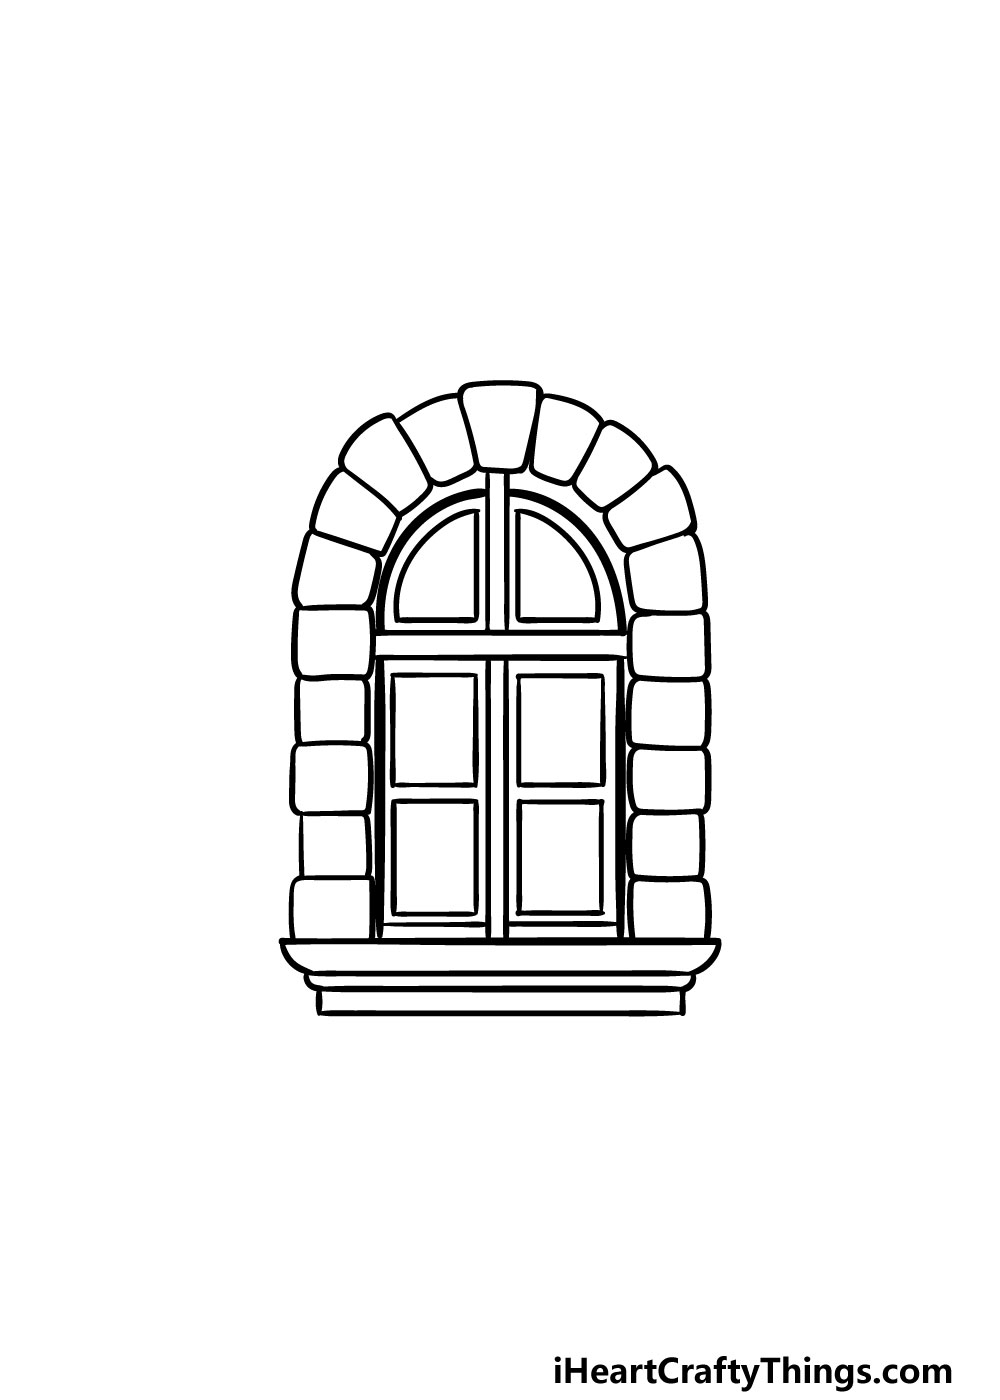
You’re almost ready for the final step of this guide on how to draw a window, but first we have a few more details to add. These will mostly be the separate panes of glass in the window.
For the four panes at the bottom of the window, you will draw some rectangle shapes within the outlines. Then, the panes on top will be drawn with a combination of straight and round lines to fit inside the outline.
That will finish off the details in this guide, but that doesn’t mean that you have to move on just yet! You can also add some details and elements of your own that you may love, and there is a lot you can do for this.
Perhaps you could draw the landscape that this window is looking out on, or maybe draw some wallpaper and other household objects around it to show what kind of house this window is on. What fun ideas can you think of to finish off this window drawing of yours?
Step 6 – Finish off your window drawing with some color

In this final step of your window drawing, you will get to have some fun adding some amazing color to it! In our reference image, we used some more muted browns and greys for the frame, and then we contrasted it with some blue on the windows.
These are the colors that we chose, but this is your drawing and you should use any colors that you love for this image!
You could keep the colors more muted like our example or use some lovely bright and vibrant colors instead if you prefer. You could also color in any additional elements or details of your own that you added.
Finally, once you know what colors you would like you can decide on the art mediums you will use to finish it off. We can’t wait to see the creative ways you choose to finish off this picture.
4 More Ways To Make Your Window Drawing Unique
Get a look at how you can make your window sketch even better with these 4 tips!
Windows come in many different styles, shapes and sizes. We love the design of this window drawing, but you could change it to a new style to make it more unique.
This could be by simplifying it to have the common rectangle or square shape that many windows have. Or you could make it even more grand and impressive by making it much bigger!
You could look around you at windows in the house or in buildings nearby for some inspiration.
Sometimes, windows will have decorations on the glass or the frame, and you could represent this in your drawing. For example, you could create a lovely stained glass design for the window.
Or, you could create a fancy wooden frame. It could be an option to change the setting of the building from a stone design to something else, too.
How else could you decorate the glass and frame of this window? We’re sure you have all sorts of great ideas!
The way this drawing of a window is shown makes it look like we are looking into it. For this reason, you could show what the room that it’s looking into looks like.
There is also another approach you could take. By changing just a few details, you could also make it look like we are looking out of the window instead.
That would give you a great opportunity to create a beautiful landscape setting.
Lastly, you could also make this window sketch even more unique by adding more to the picture. This could be as drastic as you like, and it can depend on the space you have on the page as well as your creativity!
You could even go as far as to draw the rest of the house. You may want to stick to just a portion of the house to make sure you can still show some details.
How can you think to expand this drawing?
Your Window Drawing is Complete!
You have reached the end of this guide on how to draw a window, and you should be very proud of the picture you have ended up with! We hope that this guide was lots of fun for you to work through, and we also hope that it made it much easier for you to take on.
Now you have everything you need to add your own elements onto this drawing. You could also take what you learned and use it to create your very own window variations!
Our website is full of many amazing drawing guides like this one for you to enjoy! We upload new ones all the time, so be sure to visit us often.
We would love to see your completed window drawing as well, so please remember to share it on our Facebook and Pinterest pages!