Halloween is probably the spookiest time of the year! Around this holiday, scary decorations go up and costumes are prepared for trick or treating.
One of the most recognizable symbols of Halloween is the jack-o-lantern, and these scary pumpkins will be seen all over around this time of year.
It can be a lot of fun getting into the Halloween spirit by learning how to draw a jack-o-lantern!
By the end of this tutorial, you will be able to do just that.
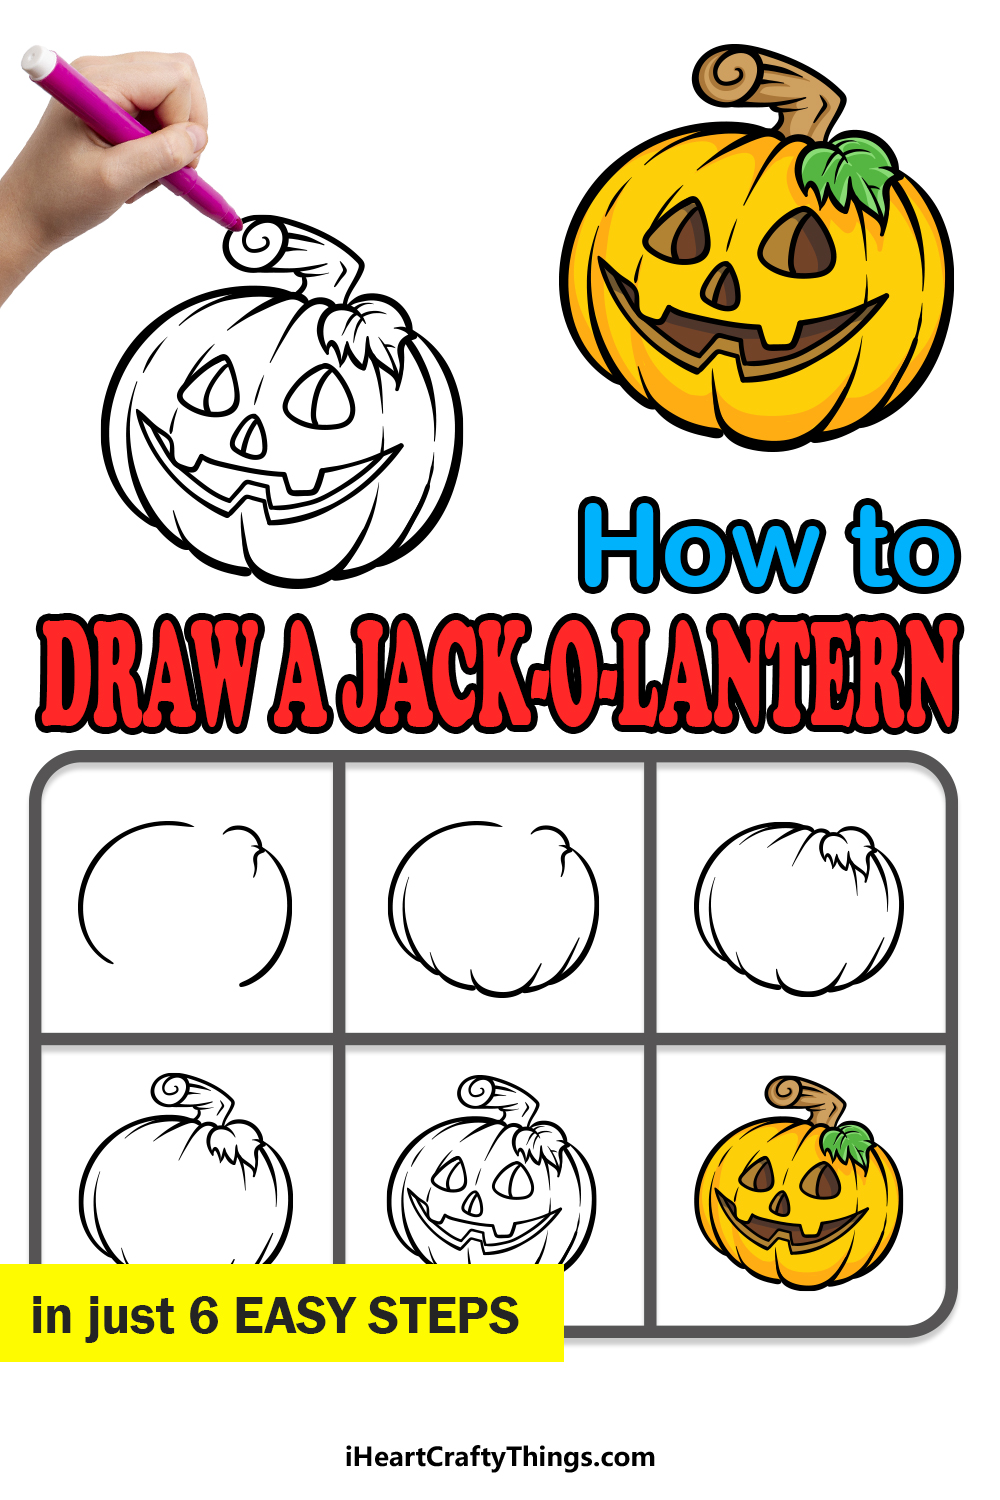
This step-by-step guide on how to draw a jack-o-lantern will show you that drawing one doesn’t have to be a scary experience.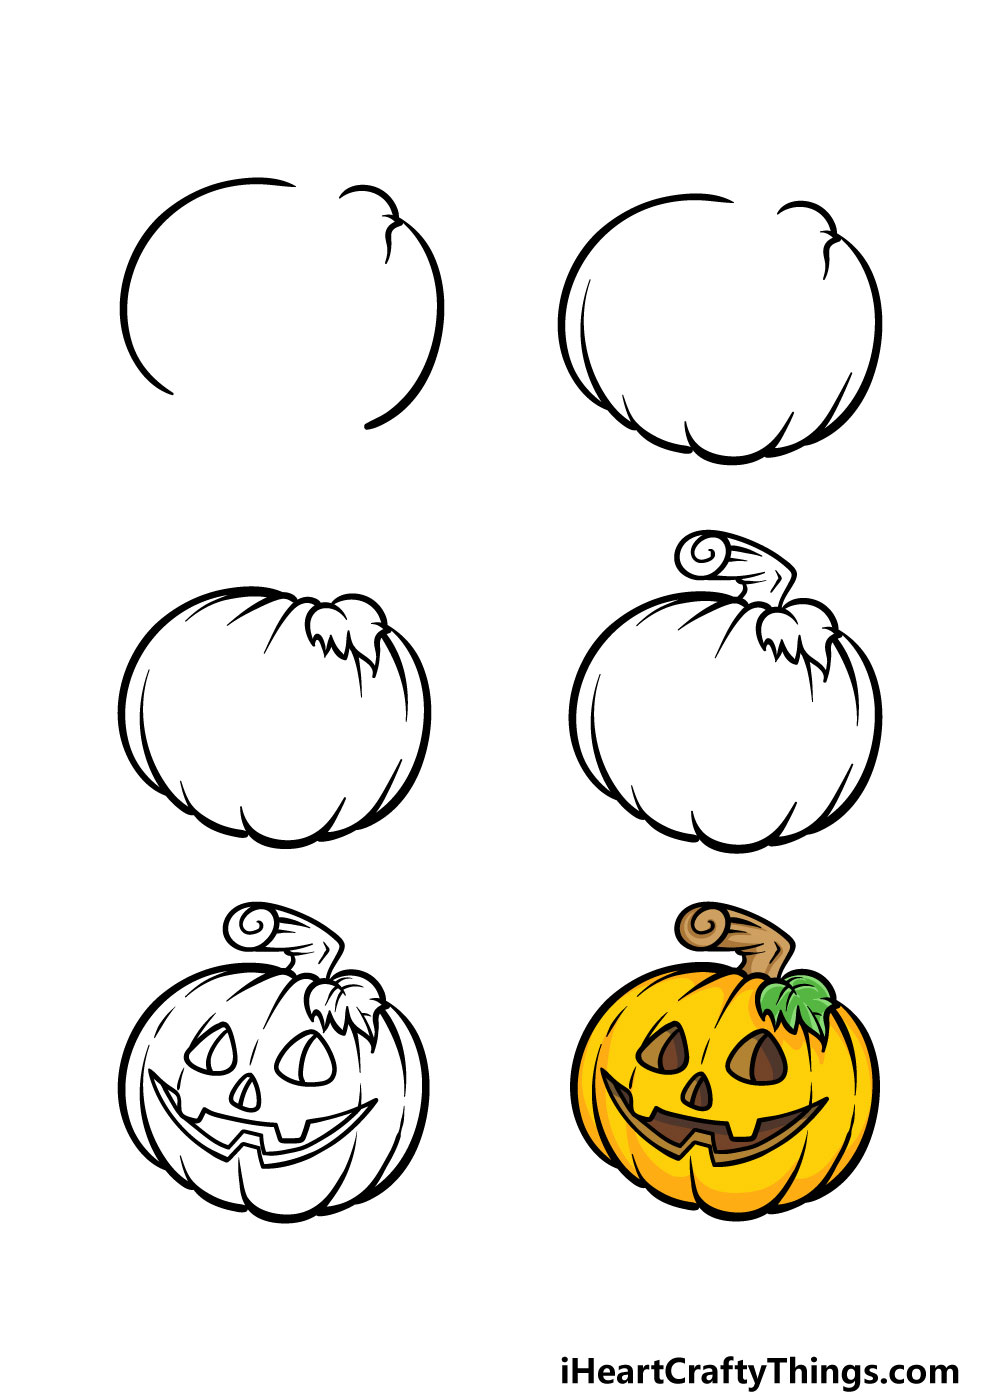
How to Draw A Jack-O-Lantern – Let’s Get Started!
Step 1
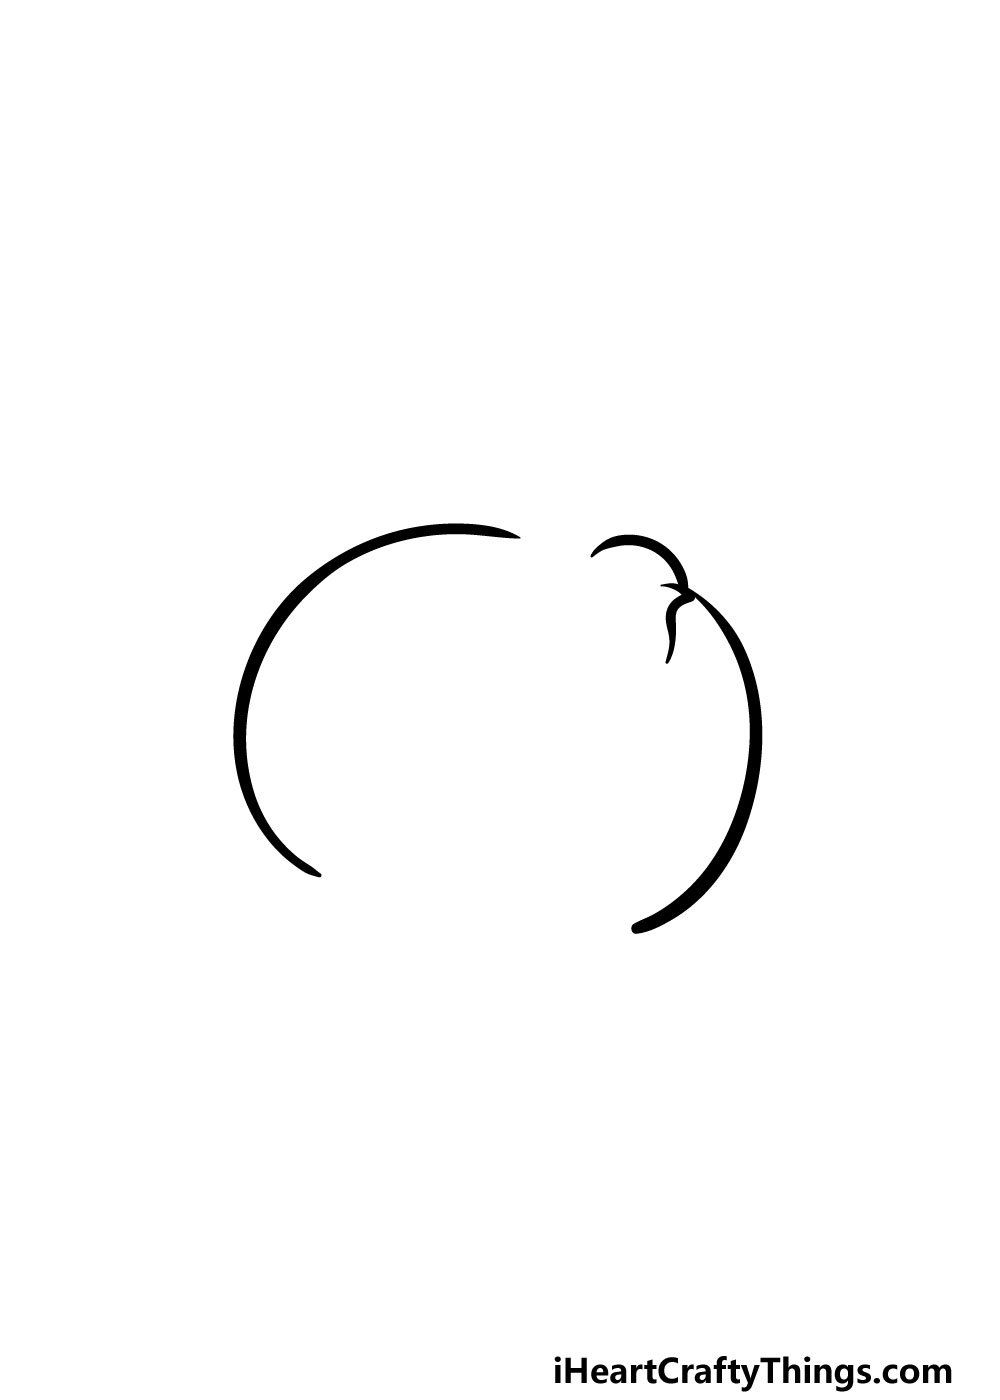
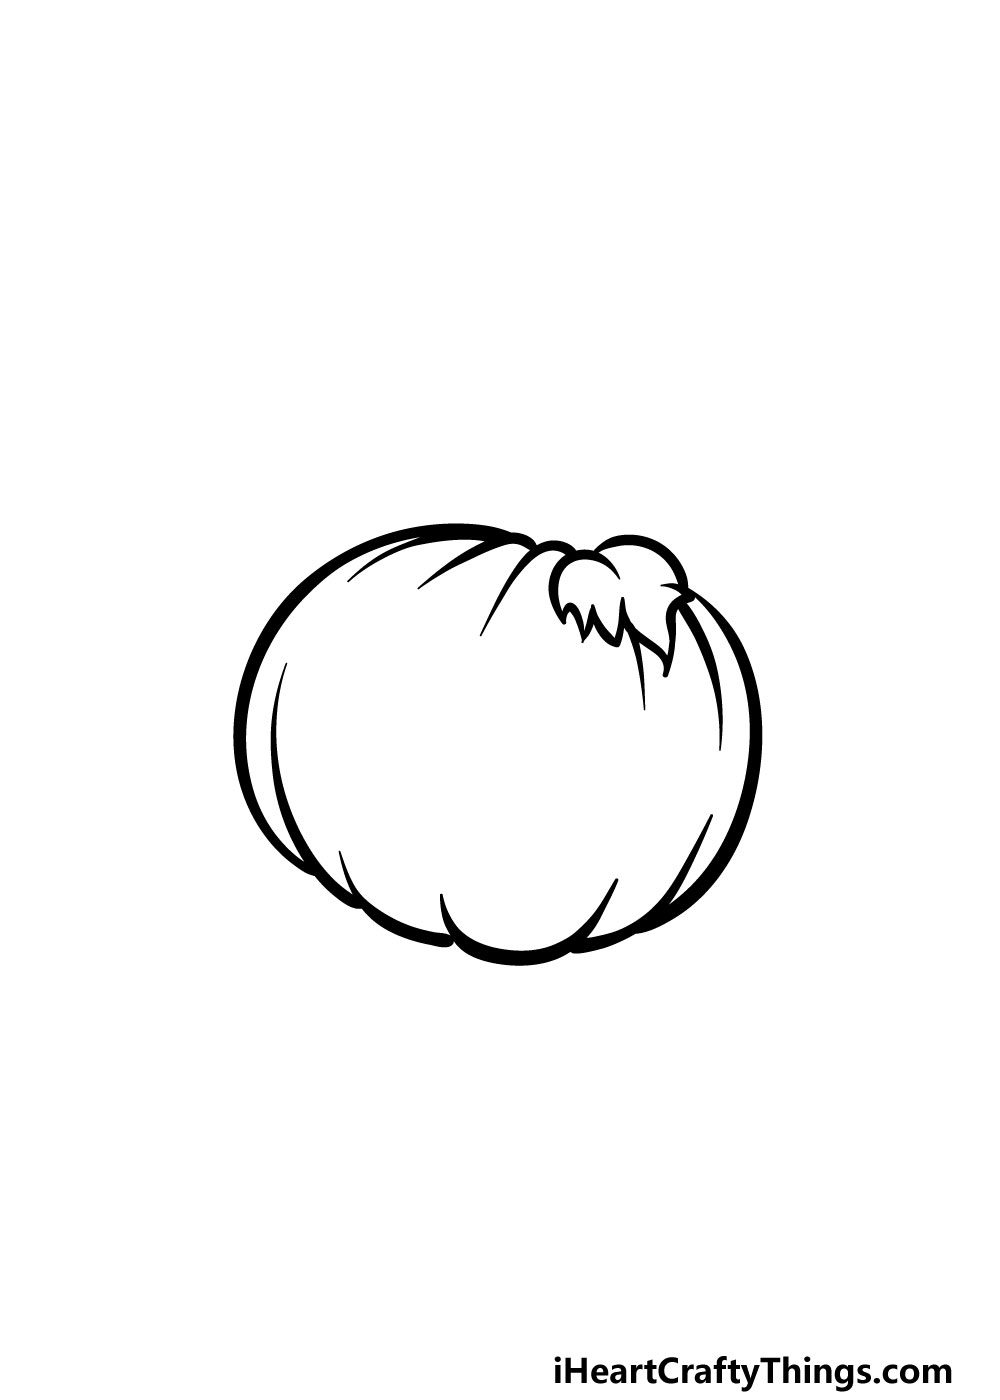
In this first step of our guide on how to draw a jack-o-lantern, we will be focusing on the outline of the pumpkin.
This outline will consist mainly of two rounded lines mirroring each other on the left and right. As you can see in the reference image, there will be some more lines at the top of the one on the right as well, which will later form the leaf.
Also, there will be a large gap at the top and bottom of the pumpkin outline.
Step 2 – Draw the base of the jack-o-lantern
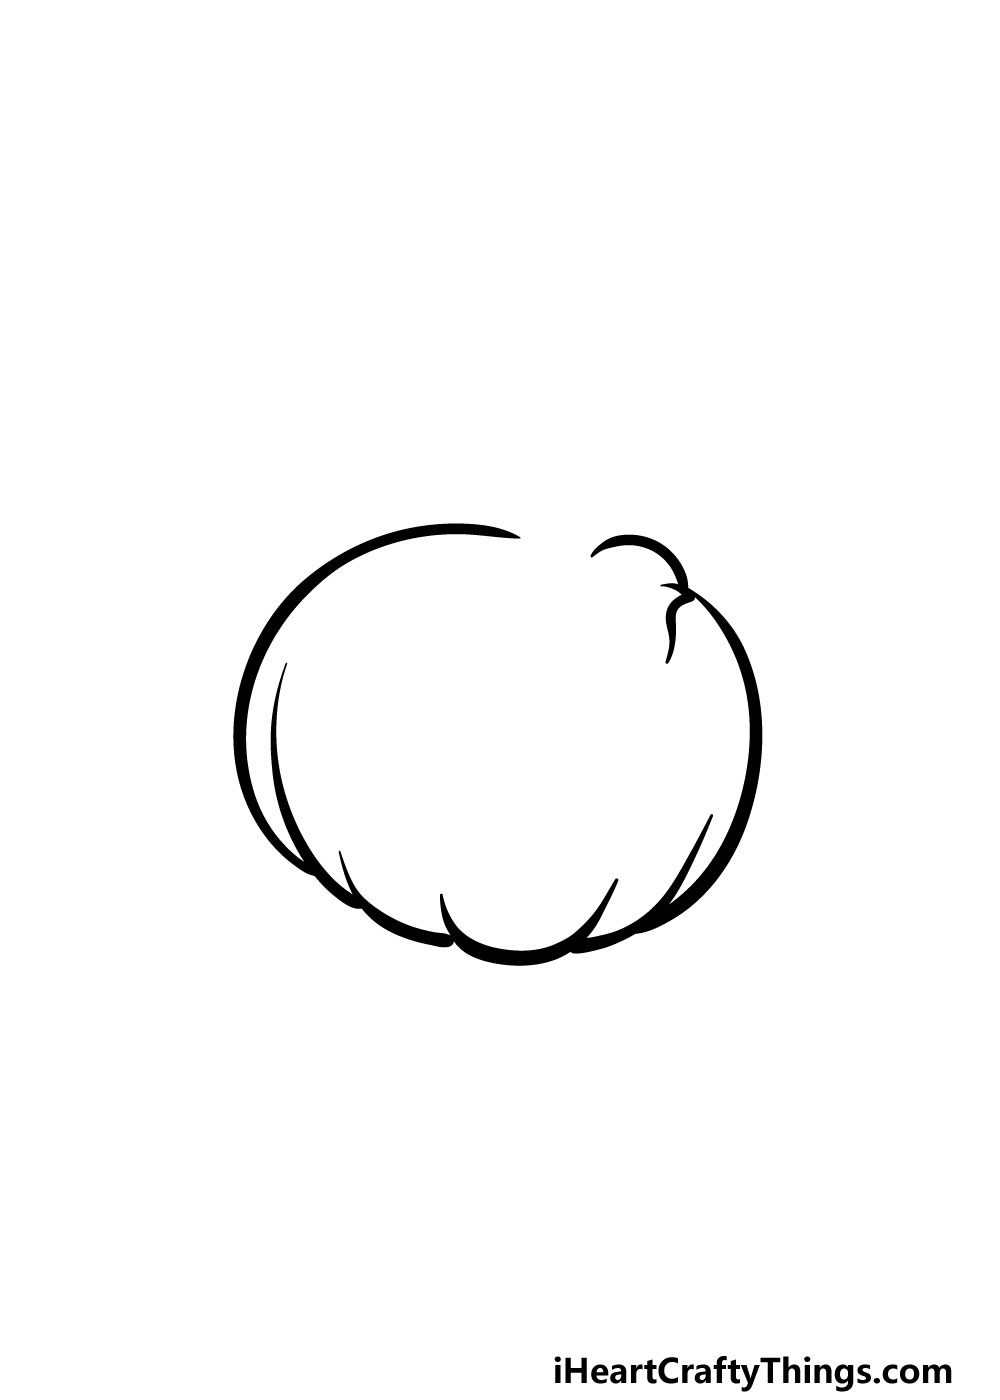
This second step of your jack-o-lantern drawing will be all about creating the base of the pumpkin.
As you can see in the reference image, we will be using some curved lines connecting to one another at the base.
Some of these lines will extend into the interior of the pumpkin in order to form the segments of the pumpkin.
For now, we will be leaving a small gap at the top of the jack-o-lantern, as we will be adding some details there later.
Step 3 – Finish off the top of the jack-o-lantern
Now that you have most of the outline of your jack-o-lantern drawing done, you can finish off the top of it in this next step.
The top of it will also have some sharp lines extending down into the jack-o-lantern, much how like the lines extended up from the base earlier.
You can also add a leaf to the top of the jack-o-lantern in this part as well. That’s all there is to it for this part, and now you’re ready for the third step!
Step 4 – Now, draw the stalk of the jack-o-lantern
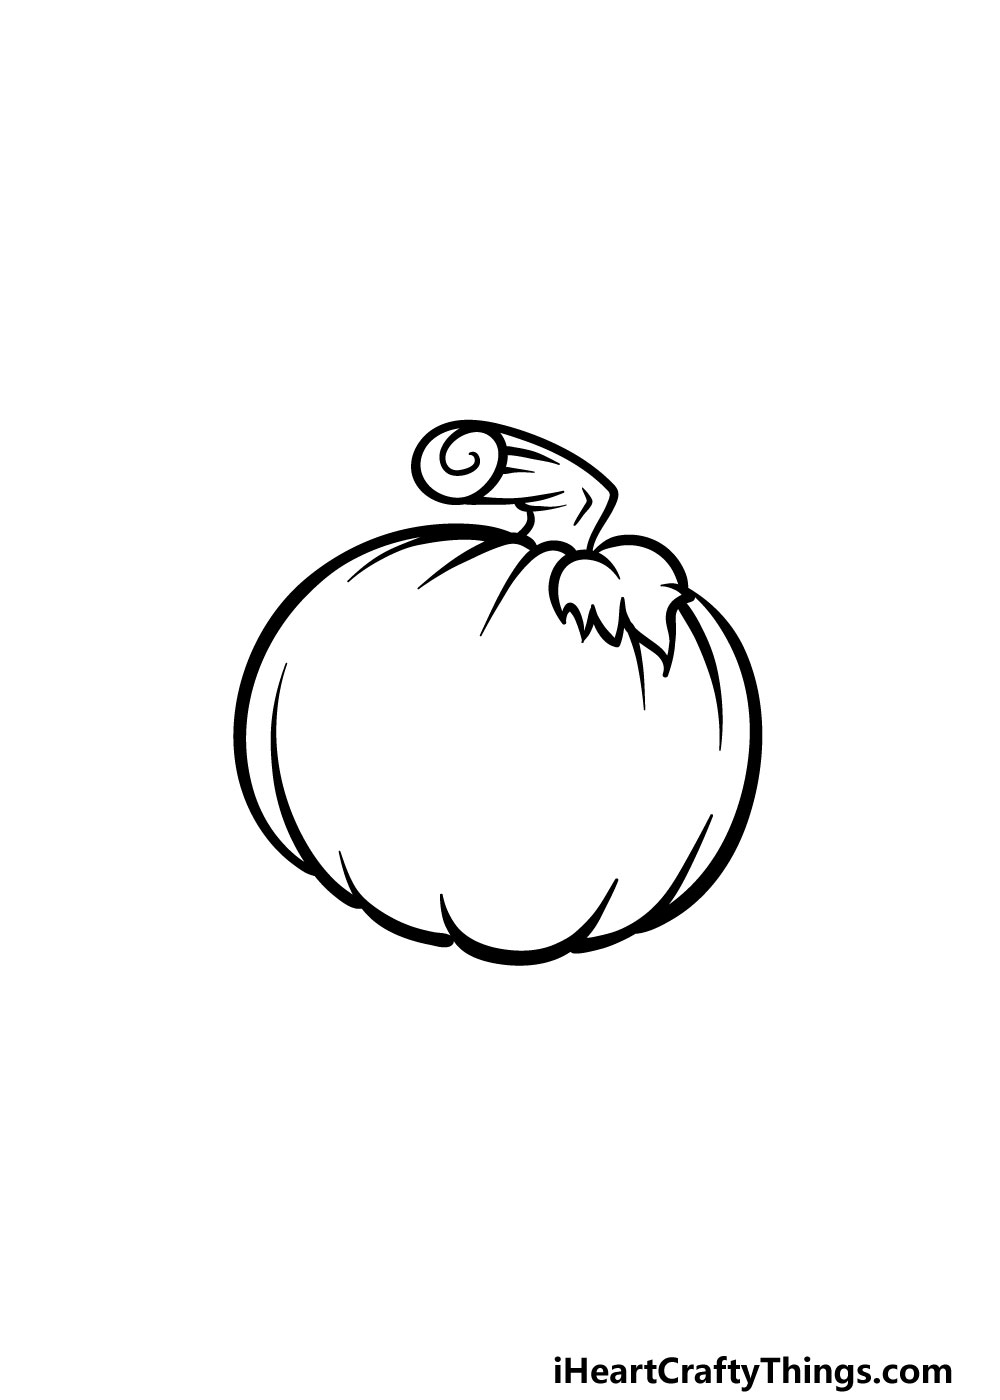
This step of our guide on how to draw a jack-o-lantern should be quite a simple one for you! All you will need to do for this one will be to draw the stalk.
This stalk is quite thick, and it bends at a sharp right angle. At the end of it, you can draw a circle to show where it was cut off.
This circle will also have a swirl shape inside of it. You can finish off the stalk with some thick line details inside of it for some extra details.
Step 5 – Now, you can finish off the face and final details
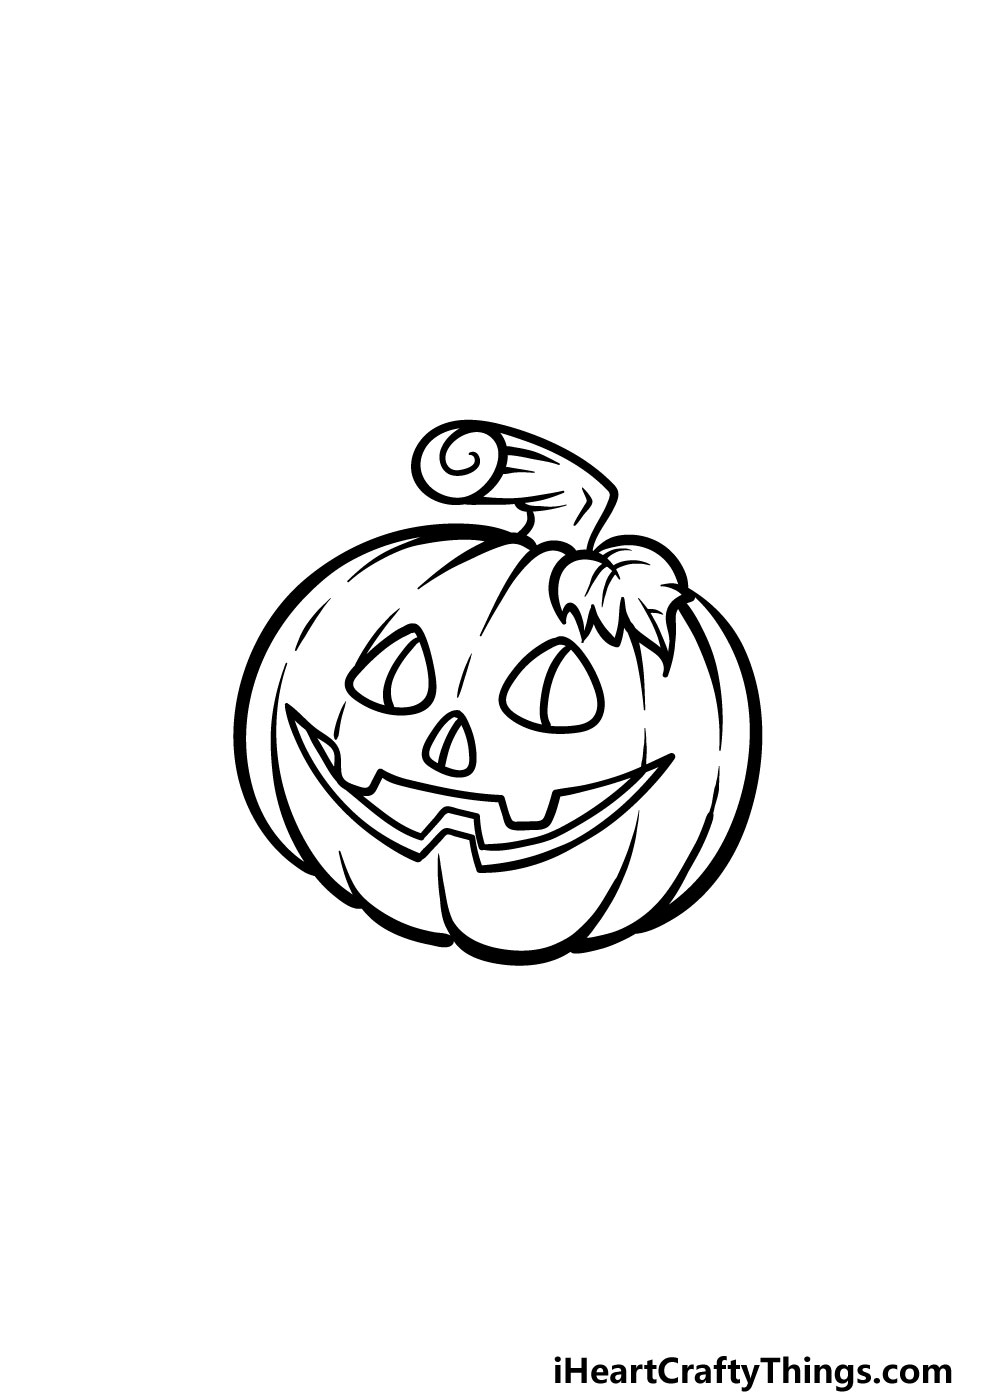
Without a spooky face on it, this would just be a regular pumpkin! We don’t want that for this drawing, so we shall add a face in this step of our guide on how to draw a jack-o-lantern.
To draw the face, we shall start with the eyes for now. These will be made up of some rounded triangles. They will also have lines drawn vertically down them to give them some depth.
A similar triangle can then be used for the nose, except it will be much smaller. Finally, we will be giving the jack-o-lantern its leering mouth.
This will be drawn with a combination of curved and rounded lines, and it will be drawn in such a way as there are two square teeth at the top with one at the bottom.
That will finish off the details for this jack-o-lantern, but you could also add some details of your own to spice it up.
Perhaps you could add some of your favorite Halloween decorations to the background or create a spooky setting for it to be sitting in.
You could also change up some of the details in order to create your own unique jack-o-lantern! What fun ideas can you think of to personalize this jack-o-lantern drawing?
Step 6 – Finish off your jack-o-lantern drawing with some color

That brings you to the final step of your jack-o-lantern drawing! This is the step where you get to have lots of bringing some amazing colors to your picture.
In our reference image, we went with yellow and orange for the pumpkin itself. Then, we used green for the leaf and browns for the stem.
These are the colors that we chose, but you should feel free to use any amazing colors that you love for it!
You could change up the tones of the colors or use some less realistic ones for a more stylistic approach. If you drew any extra background details then you can also use those added elements for even more color variation.
Once you know which colors you would like, it’s just a matter of deciding how you will add them.
Some more muted mediums such as watercolors and colored pencils would be great to help create a colder, spooky look for the image.
On the other hand, it would also look great if you used some brighter colors for a warmer picture!
5 Tips To Make Your Jack-o-lantern Drawing Even Better!
Create some spooky artwork with these tips for your Jack-o-lantern sketch!
The focus of this drawing of a Jack-o-lantern was entirely focused on the pumpkin, but you could add some more details around it to make it even better.
Perhaps you could add some more leaves onto the pumpkin or draw some spots and other details on it.
These details would be small but subtle additions that would really bring this Jack-o-lantern to life!
What are some small details you can think to add?
Next, you could really make this Jack-o-lantern even spookier by adding some more Halloween decorations. Jack-o-lanterns are one of many objects you will see around the season, but there are many more!
These could include bats, cobwebs, gravestones, witches and monsters. This is your chance to create a really spooky Halloween scene!
Once you have added all of your additional details and decorations, you could then create a full background setting for this Jack-o-lantern drawing.
If you were to do this, you could choose all kinds of cool locations! It could be as simple as the entrance to a house, or you could draw a spooky graveyard.
If you’re feeling very creative, maybe you could even make a whole haunted house setting! What other ideas can you think of?
Another fun idea for this Jack-o-lantern would be to turn it into a character. You could do this by making the pumpkin the head of a spooky ghost or monster.
A less scary option would be to make it the head of a kid in a Halloween costume. If you were to make a character, you could do it in any style you like to make the picture more suited to you!
Finally, we would really encourage you to use colors to bring this Jack-o-lantern sketch to life. The colors you choose are just one part of it, but the art tools and mediums you use are another.
By using spots of bright yellow, you could even make it look like there is a light inside of the Jack-o-lantern!
Your jack-o-lantern Drawing is Complete!
We hope that by following this guide on how to draw a jack-o-lantern that this was not a scary experience for you!
By breaking a drawing into smaller, more manageable steps you can really make it much easier and even more fun to master is, and that’s what we tried to do for you in this guide.
Now that you have completed this guide, the Halloween fun doesn’t have to end here. You can add some of your own elements and details as well, and these could be some Halloween decorations, a cool background or anything else you can think of!
When you’re ready for more fun, we hope to see you on our website. We have tons of amazing guides for you to enjoy there, and we upload new ones frequently.
Once your jack-o-lantern drawing is complete, we can’t wait to see it! You can share it with us on our Facebook and Pinterest pages for us to admire.