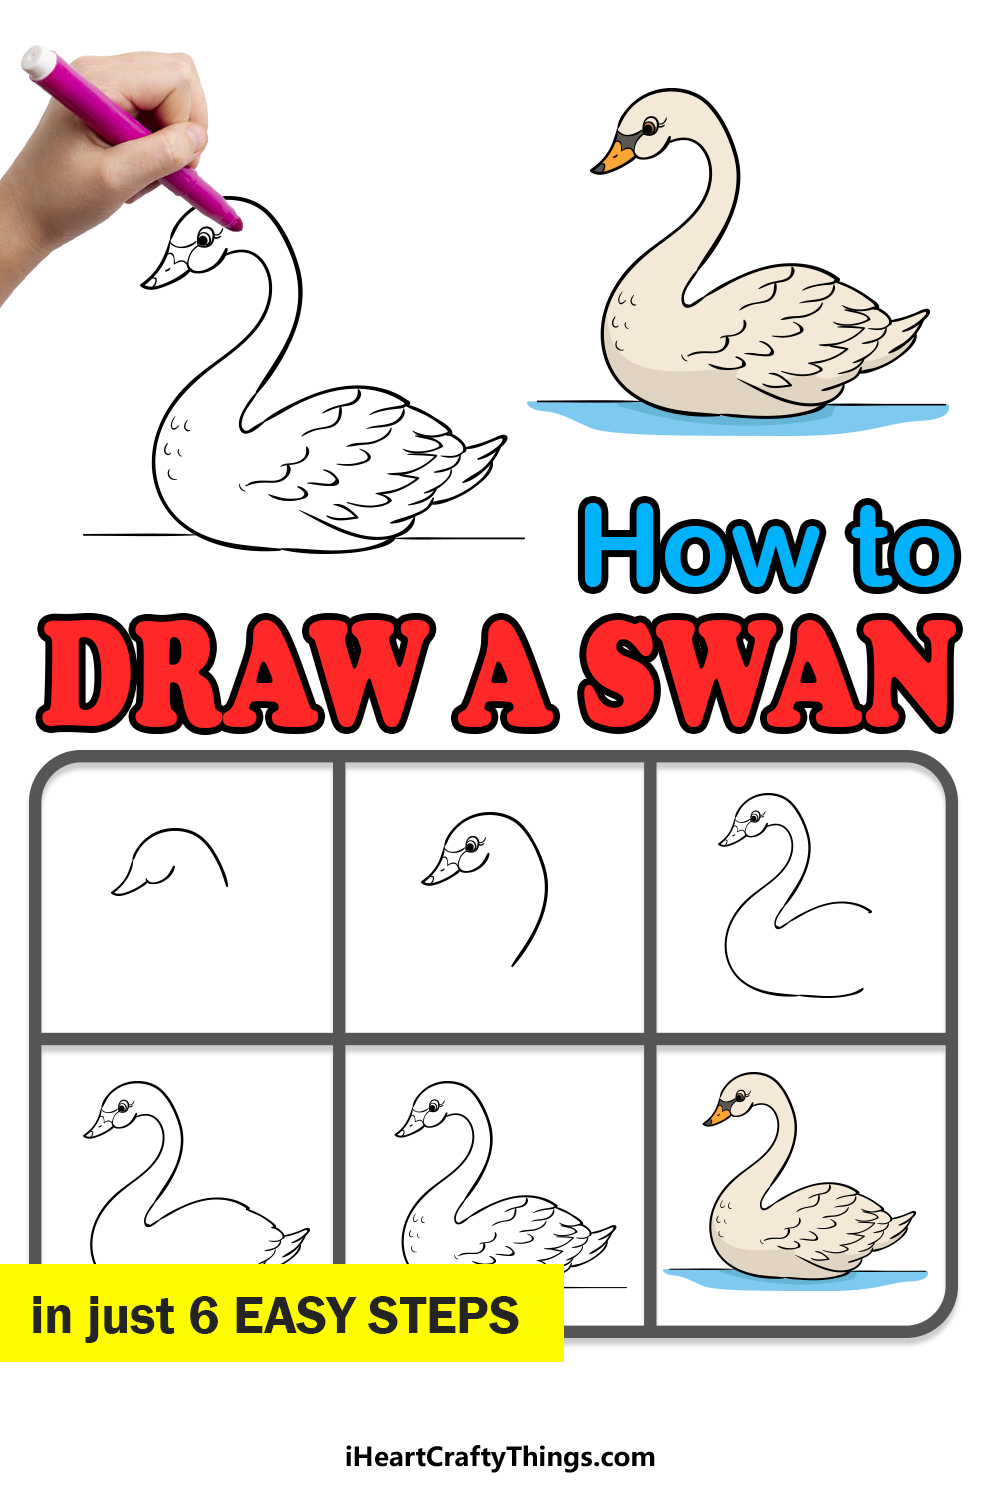
Create a beautiful work of art with this guide on how to draw a swan. You can recreate this stunning bird in just a few steps!
Swans are some of the most beautiful birds in nature, and it’s easy to see why they have appeared in so many stories and have been featured in so much art.
They stand out with their elegant features and bright white feathers, and many people wonder how they can learn to draw them. It’s not always that easy, but I know how to make it simpler for you!
I’ll take you through each and every step so that you can see how it’s done. By the end, you will have a drawing to be proud of!
You can even create some background details and add your own ideas to make it even more beautiful and unique.
Find Out How To Make Your Swan Drawing
How to Draw A Swan – Let’s get Started!
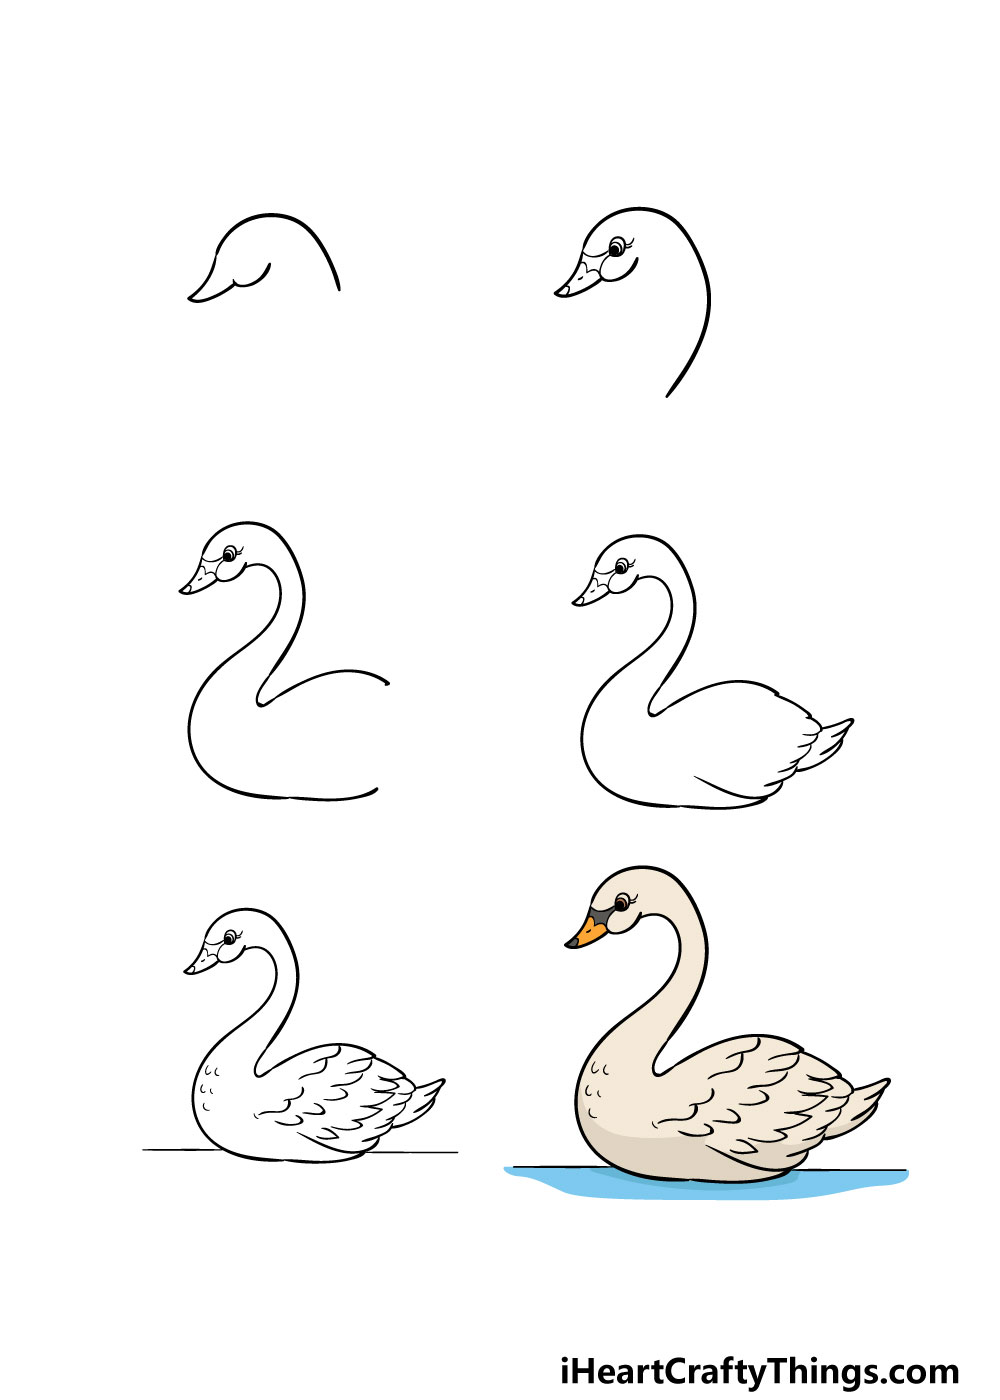
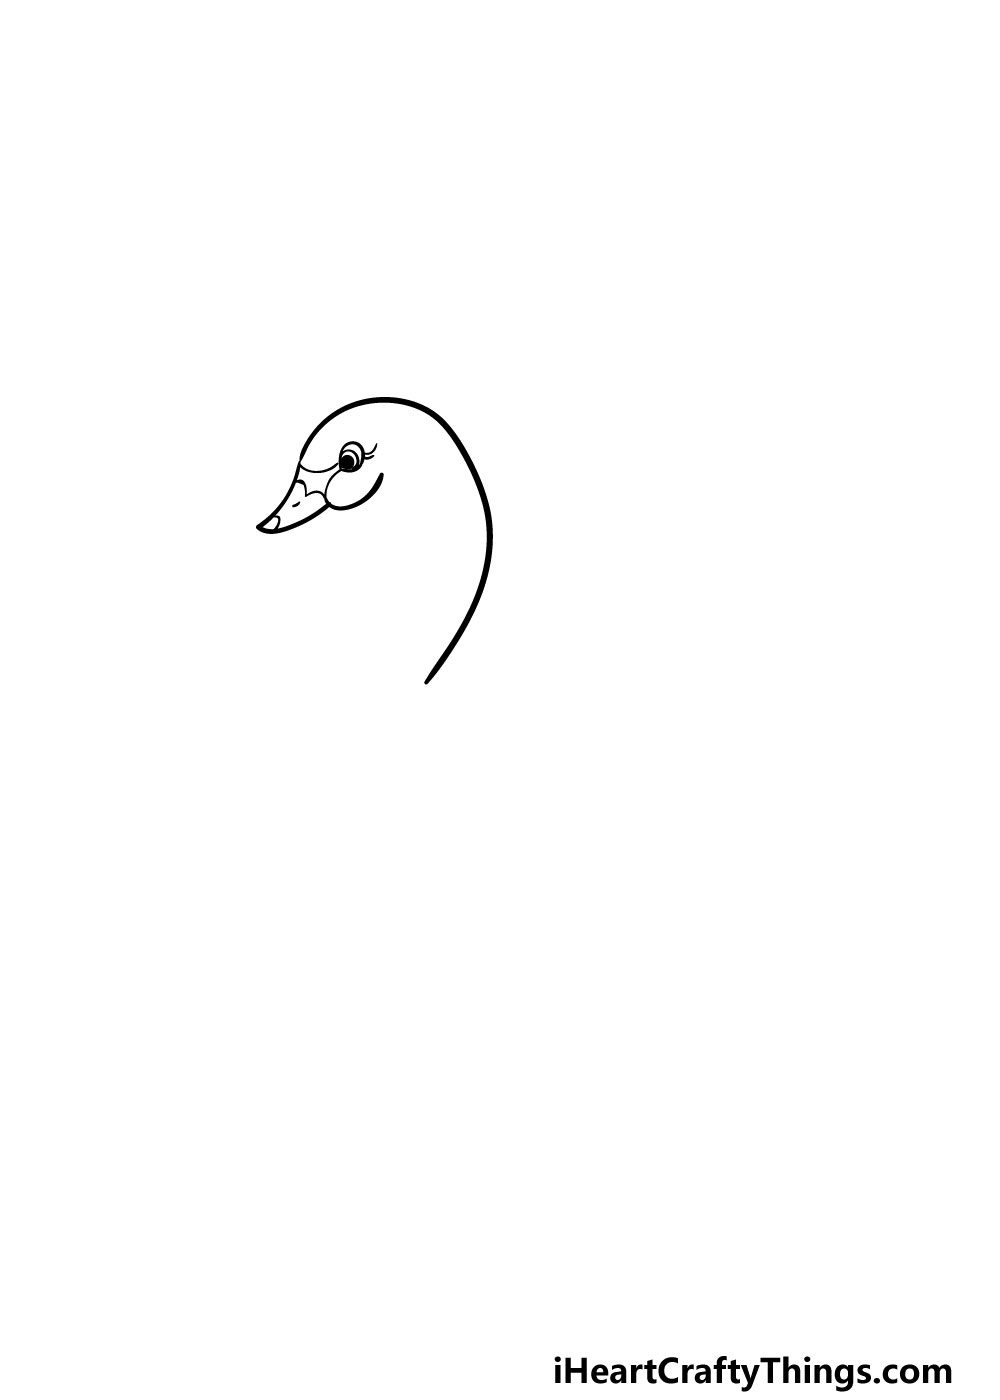
Step 1

For this first step of our guide on how to draw a swan, we will be focusing on the head and beak of the swan.
To draw this, you will be using a long curved line for the top of the head with a smaller one below for the cheek. Then, you can draw the beak of the swan by using a shaper line at the left-hand side of the head.
Once you have it looking as it does in our reference image then you’re ready for the next step!
Step 2 – Draw some facial details and extend the neck
In this part of your swan drawing, you will be adding some facial details while also extending the line for the neck.
First, you can draw the eye using an oval shape. Then, you can use a filled circle within it for the pupil of the eye.
Then, once you have finished the eye you can add some curved lines onto the beak with some small lines for the nostrils. You can then finish off this step by adding some curved lines onto the eyes for the eyelashes.
Before you move on, you can finish off this step by adding some more to the line of the neck.
Step 3 – Now, you can draw some more of the body of the swan
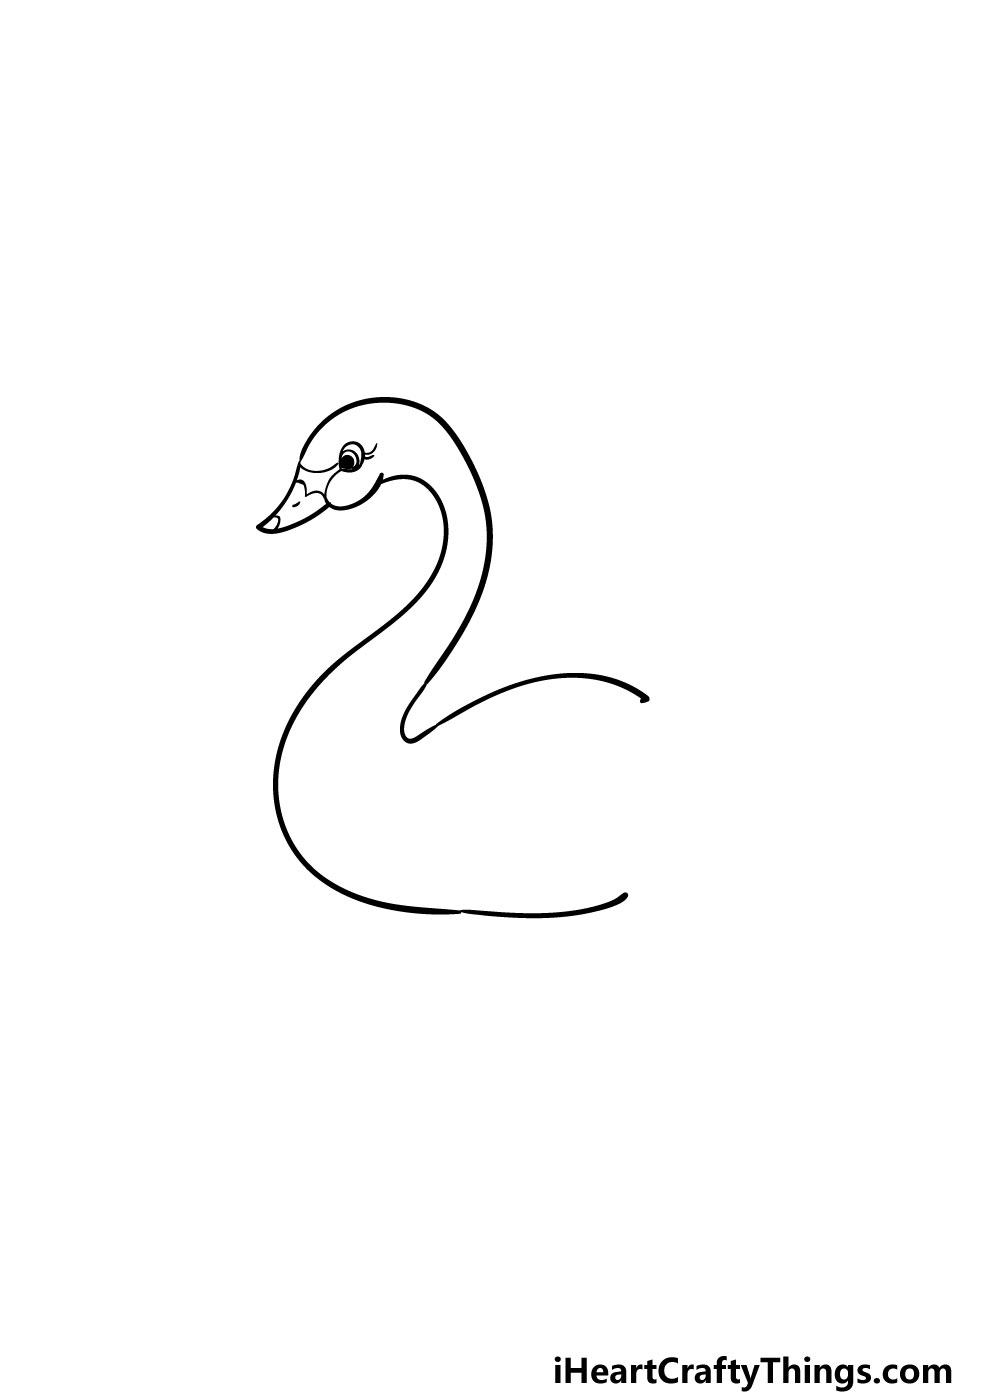
Now that you have the head of your swan done, you can now start to add on to the neck and body.
First, start off with a sharply curved line coming down from underneath the head of the swan. This will curve even more for the thick chest of the swan lower down, and after that it will extend into the base of the swan’s body.
Finally, you can also extend a curved line from the back of the base of the neck as shown in our reference image.
Step 4 – Next, draw some feathers and the tail of the swan

Your swan drawing is looking great already, and we will make it look even better with a few more details now!
First, you can draw a series of curved lines near the back of the swan as shown in our reference picture.
These will make up the feathers on the swan’s wing. Then, at the back of the swan you will be drawing some longer curved lines to make up the feathers of the swan.
Once you have these feathery details then you’re ready for the final elements!
Step 5 – Now, you can add some final details to your swan drawing
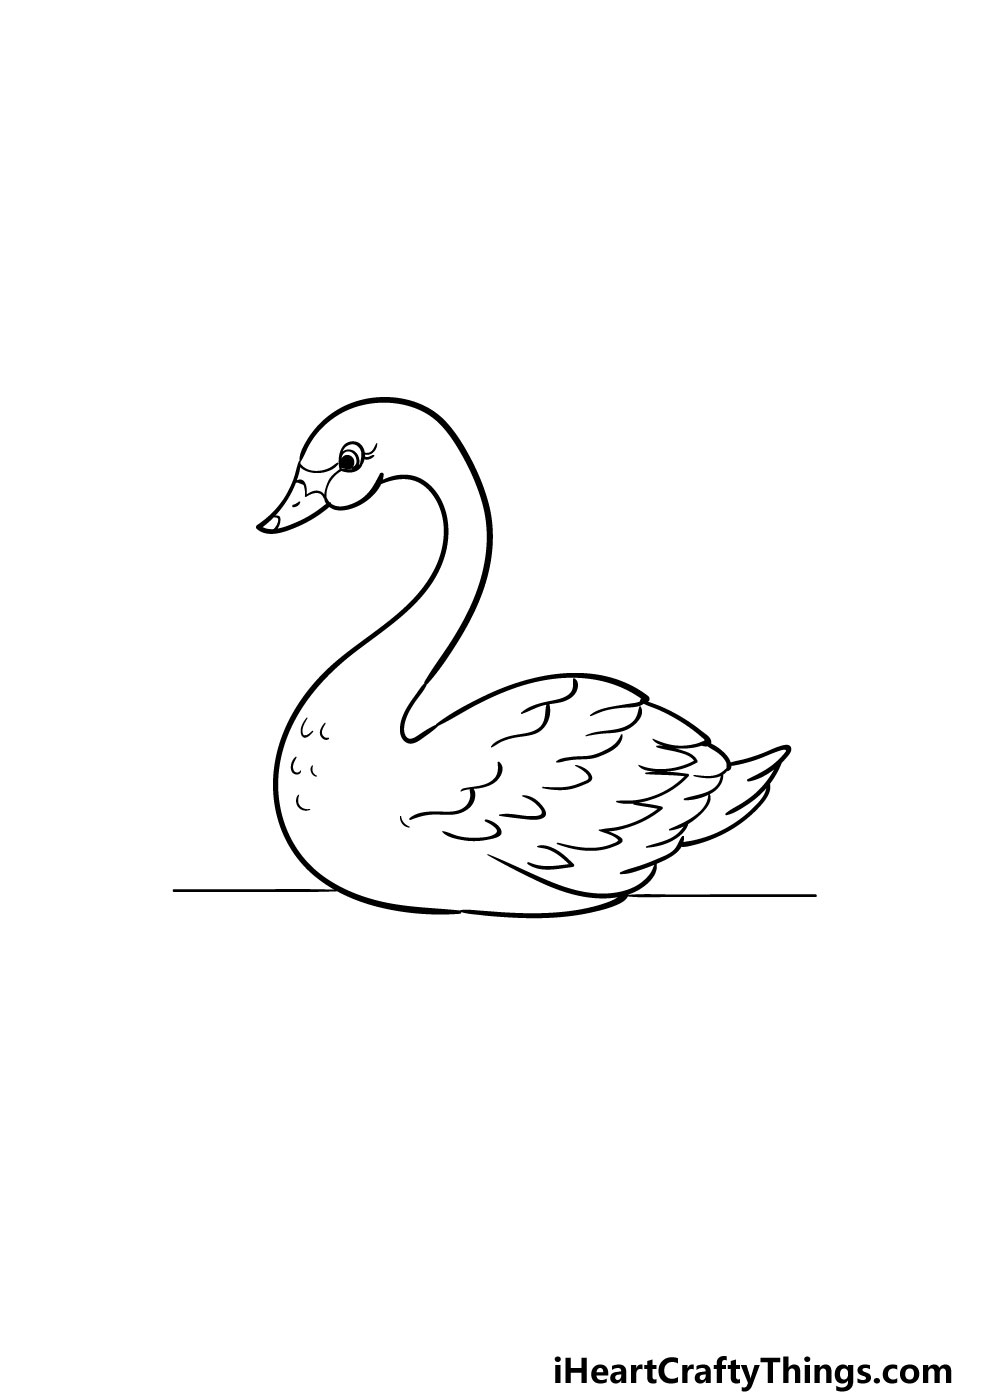
This step of our guide on how to draw a swan will be all about adding some final details before moving on to the final step.
The main element of this step will be adding lots of sharply curved lines onto the body of the swan to create even more feathery details.
With these done, you can also add a straight line underneath the swan to make it look like it is floating on a lake.
That will do it for the details of this guide, but before you move on you can also add some extra details and elements that you may want for it!
You could draw a background to show the beautiful lake it is on, and you could also add some extra birds like ducks floating on the lake.
What extra details can you think of that would really finish off this pretty drawing of yours?
Step 6 – Finish off your Swan drawing with some color
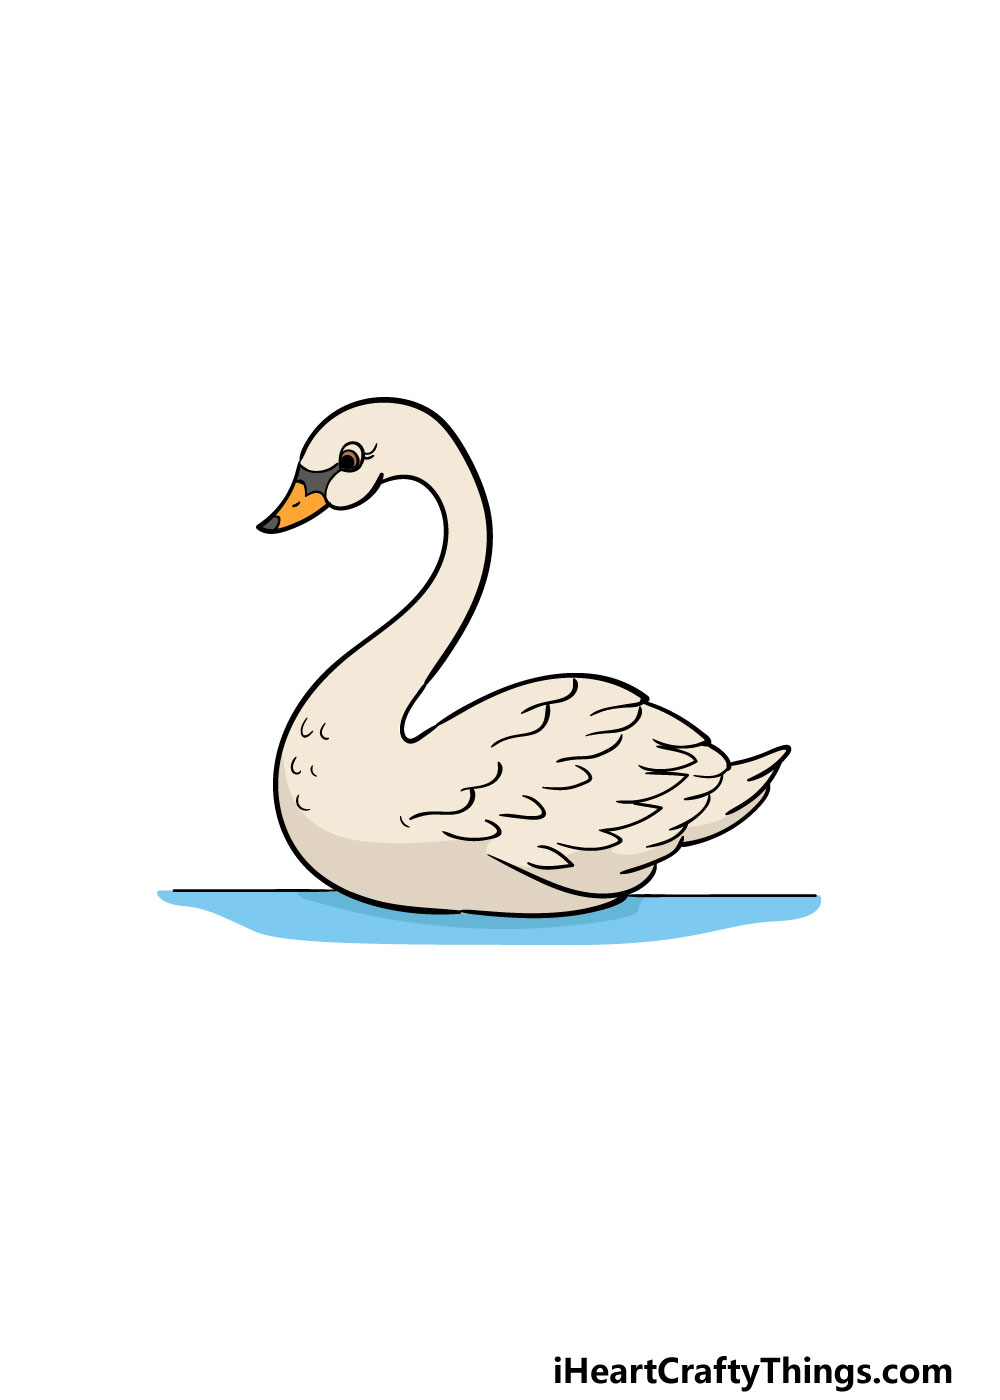
Your swan drawing is complete, and now you can have some fun making it look even more beautiful with your colors!
For our reference image, we used a light beige color for the swan, while using a lovely blue for the water of the lake.
This is just one way to color it in, however! You could change up the colors a bit for a really stunning image.
Even if you keep the colors more muted for a realistic swan, you can inject some vibrant colors by coloring in some background elements that you may have added.
You can also have some fun with the art mediums and tools that you use to color in your image. For a softer scene like this, it could look very pretty to use some watercolor paints or colored pencils, as this can create a lovely mild look.
Alternatively, you could use some lovely acrylic paints or colored pens for some ideas on how to get more vibrant tones. What colors and tools will you use to bring this picture to life?
4 More Ways To Make Your Swan Drawing Unique
Take flight with these tips to make your swan sketch even better!
Seeing a swan in real life is always a wonderful sight, and that is captured in this drawing of a swan. It’s even better to see a pair or group of swans, so you could add some more to the picture!
One simple way of doing this would be by following the steps of the guide to have a second swan mirroring the first one. Or, you could go for a group of swans for a stunning scene.
How many swans would you like to add?
Adding more swans is one way of populating this drawing, but swans can often be found with other kinds of water birds. These could also be added to the picture to make it more full of life!
Some simple examples would include geese or ducks, and these would go perfectly with this swan. These are a few examples, but there are many kinds of birds and other animals that would be perfect for this artwork.
Next, you could make this swan drawing even more tranquil and beautiful by drawing a background. There are so many amazing settings that you could create for this picture.
Swans are often associated with peace and beauty, so we would go for a setting that matches that description.
Misty lakes and majestic mountains would be a few settings that we would consider for the background.
What are some background settings you would like to use for this drawing?
Finally, swans are used in many fairytales and stories, and you could show this by taking this swan sketch in a more fantasy-inspired direction.
One way of doing this would be by incorporating text from stories or tales involving swans that you like.
Another way would be by incorporating mythological fantasy beasts and characters into the scene.
A picture is worth a thousand words, and you can tell all kinds of amazing stories with the extra elements and features that you add to your artwork!
Your Swan Drawing is Complete!
That brings you to the end of this guide on how to draw a swan! We created this guide to make the learning process behind this drawing not only much easier but also a lot of fun for you to do.
We hope that both of these goals were achieved for you and that you were able to have a great time as you drew!
Once you have finished the guide, you can keep the fun going by adding your own details, elements and additions.
We mentioned the idea of a background earlier, and that would be a great way to personalize your drawing. We can’t wait to see what you do!
You don’t have to stop here, though, and you can find more drawing fun on our website where we have lots of amazing guides for you to enjoy!
We would also love to see your amazing swan drawing once it is complete! We hope that you will share it on our Facebook and Pinterest pages for us to enjoy.