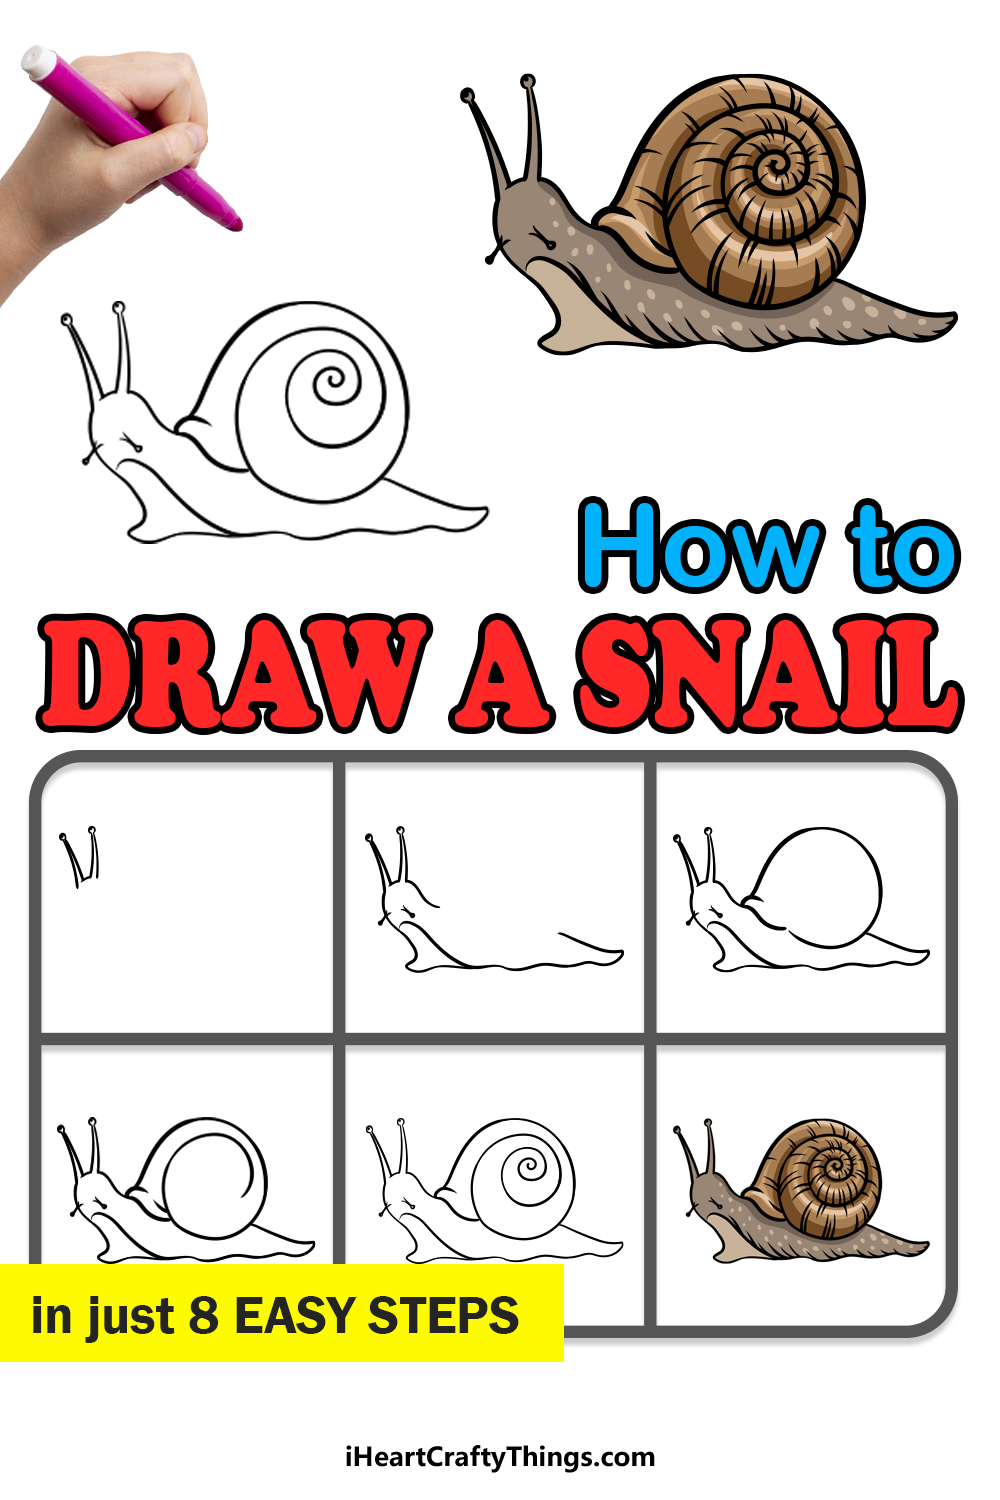
Find out the easiest way to learn how to draw a snail with this guide. Follow along and create a realistic snail in just a few steps.
Snails are fascinating little creatures, as they look like little alien beings with their unique combination of tentacles, soft slimy bodies and distinctive hard shells.
This unique appearance can make it quite difficult to draw them efficiently though, as there are a lot of details for you to get right. Luckily, I will be breaking it down into simple steps so that it will be easier for you to complete the drawing.
By the end, you will have a realistic portrayal of one of these incredible creatures, and then you can add your own background details and any other additions that you like. It all starts with the first step, so let’s begin and see how it’s done!
Watch This Guide On How To Make A Snail Drawing
How to Draw A Snail – Let’s get Started!
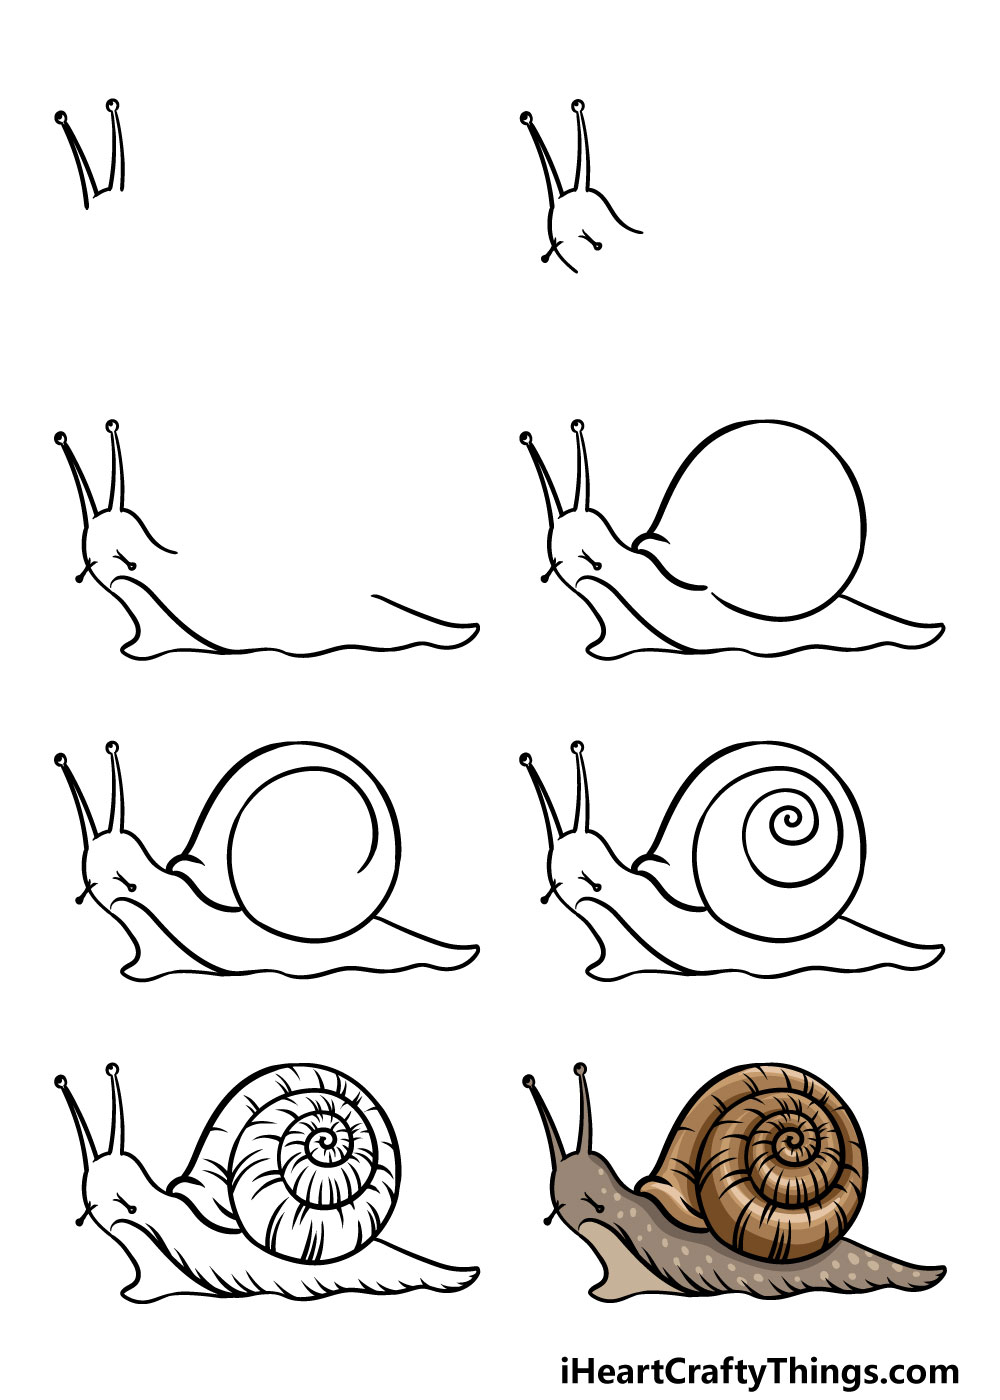
Step 1
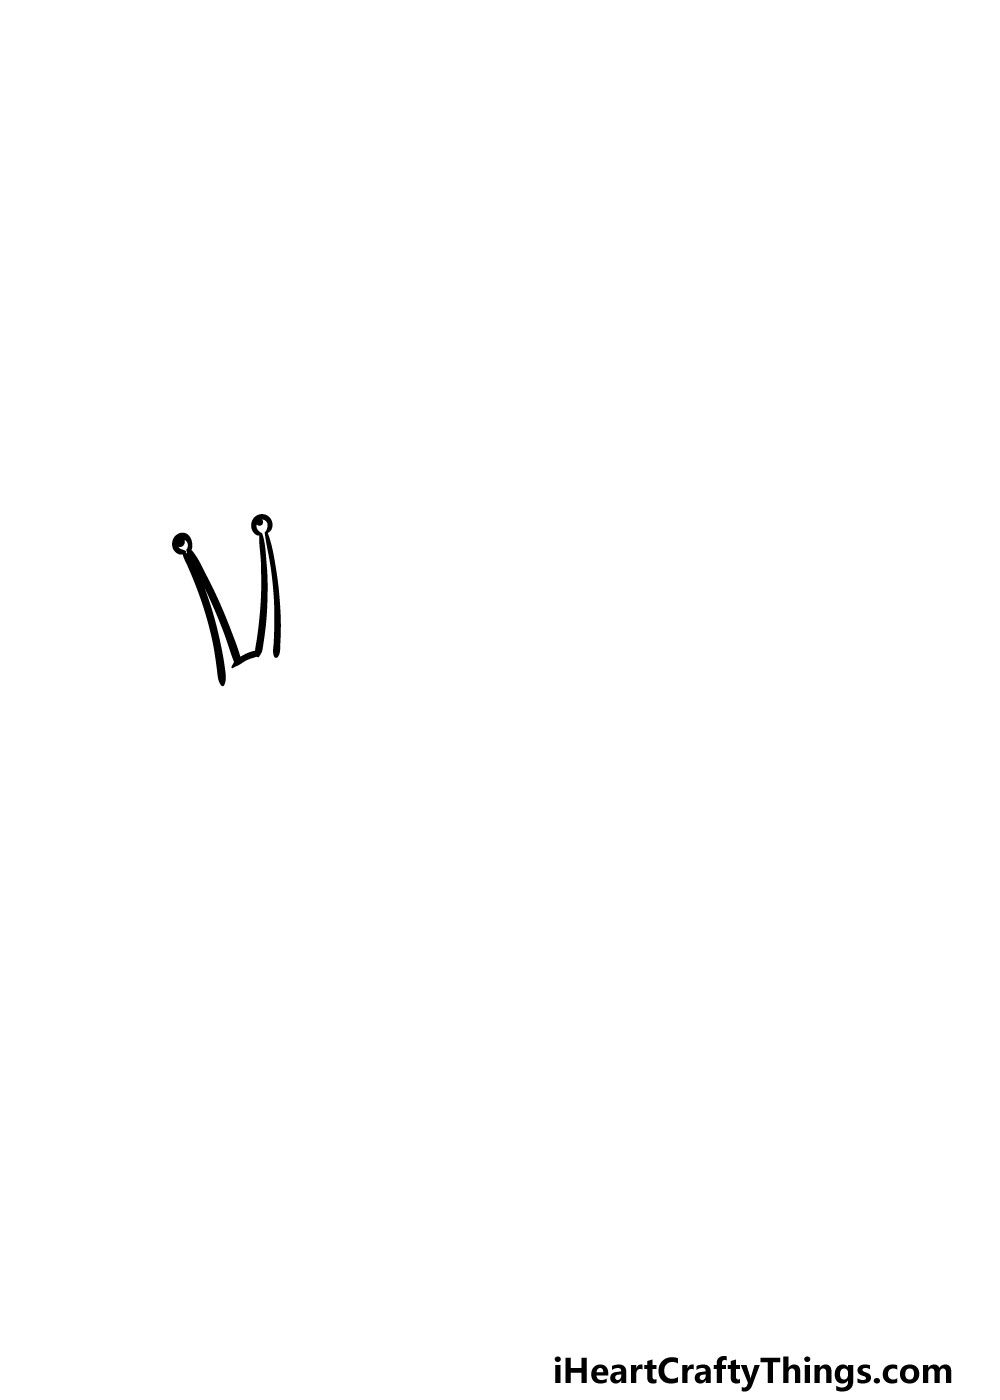
For this first step of our guide on how to draw a snail we will be starting small! We will be drawing the two little stalks on the snail’s head to start with.
These are called the upper tentacles and have the snail’s eyes at the end of them. You can draw these tentacles using some curved lines with little round knobs at the end of them.
They will then be joined by another very small curved line between the tentacles.
Finally, you can add a little dot onto the knob on each tentacle.
Step 2 – Next, draw the head of the snail
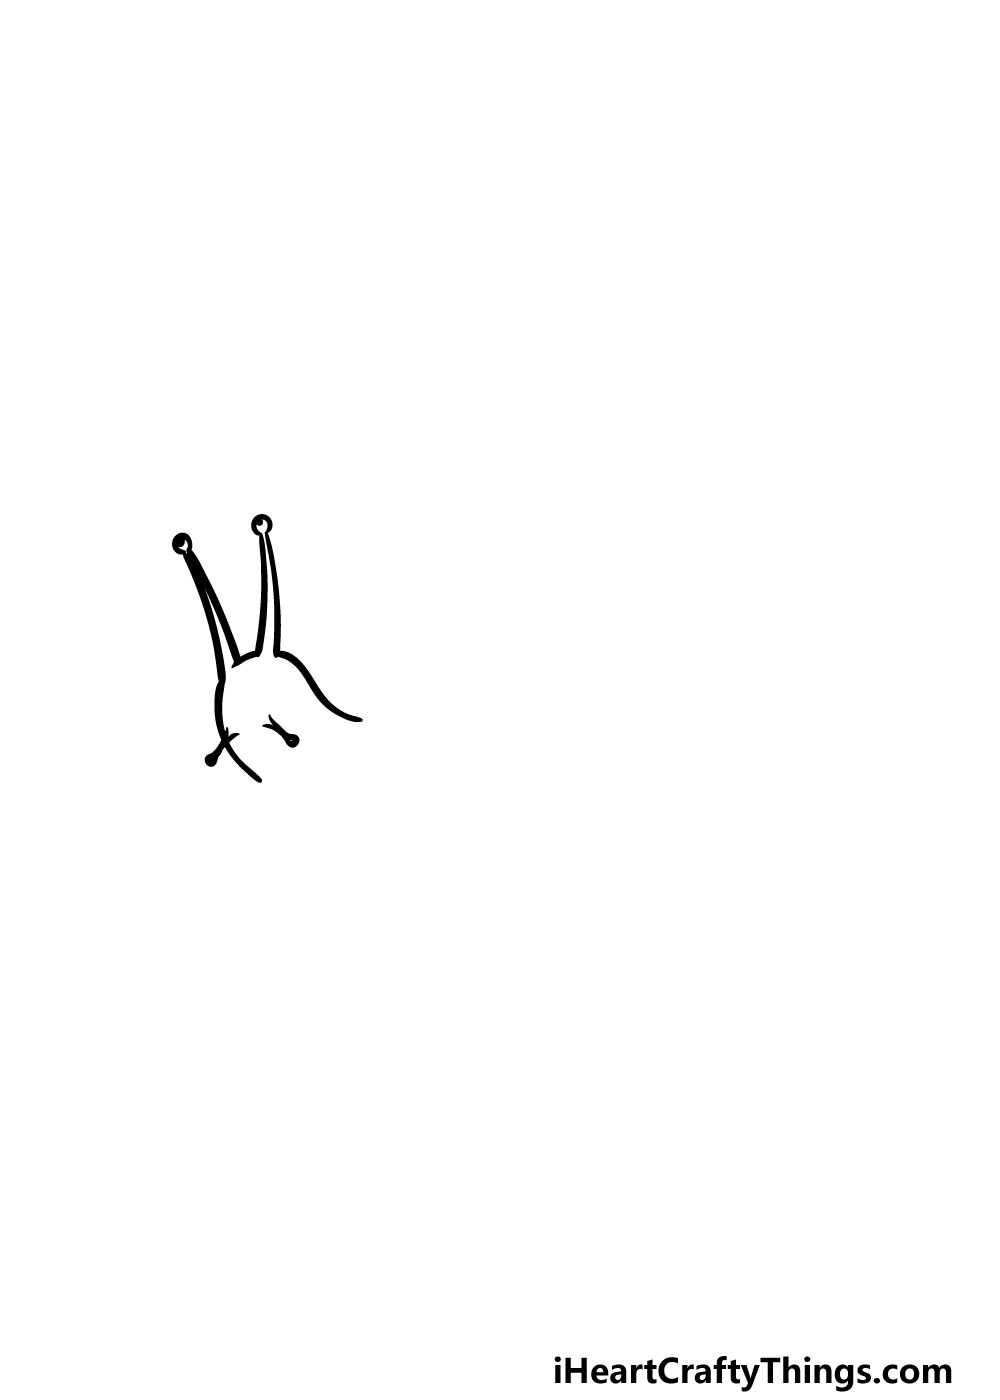
We will continue to add on to the head of your snail drawing in this next step.
All you need to do for this step is draw some curved lines coming down from the tentacles that you drew in the first step.
Then, you can add two thick lines with dots at the end for the lower tentacles of the snail’s face.
Step 3 – Now, draw the foot of your snail
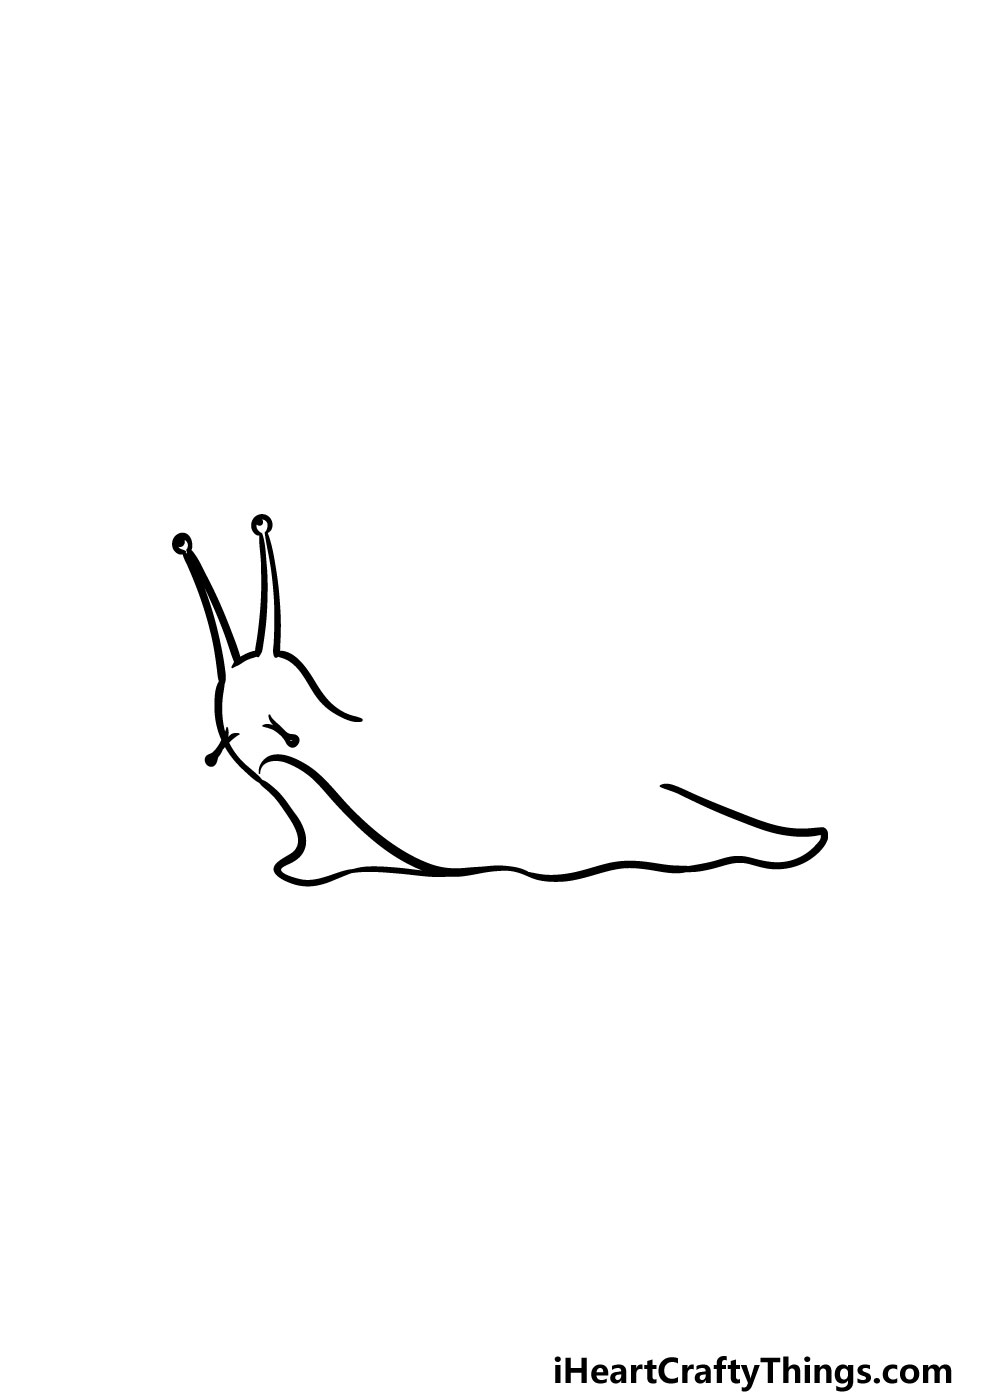
The flat base of the snail is called the foot, and that is what we will be drawing in this part of our guide on how to draw a snail.
To do this, simply extend the line coming from the front of the face into a small protrusion at the front of the foot.
Then, extend that backward in a wavy line until you have the base of the snail. It will then fold in on itself to form the back of the foot.
Step 4 – Next, draw the outline of the shell
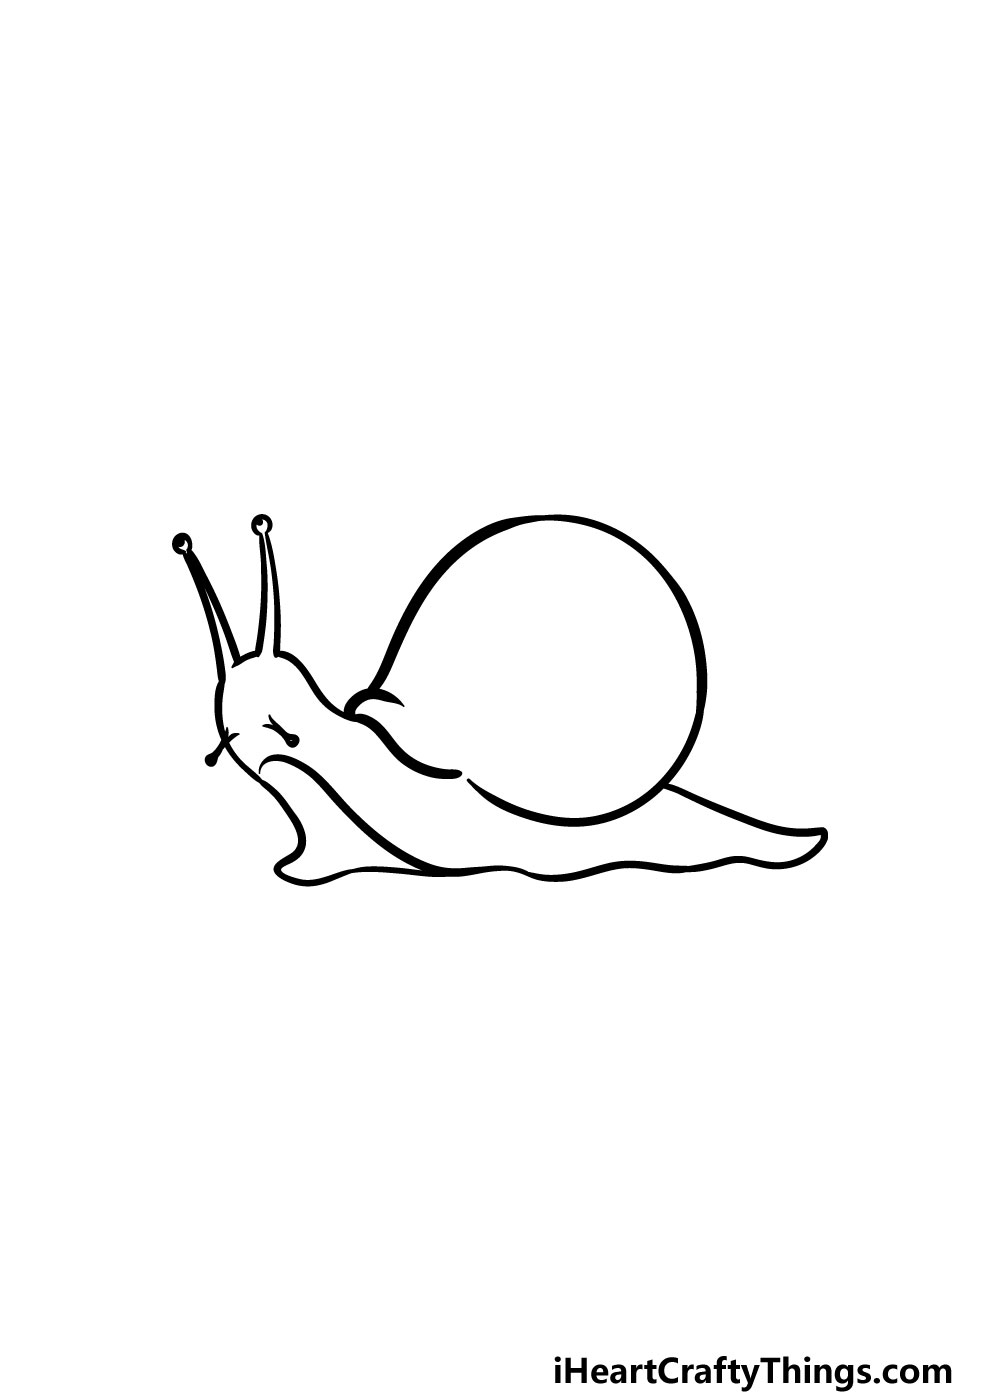
Without a shell, a snail would be a slug, so we shall start to add one to your snail drawing in this next part.
The shell will be drawn with a big, rounded line on the back of the snail. It will also have a little bump at the left-hand side of the base of the shell.
The reference image will guide you as to how this should be shaped as you draw.
Step 5 – Now, draw a curved line inside of the shell
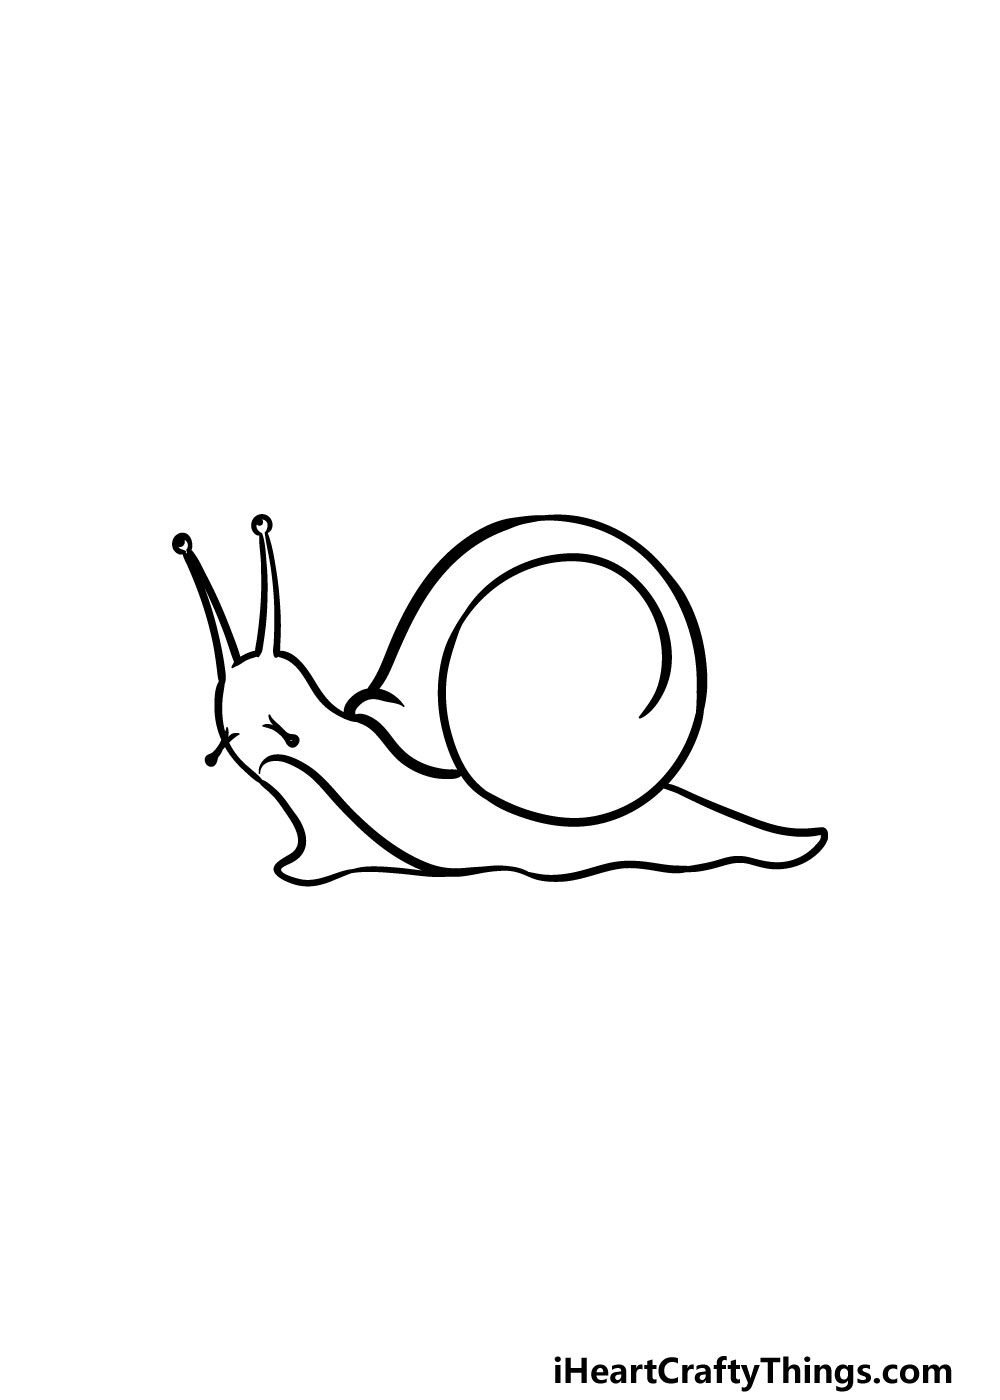
We will start to build the inner swirling shape of the shell in this step of our guide on how to draw a snail.
This line can extend from the bottom of the shell and towards the center of the shell. This line will be quite curved and rounded, and you will be building on to it in the next few steps.
Step 6 – Next, continue drawing the spiral shape of the shell
For this part of your snail drawing, you can continue drawing the spiral shape that you began in the previous step.
To do this, simply extend the curved line from the previous step into an inner spiral shape, as shown in our reference image.
You can also add one more small line at the left-hand side of the base for a bit of extra detail. Then, you just have a few more final details to add, so let’s move on to the next step!
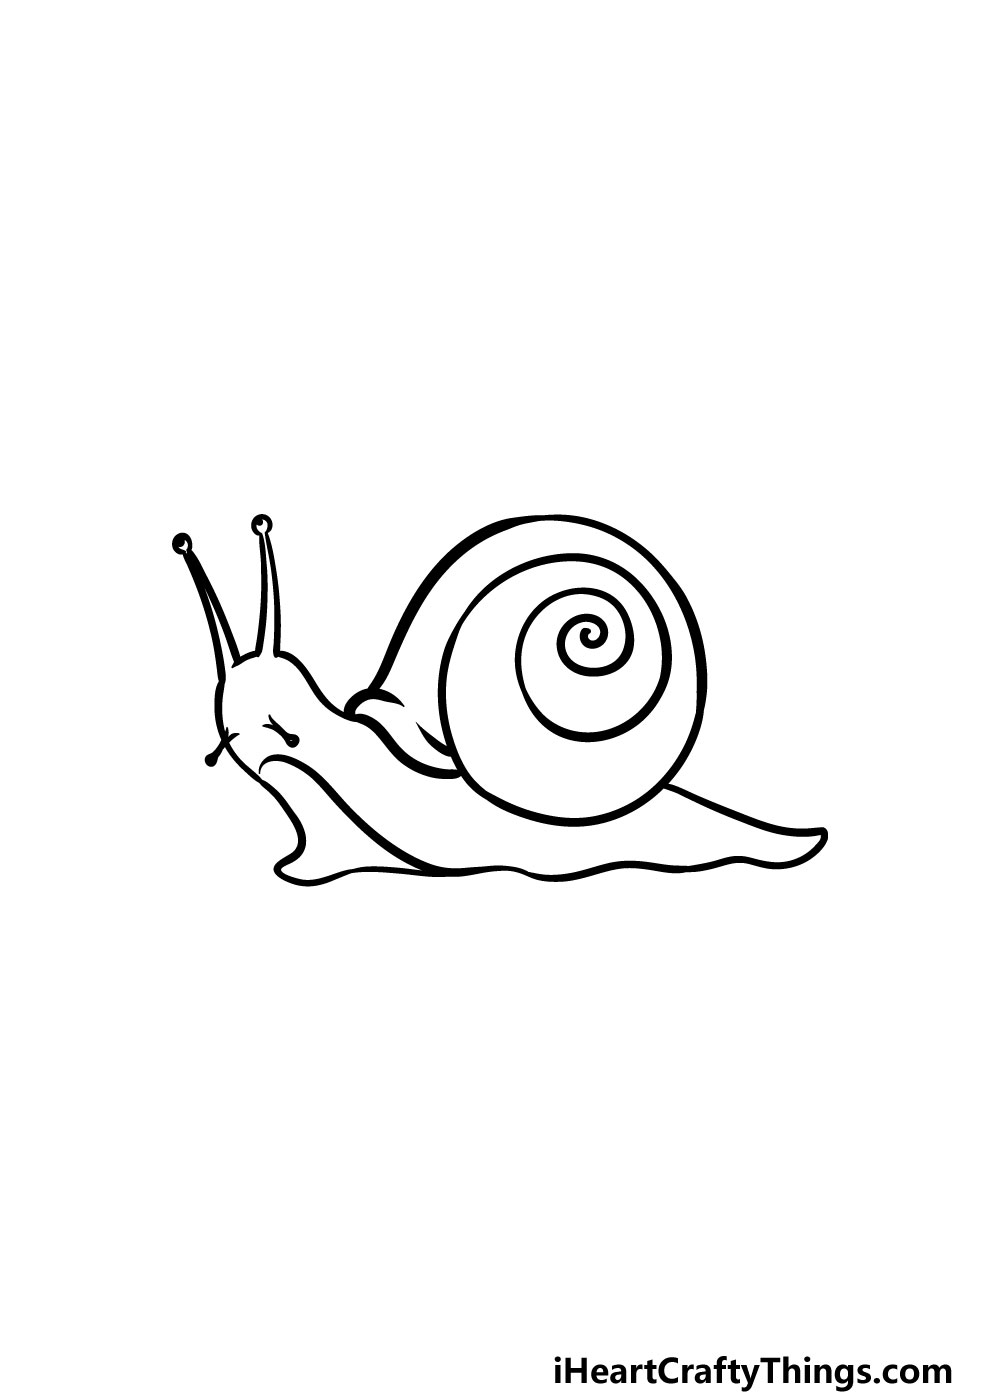
Step 7 – Draw some texture detail for your snail drawing
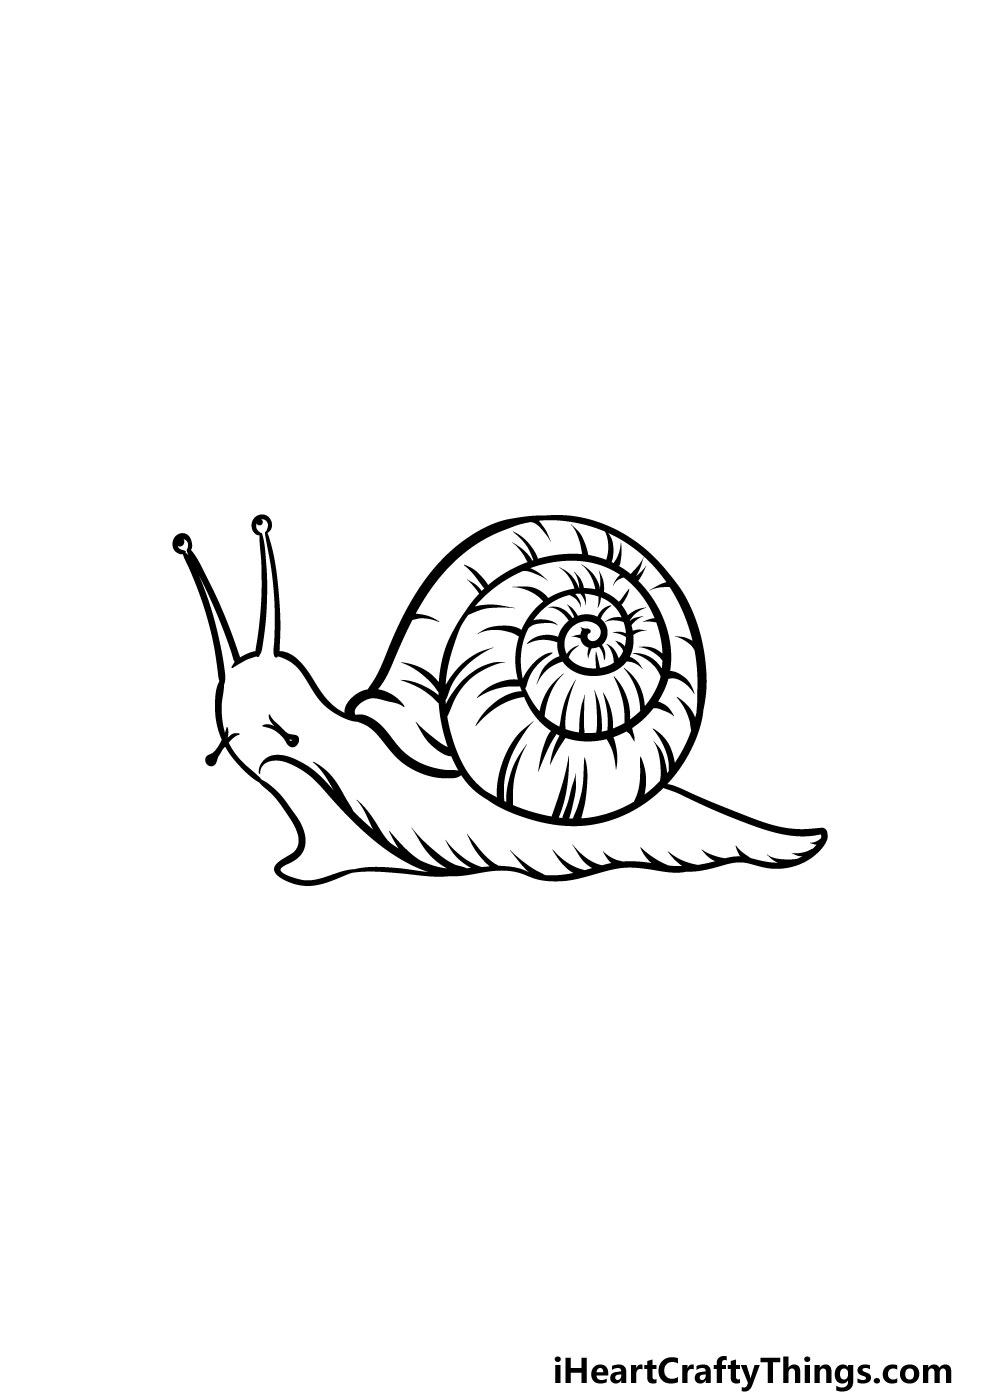
This step of our guide on how to draw a snail will be all about adding some final details before you move on to the coloring step of our guide.
Most of these details will be on the shell that you’ve been drawing so far. These details will be drawn using some small, curved and sharp lines all throughout the shell to give it some texture details.
Then, you can add some more lines to the base of the snail’s foot for even more detail.
That will do it for the details in this guide, but before you move on be sure to add any final details of your own!
You could draw a background to show what kind of environment this snail is in, for one idea. You could also draw some other small creatures to be hanging out with the snail as well!
These are just a few out of an infinite amount of ideas you could go for, so be sure to get creative with it!
Step 8 – Now finish off your snail drawing with some color
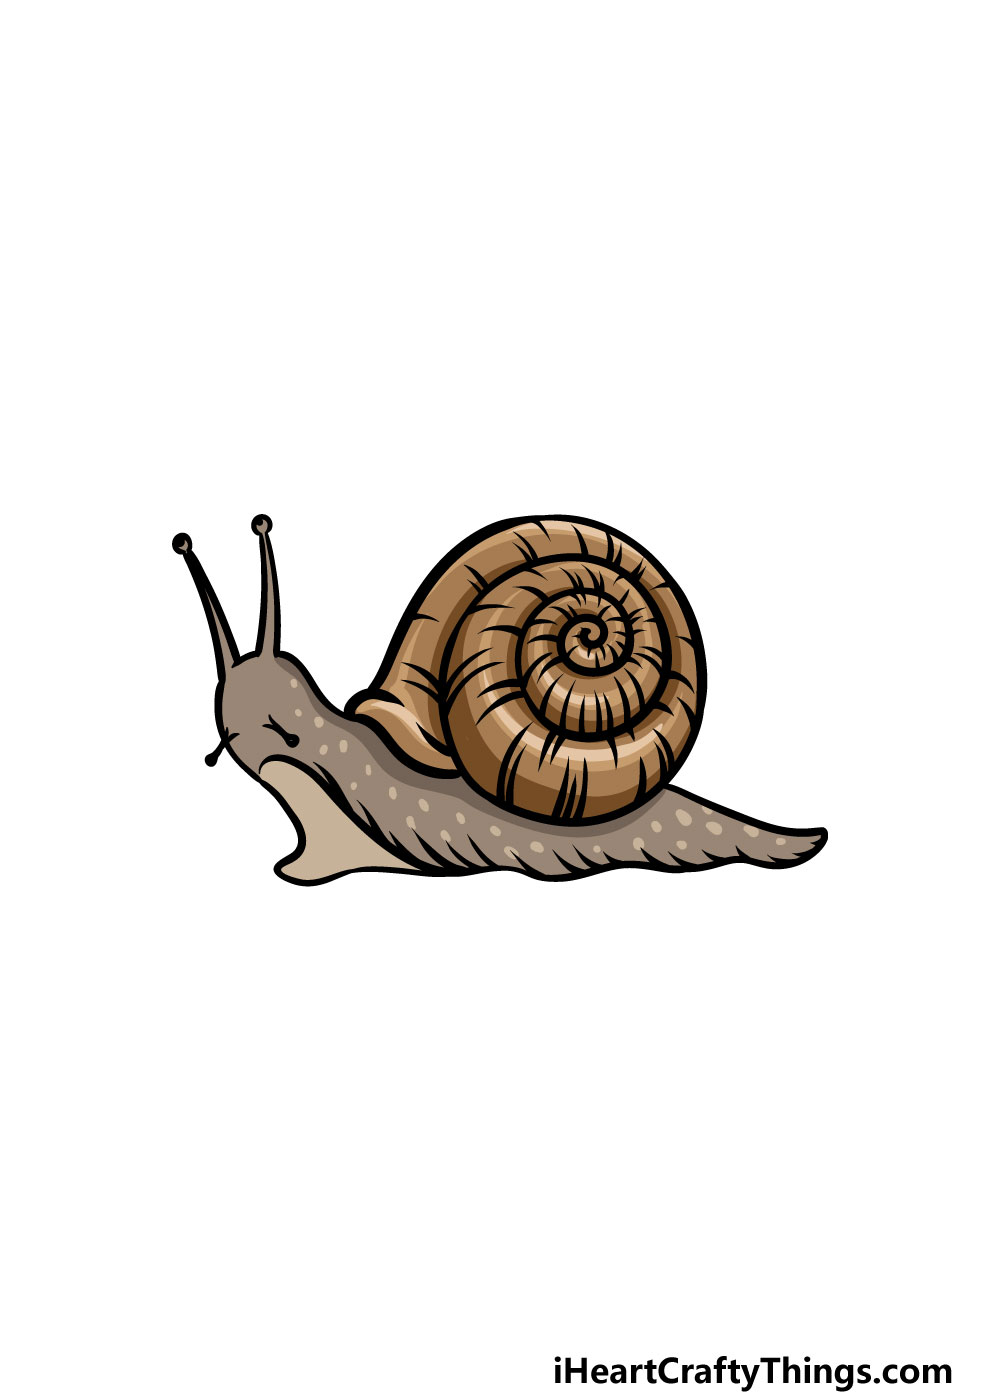
You’ve reached the final step of your snail drawing, and for this step you get to take over and express yourself with your favorite beautiful colors!
For our image, we went with a variety of different browns to color in the snail.
This is just one of many ways that you could go about it, however. Snails can come in all manner of different colors and styles, so you have a lot of freedom with how you can color in this picture!
Here’s how you can make your snail drawing even better…
Take it slow as we show you how to make your snail sketch even more amazing!
The first way you could make your snail sketch even better would be by drawing a background for it.
You can find snails in so many different places, so you would have many different options for backgrounds.
You could go for a regular house or yard setting, but those are just two examples. What are some ideas for background settings you could use for this picture?
Now that you have learned how to create this drawing of a snail, you could add some snail friends for it! This should be easy enough for you to do, as you just need to follow the steps of the guide and change a few details.
If you were to do that then you would be able to fit as many snails as you like onto the page! We’re sure you could make all kinds of fun snail scenes by adding some friends for the one that we created together.
When it comes to bringing some colors to your snail drawing, you have many options for the colors and mediums you used. We covered this briefly in the guide, but you could really experiment with it!
In the guide, we created a more muted and realistic color scheme. You could achieve similar results by using art tools such as watercolors and colored pencils.
That’s one way of doing it, but you could also go for a brighter and more vibrant color scheme if you prefer. What sorts of colors would you like to use?
Did you know that you can easily turn this snail into another creature? By removing the shell off of the back and changing a few details then this snail can become a slug!
If you want to try and do this, then you could look up some pictures of slugs and use them to help you with all of the different details.
It could be fun to show a comparison between the slug and the snail!
Your Snail Drawing is Complete!
That brings you to the end of this guide on how to draw a snail! We hope that you had a lot of fun taking it slow with us as you drew one of these fascinating little creatures alongside us.
With the help of this guide, we also hope that you found this drawing not only much easier but also more fun to work on!
Now you can show us how creative you can be by adding your own details, elements and cool backgrounds to it! We can’t wait to see what you do with it.
We also have many more amazing drawing guides like this one for you to enjoy, so be sure to visit our website when you’re ready for more!
We upload new guides all the time too, so be sure to check in often.
Once your snail drawing is complete, we would be thrilled if you would share it on our Facebook and Pinterest pages for us to enjoy!