When traveling in the countryside, there are many pretty sights to beheld, from rolling hills to fields full of cows.
While many of these would be considered natural elements, there are a few manmade structures that can be marveled at as well.
Few of these are as awe-inspiring as a majestic windmill slowly turning, however!
These wonderful structures are always great to see, and learning how to draw a windmill is a great way to recreate this beautiful sight.
If you love these magnificent buildings, then this will be a tutorial that will be perfect for you!
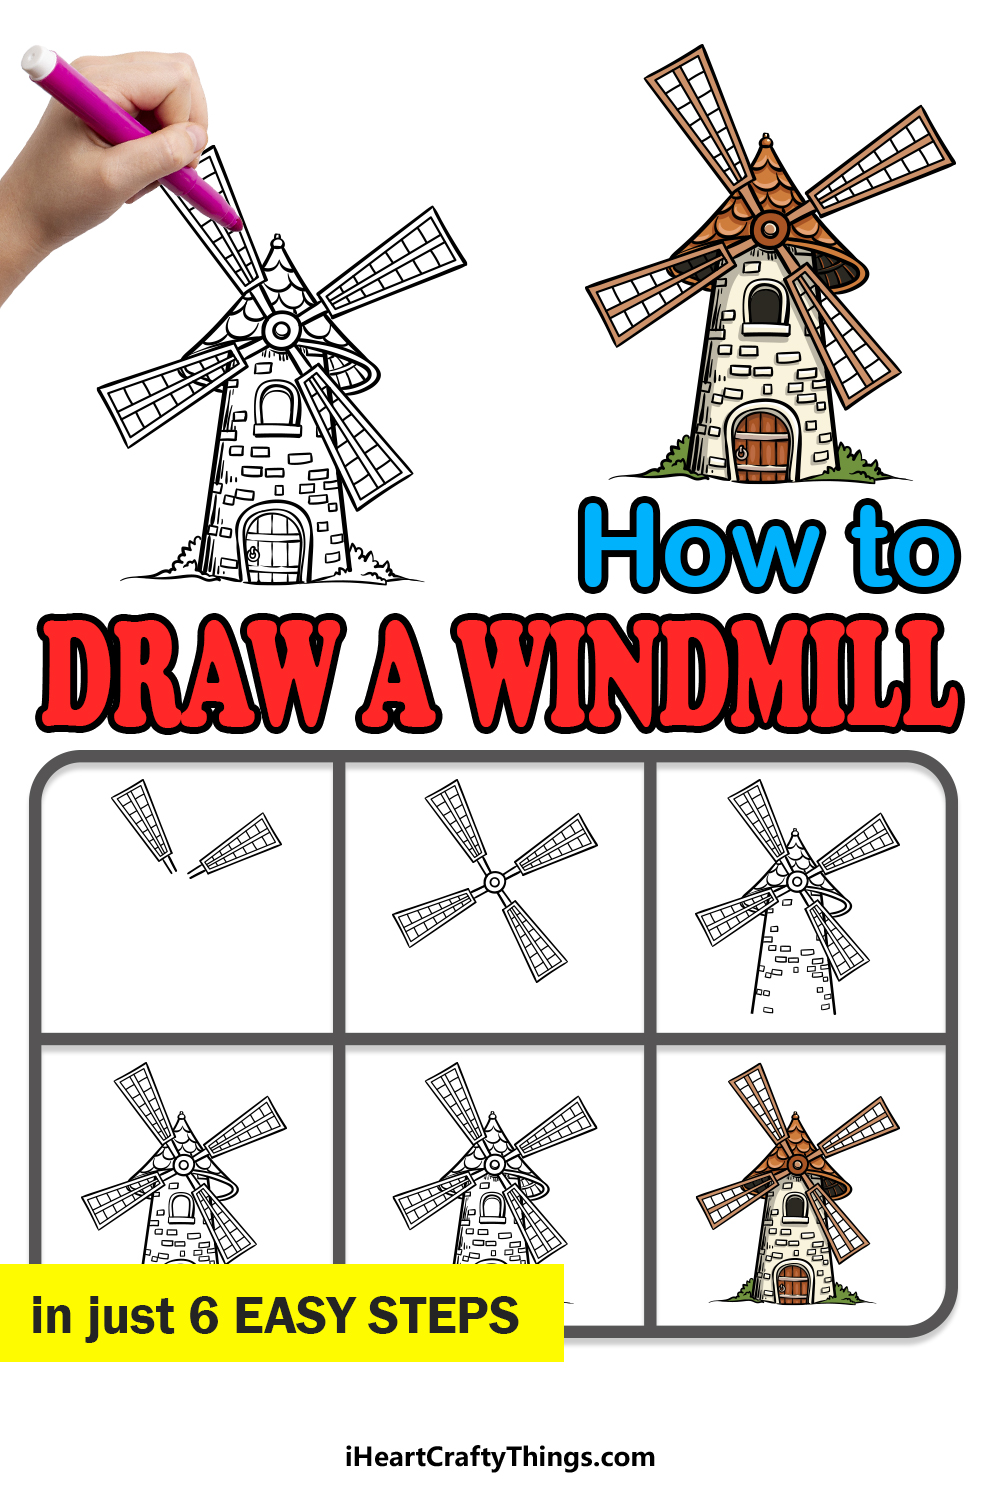
Our step-by-step guide on how to draw a windmill in just 6 easy steps will show you how fun and easy it can be to depict them!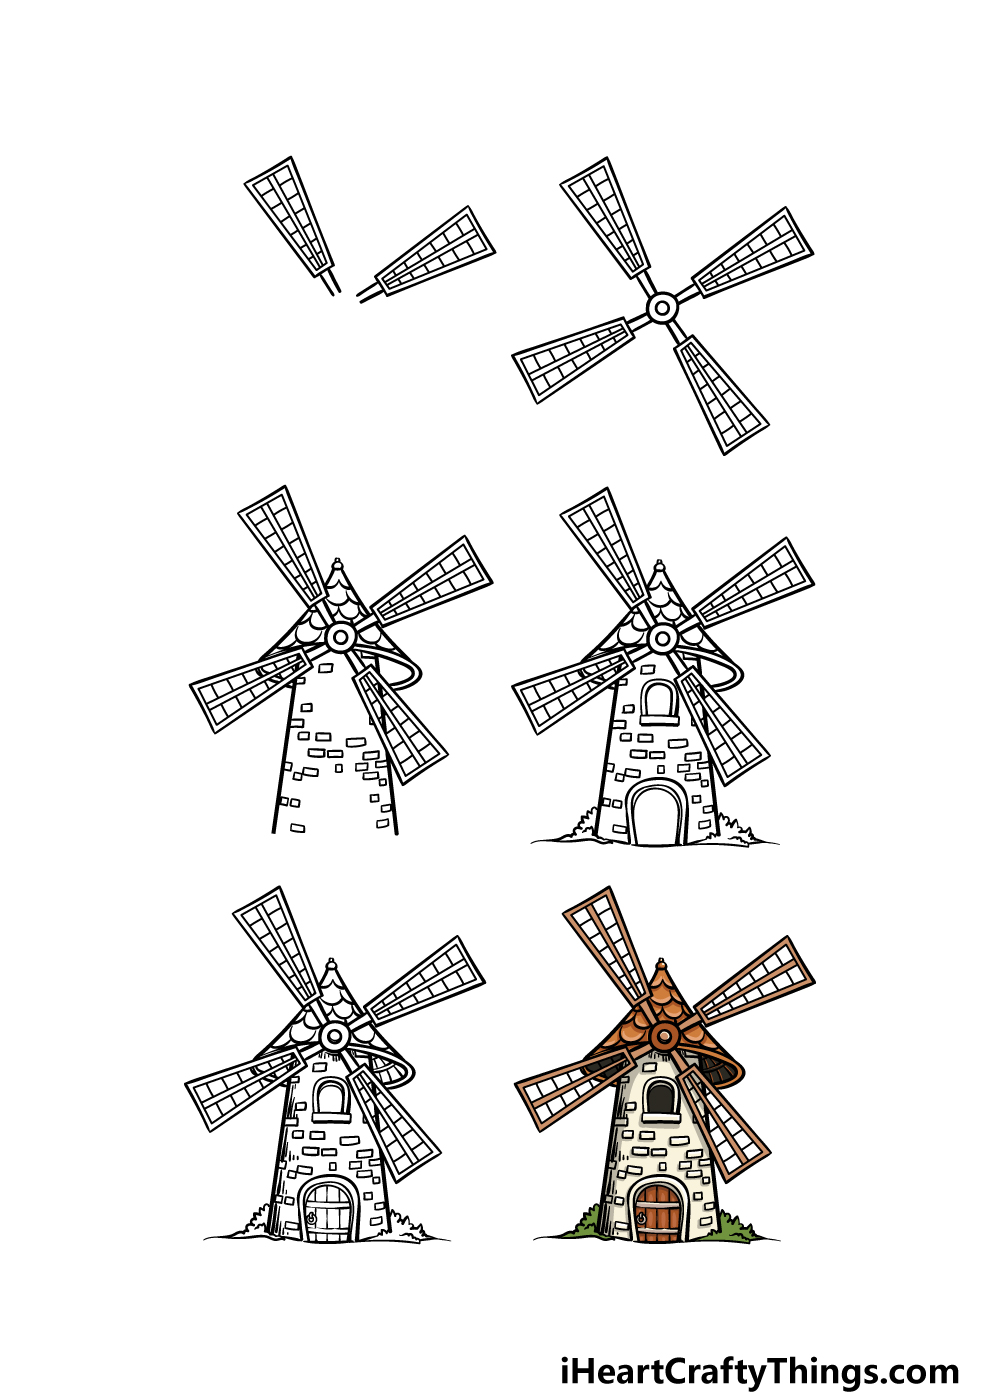
How to Draw A Windmill – Let’s Get Started!
Step 1
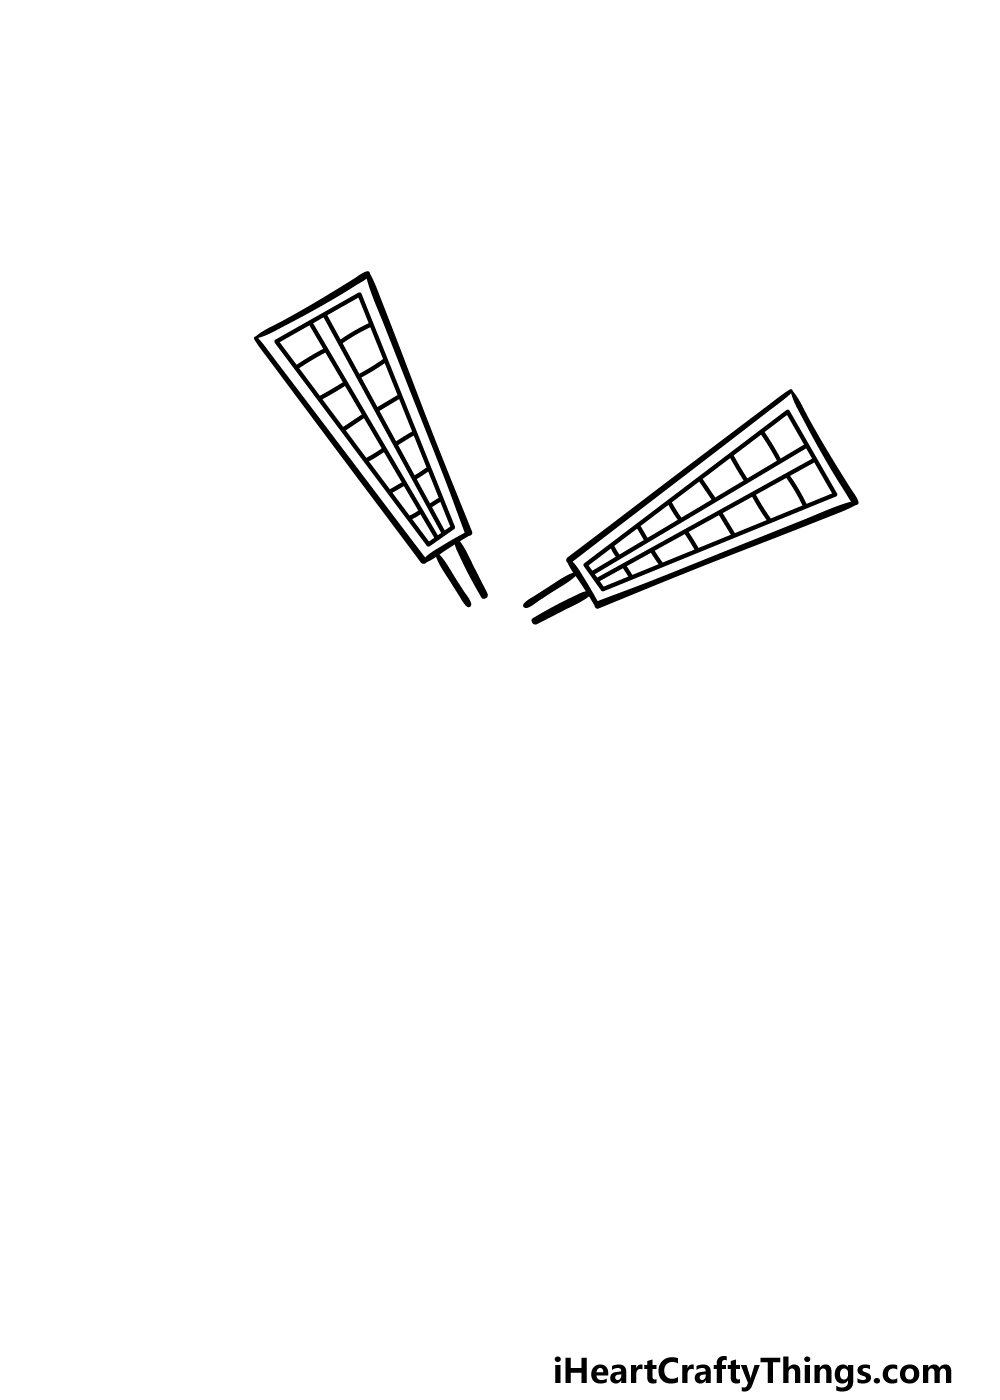
It wouldn’t be much of a windmill without some blades, and that’s what we shall begin with as we start this guide on how to draw a windmill.
Each blade of the windmill will have a thicker end that gets slightly narrower as it moves towards the center. They will be drawn in a fairly rectangular shape, as shown in the reference image.
Inside the outline for each blade, there will be some straight lines drawn along the inner perimeters of the outlines. On the inner sides there will then be some small grid patterns as well.
Finally, finish off with some straight lines extending inward from the bottom of each blade. These will connect to the central rotor, which we will be drawing in the next step of the guide.
Step 2 – Now, draw the rotor and more blades
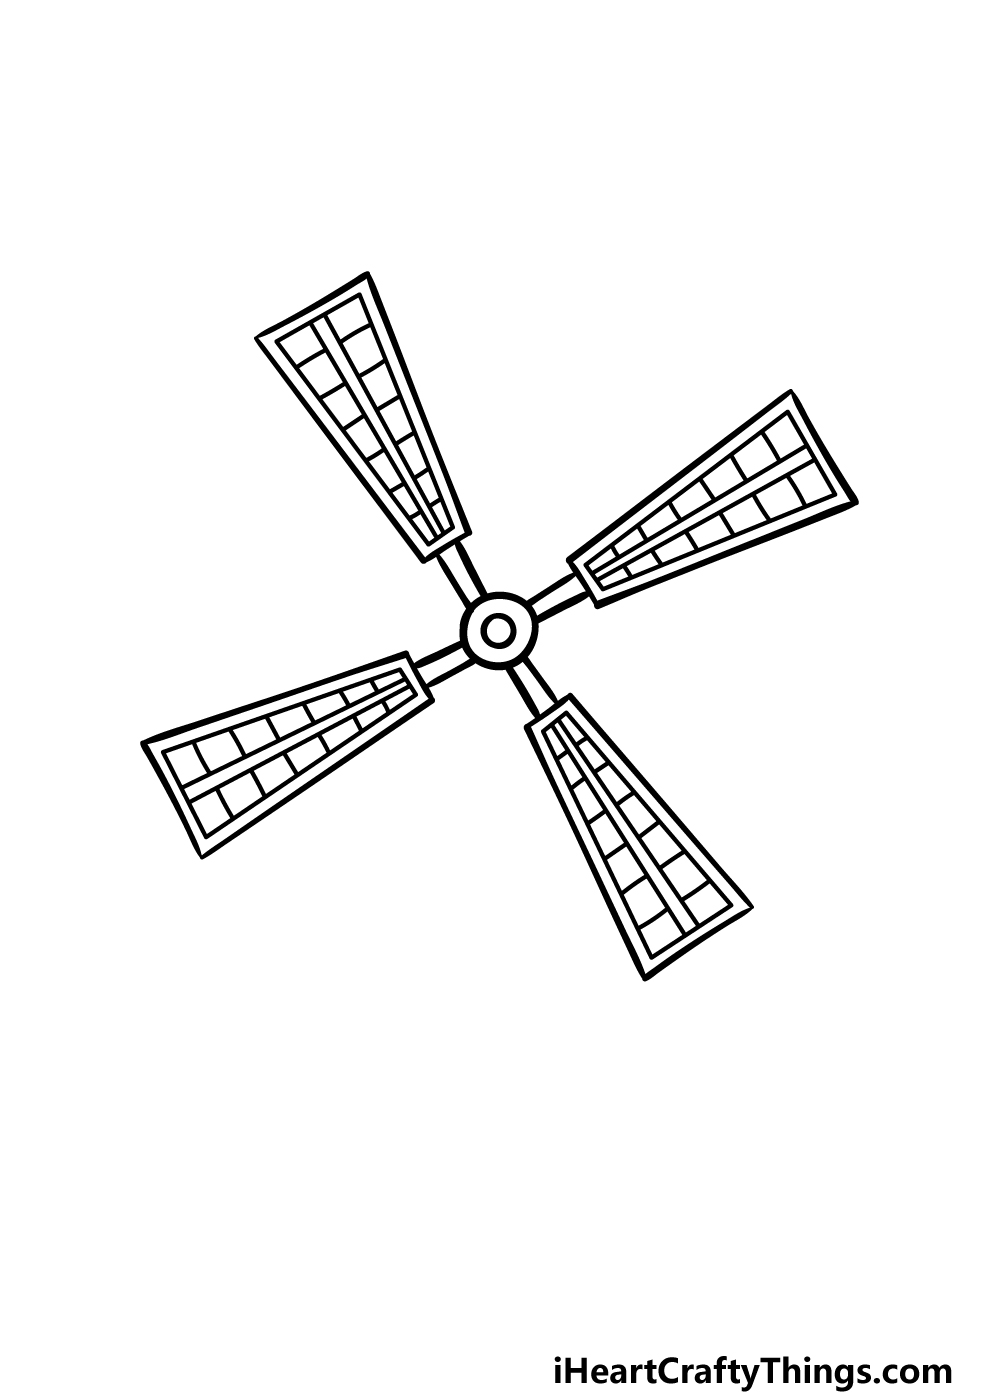
In this second step of your windmill drawing, you will be adding the central rotor and the rest of the blades.
The rotor should be rather simple to add! All you need to do for the rotor is draw a small circle that the beams on the bottoms of the first two blades will attach to.
Then, draw a smaller circle inside of this rotor outline to finish it off.
Finally, add two more blades onto this rotor. These ones will be at different angles, but otherwise they will look identical to the first two that you drew. Then, it will be time for step 3!
Step 3 – Draw the start of the body for this windmill
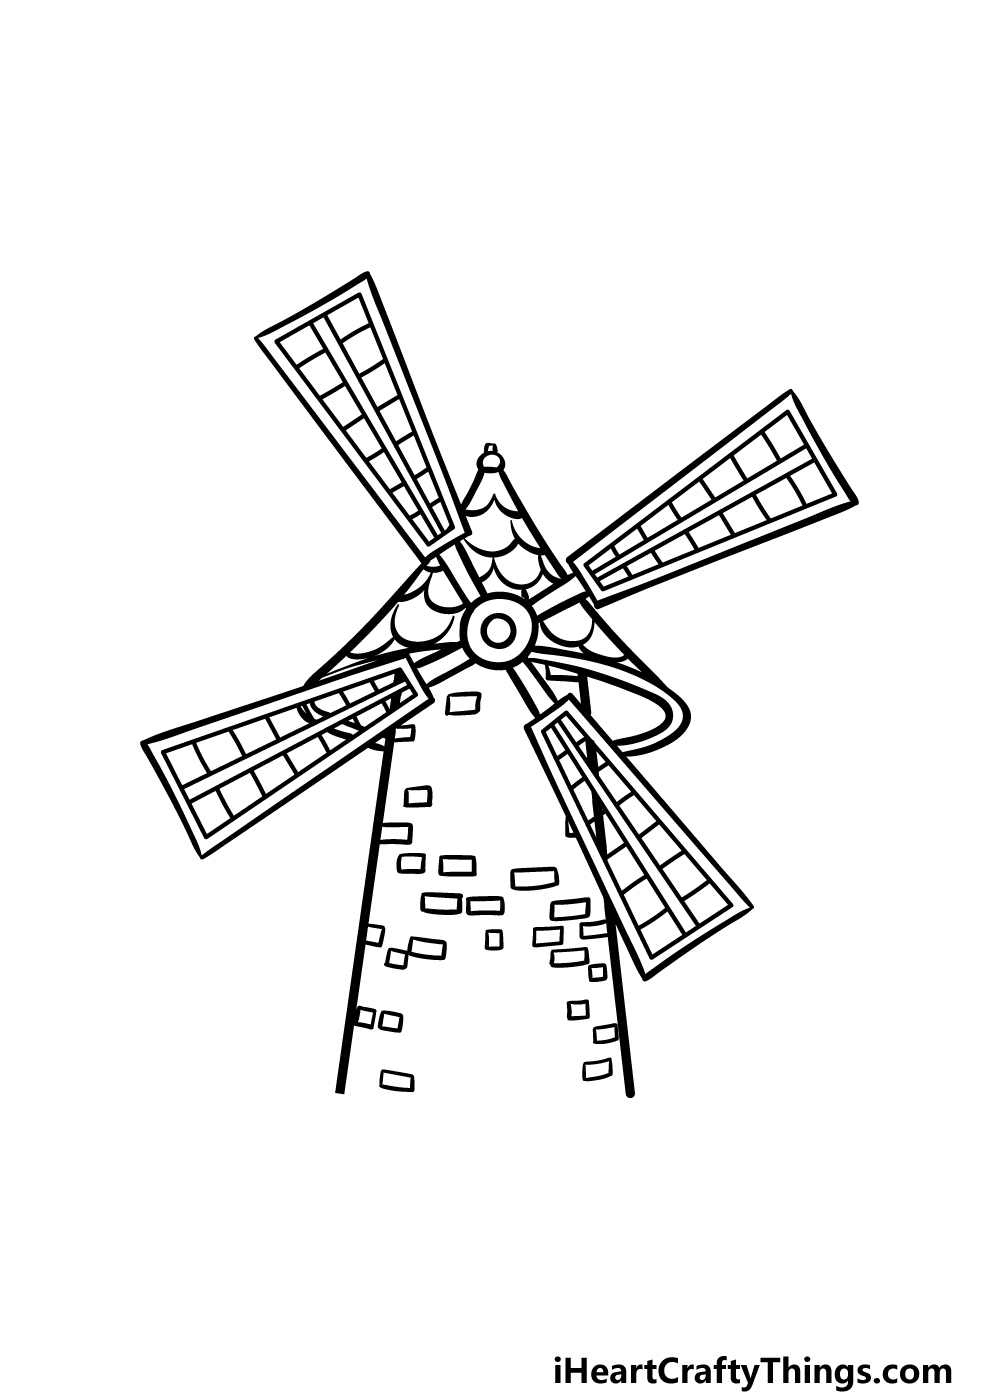
Now you will be ready to start drawing the body of this structure in this third step of our guide on how to draw a windmill.
The body of the structure will look quite quaint and old-fashioned, and you can begin by drawing a coned roof.
This will have curved lines for the sides, and then you can add rows of small, rounded lines onto the surface of it to give it a tiled look.
The sides of the windmill will be fairly straight, and you can add some small rectangular shapes all throughout the interior of the windmill outlines for a bricked look.
You can then keep adding to the design in the next few steps of the guide!
Step 4 – Next, draw some more details for the windmill
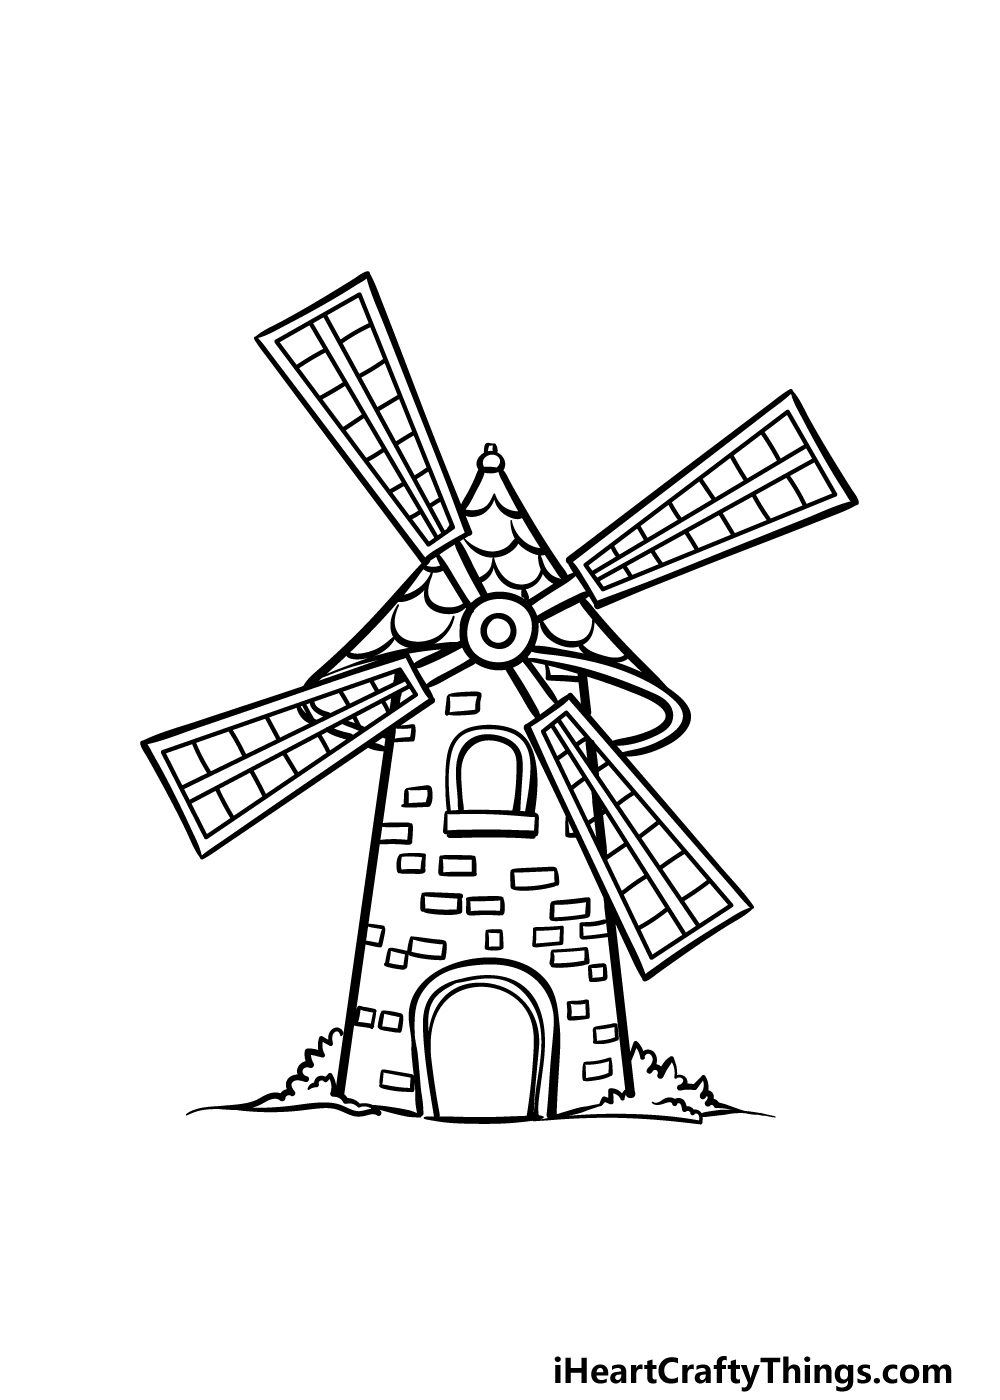
Before you move on to the final details of this windmill drawing, you will be adding some more important features.
In this step, we will be focusing on a window and door for the windmill as well as the ground it is sitting on. The window will be small and rounded with a small rectangular sill beneath it.
The door will look like a much larger version of the window as it will have a similar rounded shape.
Then, we will be finishing off by drawing some bushes onto the ground beside it, and these can be drawn using some small, bumpy lines.
Once these details have been drawn, it will be time for those final details we mentioned earlier, so let’s proceed!
Step 5 – Add the final details to your windmill drawing
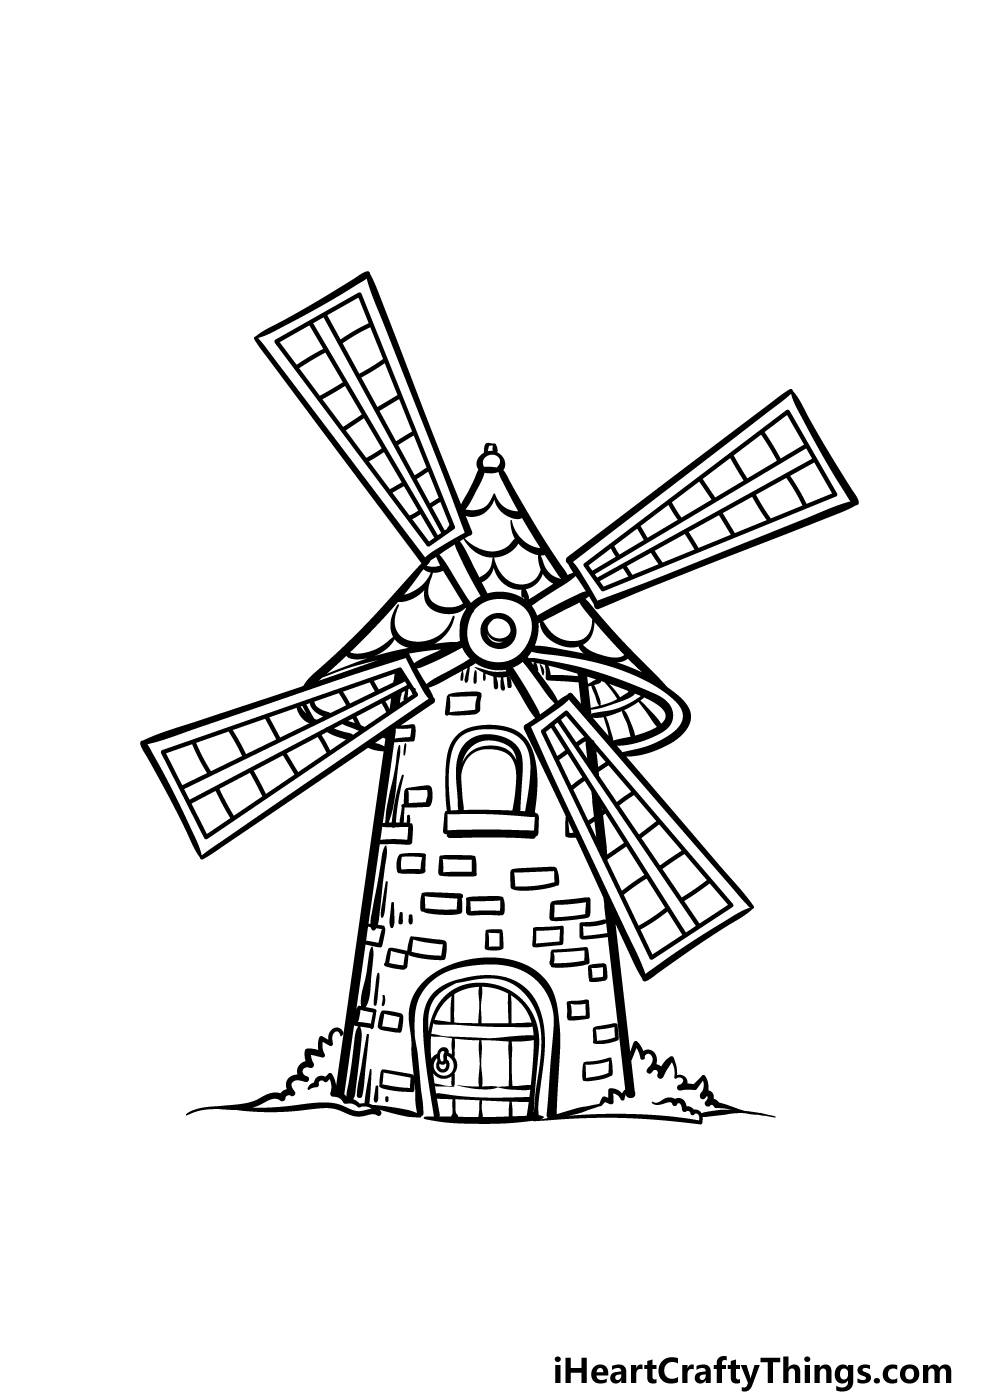
You’ve finished all of the major details and outlines in this guide on how to draw a windmill, and in this one we will finish off some smaller final details.
First, we will be adding some curved vertical and horizontal lines to the underside of the coned roof for some extra texture.
Then, we will be adding some straight vertical lines along the sides of the body of the windmill, as these will help to add some more dimension to the image.
Finish off this step by then drawing some wood details onto the front door, then you can proceed to the final step.
Before you do, there are also more details you can add. These could include a landscape in the background or perhaps some weather details.
How will you finish this off?
Step 6 – Finish off your windmill drawing with color
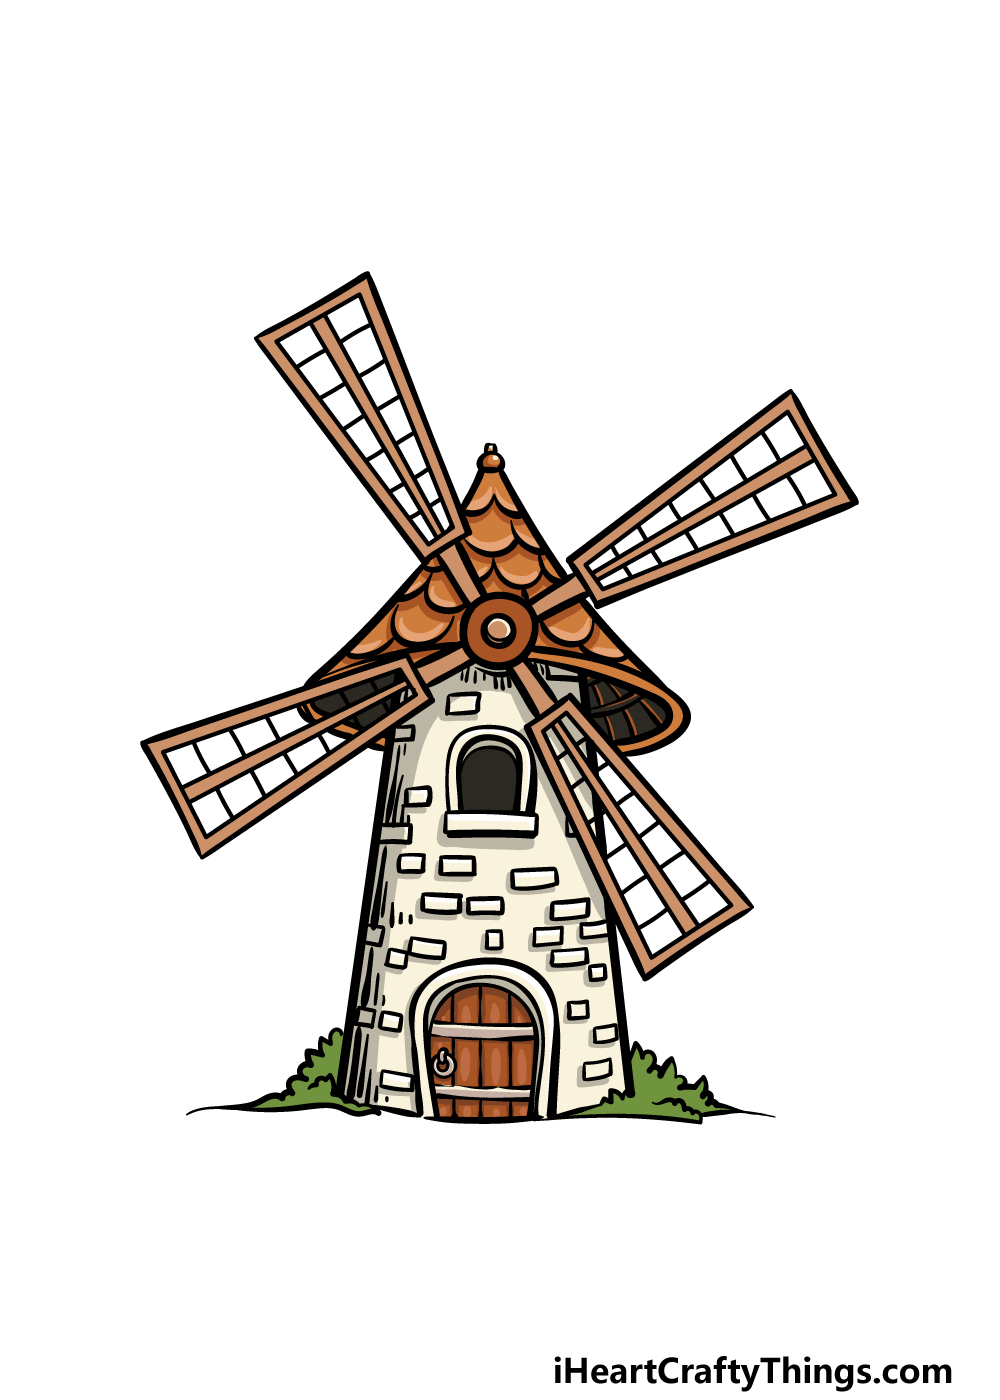
Now you’re ready to finish off this windmill drawing with some colors! In our example image, we finished off the quaint, relaxing feeling of the image by using some more muted, light colors.
These include some browns for the smaller elements along with beige for the body of the windmill. Some greens for the bushes beside it help to add some splashes of brighter colors as well.
These are colors you could go for as well, but you should also feel free to go for any additional colors you may like for it instead!
Will you use a similar color scheme or will you choose an entirely unique set of colors?
4 More Ways To Make Your Windmill Drawing Unique
You’ll definitely want to take these 4 tips for your windmill sketch for a spin!
This drawing of a windmill that we have created is done in a really old-fashioned style. If you wanted to go for a different type of windmill building, you could do so with some minor changes.
If you’re not sure what you could do to change the style, you could look up different types of windmills online to help you out. Or, you could change some details to have your very own windmill design!
What kind of windmill would you like to create?
When you see a windmill in the countryside, it will often not be alone. For that reason, you could add some more windmills to your windmill drawing to populate it even more!
Now that you know how to draw a windmill, you could add as many more as you like to this scene. They could be drawn a bit smaller in the background to show perspective, and you could change a few smaller details.
Once you have decided on the style and number of windmills you would like in this image, you could then add a background. This is something you could get really creative with!
For example, you may want to have an idyllic countryside setting or maybe have some large majestic mountains looming in the background.
These are just a few ideas, but you could also look up some landscape photos online to get some inspiration.
What are some background settings you would like to use for this picture?
Another way to make this windmill sketch even more unique would be to get creative with art mediums as you color it in.
For example, you could play around with different kinds of paints for different color intensities.
Watercolor paint would be a great choice, as it would give the picture a softer, classic look. That is just one way that you could bring some unique colors to the scene, though, and there are so many art mediums to choose from!
Your Windmill Drawing is Complete!
You have completed all 6 steps of this guide on how to draw a windmill, and you have created a wonderfully peaceful artwork in the process!
As long as you carefully work through all of the steps we have laid out for you, you will complete this lovely image before you know it.
Then, you can finish off with your own details, elements and extra ideas! This is your chance to show off how creative you can be, so have fun with it as you really personalize the picture.
If you’re ready for more, you can find some new drawing guides to enjoy on our website!
Our huge selection is sure to contain many guides you’ll love, and we will be uploading many more soon as well.
It would be great to see your amazing windmill drawing when it’s done, so please share your creation on our Facebook and Pinterest pages!