Space is full of many incredible sights and phenomena to observe.
When venturing into space, there are massive stars, terrifying black holes and incredible planets reaching out into the infinite expanse of space.
Another one of these phenomena would have to be meteors. Meteors can be composed of giant rocks or other debris that hurtle through space, sometimes even crashing to Earth.
Seeing a meteor is always an incredible experience, and learning how to draw a meteor is a great way to capture that excitement.
If you are fascinated by the wonders of space, this will be a tutorial that’s not to be missed!
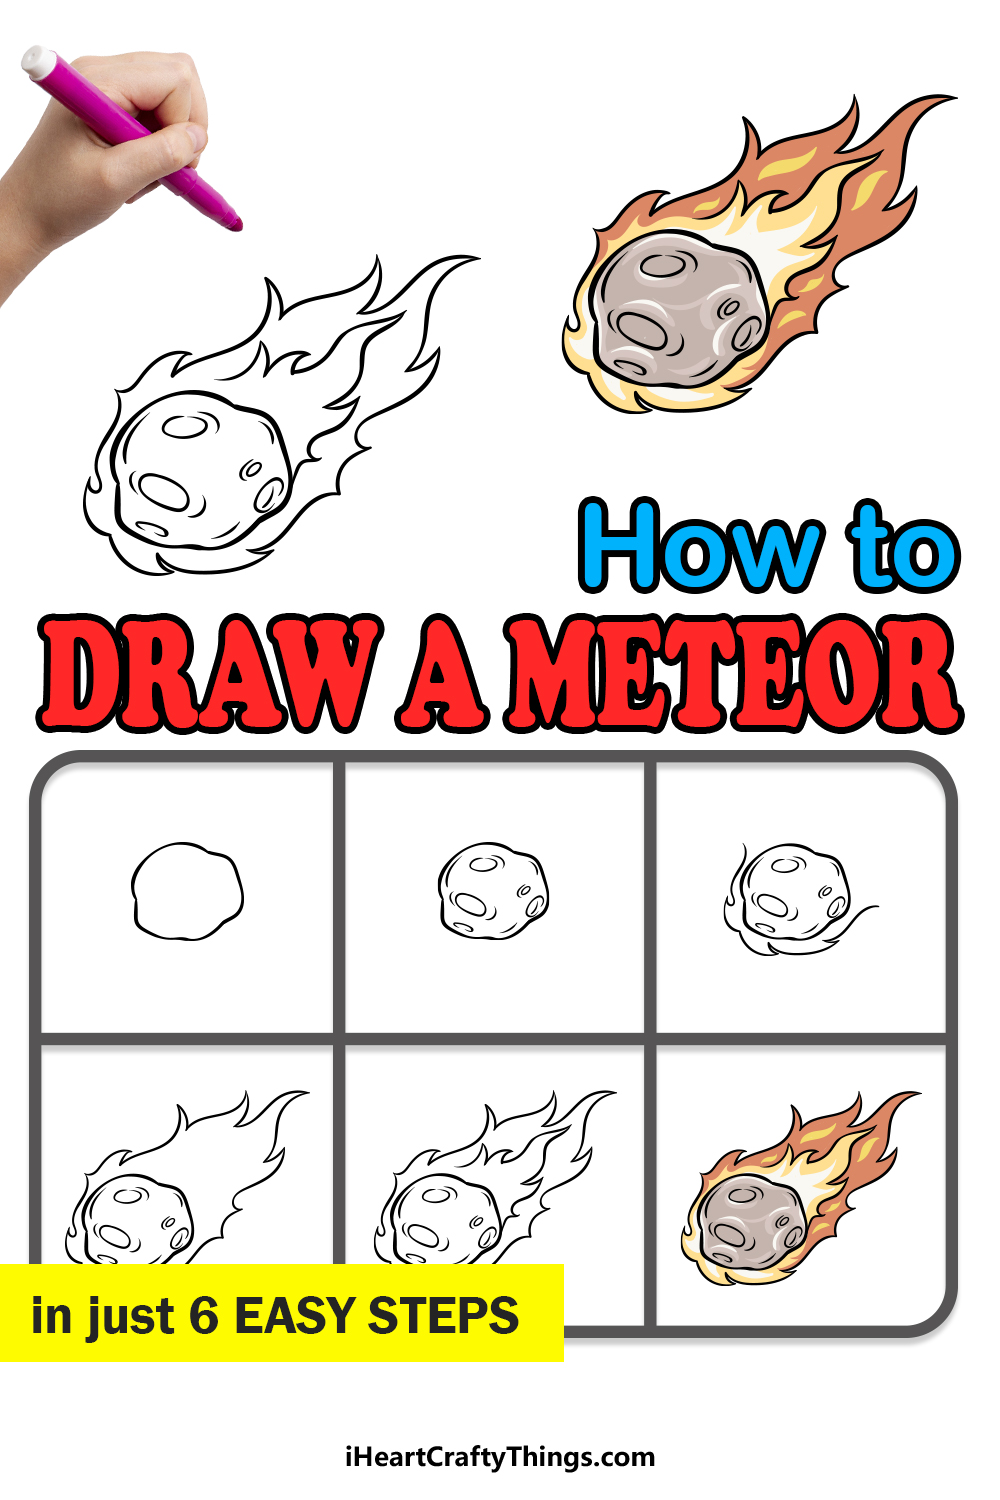
Our step-by-step guide on how to draw a meteor in just 6 easy steps will show you how to recreate this amazing celestial phenomenon.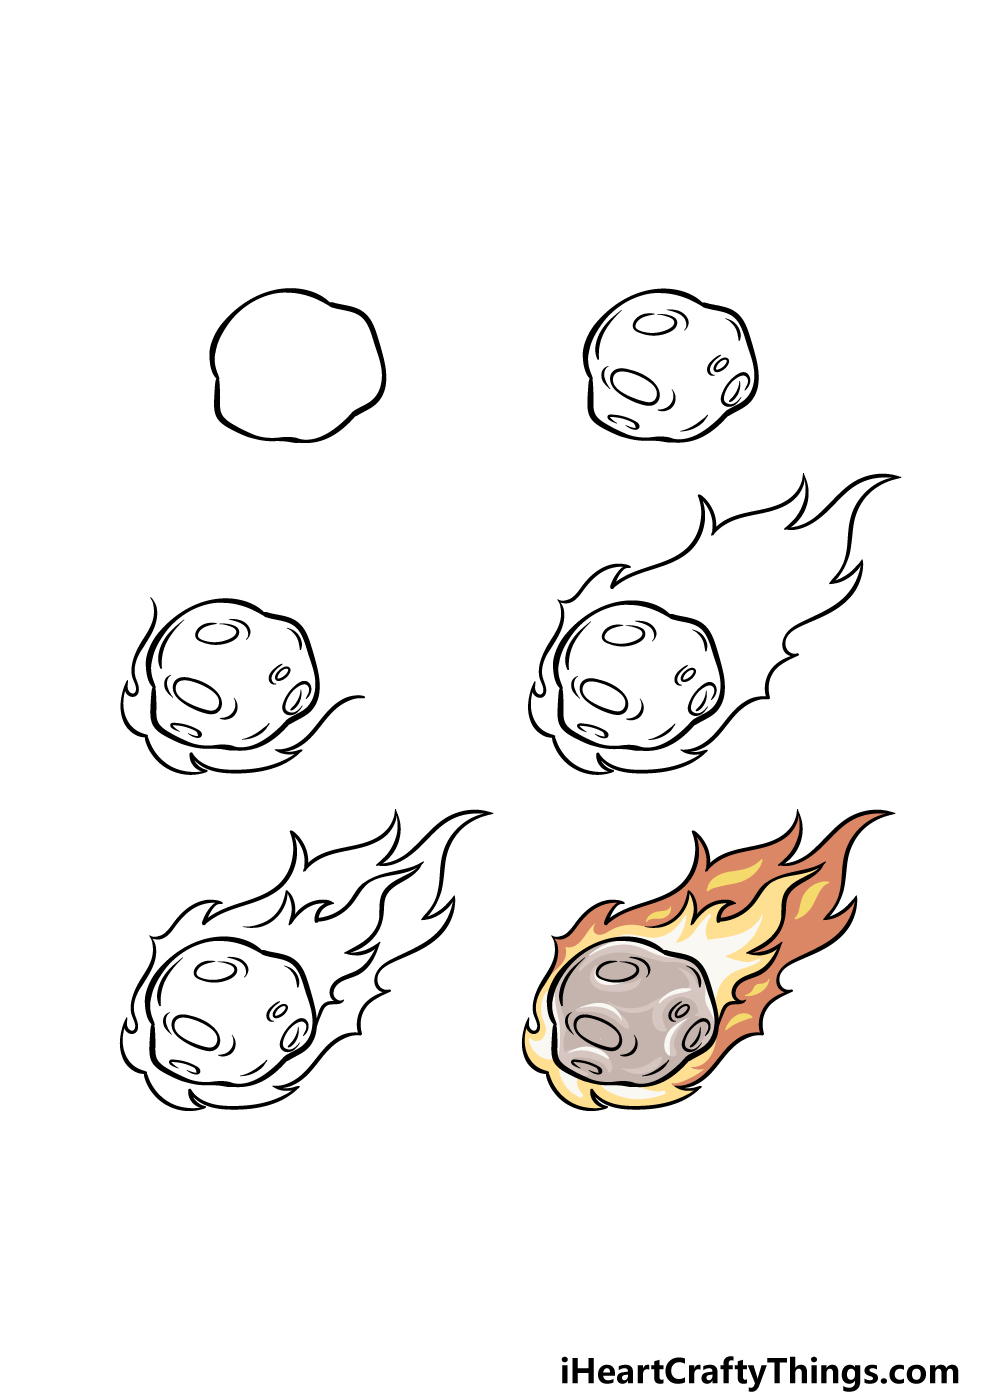
How to Draw A Meteor – Let’s Get Started!
Step 1
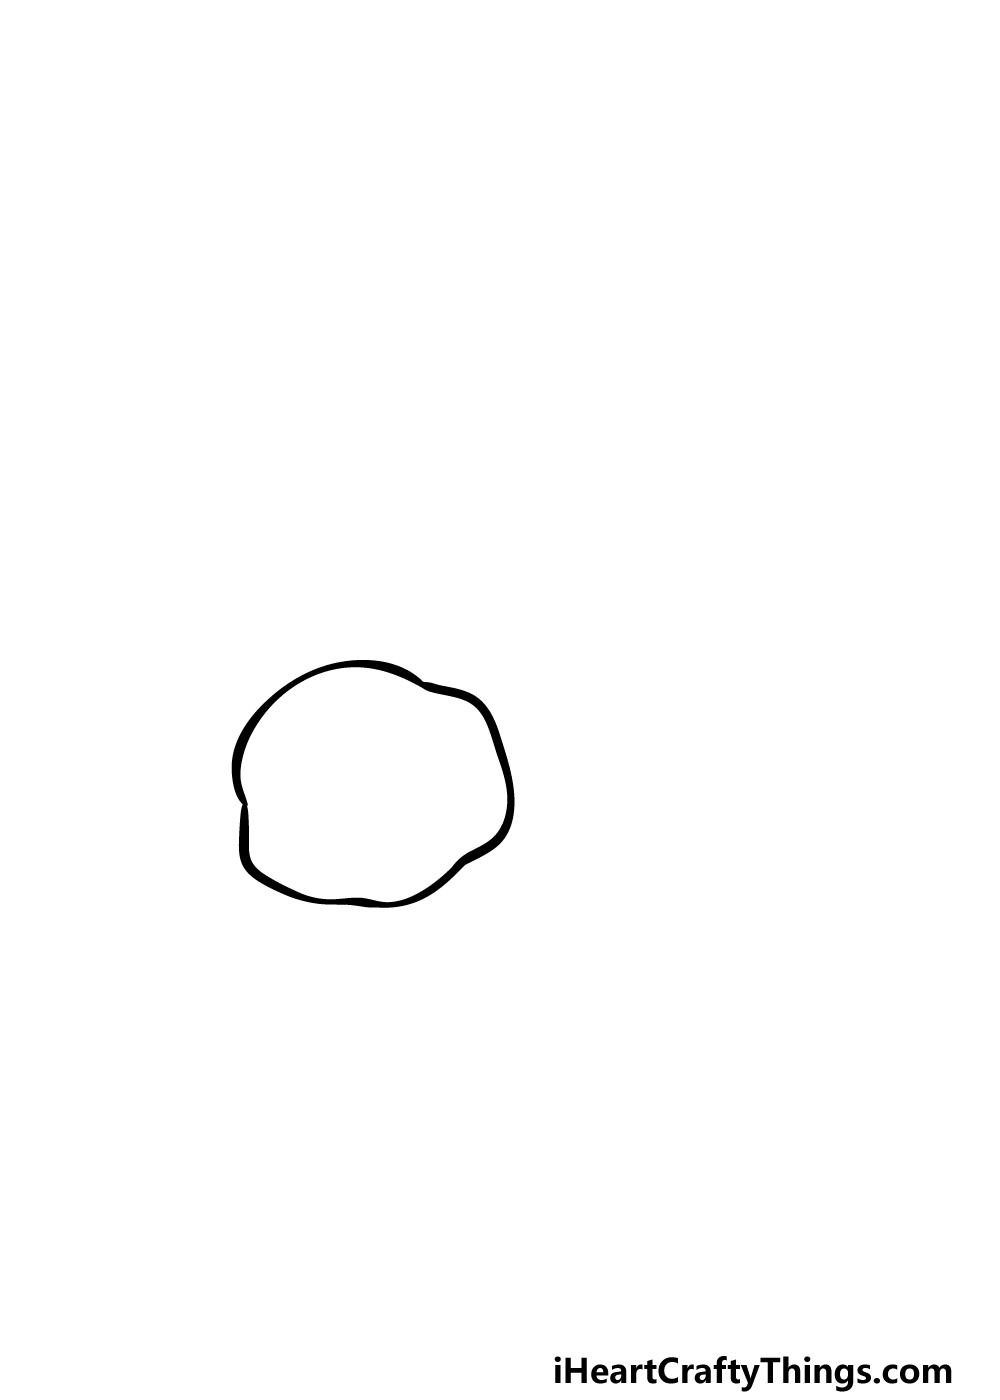
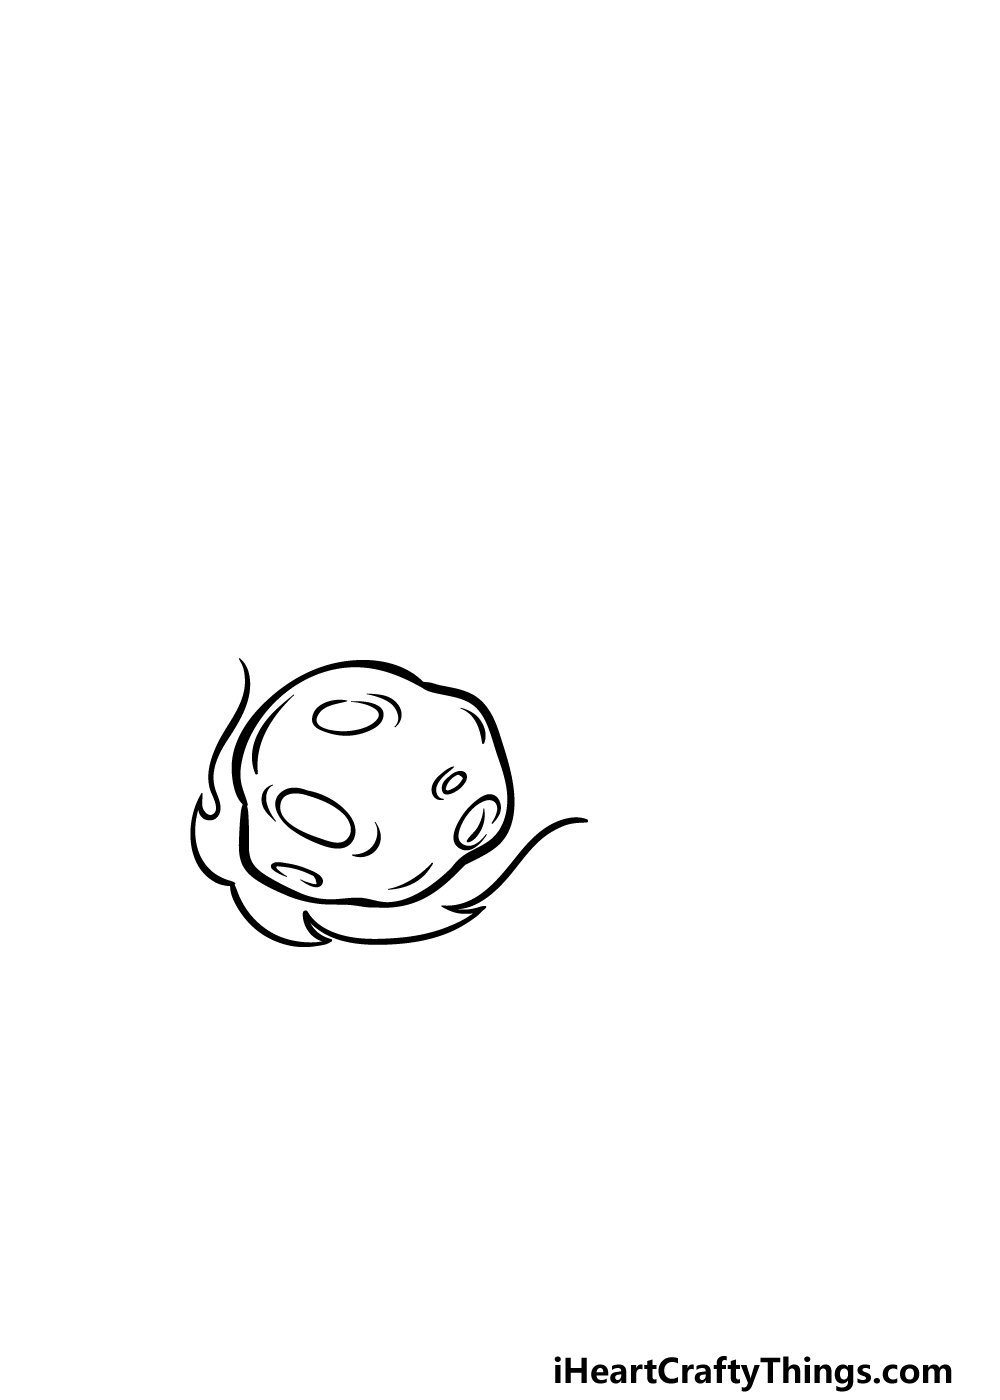
In the first step of this guide on how to draw a meteor, we will begin with the shape of the meteor itself. This should be a fairly simple step, as the shape of the meteor is actually quite basic.
It will be quite a chunky, rounded shape like the one we used in our example.
This is a meteor that looks to be a big chunk of rock debris, so we will be aiming to have the shape be quite bumpy and irregular.
When you have drawn the shape of this meteor, we can start adding more elements and details in the next few steps!
Step 2 – Now, draw some details for the meteor
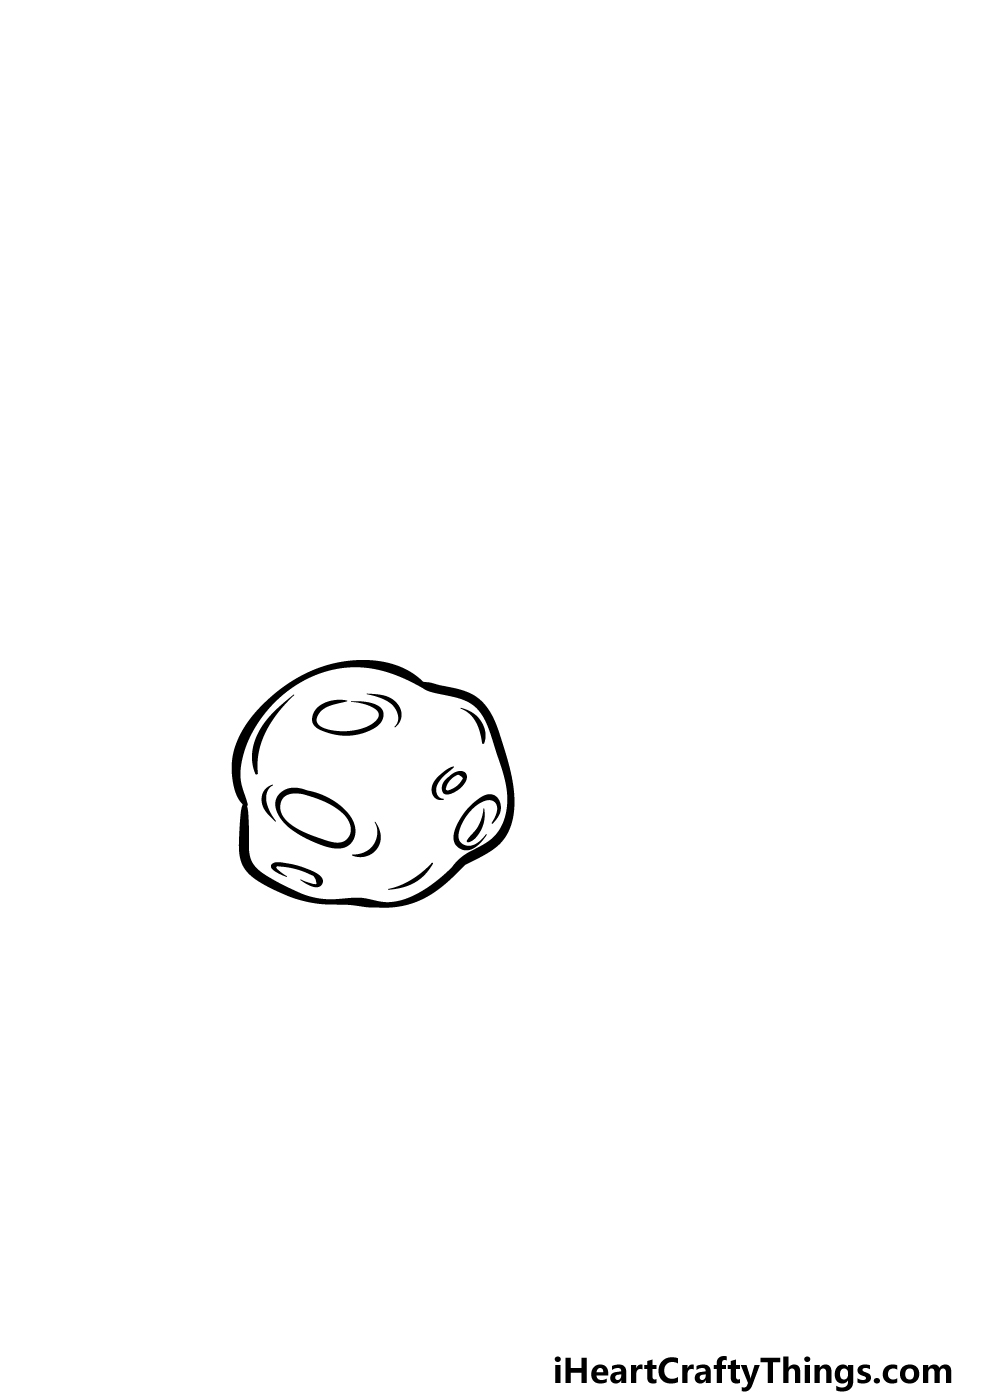
Now that you have the overall shape of this meteor drawing done, we will be able to start adding some texture details to the surface.
Meteors will often have holes and indentations all over them, and we will add some of these details now.
You can do this by adding some irregular rounded oval shapes all over the surface of the meteor.
Once you have drawn these, you can also add some simple line details around these rounded shapes to give them some more depth.
That’s all there is to it for this step, and now we can proceed to step 3 of this guide.
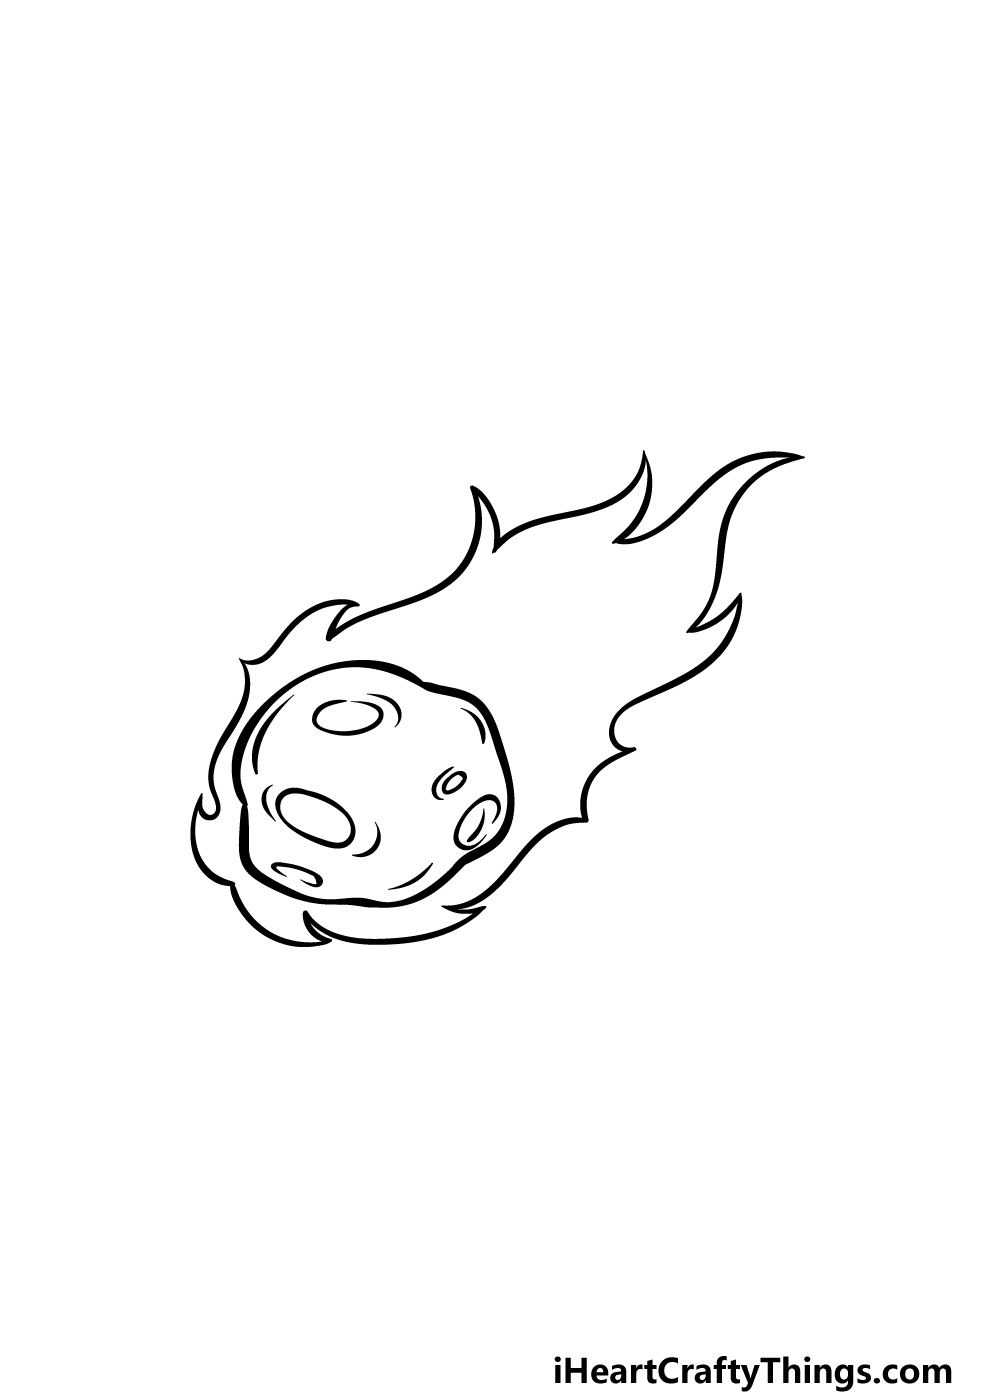
Step 3 – Draw the start of the flames around the meteor
When meteors soar through the air to enter the atmosphere, their immense speed will cause them to build up great heat and leave a fiery trail in their wake.
This fiery effect is what we shall start adding in this first step of our guide on how to draw a meteor.
To do this, you can draw some curved lines that have pointy tips incorporated into them around the front of the meteor.
This will show how the meteor is breaking through the atmosphere in a fiery blaze! Once this is started, we can add to it in the next few steps of the guide.
Step 4 – Next, draw the rest of the fire around the meteor
You started the fiery surrounding of this meteor drawing in the previous step, and in this one we will finish off the outline of this fiery mass.
To complete this outline, extend some more curved and pointy lines to create the ‘tail’ of the meteor.
This tail will be thicker the closer it is to the meteor itself, and it will get thinner the further away it gets in order to show off the trajectory it is traveling.
With this outline drawn, you will be ready to add some final details and your own ideas to the image in the fifth step of the guide.
Step 5 – Add the final details to your meteor drawing
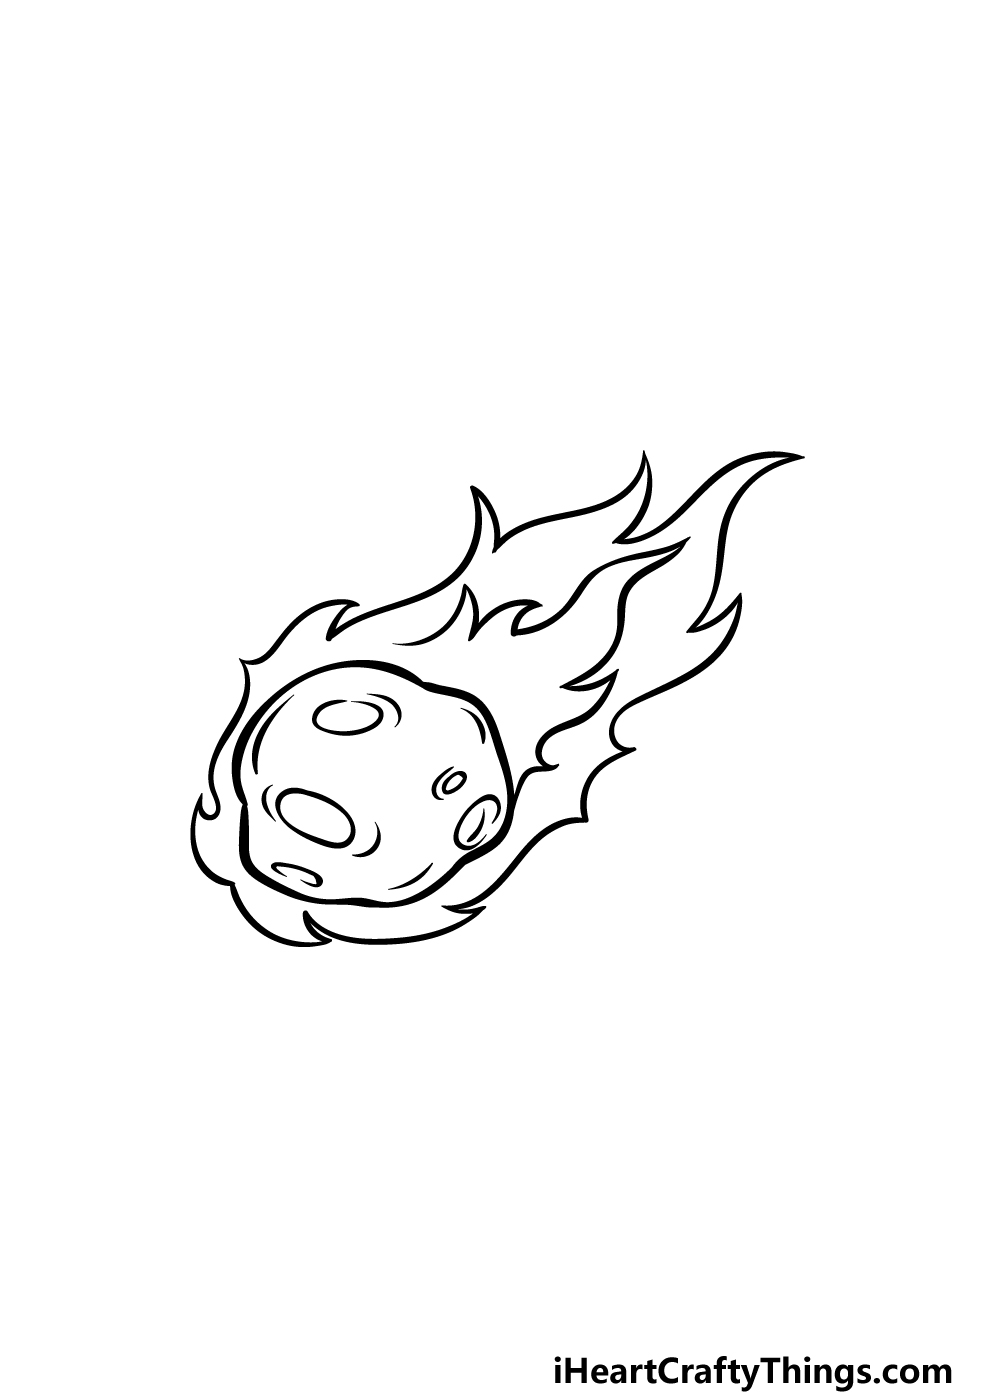
This part of our guide on how to draw a meteor will be all about finishing up some final details that will make the picture even better.
To finish off the details we have laid out, you can add some more pointy curved lines inside of the fiery tail of the meteor. This will help to add just a bit more depth to this aspect of the image.
When you have added these details, you will be ready for the final step of the guide! Before moving on, you could also add some more details of your own.
One idea would be to draw a background featuring aspects like stars, planets or even other meteors.
If you’re feeling extra creative, you could even add something fun like a wacky alien spaceship! How will you finish off this image before we color it in the final step?
Step 6 – Finish off your meteor drawing with color
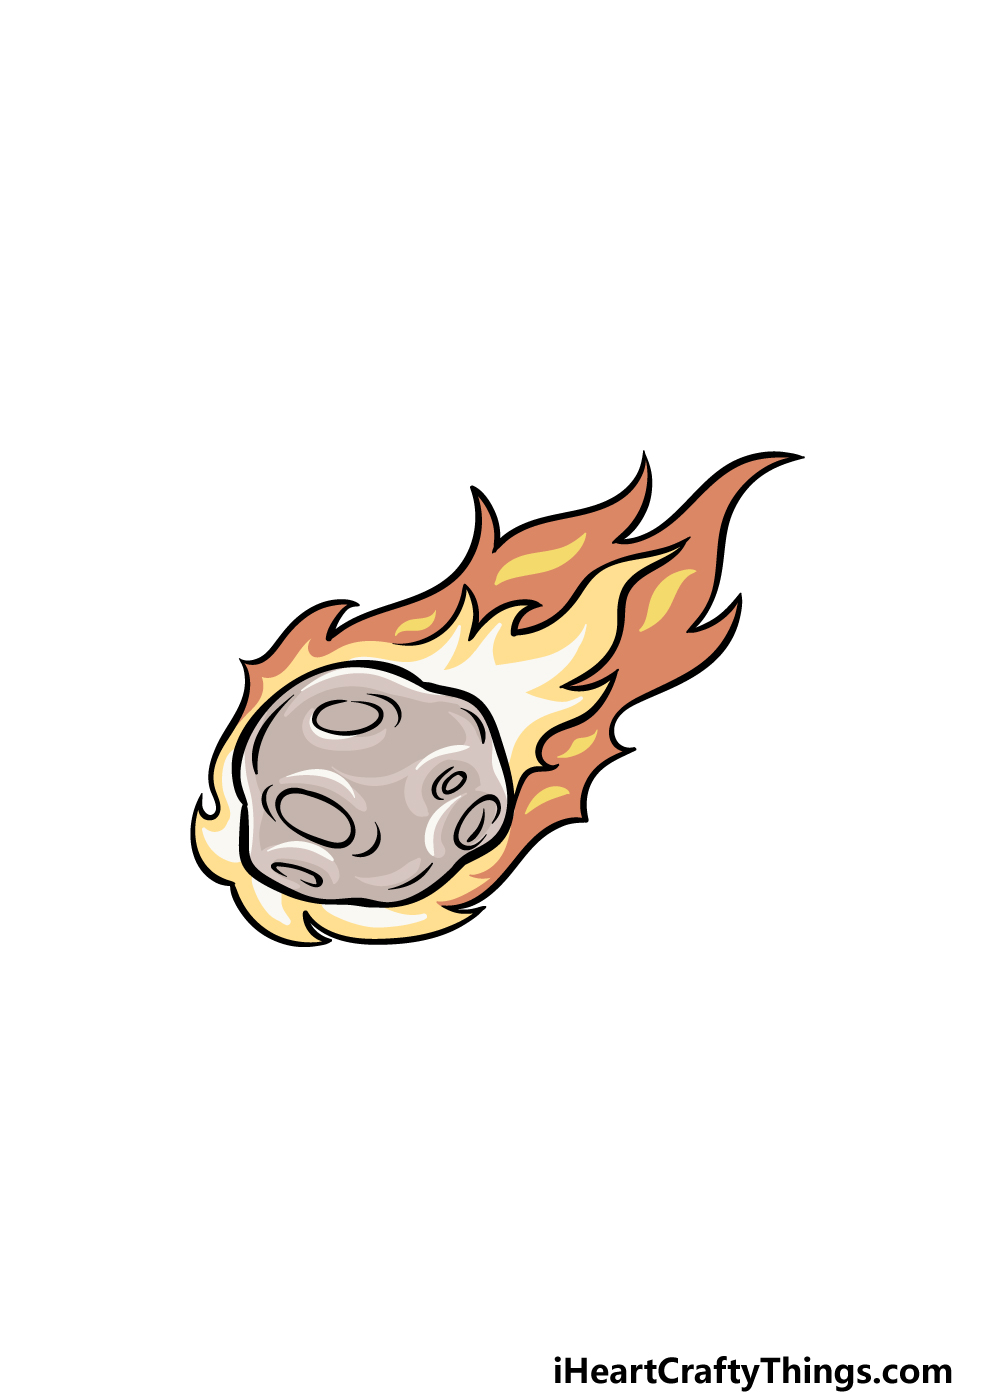
Now you’re ready to finish off your meteor drawing with some colors that will really bring it to life! In our example image, we showed you how we would interpret the colors of this picture.
We used some shades of light browns for the surface of the meteor itself to finish off that rocky look for it. Then, we used a variety of different reds and oranges for the fiery surroundings of the meteor.
Do you think you will use similar color choices to the ones that we used or will you go for a unique color approach?
You can also have lots of fun experimenting with your favorite art mediums, so let your creativity flow as you finish up your out-of-this-world artwork!
5 Tips To Make Your Meteor Drawing Even Better!
Shoot for the stars as we make your meteor sketch look even better with these tips!
This drawing of a meteor that we created in this guide looks great as it is, but it could look even better if you were to make it a meteor shower!
To do this, all you would need to do is follow the guide again and create some more meteors around it. They could look mostly the same, but you could change a few details to make each one unique.
When it comes to adding more to this drawing, you don’t need to stick to just meteors. There are so many different things we see in the sky that you could add to the drawing!
For example, you could draw some stars or maybe even some planets surrounding the meteor. The more you draw, there more there is to marvel at!
If you want to add some more life to your meteor drawing, you could do so by adding some spacecraft. These could be based on real rockets that take off from our earth.
It could also be some alien spaceships that are swerving to miss the meteor for a fun touch to the scene. What are some other kinds of spacecraft that you could add?
It can be hard to see a meteor in real life, and you need something like a telescope to get the best view. That is something that you could add to the drawing!
It would be cool to have a little scene showing someone using a telescope to see this meteor. For a fun touch, they could even be based on yourself!
Finally, when it comes to capturing the fiery surroundings of this meteor sketch, we would recommend using the right art mediums for the job.
We think it would look best if the colors were really bright and vibrant, and some art mediums would be great for that. Using acrylic paints would make the colors pop, and so would colored pens and markers.
Do you have any other bright art tools?
Your Meteor Drawing is Complete!
All 6 steps of this guide on how to draw a meteor have been completed!
Meteors are a thrilling phenomenon to witness in any context, and we hope that this guide helped to capture even a little bit of that excitement for you.
We also hope that the steps in this guide helped to eliminate any frustration so you could focus on the fun of creation!
Don’t forget that you can also keep the fun going by adding to the picture!
This is all about unleashing your creativity, so you should let your creativity run wild as you add elements, details or awesome color choices.
Then, you’ll want to head on over to our website for access to a huge selection of drawing guides to enjoy! We also plan to add many more soon, so checking in often is the best way to never miss out.
Please also consider sharing your finished meteor drawing on our Facebook and Pinterest pages so we can see how your amazing artwork turned out!