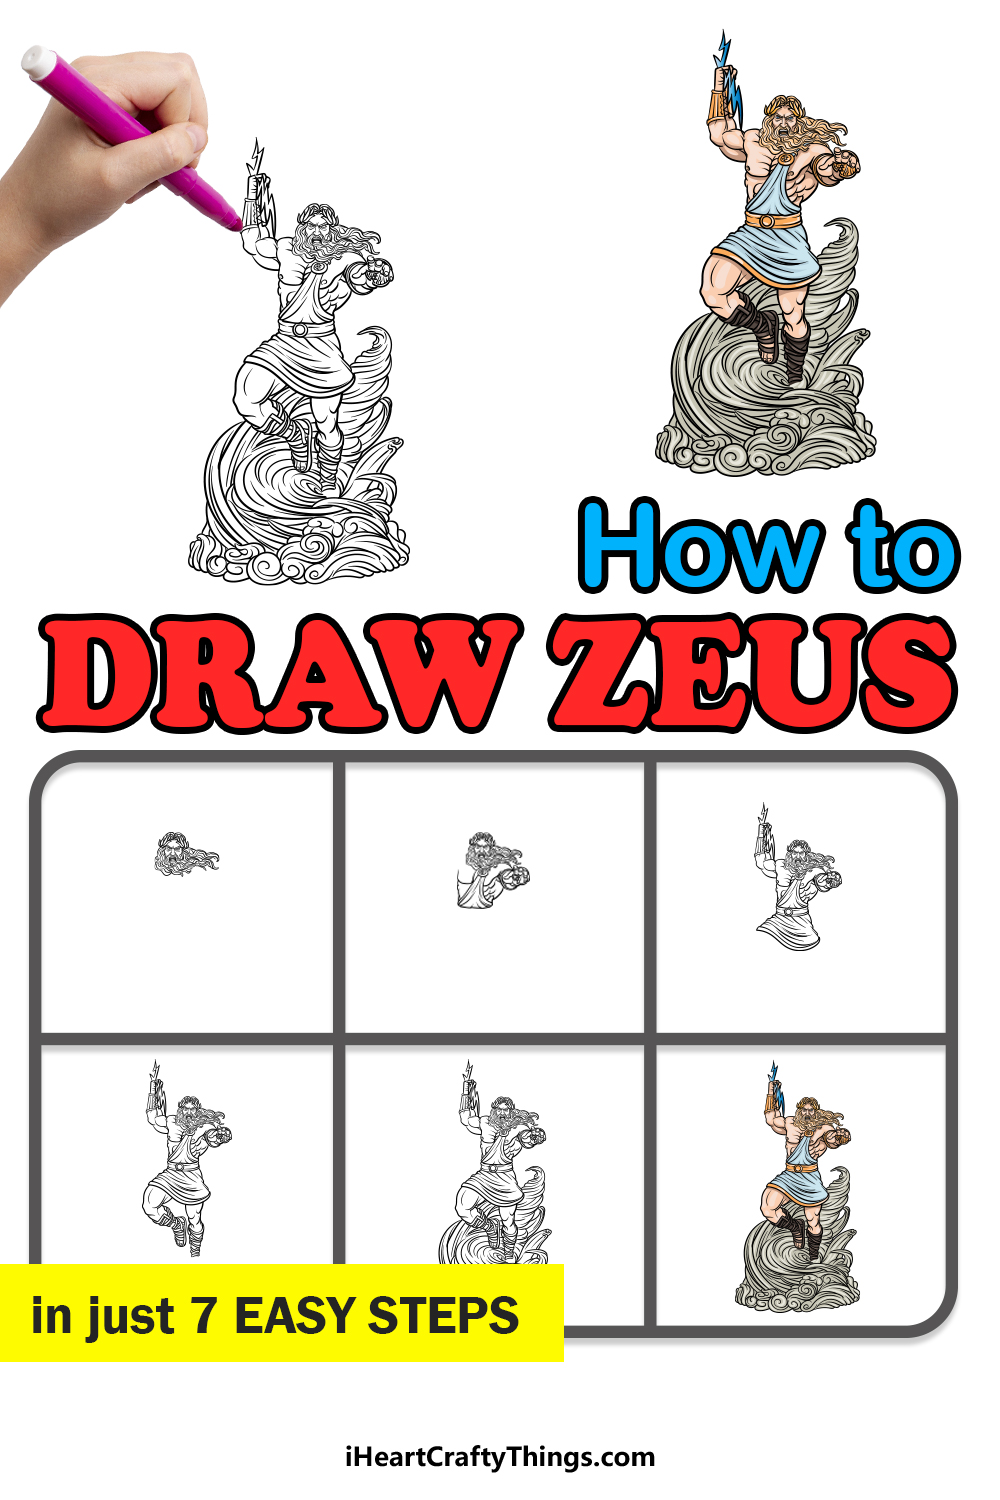
The Greek myths have some of the most epic and thrilling tales ever penned by mankind. Tales of gods, monsters and heroes populate these myths, and these stories remain popular to this day.
The god of thunder, Zeus, was said to have reigned over the other gods on Mount Olympus, and learning how to draw Zeus is a great way to show appreciation for this character!
If you have wanted to learn how to draw an awesome picture of Zeus but not known where to start, then you will love this tutorial!
Our step-by-step guide on how to draw Zeus in 6 steps will show you how you can recreate the king of the gods yourself.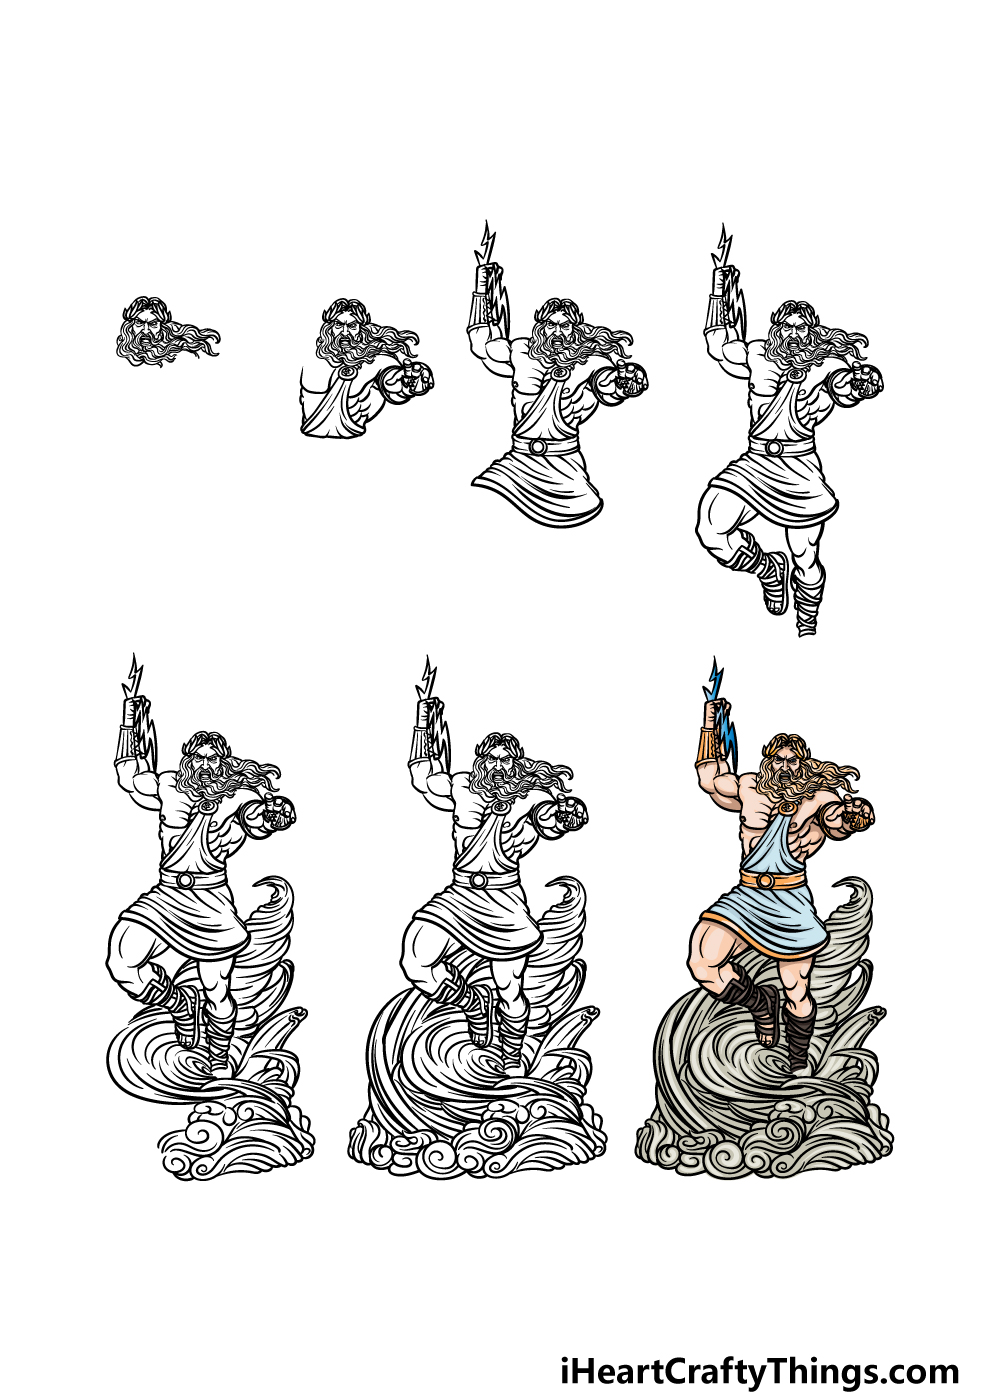
How to Draw Zeus – Let’s Get Started!
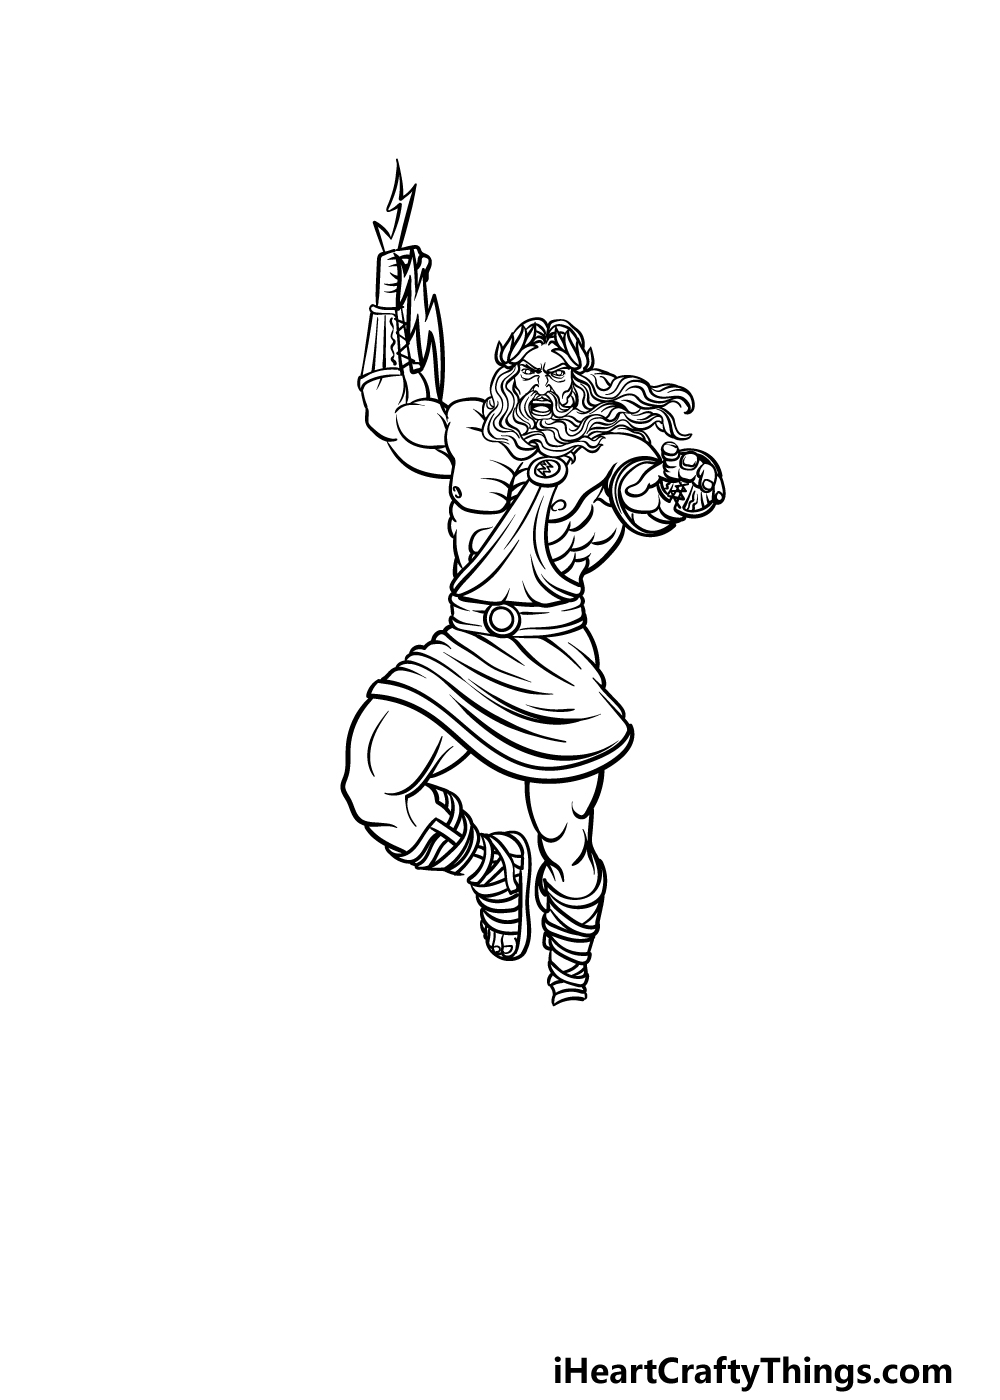
Step 1

Depictions of Zeus almost always give him a long, flowy beard, and this is what we shall start with in this guide on how to draw Zeus.
The head and beard for Zeus are quite detailed, so you may want to very closely refer to the reference image as you draw.
You could also start by drawing a rough shape using a light pencil that can guide you in getting the proportions correct.
First, we will start by drawing his angry-looking eyes and eyebrows. His angular nose will go beneath that, and then there will be his flowy mustache beneath it.
Then, we will be adding some curved, pointy shapes on the sides of his head for the wreath that he is wearing around his head.
Finally, we shall finish off by drawing lots of curvy shapes coming off his face and moving to the right to portray his flowing beard.
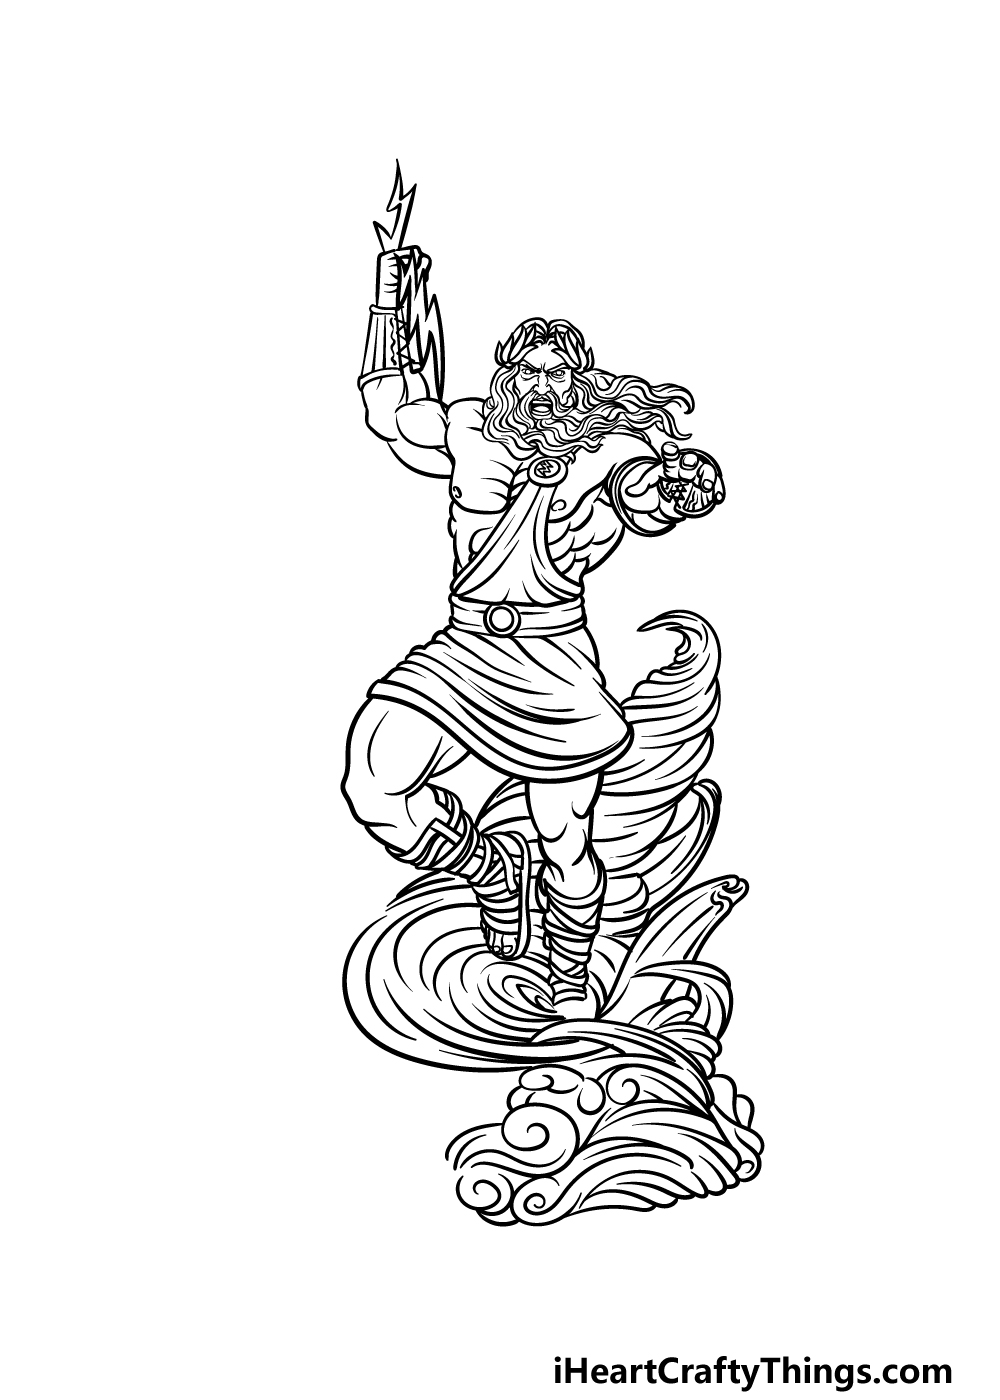
Step 2 – Next, draw his first arm and his chest
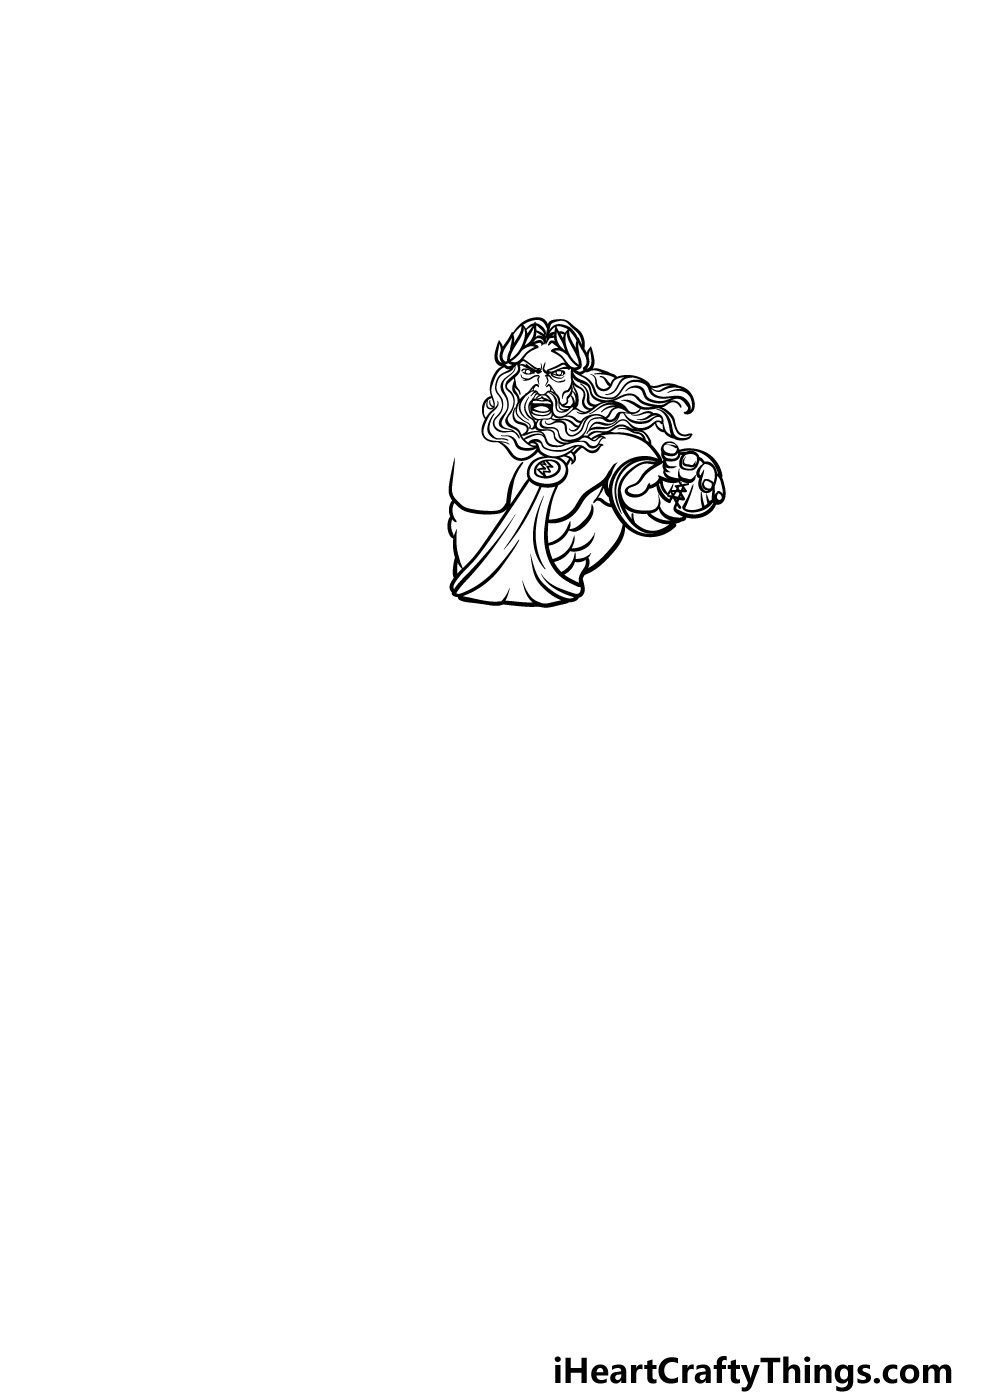
You’ve completed the head and beard for this Zeus drawing, and now we can move down to draw his first arm and his chest.
First, draw a circle within a circle at the base of his beard for a buckle that secures the toga he is wearing.
Zeus is usually associated with a lightning bolt, so you can draw a small lightning bolt onto this buckle.
Then, we will use some curved lines going down from the buckle for the start of the toga that he is wearing. You can add some line details to it to make it look more creased.
Finally, you can draw the rest of his exposed chest and then draw his large hand reaching out towards us. Then it will be on to step 3!
Step 3 – Draw some more of his body now
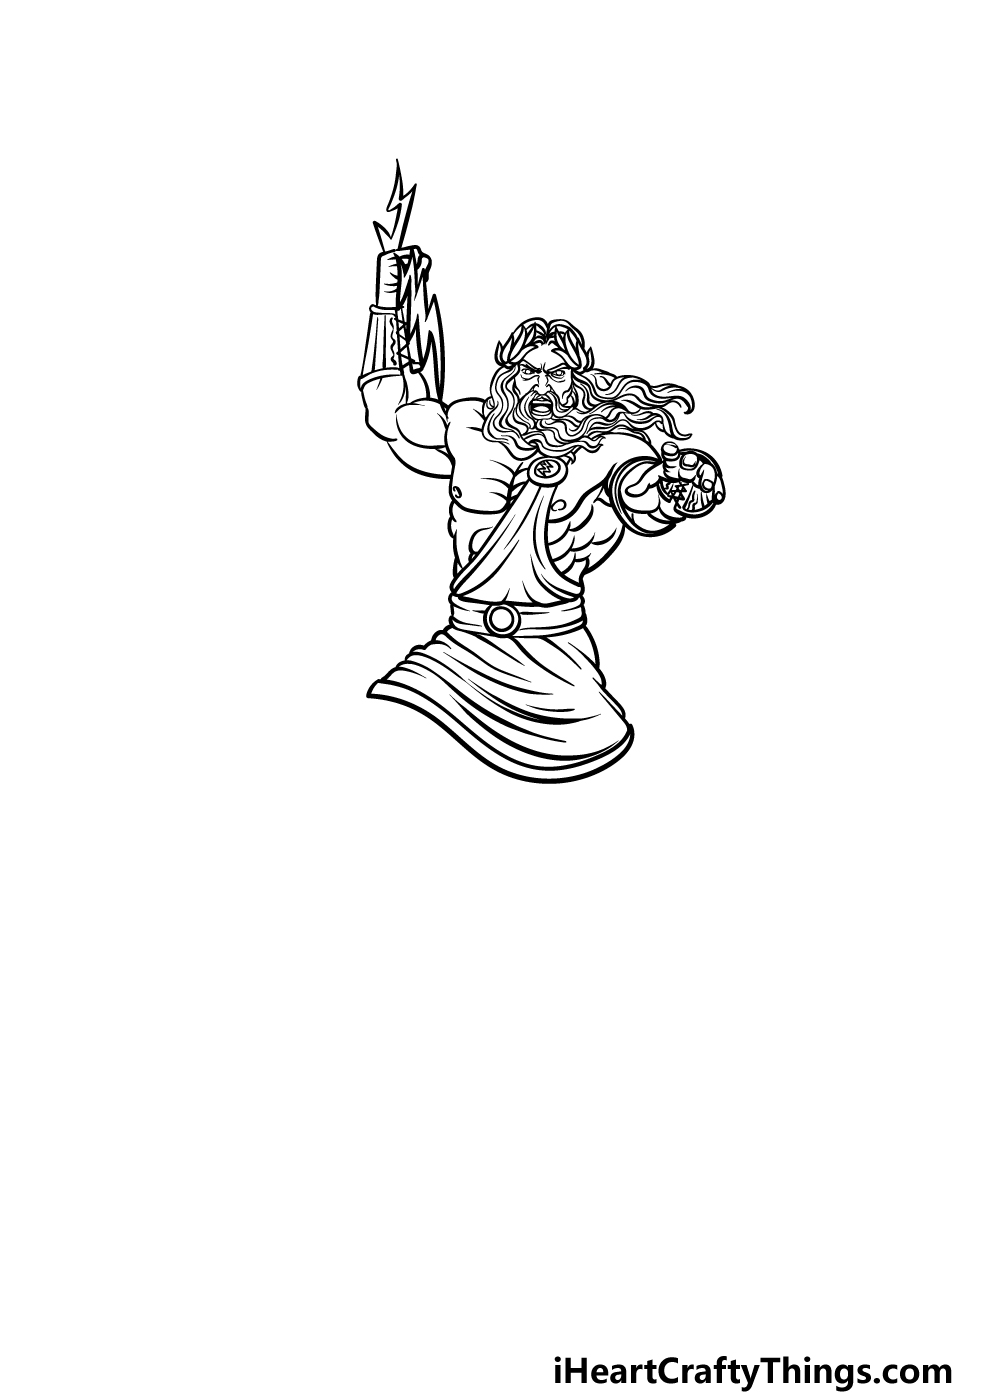
Earlier in this guide on how to draw Zeus we mentioned that he is often associated with lightning bolts.
He was also said to hurl these lightning bolts as a weapon, so we will show him brandishing one in this part.
First, draw the top of the shoulder on the left, and then you can show his muscular arm grasping onto the lightning bolt above his head.
Once that arm is drawn, you can draw some details for his chest. Finally for this step, we can then use some curved lines for the bottom half of his toga that will be covering the tops of his legs.
Be sure to also draw a belt by using some circles and slightly curved lines.
Step 4 – Now, draw his legs
We will start drawing the legs for your Zeus drawing in this next step. Like his arms, his legs will be quite muscular. The one on the left will be raised a bit while the other is quite straight.
At the bottoms of his legs, we will also be drawing his sandals. These will be composed of lots of thin, curving shapes that wrap on his legs up to just below his knees.
Step 5 – Add the stormy base for the image now
For the next few steps of this guide on how to draw Zeus, we will be creating an impressive base for him that looks as if it is made of swirling storm clouds.
This is a step where you should try to copy the lines exactly as they appear in the reference image, as it can get quite tricky.
You can use some curved and rounded lines starting around his foot on the right and then extend them outward for the rest of the base.
We will then finish it off in the next step along with some final touches.
Step 6 – Next, complete the base for Zeus
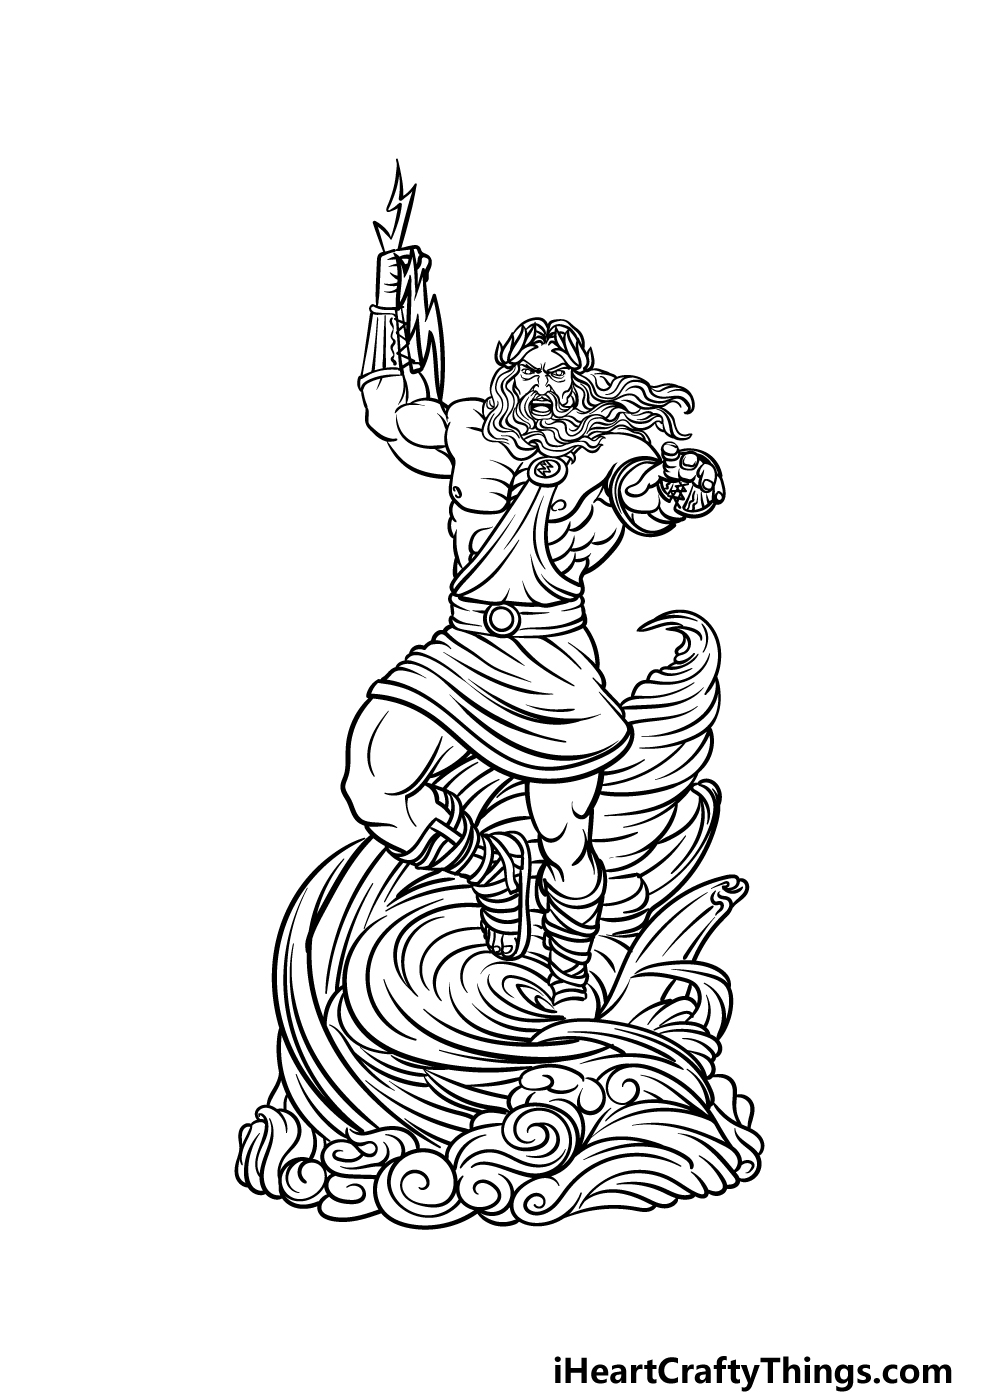
You can now finish off the base for your Zeus drawing in this step. To do this, simply keep extending what you started for the base in the prior step to extend the base on the left-hand side.
Once you have drawn this side of the base, you’ll be ready to color him in! First, be sure to add any background elements or extra features that you may want for the image.
Step 7 – Finish off your Zeus drawing with some color
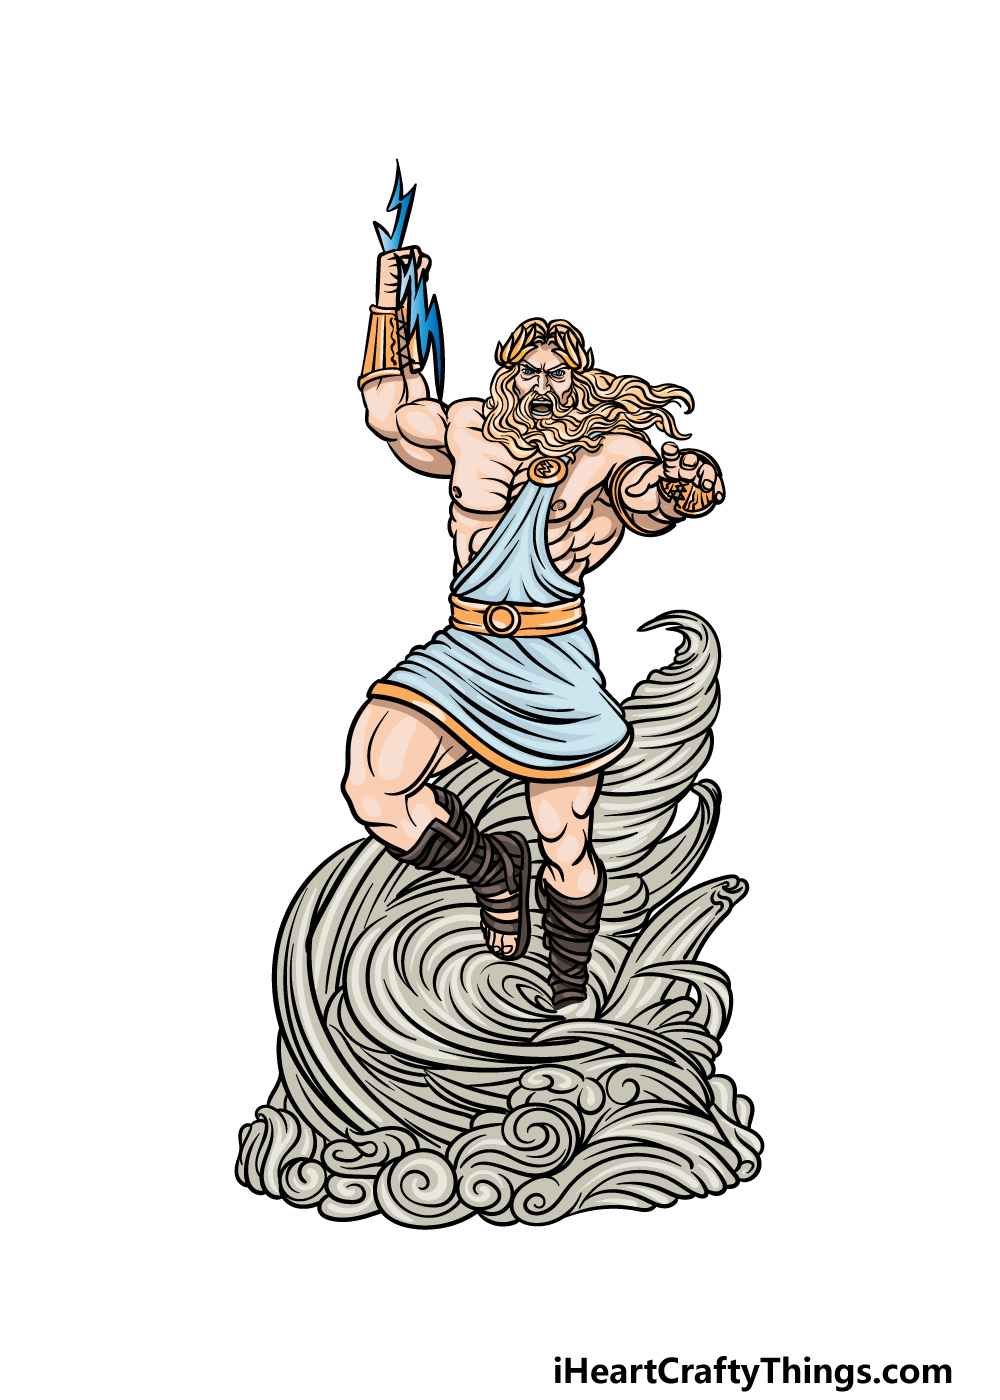
Now it’s time to color your picture in for this final step of our guide on how to draw Zeus.
For our reference image, we kept the colors a bit more muted, using colors like yellow for his beard and elements of his clothes to blues for the fabric of his toga.
We finished off y using a beige color for his stormy base.
These are the colors that we chose, but this is your chance to get creative and show off what colors you think would suit this awesome picture!
Do this to take your Zeus drawing to the next level
Create some artistic lightning as we make this Zeus sketch even better!
We created a stunning base for this Zeus drawing, but you could add even more to it. The base is swirling like clouds or a whirlwind, and now that you have mastered drawing it you could extend it.
If you have a lot of patience, you could even fill the page with this windy structure! That is one example of how you could extend the base, but you could incorporate any other elements you like.
What else could you add to finish off this awesome image?
Zeus is one of many Greek gods, and you could add some of these famous characters to this image. This would be quite an undertaking given how detailed this drawing of Zeus is.
You could prepare for adding more characters by looking at pictures online and doing lots of sketches. It would be a challenge, but the end result would definitely be worth it!
What are some characters from mythology that you would like to incorporate into this image?
Earlier, we mentioned extending the base that Zeus is on into a full background pattern. This is one way of filling the background of this Zeus sketch, but you could also design other fantastic settings.
You could take inspiration from your favorite stories from Greek myths or even create some scenes of your own.
You can tell quite a story using just your visuals, so you should certainly let your imagination run wild!
Finally, you can use colors to great effect with any drawing. The colors and mediums you choose for this Zeus drawing are no different!
We covered a few colors and mediums you can use in the guide, but this is an area where you can really have fun experimenting. Mixing different mediums can also be a fun way to bring focus to certain areas.
For example, you could use some bright yellow pens for the lighting bolt while keeping the rest of the image more muted.
Your Zeus Drawing is Complete!
We hope that you had a great time working on this incredible depiction of the god of thunder in this guide on how to draw Zeus!
There were loads of details in this picture, so we aimed to make it easier and more manageable by breaking it down into easier steps to follow.
Now you can show off how you would finish this image by adding your own details, elements, colors and art mediums.
Then, when you’re ready to take on a new drawing challenge you can visit our website for more. We upload new guides often, so be sure to check in often!
We would love to see your awesome depiction of this image, so please share your finished Zeus drawing on our Facebook and Pinterest pages for us to see!