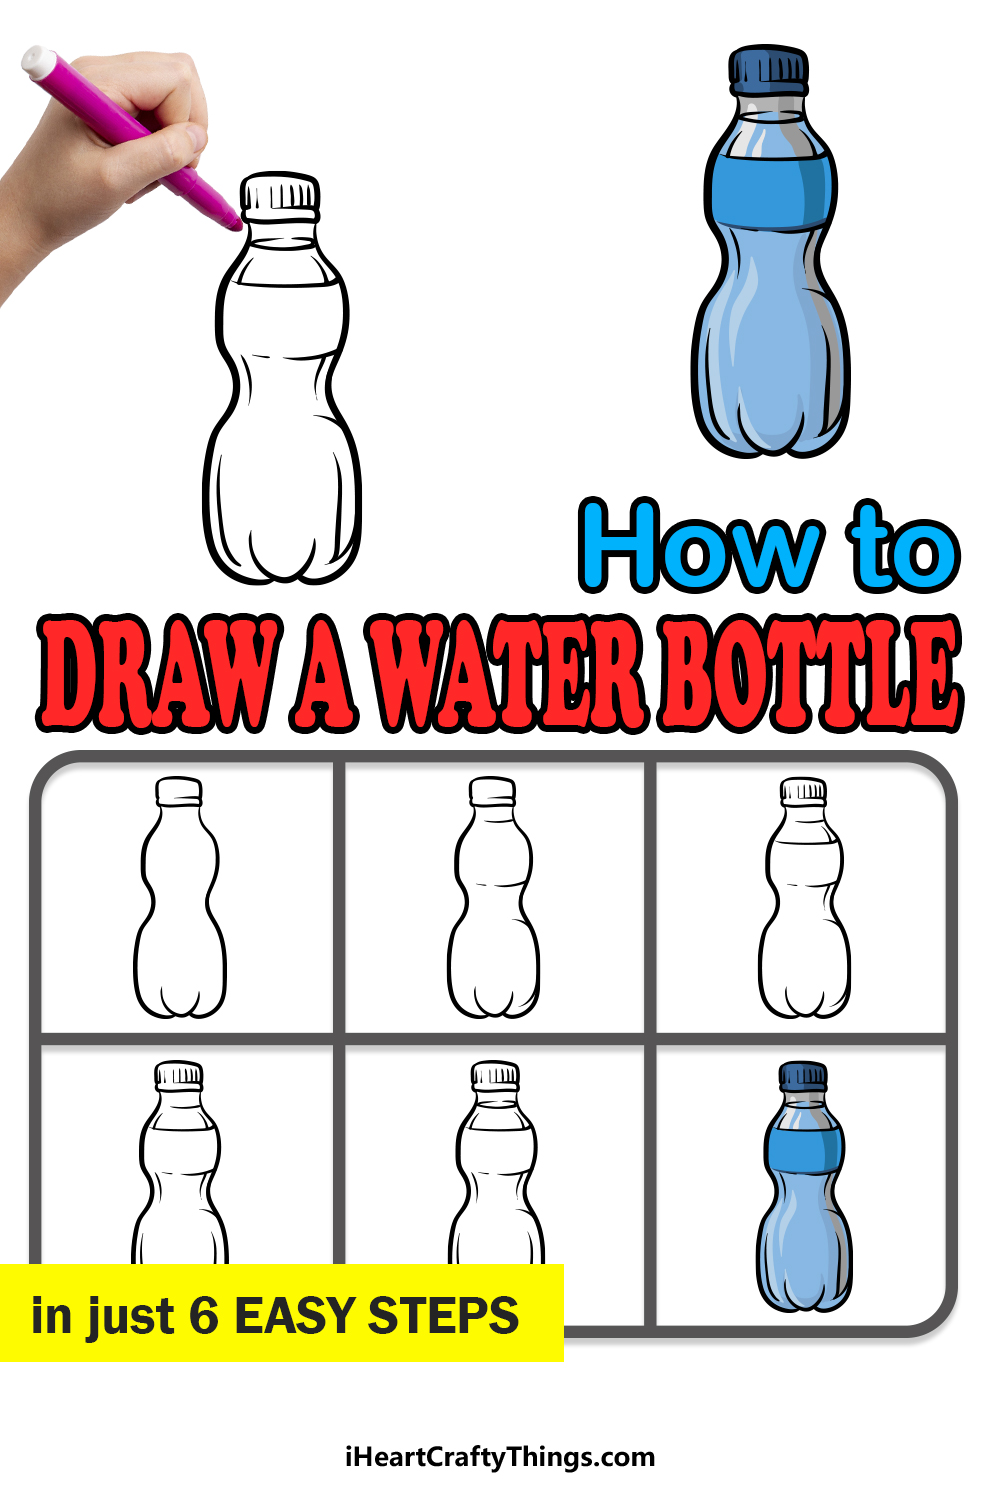
This guide on how to draw a water bottle will quench your creative thirst! Follow this tutorial for kids to discover the easiest way to make this drawing.
Water is an incredibly important resource that we need to consume every day. It’s not always easy to remember to hydrate, but keeping a water bottle with you is a great way to make it more accessible.
You may also want to make some drawings featuring a water bottle but find that even though it’s such a common object, drawing it convincingly is a tricky task.
This guide will walk you through a few steps so that you can see how it’s done. By the end, you will have a drawing that you can customize and add to in any ways you can imagine.
Discover How To Make Your Water Bottle Drawing
How to Draw A Water Bottle – Let’s Get Started!
Step 1
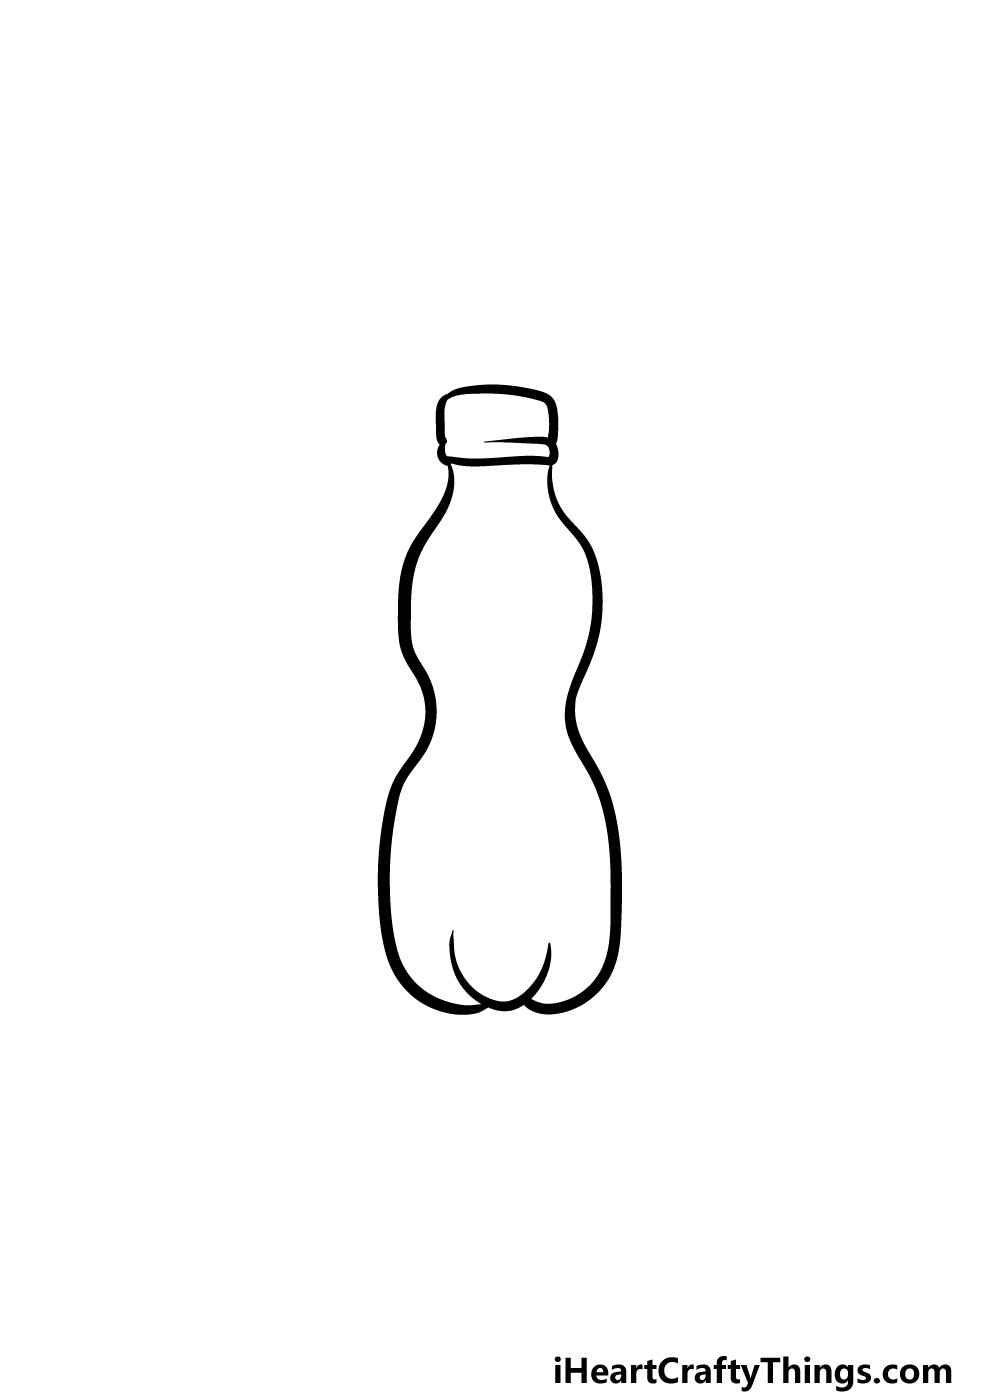
In this first step of our guide on how to draw a water bottle, we will be drawing the outline of the bottle itself. We won’t be doing any details yet, but rest assured that we will be adding those in later steps! For now, we will be using some curved lines for the bottle.
The cap of the bottle will be a rounded rectangle with a rim at the bottom, then the bottle will extend down from that and the first of those curved lines will be drawn for the first bulge of the bottle.
Then, it will curve inward and then out again into more curved lines. Finally, there will be several rounded shapes at the base of the water bottle, as shown in the reference image.
Step 2 – Draw some details for the water bottle
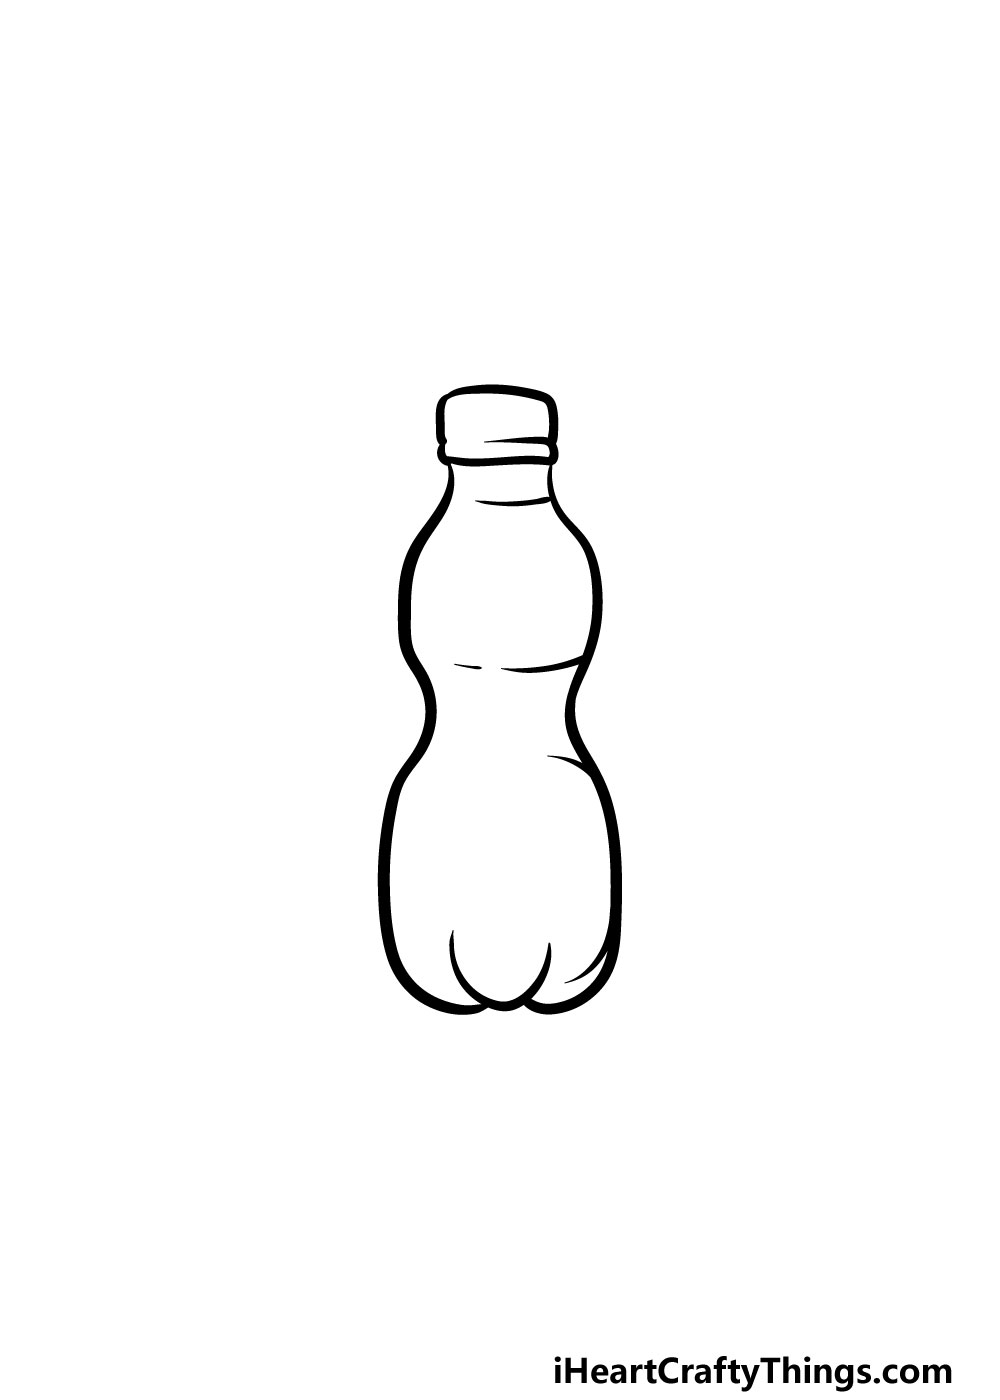
You have the outline of your water bottle drawing done, so now we can start to draw the first details in this second step.
The details will be subtle for now, but they will get more complex later on. For now, draw some short curved lines horizontally onto the bottle, and then use some on the lower half.
The details we added will form the label of the bottle as well as adding some shape definition to the bottle. Then, we’re ready to move on!
Step 3 – Keep adding some subtle detail
Continuing on with this guide on how to draw a water bottle, we will be adding even more detail to your drawing. First, you can draw some short, vertical lines onto the cap of the bottle.
These will form the ridges that create friction with your fingers so that you can turn it.
Then, you will be drawing another horizontal line onto the body of the bottle to create the top of the label. Later on you will be able to decorate that label if you would like, but for now we shall move on to the next step.
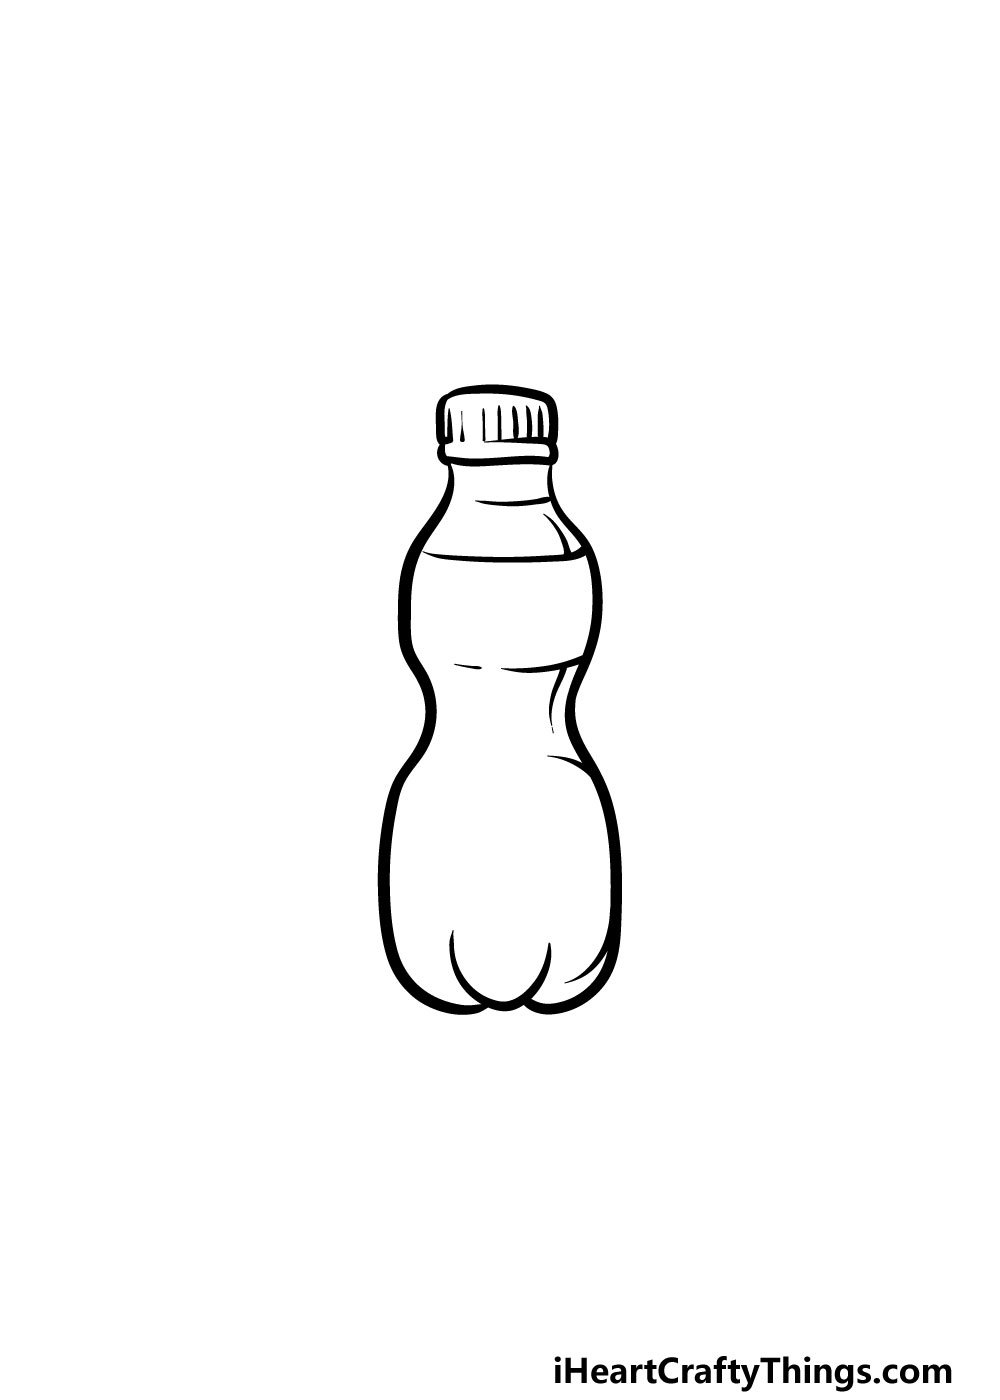
Step 4 – Keep adding some details
You’re doing a great job on this water bottle drawing! We will continue to add some detail in this fourth step.
As you can see in the reference image, we will be adding some slightly curved vertical lines to the bottle to give it even more shape definition. Details like this are subtle but make a big difference!
In the next step we will add some final details to finish it off before you start to color it in.
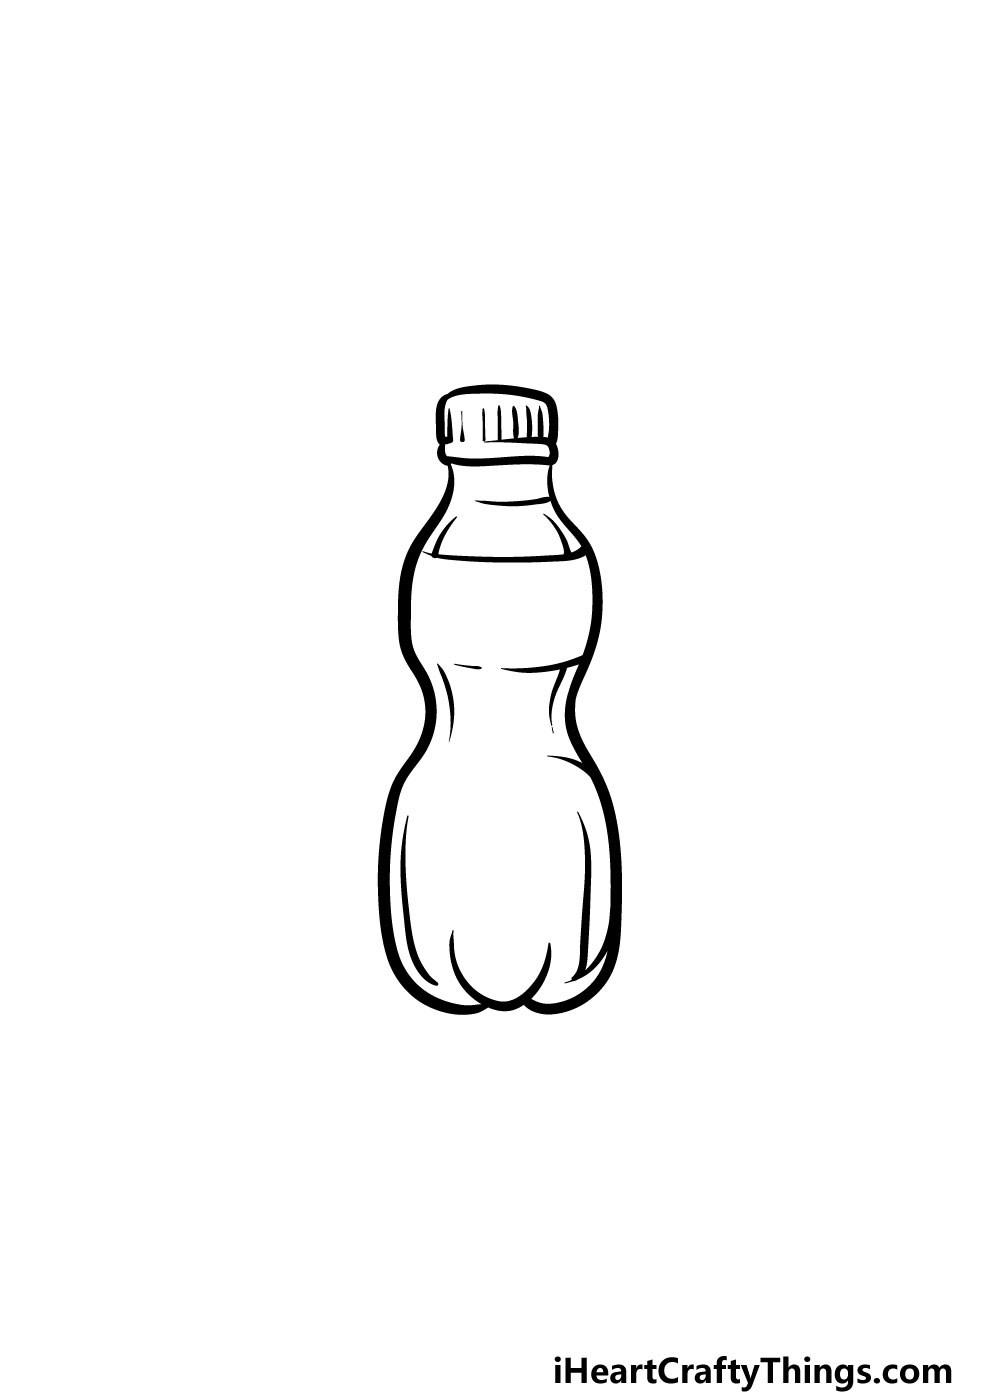
Step 5 – Add the final details of this water bottle drawing
It’s almost time for the final step where you will color in your picture, but first we will add some final small details in this step of our guide on how to draw a water bottle. First, you can add some curved lines near the top of the interior of the bottle to show where the liquid is filled up to.
That will do it for the final details, but that doesn’t mean you have to move on just yet! In this step you can also add some details of your own to finish off this picture.
We mentioned earlier that you could draw some detail on the label, and that would be a great way to personalize your picture. Perhaps you could create your own label design!
Then, you could try out some ideas such as drawing a background and other objects. Maybe you could show us what kinds of other beverages or foods you would enjoy with whatever this water bottle contains. Be sure to get creative and have fun with it!
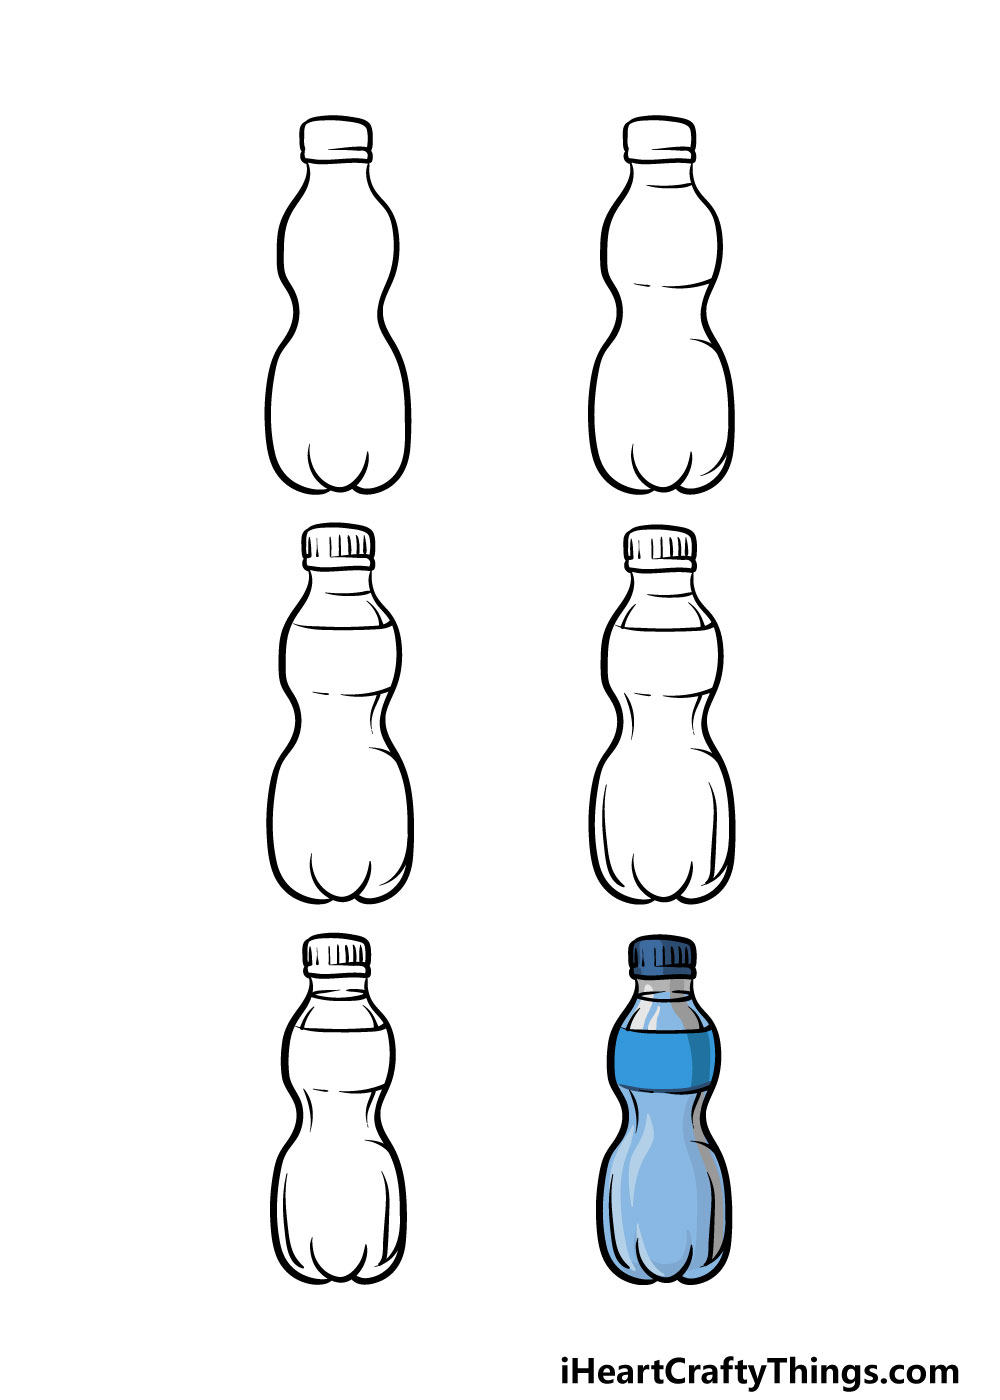
Step 6 – Finish off your water bottle drawing with some color
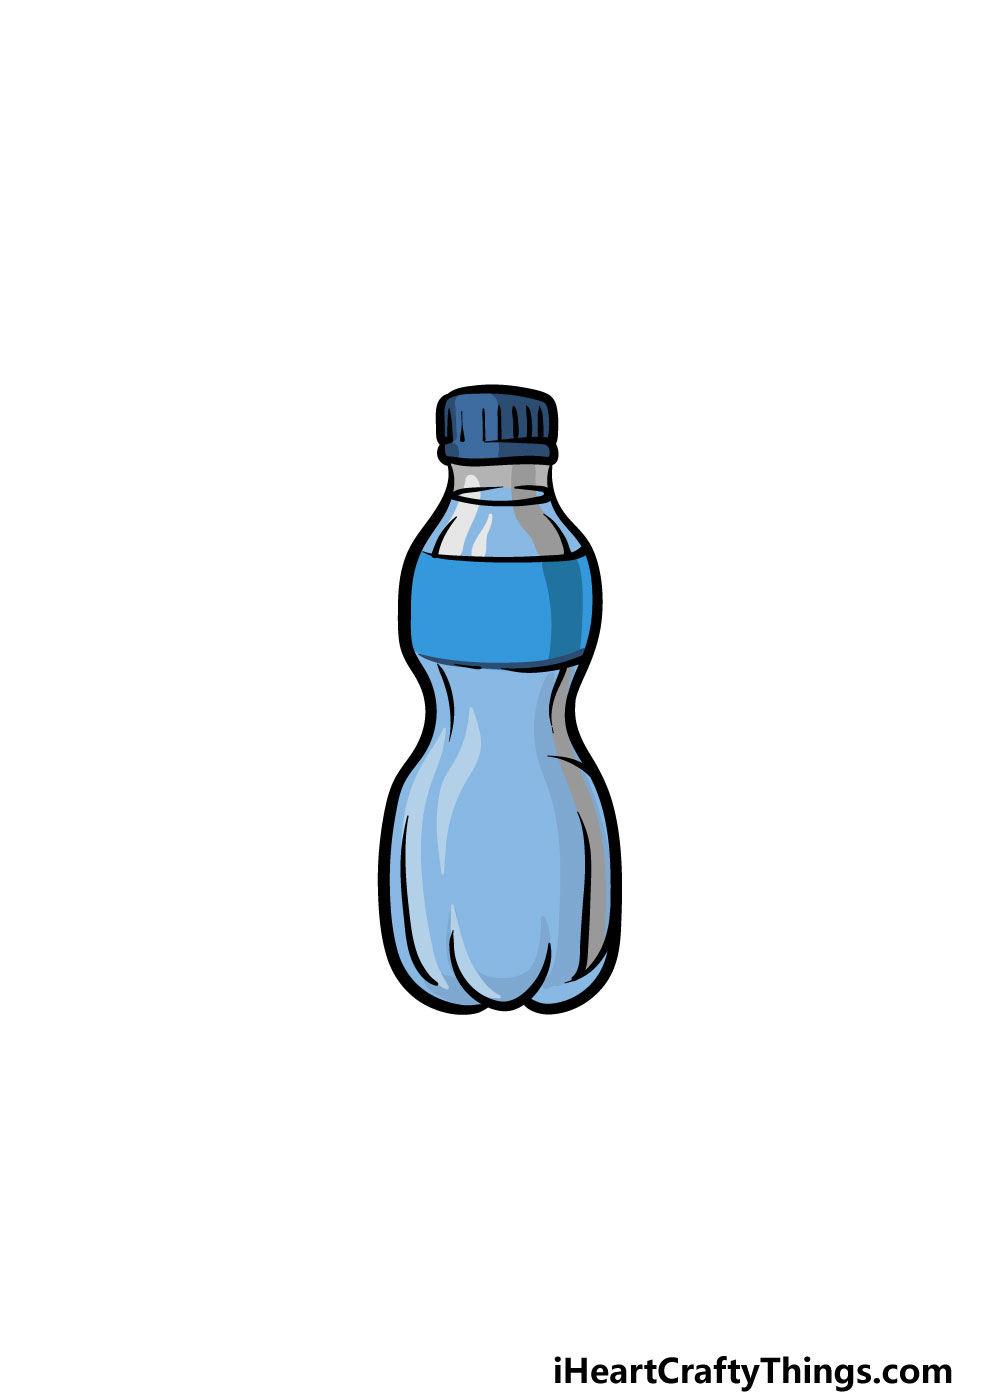
This is the final step of your water bottle drawing, and this is the one where you get to have fun coloring in your artwork!
In our reference image, we used different shades of blues and light greys to color in the picture, but that is just a suggestion.
You could use any colors that you love to color this in, as bottles will usually have bright and vibrant colors decorating them.
Also, you could show that this bottle contains something other than water. Maybe you could use some shades of brown to show that there is some tasty cola in this bottle.
You can also have fun with the art mediums you choose for this image. Watercolor paints and colored pencils are great for a more subtle, muted look.
On the other hand, acrylics and colored pens are perfect for brighter shades. What colors and art mediums do you think you will use for your image?
4 More Ways To Make Your Water Bottle Drawing Unique
Let your creativity flow as we show you some tips for this water bottle drawing!
In this guide, we created a bottle that holds water, but it could be fun to show the bottle holding other liquids. For example, you could turn this water bottle sketch into a soda bottle.
If you were to do this, it could be as simple as changing the color of the plastic portions to something darker. You could also change the label to match the label of your favorite soda brand.
What other drinks can you think of that you could use to change this water bottle?
Another fun way to take this drawing of a water bottle in a whole new direction would be by adding a background. There are so many fun ideas you could do!
Water bottles will often be used at sporting events to keep athletes and players hydrated. That means that creating a background featuring a field or other sporting activity could be a good place to start!
What are some other locations you could use as a background?
No matter where you’re enjoying some cool water, there are some other food and beverages you might enjoy alongside it.
You could use some of these items to make your water bottle sketch even more interesting to look at.
These could include some fruits or maybe something like an energy bar. It’s up to you, and you can show off what you would enjoy with a nice bottle of water!
Portraying transparent surfaces in a 2D drawing can be tricky, but there are some art tools and techniques you can use. If you want to make the plastic of this water bottle look transparent, you can use softer mediums.
These could include some colored pencils or maybe some watercolors. Another good way to show that something is transparent is by having an object behind it.
The way the object will be distorted behind the plastic helps to create this effect really well! What other tricks do you have for this drawing?
Your Water Bottle Drawing is Complete!
With that, you have completed this guide on how to draw a water bottle! Objects like this can be deceptively tricky to draw, so we hope that this guide showed you that it can be fun and easy to draw when you break it down into smaller steps.
Now that you have mastered this guide, be sure to show us what you can do with your own colors and details! There are many ways you can be creative with it, so we can’t wait to see what you do.
The drawing fun continues on our website! We have some awesome guides there, and the collection grows all the time. Be sure to log in often to make sure you find your new drawing challenge soon!
When you have finished up your water bottle drawing, we would love to see it! You can share your artwork on our Facebook and Pinterest pages for us to admire.