There are few things as relaxing as sitting beside a tranquil lake and watching the water ripple in front of you.
It’s even better if you can enjoy it from the deck of a cozy cabin with your morning coffee! It can be great to get away from it all by a beautiful lake, but sometimes it’s not always feasible to do so.
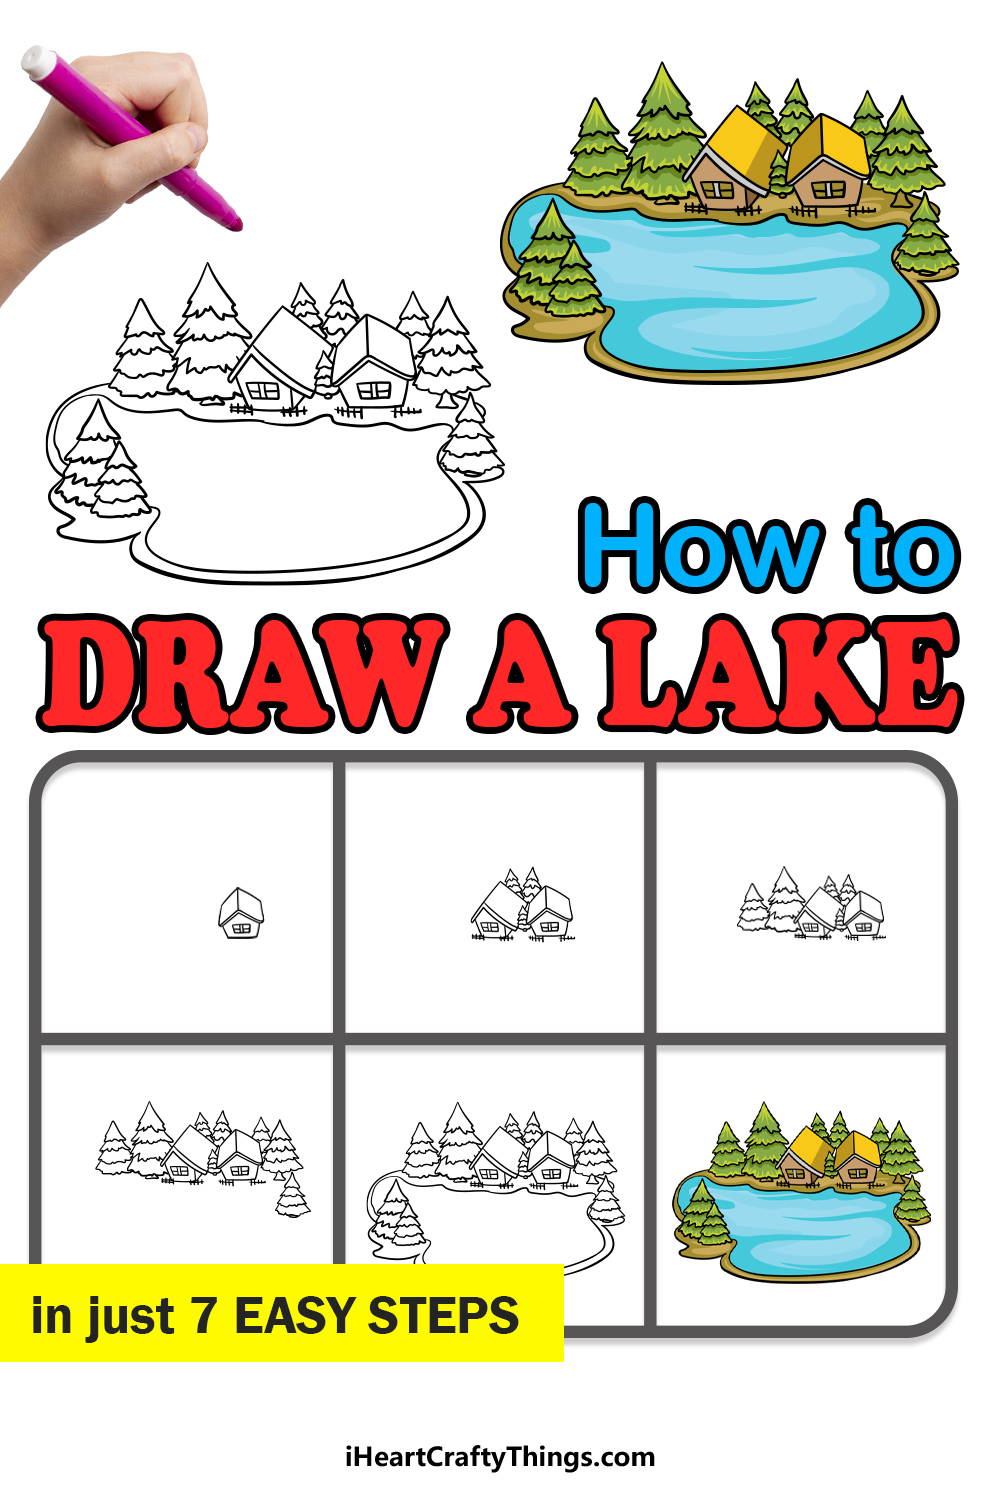
Sometimes the next best thing is to learn how to draw a lake! With the help of this guide, you will be able to do just that.
We hope that you enjoy this step-by-step guide on how to draw a lake!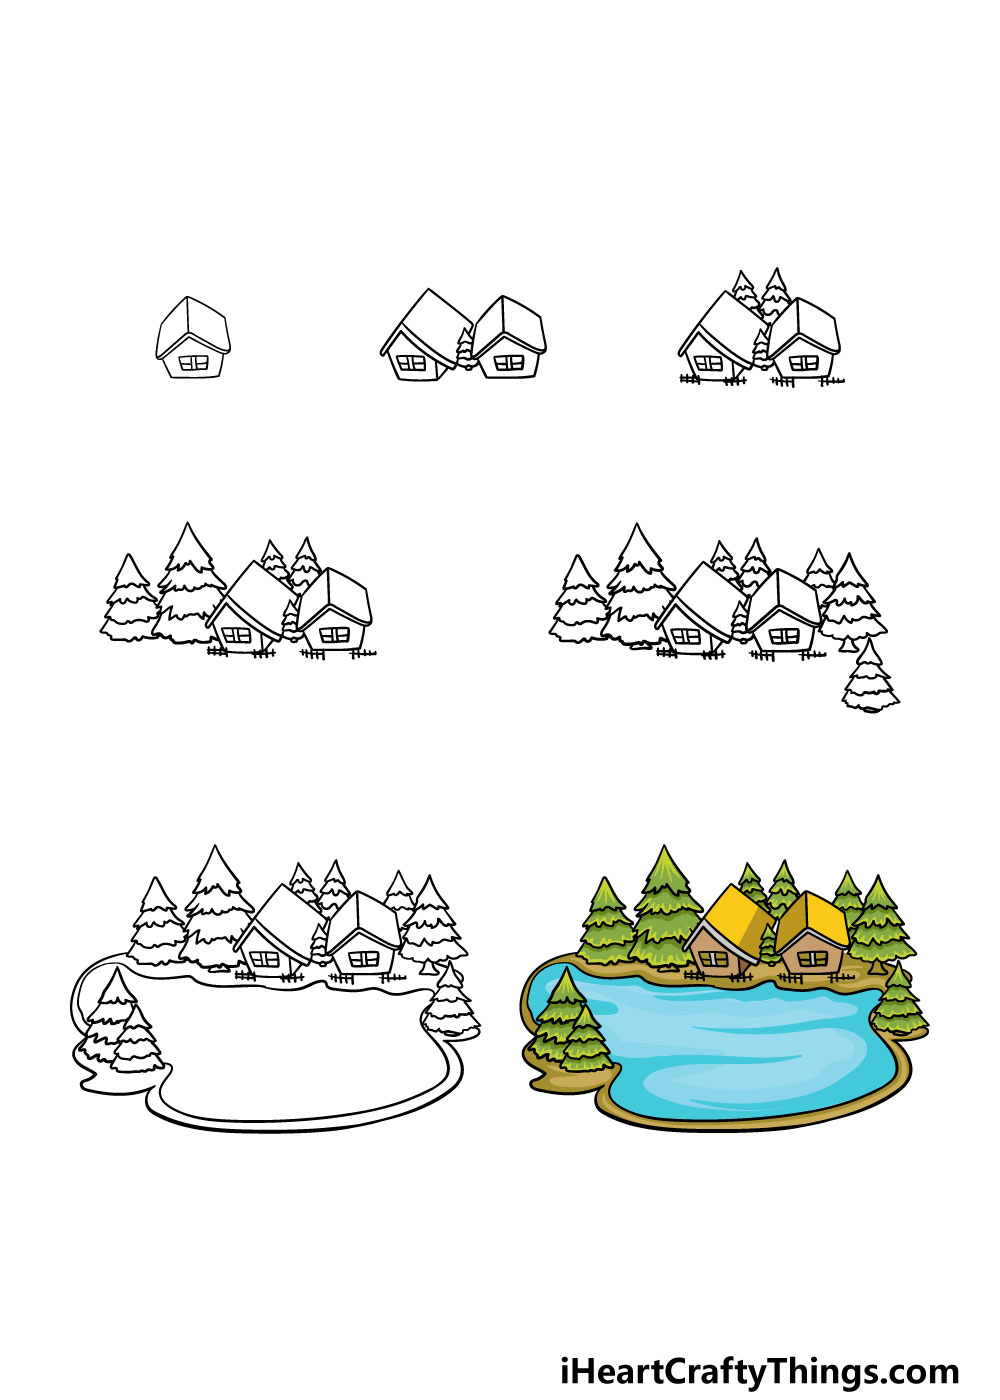
How to Draw A Lake – Let’s Get Started!
Step 1

We won’t just be drawing a lake in this guide on how to draw a lake, we will also be drawing some houses and trees for the surroundings.
For this first step, we will be drawing one of the little cabins on the lake.
We’re viewing this lake from a bird’s eye view, so that is worth keeping in mind as we draw the cabins at an angle.
To draw the first cabin, you can use some straight lines to draw the walls, window and roof of the cabin. That’s all there is to it in this step, and you’re ready to move on!
Step 2 – Draw the next cabin and first tree

Now that you’ve drawn one cabin for your lake, you should have no problems drawing the next one.
This cabin will look very similar to the first one, and you can also draw a nice pine tree between them.
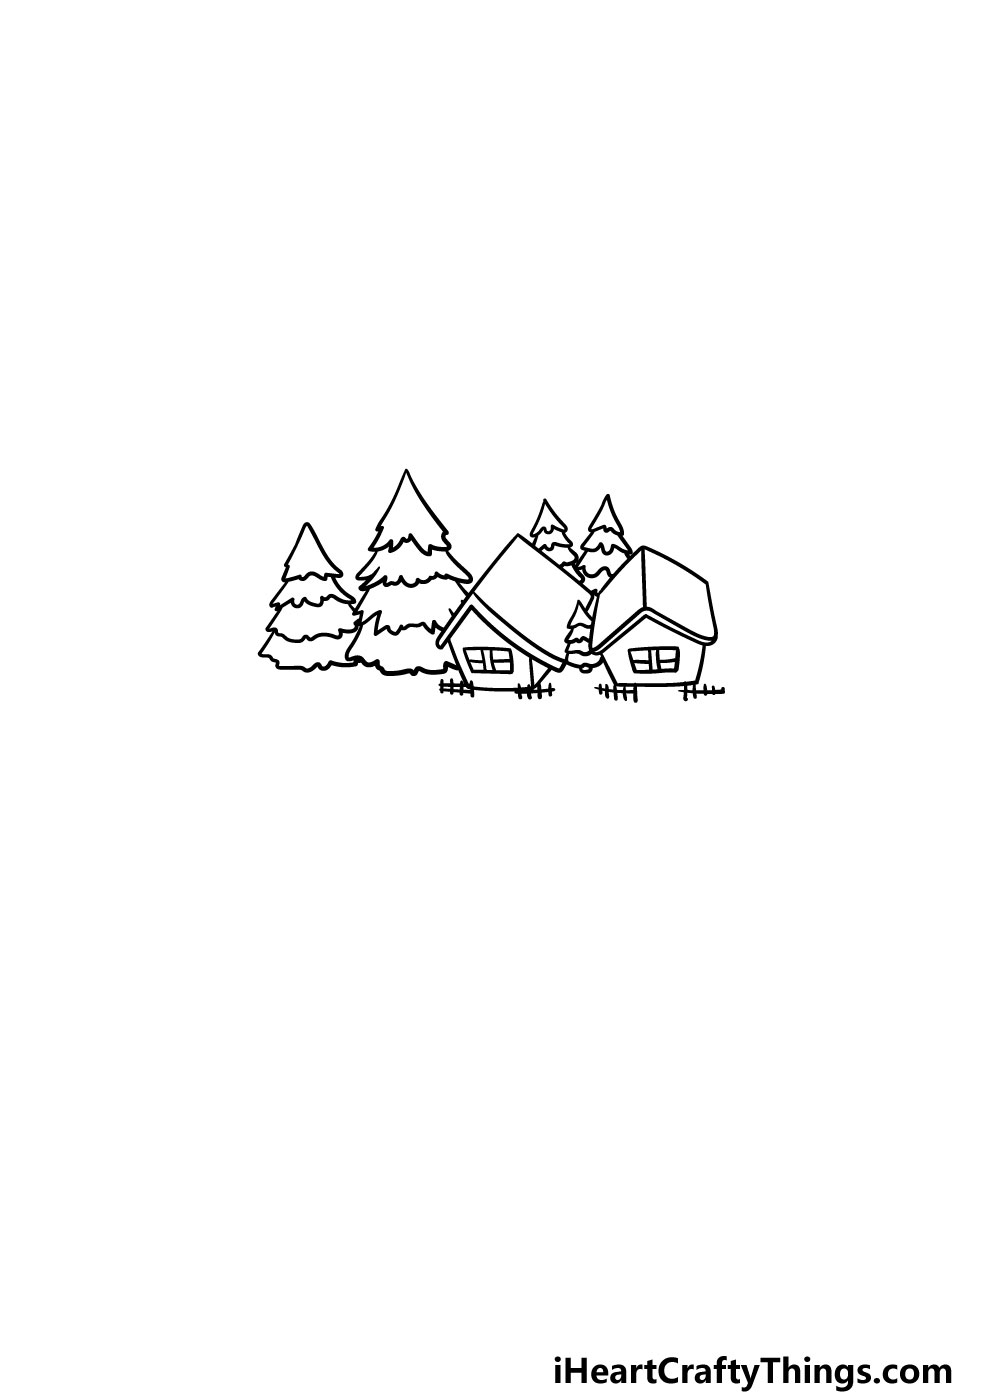
Step 3 – Add some more details for the cabins

You have the two cabins for your drawing done, and now you can add some more details around them in this step of our guide on how to draw a lake.
First, you can use some straight lines making a criss-cross shape in front of the cabins for some little fences in front of them.
Then, you can draw some more pine trees that are much larger behind the two cabins.
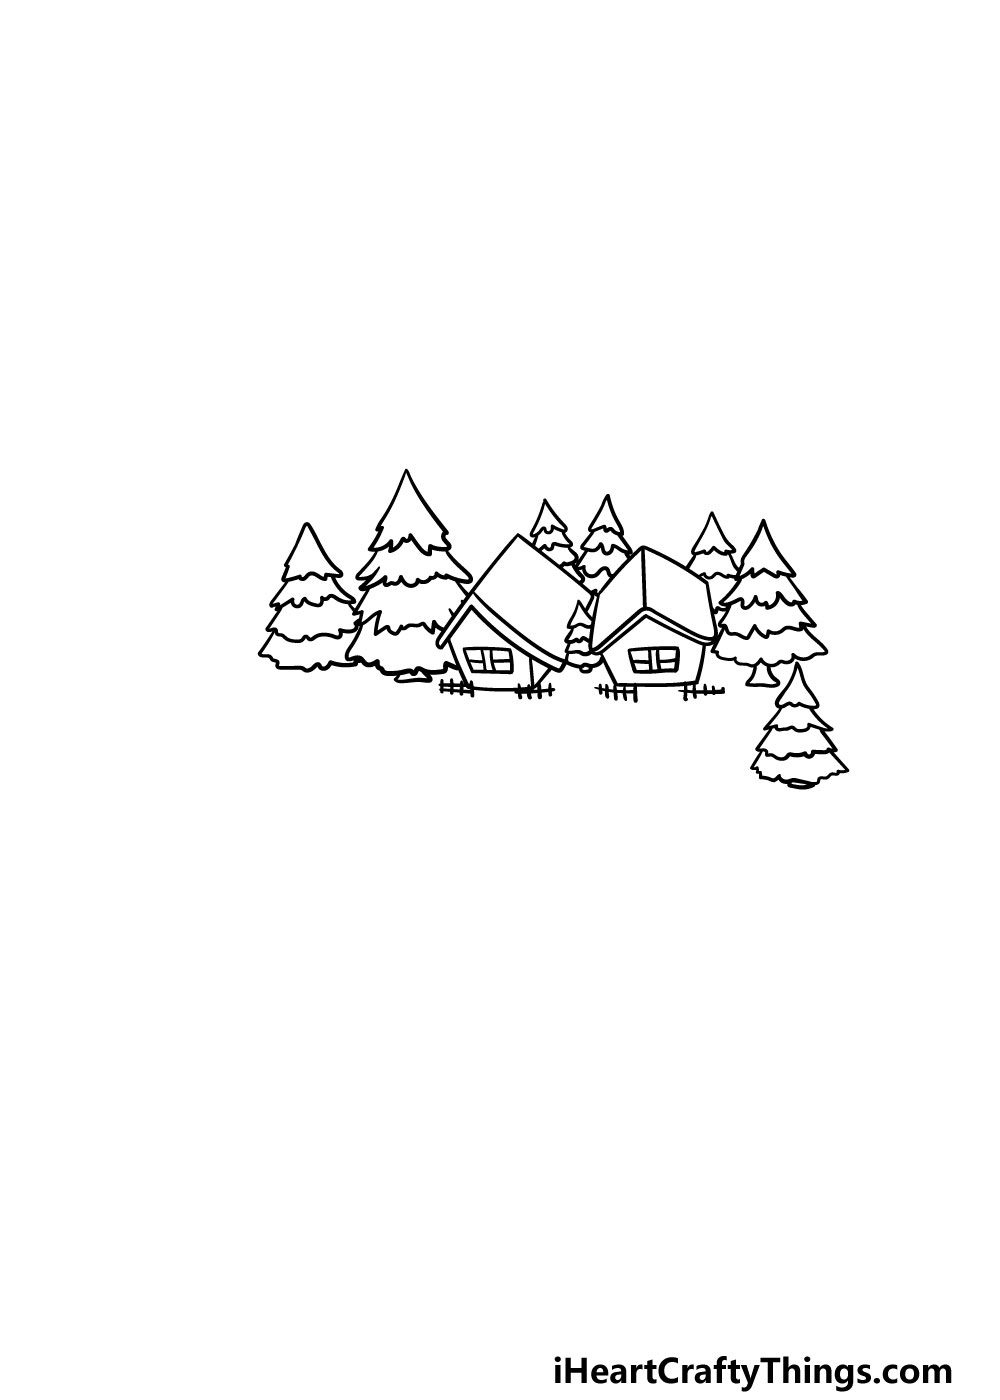
Step 4 – Continue drawing some trees
This lovely lake drawing you’re working on must be near a forest, because we are going to be adding some more trees in this step.
These trees are going to be the largest ones of all so far, and they will go to the left-hand side of the cabins.
Much like the previous ones, they will be drawn in several sections, each one getting smaller the higher it goes.
Step 5 – Add even more pine trees
This picture is already looking great, but it needs a few more trees to finish off these beautiful surroundings in this step of our guide on how to draw a lake!
For this step, we will be adding three more trees on the right-hand side of the lake.
We will be adding some more details in the next step, but before that you could add any details of your own such as even more trees and perhaps another cabin if you’d like!
When you’re ready, we have just a few more details to add.
Step 6 – Now, add the lake and final details
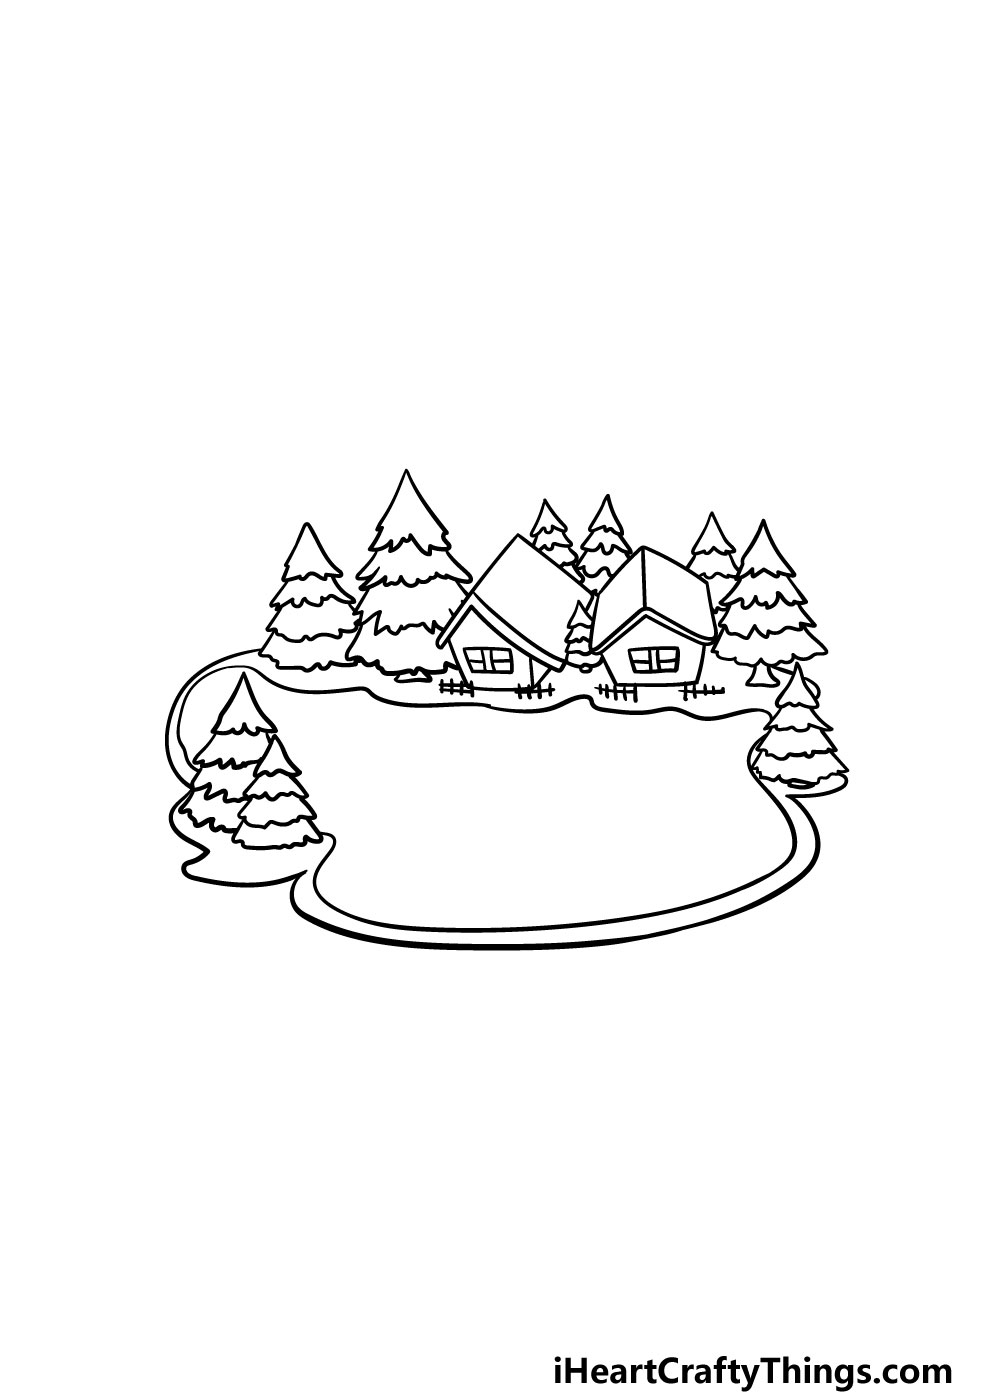
So far for your lake drawing, we have been drawing lots of different things but none of those things have included a lake.
We will be fixing that in this step, as now it’s time to draw the lake itself! To do this, you can use some curved lines to make the outline of the lake.
Then, you can use more curved lines within the perimeter of that outline.
Then, you can add some more trees on the left-hand side of the lake. Once you have these details drawn, you’re ready for the final step of this guide!
Before you move on, however, you can add any details of your own that you may want for it.
We mentioned drawing more trees or cabins, but what else can you think of for this picture?
Perhaps you could add to the background by drawing some extra parts for it. Maybe you could add some beautiful mountains or clouds above the lake for a few ideas.
What can you think of to finish off this lake drawing before you add color?
Step 7 – Finish off your Lake drawing with some color
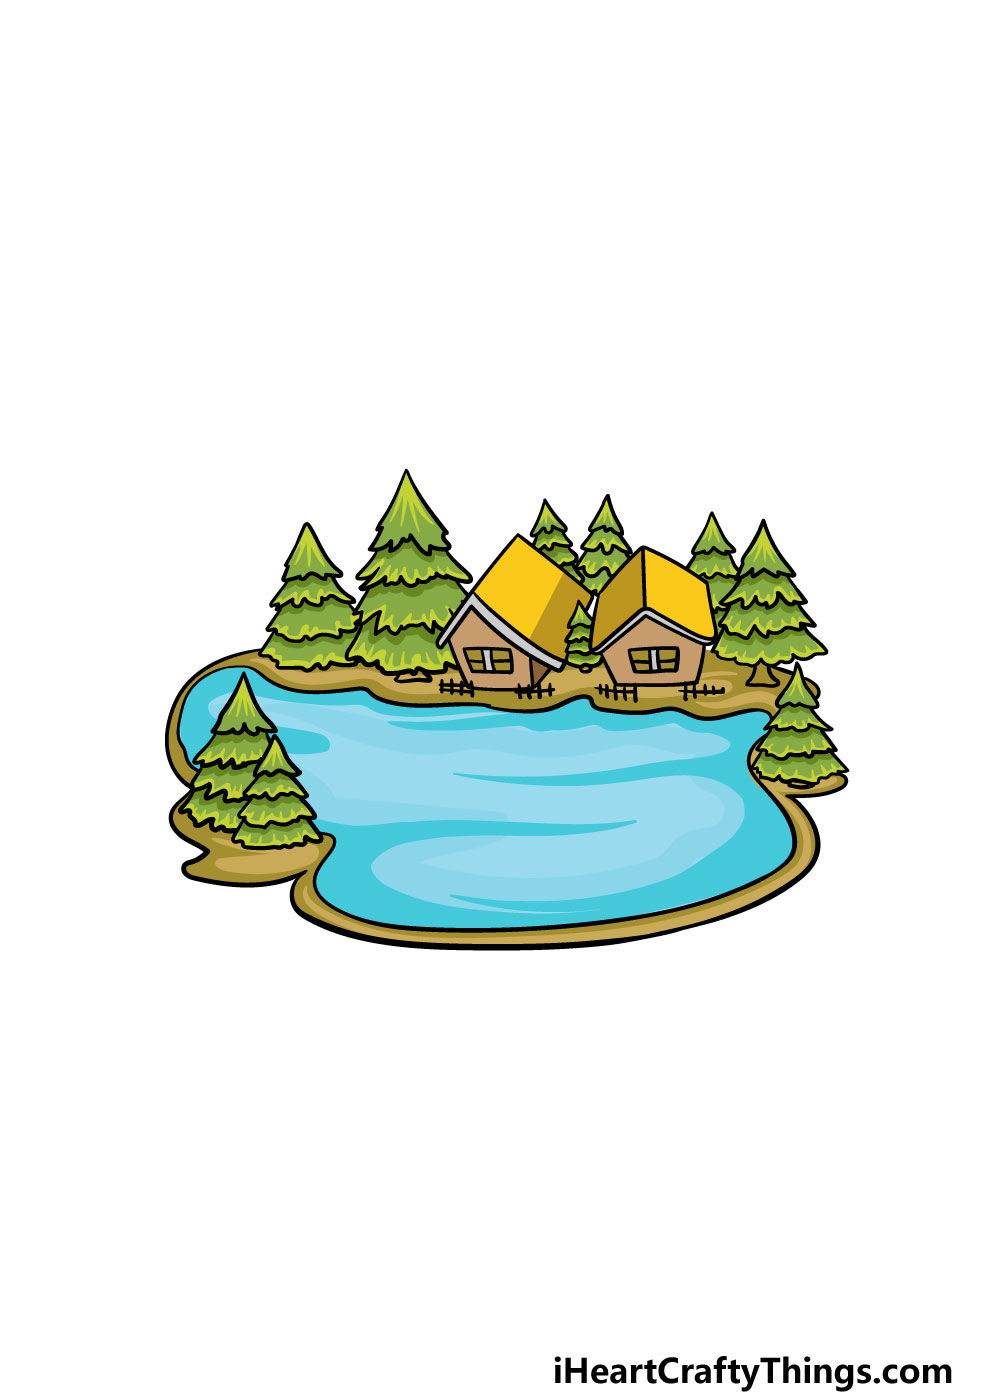
You have reached the final step of this guide on how to draw a lake! You’ve done a great job on this drawing, and now you get to relax with some coloring fun.
We have shown you one way that you could color in this drawing, but this is merely a suggestion. You should use all of your favorite colors to fill in this picture and get creative with it!
Once you know how you would like to color it in, you can then have some fun choosing which art mediums and tools you’ll use for it.
For a drawing like this, it can look great to use some softer mediums such as watercolors and colored pencils to fill it in.
That’s just one way that you could go about it, and it would also look amazing if you used some brighter mediums like acrylic paints or colored pens.
We can’t wait to see what you choose to color it in!
4 More Ways To Make Your Lake Drawing Unique
Take a dive into these fun and easy tips we have for your lake sketch!
This tranquil drawing of a lake has many pine trees surrounding the lake. These look great, but you could also add some more trees to fill out the scene.
You could include some more pine trees, but if you love other kinds of trees then they would also look good in this lake setting!
Can you think of any other kinds of trees, plants and other natural elements that you could add here?
This lake has two small cabins bordering it, and you could add different kinds of buildings and man-made features to make it even more inviting.
This could be as simple as adding some more cabins that look similar to the ones already included. You could also add some with different designs or add structures such as a pier.
These are just a few of the man-made structures you could add to make this a lake paradise. You could even remove all man-made structures if you want it to be completely natural!
If you do decide to keep some man-made structures in your lake drawing, you could draw some humans enjoying the lake. This would be a great way to add all sorts of fun details and adventures!
Even if the humans look small in the grand scheme of the design, you could still portray them in all sorts of fun poses and activities. How many humans would you add to the scene?
Finally, you could extend the background of your lake sketch even further by adding more to the landscape. There are so many ways you could do this to make it even more stunning.
For one example, you could make the lake an even larger part of the scene and add some more trees around it.
Or, maybe you may want to add some majestic mountains and clouds to the background to make it even more impressive.
What other features could you use to extend the landscape?
Your Lake Drawing is Complete!
With the final elements drawn and all the colors complete, that means that you have reached the end of this guide on how to draw a lake!
We hope that your time working on this guide was as fun and relaxed as sitting by a tranquil lake!
Now that you have finished the guide, you can keep the fun going by personalizing the drawing even further.
We mentioned a few ideas that you could try such as drawing some extra scenery or more elements, but there are lots of things that you can do. You should really let your creativity flow and see what happens!
We have many amazing guides covering a wide variety of different subjects on our website. We look forward to seeing you there, and we upload new guides often so we hope to see you often!
Once your lake drawing is complete, we would love to see it! You can share it on our Facebook and Pinterest pages for us to see.