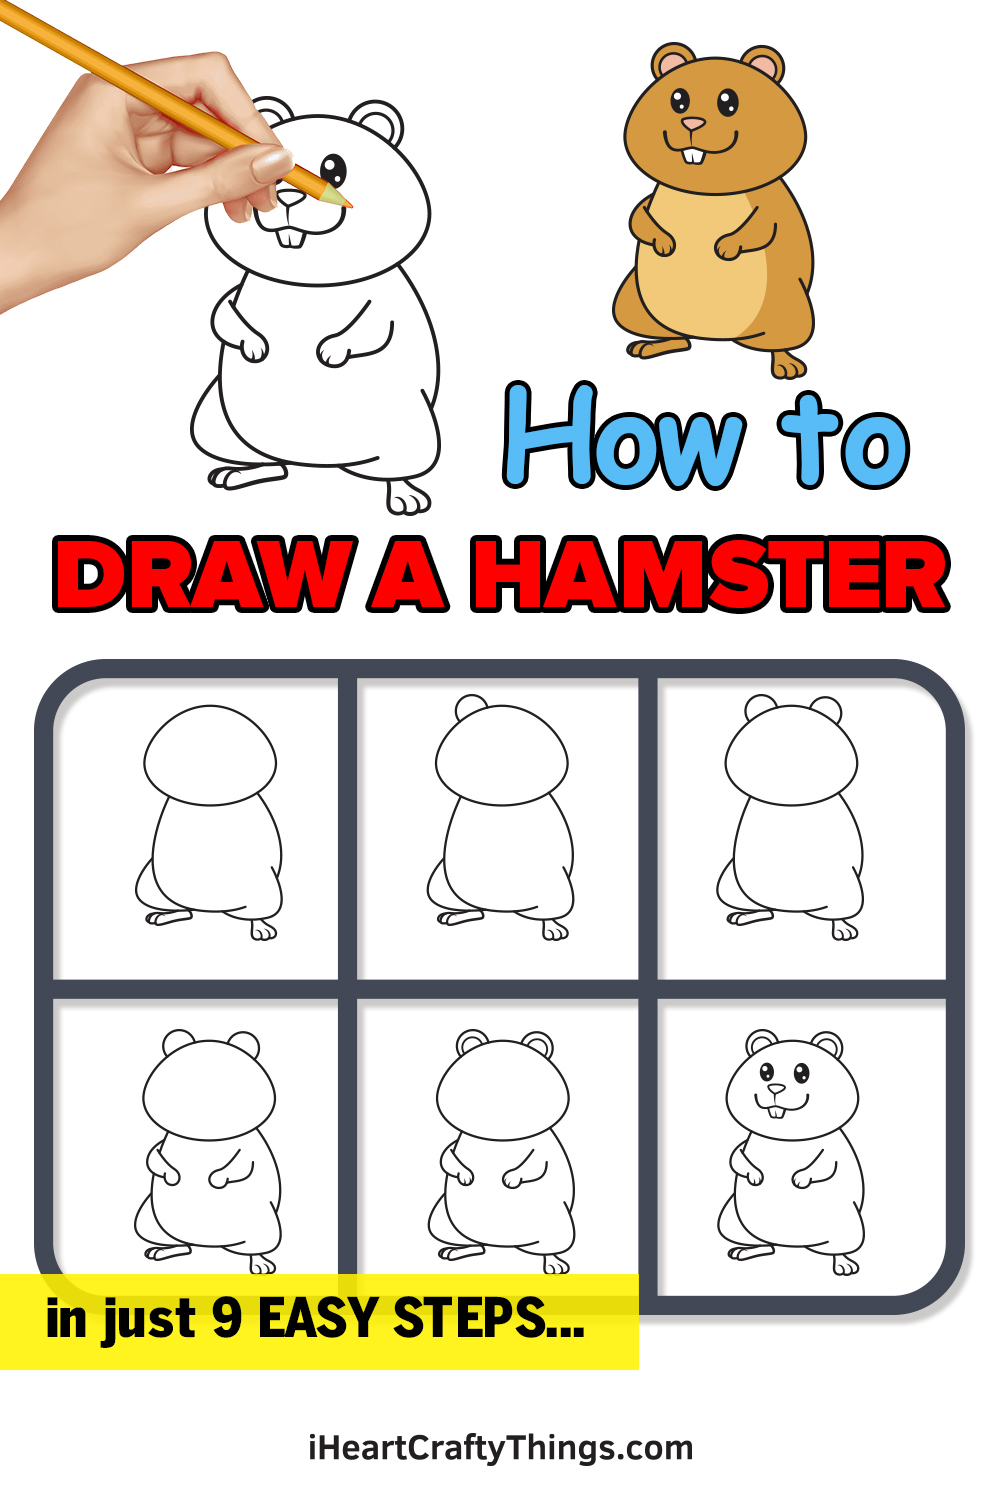
If you want to know how to draw a hamster, then all you need to do is follow the steps of this guide! This tutorial for kids will make this design much easier for you to make this adorable drawing.
Hamsters are so cute, and they make for wonderful little pets. They come in many different forms, colors and variations and they all have their own little personalities.
The cartoon hamster we will create in this guide is simple yet so cute! Throughout these steps, I will walk you through each and every step to make it as easy as possible.
Then, you can add your own ideas to the drawing. It could be fun to draw a background or add some toys and accessories for it to interact with.
It’s all up to you, and you can begin with this first step.
Watch And Learn How To Make Your Hamster Drawing
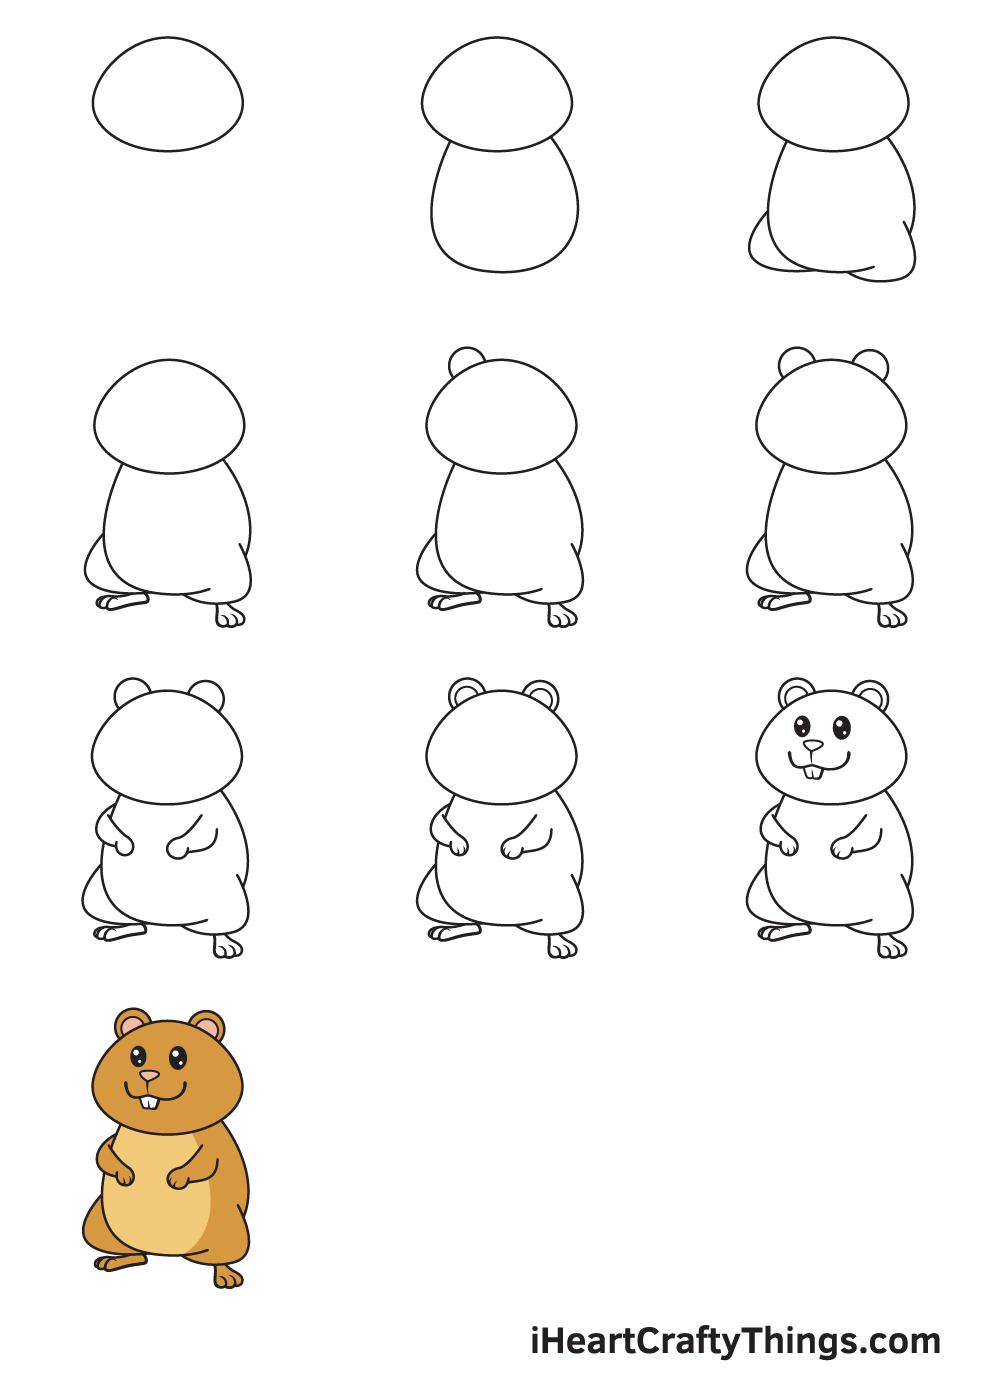
How to Draw a Hamster – Let’s get started!
Step 1
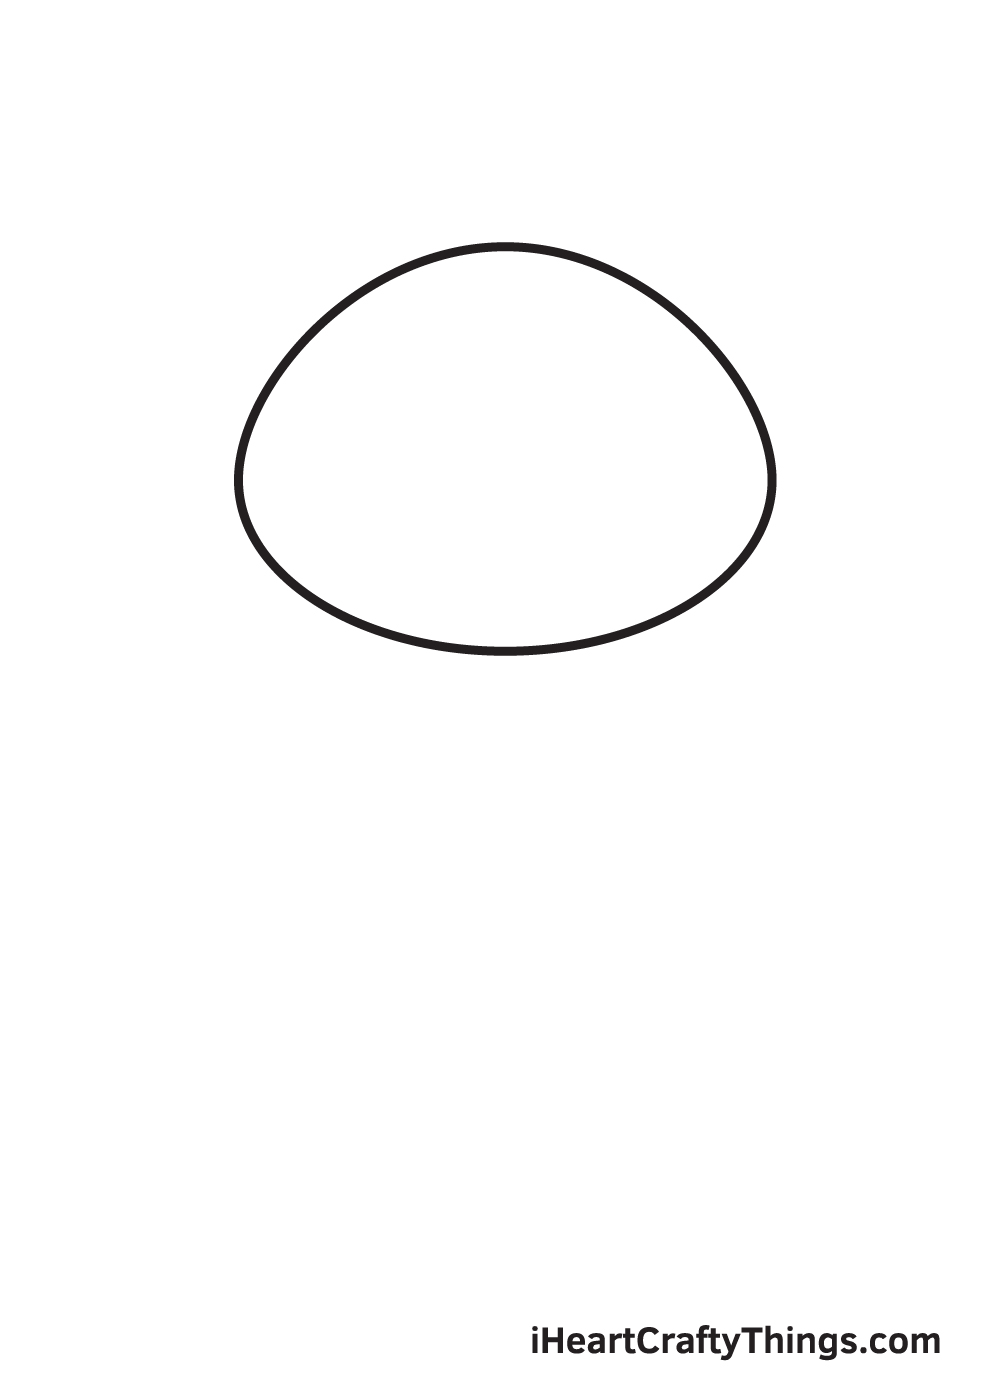
Starting on the upper portion of your paper, draw an irregular circle shape with greater width than length. This creates an outline of the hamster’s head.
Did you know that hamsters typically stuff food on either—or both—sides of its cheeks to carry the food back to their sleeping area.
The insides of their cheeks are particularly spacious, enabling them to store lots of food on their cheeks. Thus, don’t forget to emphasize the hamster’s cheeks when drawing its face!
To make sure that the hamster will be drawn in the center, create reference lines by drawing an intersecting horizontal and vertical line.
The vertical line above the horizontal line marks the spot where you should draw the outline of the head.
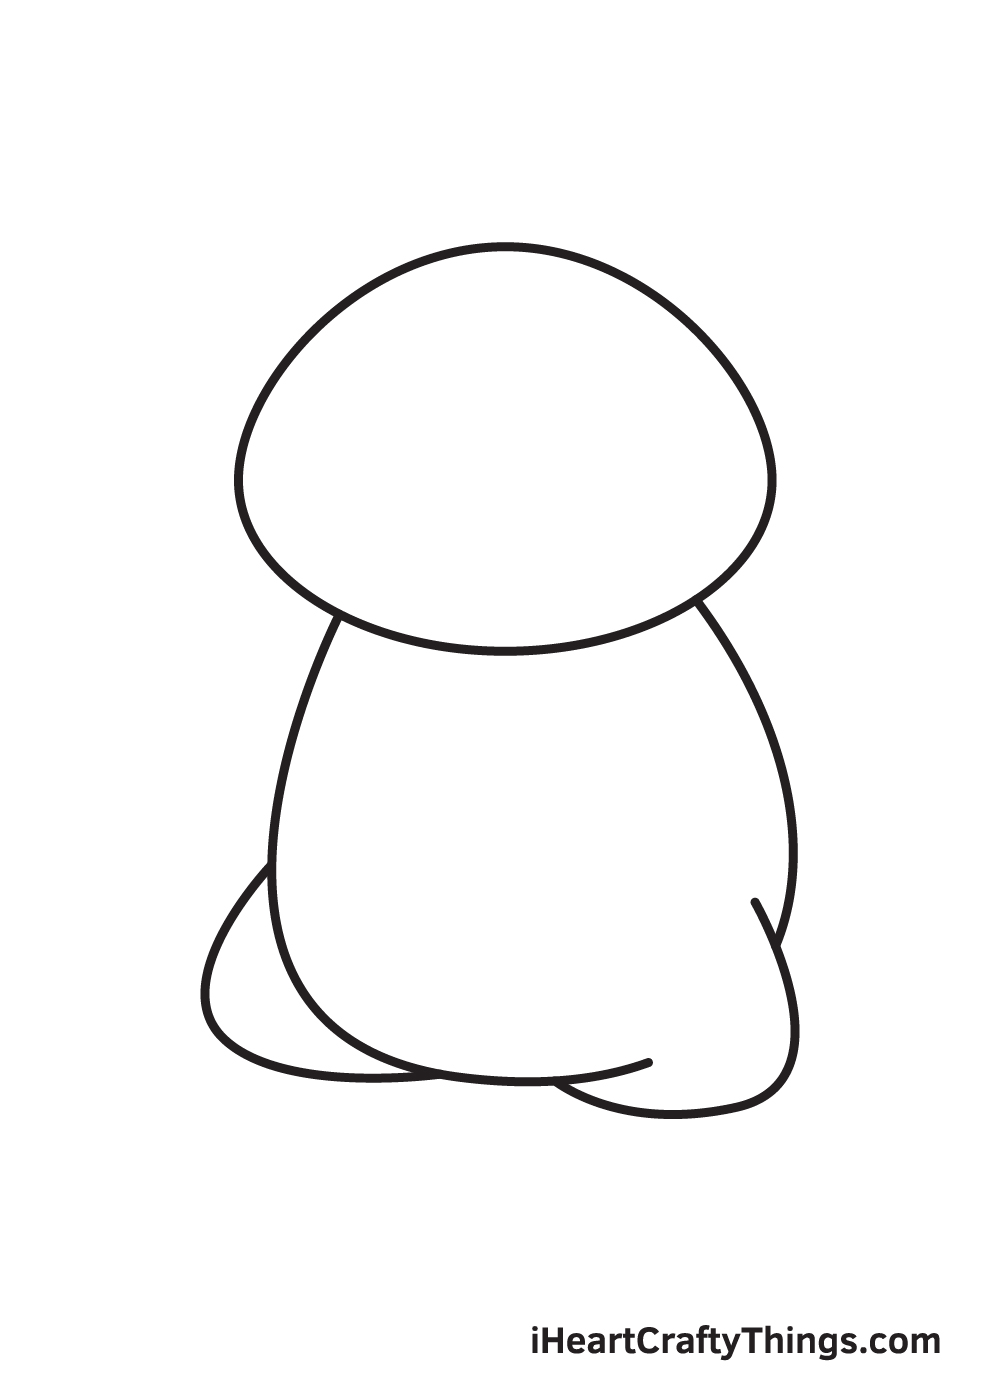
Step 2 – Outline the Hamster’s Head and Body
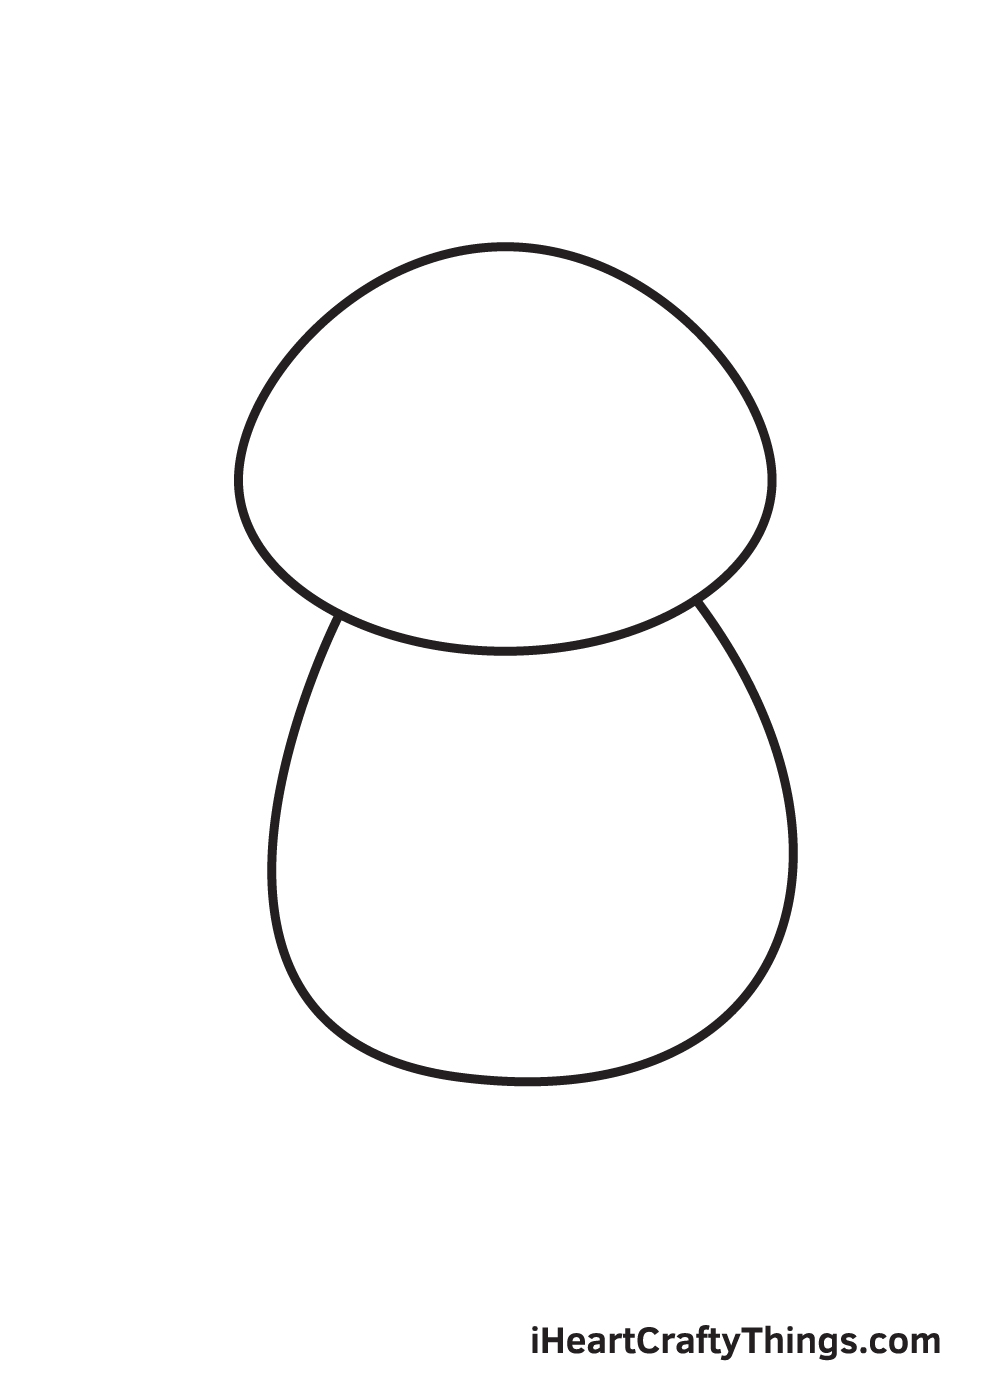
Draw another irregular circle shape below the hamster’s head, which we drew in the previous step. This forms the body of the hamster. Take note that the head and the body should be directly connected, and the body should also be relatively bigger than the shape of the head.
When drawing the outline of the body, avoid pressing down too hard with your pencil. It is important to draw with light strokes so you can easily erase any lines from the outline that you may no longer need later on.
Step 3 – Next, Draw the Legs of the Hamster
Draw a slightly pointed curve on each side of the hamster’s lower body. This forms the folded chubby legs of the hamster.
Make sure to get rid of any lines overlapping inside the right leg of the hamster by using an eraser.
Step 4 – Afterwards, Draw the Hamster’s Feet
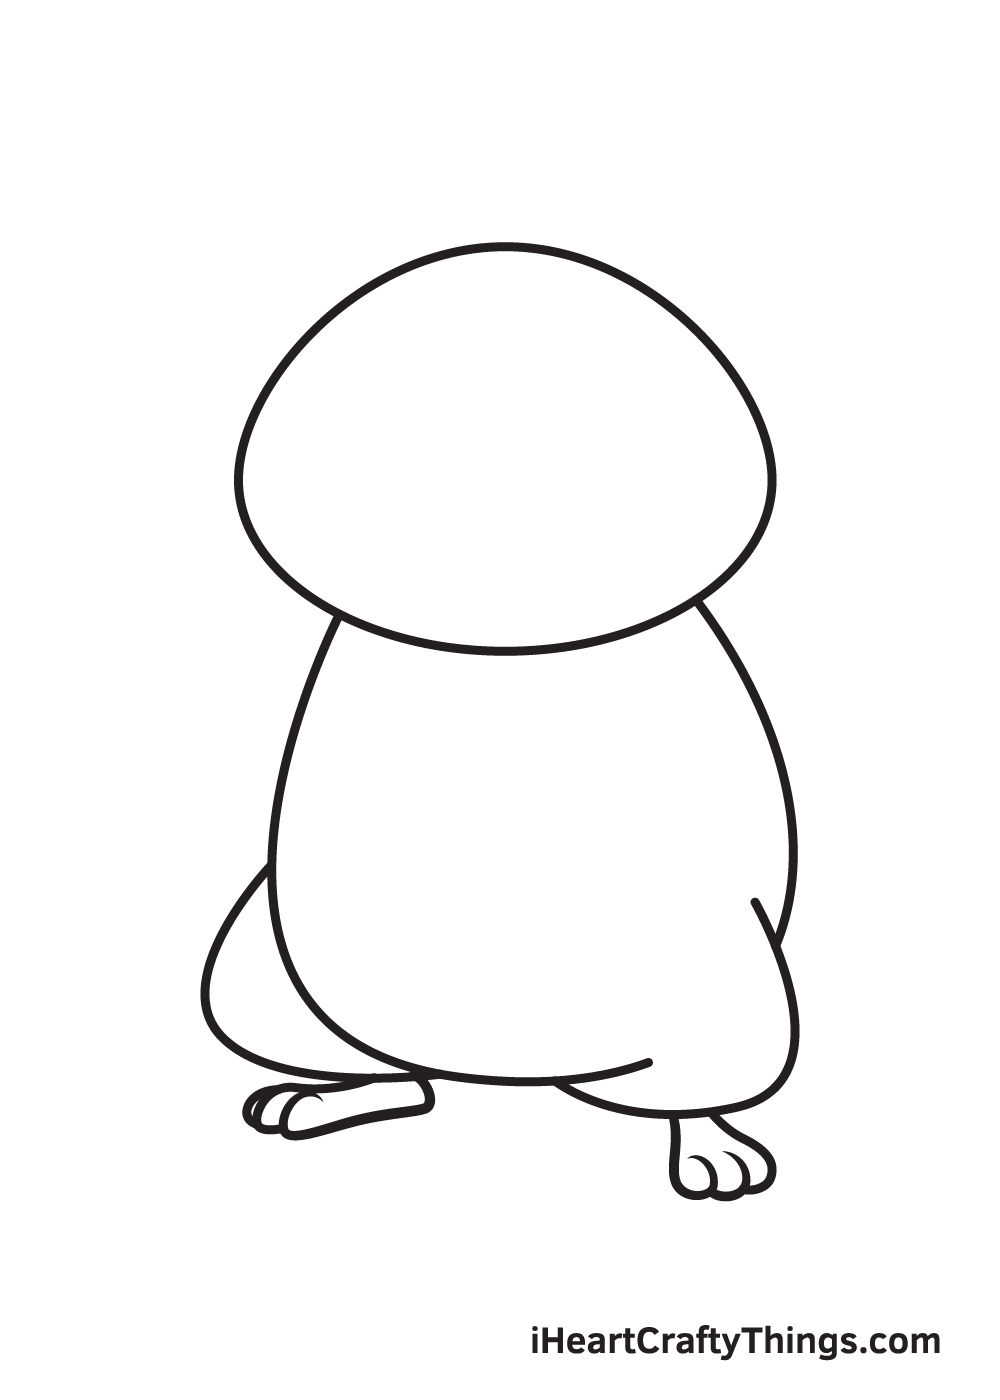
Right underneath each leg, draw a small foot with three paws.
Take note that since the hamster is facing towards the left side, the left foot should be positioned sideways while the right foot must be straight.
Step 5 – Then, Draw the Left Ear of the Hamster
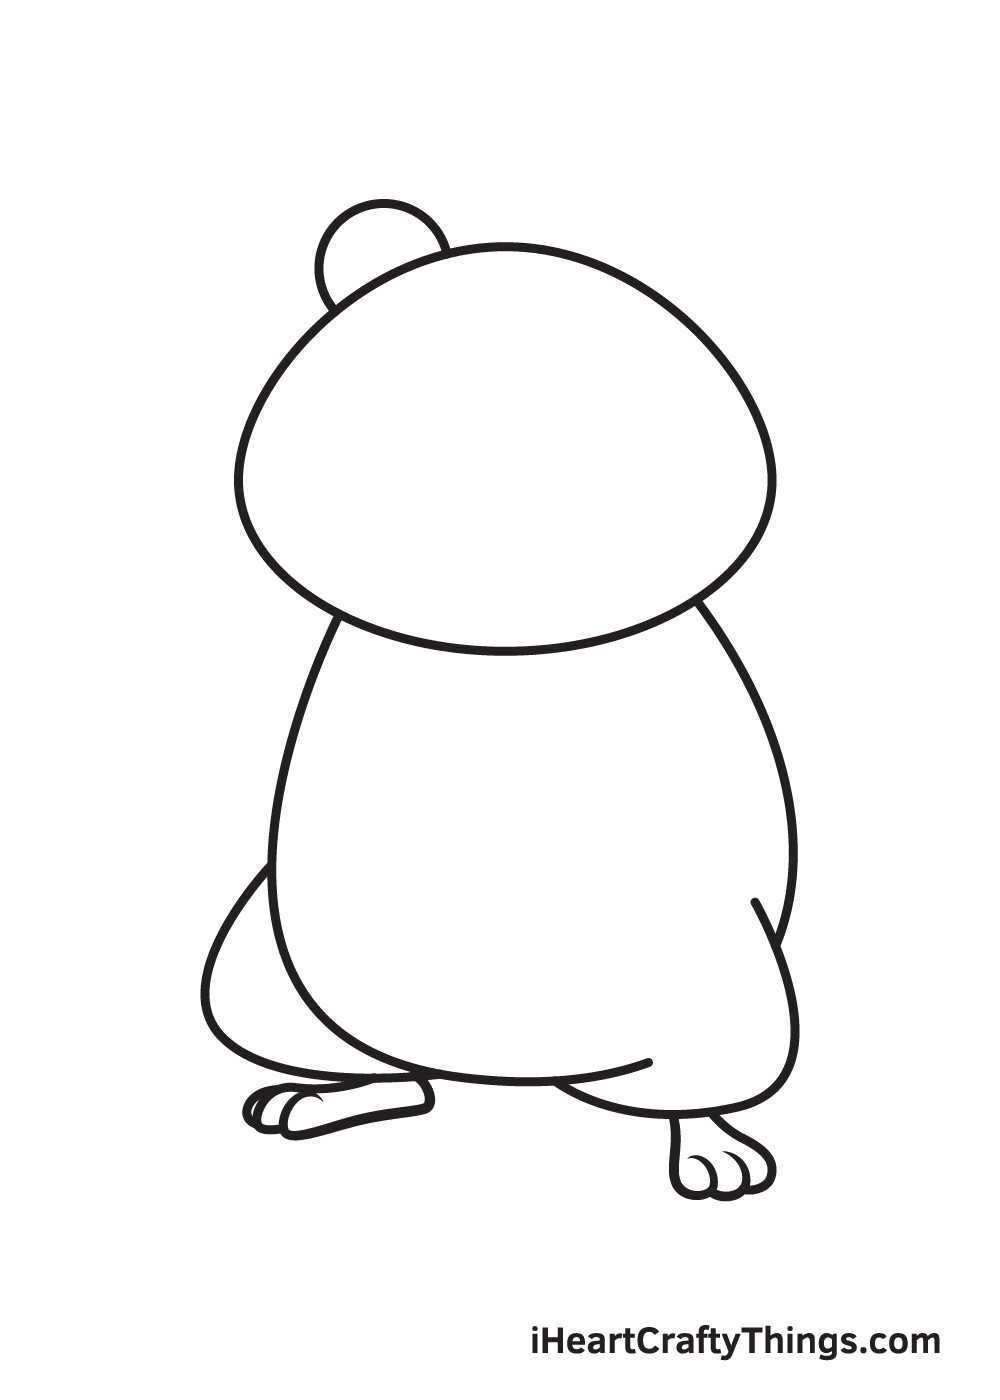
Draw a semicircle on the top left side of the hamster’s head. This forms the left ear of the hamster.
Step 6 – Complete the Hamster’s Pair of Ears

Repeat the previous step on the opposite side at the top of the hamster’s head. This creates the right ear of the hamster.
After finishing this step, the pair of ears of your hamster should now be complete.
Step 7 – Draw the Hamster’s Left and Right Arm
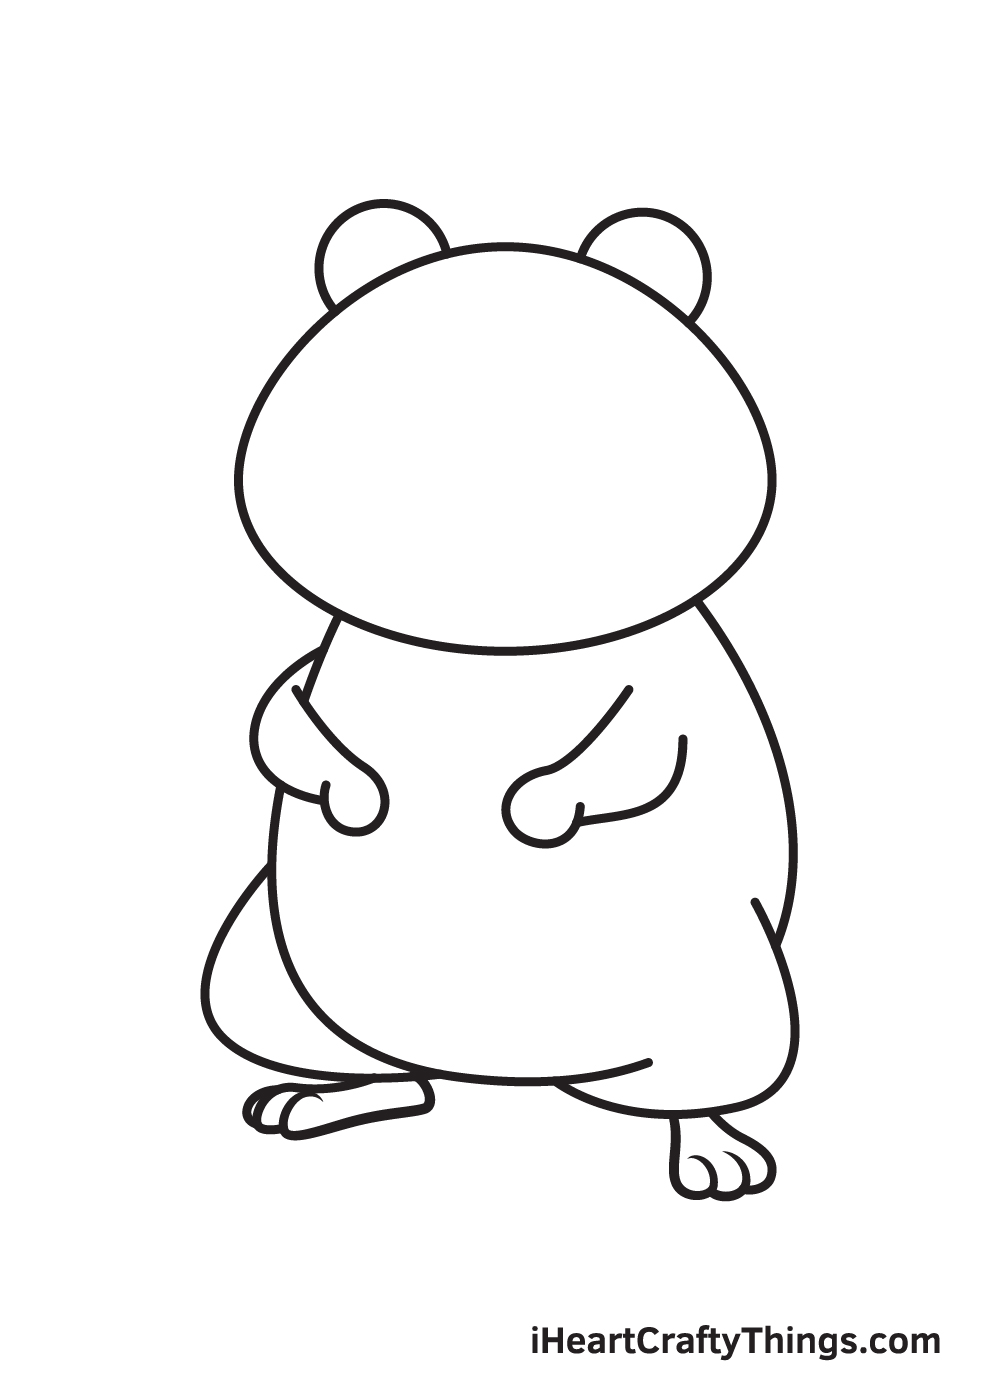
Draw an elongated shape with a circle at the end on each side of the hamster’s upper body. This creates the pair of arms and hands of the hamster.
As you can see in the illustration, both arms of the hamster are on its front side, meeting over its chest.
Step 8 – Add Details on the Ears and Hands
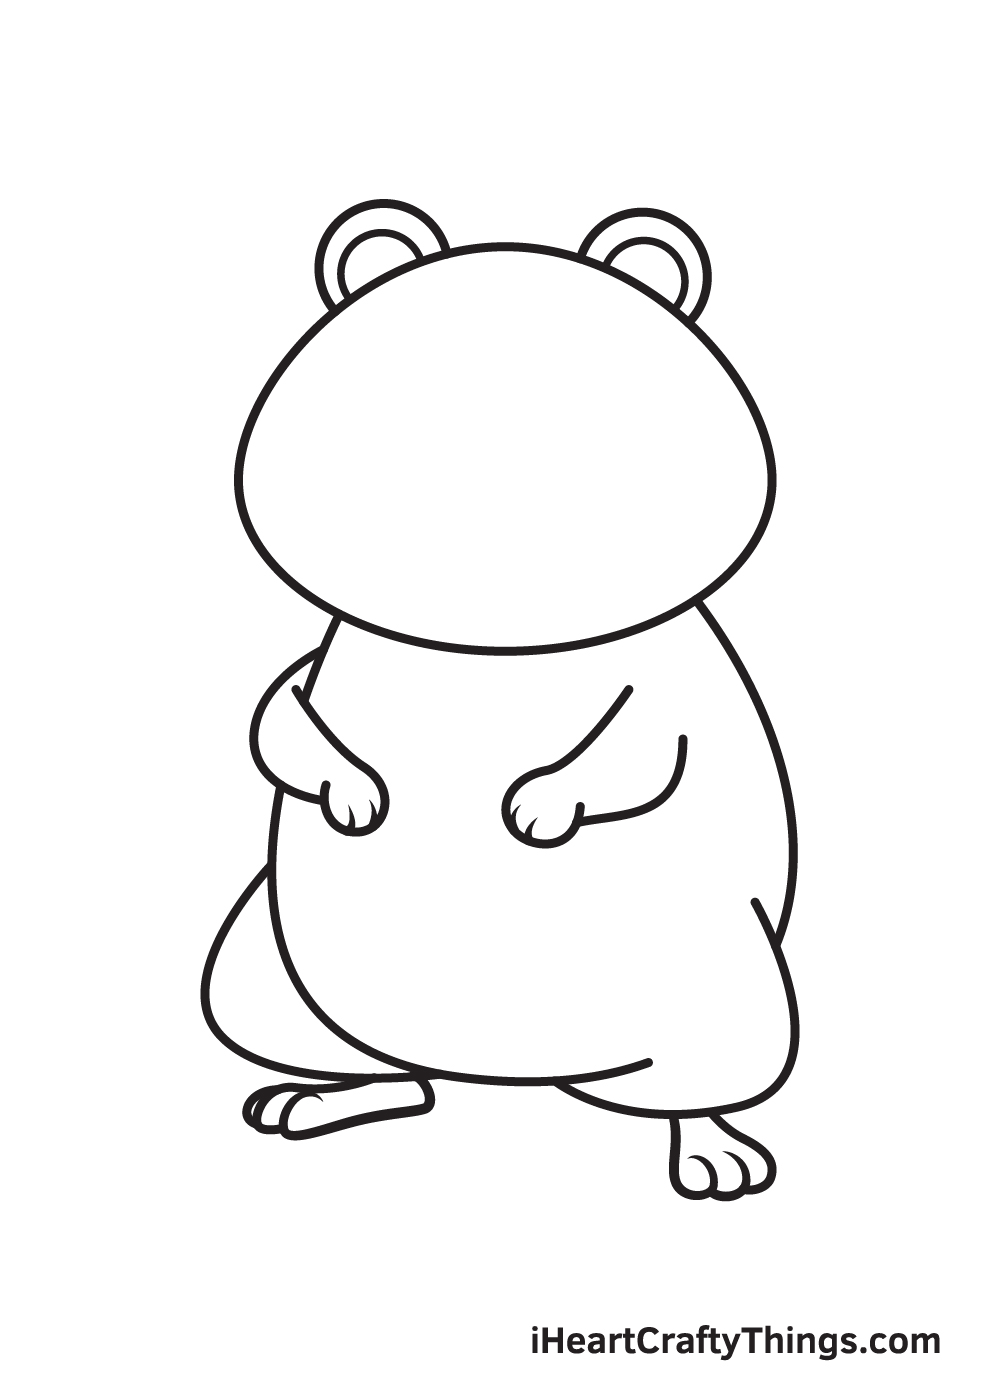
When drawing animals, details and patterns are essential to add texture on your drawing, making it look more realistic. So, in this step, that’s exactly what we’ll be working on.
Starting from the top down to the bottom, draw a curved line within each ear parallel to its shape. This creates the appearance of the inside or inner ears.
Then, moving on to the hands, draw multiple short curved lines on both hands to separate each finger of the hamster.
Step 9 – Now, Draw the Hamster’s Facial Features
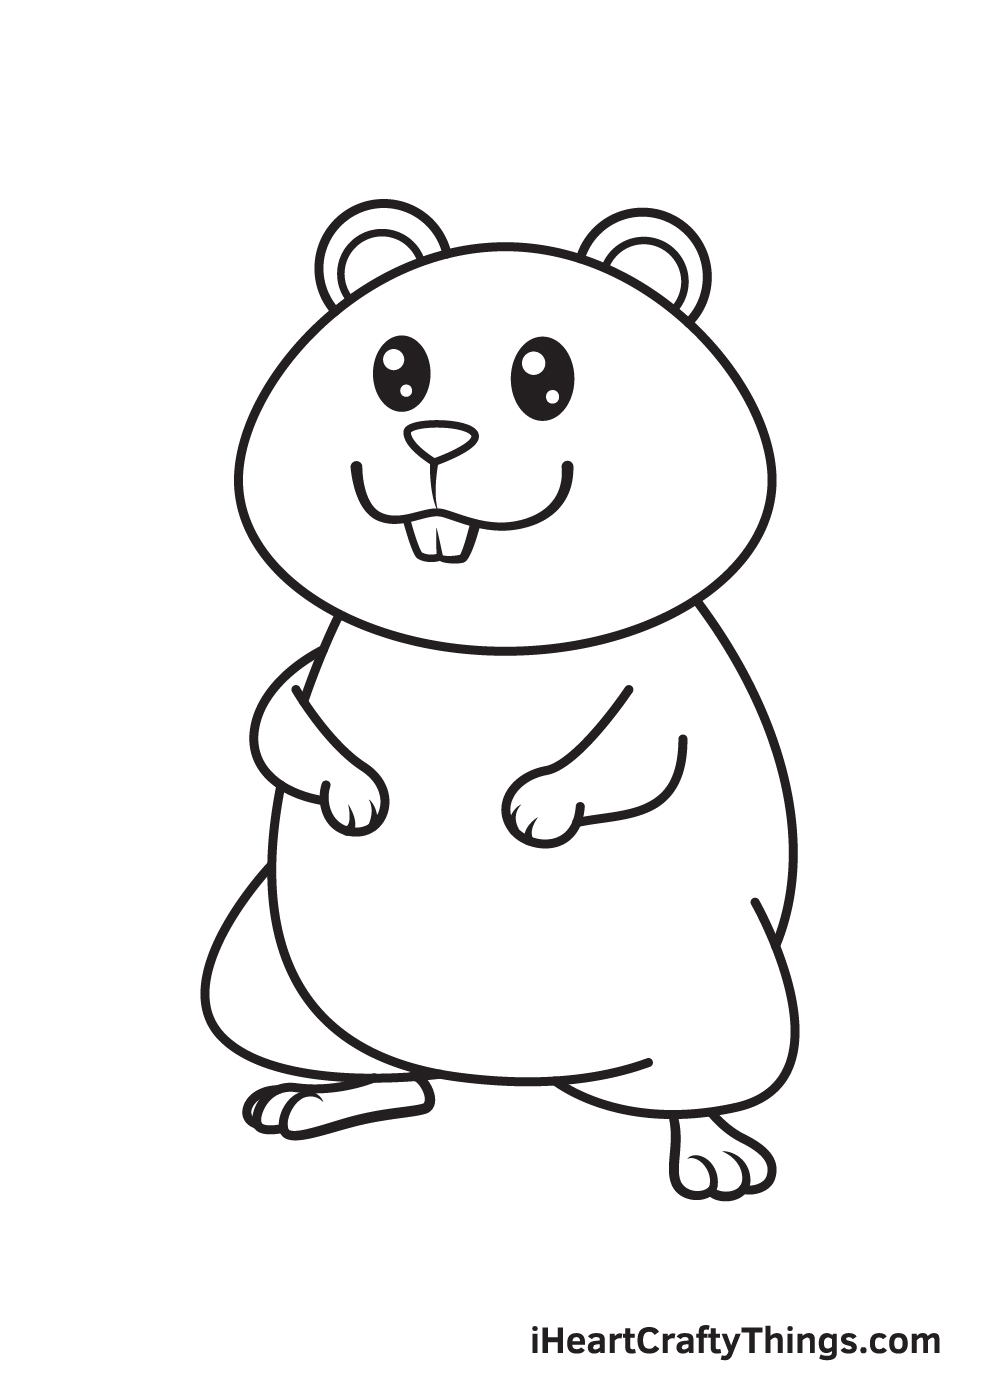
To complete the look, create the features of your hamster’s face. How you draw the facial features determine if the expression or emotion of the hamster, or any character you’re drawing in general.
Starting from the top down to the bottom, draw two standing oval shapes for the eyes. Add shade to the entire eyes while leaving out two tiny circles unshaded to create the illusion of “glimmering eyes”.
To create the nose, simply draw an upside down wide triangle shape. Afterwards, draw a vertical line connected to the pointed tip at the bottom of the nose.
For the mouth, draw an upward curved line with a small bump in the middle. Don’t forget to add a single tooth in the middle underneath the hamster’s mouth—it’s one of the distinct features of a hamster!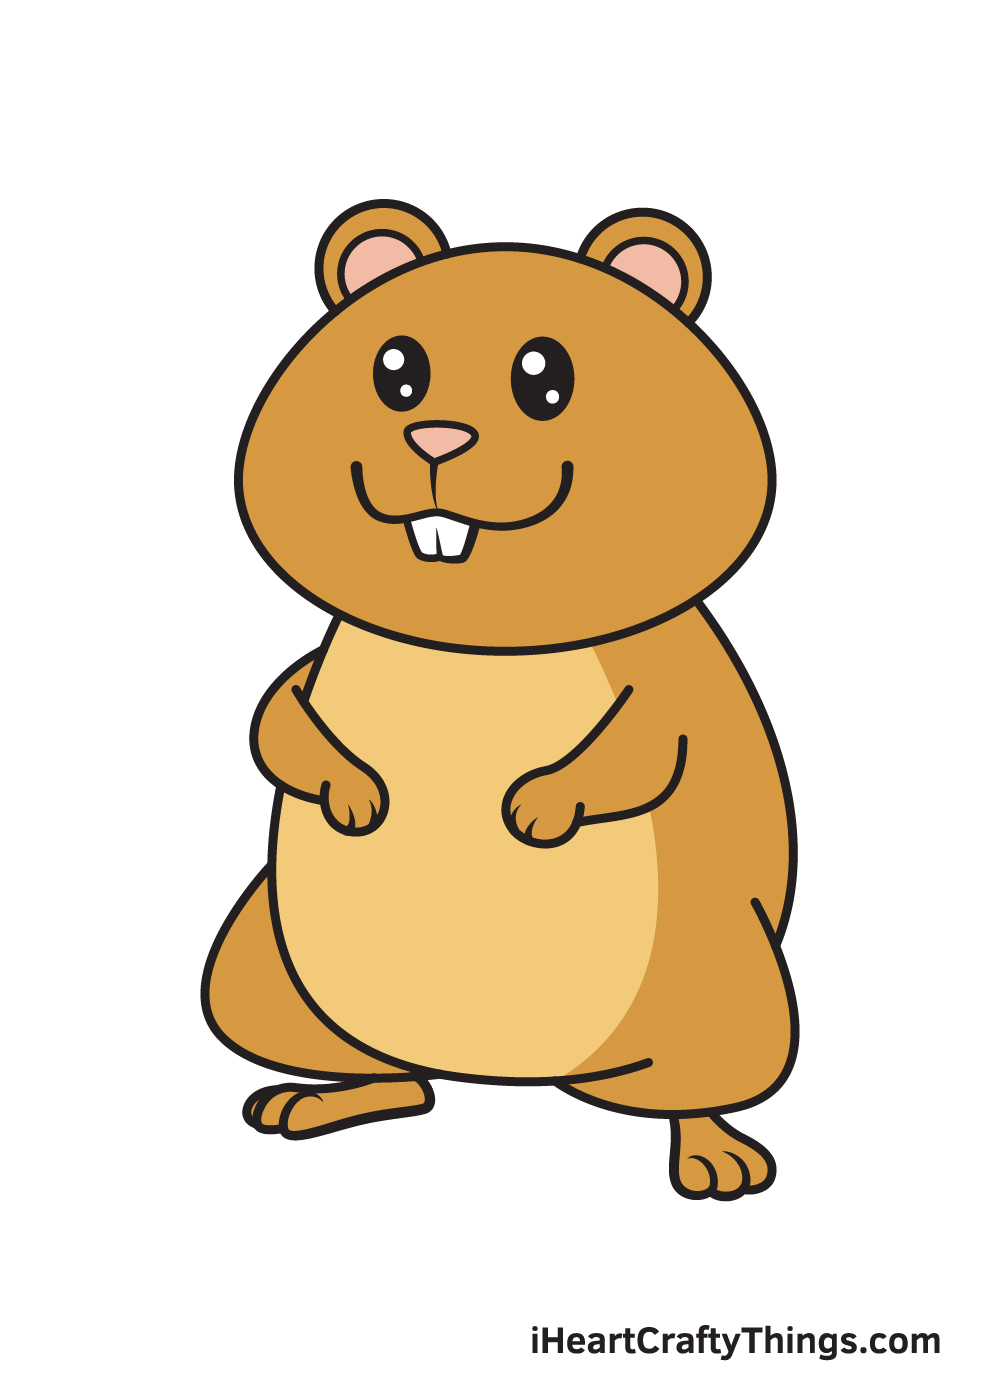
Now that we’ve successfully drawn a hamster, it’s finally time for the most enjoyable part. In this final step, we’ll be choosing the colors and coloring the hamster.
This step is optional, but we recommend doing this to make your artwork look vibrant and colorful!
Hamsters come in six primary colors: white, black, grey, brown, yellow, and red. Any other colors of a hamster is a variation or a mixture of these basic colors.
You can opt to color the hamster using its original colors or handpick a unique set of colors to create a hamster like no other. Either way, we’re sure the colors will turn out beautifully!
Do this to take your hamster drawing to the next level
Make this cute hamster sketch even better with these fun and easy tips!
This hamster drawing we have created together is in such a sweet pose! Once you have finished this guide, you may want to depict this hamster in different poses.
You could do this by keeping the face as it is and then changing the details of the body and limbs.
There are lots of fun ways that you could pose this hamster as well, and it could be in all sorts of fun situations!
What are some cool poses you could create for this hamster?
When you have played around with some poses, you could put what you learned to use to give this hamster some friends. You could keep the drawing of a hamster we worked on as is, and then add some more hamsters around him.
This would be a great way to try out all of the different poses you have in mind. They could be just hanging out or enjoying a fun hamster party!
What would a crew of cute hamsters be up to?
Hamsters love to play with toys, so we think this one deserves some fun toys and accessories. One classic example would be a hamster wheel, but there are also water bottles and little bowls that it could interact with.
These are just a few examples of the kinds of accessories you could depict, but there are many others as well. You could look at a pet shop to get some ideas for fun accessories to add to your hamster sketch.
Finally, why not finish off this hamster drawing you java worked so hard on with some background details! If you added more hamsters and toys, the background setting would help tie it all together.
For example, the hamster could be in a cozy cage with sawdust on the floor and toys to play with.
You might prefer to have the hamster on an adventure in a forest, and these are just a few ideas out of countless great ones!
Your Hamster Drawing is Complete!
Hopefully, you have fun drawing a hamster. Now that you can draw a hamster, you can incorporate it into more complex drawings in the future.
Maybe you can draw a hamster roaming in the fields or perhaps a human being playing with its pet hamster?
As soon as you finish drawing and coloring a hamster, make sure to show off your masterpiece!
Take a photo of your artwork and share it on our Facebook page and on Pinterest! And while you’re at it, we hope you take the time to like our Facebook page too!
We would love to see your sweet charming hamster!
Here Is A Cute Hamster Drawing To Inspire You!
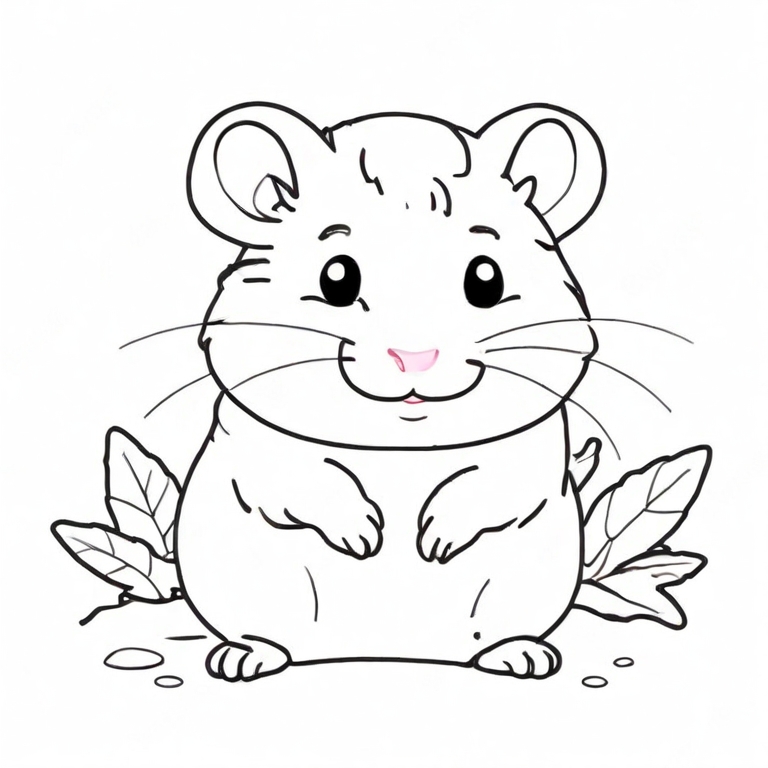
Hamsters have to be some of the cutest rodents on the planet, and that’s why so many love to have them as pets! This cute hamster drawing for kids shows us an absolutely adorable hamster friend.
Drawn by our artist Amanda, this hamster is so fluffy and cute, and now you can create your very own version of the drawing.
When drawing the outline, you’ll see Amanda didn’t keep it totally smooth.
She used some bumpy lines in order to make the hamster look furrier, and you can make it look even more so by adding some furry lines.
Then, it could be good to add some little toys for the hamster.
Drawing a background of a hamster cage would also help you to create a lovely little home for this hamster. What will you add to your cute hamster sketch?