


The secret to learning how to draw holding hands is revealed in this guide for kids! Make this tricky design easy by following these steps.
You can ask any artist and almost any of them will tell you that drawing hands is notoriously tricky. I’ve even spoken to professional artists with decades of experience who will avoid drawing hands unless it’s absolutely necessary.
This is especially true when you draw them doing something dynamic. As with anything, you can make it easier by breaking it down into smaller, simpler steps.
That’s exactly what I have done in this guide! Soon, you will see the best way to build up your drawing and make it simple. You’ll amaze your friends and perhaps even yourself by the time you have finished the guide!
Watch This Guide On How To Make A Holding Hands Drawing
How to Draw Holding Hands – Let’s get started!
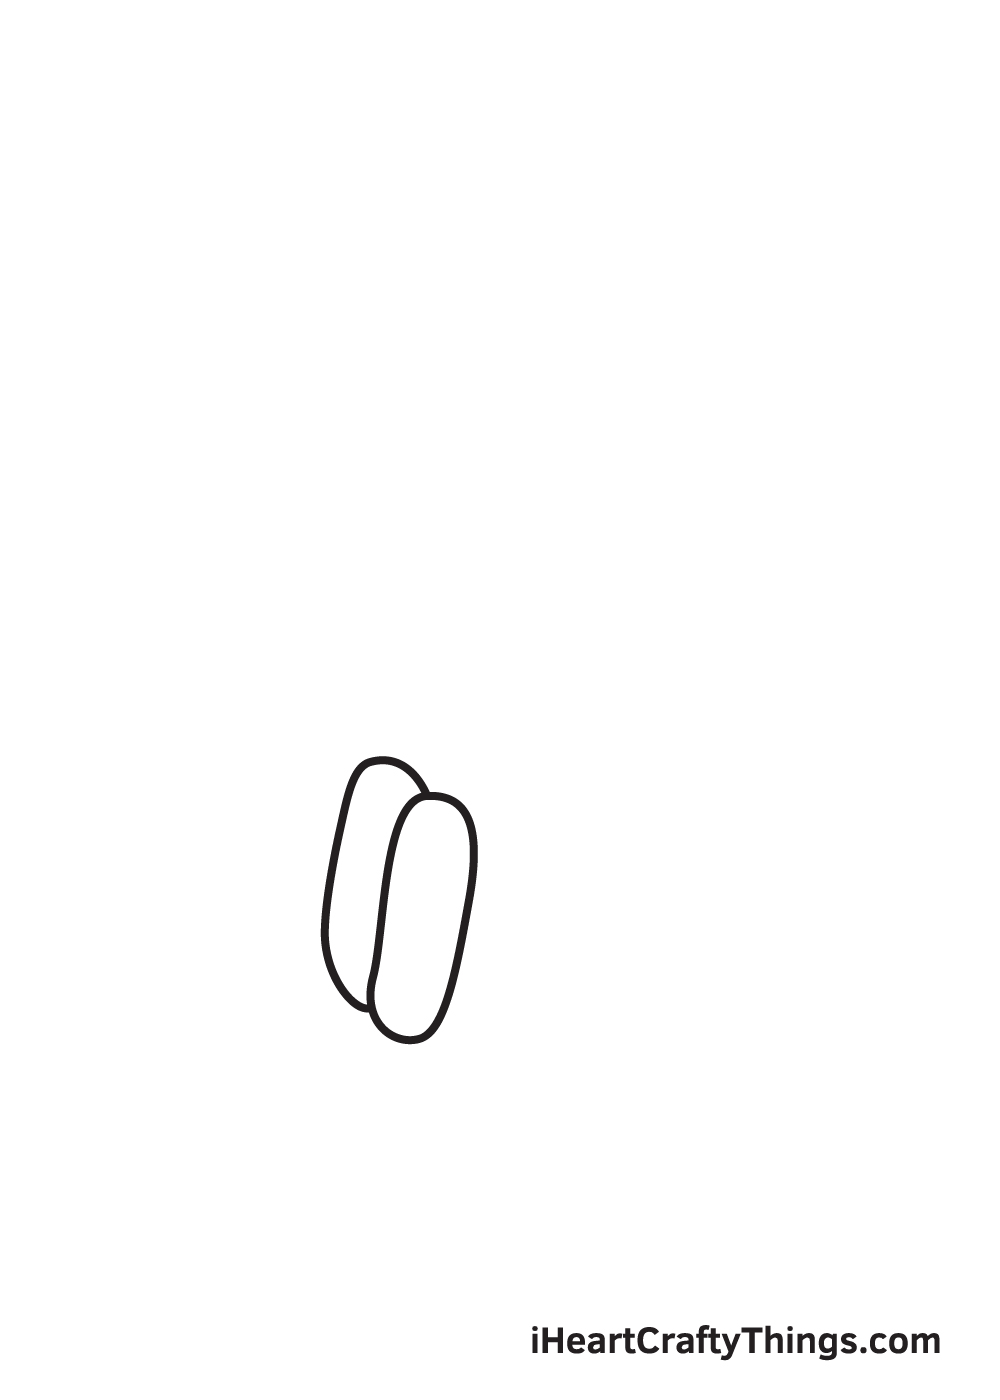
Step 1

Start by drawing an irregular standing oval shape on the bottom part of your paper.
This forms the folded ring finger of the hand in the back.
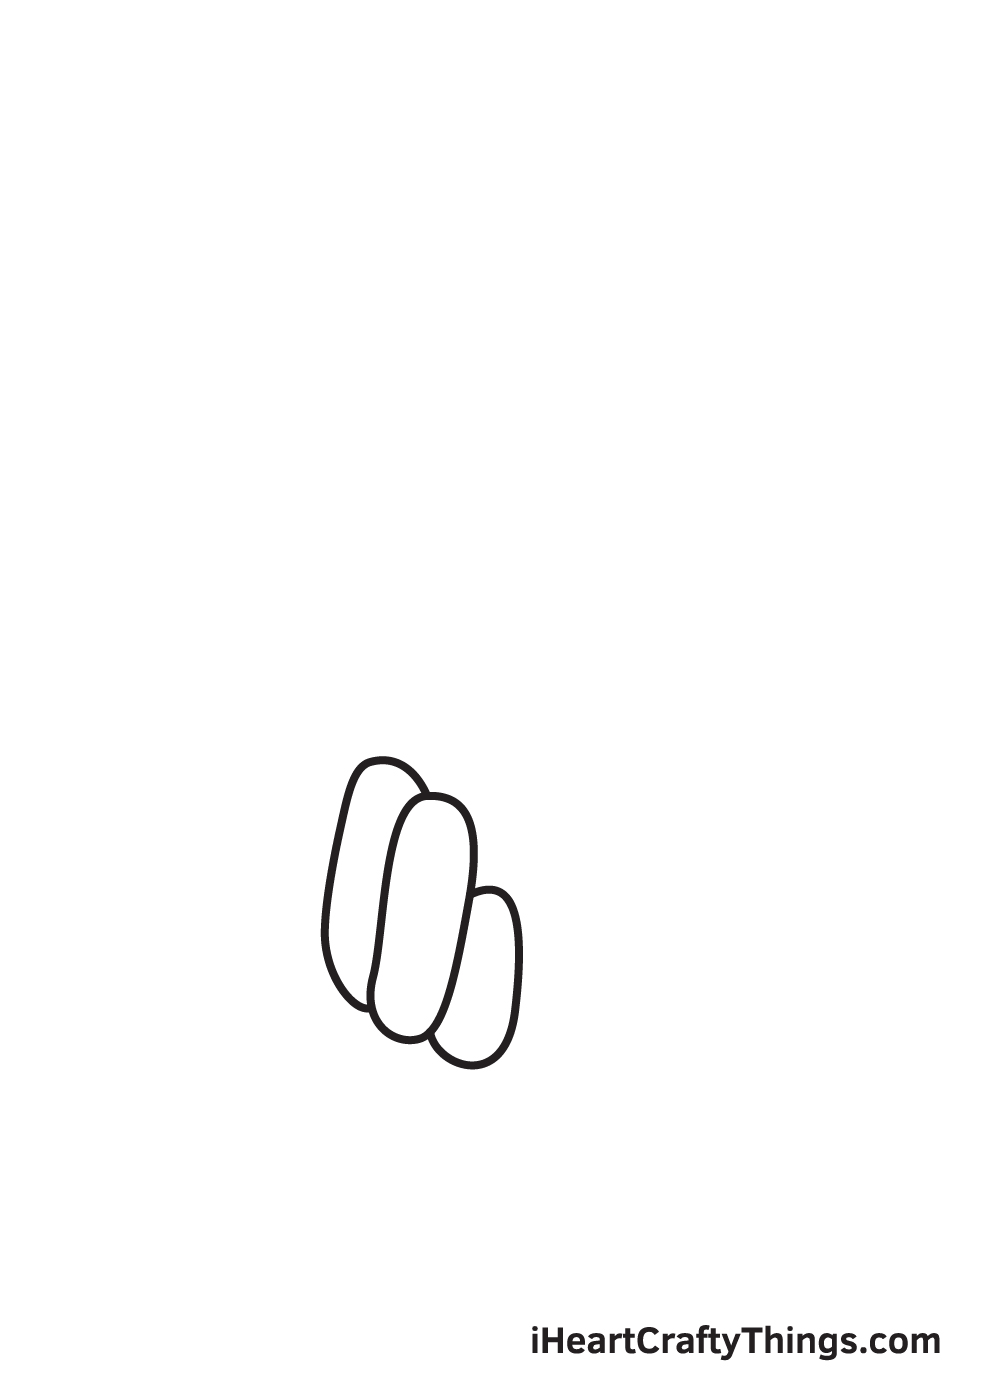
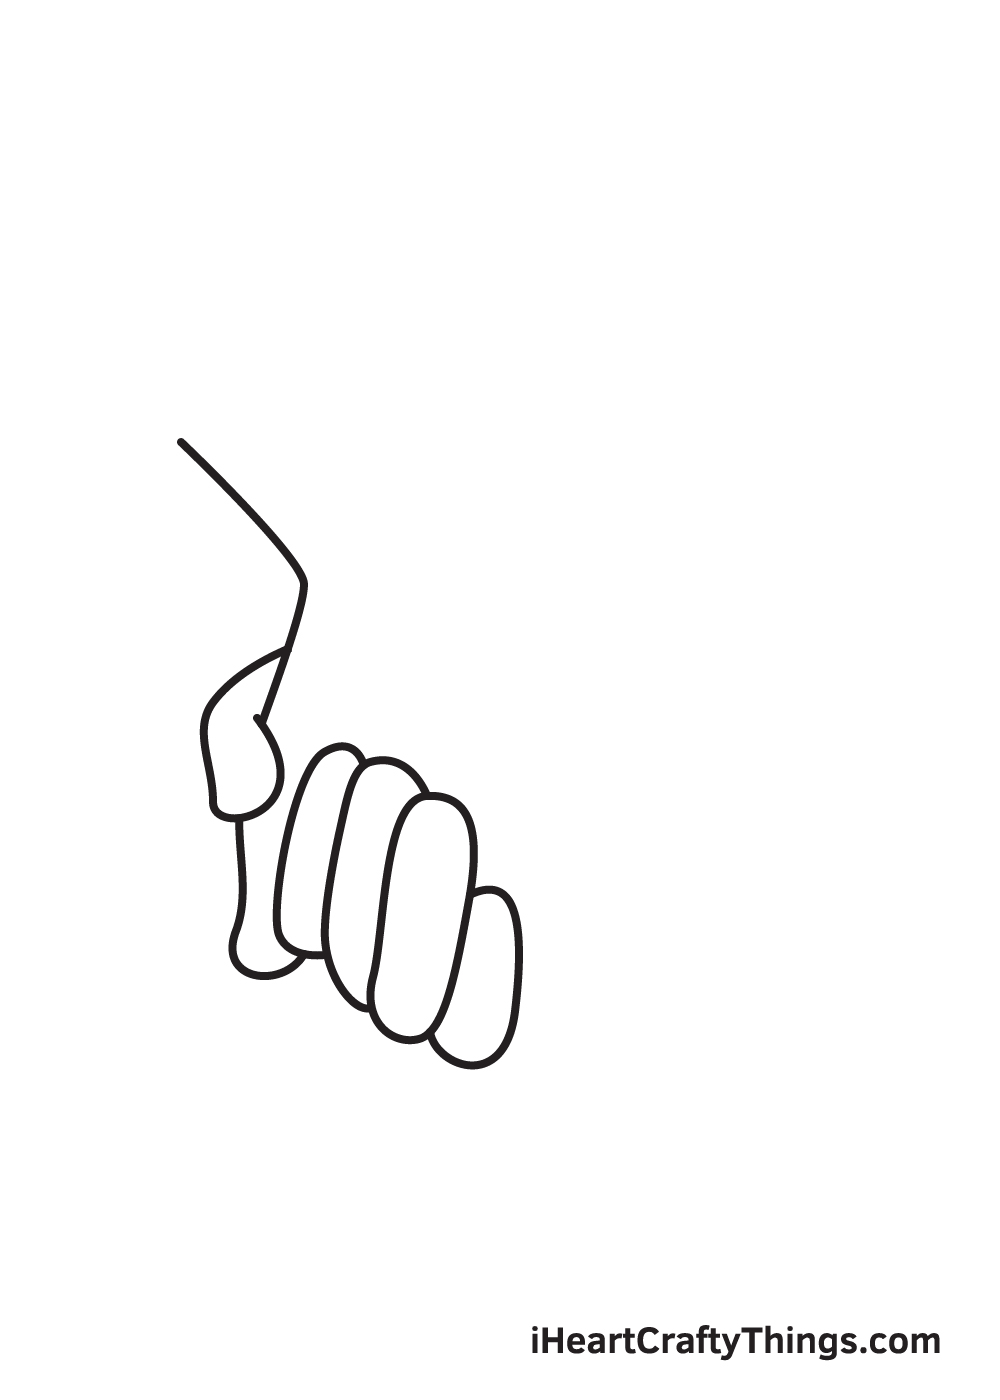
Step 2 – Draw the First Two Fingers of the Hand in the Back
Draw a similar shape on the left side of the ring finger that we drew in the previous step. This forms the folded middle finger of the hand in the back.
Keep in mind that the two fingers should be drawn side by side, directly touching each other. Also, the middle finger should be slightly longer than the ring finger.
After finishing this step, the ring finger and the middle finger of the hand in the back should now be complete.
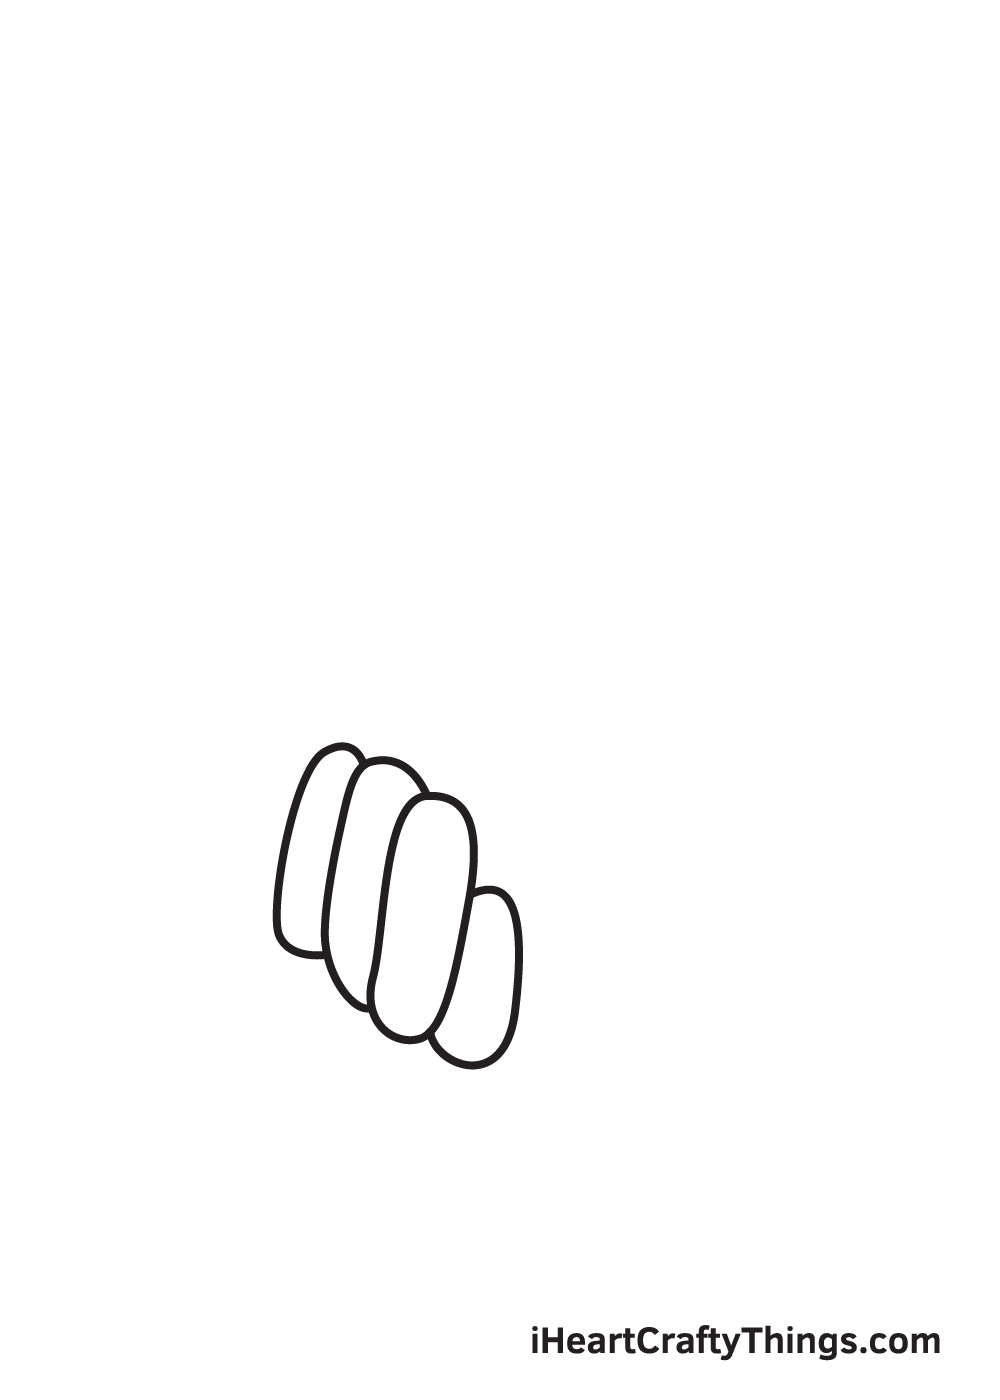
Step 3 – Next, Draw the Pinky Finger of the Hand in the Back
Draw a smaller oval shape on the right side of the ring finger. This forms the pinky finger of the hand in the back.
Bear in mind that the pinky finger should be smaller than both the middle finger and ring finger.
Step 4 – Then, Draw the Index Finger of the Hand in the Back
Draw another oval shape on the left side of the middle finger. This forms the index finger of the hand in the back.
At this point, the index, middle, ring, and pinky finger of the hand in the back is now complete.
Remember, all four fingers should be side by side in a slightly diagonal formation.
Step 5 – Afterwards, Draw the Thumb of Both Hands
On the left side of your paper, draw a thumb right next to the index finger we drew previously. This forms the thumb of the hand in the front.
Afterwards, draw another finger folded over the thumb that we drew just now. This forms the thumb of the hand in the back, thus completing all of its five fingers.
Step 6 – Draw the Three Fingers of the Hand in the Front
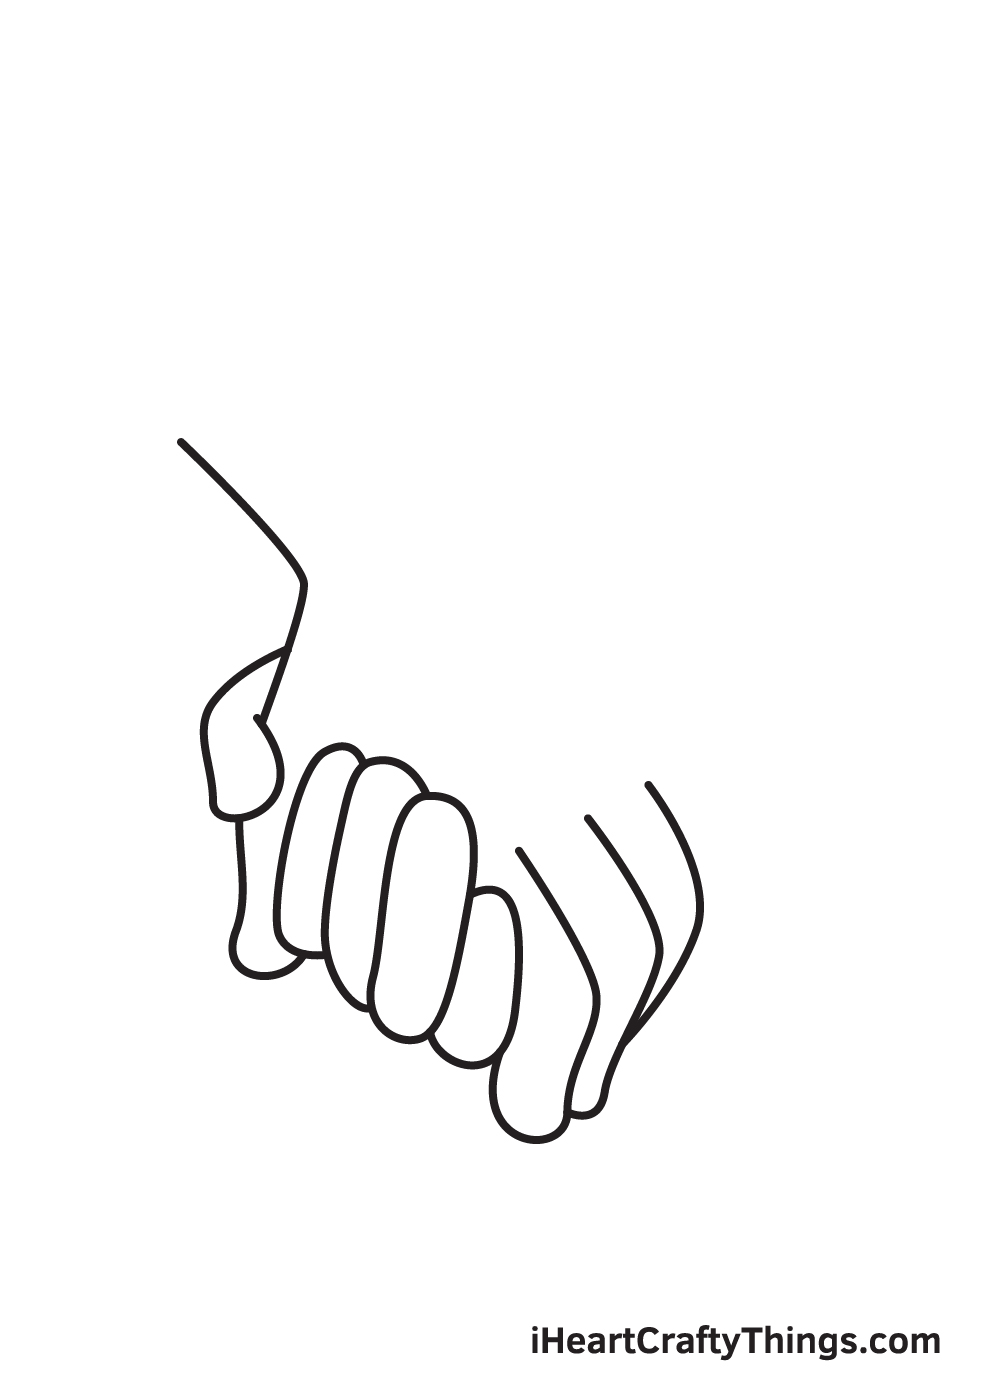
Moving forward to the hand in the front, proceed by drawing its index, middle, and ring finger perched over the four fingers of the hand in the back.
When drawn correctly, it should look like the front hand is resting atop the back hand, as shown in the illustration above.
At this point, the holding hands should now be partially visible.
Step 7 – Now, Complete the Form of the Hand in the Front
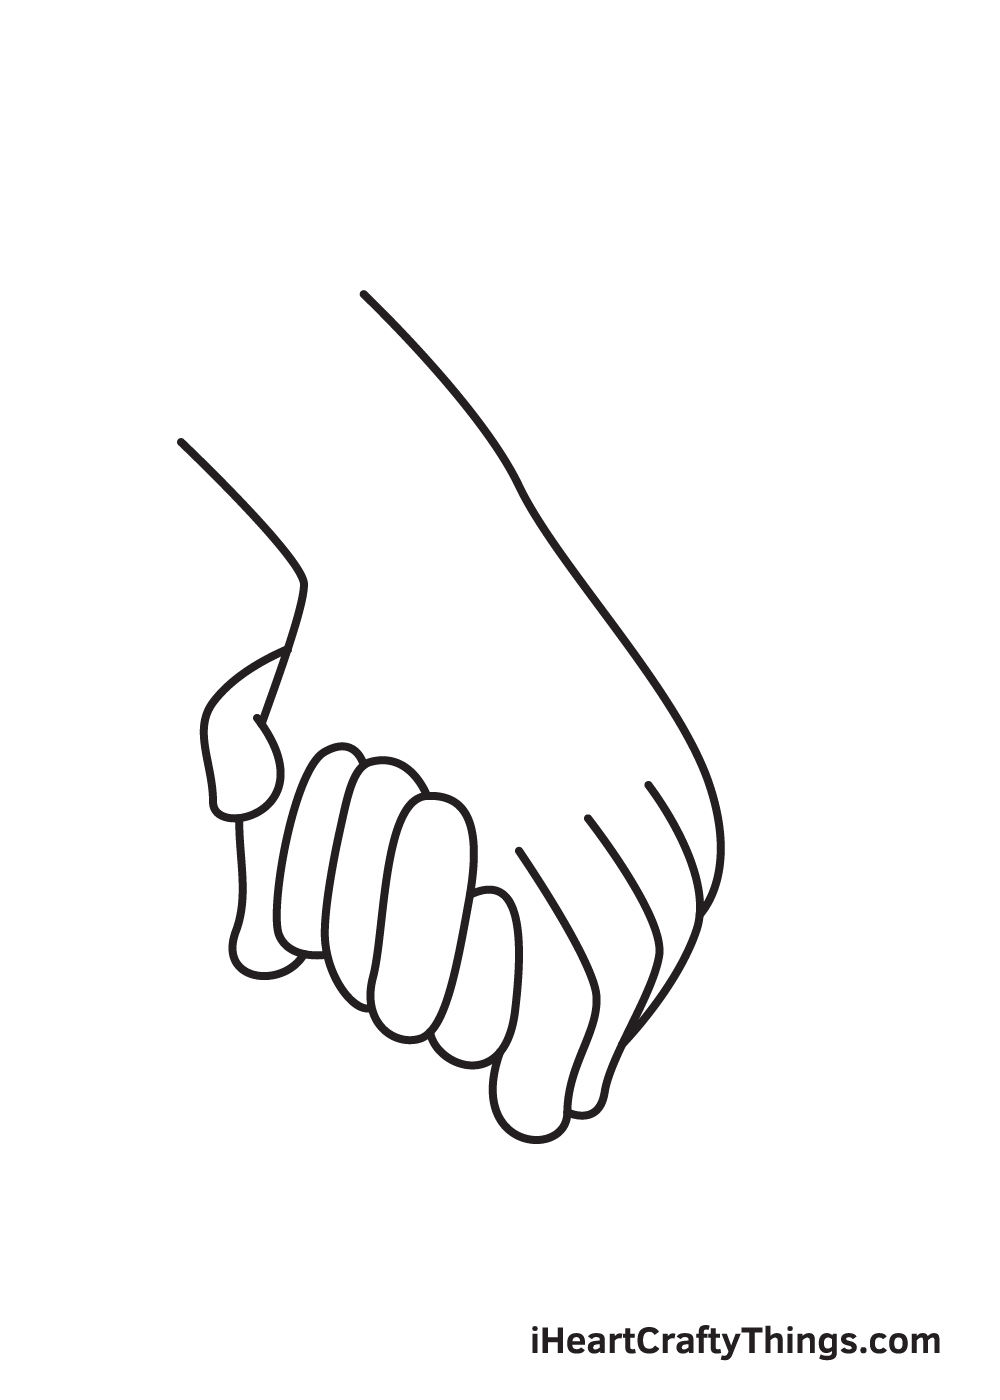
Draw a diagonal line beginning from the wrist of the hand in the front all the way to form its pinky finger.
After finishing this step, the form of the hand in the front should now be complete.
Step 8 – Then, Draw the Wrist of the Hand in the Back
Going back to the hand in the back, draw two lines above the front hand. This forms the arm of the hand in the back. Afterwards, draw a curved line at the bottom to finalize the structure of the hand in the back.
As you can see, the figure of the two holding hands have finally come together! Now, all it’s missing are some essential details to finalize the drawing!
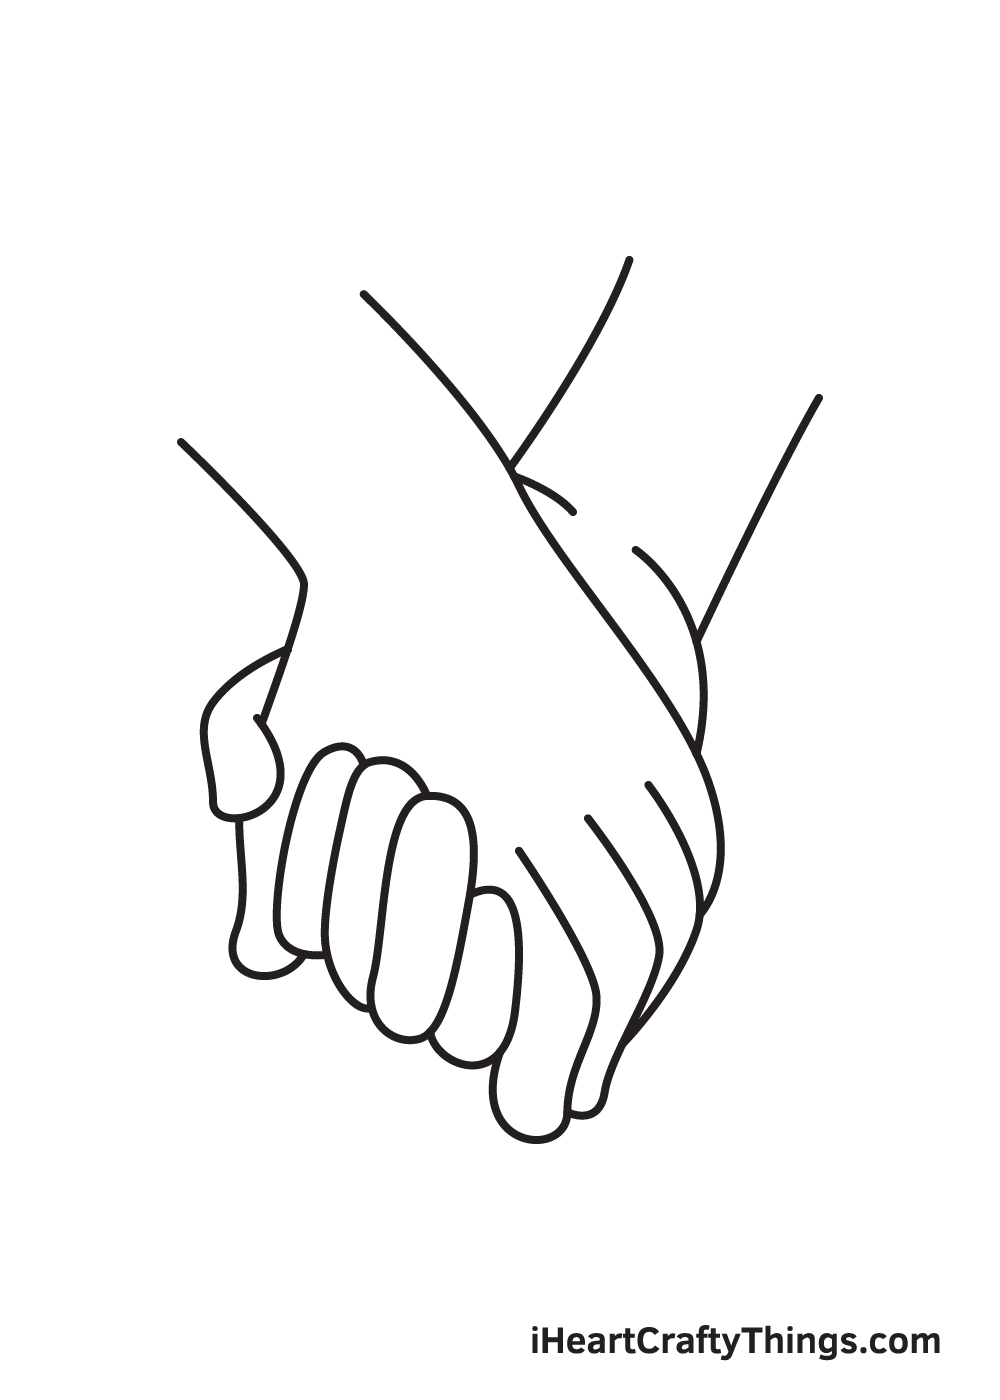
Step 9 – Now, Add the Nails of Each Finger of Both Hands
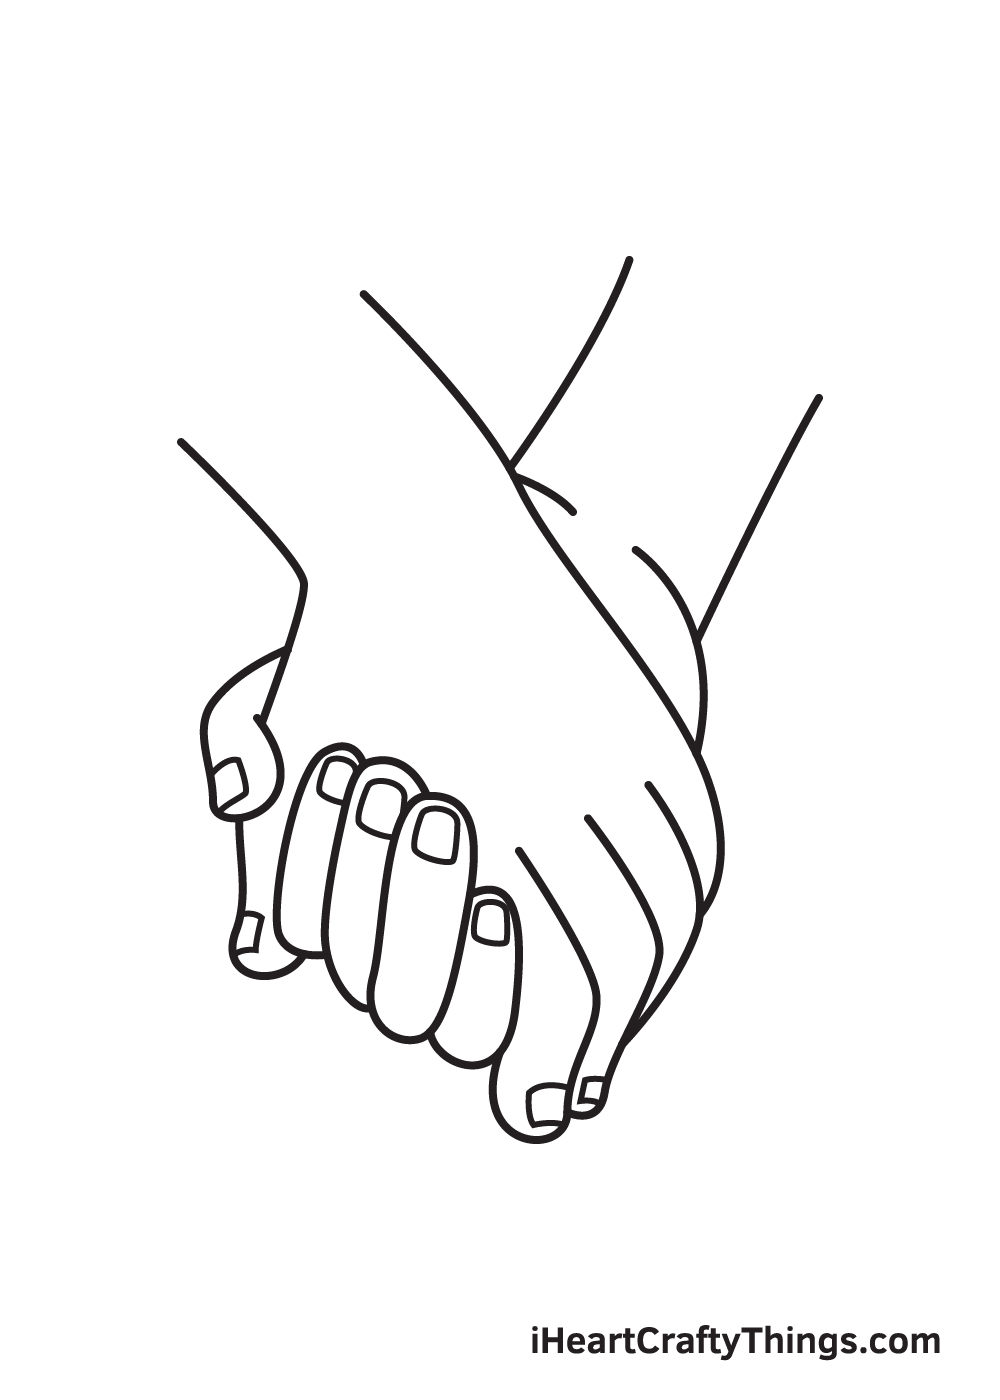
Draw irregular square shapes on each tip of every finger to form the nails. Since some fingers are tilted to the side, you may need to draw a half square shape on some of the fingers like the thumb.
Also, the bottom part of the ring and pinky finger of the hand in the front is not visible, so you can skip drawing the nails on these fingers.
There you have it—you have successfully drawn holding hands! Now, it’s finally time for the most exciting part, which is coloring your drawing!
The colors you will be using for the hands are entirely up to you! But here’s a tip you may find useful: mix the colors white, yellow, red, and blue to create a skin tone color.
Depending on the complexion you’re trying to achieve, you may need to add more of any of these colors.
Have fun playing with colors and watch as the holding hands ultimately comes to life!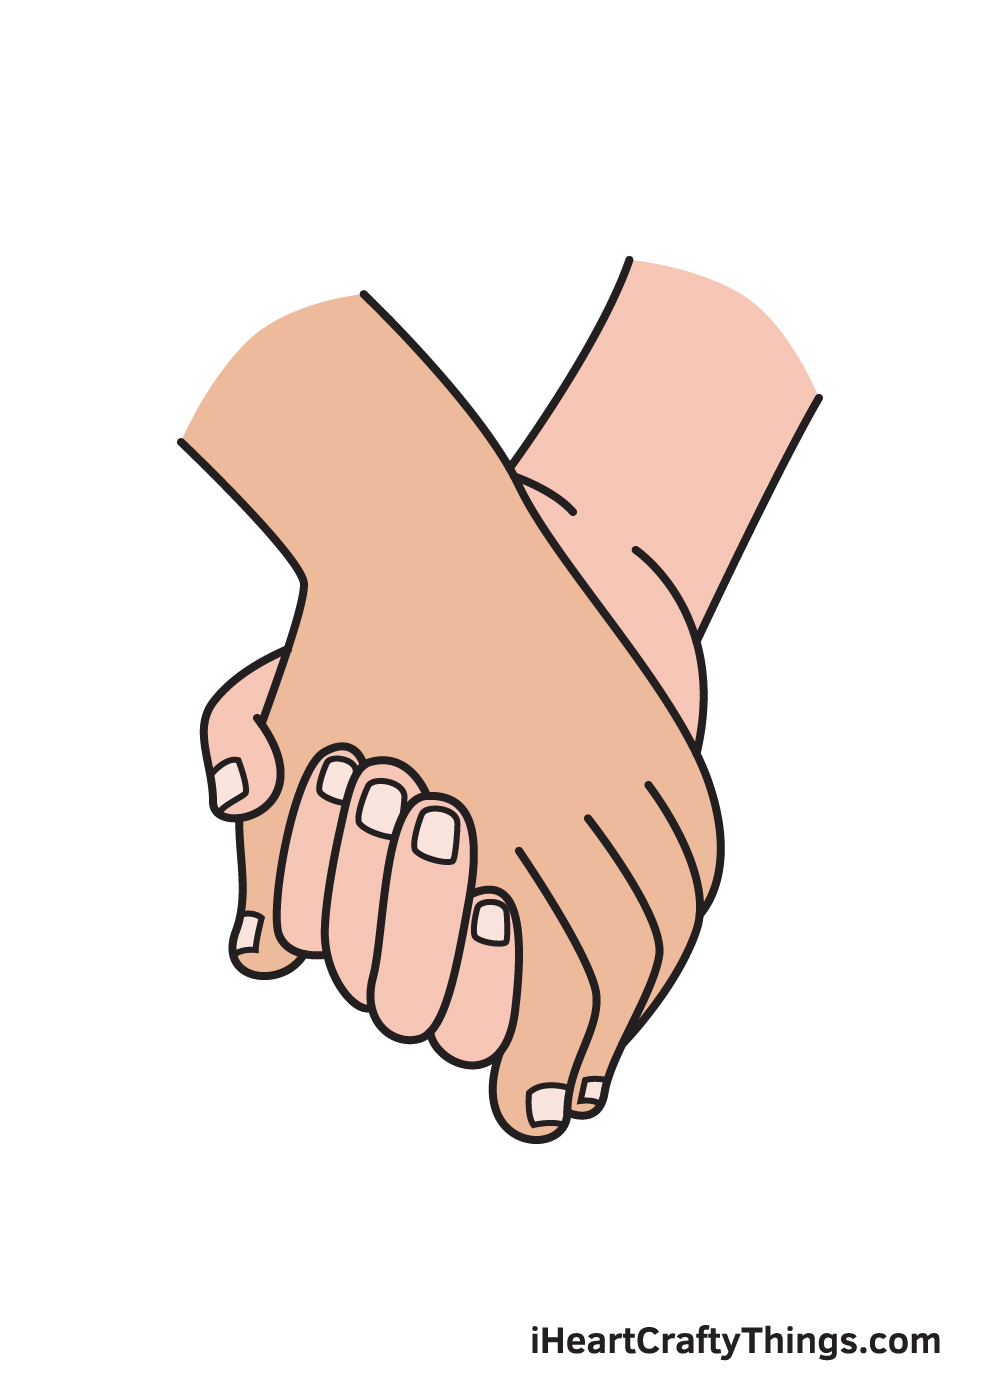
Bonus: Make This Drawing A Bit Easier With These Tips
We’ve reached the end of this guide on how to draw holding hands, but that doesn’t mean it was an easy journey! We’re about to cover some additional tips to make your drawing better, but first we wanted to provide some more tips.
As we touched on earlier, drawing hands is notoriously difficult for even the most experienced artists, so we know that even though we had lots of steps, this drawing could be too challenging.
There are a few ways to make it easier on yourself, however. One of the best ways to make it easier is to consult the real thing that you’re drawing.
The best way to do this would be to get some friends or family members to recreate the holding hands drawing we created in this guide. This way, you can take a closer look and see how the details and proportions should look.
We would also recommend taking a few photos of the real holding hands to use as a reference. If you still have a difficult time even with these reference images, then simplifying the image would be an idea.
If you made this a simpler cartoon style, then that could make portraying the details and proportions a bit easier. Many cartoons will have four fingers instead of 5, so that could be done as well.
If there is a style that you typically like to work in then you should certainly go for that as well. It’s good to challenge yourself with new styles, but sometimes you should also play to your strengths.
Once you have the hang of a simpler style, you could also take what you’ve learned and give the one you struggled with another try.
Here’s how you can make your holding hands drawing even better…
We’re here to lend a hand as we show you how to improve this drawing even more.
Creating this holding hands drawing was quite a challenge, but now we can focus on how you can add some small but effective improvements.
One way that you can do this is by adding some details to the fingers. For example, people will wear all kinds of rings, and you could add some to the fingers of these hands.
Maybe you have a ring that you or someone you know owns, and you could use them as examples as you draw them here. What else could you add to these hands?
In this guide, we were focusing on the basics of how to make it easy to draw holding hands. That means that we didn’t go over finer texture details, but we will do that now.
If you look at your own hands right now, you will see that there are small details such as pore texture, skin creasing, bones poking and veins showing.
You could add some of these realistic details to your own drawing, and you have some hand models to use at the ends of your arms!
We covered coloring in your drawing earlier, and now we will talk a bit more of what you can do. You can create all kinds of skin tones and colors, but choosing the colors is just a part of it.
By playing around with different art tools and mediums, you can achieve any kind of color effects that you like.
Mixing mediums like paints and colored pens can also help you to achieve different textures and intensities in one image.
The last tip we have for you to make this holding hands drawing even better is to add more of the arms they’re attached to.
You could draw the wrists and some of the forearm, but you could also draw sleeves of shirts or sweaters wrinkling up as well.
How much more of the people these arms belong to you draw is up to you!
Your Holding Hands Drawing is Complete!
Hopefully, you have fun drawing holding hands with the help of this step-by-step tutorial.
Now that you can draw holding hands, maybe you can draw a romantic couple holding each other’s hands next? Or perhaps a kid holding his or her mother’s hand?
Finishing a masterpiece like this is an achievement, so you should definitely feel proud of yourself!
Don’t forget to take a photo of your artwork and share it on our Facebook page and on Pinterest. Don’t be embarrassed—we’re sure it looks impressive!
We can’t wait to see your realistic holding hands drawing!