There are many different kinds of animals to see in the ocean, and it seems that each is more bizarre than the last!
It would be hard to beat the look of the walrus when it comes to strange creatures, however. These large, blubbery creatures also sport long, sharp tusks extending down from their mouths.
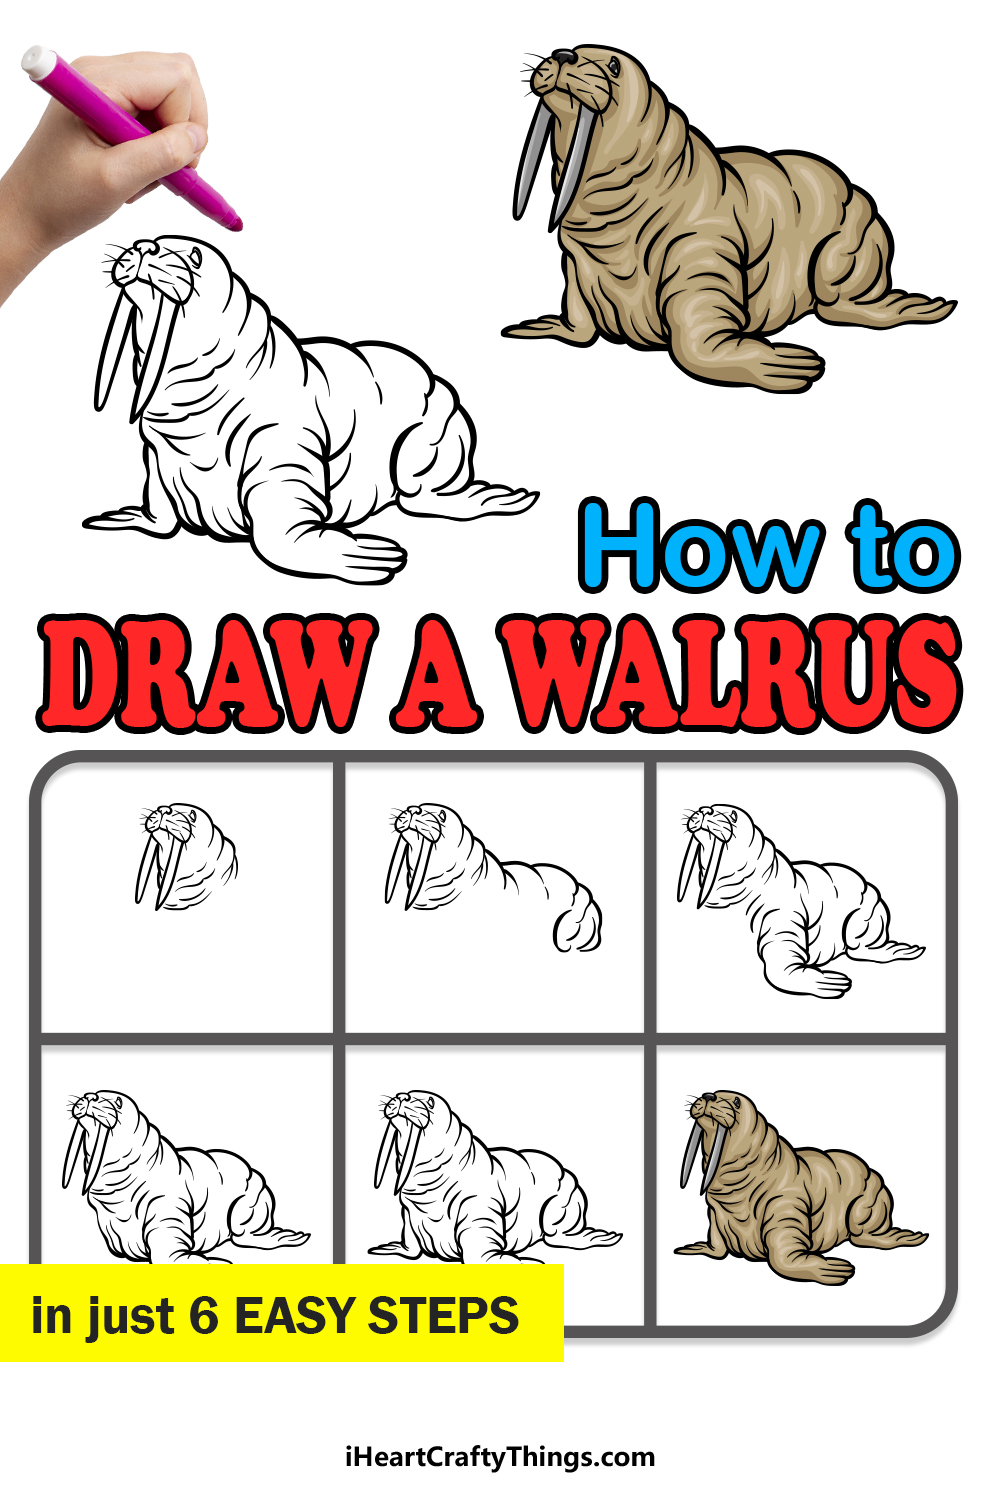
Because of their unique look, these creatures are common in artistic depictions, and many people like to learn how to draw a walrus.
By the end of this guide, you will know everything you need to know about depicting these fascinating animals. As long as you follow all of the steps we have laid out for you and try your best, we know you will get the hang of it easily!
Please enjoy this step-by-step guide on how to draw a walrus that we have prepared for you!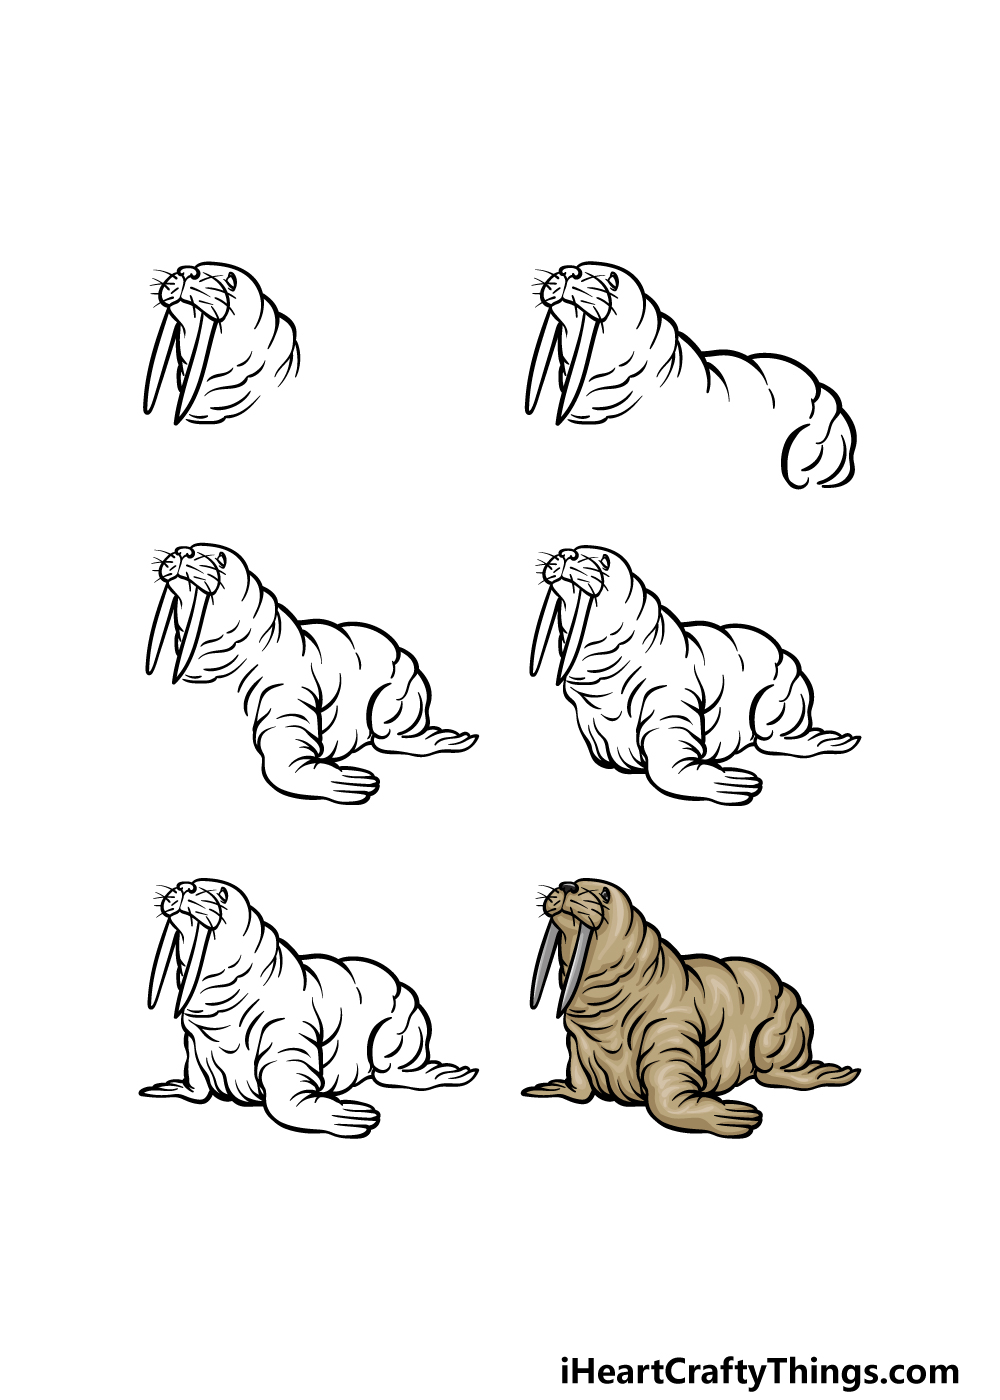
How to Draw A Walrus – Let’s Get Started!
Step 1
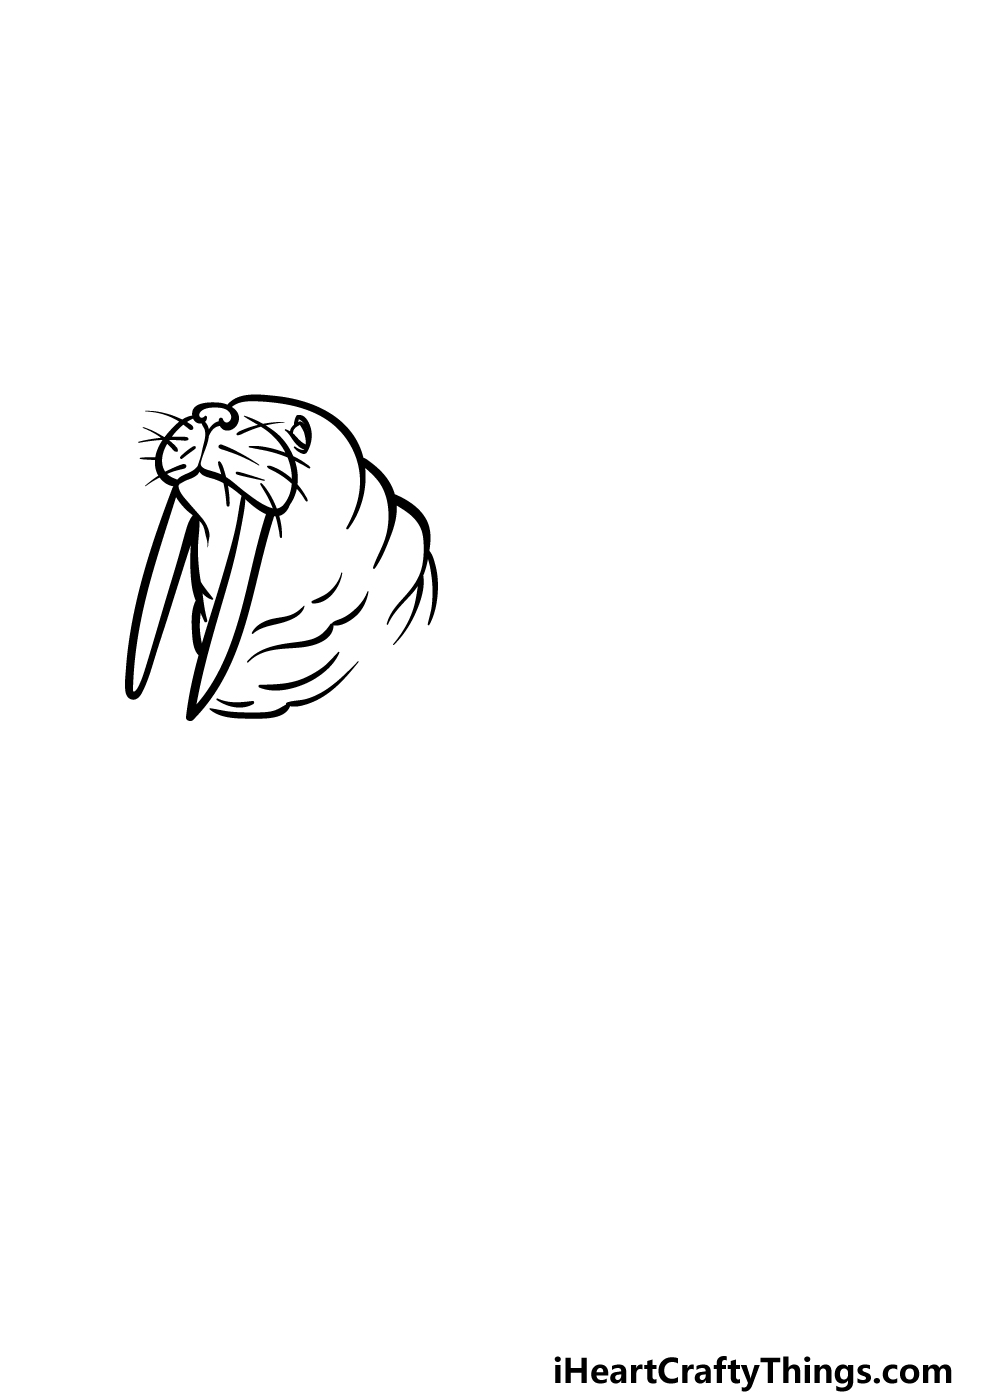
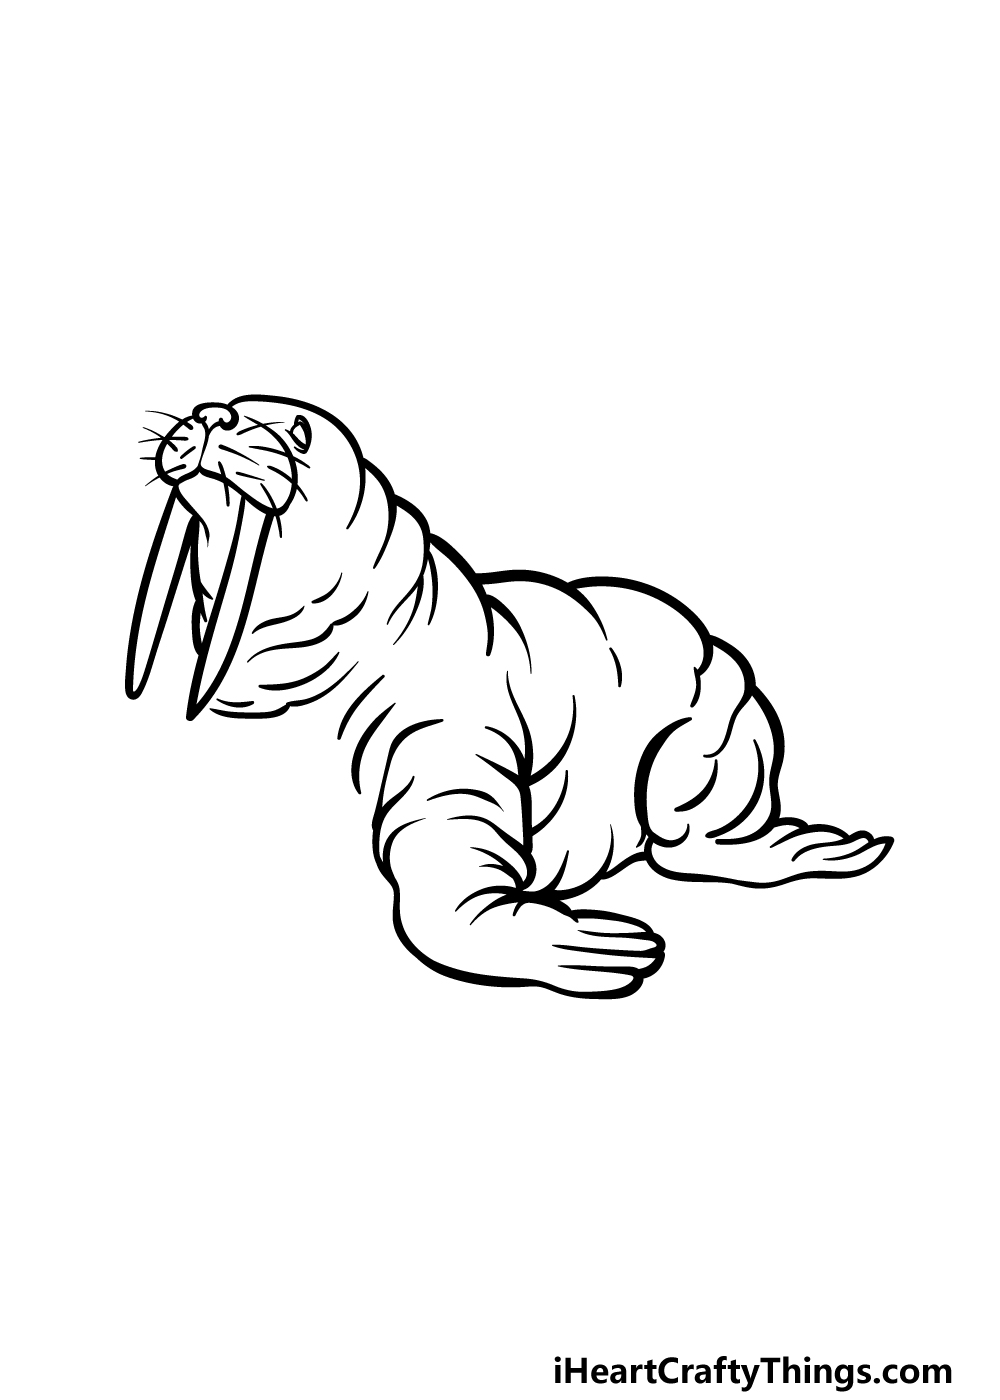
We shall kick off this guide on how to draw a walrus with the most recognizable part of the animal!
This means that we will be drawing the head and large tusks of the walrus, and you can start by using a curved line for the top of the head.
The body of the walrus will generally look rather lumpy and wrinkled, and we will draw this effect using lots of curved lines connecting to one another.
Use this effect for the back and front of the neck, and then draw some facial details such as the eyes, nose and whiskers.
Finish off by using some long curved lines with pointy tips at the ends for the tusks, and then it’s on to step 2!
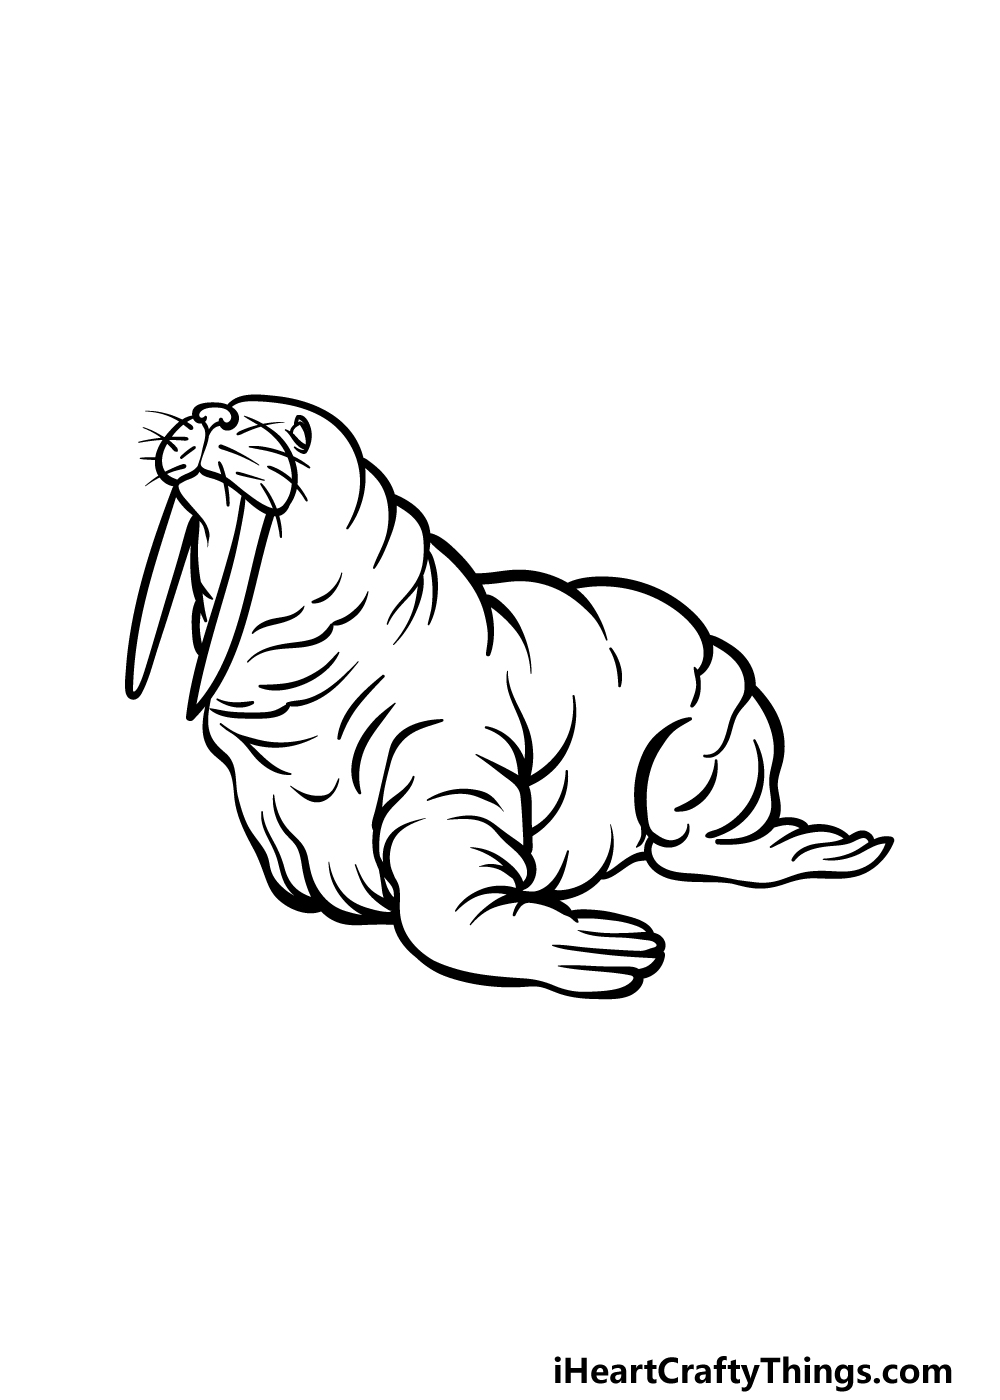
Step 2 – Now, draw the back of the walrus
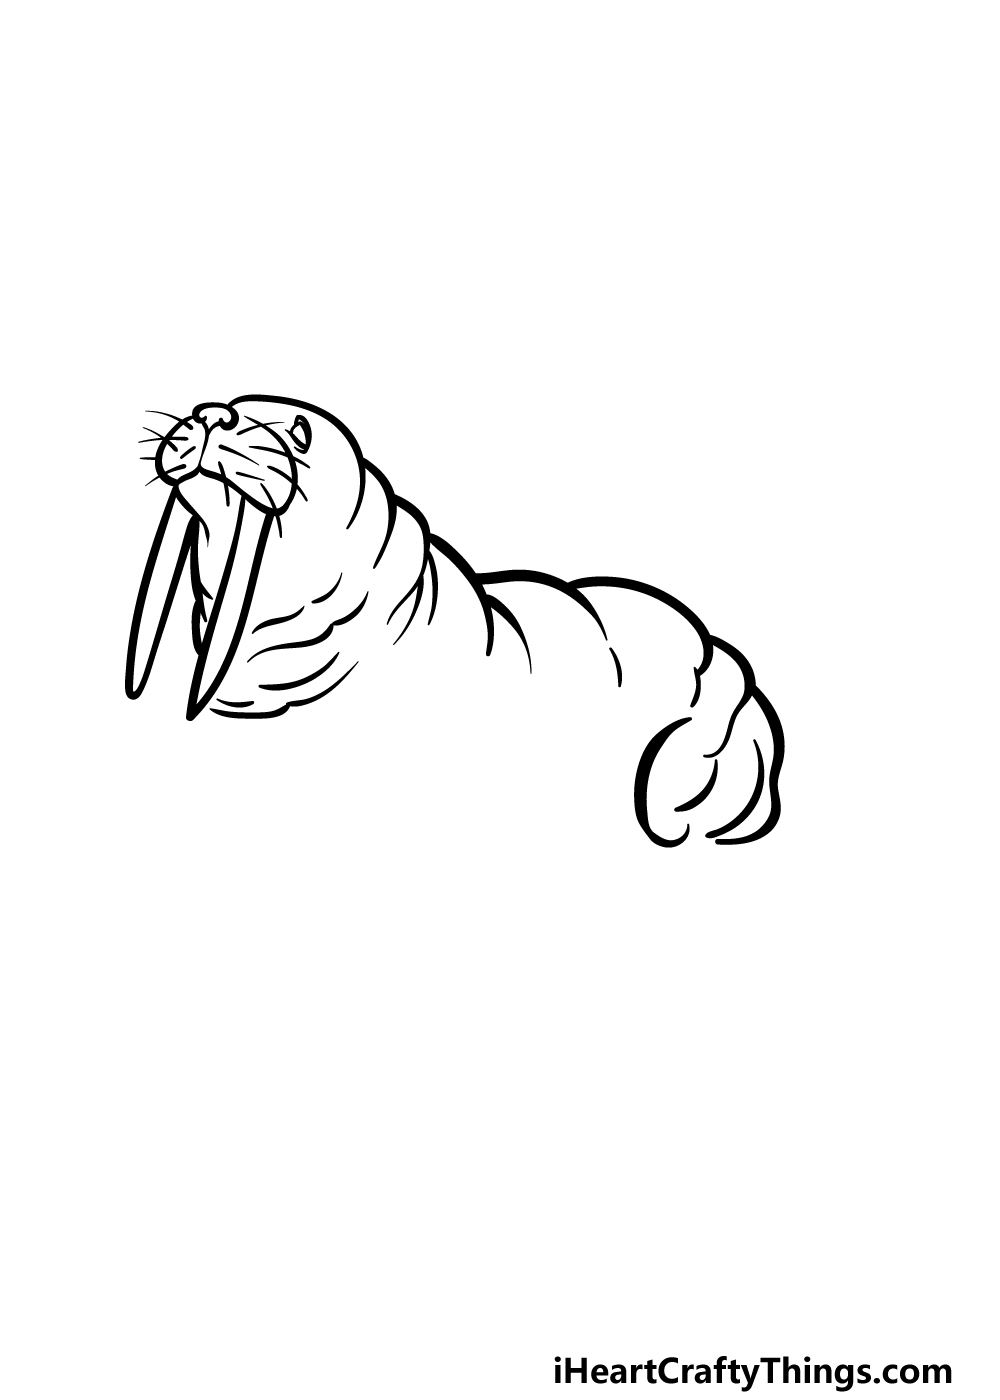
With the head complete, we can now draw the back of this walrus! Much like the neck, we will draw the back using some curved, wavy lines to create that wrinkly look that we’re going for.
The back will angle downwards a bit, and you can also draw the top of the thigh for the back flipper using some curved lines.
Once the back is drawn, we will be ready to take on step 3 of the guide!
Step 3 – Draw the first flippers for the walrus
This big animal wouldn’t do very well in the water without some flippers to propel it along, so we had better add some in this third step of our guide on how to draw a walrus!
The front flipper will be drawn using the same curved line method you’ve been using, and it will have a thick upper section that leads to the end of the flipper extending out at a right angle.
The back flipper will be flat against the ground and pointing backward, and it will attach directly to the hip that you drew in the previous step.
Step 4 – Next, draw the chest of the walrus
Continuing with this walrus drawing, you will be adding the final part of the body in this step. This will be the chest of the animal, and this will be rather wrinkly like the rest of the body is.
Simply use some more curved lines connecting to one another as shown in the reference image, and then add some line details extending inside the chest portion.
This will help this final section of the body to look consistent with the rest of the body that you’ve drawn already.
Once this part is done, we will then move on to the next part to finish off the final aspects and details of this picture!
Step 5 – Add the final details to your walrus drawing
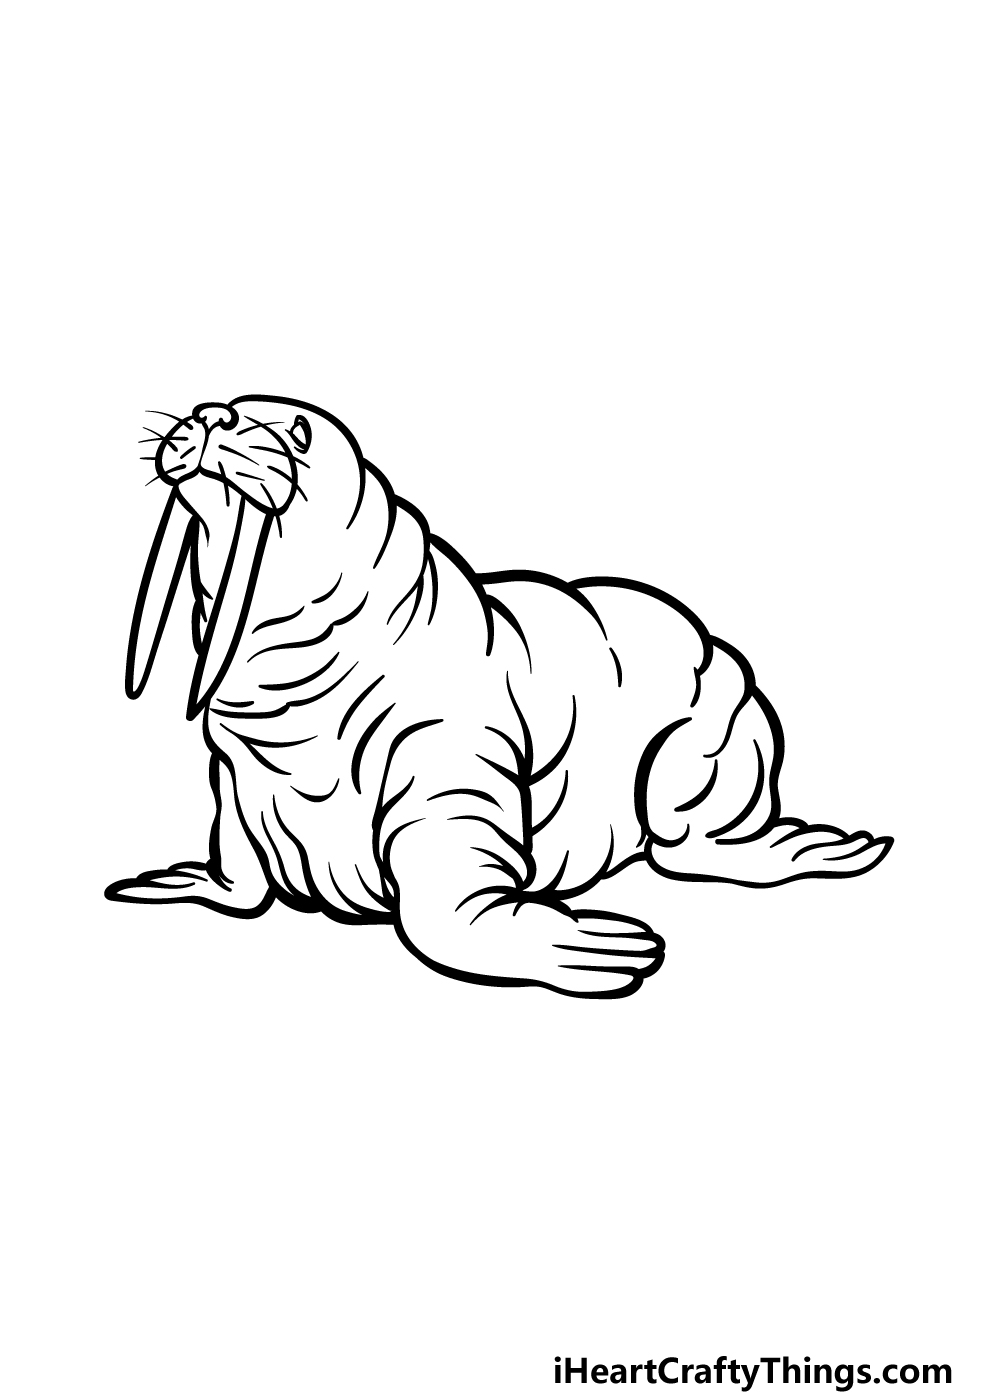
Before you move on to the final step of this guide on how to draw a walrus, we have just one more element to add along with some final details! The main thing to add will be the last flipper.
This one will go on the right, and it will still straight out as the first one did. Other than the position, angle and smaller perspective, it will look rather similar to the other flippers you’ve drawn.
Once this flipper is drawn, you can then go about adding some more details and ideas of your own!
These could include a fun background or even some more sea animals to go with this walrus. What kinds of settings and other animals can you think of to finish up the scene?
Step 6 – Finish off your walrus drawing with color
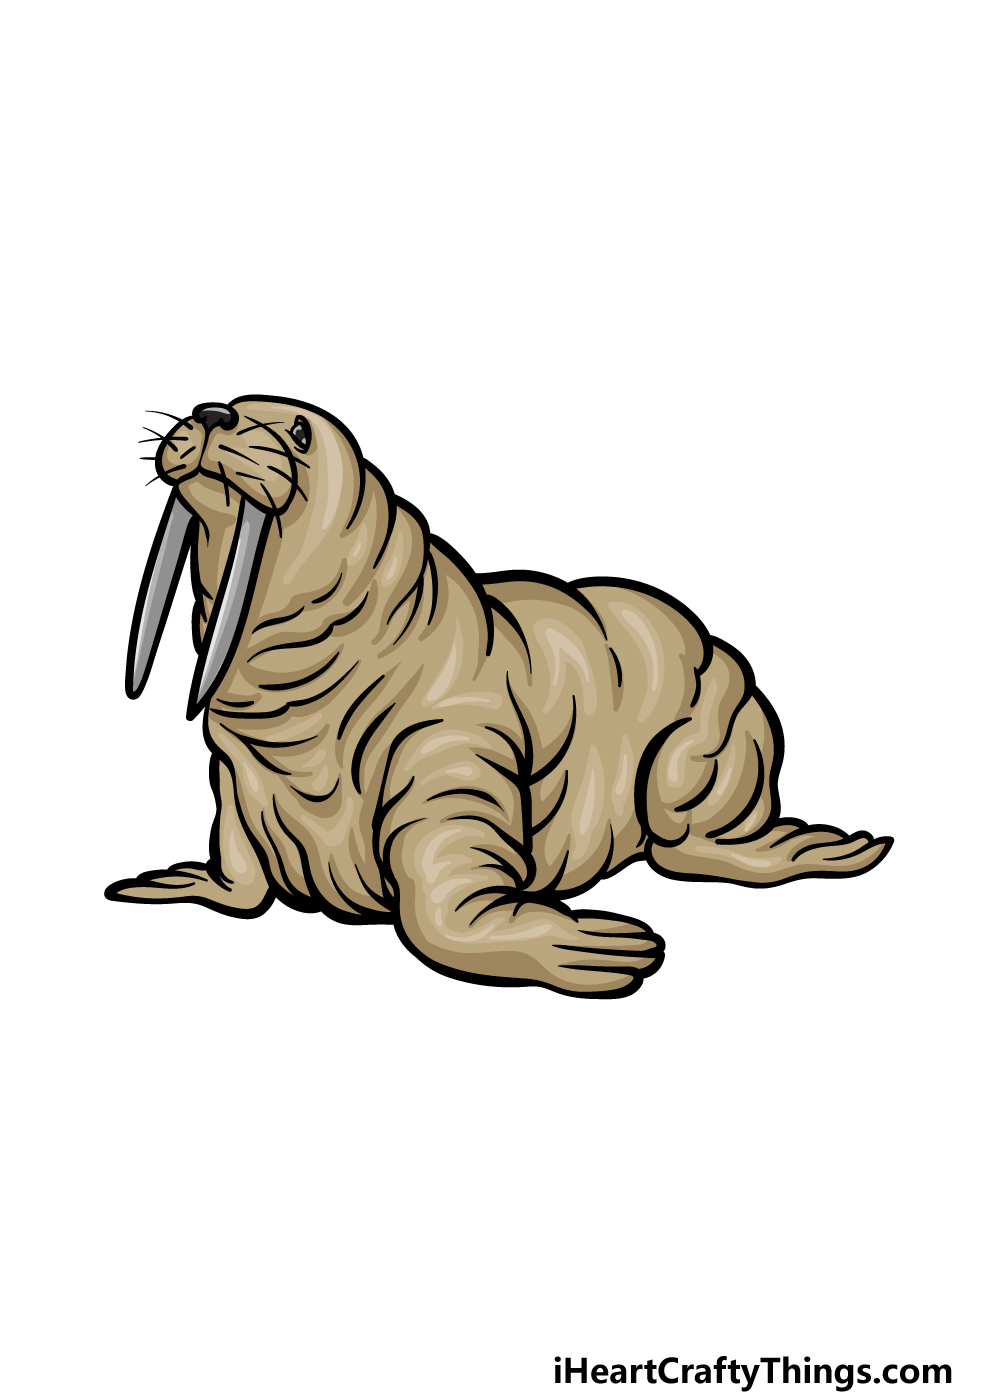
This is the final step of this walrus drawing, and in it you can finish off by coloring your creation! Our reference image shows you just one of the ways that you could go about coloring your walrus.
We used various shades of browns throughout the body to give it a more realistic look. By incorporating shades of different intensities, you can make sure that there is more definition for the skin.
When coloring your own version, you could go for all manner of incredible colors!
You could use other muted colors for a more realistic version, or you could use brighter, more stylistic colors to create a more vibrant picture.
What colors and art mediums will you choose to complete this image?
3 More tips to make your walrus drawing easy!
Find out how to make your walrus sketch even easier with these fun tips!
This drawing of a walrus was made more realistic by having many lines and folds in its skin. This makes the drawing look really great, but it can also make it much harder to draw, as there are so many details to account for.
If these details are proving too frustrating, you should definitely look into removing some of them in order to simplify the image.
For earlier attempts at this image, you could remove some of these wrinkles entirely!
Doing this would make it a simpler image, but it would make it easier and remove much of the frustration.
You could always make later attempts where you include more of the details you removed!
If you want to include these details in your own walrus drawing, you could use a pencil to map them out. Using your pencil, you could start with the outline of the walrus.
Then, slowly add some more of the finer skin details and lines until it starts looking more like our example. Try to carefully follow our example image if this is an area that is giving you problems.
Then, when you are happy with how it is looking you can then use a pen or a darker pencil to add the final lines.
Finally, if all of these tips are still not making your walrus sketch easy enough, you could use another source to make it even easier. If you use a search engine online, you will find many pictures of walruses.
Many of them will probably be posed similarly to our example, and these are your best bet for making the image easier. These photos will also help you to add some more details and make it even more realistic.
They would also help if you potentially wish to portray the walrus in a different pose or if you want it to face a different direction. Using a photo along with our other tips should make it so much easier!
Your Walrus Drawing is Complete!
We hope that you had an incredible time working on this guide on how to draw a walrus!
Drawing a creature like this that has so many details can be quite a challenge, but we tried to show you how easy it can ve when it’s broken down into smaller steps.
Following the steps and doing your best is a surefire way to conquer any drawing challenge!
Now that you can draw this awesome walrus, you can keep the drawing going with your own cool details and elements.
We spoke about a few ideas such as drawing a background and some more animals, but now it’s up to you to take over and show what you can do!
When you’re ready to keep the drawing momentum going, you can check out our website for more awesome drawing guides to enjoy!
We have a massive selection to choose from with more on the way, so keep checking in!
You can then finish up the process by sharing your finished walrus drawing on our Facebook and Pinterest pages!