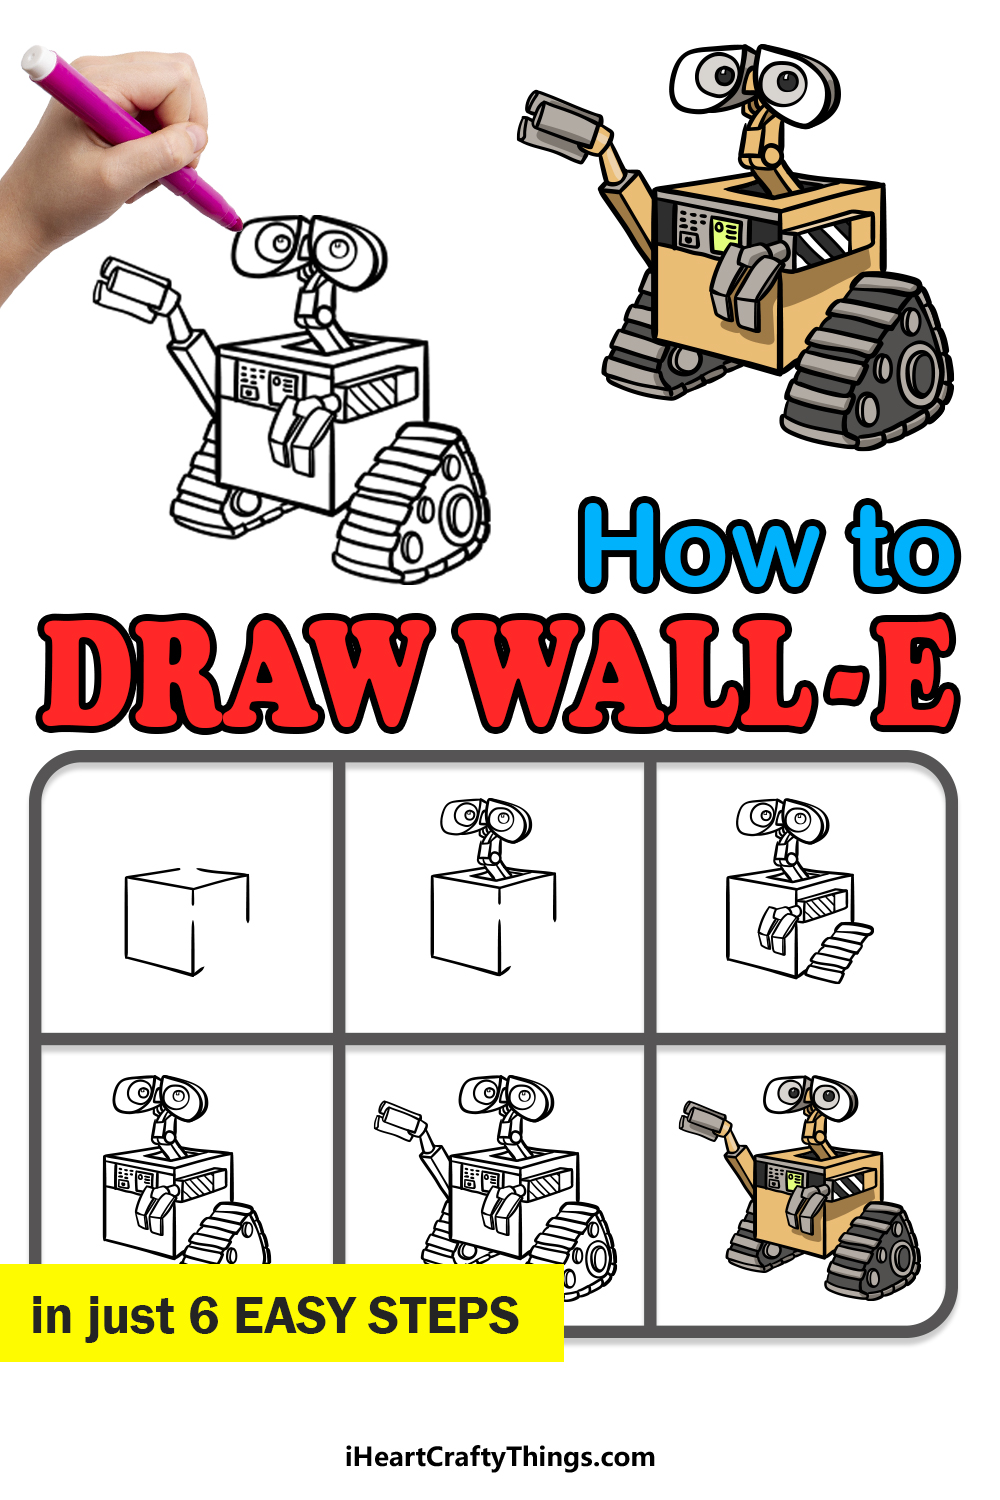
There are many classic characters throughout the many animated films that Disney and Pixar have released over the years.
Yet not many of these characters, beloved as they are, can claim to have won over as many hearts without saying a single word as the adorable robot Wall-E has.
Released in 2008, this charming film features a unique plot and an important message about environmental conservation.
Learning how to draw Wall-E is a great way to show off your love for the lovable little guy!
This guide in front of you will show you everything you need to know in order to do that.
We hope that you have lots of fun with this step-by-step guide on how to draw Wall-E in 6 steps!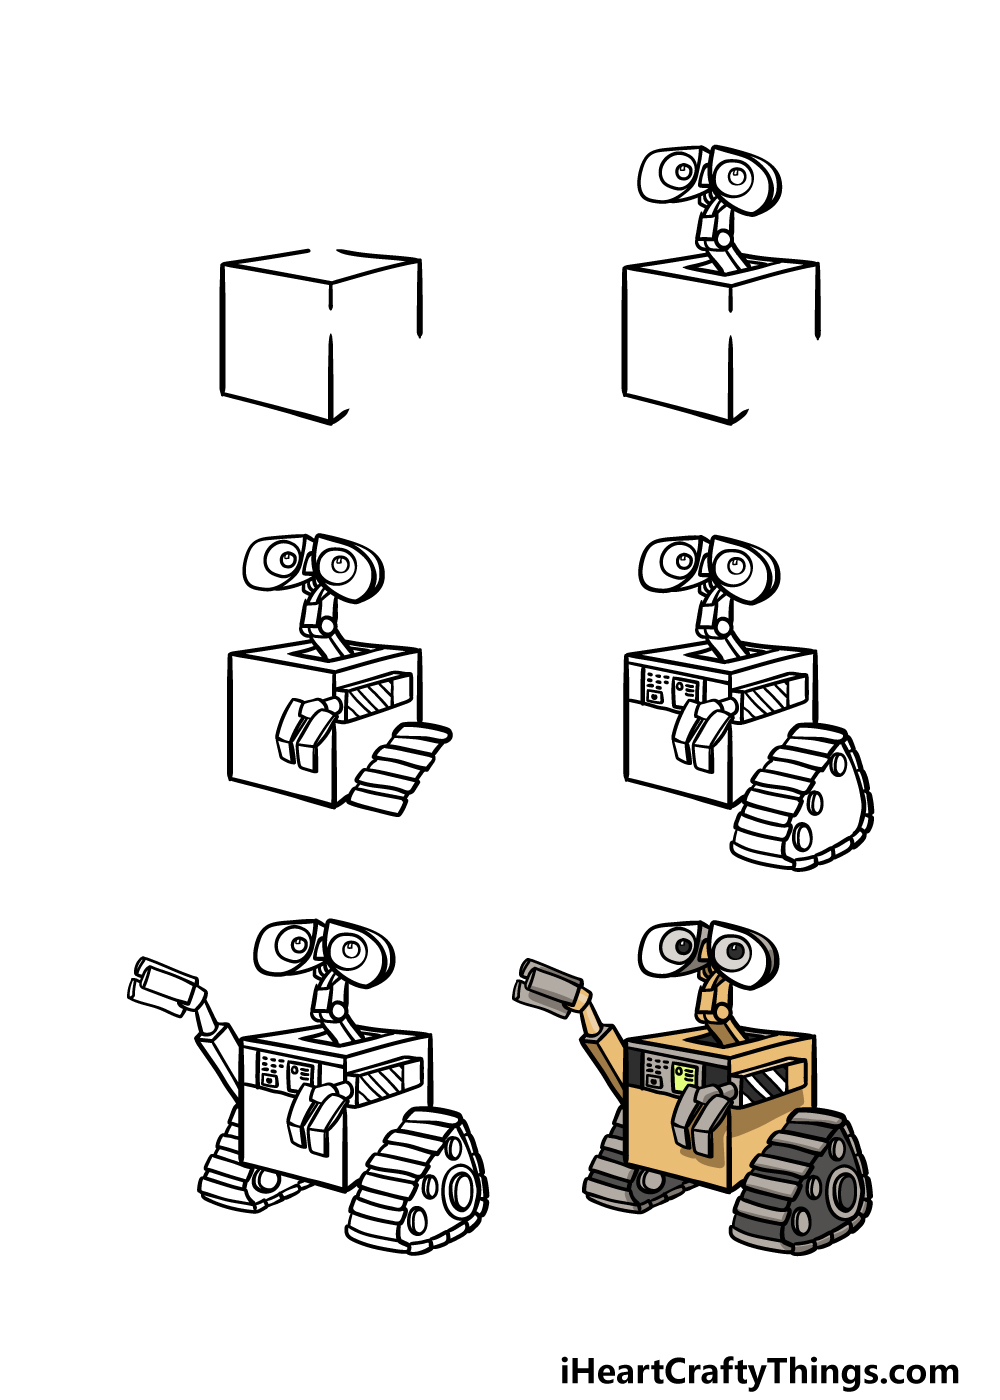
How to Draw Wall-E – Let’s Get Started!
Step 1
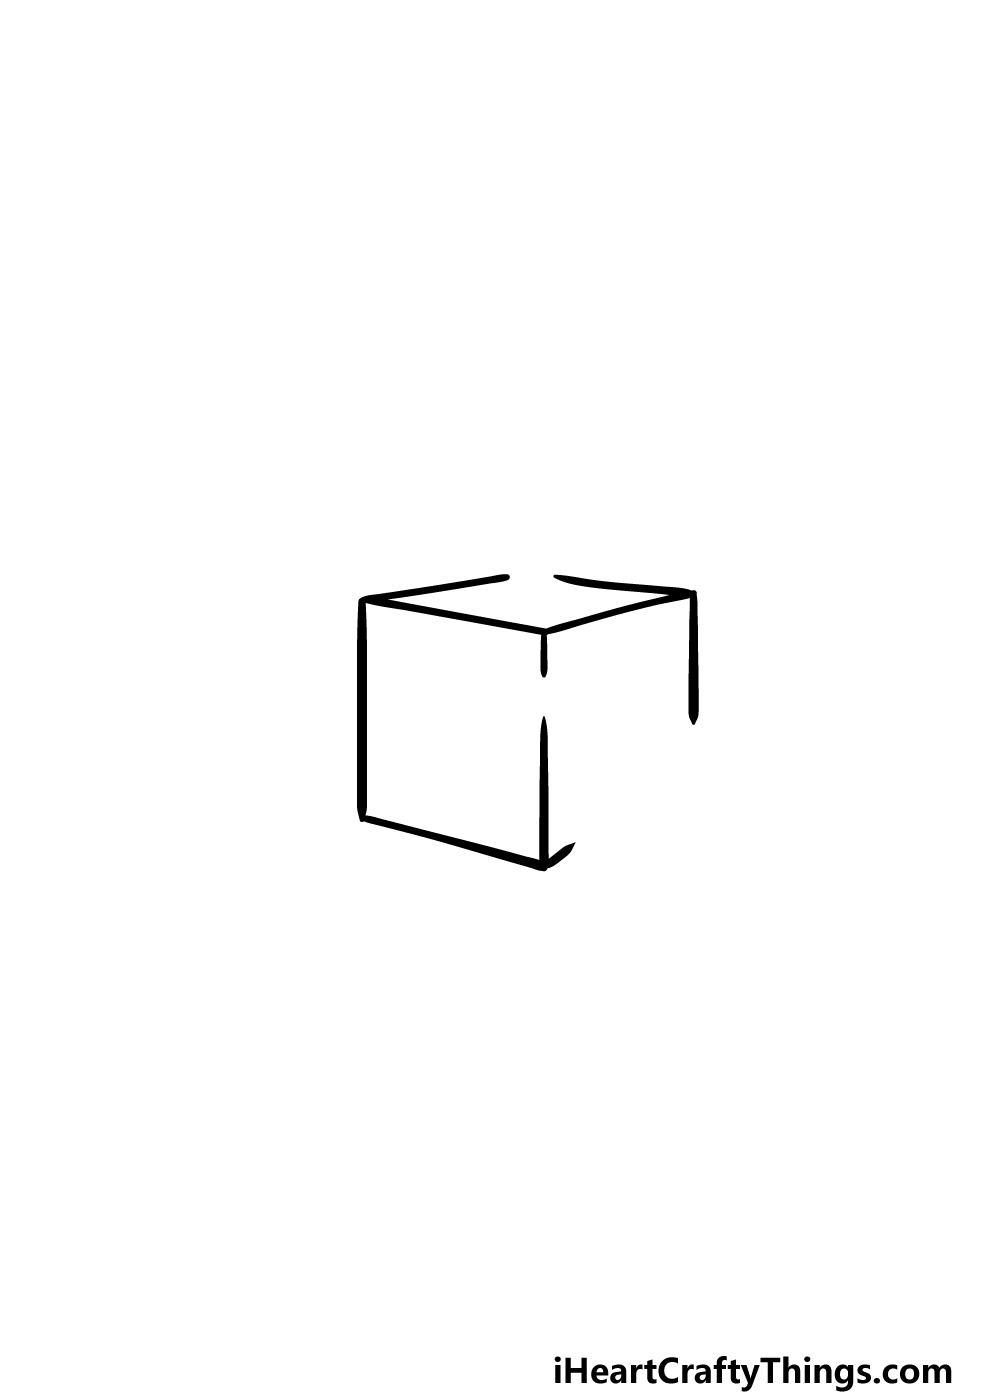
Before you start this guide on how to draw Wall-E, you may want to grab a ruler for this first step, as we will be drawing lots of straight lines.
Once you are ready to go, we can start drawing his square body. Try to imagine it as a big cube, as that is essentially what we will be drawing as the basis of his body.
Start by drawing a square shape, but be sure to leave a small gap on the right-hand side of it. Then draw a flat square shape for the top edge, and this time leave a small gap on the top corner.
Finally, extend another line down from the right corner of that top square, but be sure to leave a big gap on the lower right side of the cube.
Step 2 – Now, draw the head and neck for Wall-E in this step

Now that you have the cubed body for Wall-E drawn, you can now start drawing his head and neck. You will also see why we left a space on top of your Wall-E drawing in the previous step!
Use some straight lines to draw the thin neck sticking up out of this gap. There will be a round hinge in the middle that makes the neck arch backward, and then you can draw his head on top of it.
His head looks a bit like a pair of binoculars, so use some circles with more circles within them for his eyes, and then draw the casing around them. Then you will be ready for step 3!
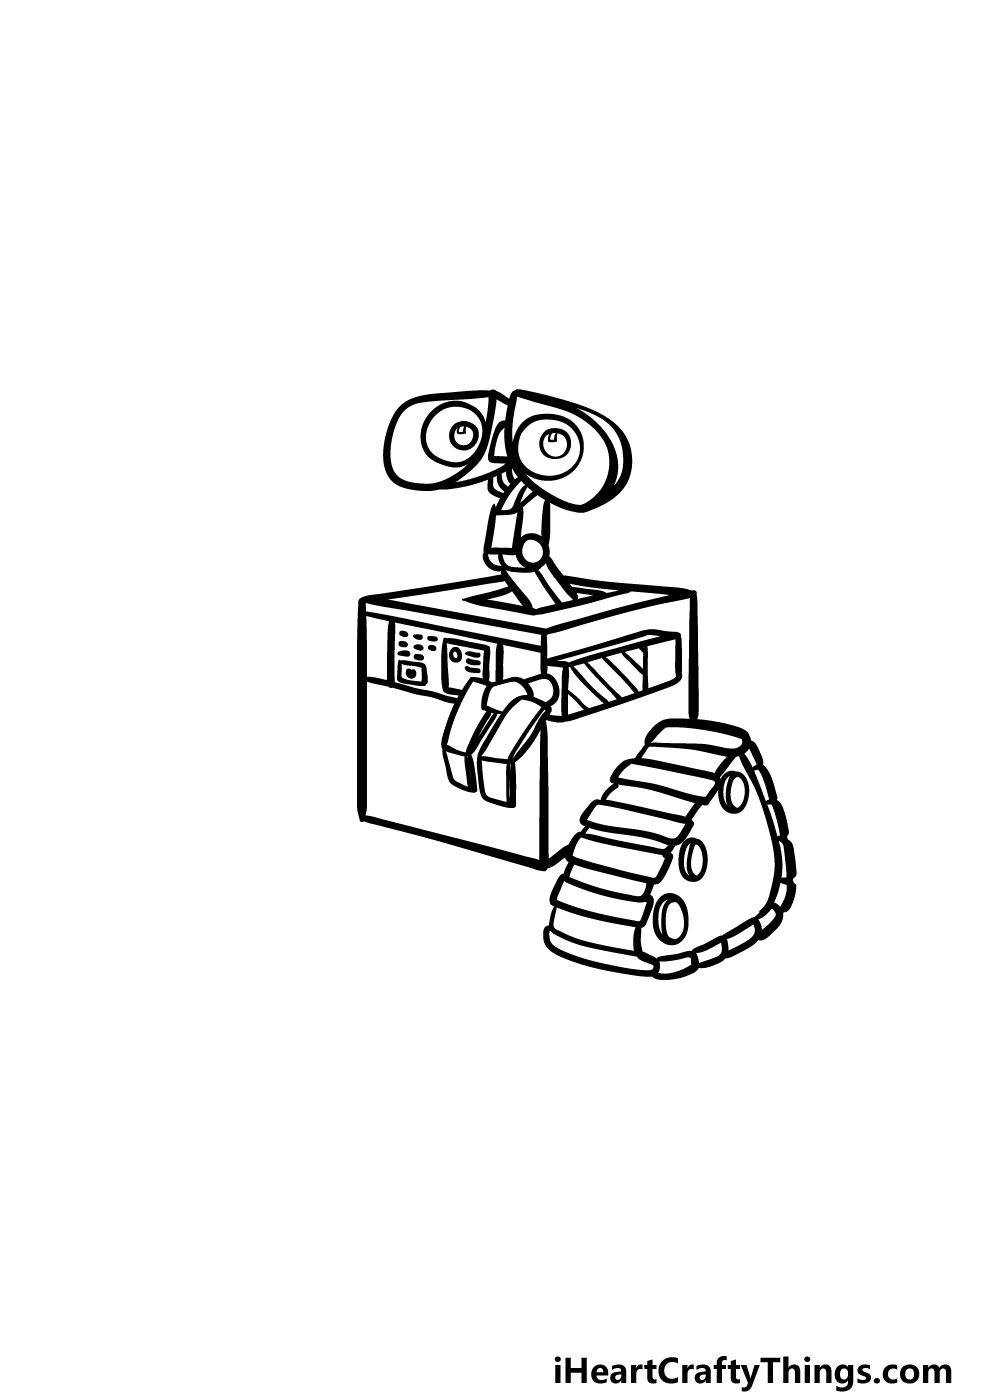
Step 3 – Next, draw his first arm and start his treads
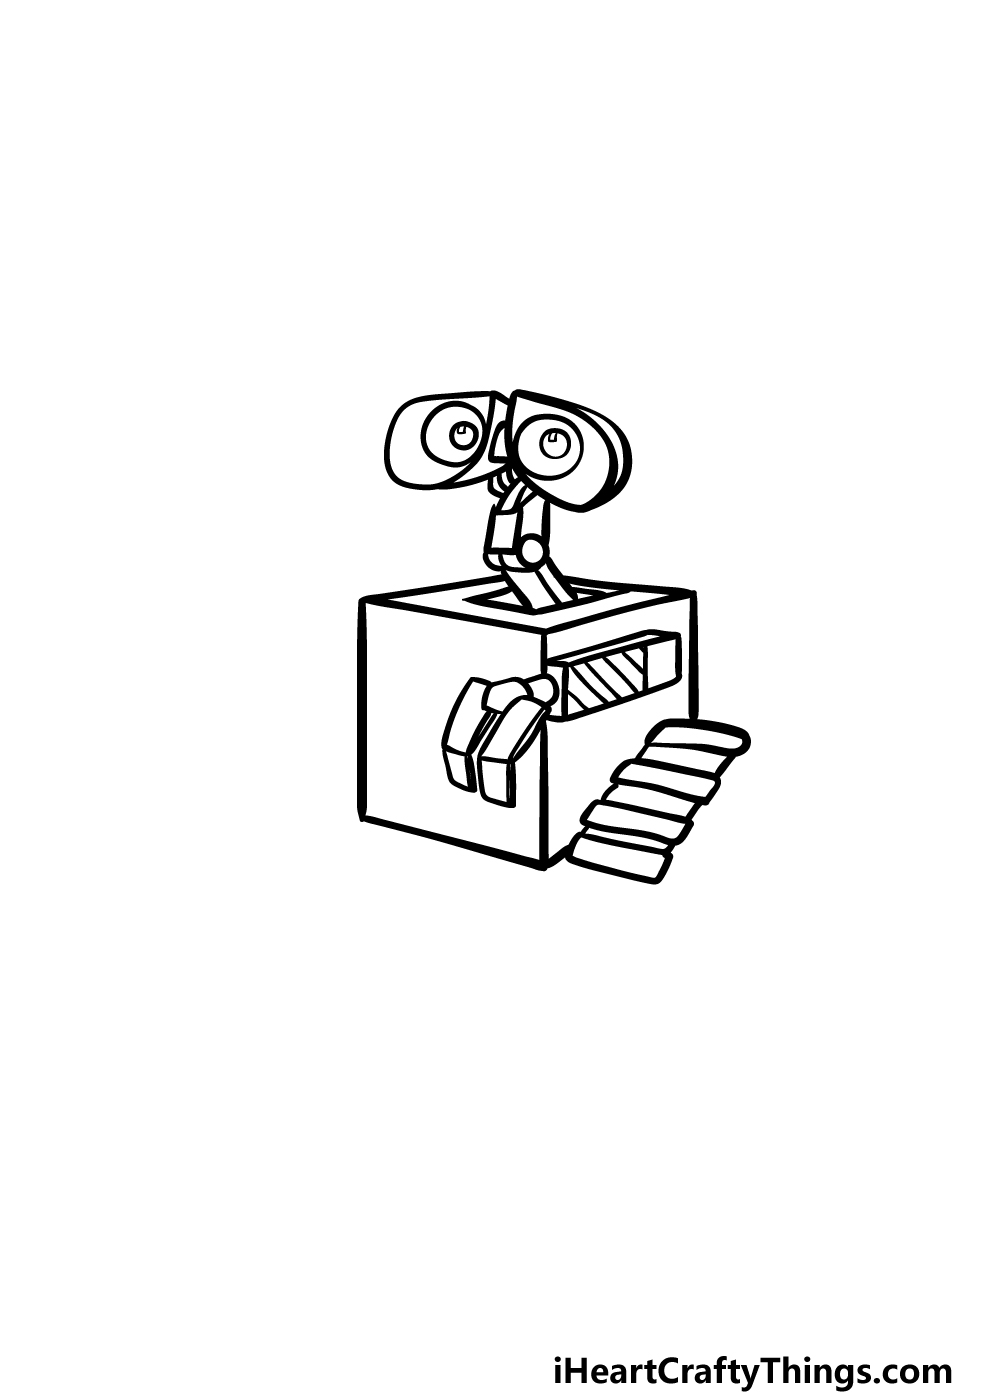
Continuing on with this guide on how to draw Wall-E, we will now be drawing his first arm as well as the treads that he uses to get around.
For his arm, start out by drawing a thin, rectangular shape near the middle of the cube’s right-hand side.
Then, in the gap that you left on that edge, you can draw his claw hand using some straight, angular shapes.
Finally, we will be filling in the final space that we left at the bottom right-hand side of the cube. This will be filled with the start of the treads he uses to move around.
To draw this, simply add a long, thin rectangle followed by a slightly shorter one and then one the same length as the first, and so on. We will finish drawing these treads in the next step, so let’s move on!
Step 4 – Draw the rest of the treads and some more details
As mentioned in the previous part of your Wall-E drawing, we will be finishing off the tread that you started in the last step now.
Draw some more rows of small, thin rectangle shapes for the back of the treads, and then you can draw some circles inside of the inner shape.
You can theme use some simple lines for some buttons and small screens on his chest, as shown in our reference image. Then it’s on to the final details and touches in the next step of the guide!
Step 5 – Add the final touches for your Wall-E drawing
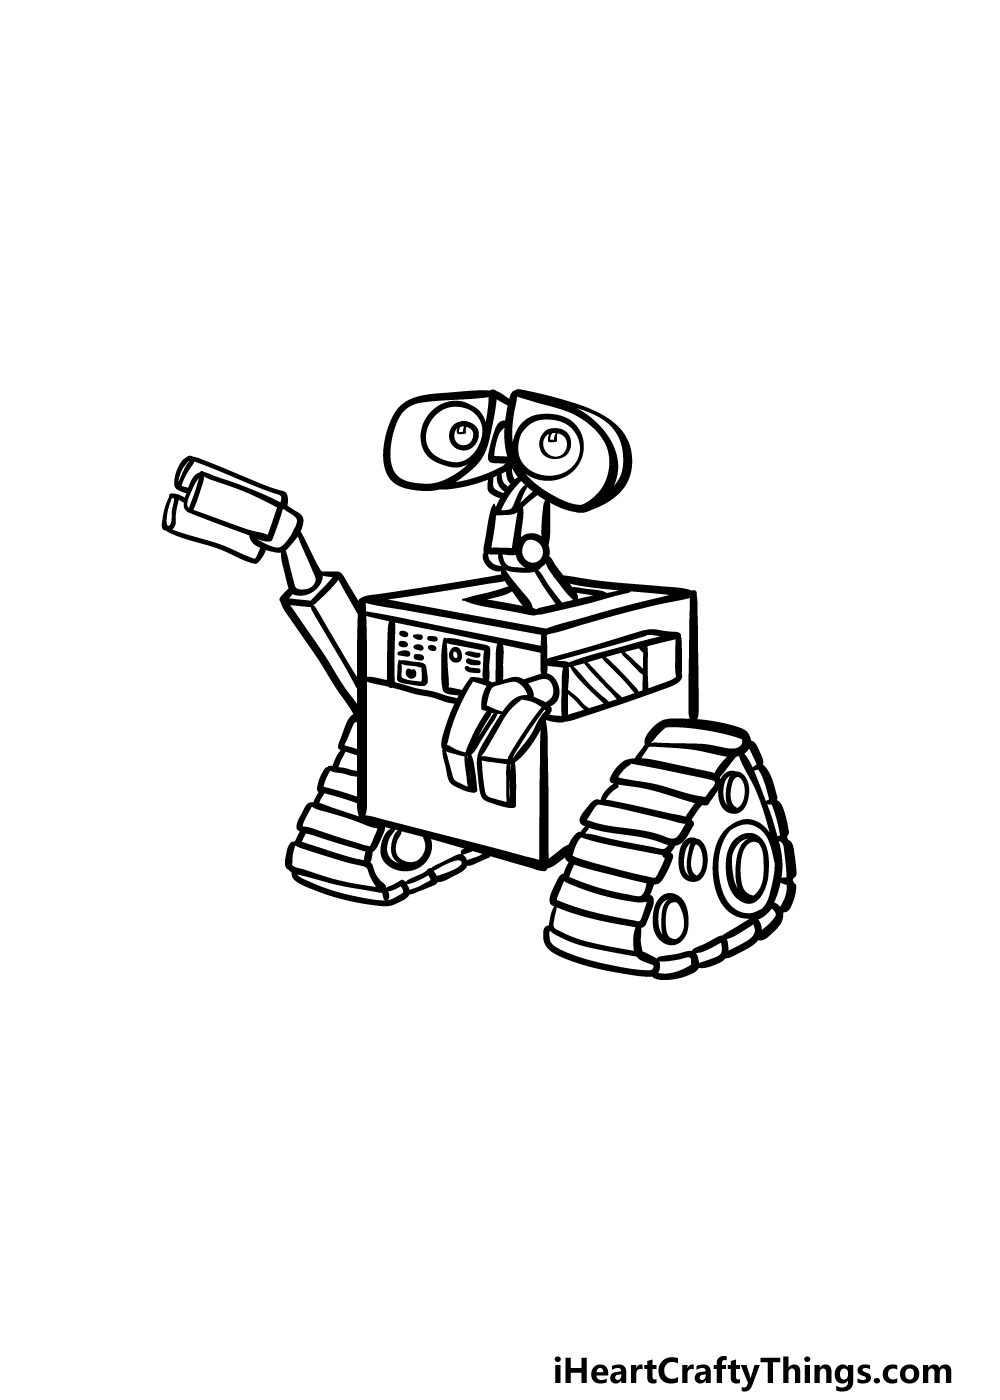
It’s time to finish off this drawing before you move on to the final step of this guide on how to draw Wall-E.
First, using the same method you used for the first treads, you can draw the bottom of the second one poking out on the lower left-hand side.
Finally, use some more straight lines and rectangular shapes to have his other arm and claw reaching out.
Once you have drawn these, you will be ready to color Wall-E in! Before you move on to that step, feel free to also add any details or ideas of your own.
Perhaps you could draw a background to show off your favorite scene from the film! How will you finish off this picture?
Step 6 – Finish off your Wall-E drawing with some color
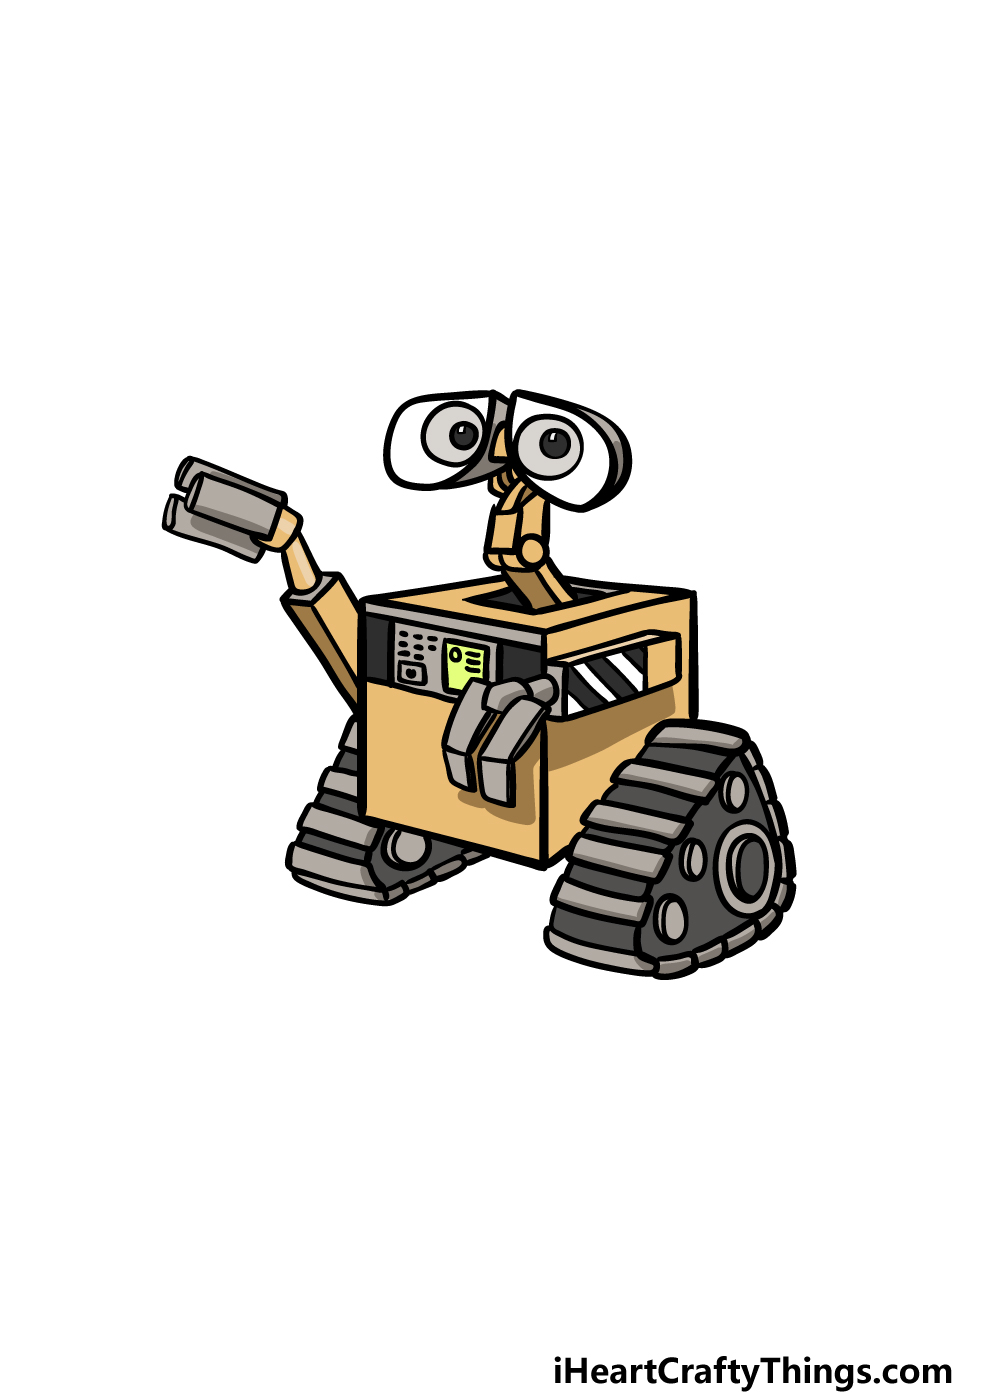
This final step of your Wall-E drawing will be all about finishing it off with some color. In the film, Wall-E has a rather muted color scheme.
In our example image, we aimed to replicate this color scheme by using some darker yellows and greys to color him in.
You can use our example as a guide if you would like to keep his colors looking as they did in the movie, or you could use some unique color choices of your own!
When you know which colors you would like, you can also have fun choosing the art mediums you will use to achieve them. We can’t wait to see how you finish off this drawing with color!
5 Tips To Make Your Wall-E Drawing Even Better!
Check out these tips for making your Wall-E sketch even cooler than it is!
In the movie, Wall-E will sort trash and compact it into squares. To show this side of his character in this drawing of Wall-E, you could draw some broken machinery and trash cubes around him.
The messier you make the environment around him, the more accurate it will be to how it looked in the movie. What are some distinct types of trash you could add to the scene?
Wall-E also finds himself in more pristine environments that are inhabited by humans in the movie. This would be another approach to creating a background for your artwork.
You could use some of these environments from the movie or create one inspired by it for this less cluttered background setting.
In the movie, Wall-E finds himself joined by another robot named Eve. She has a much cleaner and more efficient design, and it would be great to add her to this Wall-E drawing!
If you need a refresher on what she looks like, you could refer to the film or look up images online. Then the only question will be how would you pose her next to Wall-E?
The interpretation of Wall-E that we created in this image is quite clean and simple, and this was done to make it a bit easier to draw.
Now that you have completed the drawing, you could add some more details to make him look a bit more weathered. This could include dirt and rust stains along with small details we may have left out.
Once again, the movie can help you if you want to make him look super accurate!
Finally, it would be fun to add some different Pixar characters from other movies to your Wall-E sketch! This would be a great way to pay tribute to your favorite films from this studio.
You could have characters from Toy Story, Ratatouille or the Incredibles to name a few. What are some characters you would like to join Wall-E?
Your Wall-E Drawing is Complete!
Wall-E is such a classic character from animated film history, and we hope that you had a wonderful time recreating him in this guide on how to draw Wall-E!
There were lots of small details and tricky angles to get right for this image, so that’s why we attempted to break it down for you so that it would be fun and easy to work on.
If you enjoyed this guide, we have many more for you on our website, many of which also feature famous animated characters!
Be sure to visit us there for more fun, and check in regularly as we upload new ones frequently.
When you have completed your Wall-E drawing, please also share it on our Facebook and Pinterest pages for us to enjoy!