When thinking of impressive bird species, you may think of colorful and exotic parrots or maybe graceful predators such as eagles and hawks.
Vultures are neither colorful nor apex predators, but they are still impressive in their own right.
They sometimes get a bit of a bad reputation due to the fact that they scavenge the spoils of other animals, but they are still impressive in size and appearance.
This can make learning how to draw a vulture a fun and unique challenge.
If this is a challenge that you would like to take on, then you’re in the right place!
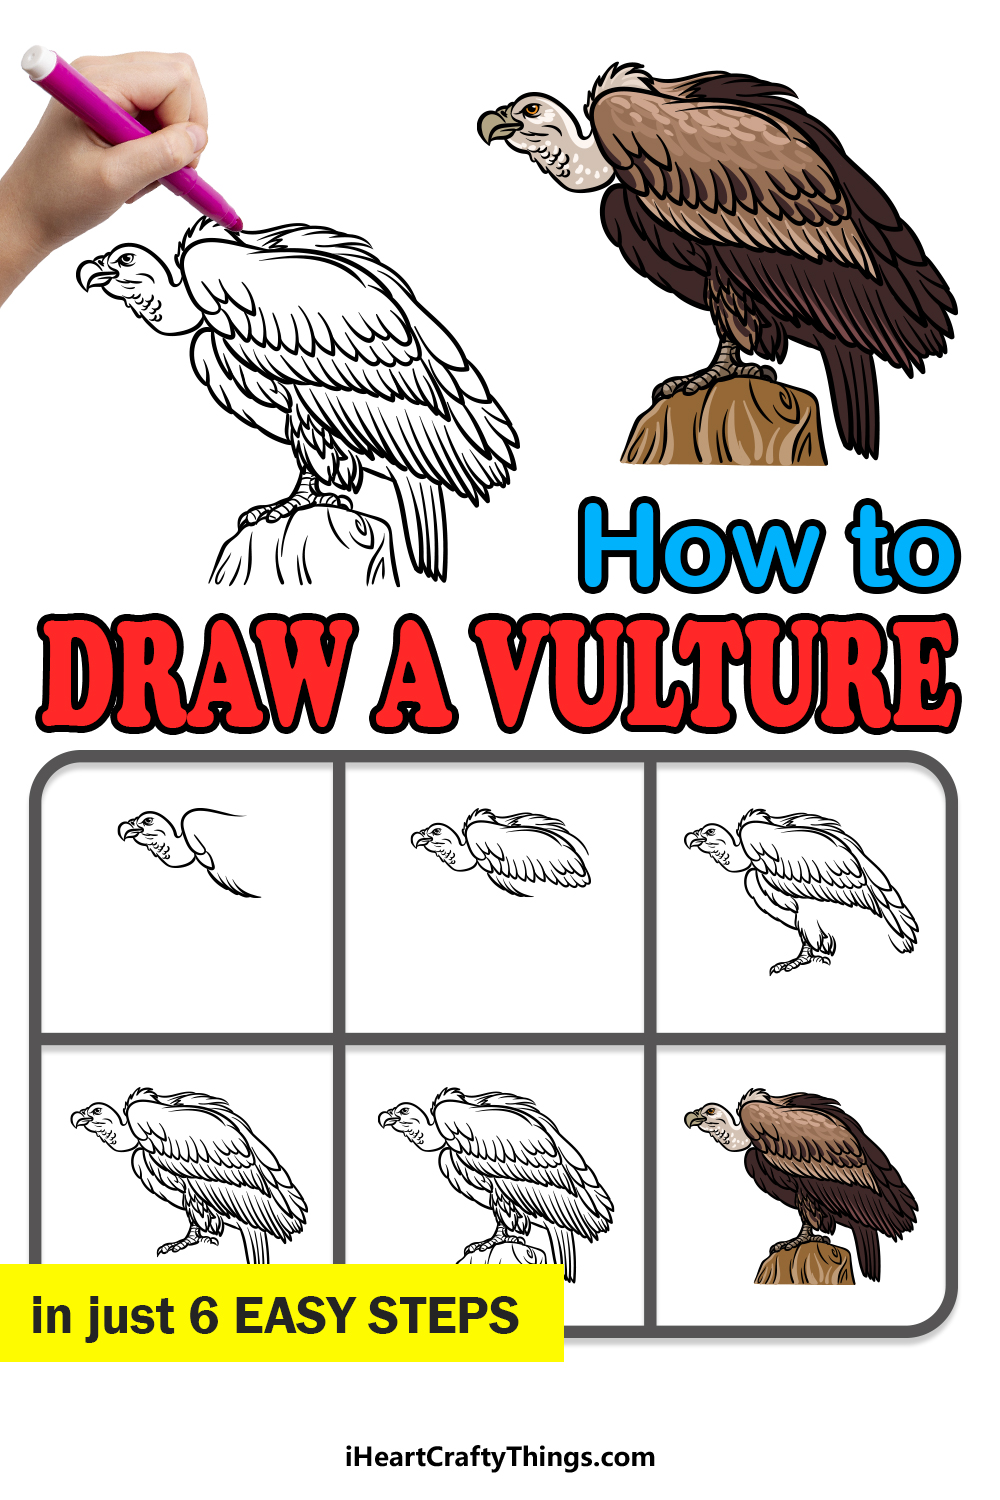
Our step-by-step guide on how to draw a vulture in just 6 easy steps will show you how fun and easy it can be.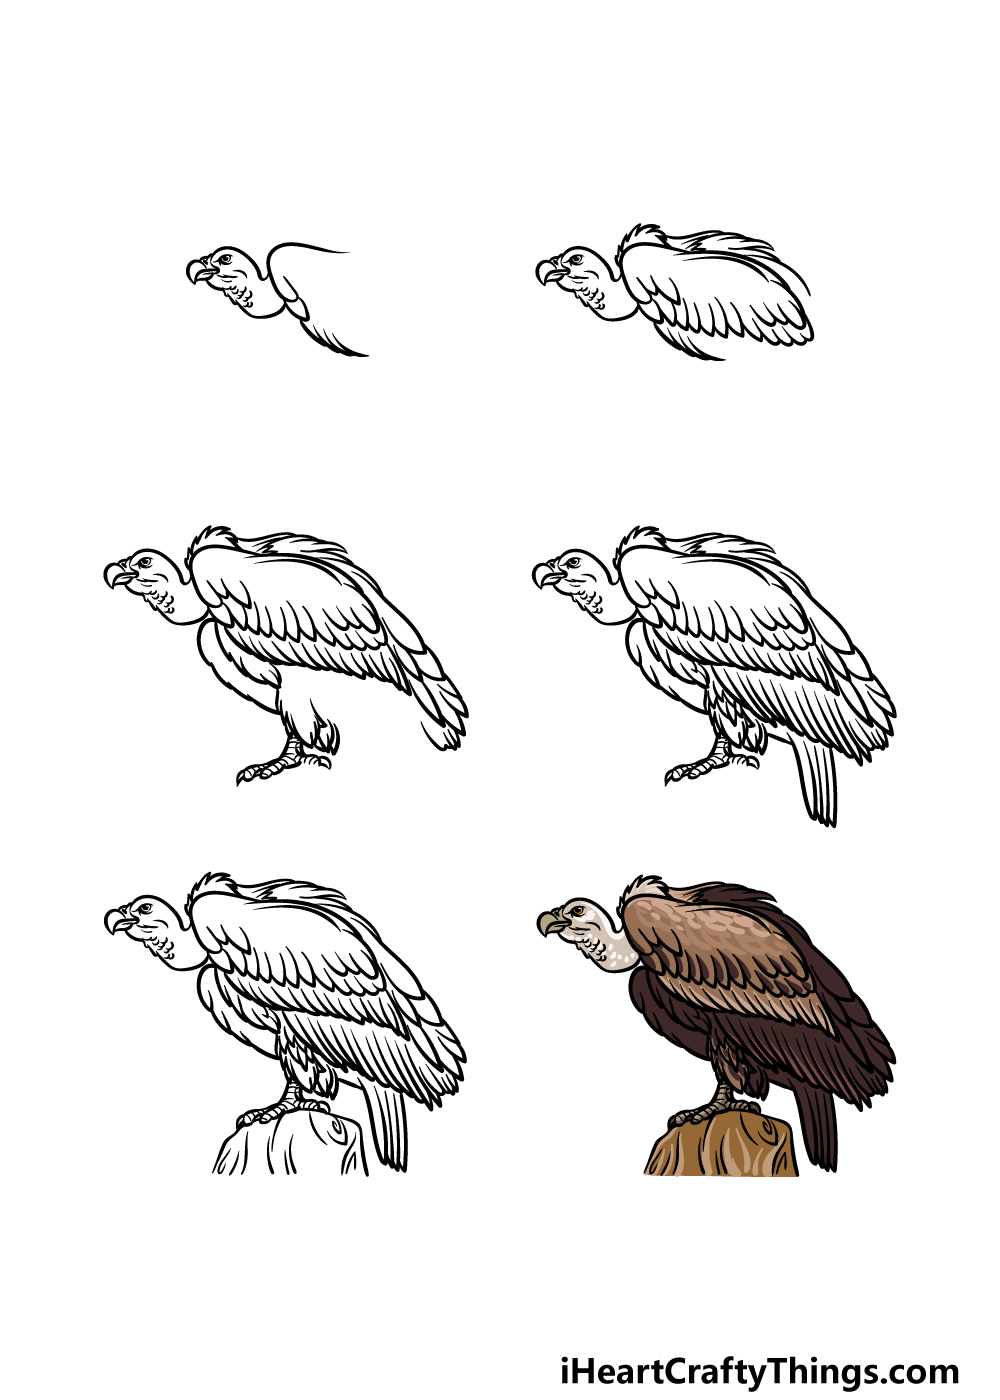
How to Draw A Vulture – Let’s Get Started!
Step 1

In this first step of our guide on how to draw a vulture, we will be focusing on the head, neck and start of the body for the vulture.
First, draw its small, curved and pointy beak before adding a small eye near to it. Vultures are known for their long, bent necks, and we will draw that now.
First, draw some curved lines for the head outline, and then draw the bent neck behind it. You can also add some small line details to the interior to make the neck look a bit more feathery.
Draw some more curved lines for the start of the body, and then you can move on to step 2!
Step 2 – Draw some more of the body features
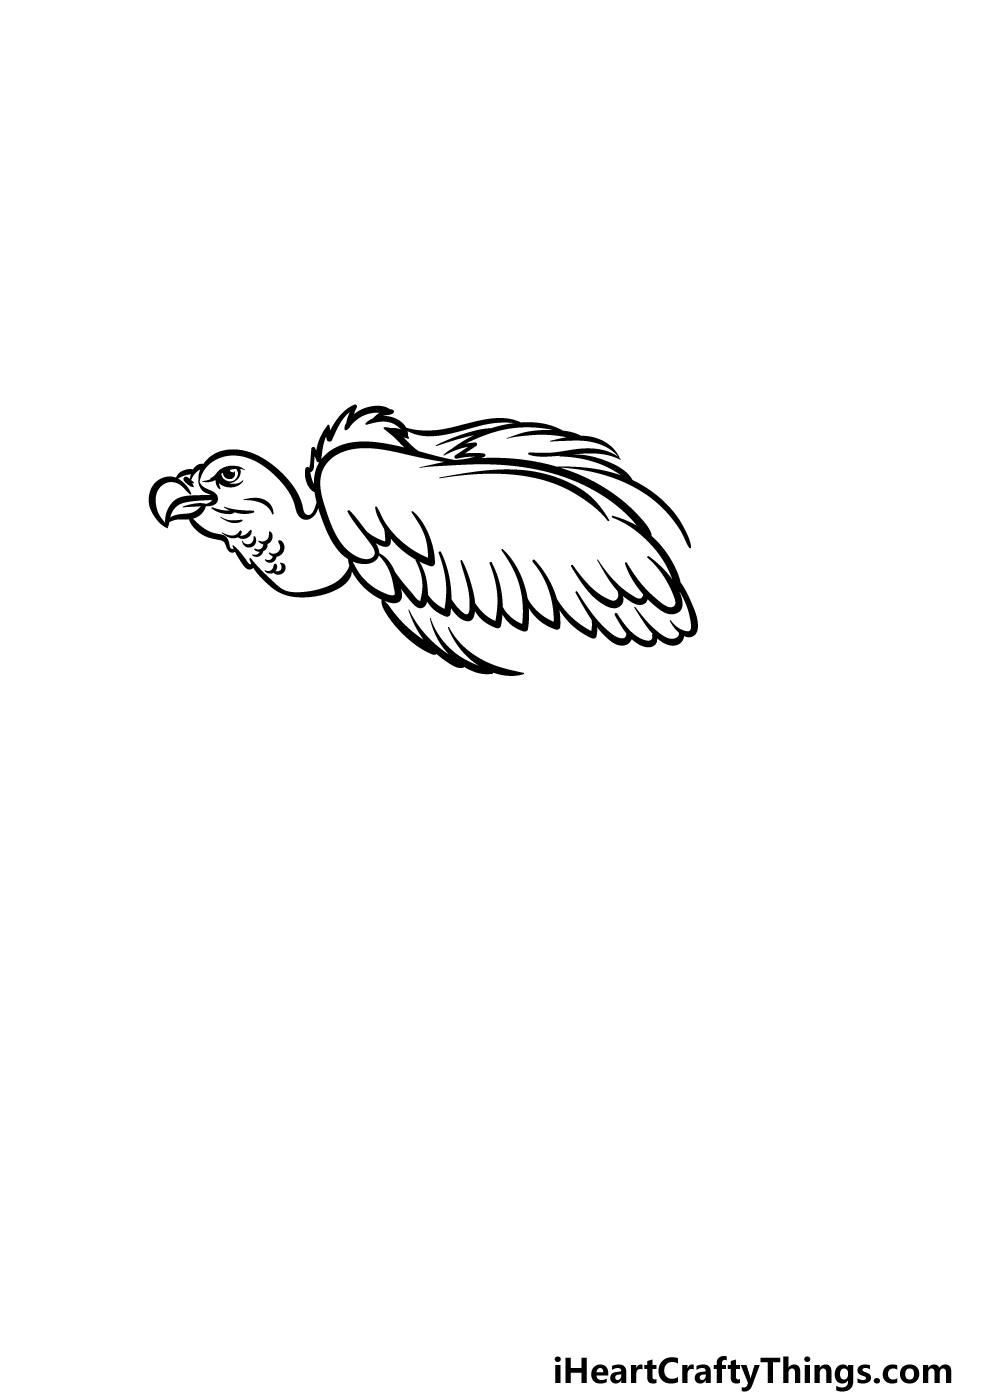
For the second step of your vulture drawing, we will be adding some more details to the body.
First, add some rows of curved lines with pointy tips for some rows of feathers onto the interior of the body.
Then, add some more pointy lines at the top of the body for some more feather details.
Finish off the final outlines for the body that we show in the reference image, and then you can proceed to step 3 of the guide.
Step 3 – Now, draw more feathers and the legs
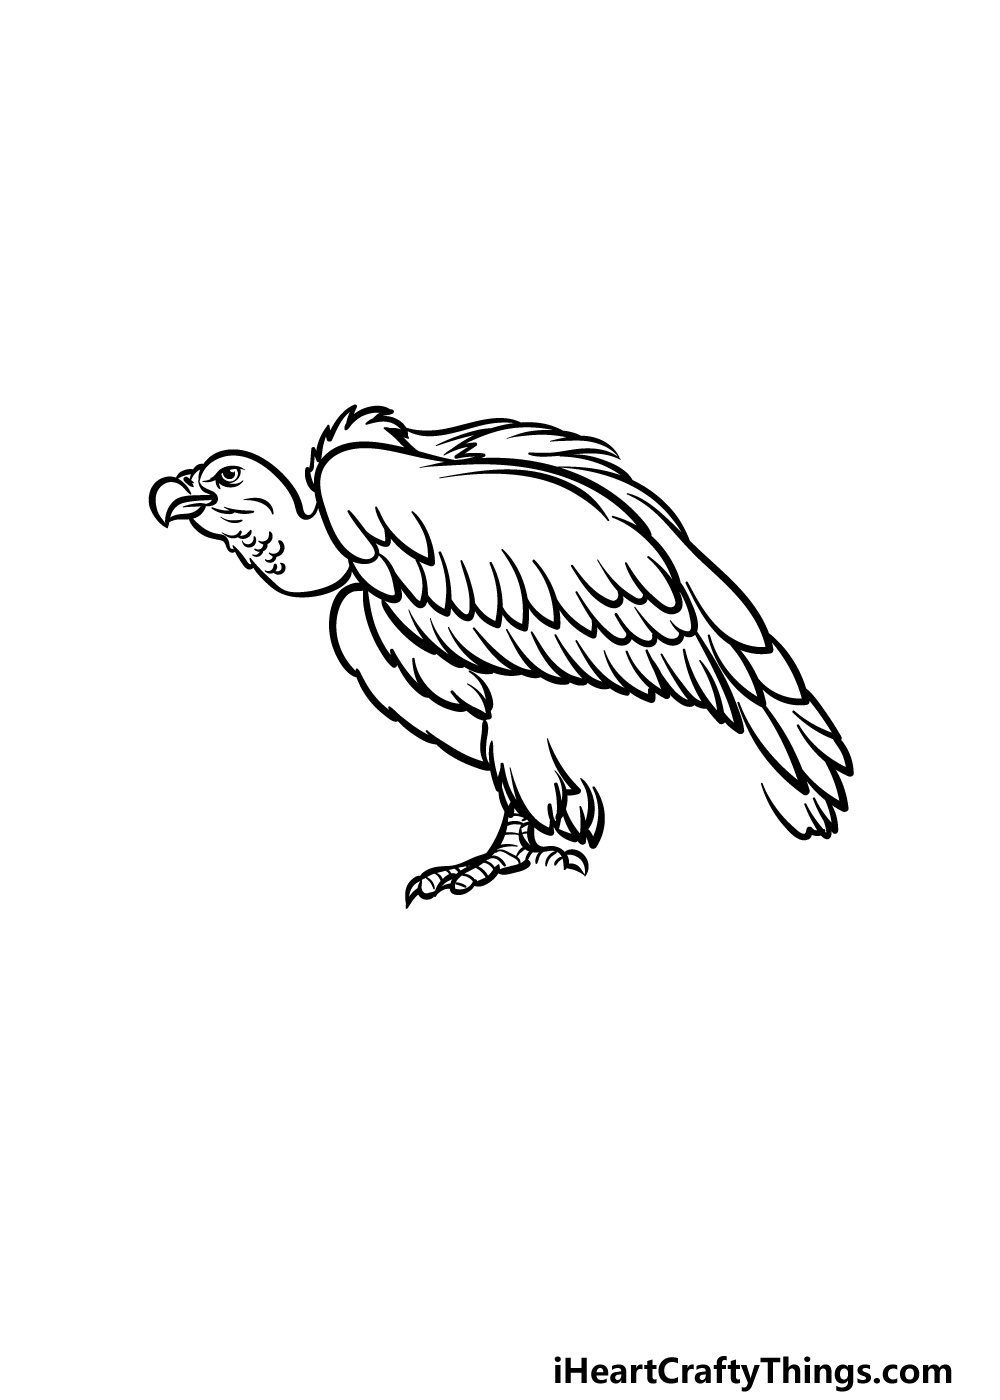
Continuing with this guide on how to draw a vulture, we shall be adding some more details to the body while also adding the legs.
First, add some more rows of curved lines with sharp points for more rows of feathers. These will also extend to the back of the wings.
Then we will be drawing the legs for the vulture. The legs will have a feathery base that you can draw with more curved lines, and then you can use some smoother lines for the thin legs.
Be sure to add the talons onto the feet, and then finish off by drawing lines across the leg interiors.
Step 4 – Next, draw the rest of the vulture
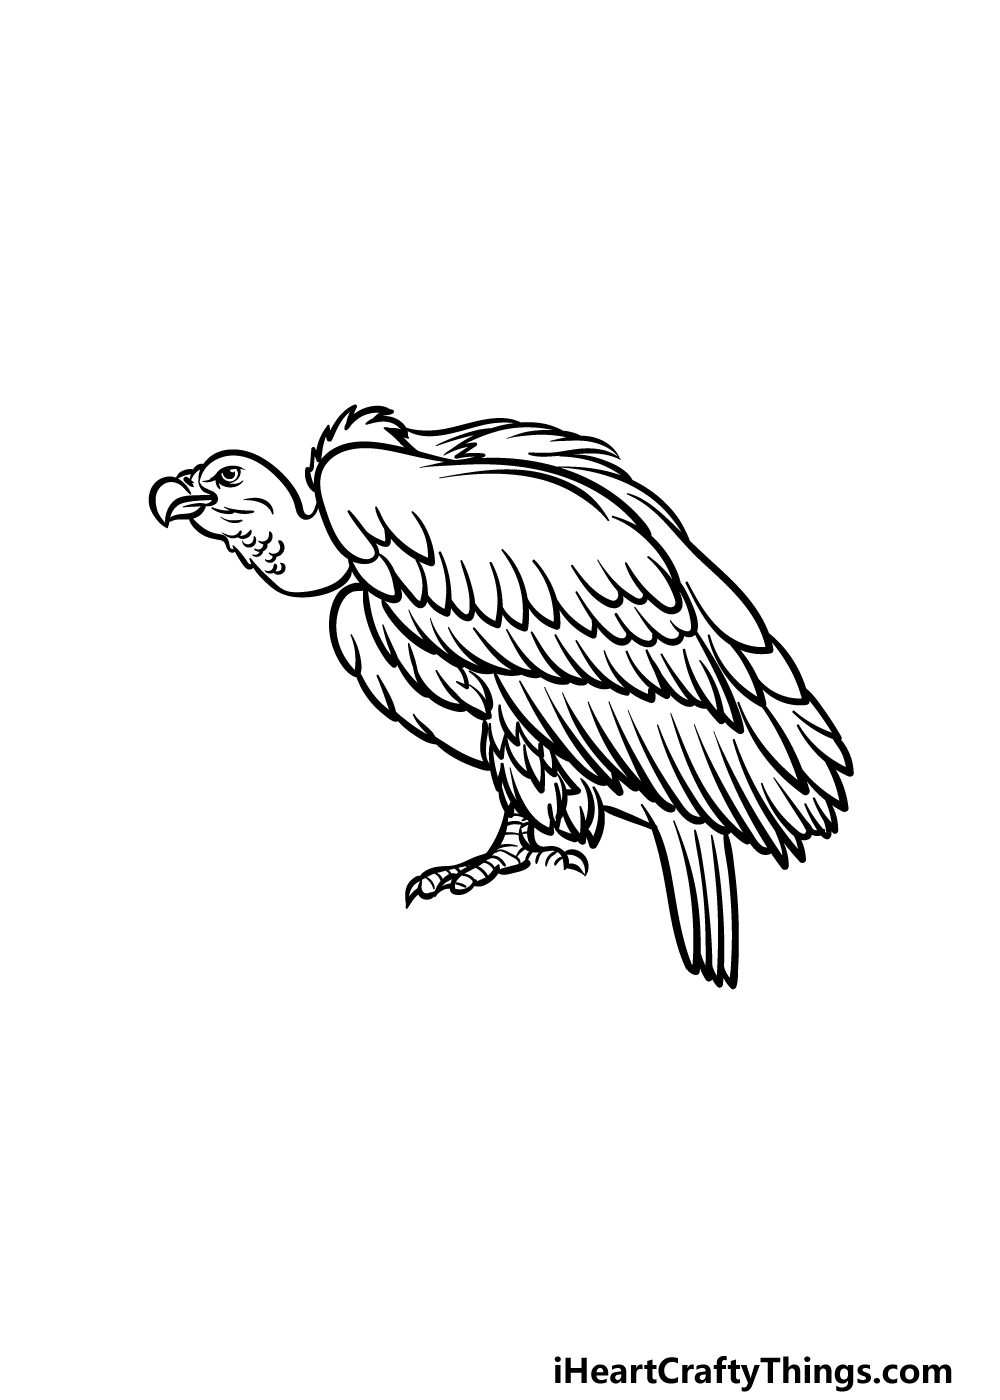
Now you’re ready to finish off the bird itself in this step of your vulture drawing. The main aspect we will be adding in this step will be the feathers at the end of the wings.
You can draw these by using yet more slightly curved lines with more sharp points to them.
Be sure to fill in any more empty spaces that may be left, and then you will be ready to start adding some final details and elements in the next step of the guide!
Step 5 – Add the final details to your vulture drawing
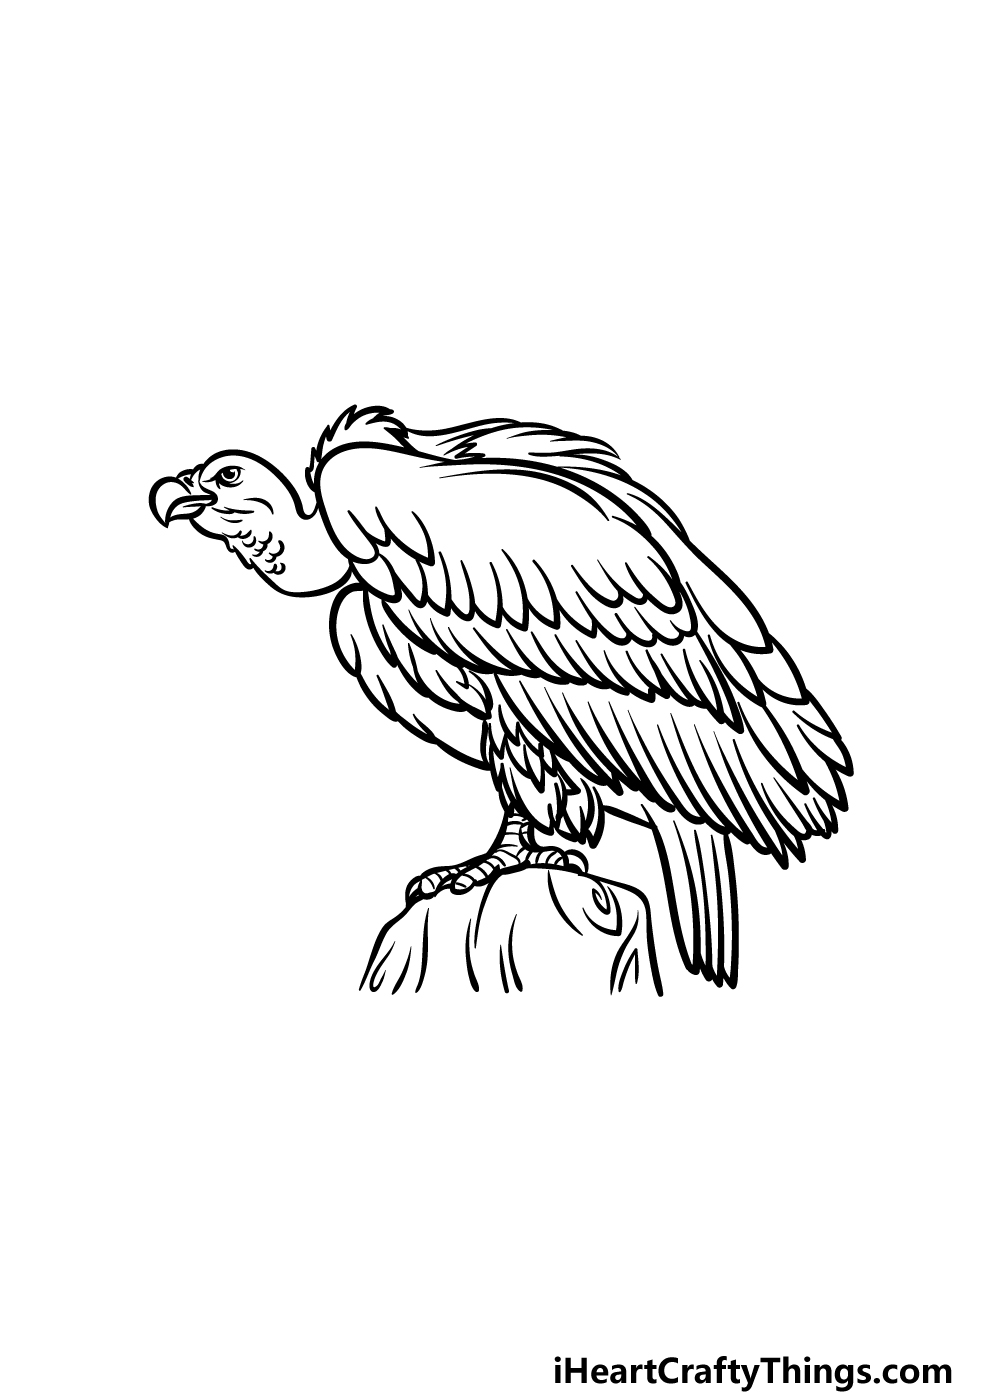
This fifth step of our guide on how to draw a vulture will see you adding the final element to the picture.
You will also have the opportunity to add some ideas and details of your own to really finish it off!
For now, we will be drawing some wood that the vulture is sitting upon. Use some smooth, curved lines for the outline of the wood, and then add some wavier line details inside of it to give it some more texture.
Then it’s up to you to add any additional details that you may want for the image! Will you add a background or maybe draw some more birds and animals to go with the vulture?
Be sure to have fun with it and see what you come up with!
Step 6 – Finish off your vulture drawing with color
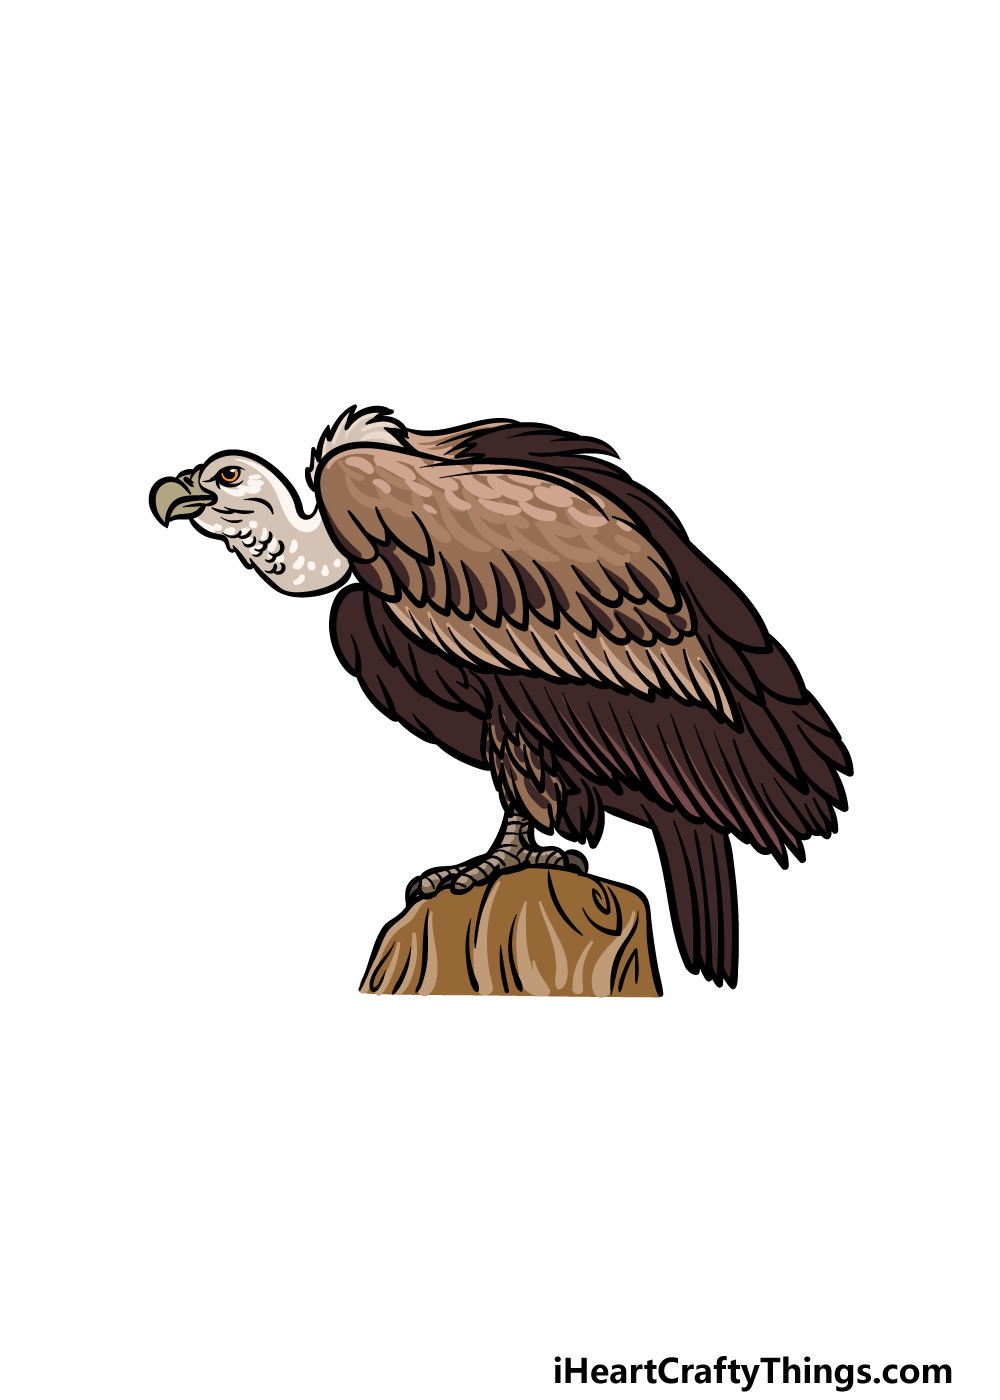
Vultures aren’t exactly very colorful birds, but there are still loads of ways for you to get some color variety in your drawing.
The main color you will see on a vulture will be brown, but you can keep the colors looking more distinct by using various shades.
In our reference image, we used some dark browns for the edges of the wings and then made them lighter as we moved inward on the picture.
For the neck, we used some very light browns and beige colors, and then finished off with a warmer brown for the wood that it is sitting on.
Will you use these same shades or will you go for a unique look for your drawing?
There are many different ways that you can personalize the colors, and this includes changing up the art mediums that you use. We can’t wait to see what you do!
Here’s how you can make your vulture drawing even better…
You won’t need to scavenge for more tips for your vulture sketch after finishing these tips!
If you see a vulture in real life, you will know that they usually hang out in large groups. For that reason, you could make this drawing of a vulture more true to life by adding more vultures.
These groups of vultures can get quite large, so you could add as many vultures as you like! It’s up to you and how patient you are, so how many do you think you would like
While vultures are feeding, they will often be surrounded by other scavengers or just other animals. You could show this aspect by adding some more African animals to this scene.
For scavengers, you could add some hyenas that are after the same carcass this vulture would be wanting. Or you could include zebras, gazelles or maybe some giraffes.
These are just a few examples, but what are some other animals you could add to this wildlife scene?
Continuing from our previous tip, you could also improve this vulture drawing by adding a background to finish off the scene. This would be especially great to do if you added more wildlife.
The African savannah is a beautiful place with much variety to behold, so you would have many options.
If you need some inspiration, then you could look up some images of landscapes in Africa to use for your background.
What sort of setting would you like to create with a background?
Bringing the focus back to the vulture sketch itself, you could change a few details to make it more unique.
This would also be good to do if you wanted to add more vultures to the scene as we suggested in the first tip.
However, even if you just wish to have one vulture in the image, you could still make changes such as its wings being extended or the head turned to a different angle.
What are some other changes you could potentially make?
Your Vulture Drawing is Complete!
That brings you to the end of this guide on how to draw a vulture!
While this may not be the most extravagant bird species out there, there are still a lot of details and proportions to get right when drawing one.
That’s why tried to make sure it would be fun and easy to take on these details by breaking them down into smaller, more manageable steps for you to take on.
Hopefully we succeeded in this regard!
When you have finished this picture, there are still ways to keep the fun going.
You could draw a background, add some more details or even draw a few more animals for just a few more ideas. What else can you think of that would finish this drawing off in style?
Then, when you’re ready to take on an awesome new drawing challenge, you can find more drawing guides on our website. We have a huge selection with more on the way soon, so keep checking in to never miss out!
We would also be thrilled to see how your vulture drawing turned out, so you can show us by sharing your creation on our Facebook and Pinterest pages for us to admire.