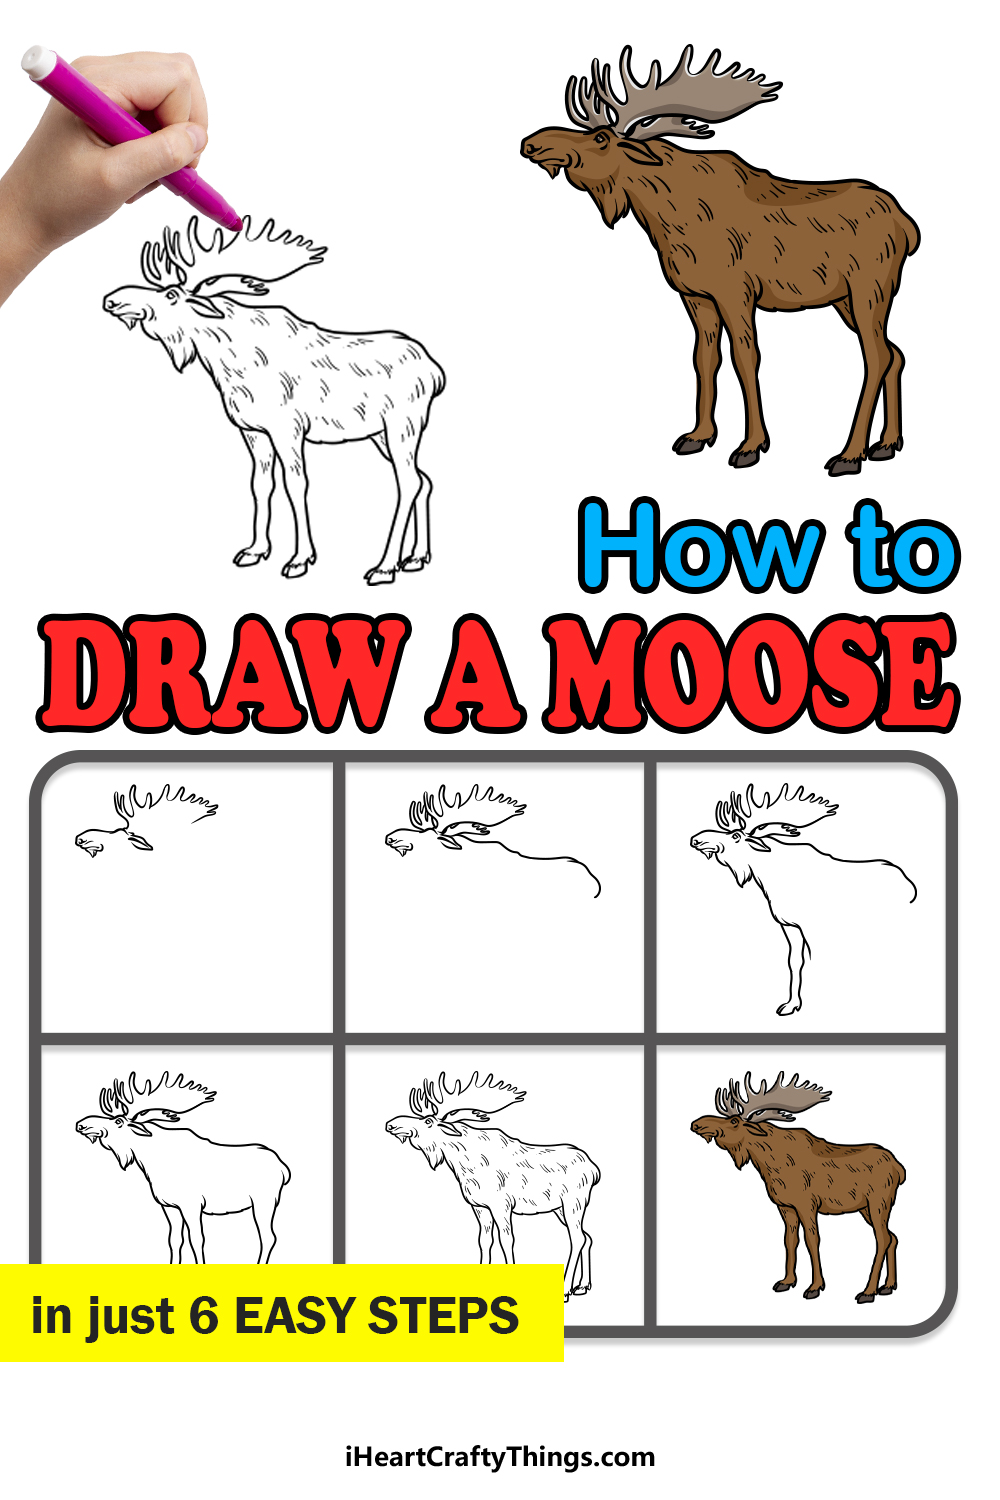
Moose are some of the most distinctive and impressive animals in the natural world. These bulky giants may not win any beauty contests, but they still manage to impress with their large size and impressive antlers.
Because they look so unique, they have won many fans around the world. This uniqueness can also make it frustrating to learn how to draw a moose.
With the right guide to work with, it doesn’t have to be challenging at all, and you are looking at that guide right now!
This step-by-step guide on how to draw a moose will make recreating one of these incredible animals easier than ever.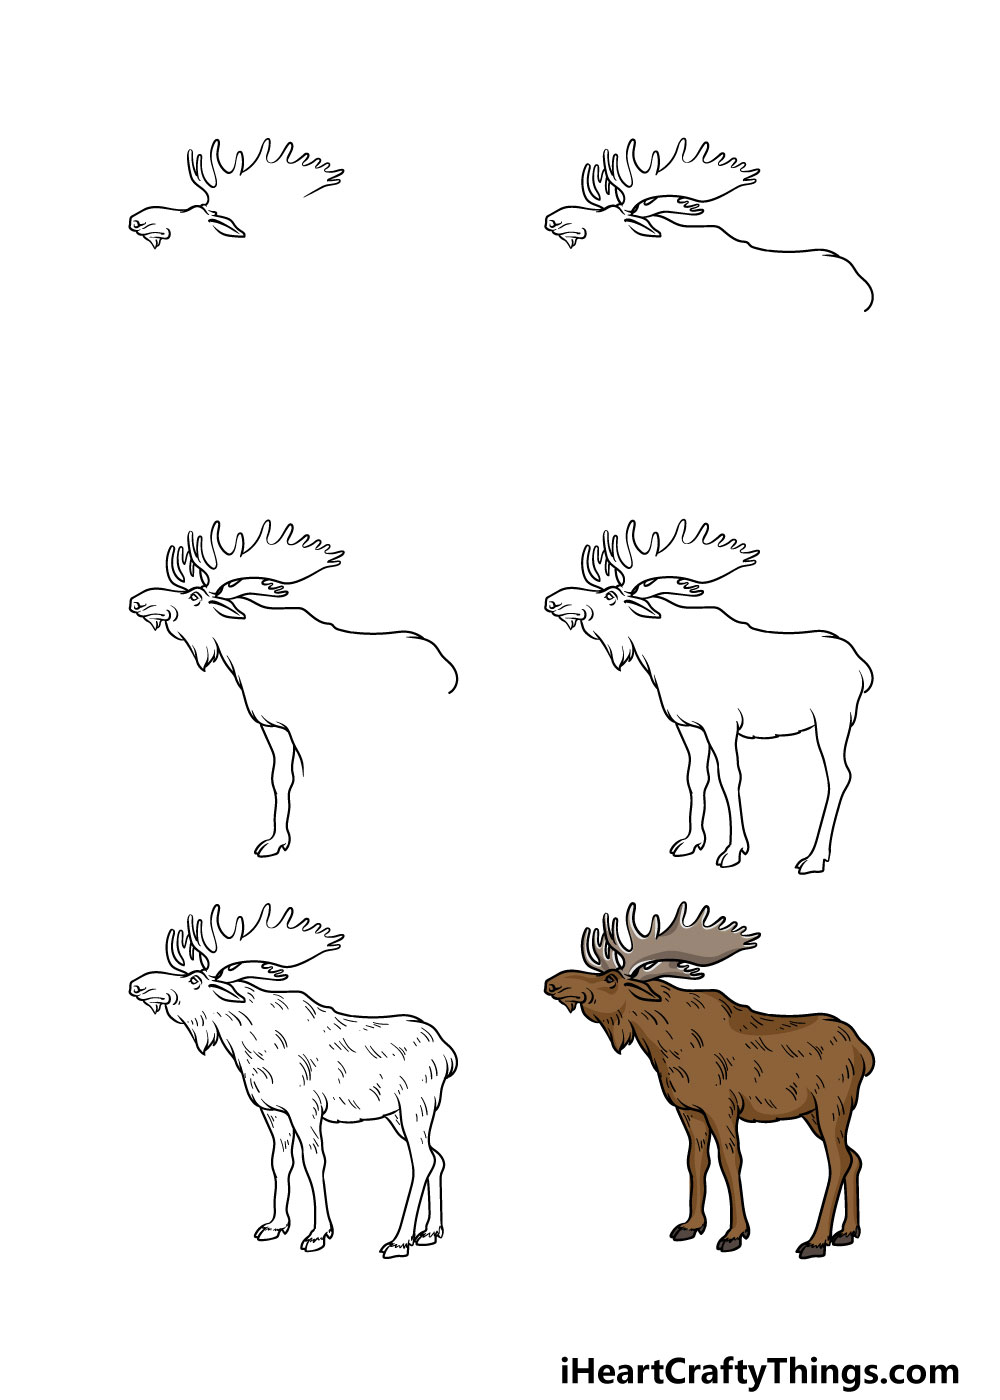
How to Draw A Moose – Let’s Get Started!
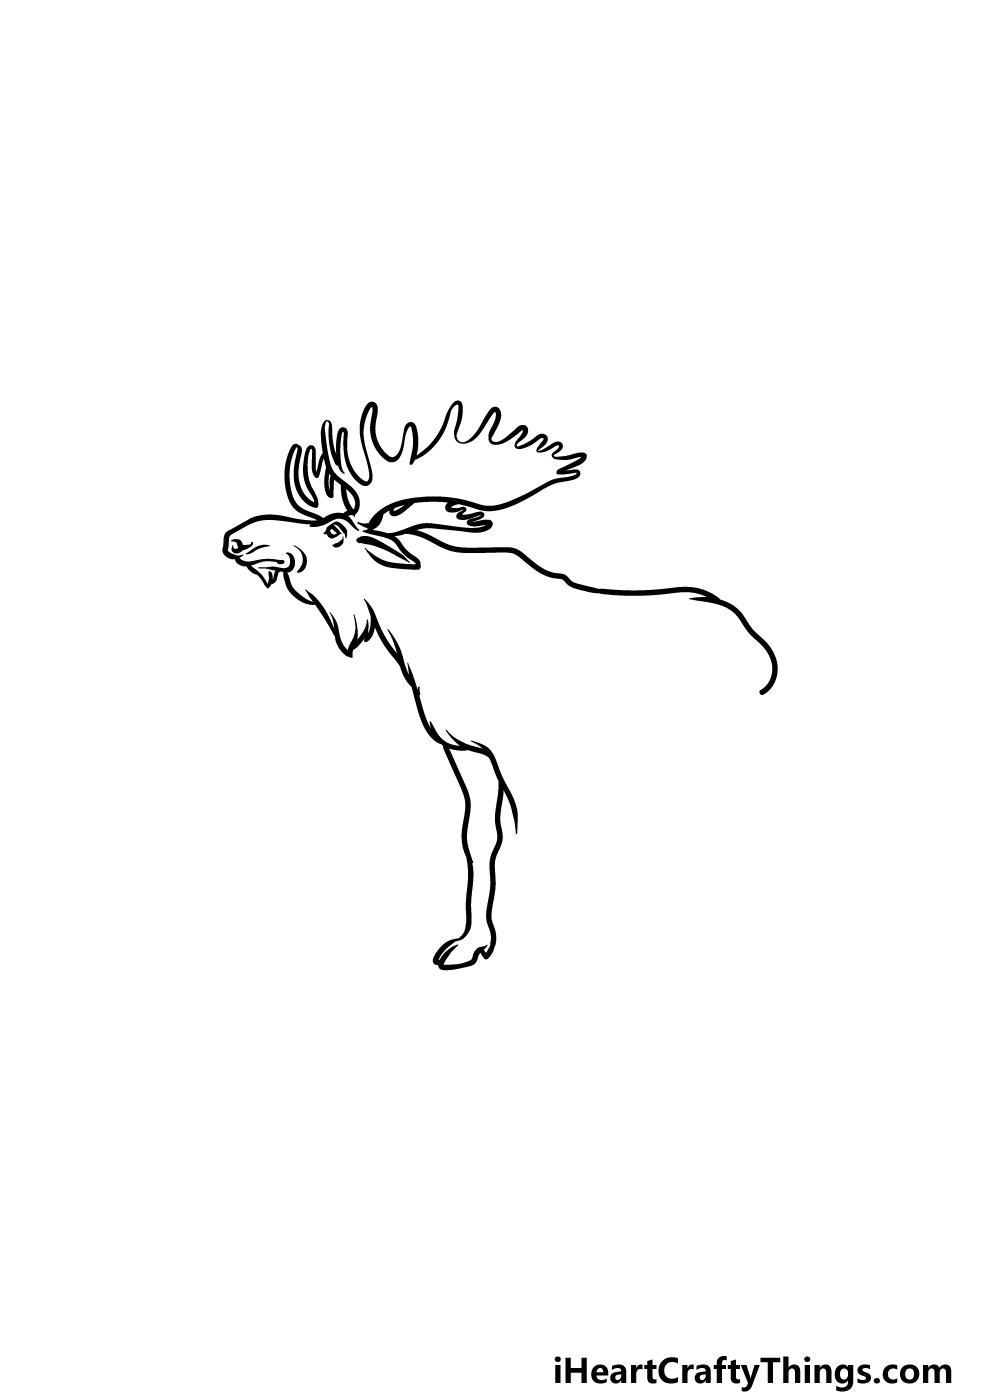
Step 1
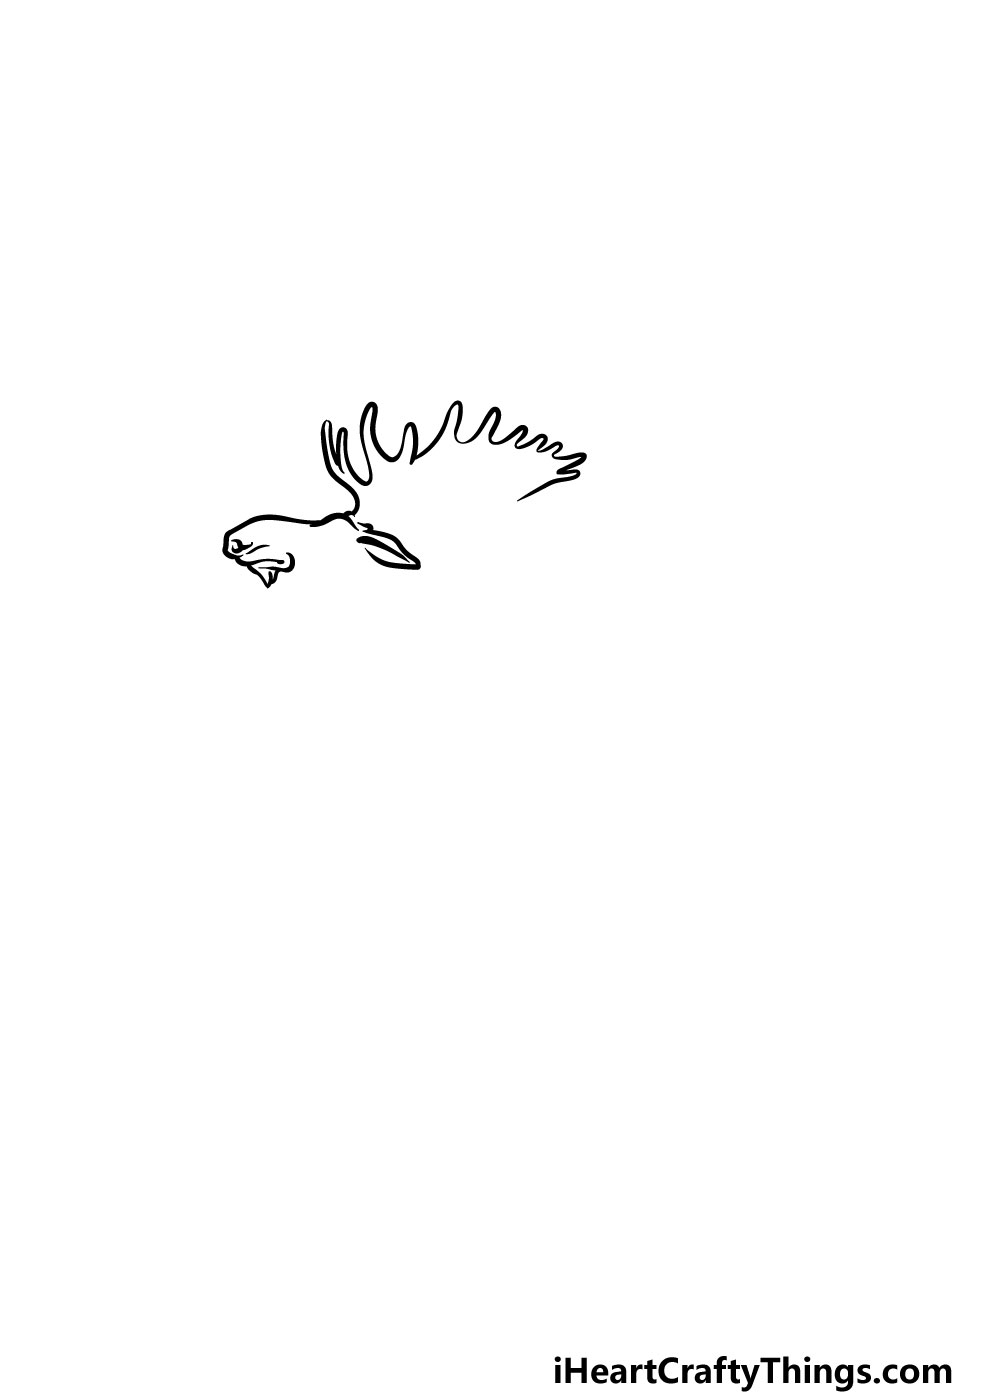
For this first step of our guide on how to draw a moose, we will be starting with the face and the top of the antlers.
To draw these elements, you can use a series of curved and rounded lines to draw the antlers. As you can see in the reference image, we will only be drawing the top of these antlers for now.
Then, once you have the top of these antlers drawn you can then draw the face and ears of the moose.
That’s all there is to it with this step, and you’re no ready for step 2!
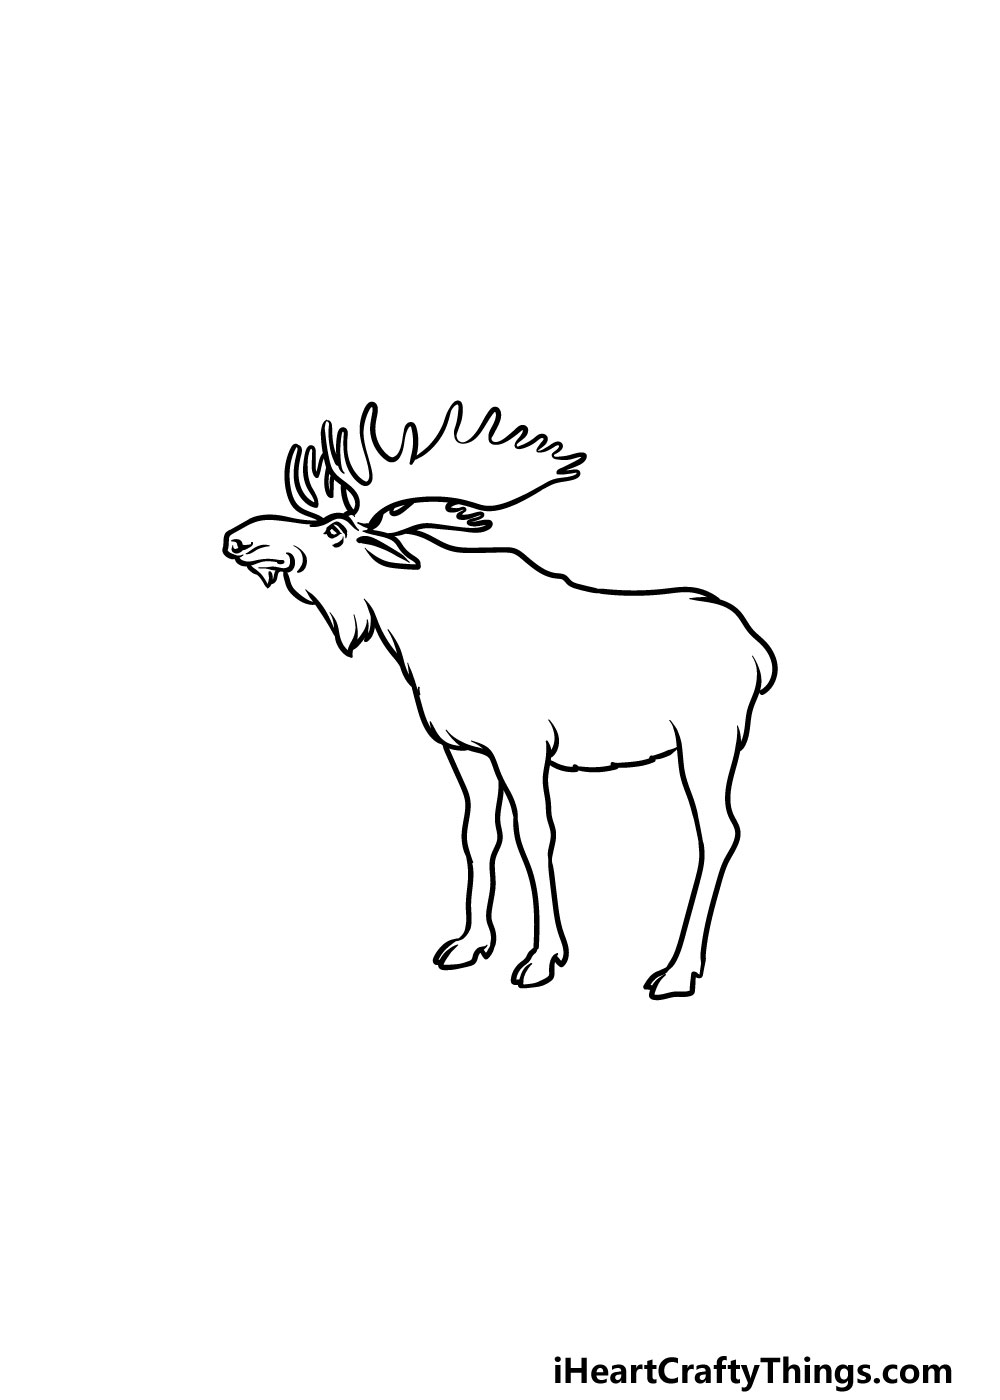
Step 2 – Add some more of the antlers as well as the back of the moose
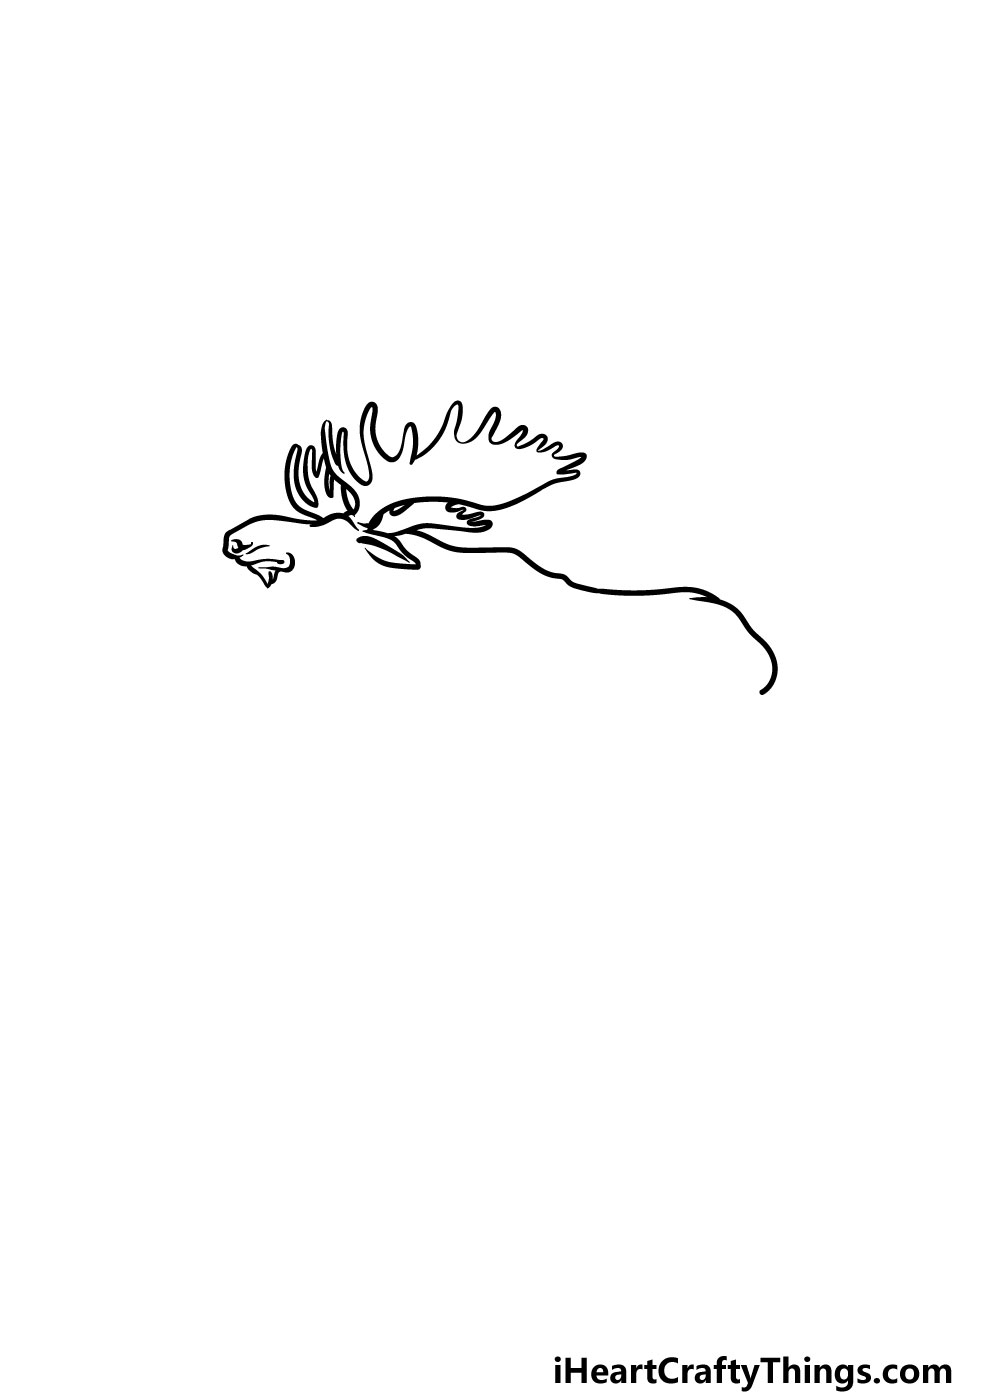
In this part of your moose drawing, you can finish off drawing the antlers of your moose as well as beginning with the back.
To finish the antlers, simply draw some more curved lines for the top of them, whereas the bottom will be long and smooth.
Then, once you’ve finished with the antlers you can then draw the back using more slightly curved lines.
Step 3 – Now, draw the first leg of your moose
For this part of our guide on how to draw a moose, we will be finishing off the face and then adding the chest and first leg.
First, you can use some jagged lines to create a sort of beard for the moose. Then, you can use a small round shape for the eye which will be close to the ear.
Finally, you will create a jagged furry chest for the moose and then draw the first leg as it appears in the reference image.
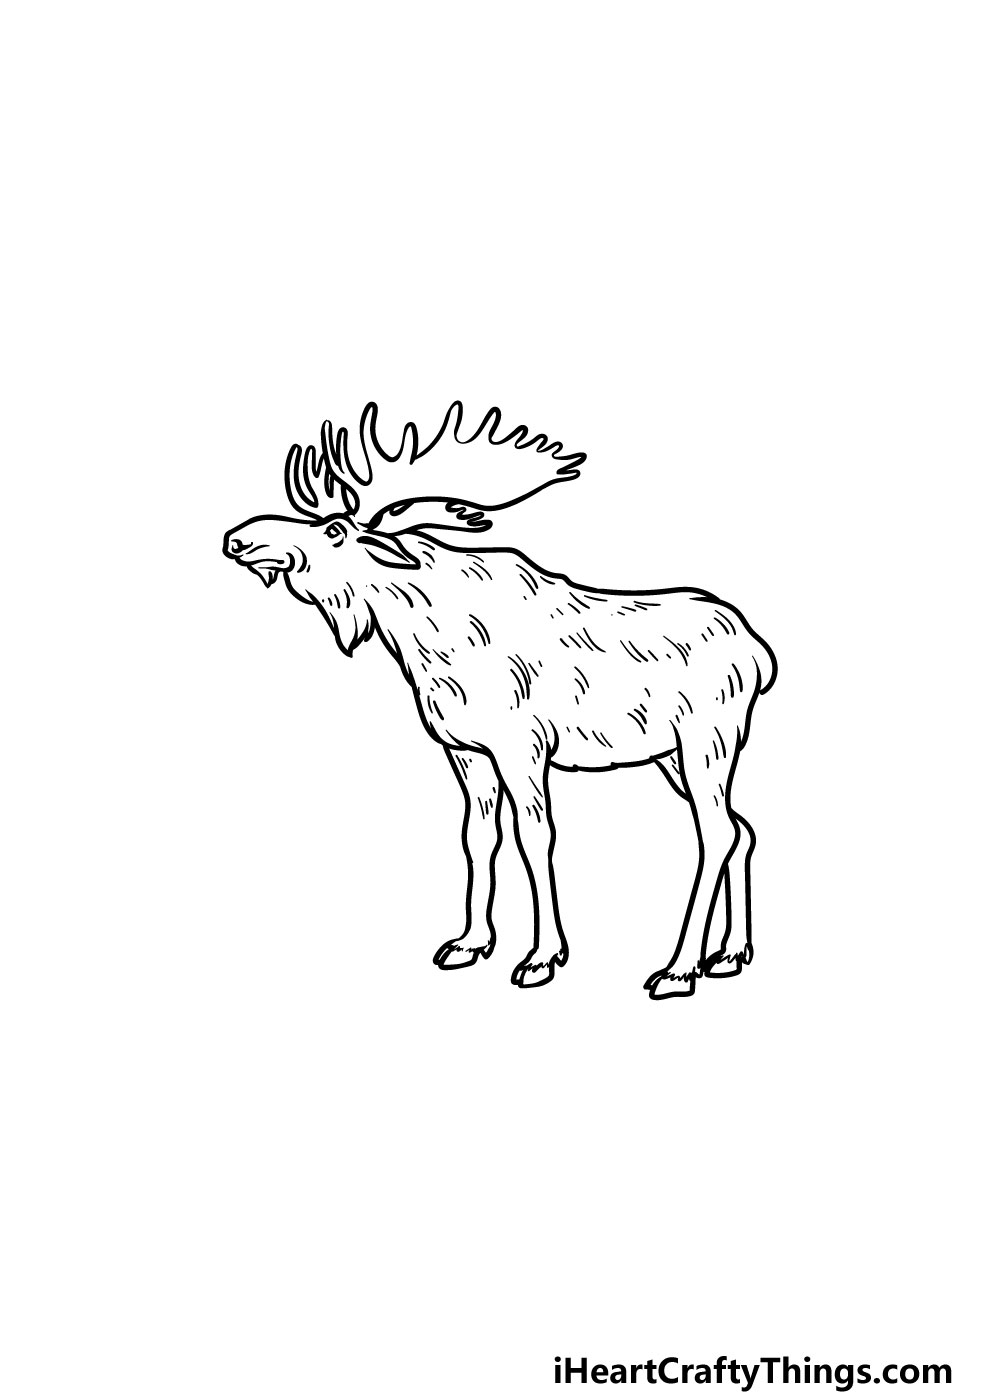
Step 4 – Draw two more legs for the moose
You’ve drawn one leg for your moose drawing so far, and in this step you will be adding two more along with the belly.
These legs will look quite similar to the one that you already drew, and then you can use a jagged line similar to the beard for the belly.
Once these aspects are drawn, you only have a few more details to add before the final step!
Step 5 – Now, you can add some final details and the last leg
It’s almost time to color in your picture, but there are a few final details to add in this fifth step of our guide on how to draw a moose.
First, you can add the final leg jutting out at the back of the moose. Then, you can make your moose look furrier and hairier by adding lots of small, straight lines throughout the body to achieve this effect.
Once you have drawn these details then you have technically finished all of the details in this guide! Before you move on to the final step, you can add a few final details and touches of your own.
You could add some more creatures around the moose for one idea, or you could change the positioning of the animal for some variety.
It also can add a lot to an image if you create an awesome background for it! You could look up some pictures of the Alaskan wilderness as some inspiration for the setting of this picture.
That’s just one idea out of many, so how will you finish up this picture before the final step?
Step 6 – Finish off your moose drawing with some color
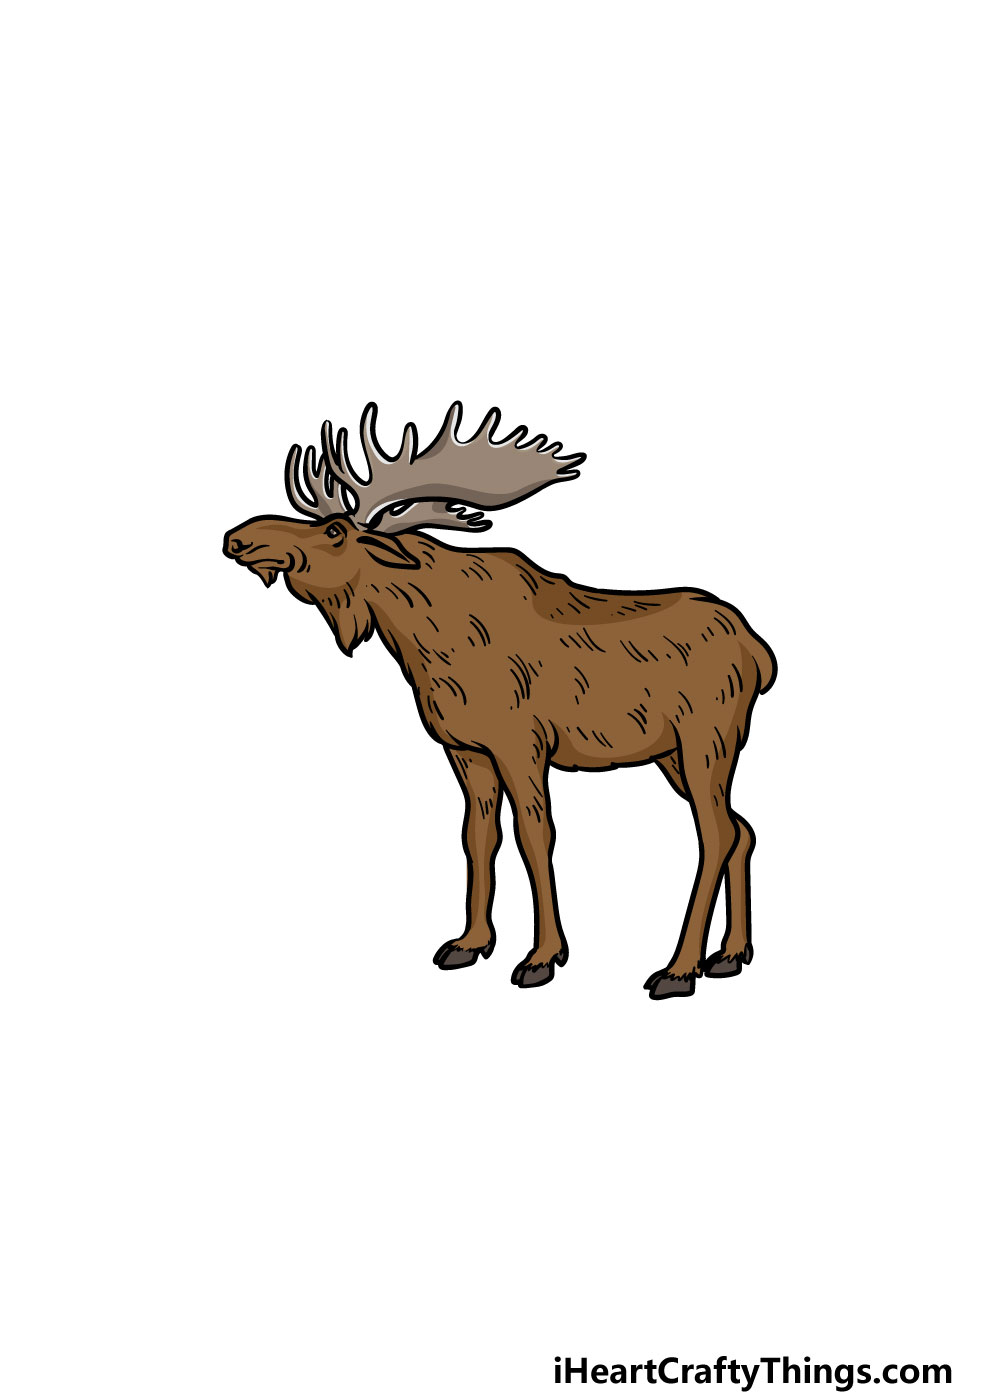
That brings you to the final step of this guide on how to draw a moose! This is a step that is a lot of fun as you get to add some beautiful colors to finish off your drawing.
In our example image, we used some shades of brown to color in, and even if you keep the colors more realistic you can still find ways to bring a wider range of colors into the picture.
Some ways you could do this would be to add some colors to the background or any other elements that you added to it.
Once you know all of the colors you would like, you can also experiment with the art tools and mediums you use to color it in.
Watercolors can be great for outdoors images like this as it gives a softer look to the image. What colors and art mediums will you use to finish off your moose drawing.
5 Tips To Make Your Moose Drawing Even Better!
Make this moose sketch even better with these 5 fun and easy ideas!
This moose drawing is already looking great, but the moose looks like it could use a friend! Now that you know how to draw a moose, adding another one should be easy enough.
The second moose could be facing another way or even simply have its head turned in a different direction. Do you think you would like to add a moose pal to this drawing?
Adding another moose to this drawing of a moose is one idea, but you could add some other animals as well! There are so many animals you could add to make this artwork even better.
They could be animals that you would expect to see in the same location as a moose. Or, you could add any other animals you like to make this more relevant to your interests!
We love the realistic and detailed style of this moose sketch, but you could also play around with the style it is drawn in.
For example, you may want to draw the moose in a simpler cartoon style. This would depend on what your favorite styles are, and you could even make a few variations.
What are some art styles you could use for this drawing?
Adding a background would also be a great way to make this even more incredible. Moose can be found in some of the most beautiful places on the planet, so you have some great places to choose from.
For example, you could use a majestic Alaskan mountain setting to provide a backdrop. What other places would you like to use as a background?
When you’re happy with how your moose drawing looks, you can present it in a number of ways. One would be to frame your artwork so that it can hang on the wall.
Or you could draw it on some high-quality paper and turn it into a card for someone in your life. How else could you present this image?
Your Moose Drawing is Complete!
You have finished the final details, added your own touches and colored in your amazing picture, and that means that you have reached the end of this guide on how to draw a moose!
We hope that with the help of this guide you found this drawing to be much easier than you may have expected. We also hope that it ended up being lots of fun for you to do as well!
Now that you have finished this guide on how to draw a moose, you can add your own touches and elements to really finish it off!
We spoke about how you could create a background or add some animals as an idea. What kind of landscape do you think would suit your moose drawing best?
When you’re ready for a new drawing challenge, be sure to visit our website! We have plenty of amazing drawing guides ready for you there, and we also upload new ones all the time for you to enjoy.
Once your moose drawing is complete, we hope that you will share it on our Facebook and Pinterest pages for us to enjoy! We can’t wait to see your creative and incredible drawing!