The concept of a voodoo doll is simultaneously fascinating and terrifying.
This concept appears in a few cultures and beliefs around the world, and supposedly you can create a doll version of someone that will feel and experience everything that the doll does.
Because of this concept, these voodoo dolls have shown up in many forms of media, usually with a horror them to it.
It can also be fun to design your own one, so learning how to draw a voodoo doll is essential for that.
If you would like to learn how to go about doing that, then this will be the guide for you!
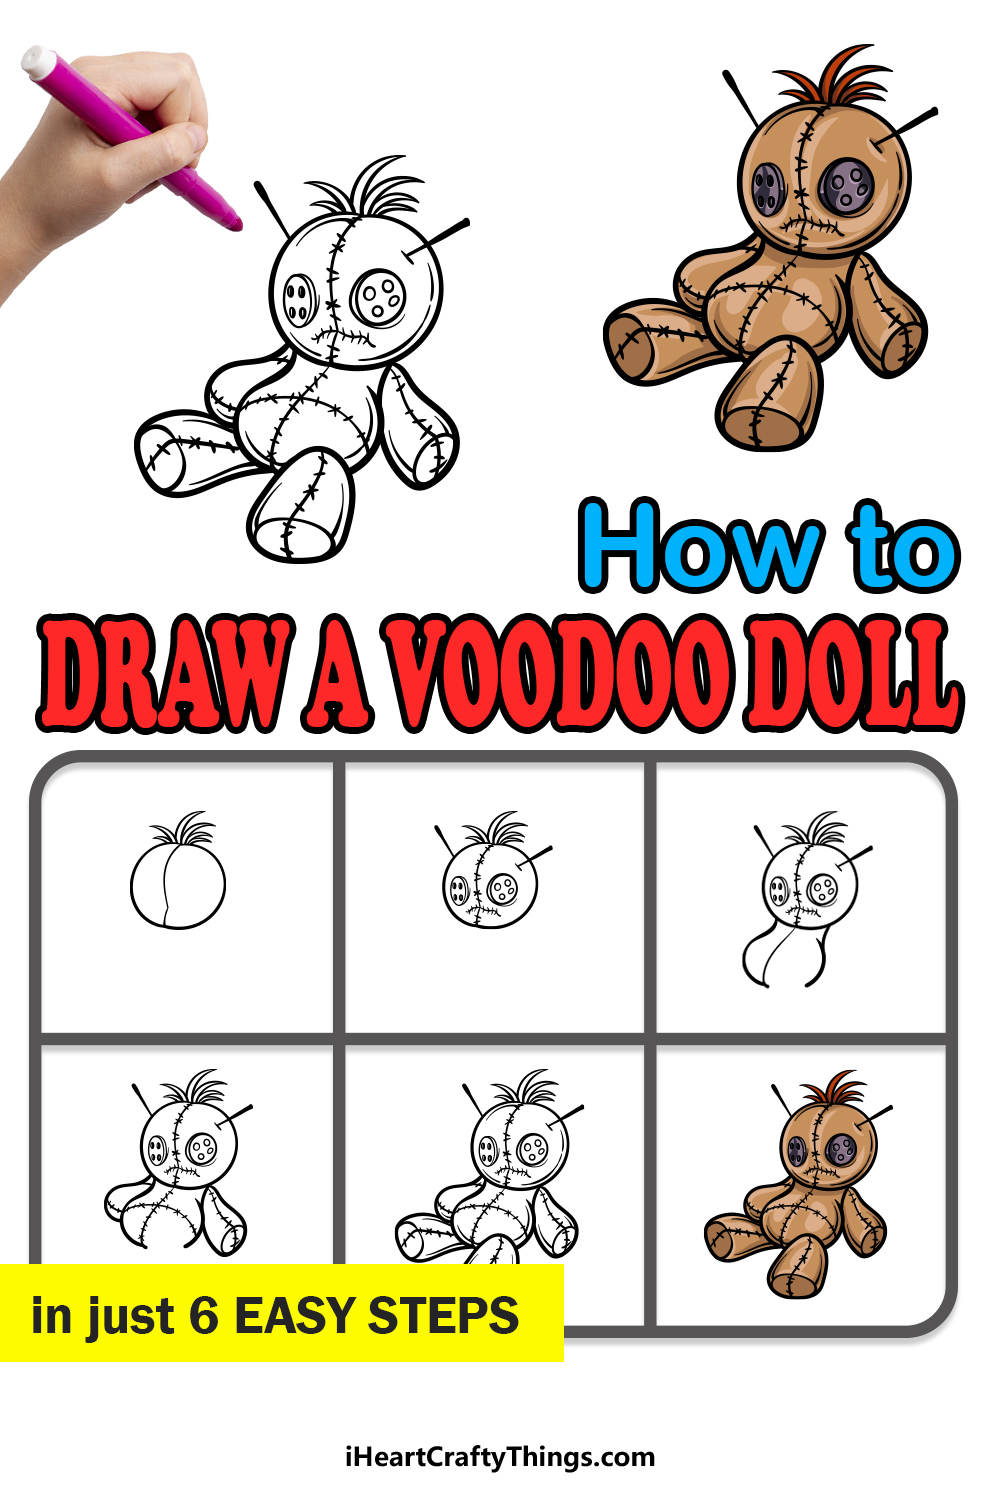
Our step-by-step guide on how to draw a voodoo doll in 6 steps will show you how to do it without getting cursed by frustration!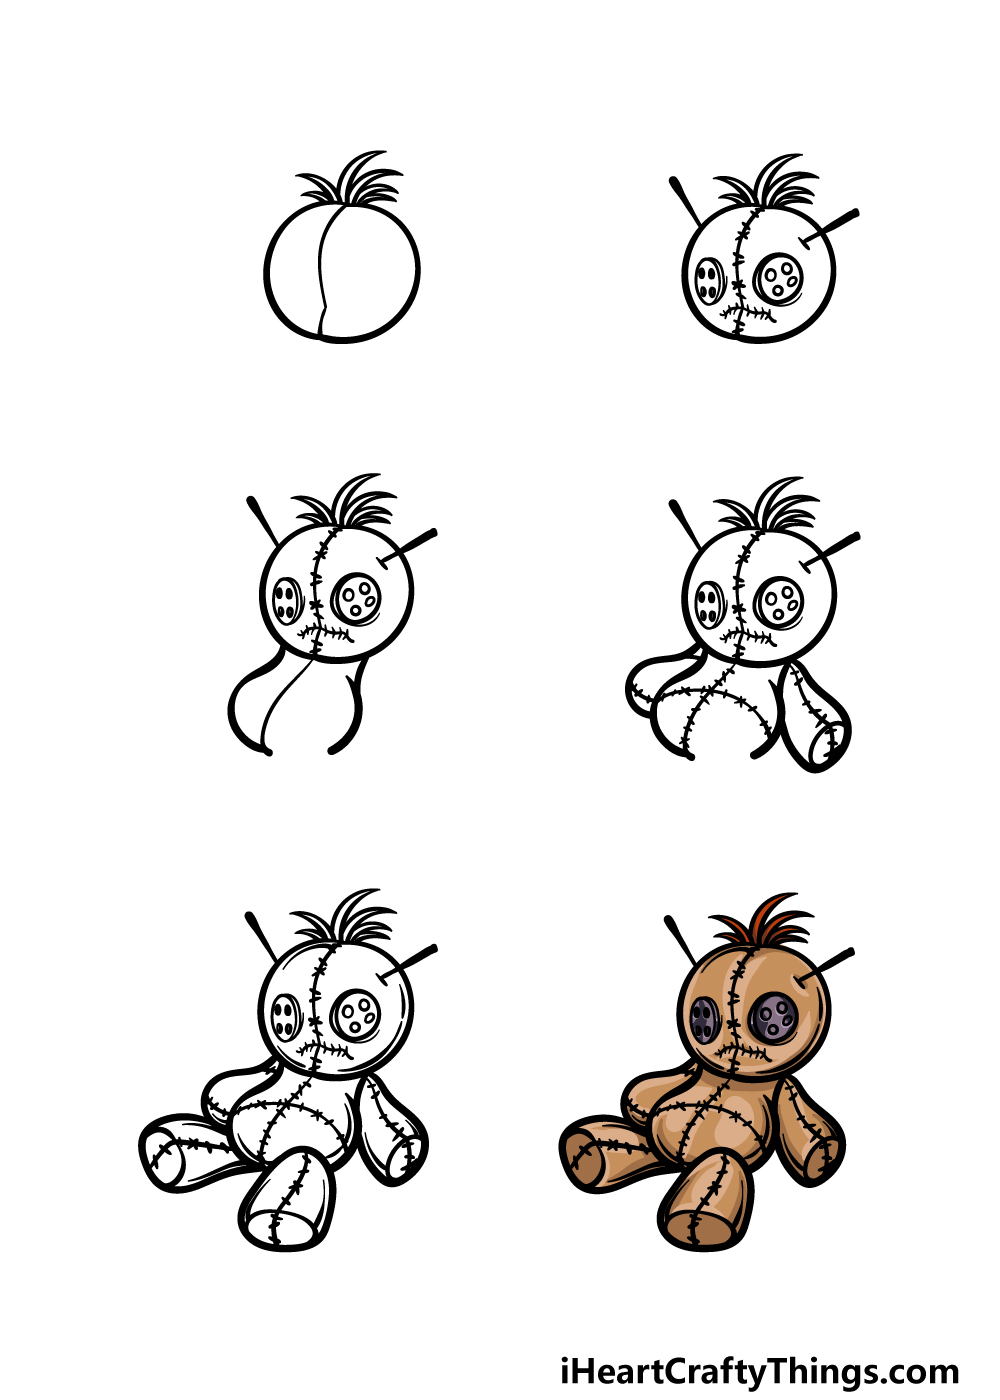
How to Draw A Voodoo Doll – Let’s Get Started!
Step 1
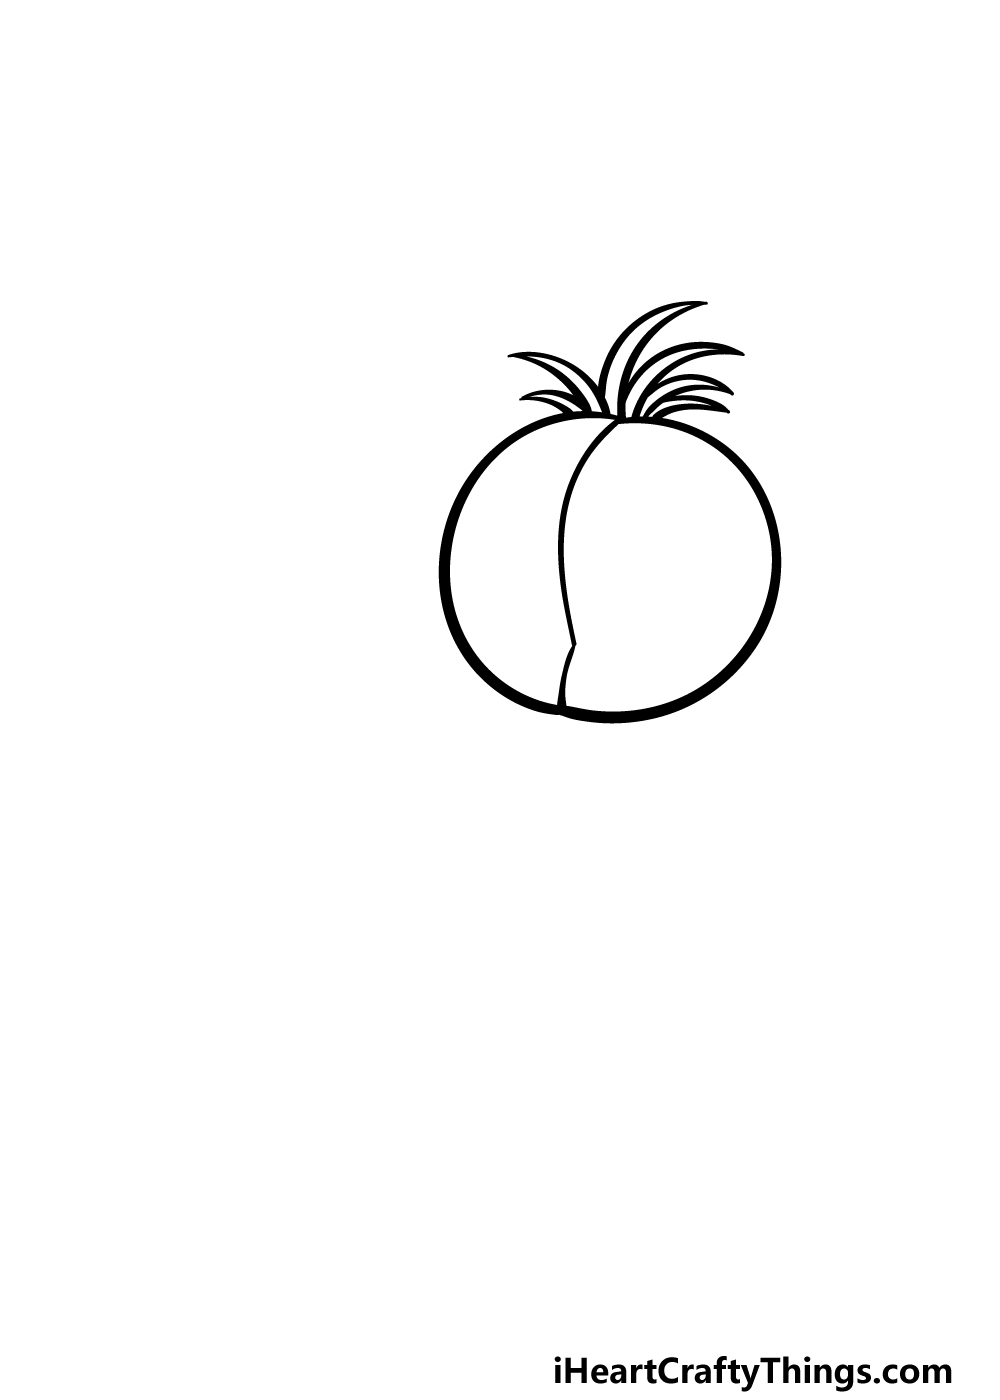
In this guide on how to draw a voodoo doll, we will be drawing a doll that is stylized and even quite cute, all things considered! To get this started, we will begin with the head for the doll.
To do this, we will be drawing a round shape that is almost a circle. Once you have drawn that, we will be adding a line going down the center of the face.
It will be bent a bit to show off the contours of the head, as shown in the reference image.
Once you have drawn that, we will then finish off this step by adding some thick hairs onto the top of the head.
These will look more like blades of grass, and they can be drawn with some curved lines culminating in sharp points.
Step 2 – Next, we will be drawing the facial details
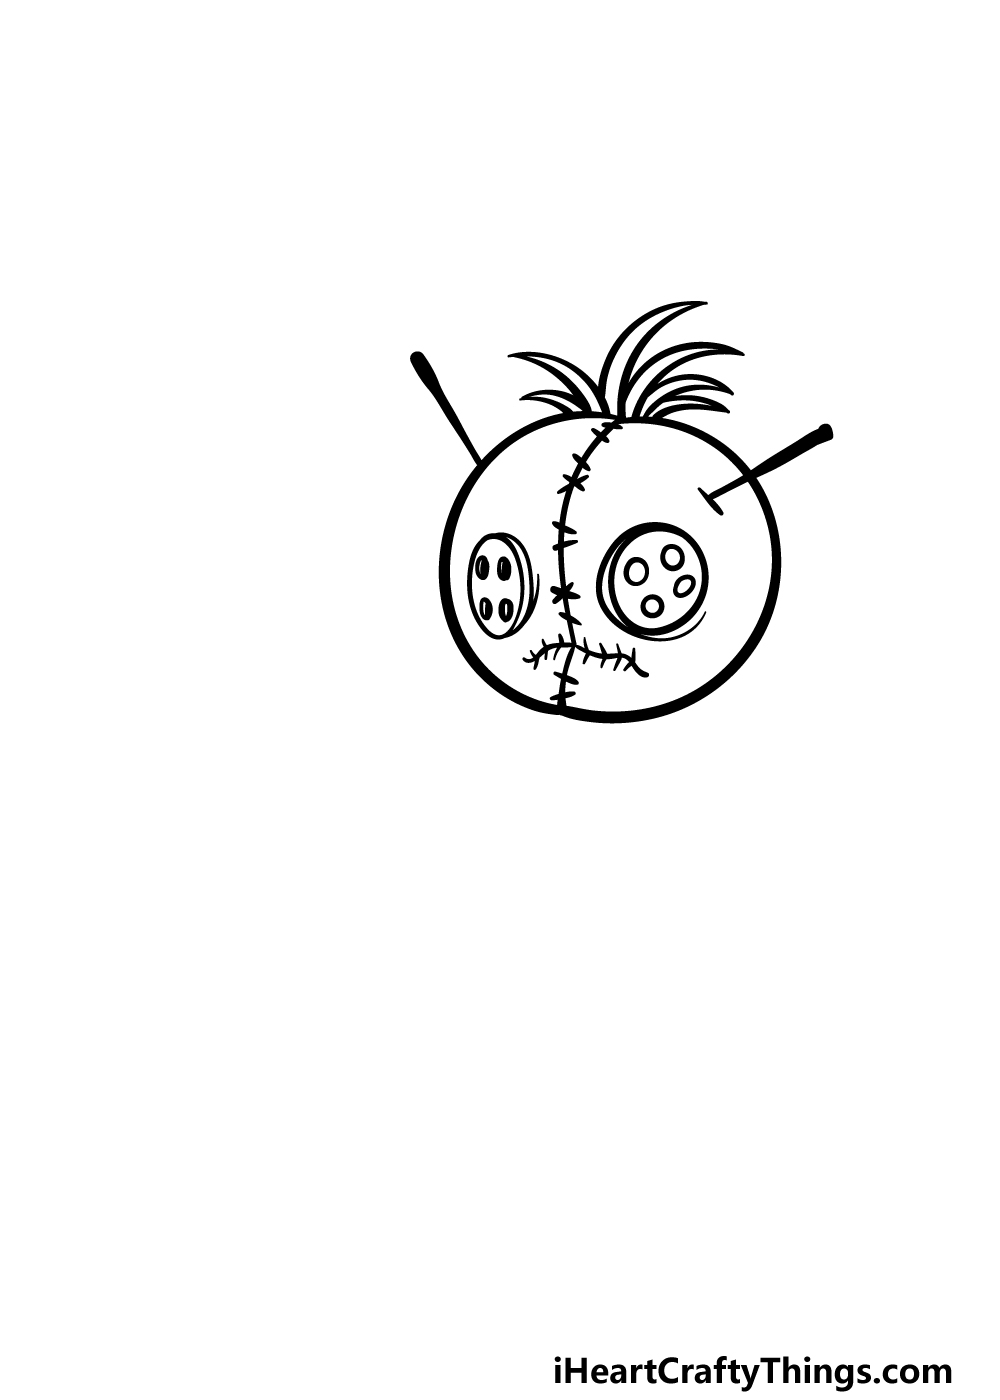
Now that you have the outline for the head done, we will be adding some facial details to your voodoo doll drawing now.
First, we will be drawing the eyes of the doll. These eyes will be drawn as some large buttons sewn onto the face.
To draw them, simply draw some large round circular shapes that have curved rims to them on the sides. Then, we will draw four small circles onto each of these eyes.
Next, draw a wavy line for the mouth, and then add little vertical lines onto it for some stitching. Then, add some similar horizontal lines onto the line that you drew in the center of the face previously.
Finally, we will be drawing some big straight lines poking out the face for some big pins poking into the head.
Step 3 – Draw the start of the body
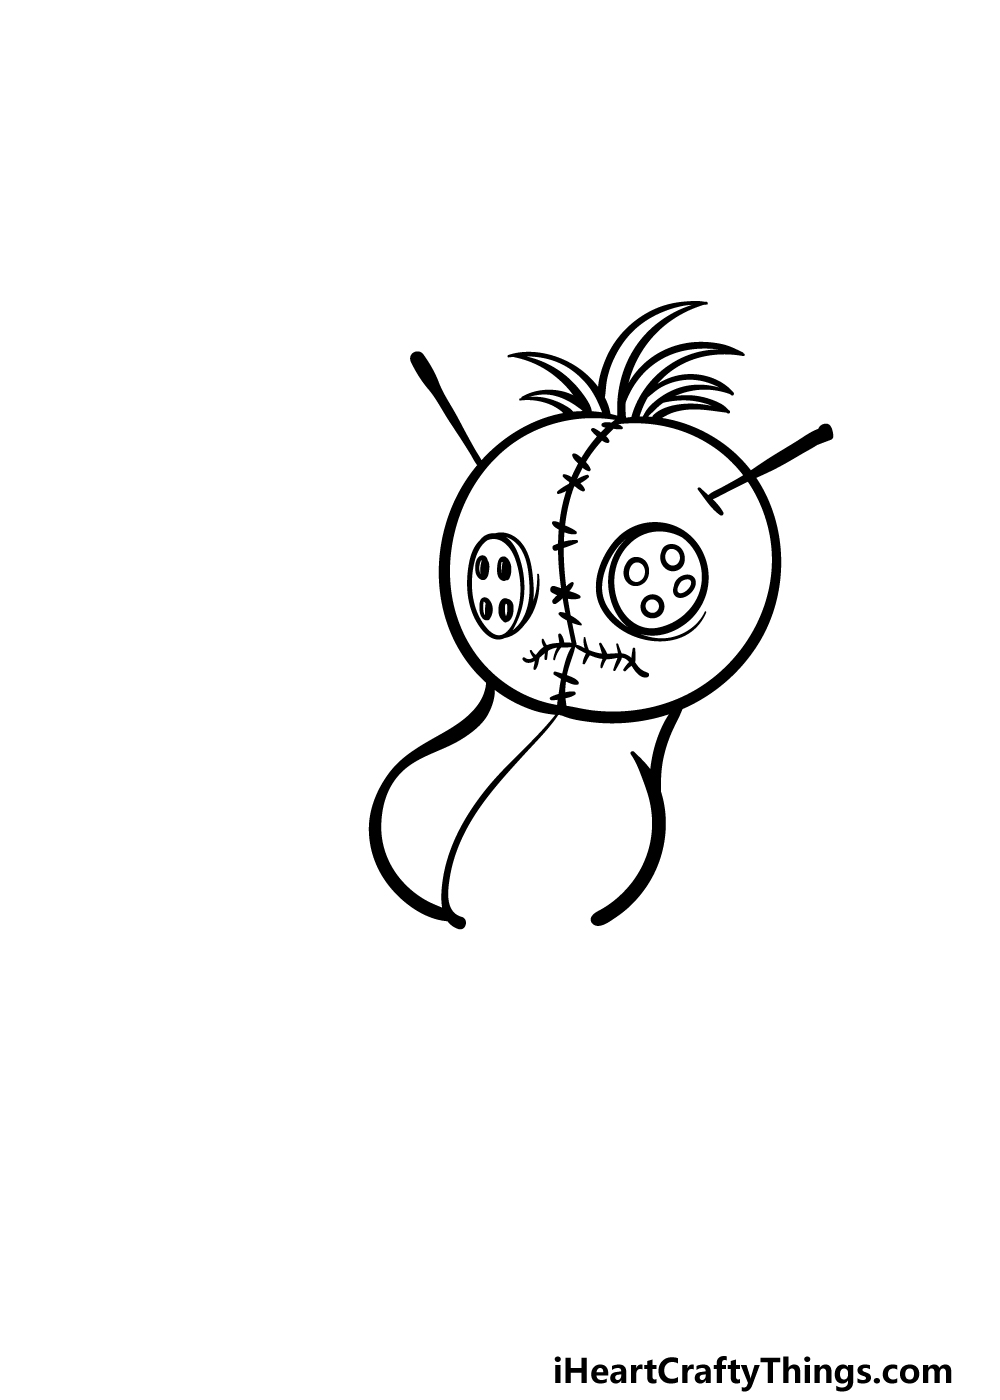
This little guy needs a body, so we shall start to draw one in this step of our guide on how to draw a voodoo doll.
To do this, simply extend some curved lines down from the head that bulge out for the belly.
You can do the same for the back, and then add another center line that follows the contours of the body, much as you did for the head.
Then you will be ready for step 4!
Step 4 – Now, draw the arms and stitching
Continuing on, we shall add some arms and stitching details in this part of your voodoo doll drawing.
For the arms, add some thick, rounded lines coming out from the base of the head and back around to the body. Then, add a circular shape onto the end of the arm, as shown in the reference image.
Then, add one of those stitch lines down each arm, as you have done for other areas of the body and head.
You can then finish off this step by adding another of these stitch lines horizontally across the belly. Once you have drawn these details, you will be moving on to the final details in the next part!
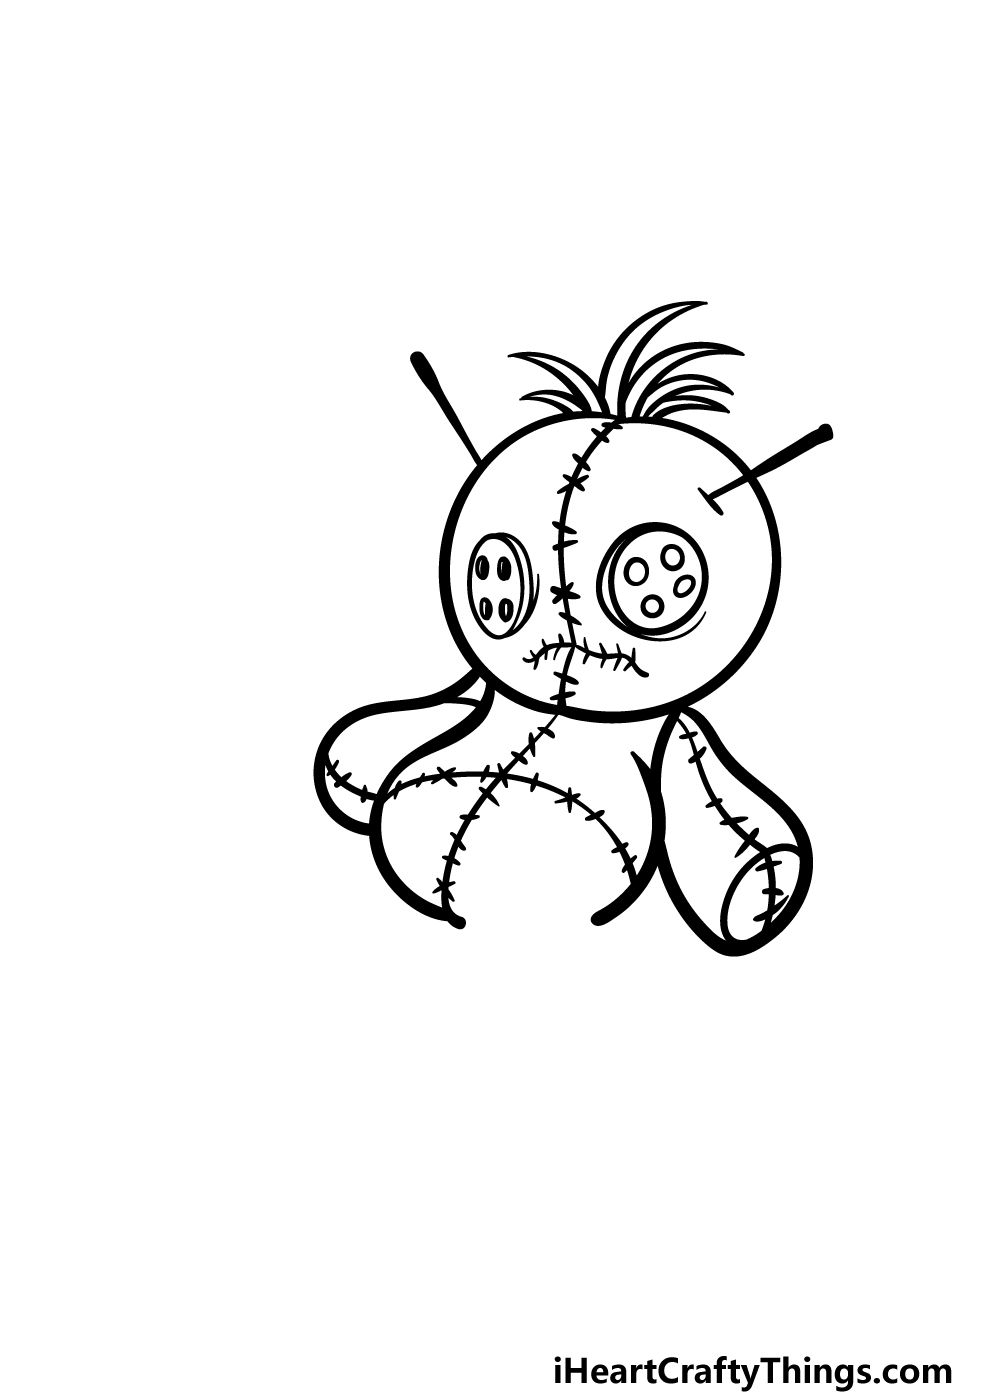
Step 5 – Finish off your voodoo doll drawing

This step of our guide on how to draw a voodoo doll will be all about finishing off with the final details and elements. The main aspect of this step will be finishing off the legs.
These will look very similar to the arms and will have the same rounded look that those had.
They will also have circular shapes at the base for the bottom of the legs, and they will also have some stitching details on them.
Then there will just be some minor line detailing to add throughout the doll, and you’ll be ready to proceed to the final step! Before you do, you could also add some details such as a background with other objects to go with it.
What kinds of weird and wonderful objects do you think would go well with this awesome voodoo doll?
Step 6 – Finish off your voodoo doll drawing with some color
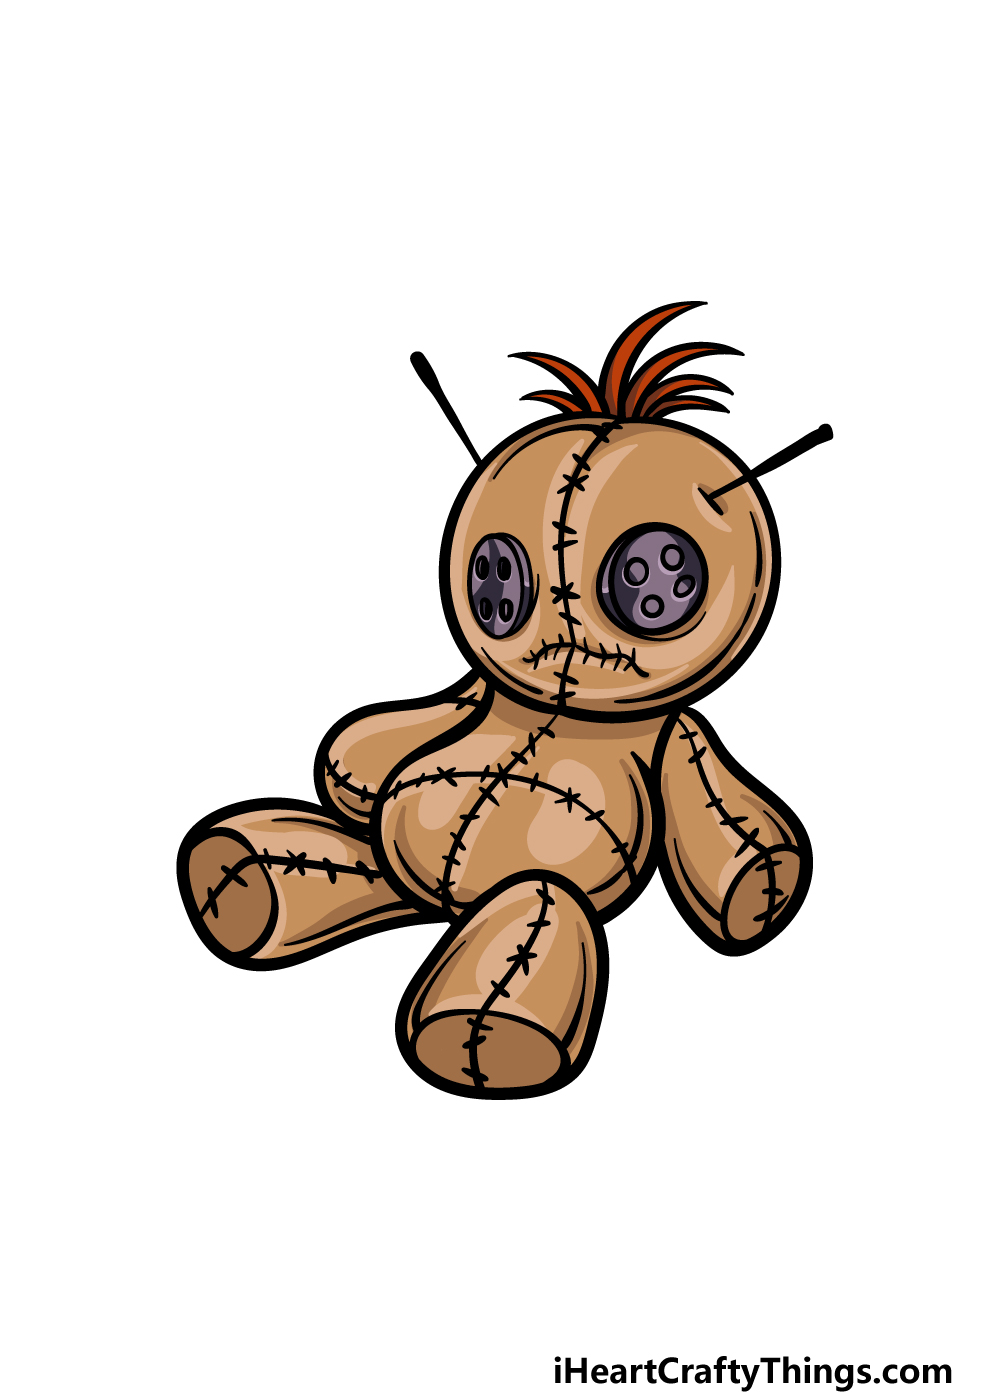
Now you have arrived at the final step of your voodoo doll drawing, and in this one you will finish off with some color. In our reference image, we went with some more muted colors.
The browns that we used for the body and head give the doll a look of being made of burlap or a similar material.
We then used some dark gray and purple for the button eyes, and then finished off with some dark red for the hair.
These are just a few of the incredible colors that you could use, but they are far from the only colors to go for!
This is a step where you can really express your creativity, so be sure to use all of the colors that you love as you bring this drawing to life.
Do this to take your voodoo doll drawing to the next level
These tips for your voodoo doll sketch will help to make it even better!
For this drawing of a voodoo doll, we kept the details and extra elements to a minimum.
This includes details such as the button eyes and pins sticking off the doll, but you could add more of these!
We mentioned the buttons and pins as details that you could add, but if there are any other details you can think of, be sure to add them, as the more detail you can fit in the better!
This voodoo doll looks great on its own, but you could add some other voodoo tools and objects to create a fuller scene.
This is something you could get really creative with as you imagine what would be in a voodoo workshop.
Maybe there could be some shrunken heads or jars containing all sorts of weird and wonderful things.
Don’t be shy about adding some really weird and creative objects to the arrangement, as it will only make it even cooler!
Taking the previous tip even further, you could also make the picture more interesting by drawing a background.
There are so many places you could potentially find such a voodoo doll, so you can have some fun with it.
In the previous tip, we mentioned creating a voodoo workshop, and that would be a cool setting for the background.
With this background, you could add all of the extra objects and features we spoke about in the previous tip too!
For this voodoo doll sketch, we made a fairly neutral design that doesn’t look like anyone in particular. For a fun touch, you could add some features to make it resemble someone.
It could be funny to make it look like a friend or a family member that you think would find it funny. If you’re worried about hurting anyone’s feelings, then you could feature yourself as the voodoo doll!
If you do base it on someone you know, the artwork could make a fun gift!
Your Voodoo Doll Drawing is Complete!
You have completed all of the steps in this guide on how to draw a voodoo doll, and that means that your drawing is ready to go!
We hope that you had a lot of fun working on this guide, and that you also found it to be easy and frustration-free to work on. We also this voodoo doll doesn’t take on the powers of a real-life one!
Don’t forget to add your own incredible details, colors and art medium choices to really make it your own!
Then, you’ll want to visit our website when you’re ready for more, as we have plenty of amazing guides for you to enjoy there, and we have many more incoming soon!
We would love to see your fantastic voodoo doll drawing when it is complete, so please remember to share it on our Facebook and Pinterest pages when it’s done.